PIERRE Display - Rio 4”
Description
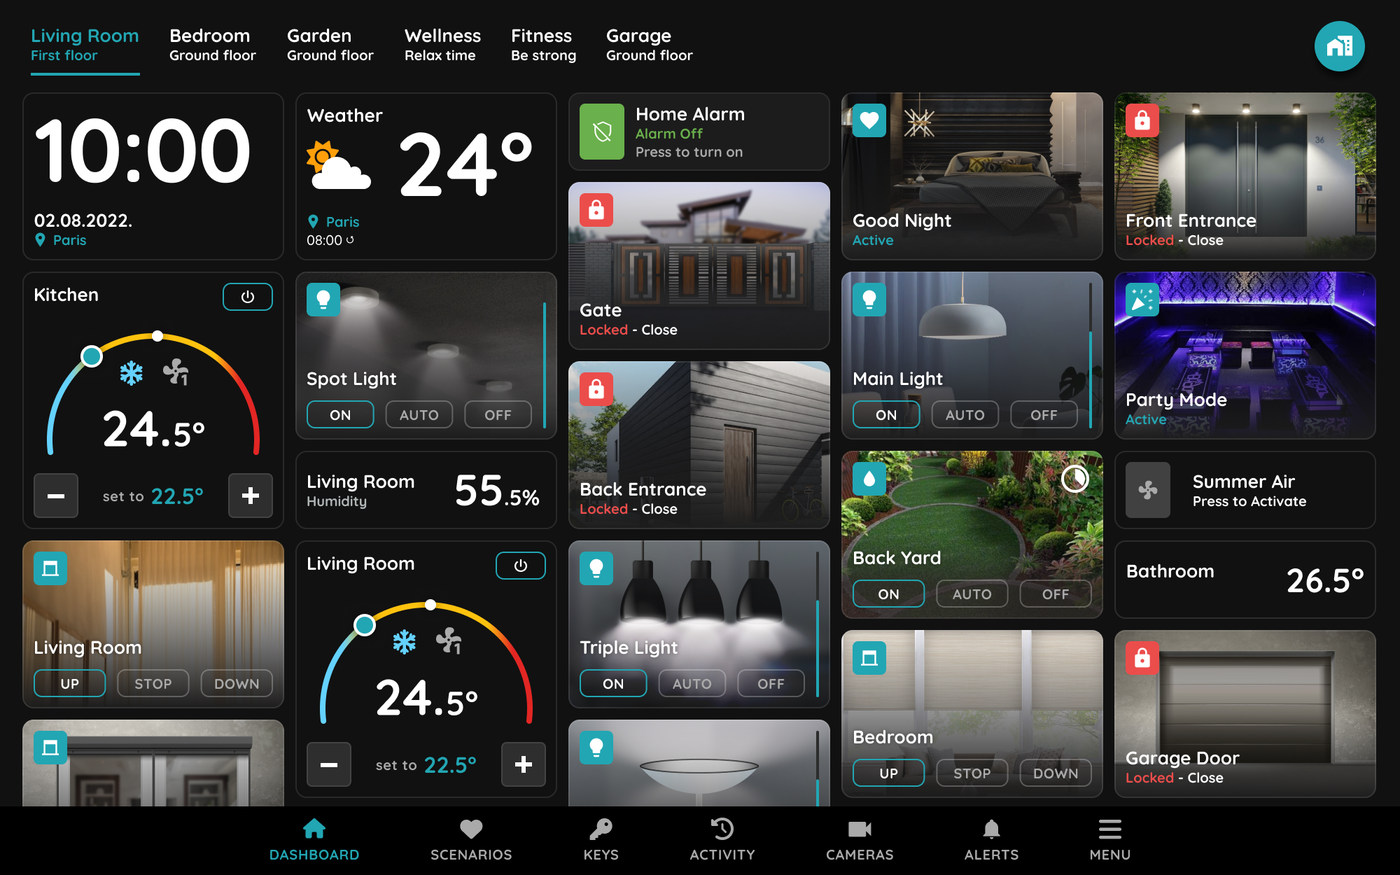
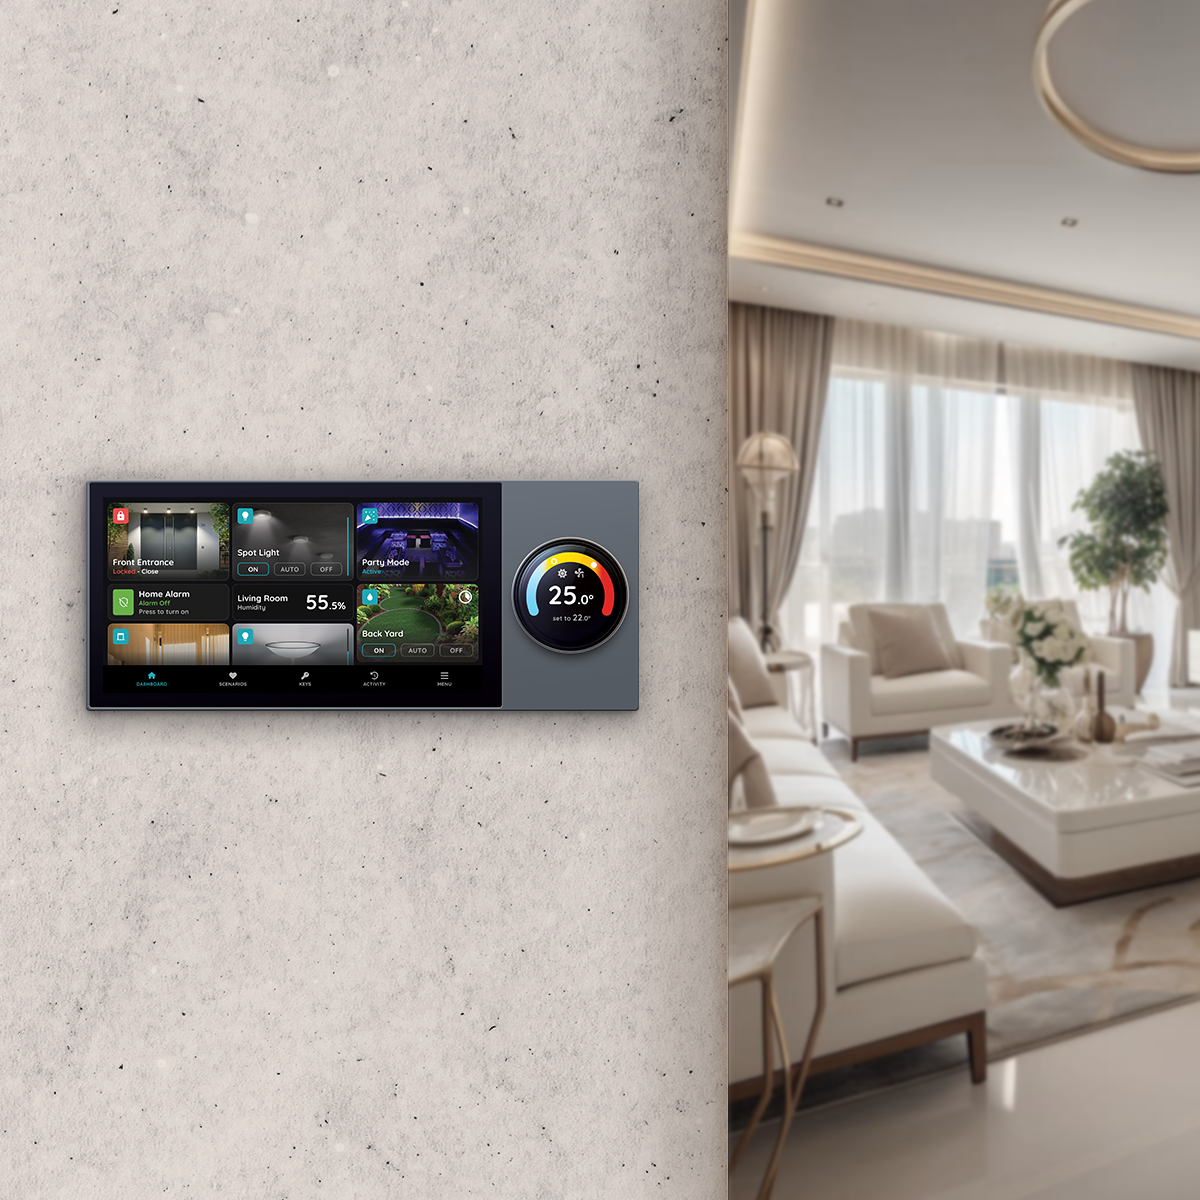
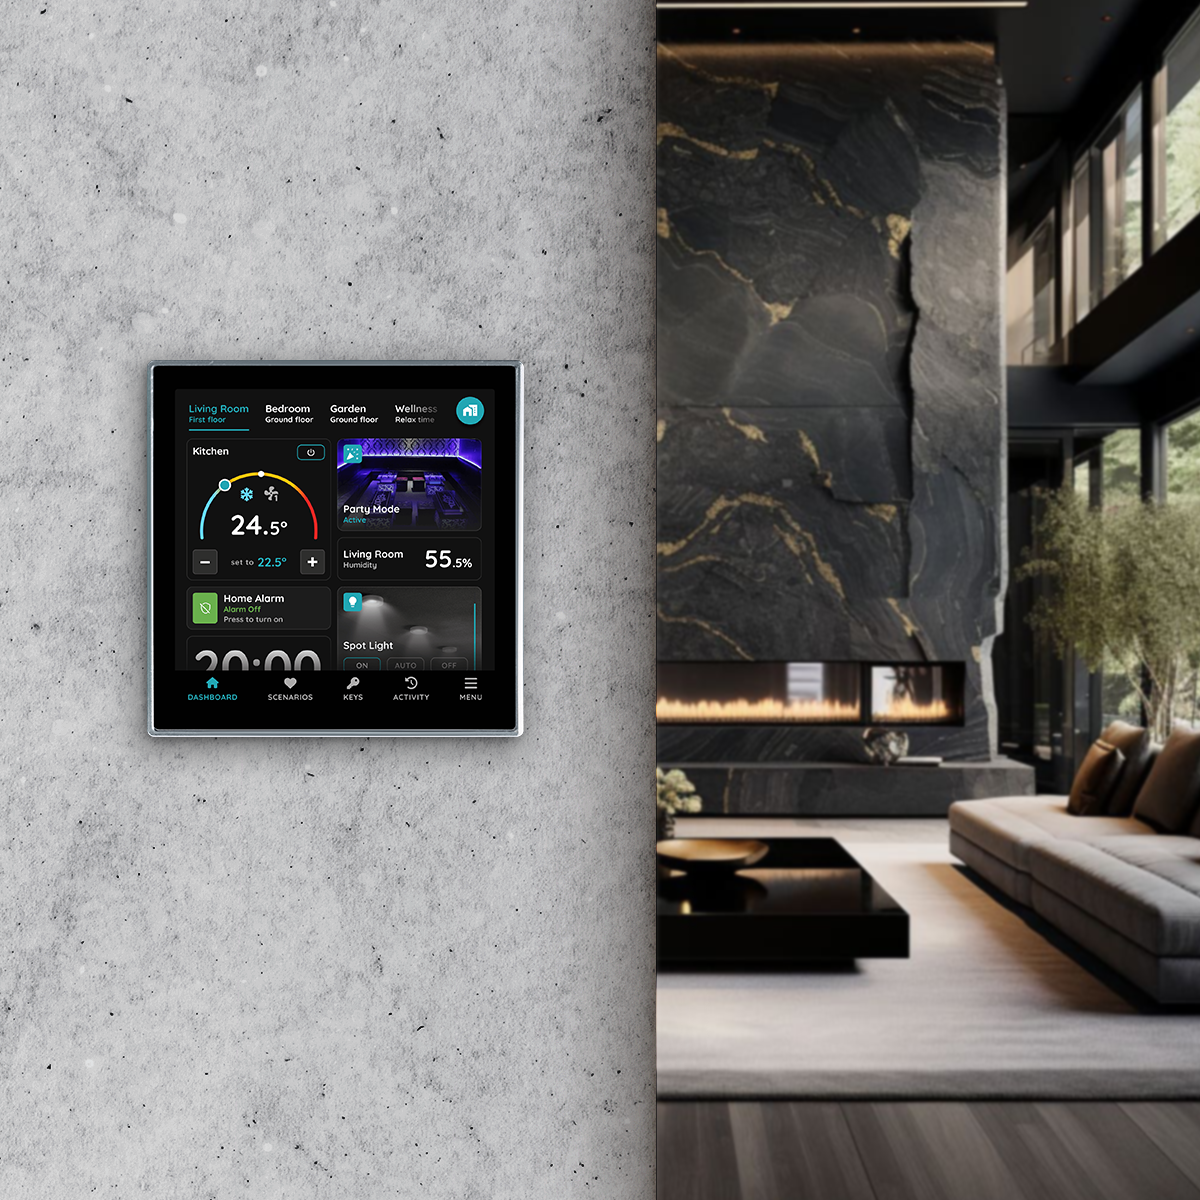
The PIERRE Room Control Display Rio 4" is a wall-mounted unit that combines four roles in one device: room control panel, PIERRE Wave gateway, local server, and indoor intercom unit.
Touchscreen Control
The 4-inch touchscreen gives direct control of the system:
- Lighting control.
- Blind and curtain control.
- Heating and cooling control.
- Scene activation.
- Device monitoring.
The available functions depend on the configuration of the project.
PIERRE Wave Gateway
The display acts as a PIERRE Wave gateway, handling communication with the wireless devices:
- Device pairing.
- Device control.
- Mesh network management.
- Wave device communication.
Local Mode
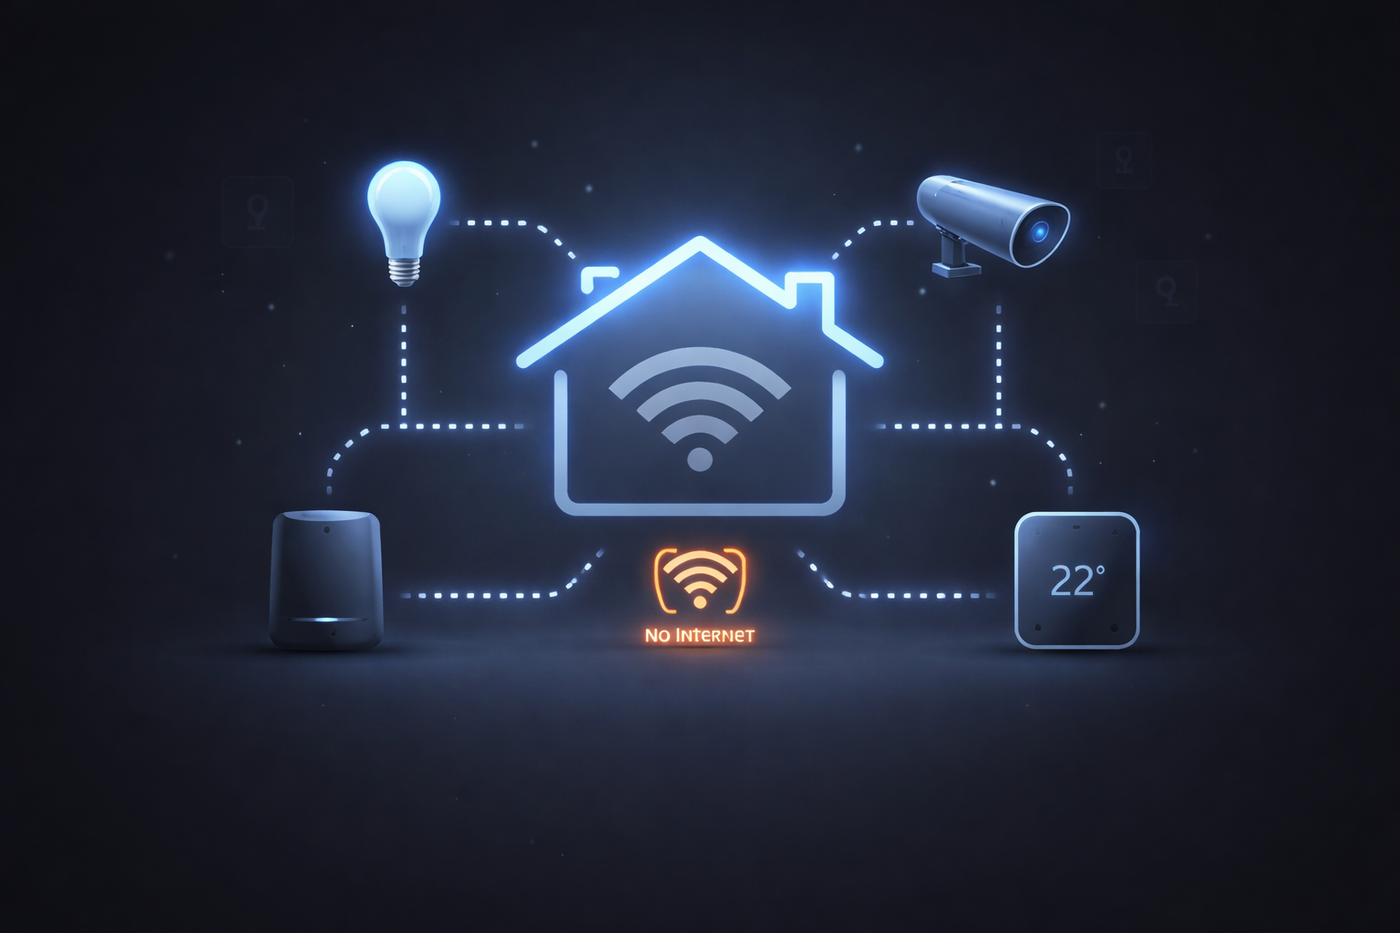
The display runs as a local server, so the system keeps working when the internet connection is unavailable. Local operation supports device control, automations, scenes and wireless communication. Some cloud-dependent functions still require an active internet connection.
Intercom Function
- Audio and video communication.
- Door answering and door unlocking.
- Call notifications.
Integrated Relays
The display has two integrated relay outputs, with a maximum load of 200 W per output. Typical uses: lighting control, floor heating control, valve control and auxiliary outputs.
Integrated Sensor
Built-in brightness sensor. Typical uses: day/night automations, blind automation and brightness-based scenarios. The Rio 4" has no temperature or humidity sensor; use a separate room sensor or a Modbus thermostat for heating control.
RS485 Interface
The integrated RS485 port connects Modbus RTU devices directly to the system. Several Modbus RTU devices can share the same RS485 bus when each has its own address and the same line settings. Typical devices:
- PIERRE Modbus thermostats.
- Temperature and humidity sensors.
- Fan coil units.
- Energy meters.
- Third-party Modbus RTU devices.
Network Connectivity
- Ethernet (LAN)
- Wi-Fi
- PIERRE Wave
- RS485 / Modbus RTU
Cabling
From the electrical distribution cabinet to the display:
- Minimum: 2 × 1.5 mm² NYM-O – live (L) and neutral (N).
- Recommended: 5 × 1.5 mm² NYM-O. This allows both integrated relay outputs to be used directly from the cabinet, which gives more flexibility later.
Plan the network cable and the RS485 bus cable separately, according to the project.
Technical Notes
- Run the recommended 5-core cable even where the relays are not used at first – adding conductors afterwards means opening the wall.
- The display mounts in a standard 86 mm wall box. Plan the box position and the cable entries during the electrical design.
- Position the display for its gateway role as well as for its control role: central enough to reach the wireless devices, and at a height that is comfortable to operate.
- Where the RS485 bus is used, plan the cable route with the Modbus devices in mind and keep it away from mains wiring.
PIERRE Display - Rio 4" settings
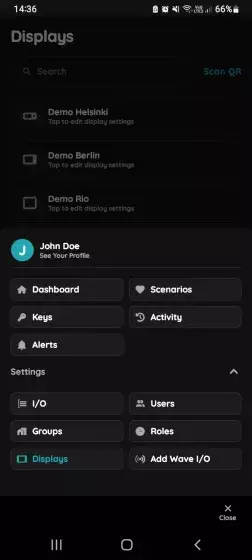
Open display
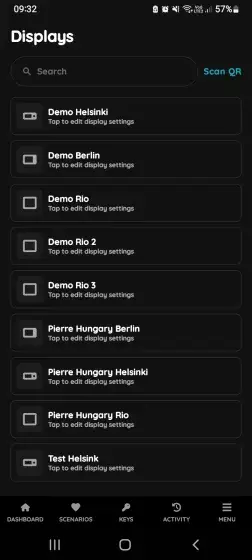
Choose Display Rio
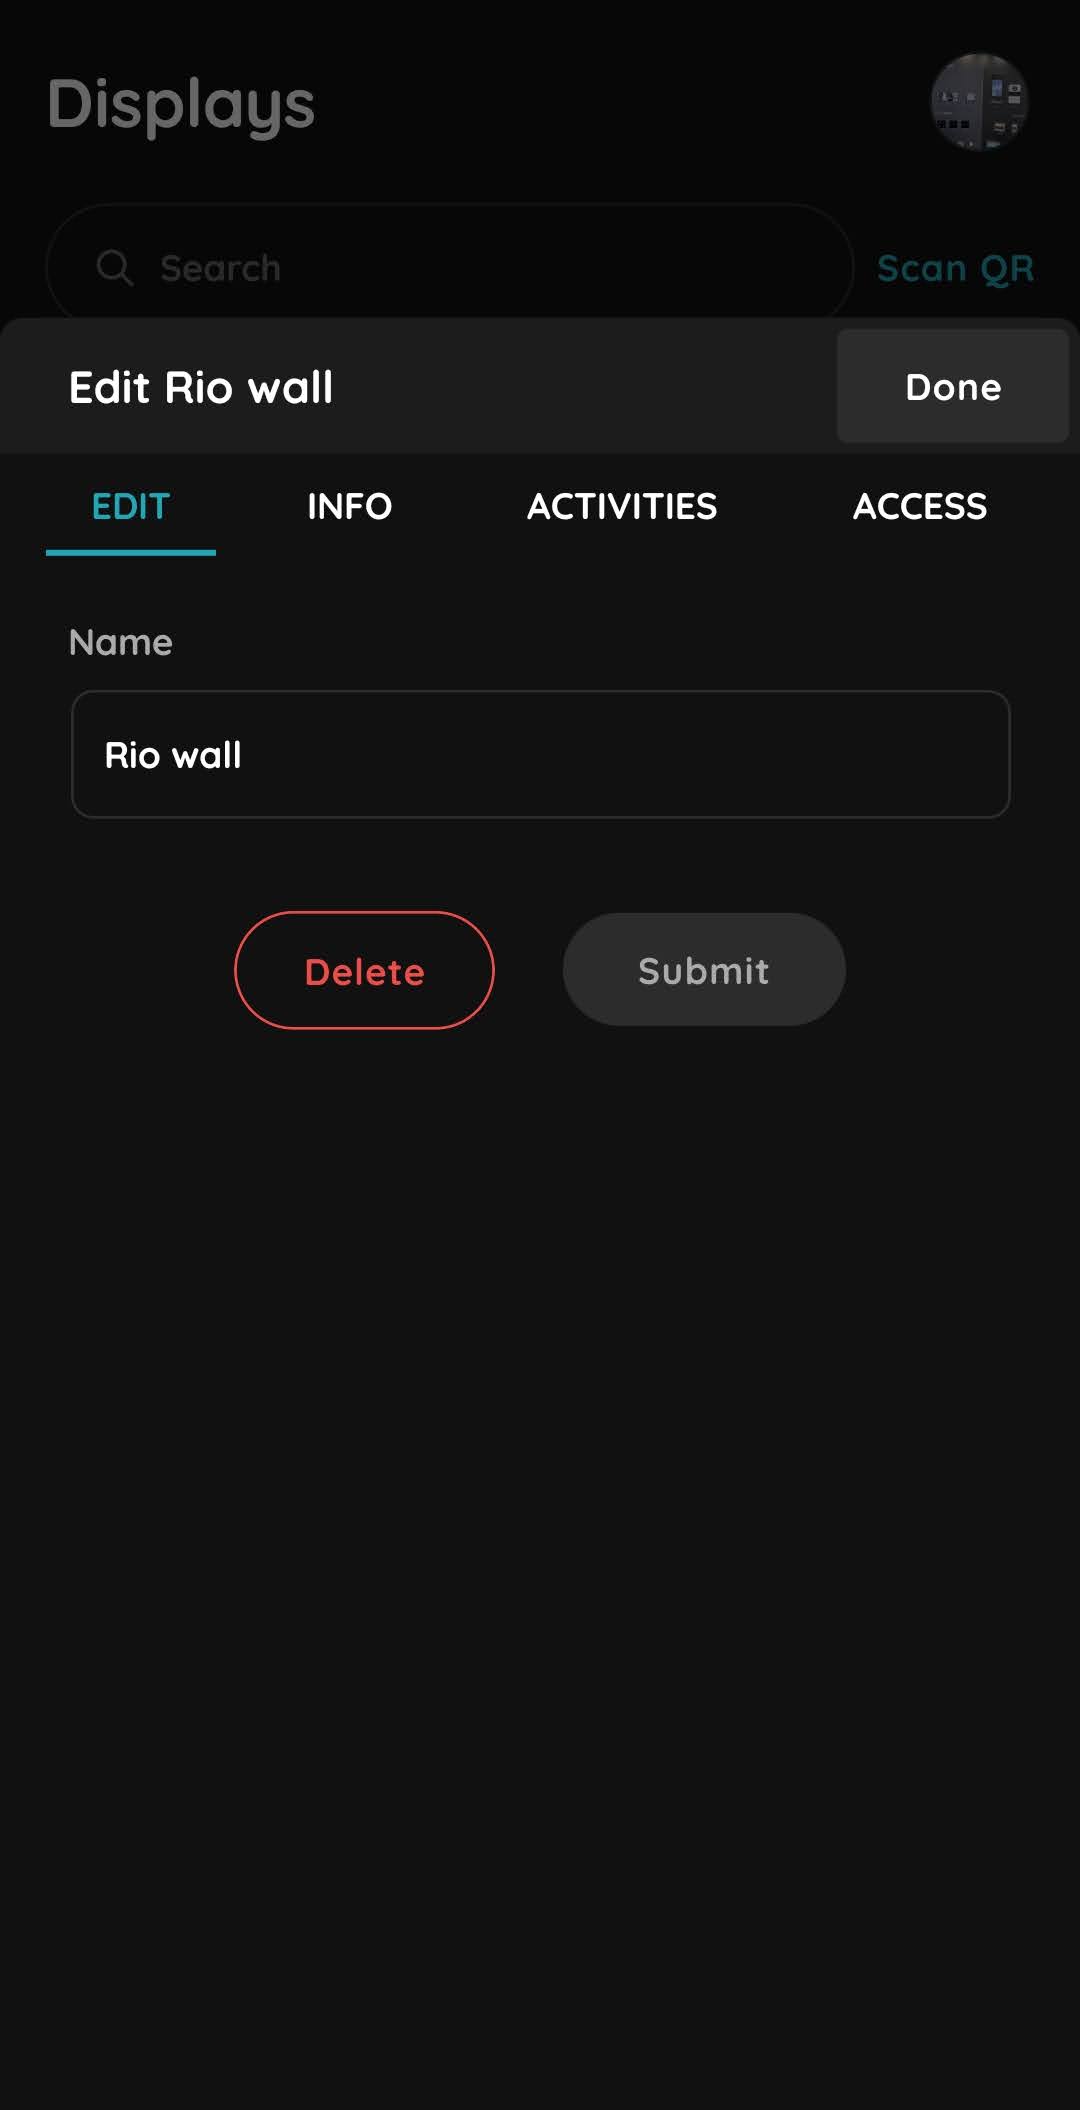
Edit - Display
Use following tabs:
- Activity – Shows all activities that occurred in the smart home system (which device was activated, by whom, and when).
- Access – Shows the Role access assigned to the display.
- Personalization – This section allows administrators to customize the user interface, available features, and access permissions for users and Displays.
- Sensors – Shows the list of integrated sensors.
- Relays – Shows the list of devices connected to the relays.
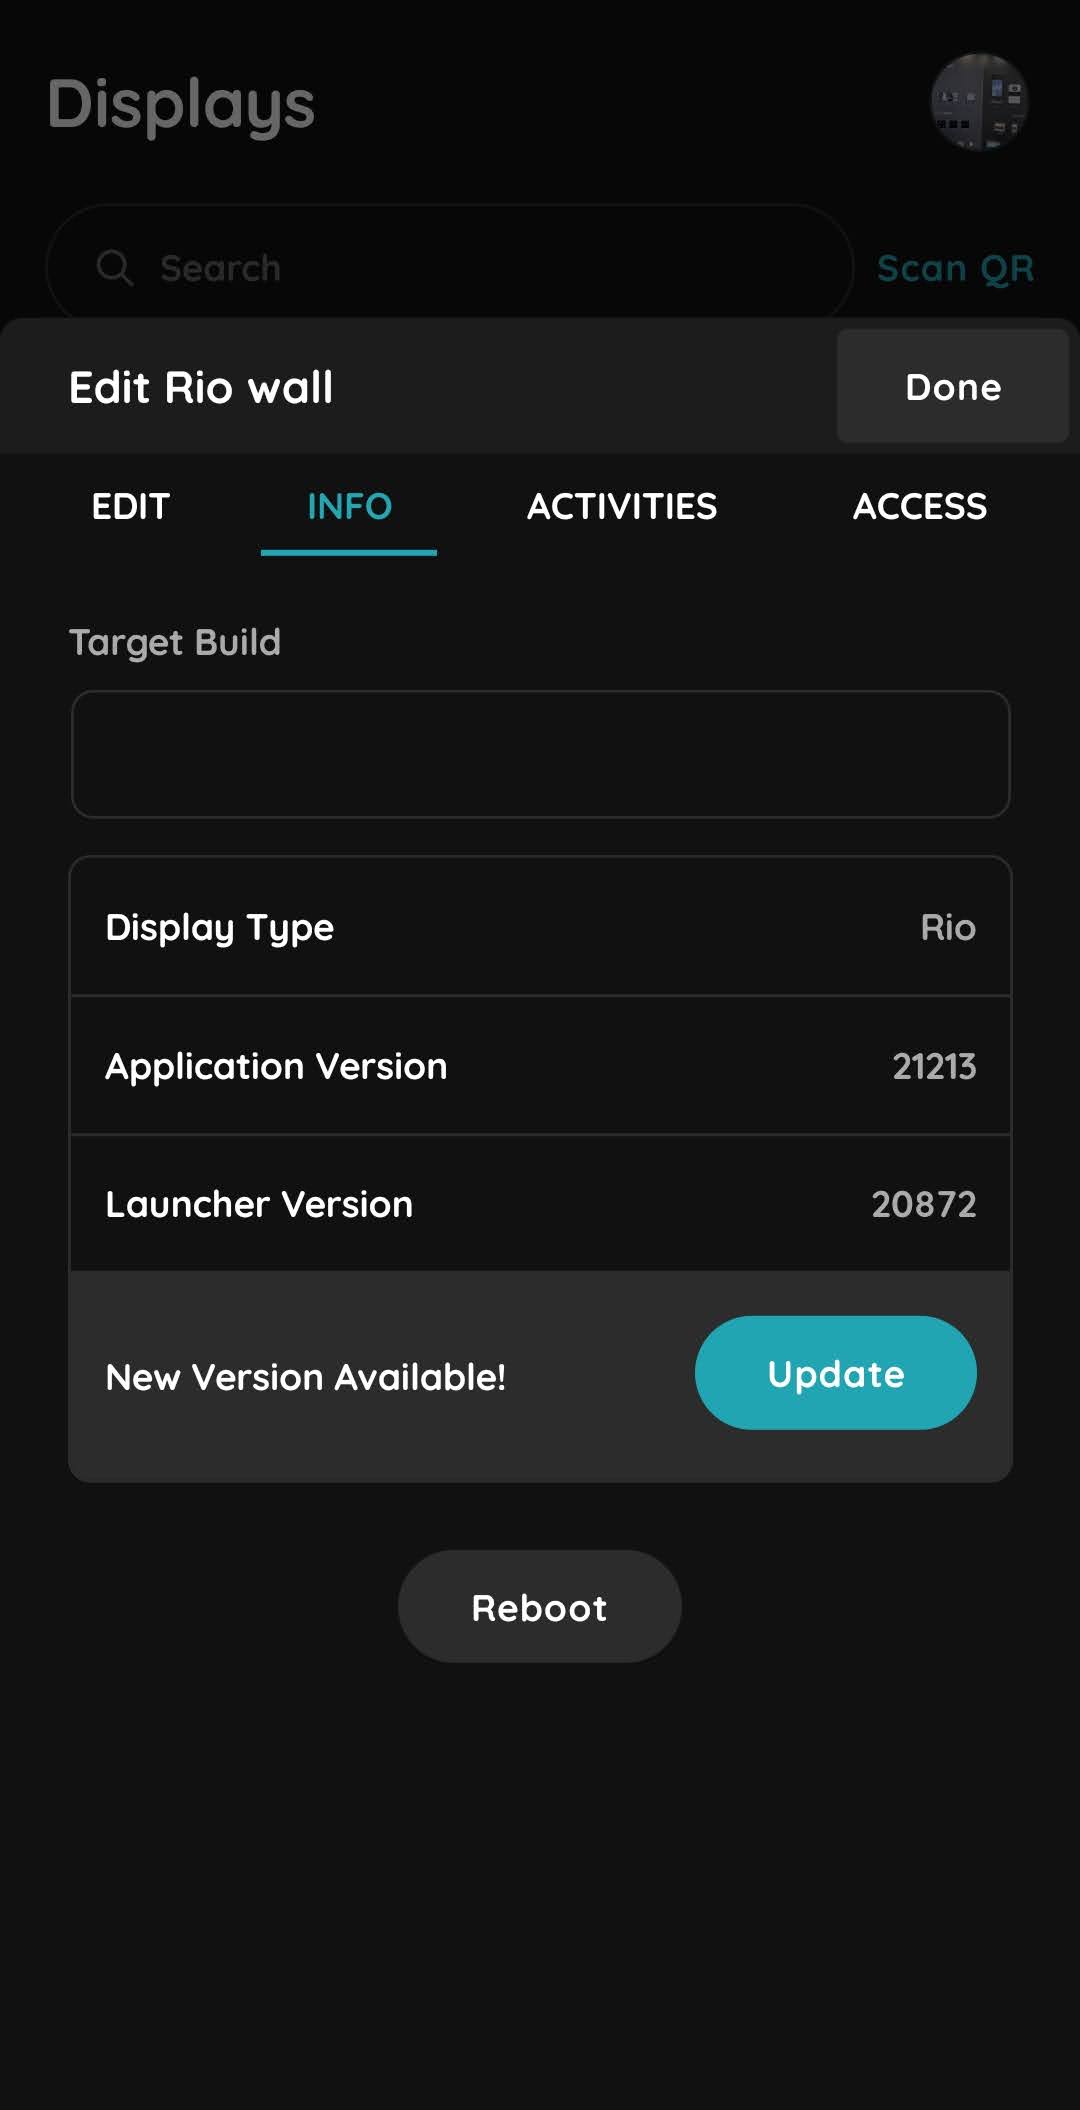
Info - Display
- Target build - certified PIERRE Partners can manually update displays to desired version.
- Display type - Model name of the display
- Application version - Installed application version
- Launcher version - Installed launcher version
- New Version Available! - Click the Update button to install the latest display firmware.
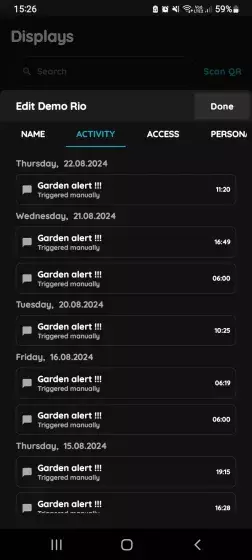
Activity - Display
This section shows all activities that occurred in the smart home system, including who activated a device and when.
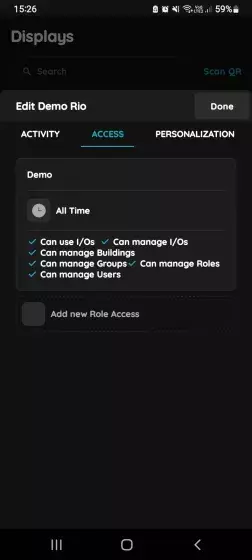
Access - Display
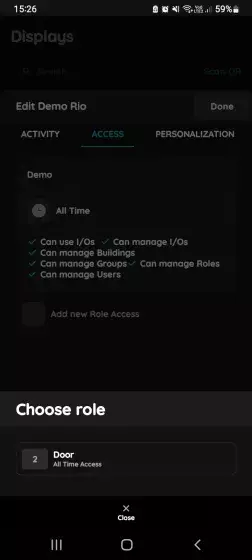
Add new Role Access - Display
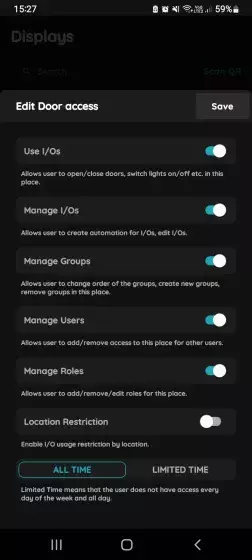
Edit Access - Display
These fields define the access permissions. You can enable or disable them using the sliders.
You can activate or deactivate them by slider.
- Use I/O - Allow user to open/close doors, switch lights on/off etc in this place.
- Manage I/O - Allow user to create automation for I/Os, edit I/Os.
- Manage Buildings - Allow user to create, edit or remove building.
- Manage Controllers - Allow user to add, edit and remove controllers in this place.
- Manage Groups - Allow user to change order of the groups, create new groups, remove groups in this place.
- Manage Users - Allows user to add/remove access to this place for other users.
- Manage Roles - Allow user to add/remove/edit roles for this place.
- Location Restriction - Enable I/O usage restriction by location (radius around the building in which I/O usage is allowed).
- ALL TIME - User has access every day of the week and all day.
- LIMITED TIME - User does not have access every day of the week and all day.
To confirm your settings, tap Save. To delete the access configuration, tap Delete.
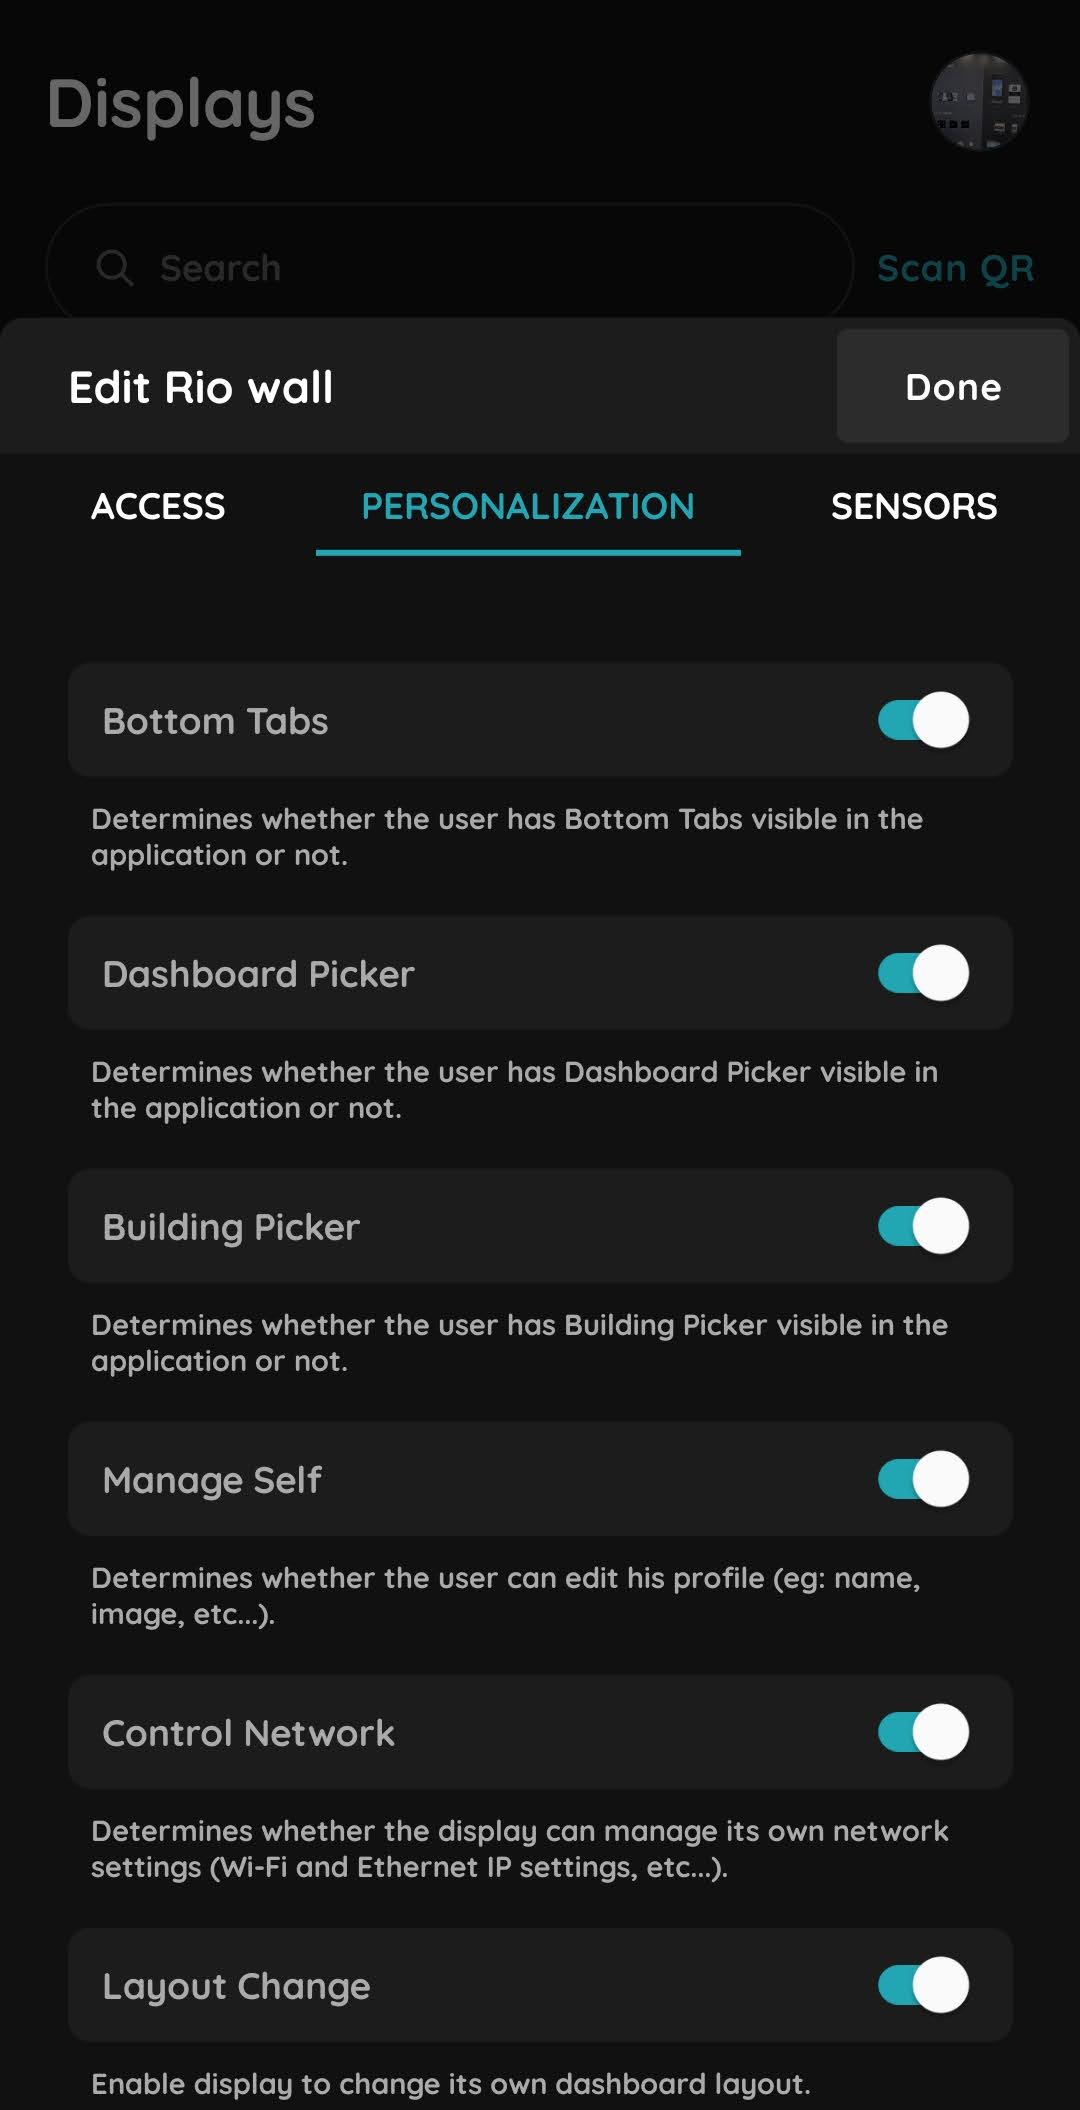
Personalization
Activate or deactivate these features:
- Bottom Tabs - Determines whether the user has Bottom Tabs visible in the application or not.
- Dashboard Picker - Determines whether the user has group Picker visible in the application or not.
- Building Picker - Determines whether the user has Building Picker visible in the application or not.
- Manage Self - Determines whether the user can edit his profile (eg: name, image, etc. ...)
- PIERRE Wave – Enable or disable the PIERRE Wave Gateway on the display.
- Control Network – Determines whether the display can manage its own network settings (Wi-Fi, Ethernet IP settings, etc.).
-
Layout Change – Allows the display to change its own dashboard layout.
To confirm your settings, tap Submit.
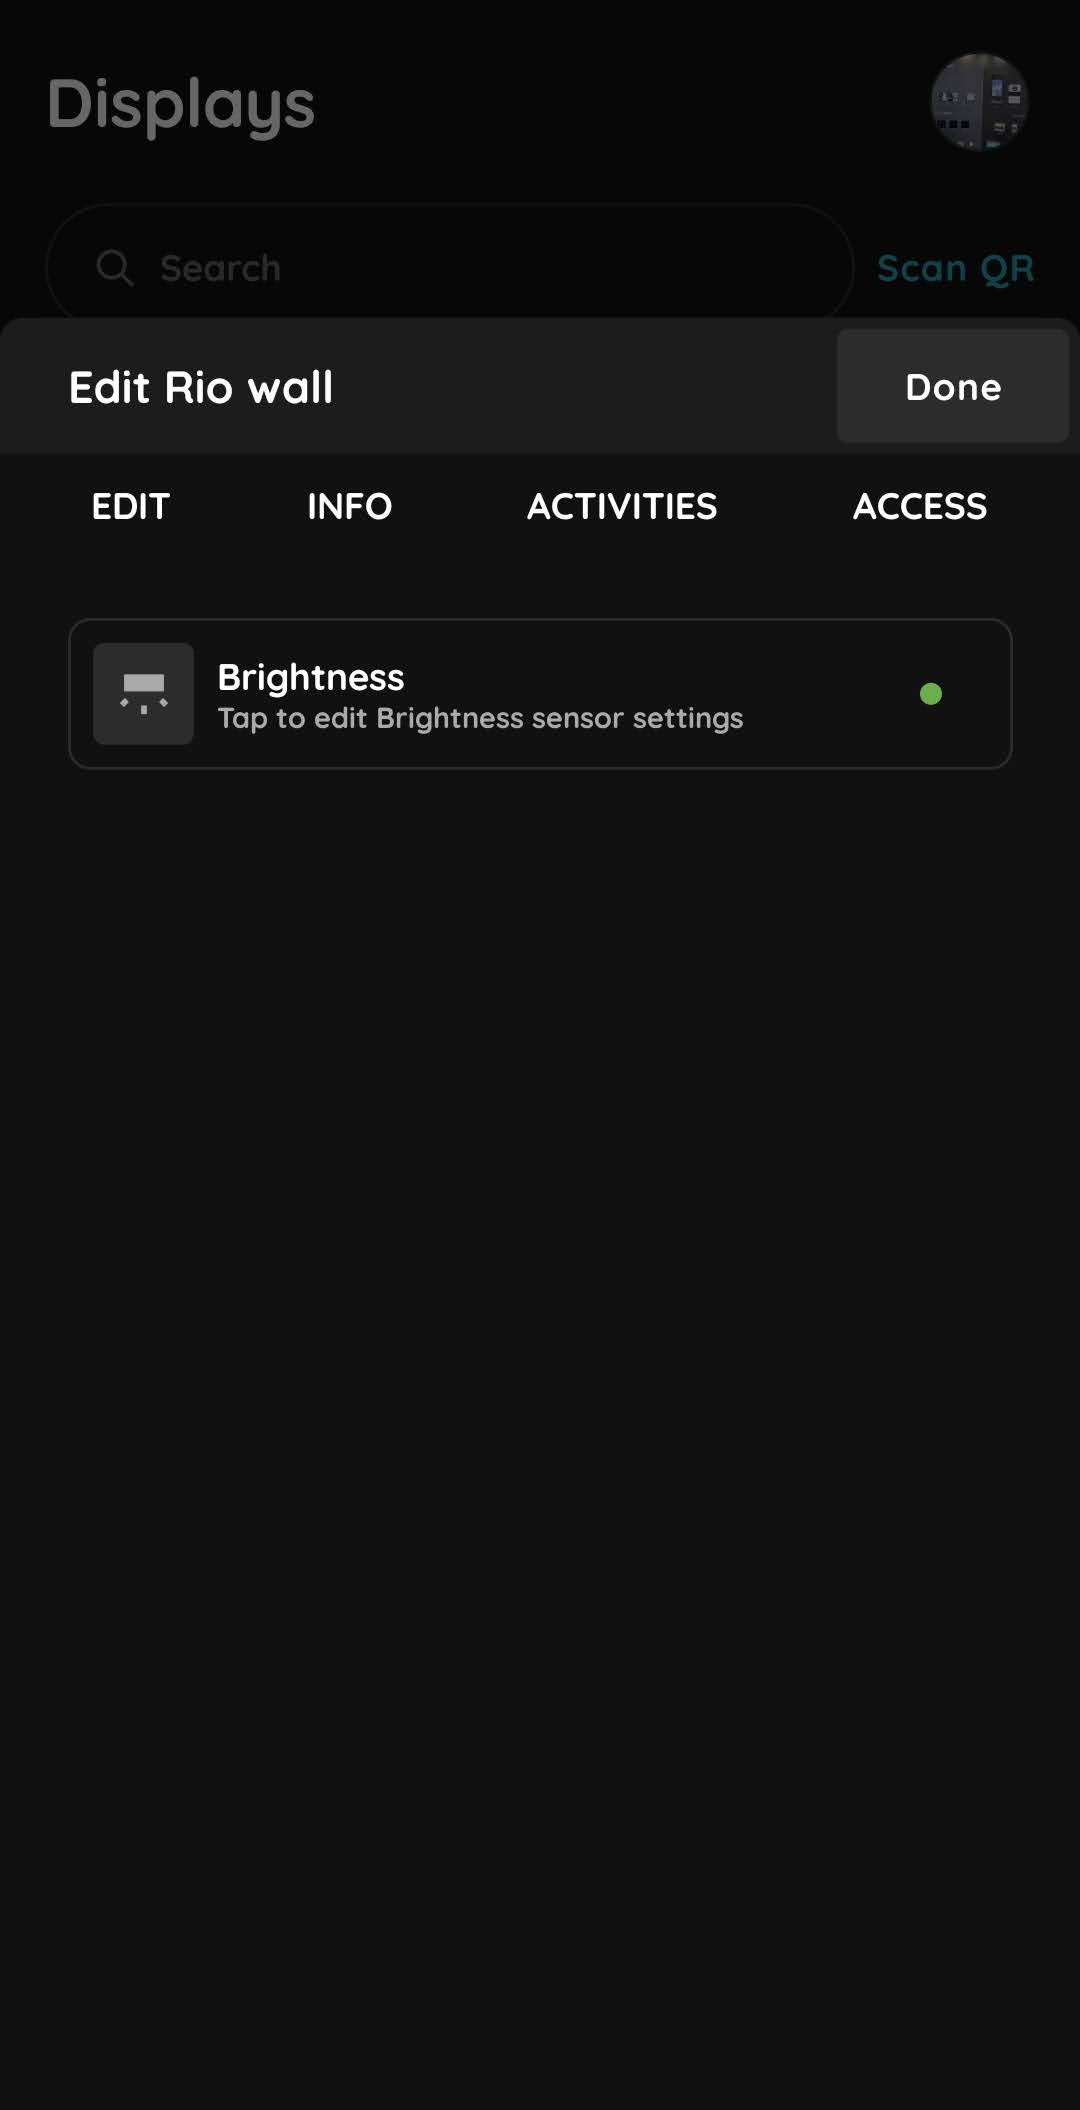
Sensors - Display
The PIERRE Display Rio 4" has an integrated Brightness Sensor.
Tap the sensor to edit it. To confirm your changes, tap Done.
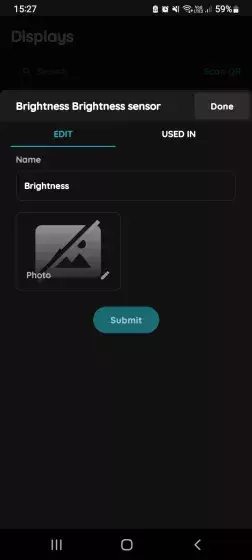
Edit Brightness sensor settings - Display
Edit these fields:
- Name – Tap this field to edit the name of the Brightness Sensor.
- Photo – Choose a source for the photo.
To confirm your changes, tap Submit.
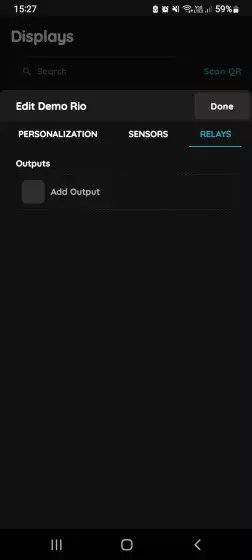
Relays - Display
This section shows a list of outputs connected to the Relays. Tap an output to edit it. You can also add a new output by tapping Add Output. To confirm, tap Done.
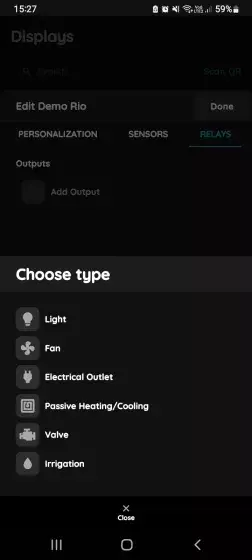
Add Output - Choose type
Choose a type from the list:
- Light
- Fan
- Electrical Outlet
- Passive Heating/Cooling
- Valve
- Irrigation
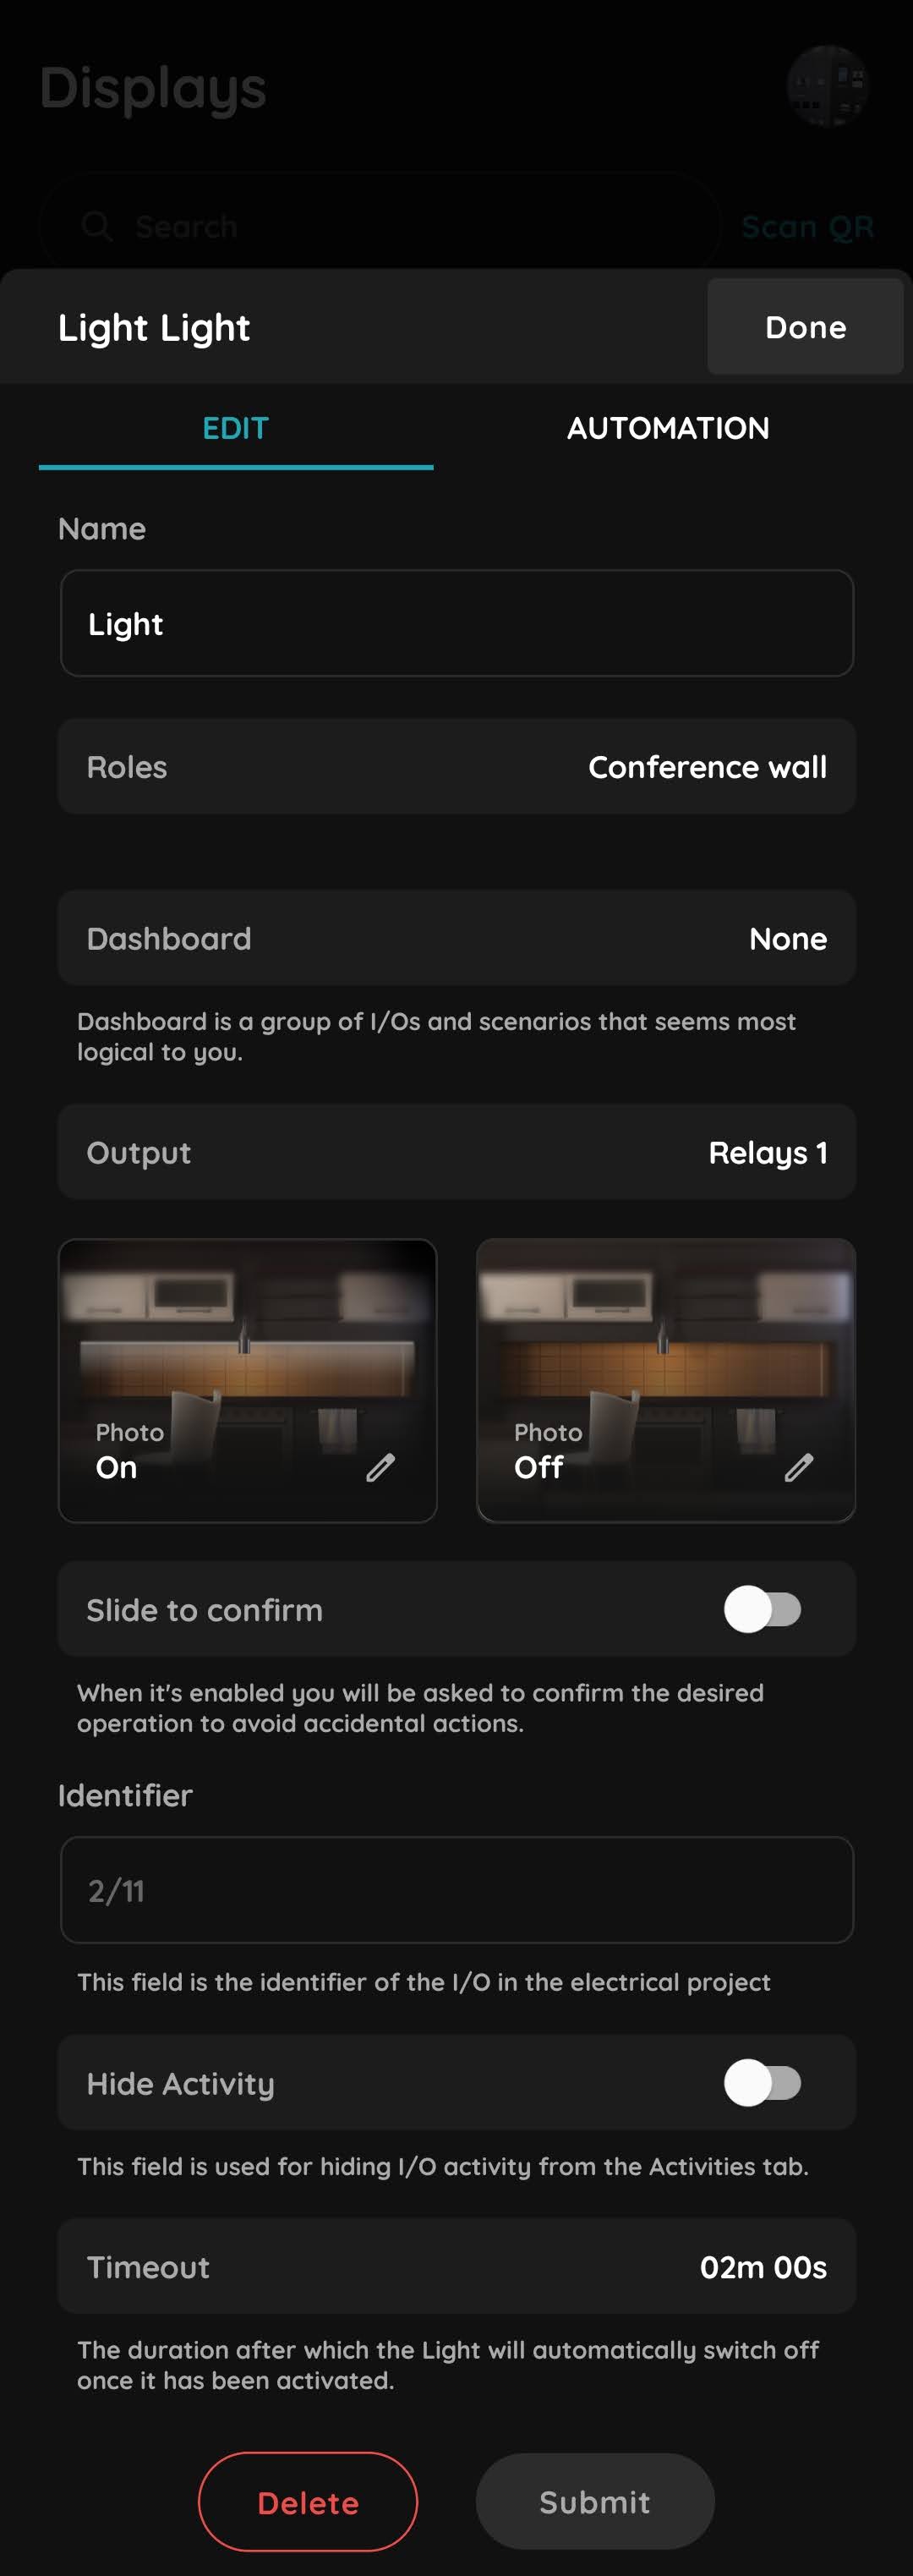
Output Settings
You can edit:
- Name - Add the Name of the output
- Roles - Select the correct Role for the output
- Dashboard - Select the Dashboard where you want the IO to be displayed
- Output – Select the physical Relay 1 or Relay 2 where the consumer will be connected.
- Photo – Edit the photo.
- Slide to Confirm – Enable or disable the “Slide to Confirm” option.
- Identifier - Edit the identifier from the electrical plan
- Hide Activity – This option is used to hide I/O activity from the Activity tab.
- Timeout – Defines the duration after which the I/O automatically switches off once it has been activated by an Automation or another I/O.
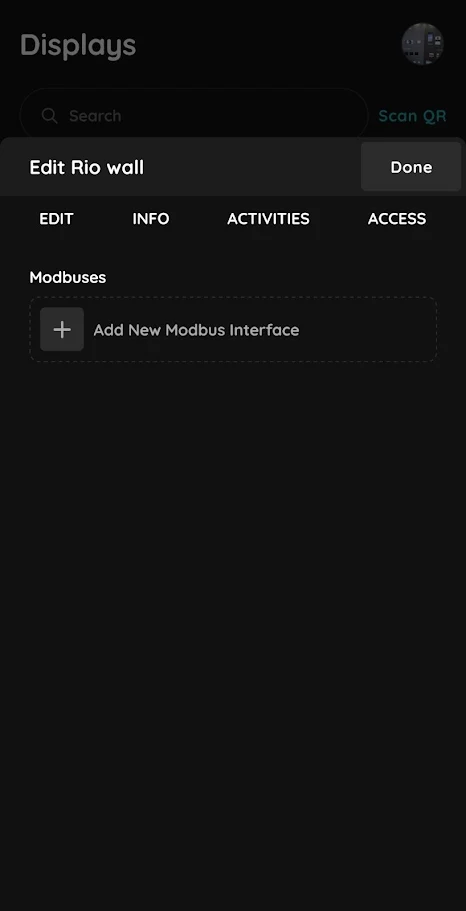
Modbuses
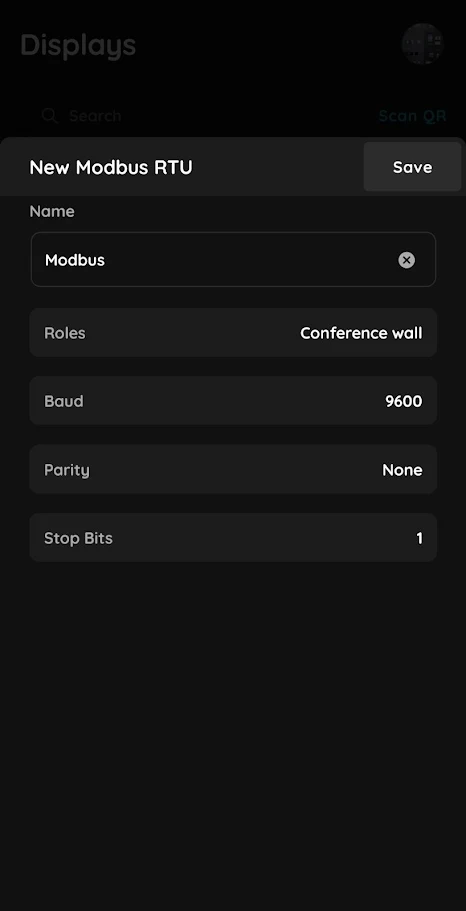
New Modbus RTU
Edit the settings below:
- Name – Enter a Name for the Modbus interface.
- Roles - Select the appropriate Role for the Modbus device.
- Baud – Select the communication speed for the Modbus interface (2400 to 115200 bps).
- Parity – Select the required parity setting.
- Stop Bits – Select the required stop bit configuration.
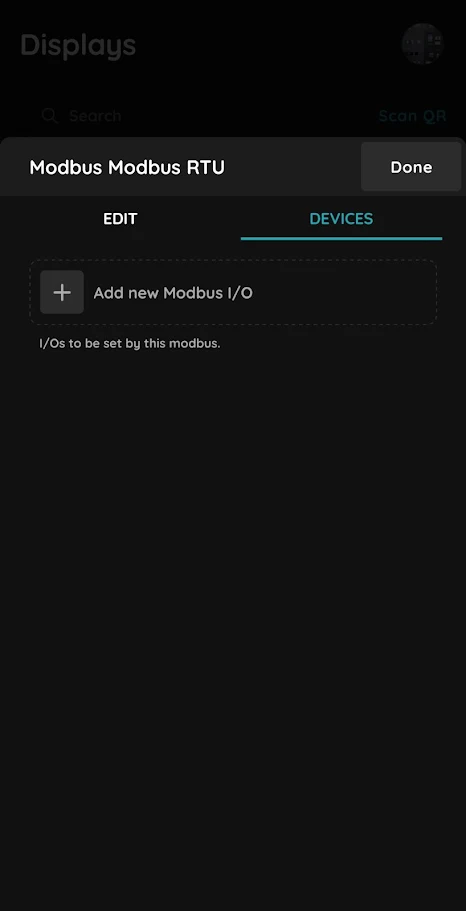
Modbus - Add new Modbus I/O
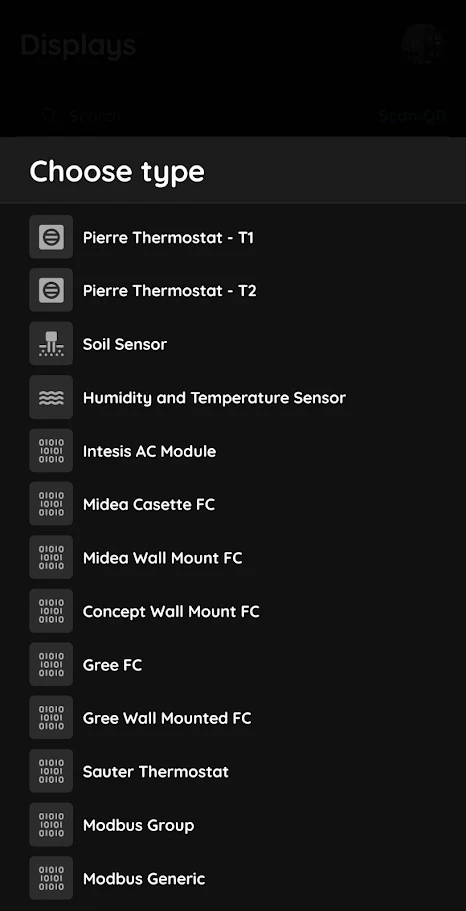
Modbus - Choose type
Or you can choose Modbus Generic to manually configure a custom Modbus device.
Schemes
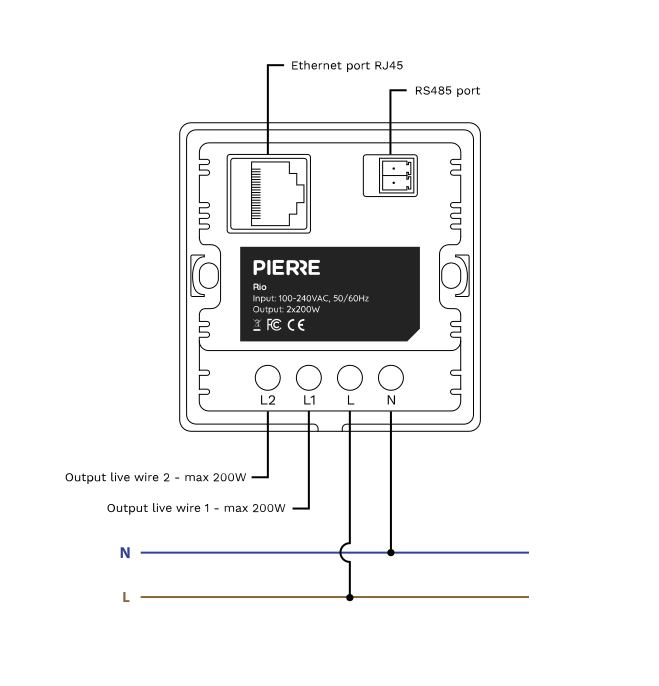
Wiring PIERRE display - Rio 4” - Electric schemes
Cables
| Position | Wires | Diameter | Type | Comment | CATEGORY |
|---|---|---|---|---|---|
| From PIERRE Display to Electric box | 2 | 1.5 mm² | NYM-O | L, N | Required |
| From PIERRE Display to Consumer | 3 | 1.5 mm² | NYM-O | L1, L2, N | Optional |
| From PIERRE Display to Network Switch | 1 | - | Cat 5e U/UTP | - | Recommended |
| From PIERRE Display to Modbus | 2 | 0.5 mm² | Shielded twisted pair | A+, B- | Optional |
FAQ
The system will continue to function locally without internet access, but remote access (such as controlling devices from a phone while away) will not be possible.
Yes, the display sound can be adjusted. Swipe down from the top of the display to access the menu, where you can find sound settings.
Displays connect to the system through the network, either wired or wireless, and do not require a direct connection to the Controller.
Yes, a display can be replaced by a larger model. Check the mounting: the larger display needs a matching back box or wall cut-out; the supply and network connection stay the same.
No, the displays are not waterproof and are not suitable for installation in areas exposed to moisture or rain.
No, a classic thermostat is not necessary. Instead, a temperature sensor integrated with the PIERRE system can monitor the room’s temperature and manage the heating/cooling devices accordingly.
Yes, PIERRE offers its own smart thermostats, which can be found in the thermostat product category.
The Rio display has no built-in temperature sensor, but it has relays that can switch the heating or cooling circuit. Pair it with a PIERRE temperature sensor (wired or Wave) in the room and the system controls the heating from that sensor.
Yes. Wire the heating circuit to the display's relay and add a PIERRE temperature sensor in the room, because the Rio itself does not measure temperature.
Yes, the display can control underfloor heating valves as well as other heating and cooling systems.
A mains supply (L and N, 2 × 1.5 mm²) and a network connection — a UTP cable to the network switch is recommended; Wi-Fi is possible.
Heat meters with an M-Bus interface are read through an Intesis M-Bus to Modbus gateway connected to a PIERRE Pro controller. The meters are wired to the gateway's M-Bus (a shared two-wire bus) and the controller reads them over Modbus RTU.