
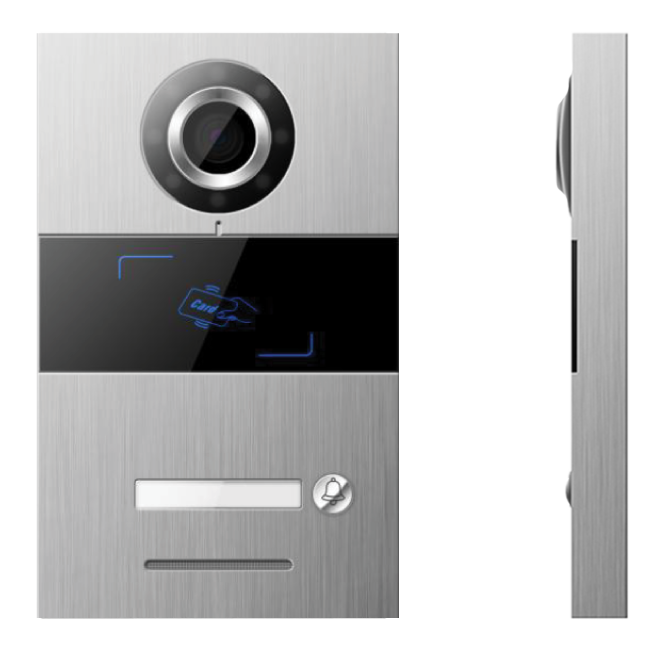
Intercom Springfield (1 Button)
| SKU | P-INT-SPRINGFIELD |
|---|---|
| Product line | PIERRE Pro, PIERRE Wave |
| Category | Intercoms |
| Manufacturer | GVS |
| Manufacturer SKU | SO001 |
| GTIN / EAN | 8606034720109 |
| HS code | 8517692000 |
Overview
The PIERRE Springfield Intercom is engineered with dual power options, accommodating both DC 24V and PoE 48V, ensuring flexibility in deployment across various installations. It integrates a 2MP CMOS camera equipped with a 2.2mm focus length lens, providing a diagonal field of view of 95° for comprehensive surveillance coverage. The camera angle can be adjusted by 12° in all directions, optimizing the device's placement and coverage area.
The white fill-in light enhances visibility under zero-lux conditions, ensuring reliability in low-light environments. Designed to handle challenging conditions, the intercom operates efficiently with a maximum current draw of 300mA, maintaining a low static current of 75mA in PoE mode. This rugged construction and adaptive power configuration make it a reliable solution for secure access control in various residential and commercial settings.
Key features
DC 24V and PoE 48V, 2MP CMOS camera, diagonal 95° view, 2.2mm focus length, 1 button, RFID 13,56mHz, Wiegand, Mifare, adjustable angle of the camera: up/down/left/right 12°
Technical specifications
| Electrical | |
|---|---|
| Power Supply | DC 24V/PoE 48V |
| Current | 0.3 A |
| Standby Power | ≤75mA (PoE 48V) |
| Connectivity | |
| Connectivity | 10M/100M Ethernet RJ45 |
| PoE Support | Yes |
| PoE Protocol | IEEE 802.3af/at 15.4W/30W |
| Physical | |
| Panel Material | Metal |
| Product Color | Grey |
| Mounting Type | Wall mount |
| Recommended Installation Height | 1.60 m |
| Features | |
| LED Indicators | Yes |
| Environmental | |
| Operating Temperature (°C) | -20°C ~ +70°C |
| Operating Temperature | -4°F ~ +158°F |
| Safety | |
| Safety Features | Reverse polarity protection, Tamper protection, Disconnection alarm, Door status detection |
Pin layout
| Pin | Label | Type | Position |
|---|---|---|---|
| 1 | 24V+ | power_24V_in | top |
| 2 | GND | power_gnd_in | top |
| 3 | ETH | ethernet_in | top |
| 4 | COM | power_12V_input | top |
| 5 | NO | sensor_signal | top |
Physical & packaging
| Dimensions (L × W × H) | 120 × 40 × 193 mm |
|---|---|
| Weight | 620 g |
| Box dimensions (L × W × H) | 149 × 113 × 241 mm |
| Box weight | 800 g |
User manual
- 1. Product Size
- 2. Product Description
- 3. What you need
- 4. Installation Height
- 5. Installation
- 6. Wiring Diagrams
- 7. Network Configuration for PIERRE Intercoms
- 8. Setup in PIERRE Partner Application
- 9. Set up the PIERRE Springfield intercom
- 10. Configuring SIP Account Settings
- 11. Configuring Contact Settings
- 12. Call Settings
- 13. Assigning Fixed IP Addresses to Displays
- 14. Operation Instructions
- 15. Configuration
- 16. Contact Setting
- 17. Card Management
- 18. Card Management Setting
- 19. Unlocking Management
- 20. Alarm Setting
- 21. Network Setting
- 22. Time Setting
- 23. Video Setting
- 24. Login Password Change
- 25. About
- 26. Roles and access in Smart PIERRE
- 27. FAQ
1. Product Size
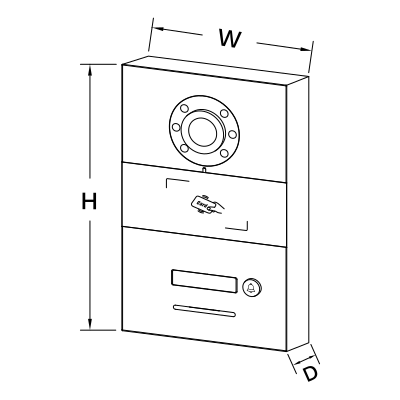
W: 12 cm
H: 19.3 cm
D: 4 cm
2. Product Description
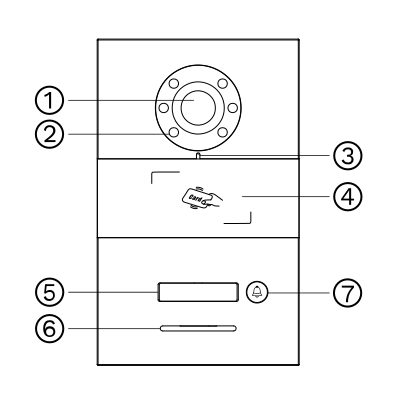
- Camera
- Fill Light
- MIC
- Card Reader Area
- Name Tag
- Speaker
- Call Button
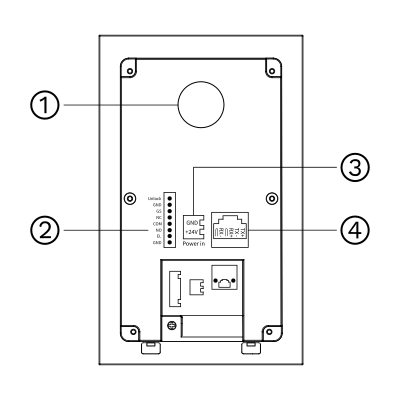
- Mounting Hole
- Used to secure the device to the wall with screws or fasteners.
- I/O Terminal Block
- This terminal block connects external devices:
- Unlock / NO / COM / NC – Relay output for electric lock control
- GND – Ground
- GS – Door sensor input
- EL – Additional lock or auxiliary output
- +24V / GND – Power input (24V DC)
- A dedicated 2-pin terminal for connecting the 24V DC power supply.
- +24V – Positive voltage
- GND – Ground
- Connects the intercom to the network switch (Ethernet). Used for the SIP calls to the PIERRE display and for the web configuration interface.
3. What you need
Wired, SIP based. Needs a PIERRE display as the indoor unit (the Smart PIERRE app can also answer calls), a network switch and a DC power supply (see the power input in Product Description).
4. Installation Height
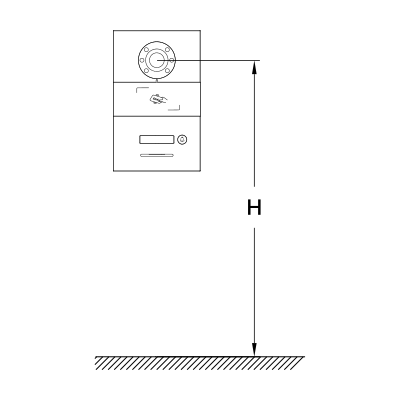
Recommended Installation Height: 1.6 meters - 5.25 feet
H: 1.60 m - 5.25 feet
5. Installation
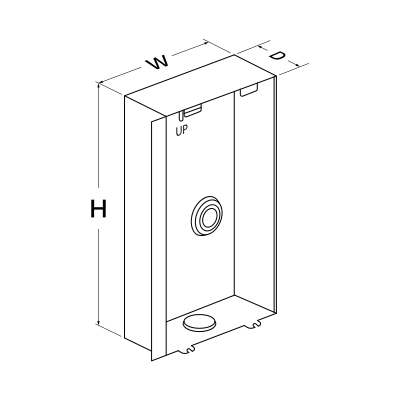
Installation Steps
Embedded Box Dimensions
- Width: 100.6 mm
- Height: 175.5 mm
- Depth: 39 mm
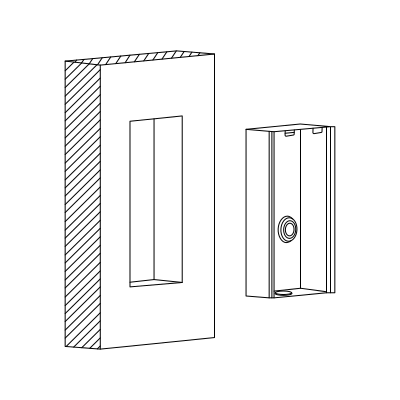
Step 1: Prepare the Wall Slot for the Embedded Box
Cut a slot in the wall that matches the dimensions of the embedded box (100.6 × 175.5 × 39 mm). Ensure the slot is level and deep enough to securely hold the box.
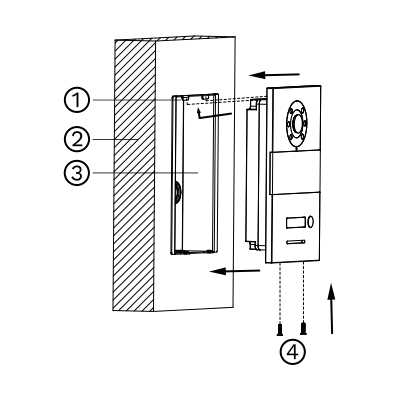
Step 2: Install the Embedded Box
Place the embedded box into the prepared wall slot, ensuring it fits securely. Align it properly, then fasten it using screws to fix it firmly in place.
- Holder
- Wall
- Embedded Box
- Screws
6. Wiring Diagrams
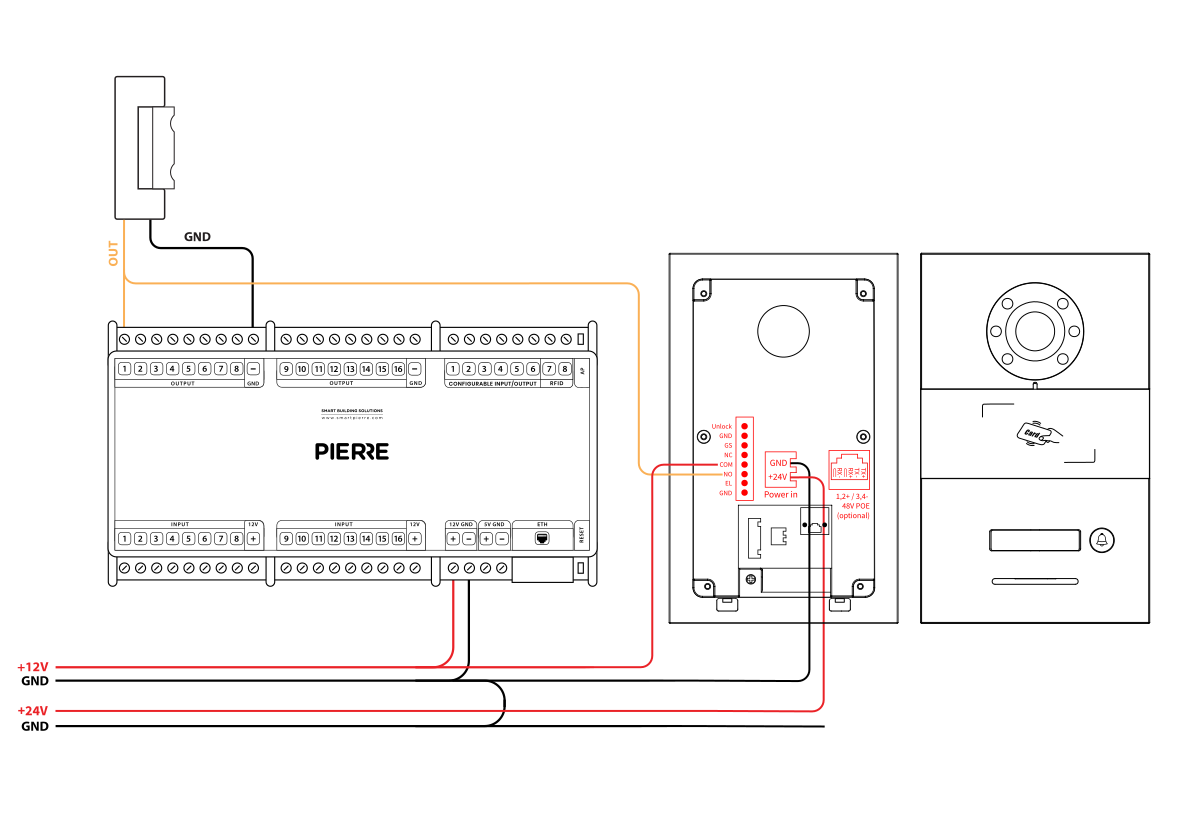
PIERRE Springfield Intercom Wiring-hybrid (PIERRE Controller and Intercom)
This diagram shows the Springfield intercom wired together with a PIERRE Controller: the intercom relay output (NO/COM) triggers the lock input of the Controller, and the Controller powers the electric lock. The main interfaces of the intercom are:
- Power Input (+12V / GND): Connect to a 12V DC power supply.
- Lock Control (LOCK1 / LOCK2): Relay outputs for controlling electric or magnetic locks.
- Exit Button (EXIT): Connect an internal button to unlock the door from inside.
- Alarm Output: Triggers external alarms on tamper or configured events.
- LAN Port (RJ45): Connects the device to the local network or server.
- Wiegand Interface (WG IN/OUT): For integration with external access control readers (26/34-bit).
- RS485 Port (A/B): For communication with external devices like controllers or sensors.
Note: Always wire with the power off. Installation should be done by qualified personnel.
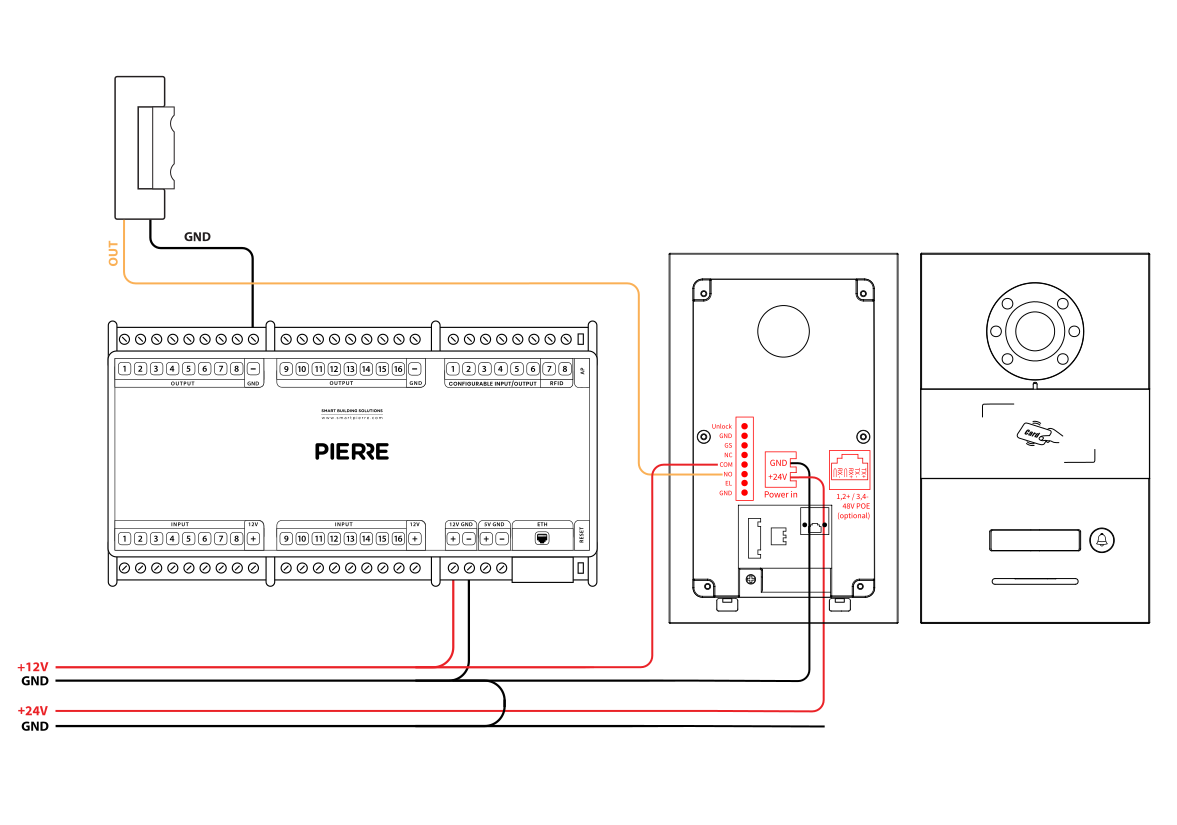
PIERRE Springfield Intercom Wiring Gate/Door opening by Intercom
This diagram shows the external wiring setup for connecting the Springfield intercom to peripherals and systems:
- 12V Power Supply: Provides power to the device.
- LAN Port: Connects the device to the local network.
- Electric Lock Terminals (LOCK1 / LOCK2): For controlling one or two door locks.
- Exit Button: Allows door unlock from inside.
- Door Sensor: Detects door open/closed status.
- Alarm Output: For external siren or warning light connection.
- Wiegand / RS485 Ports: For third-party access systems or integration.
Note: Ensure all connections follow polarity and voltage specifications. Only qualified installers should perform wiring.
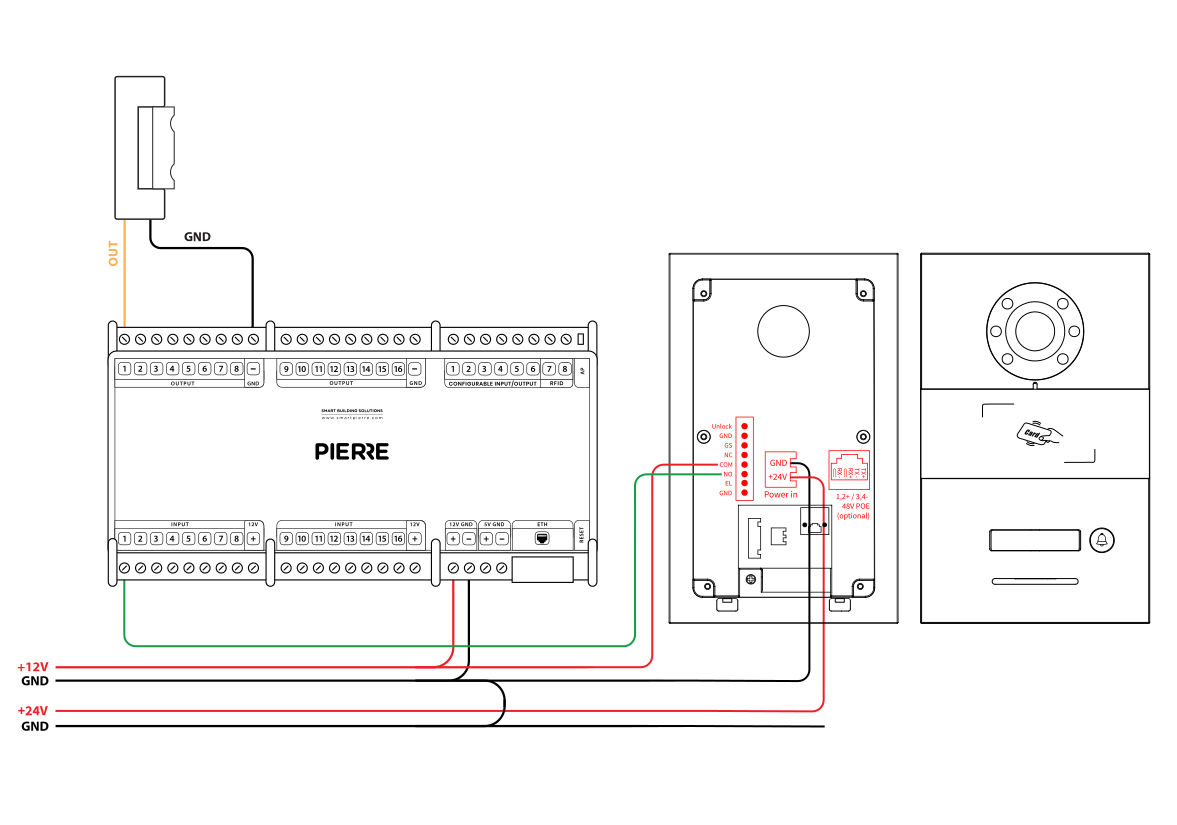
PIERRE Springfield Intercom Wiring Gate/Door opening by PIERRE Controller
This diagram shows how the Springfield intercom integrates with a door access system:
- Power Input (12V DC): Powers the device.
- LAN Connection: Connects to the building's network for communication with indoor monitors or the server.
- Exit Button and Door Sensor: Allows users to exit and tracks door status (open/closed).
- Electric Lock Output: Controls the locking mechanism.
- Alarm Output: Connects to a security alarm for tamper or door-related alerts.
- Integration Ports (RS485 / Wiegand): For connecting external access controllers or card readers.
Note: Always ensure proper voltage and secure connections. Installation must be performed by qualified personnel.
| Run | Wires | Cross-section | Cable type | Conductors |
|---|---|---|---|---|
| From PIERRE to Smart Intercom | 1 | cat.5 | Cat 5e U/UTP | 12 V, GND |
| From Intercom to Network switch | 1 | - | Cat 5e U/UTP | - |
7. Network Configuration for PIERRE Intercoms
The PIERRE intercoms are SIP-based and work on an offline-first principle: calls are set up over the local network, and remote access is added when an internet connection is available. A dedicated SIP server is not required for local calls.
A network router is a required component of the PIERRE door entry system. The modem-router supplied by the internet service provider is suitable.
Configure the DHCP server range on the router according to the size of the project.
Example – residential building with 50 apartments:
- Router IP address: 192.168.1.100
- Fixed IP addresses of the PIERRE displays (intercom indoor units):
- Apartment 1: 192.168.1.1
- Apartment 6: 192.168.1.6
- Apartment 50: 192.168.1.50
- DHCP server range on the router: 192.168.1.101 – 192.168.1.254
Every PIERRE display needs a fixed IP address. Assign a fixed IP address outside the DHCP range to every display so that the intercom can always reach it.
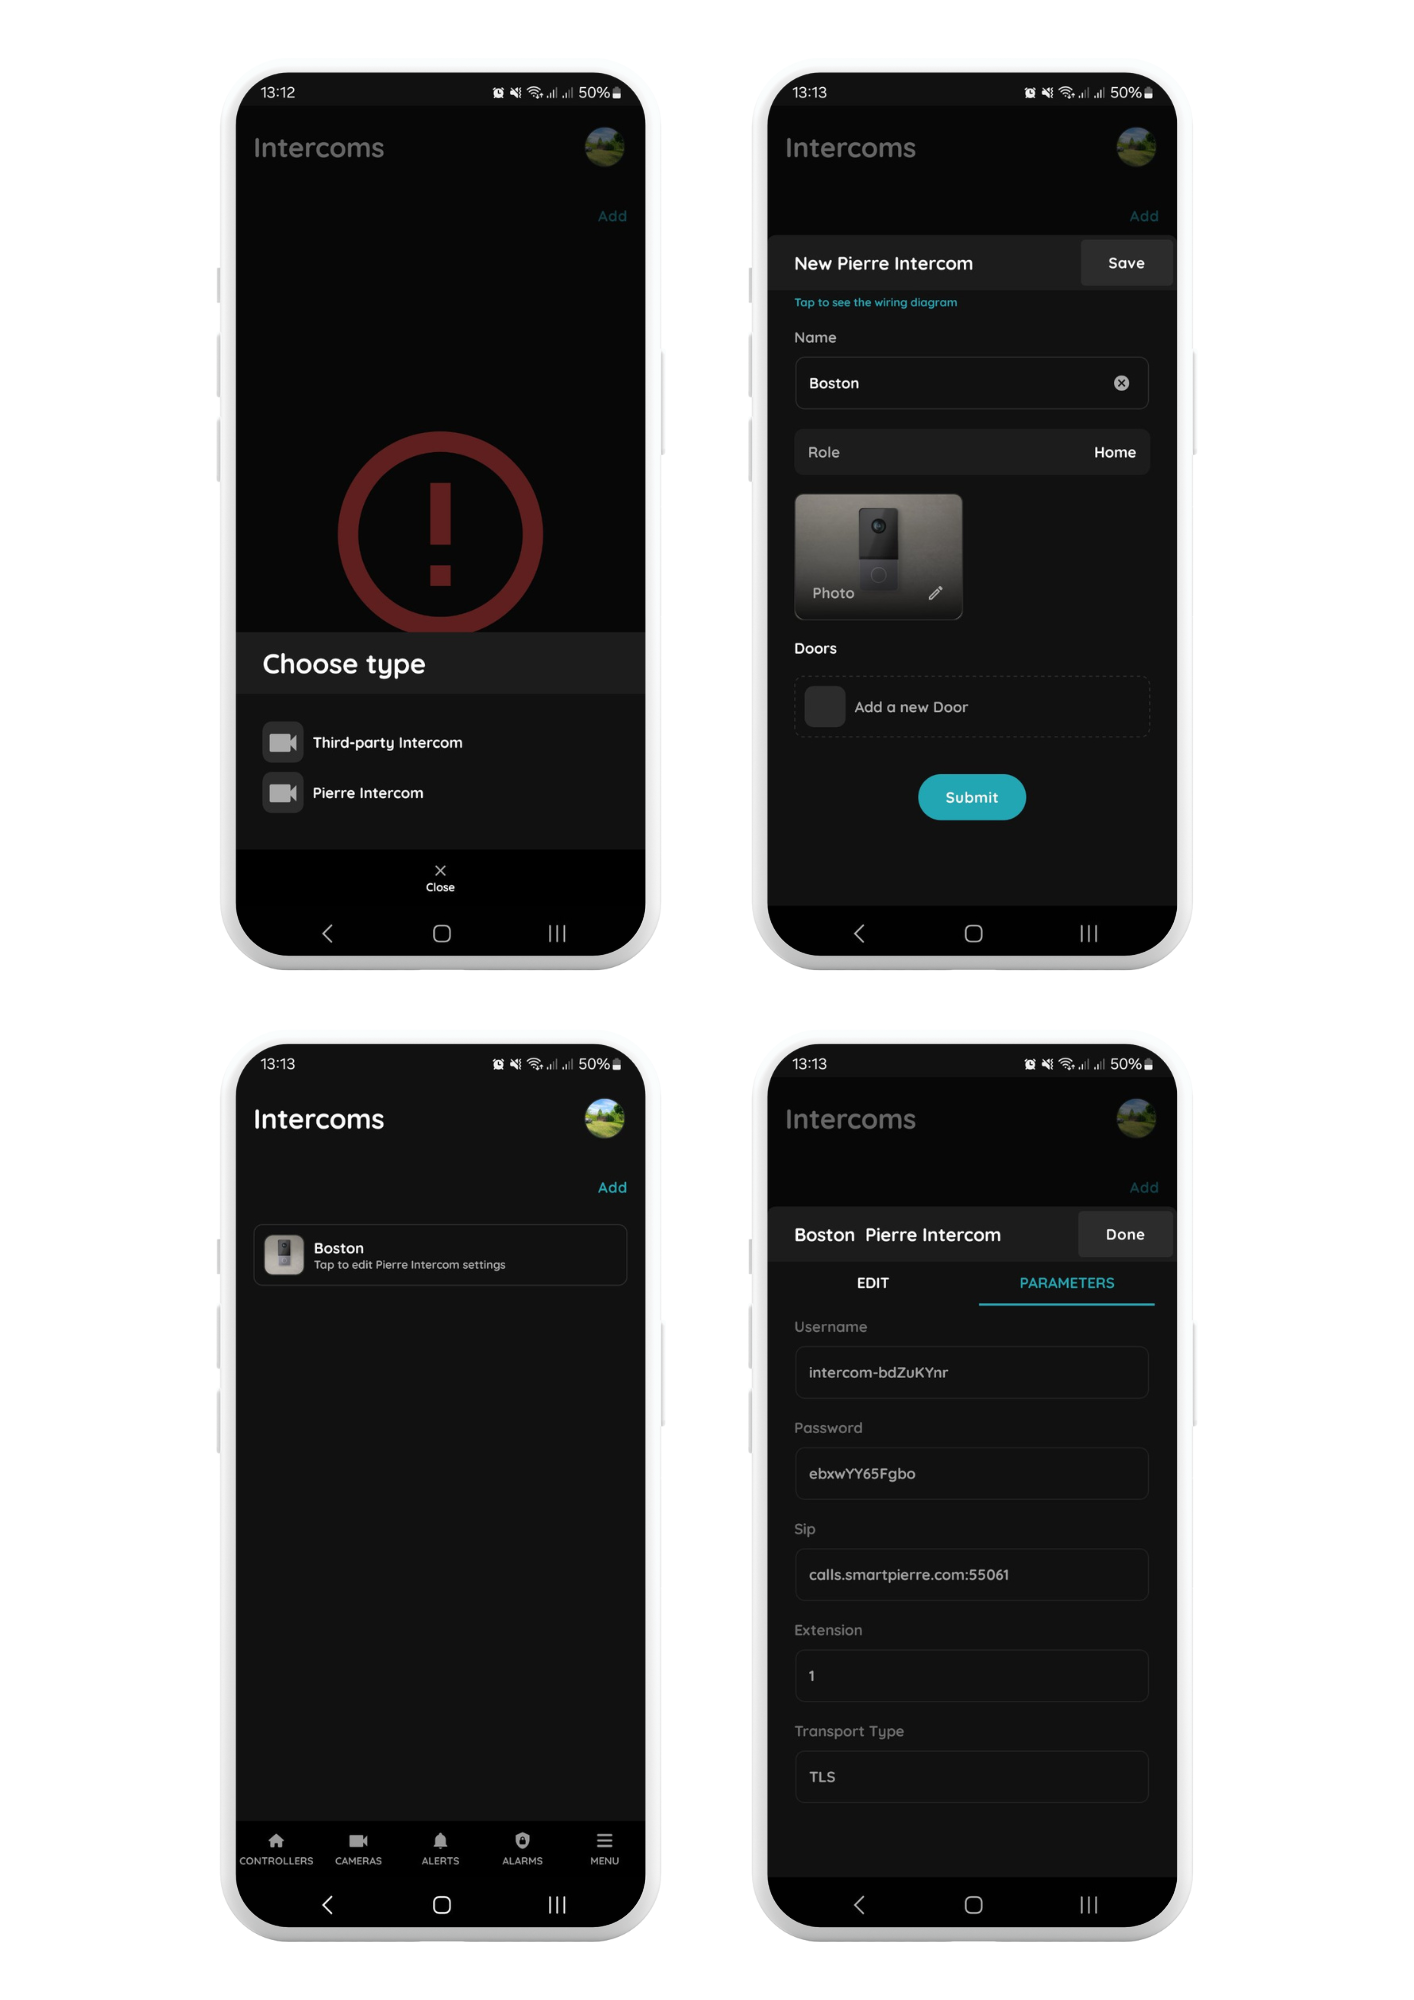
8. Setup in PIERRE Partner Application
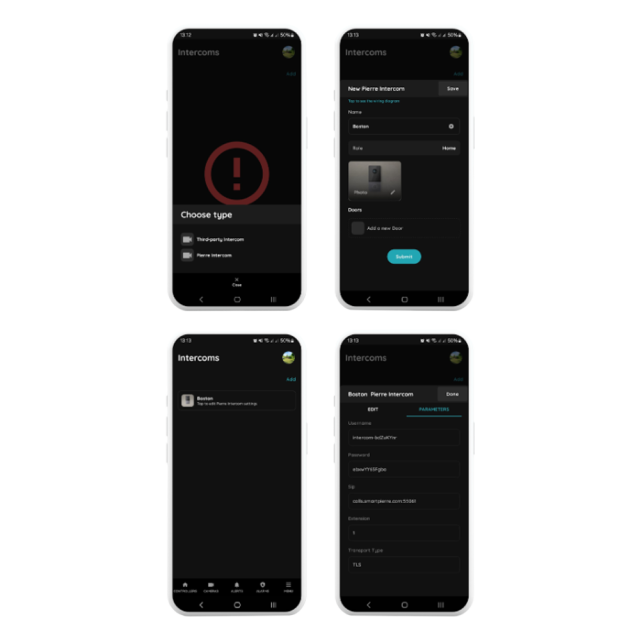
Menu - Intercoms - Add
Select the PIERRE Intercom
Choose the PIERRE Intercom from the available options.
Configure the Intercom Settings
- Name: Enter a custom name of your choice.
- Role: Select the appropriate role for the intercom.
- Doors: Specify which doors can be opened via the intercom.
Save the Configuration
After saving, click on the newly created intercom to view or modify its settings.
Access Parameters
Navigate to the Parameters tab to find the configuration settings for the PIERRE Intercom. These settings are automatically generated by the system and can be adjusted as needed.
9. Set up the PIERRE Springfield intercom
- Default Network Configuration: DHCP
- By default, the PIERRE Springfield intercom obtains its IP address from the DHCP server (managed by your router).
- Connect to the Network
- Connect your laptop to the same network by Wi-Fi or Ethernet.
- Scan the network using an IP scanner (e.g., Angry IP Scanner) to identify the intercom’s assigned IP address.
- Open a web browser and enter the identified IP address.
- Default login credentials:
- Username: admin
- Password: admin
Important: Change the default login credentials at the end of the setup process and record the new details securely.
10. Configuring SIP Account Settings
In the intercom’s web interface, set up the following parameters under SIP Account Settings:
- Username: Enter the extension from the PIERRE Partner application.
- User Name 1: Use the username from the PIERRE Partner application.
- Server Password: Enter the password from the PIERRE Partner application.
- Server Address: Input the server address provided by PIERRE Partner application.
- Server Port: Set to 55061.
- Transfer Mode: Select TLS (Transport Layer Security).
11. Configuring Contact Settings
- Navigate to Address Book under Contact Settings.
- Add a contact:
- Remark: Provide a name (e.g., Apartment 1, John Doe).
- SIP: Enter the SIP address in this format:
sip:1@display-ip-address
12. Call Settings
- Configure the Call Behavior:
- Short Press: Assign the contact from the address book to the button’s short press.
- Long Press: Assign the same contact for the long press.
13. Assigning Fixed IP Addresses to Displays
Step 1: Open the network settings
- On the display, pull down the status bar from the top of the screen.
- Wi-Fi is optional and is not needed for the intercom. Use Ethernet for the intercom network.
Step 2: Set Ethernet to a static address
- Select the Ethernet (primary) network.
- Open IP Settings and select Static.
Step 3: Assign the fixed IP address
- IP address: a fixed address outside the DHCP range of the router.
- Gateway: the IP address of the router.
- Subnet mask: as used on the network (usually 255.255.255.0).
- DNS: as required by the network.
Step 4: Router
- The router distributes IP addresses (DHCP) to all other devices.
- The display addresses must stay outside the DHCP range.
Example configuration for smaller projects (up to 45 apartments)
Router DHCP server start address: set the DHCP server to distribute addresses from, for example, 192.168.1.101.
Static IP range for displays: assign static addresses below the DHCP range, for example:
- Display for Apartment 1: 192.168.1.1
- Display for Apartment 6: 192.168.1.6
- Display for Apartment 45: 192.168.1.45
This avoids IP conflicts between the displays and the DHCP clients.
14. Operation Instructions
Calling the Indoor Station / Management Center
Prerequisite:
Ensure the target device (Indoor Monitor or Guard Unit) has been configured as the called party using the configuration tool.
Operation:
- The user can press the call button either short or long depending on the desired function.
- The intercom initiates a call to the Indoor Monitor or Management Center (Guard Unit) as configured.
- A ringback tone will be played during the call attempt.
- If the call is not answered within 30 seconds, it will be automatically terminated.
During the Call:
- The Indoor Monitor or Guard Unit can remotely unlock the door.
- They can also take a screenshot for recordkeeping or security purposes.
15. Configuration
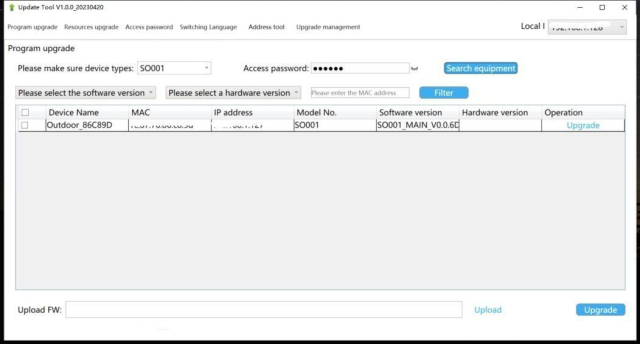
Follow the steps below to configure the Springfield intercom using the configuration tool:
Step 1: Launch the Configuration Tool
- Run the program named “WpfAppUpdate” as an administrator.
Step 2: Switch Language (Optional)
- Select your preferred language from the language options in the tool.
Step 3: Device Search
- Set the Device Type to "SO001".
- Enter the Access Password: 801801.
- Click "Search Equipment" to locate the device.
- Identify the device using its MAC address and corresponding IP address.
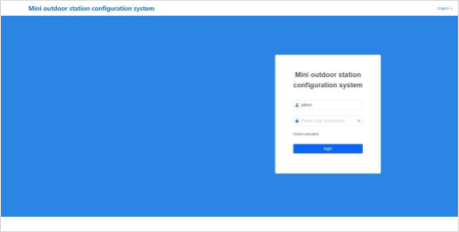
Step 4: Access the Web Configuration Page
- Open a web browser and go to http://<intercom-ip-address>/#/ (the address found in Step 3).
- Log in with the default credentials (username admin, password admin – see "Set up the PIERRE Springfield intercom").
Important Note:
Ensure that the computer's IP address and the device's IP address are on the same network segment to allow successful communication and configuration.
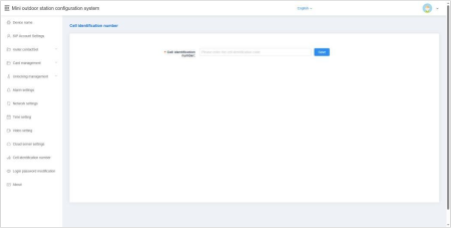
Device Name
The device name can be modified to suit your system configuration.
If you intend to use SIP account information from the address book, the device name must match the name associated with the SIP account in the address book.
After entering the device name, the system will prompt you with a pop-up window asking whether to use the corresponding account information from the address book.
16. Contact Setting
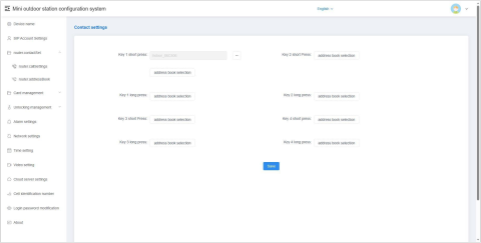
Call Setting
This setting allows you to configure the called party for the button on a single outdoor unit.
- Click the “Address Book Selection” button.
- In the pop-up window, select the contact(s) to be called when the button is short-pressed or long-pressed.
- Each button can be assigned up to 8 contacts.
This enables flexible calling behavior depending on how the button is used.
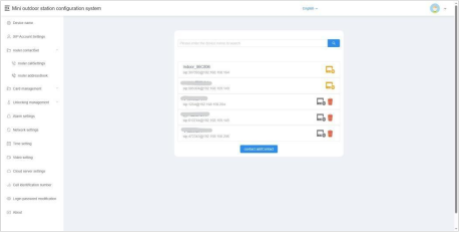
Contacts List
This section displays information about all current contacts. Contacts may include:
- Network devices discovered automatically when automatic configuration is enabled
- Devices imported from the address book
- Manually added devices
Add
You can add a new contact to the local device by entering the following information:
- Remarks (display name)
- SIP Account
Delete
You can delete contact entries from the list.
Note:
- Online network devices discovered through automatic configuration cannot be deleted.
- Devices imported from the address book are also not deletable.
17. Card Management
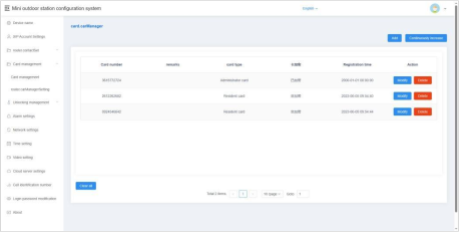
Use the configuration tool to register, modify, delete, or clear access card information on the local device.
In default server or custom server mode, card data is automatically synchronized with the platform. The device supports up to 20,000 access cards.
Single Addition
- Enter the card number manually or place the IC card near the card reader area of the intercom to automatically read the card number.
- Select the card type:
- User Card
- Administrator Card
Continuous Addition
- Select the desired card type.
- Swipe each IC card over the card reader one by one.
- A beep will indicate each successful registration.
- Repeat the swiping process to register multiple cards in sequence.
Modification
- Click the Modify button in the action bar to update access card details.
Deletion
- Click the Delete button in the action bar to remove an access card.
- Once deleted, the card will no longer have permission to unlock the device.
Empty
- Clears all user and administrator card data from the device.
18. Card Management Setting
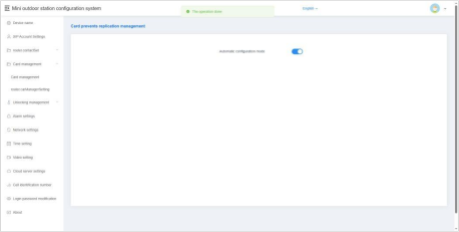
Card Anti-Copy
When this option is enabled, all newly registered access cards will be encrypted, making them non-copyable. This enhances security by preventing unauthorized duplication of cards.
19. Unlocking Management
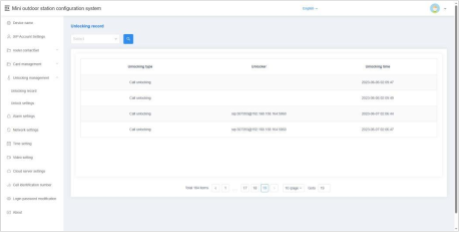
Unlocking Records
This feature allows you to view the unlock history of the device. Each record includes details of the unlocking method, time, and user or device involved, providing a clear audit trail for security monitoring.
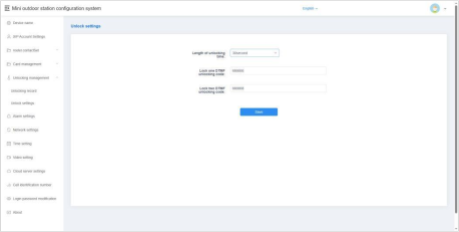
Unlocking Setting
Unlocking Time
You can configure the duration the door remains unlocked after an unlock command is issued.
- The time range is 1 to 30 seconds.
- After the set time elapses, the door will automatically re-lock.
Lock 1 / Lock 2 DTMF Unlock Password
Set the DTMF unlock password for Lock 1 and Lock 2.
- Default passwords:
- Lock 1: 666666
- Lock 2: 888888
20. Alarm Setting
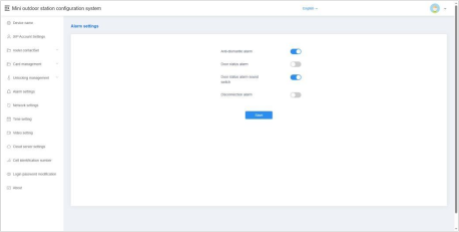
Tamper Alarm
When enabled, the device will sound an alarm tone if it is physically tampered with or removed by external force.
Disconnection Alarm
When enabled, the device will emit an alarm tone if it becomes disconnected from the network.
Additionally, a disconnection icon will appear in the status bar.
Door Status Alarm & Alarm Tone
When enabled, if the door remains open for more than 120 seconds, the device will trigger an alarm tone to alert users of the abnormal door status.
21. Network Setting
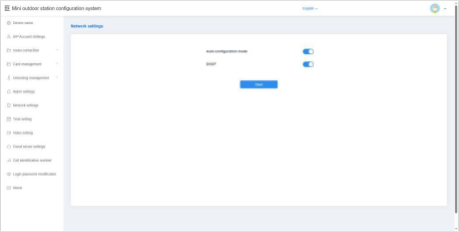
Automatic Configuration Mode
When enabled, the device can automatically discover other intercom devices of the same series within the same network segment. This simplifies device integration and communication.
DHCP
When DHCP is disabled, you must manually configure the network settings. Enter the following parameters:
- IP Address
- Subnet Mask
- Gateway
- DNS Server
22. Time Setting
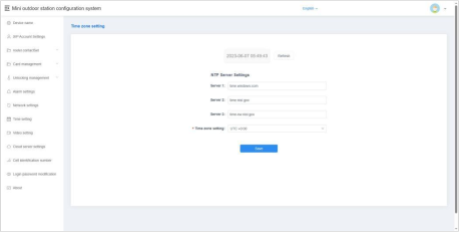
Refresh
After modifying the NTP server or time zone settings, click Save, then click Refresh. This allows the device to update and synchronize its local time with the configured settings.
NTP Server Setup
Enter the address of an NTP (Network Time Protocol) server to enable the device to automatically obtain accurate clock time.
Time Zone Setting
Select the appropriate time zone based on your country or region. The device will adjust the local time according to the selected time zone and the NTP server data.
23. Video Setting
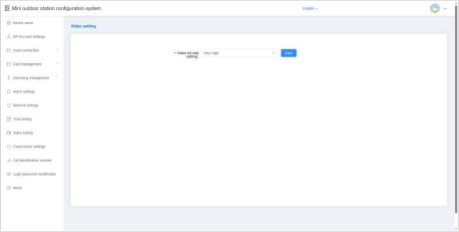
This option allows you to configure the video bit rate used during calls and monitoring. Adjusting the bit rate helps balance video quality and network performance based on your specific environment and bandwidth availability.
24. Login Password Change
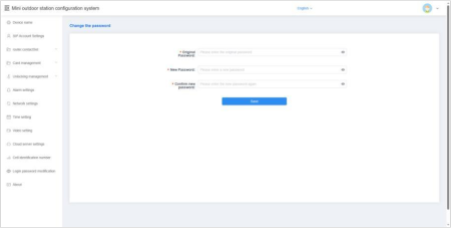
This option allows you to change the login password used to access the device’s configuration interface.
It is recommended to set a strong, secure password to protect the device from unauthorized access.
25. About
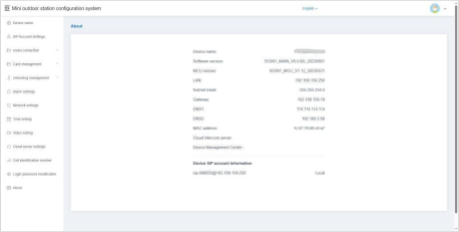
The About section provides detailed information about the device, including:
- Device Name
- Software Version
- MCU Version
- LAN IP Address
- Subnet Mask
- Gateway
- DNS Server
- MAC Address
- Cloud Intercom Server
- Device Management Center
- SIP Account Information
This information is useful for network configuration, troubleshooting, and technical support.
26. Roles and access in Smart PIERRE
Role setup for PIERRE intercoms for residential building
The PIERRE intercom must be added to the Common Controller using a separate role.
Each apartment must have access to the intercom and the corresponding door for remote unlocking. The intercom and the associated door must be assigned to a dedicated role named Intercom and removed from the Default role.
The Intercom role must then be assigned to the PIERRE indoor displays (intercom indoor units) and to the users who should be able to receive and answer intercom calls.
Role and door assignment for the intercom
27. FAQ
Q1: Will the intercom work without internet?
Yes. The intercom works locally without internet access. Calls still ring on the PIERRE display, but you cannot receive intercom calls remotely from outside the local network.
Q2: Does the intercom support PoE power supply?
Depending on the model, the intercom can be powered over Ethernet (PoE). Check the product specifications of your model.
Q3: Is an indoor intercom unit required?
No. PIERRE displays work as the indoor intercom unit, so a separate indoor unit is not needed. The Smart PIERRE app on a smartphone can also answer intercom calls.
Q4: Will the intercom ring on my phone if there is no internet?
No. Without internet the intercom does not ring on the phone, but it still rings on the PIERRE display.