Smart PIERRE - Valve automations
Description
The Valve Automation feature allows valves within the PIERRE system to be controlled automatically based on sensor inputs, schedules, and automation rules.
Valve automation can be used for water management, leak protection, heating systems, cooling systems, and other applications requiring automatic flow control.
Leakage Protection
Valves can be linked to Leakage Sensors to provide automatic protection against water damage.
Typical operation:
-
A Leakage Sensor detects water.
-
An automation is triggered.
-
The valve automatically closes.
-
Water flow is stopped until the issue is resolved.
This functionality helps minimize the risk of property damage caused by water leaks.
Heating and Cooling Systems
Valves can be integrated into HVAC systems to control the flow of heating or cooling media.
Typical applications include:
-
Underfloor heating systems
-
Radiator heating systems
-
Fan coil systems
-
Cooling circuits
-
Zone control applications
The valve can automatically open or close according to temperature requirements and automation logic.
Automation Triggers
Valve operation can be automated using:
-
Leakage sensors
-
Temperature sensors
-
Presence sensors
-
Time schedules
-
System states
-
Custom automation conditions
Multiple conditions can be combined to create advanced automation scenarios.
Scheduling
Valves can be controlled according to predefined schedules.
Examples include:
-
Heating schedules
-
Cooling schedules
-
Irrigation schedules
-
Time-based water management
System Integration
Valves can interact with other PIERRE functions, including:
-
HVAC systems
-
Sensors
-
Scenes
-
Automations
-
Notifications
This enables centralized control and coordinated operation throughout the installation.
Benefits
-
Automatic leak protection.
-
Improved energy efficiency.
-
Optimized heating and cooling control.
-
Reduced water consumption.
-
Flexible automation possibilities.
-
Seamless integration with the PIERRE system.
Automation for the Valve
Valve will be open when Leakage sensor is not active.
You can find Valve on the Dashboard or on the I/O list.
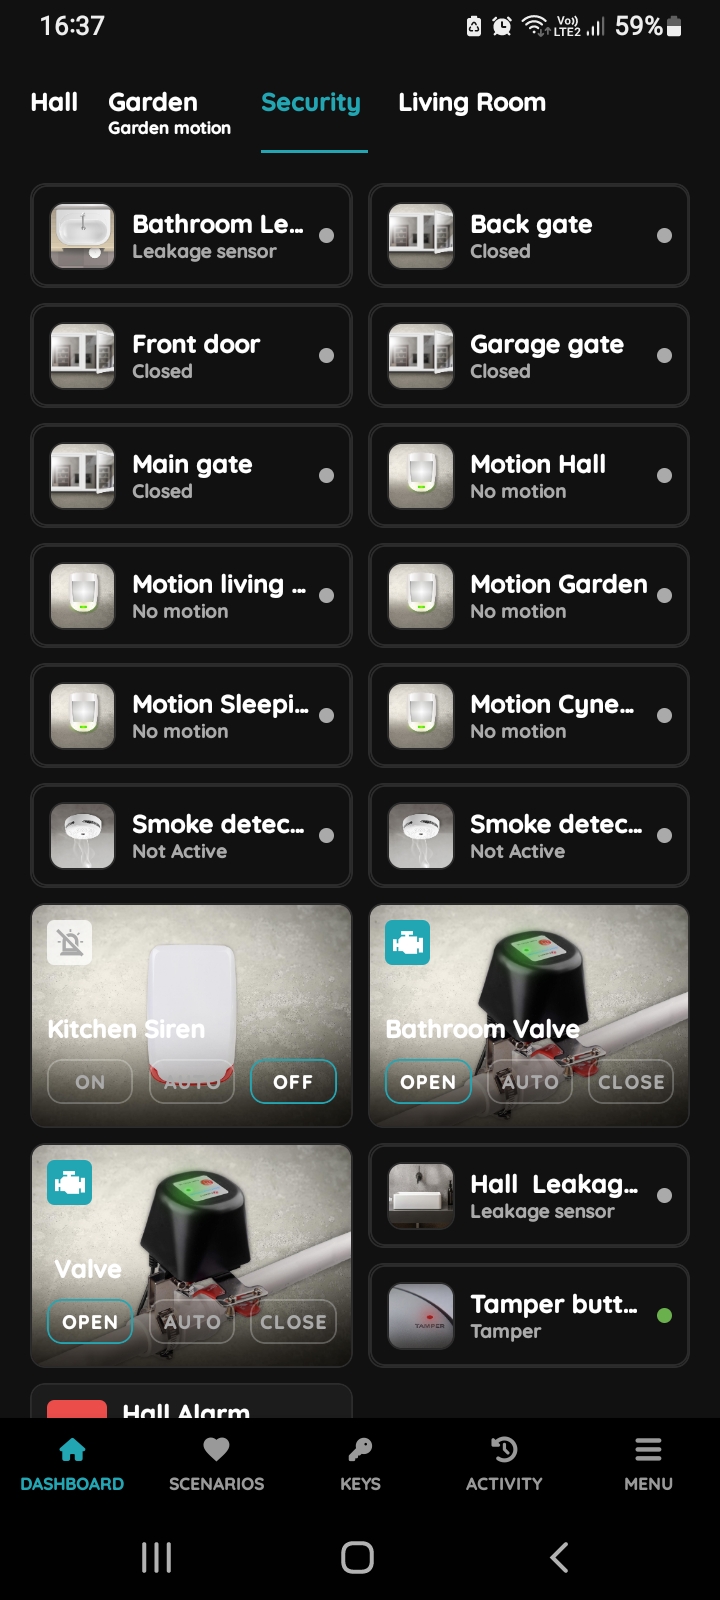
Find Valve on the Dashboard
Tap on the Bathroom Valve on the Dashboard in order to open it and add automation for it.
Or open I/O list from the Menu and find it there.
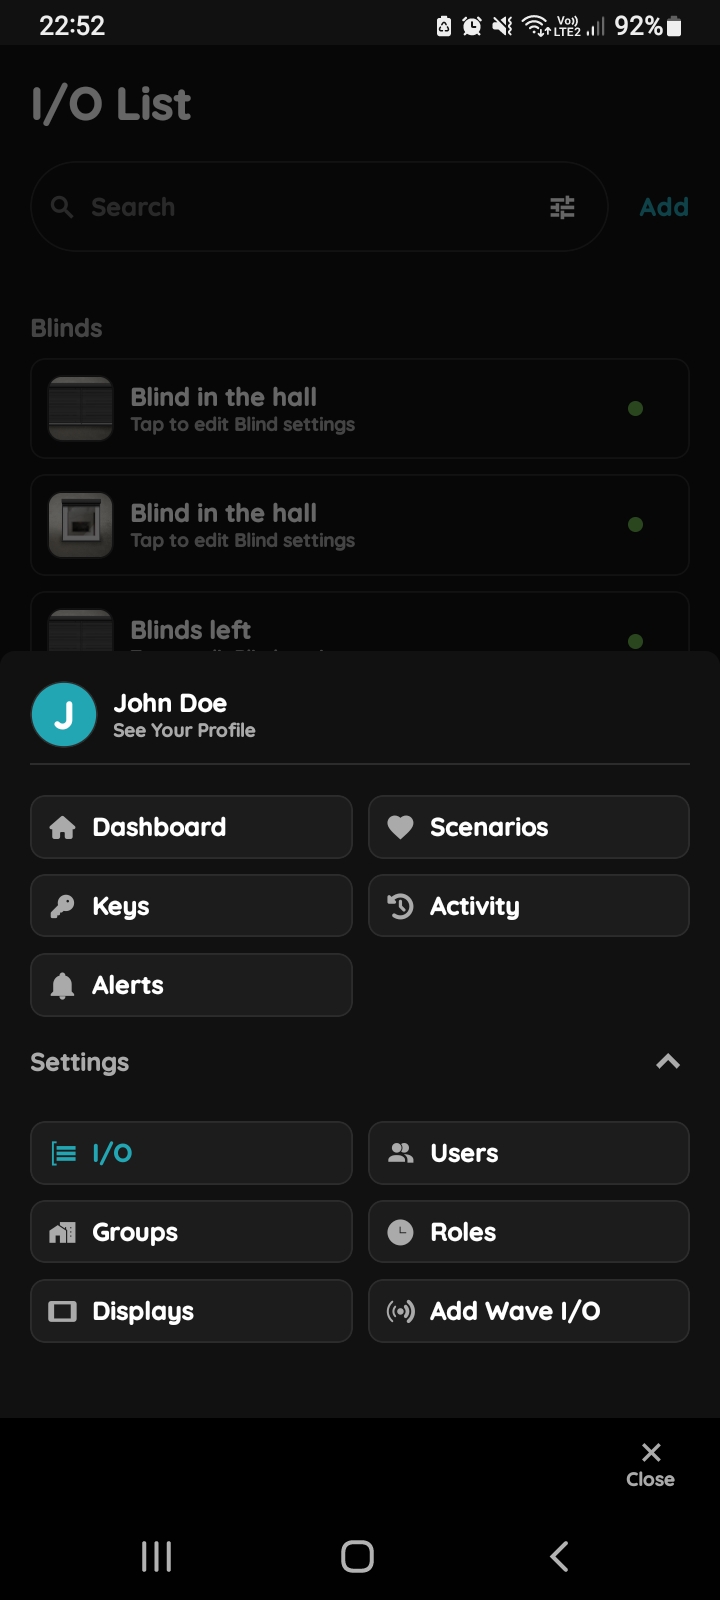
Open I/O from the Menu
Open Menu, under Settings, tap on the I/O from the Menu.
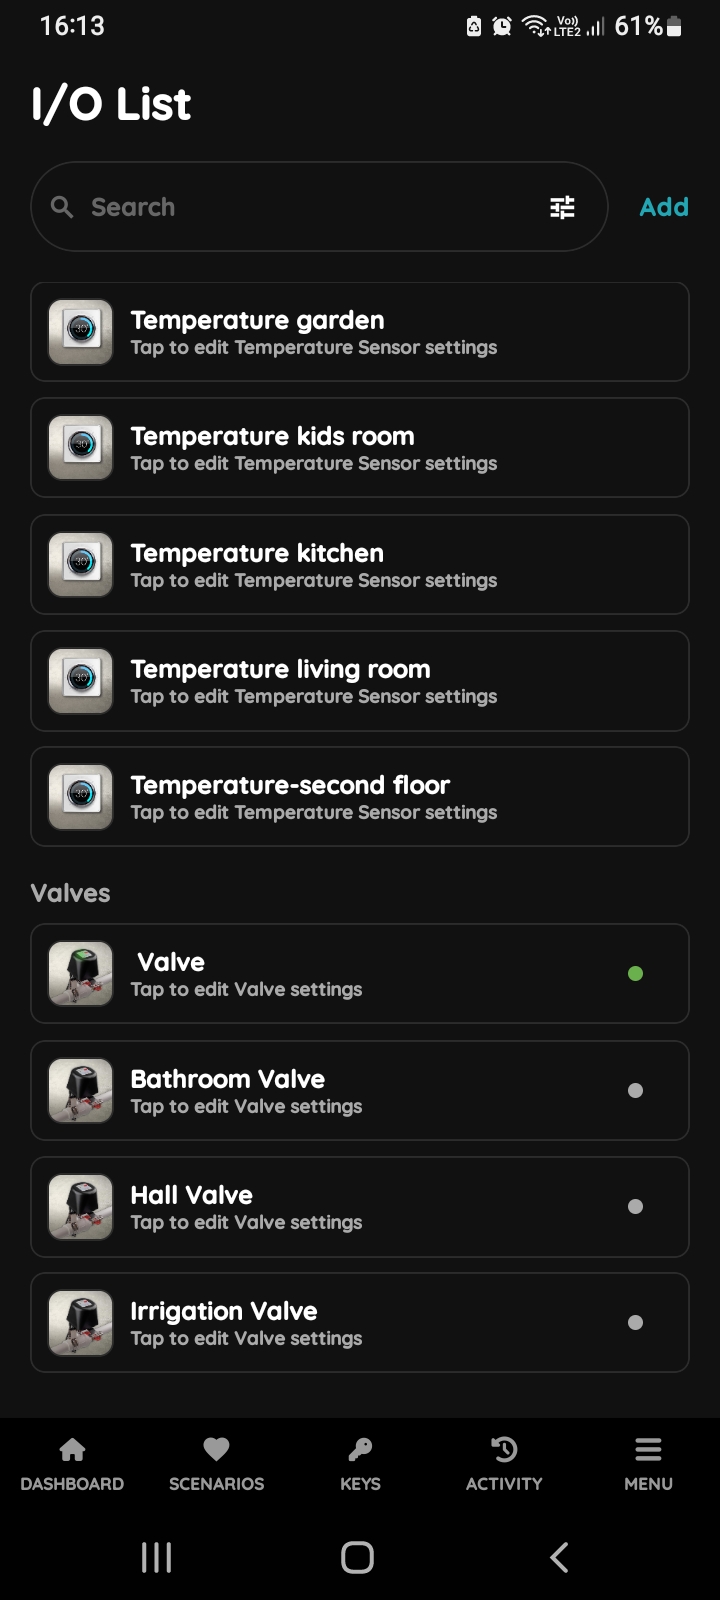
I/O list - Valve
Open I/O list, scroll to the Valves and tap on the desired Valve, in this case on the Bathroom Valve.
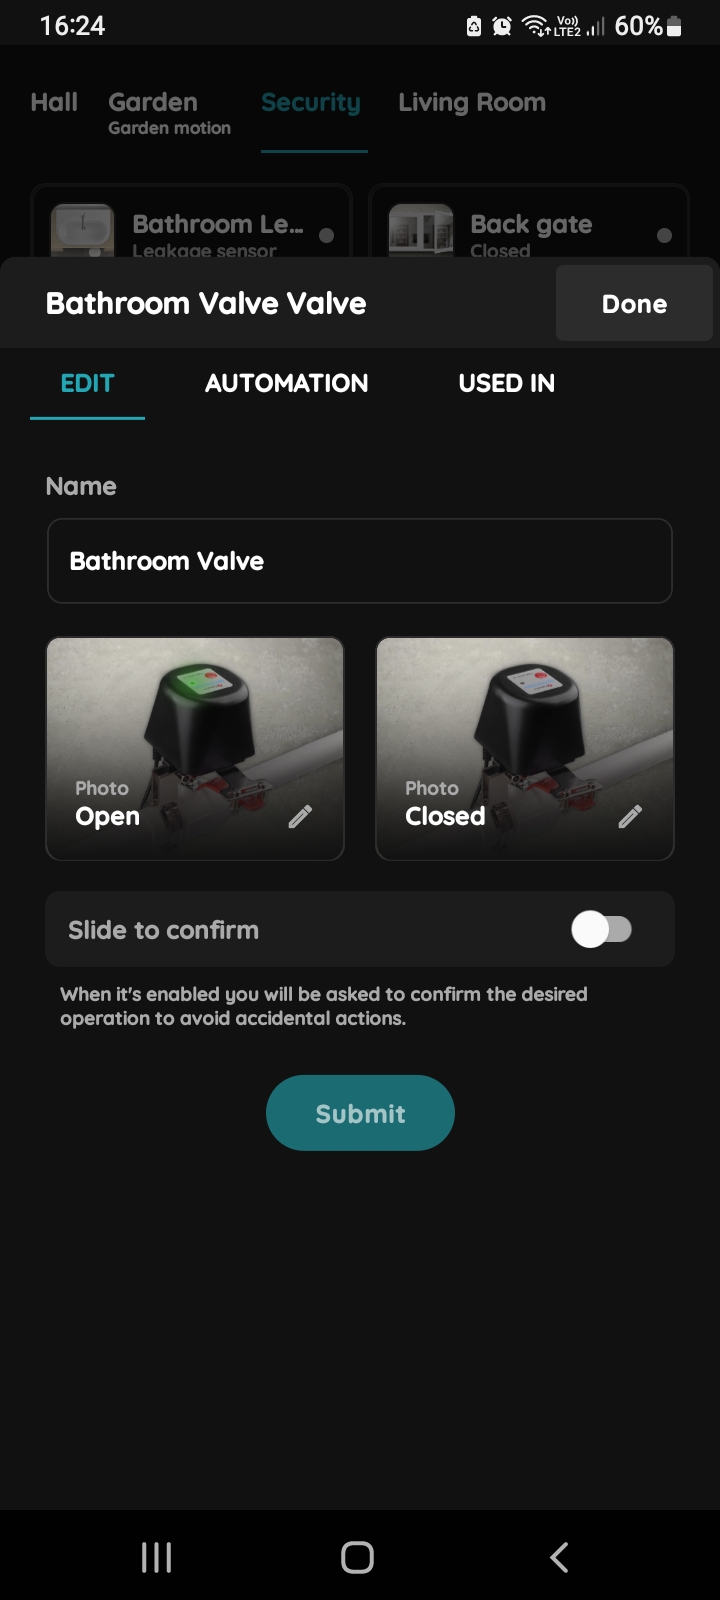
Edit, Automation, Used In - Valve
Tap on the tab Automation.
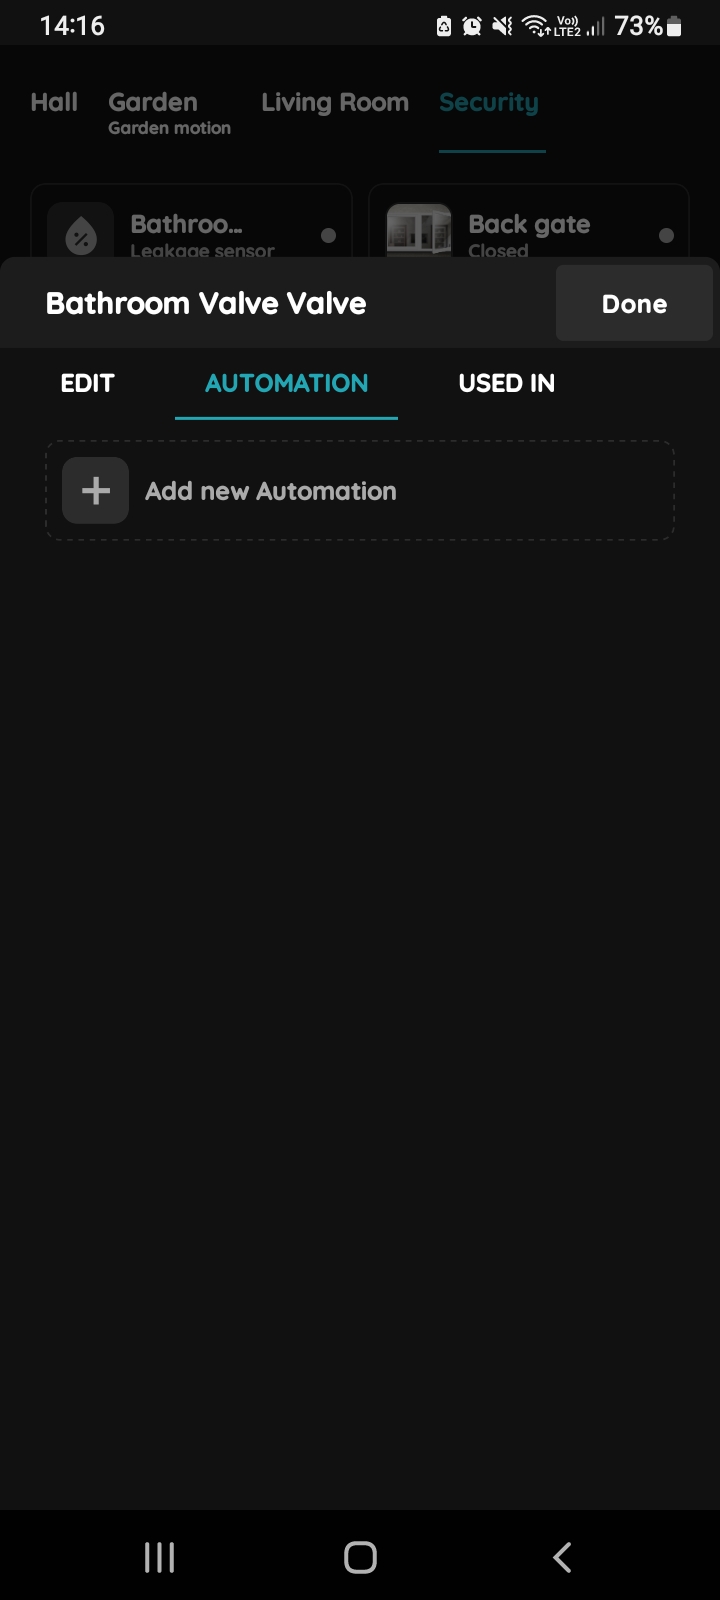
Add new Automation - Valve and Leakage sensor
Tap the +Add new Automation.
Add one or multiple leakage sensor with OR logical operator.
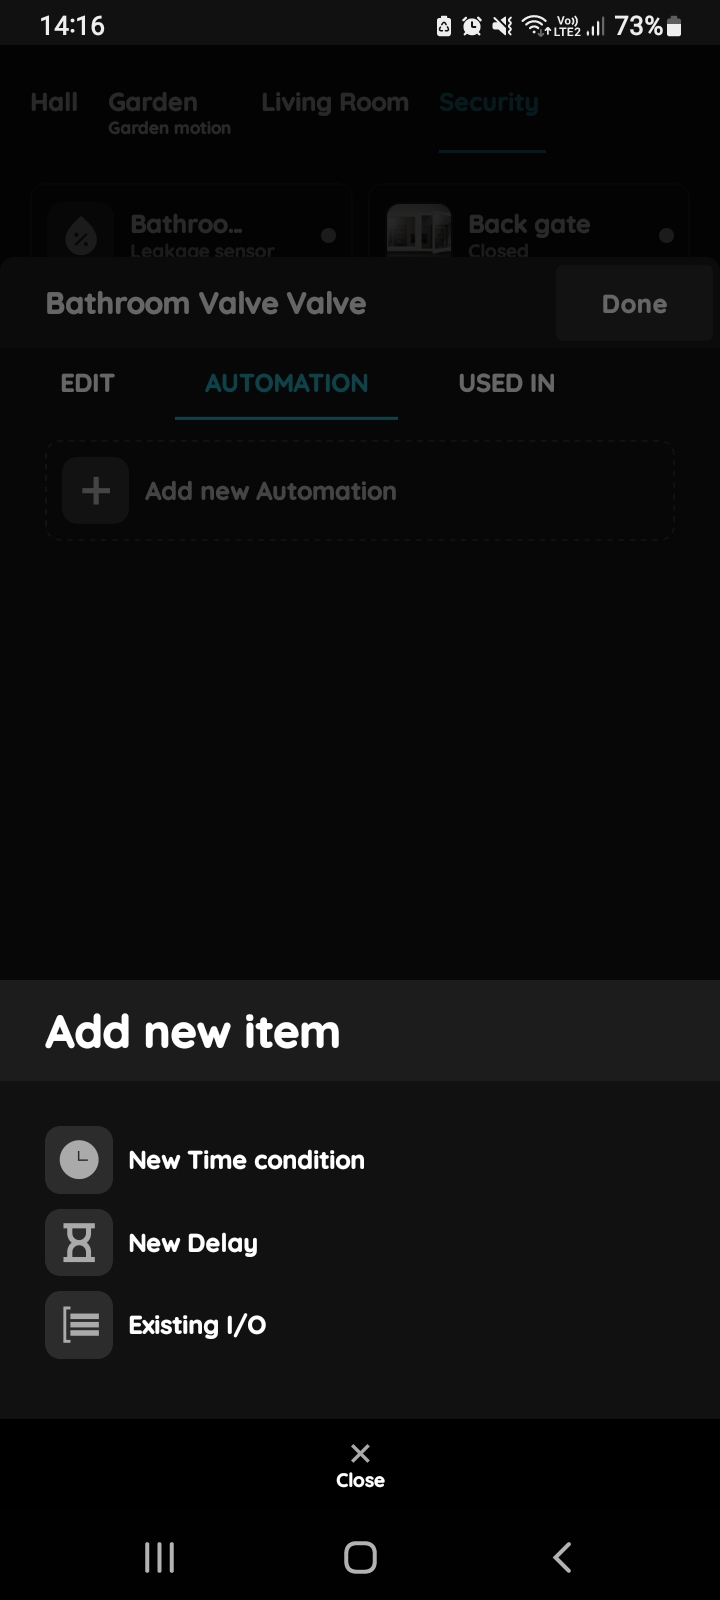
Add new item - Valve
There is possibility to add:
- New Time condition,
- New Delay,
- Existing I/O.
Tap on the Existing I/O from the list.
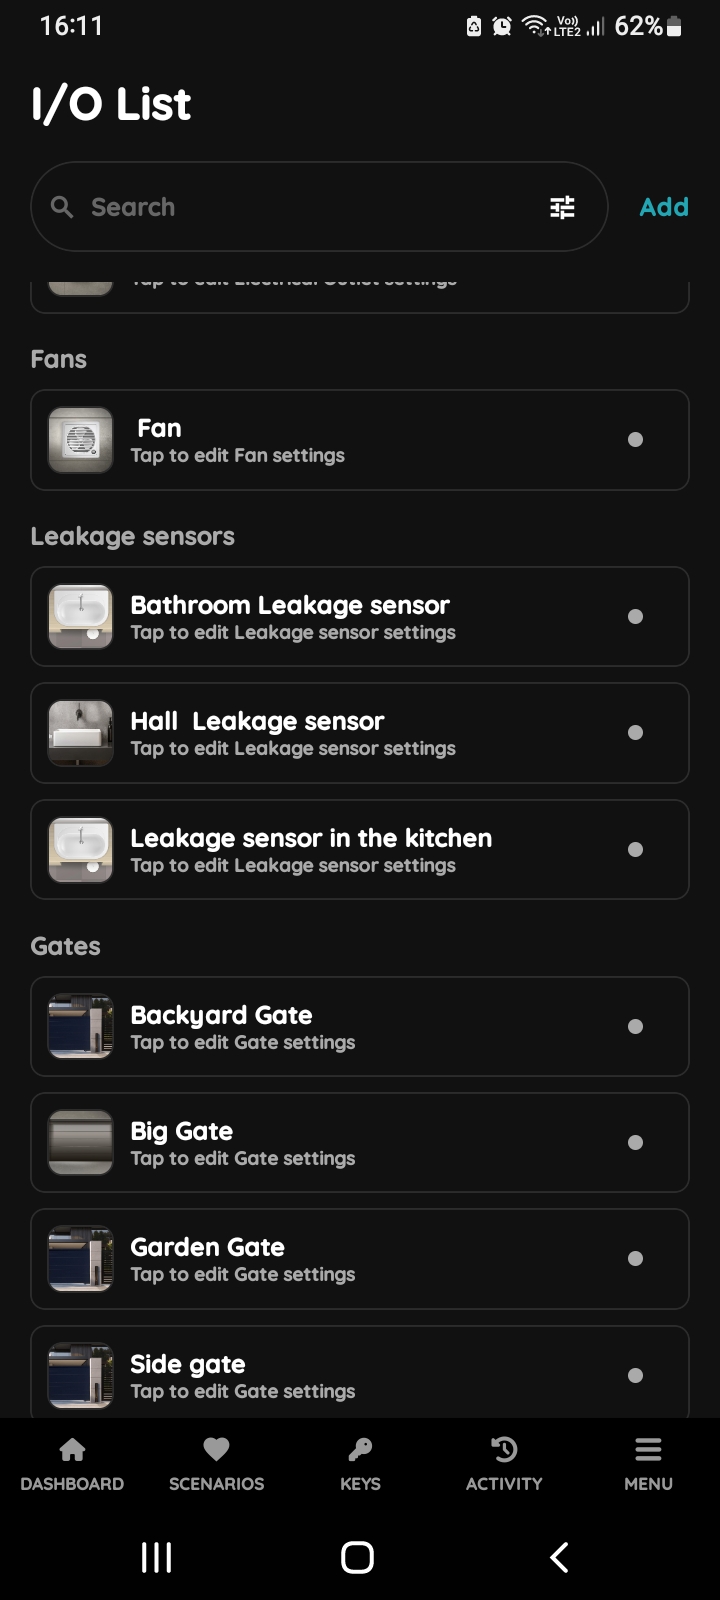
I/O List - Leakage sensor
Open I/O list, scroll to the Leakage sensors and tap on the card of the desired Leakage sensor.
In this case tap on the the Bathroom Leakage sensor.
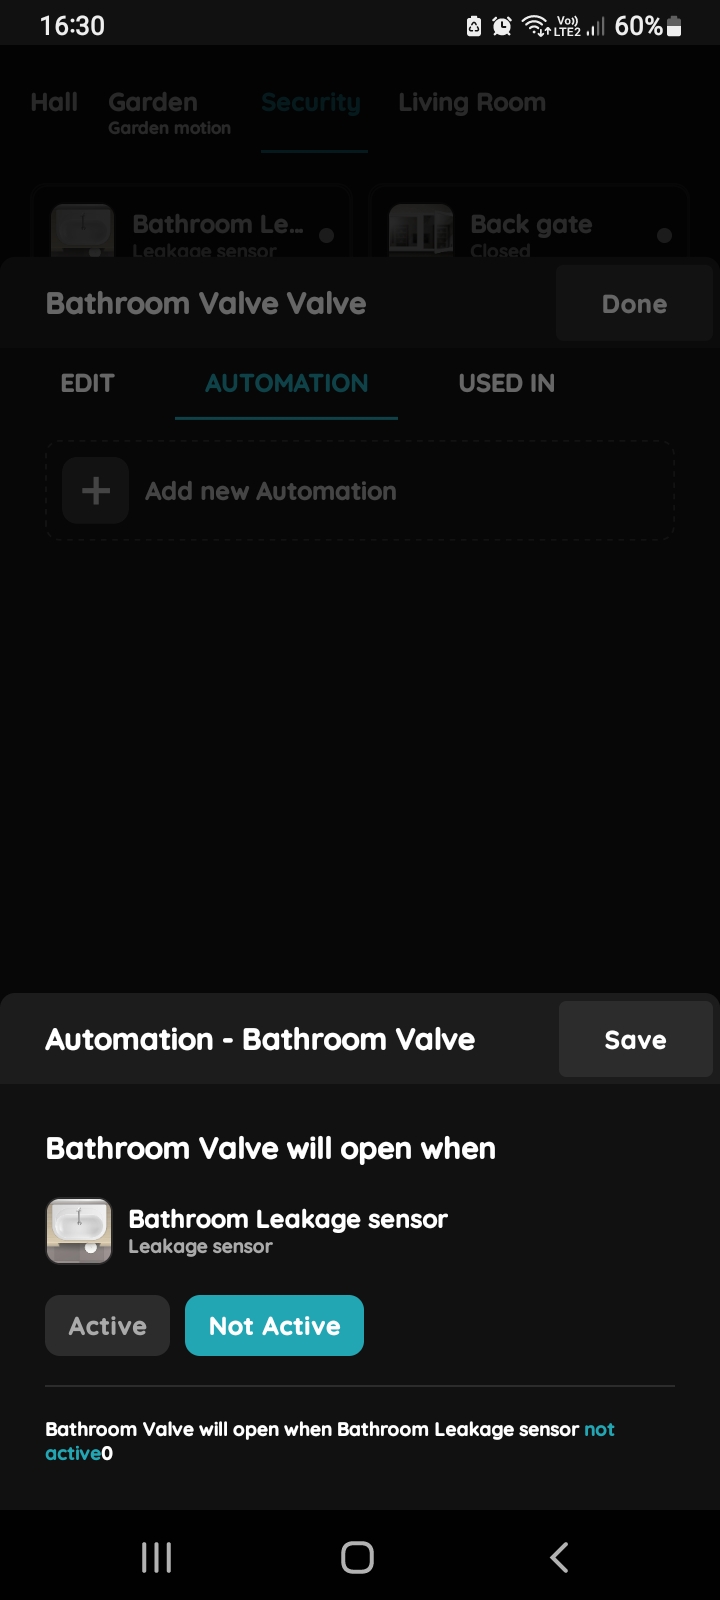
Automation - Valve and Leakage sensor
Bathroom Valve will open when Bathroom Leakage sensor is not active.
Tap the button Not Active.
Tap the button Save.
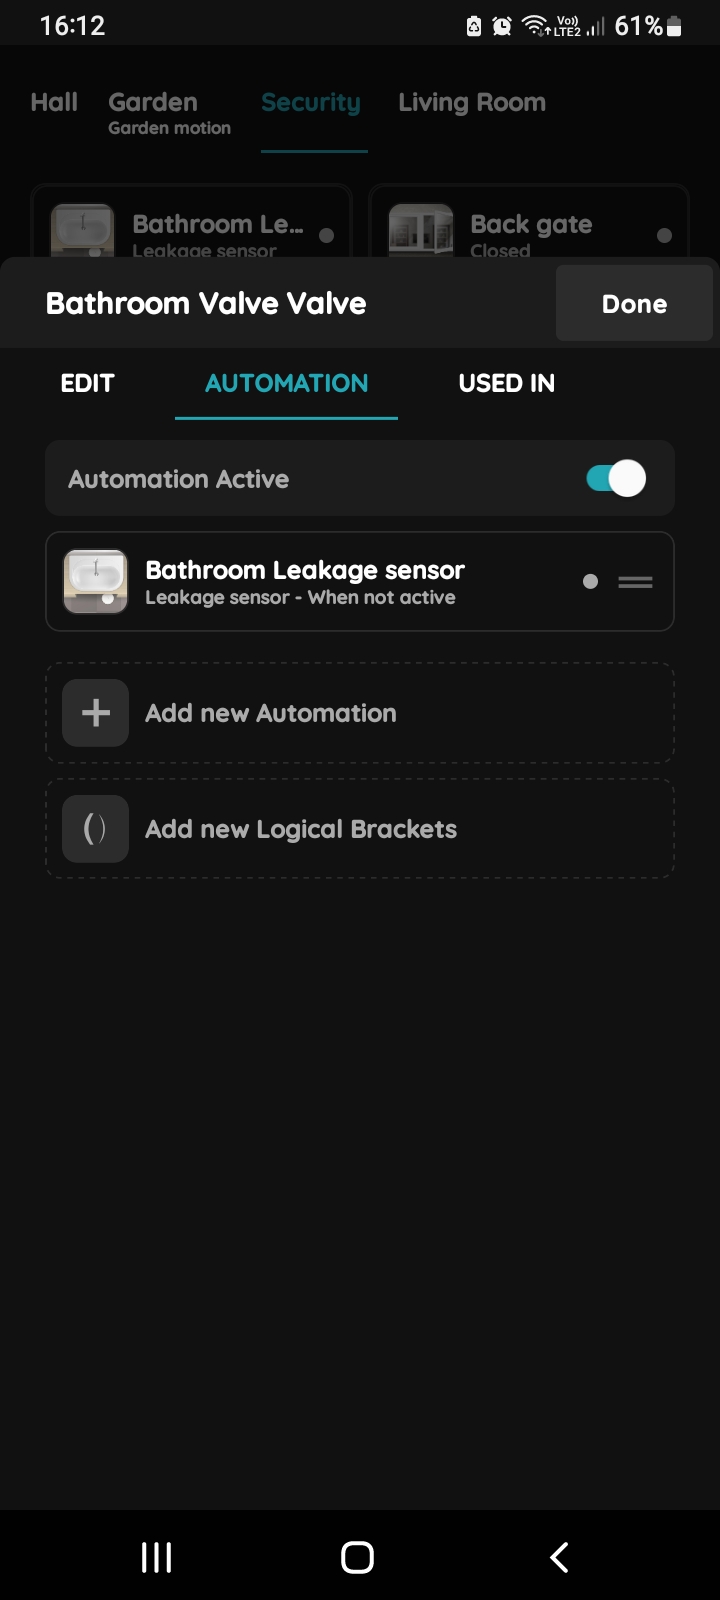
Confirm settings for Automation - Valve
To confirm settings of the automation tap on the button Done.
A common use case is to control the Valve based on one or more leakage sensors. The valve operates normally when the leakage sensors are inactive. If multiple leakage sensors are used, add them to the automation using the OR logical operator.
With this configuration, the Valve will stop operating if any one of the leakage sensors becomes active.