Smart PIERRE - Fan
Description
Fans are ventilation outputs controlled from the Smart PIERRE app. They appear on the Dashboard and in the I/O list, and can be switched manually or left to the system.
Control Modes
- On — the fan runs until it is switched off or a scenario changes it.
- Off — the fan is stopped.
- Auto — the fan follows the conditions configured for it, for example a humidity level or a temperature threshold. In Auto mode a timeout defines how long the fan keeps running after the condition that started it has cleared.
Status
The current state is shown by the icon and picture of the fan, so On, Off and Auto can be told apart at a glance from the Dashboard.
Automations and Scenarios
- A fan can be a condition or an action in an automation — for example started by a humidity sensor in a bathroom.
- A fan can be part of a scenario together with other outputs.
- Long press on the fan opens the Used In tab, which lists every automation and scenario the fan takes part in. Check this before renaming or deleting the output.
Technical Notes
- A fan output switches a relay; the fan itself is powered from its own circuit, not from the controller.
- Multi-speed fans need one output per speed, and the speeds must be interlocked so two are never energised at once.
- Set the Auto timeout to match how long the room actually needs — too short and the humidity is not removed, too long and the fan runs needlessly.
Control of the Fan
Controlling the Fan is simple and efficient, with everything managed directly from the Dashboard.
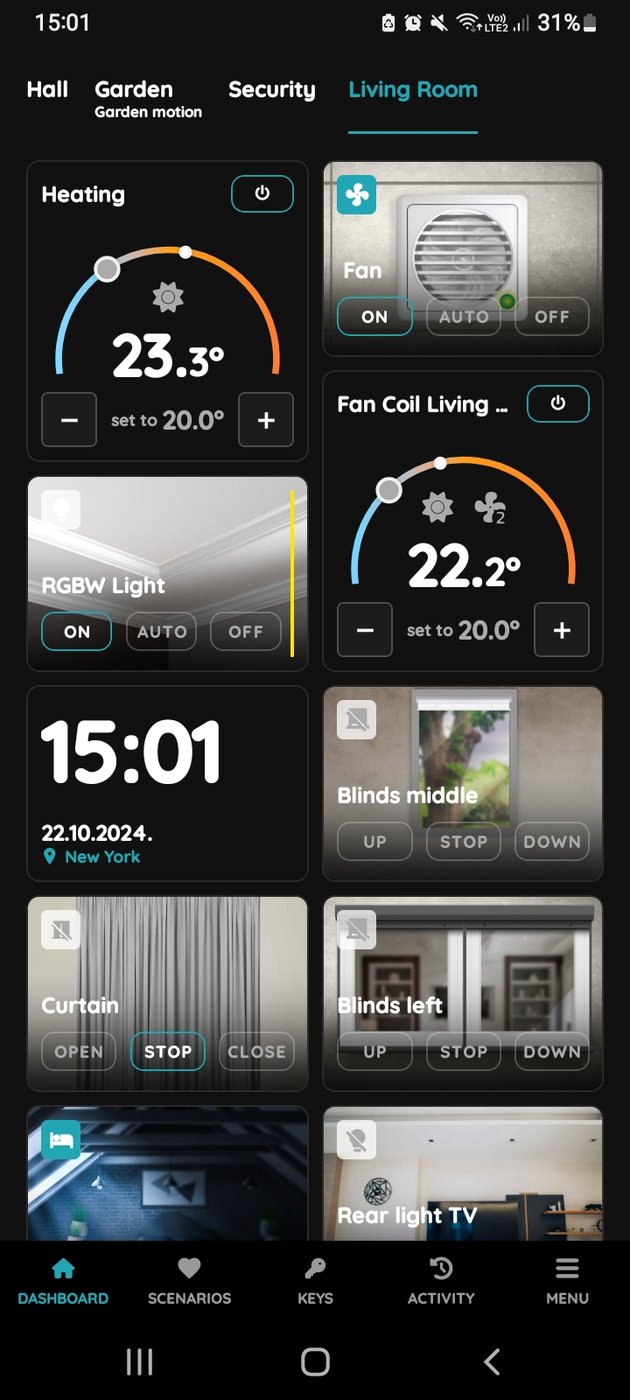
Follow the example of the Fan.
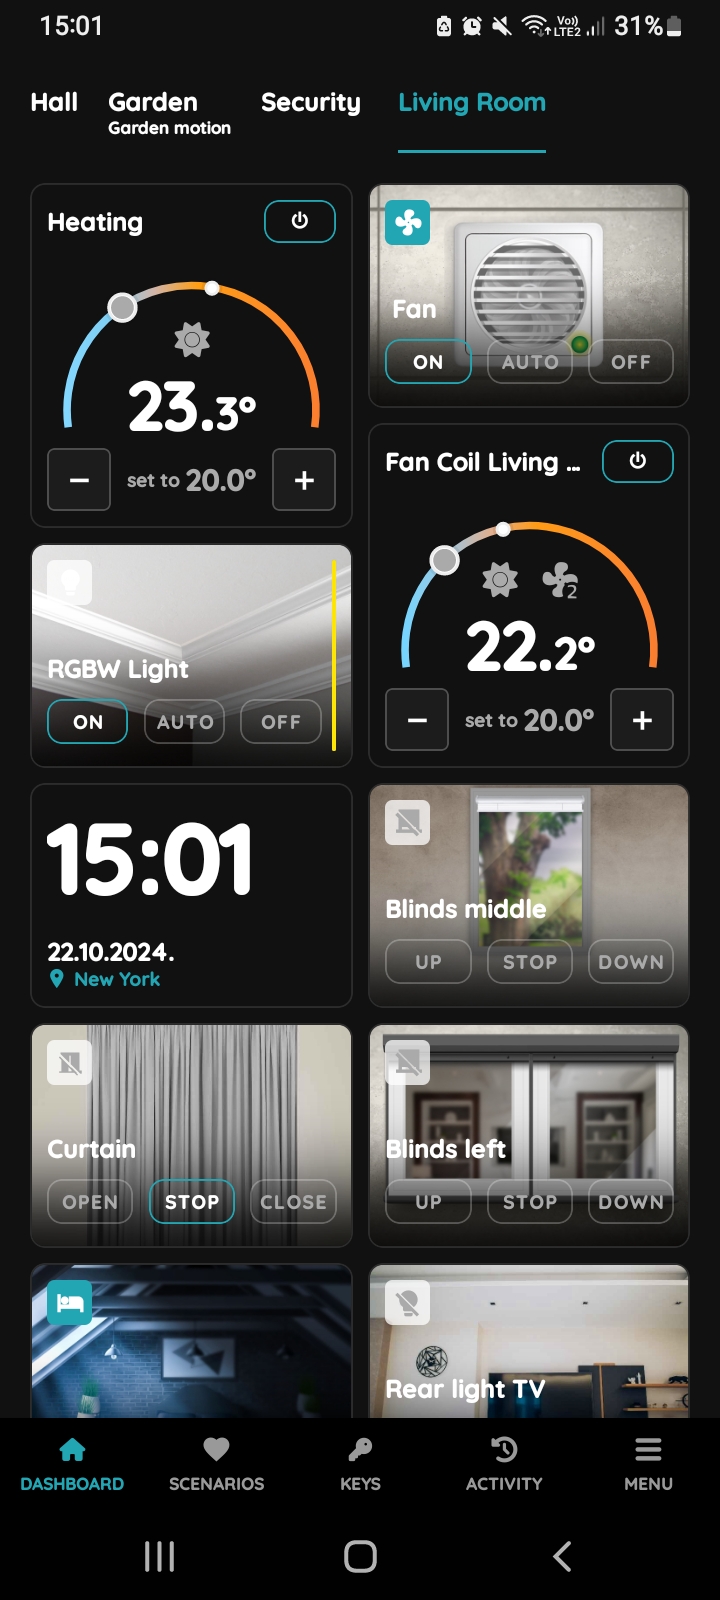
On, Off, Auto - Fan
There are three buttons for controlling the Fan:
- On - Tap this button to turn On the Fan.
- Off - Tap this button to turn Off the Fan.
- Auto - If you tap the Auto button, the Fan will activate automatically when the specified conditions are met.
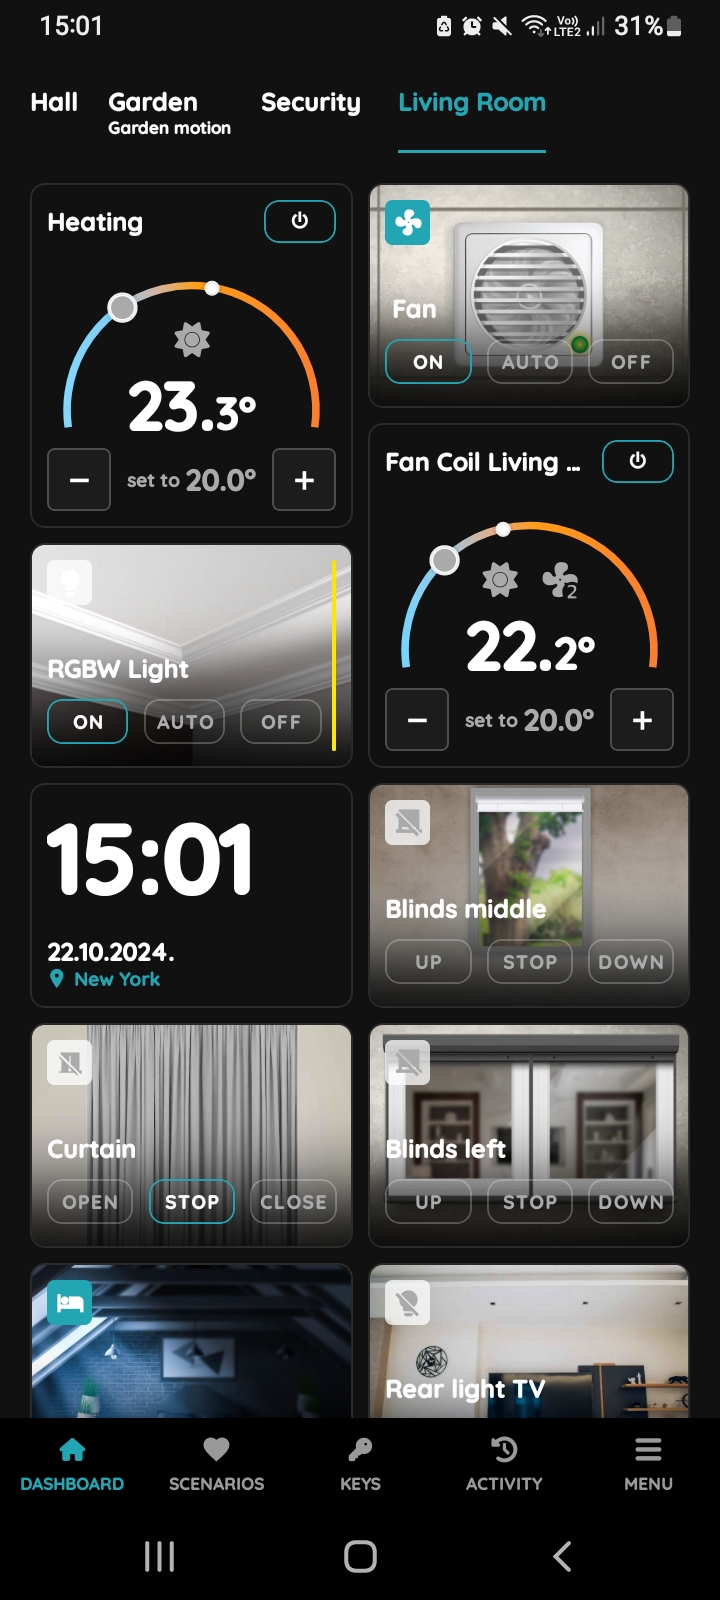
Turn the Fan On
To turn the Fan On, tap the On button.
The icon turns blue and picture of the Fan will change, indicating it has been turned On.
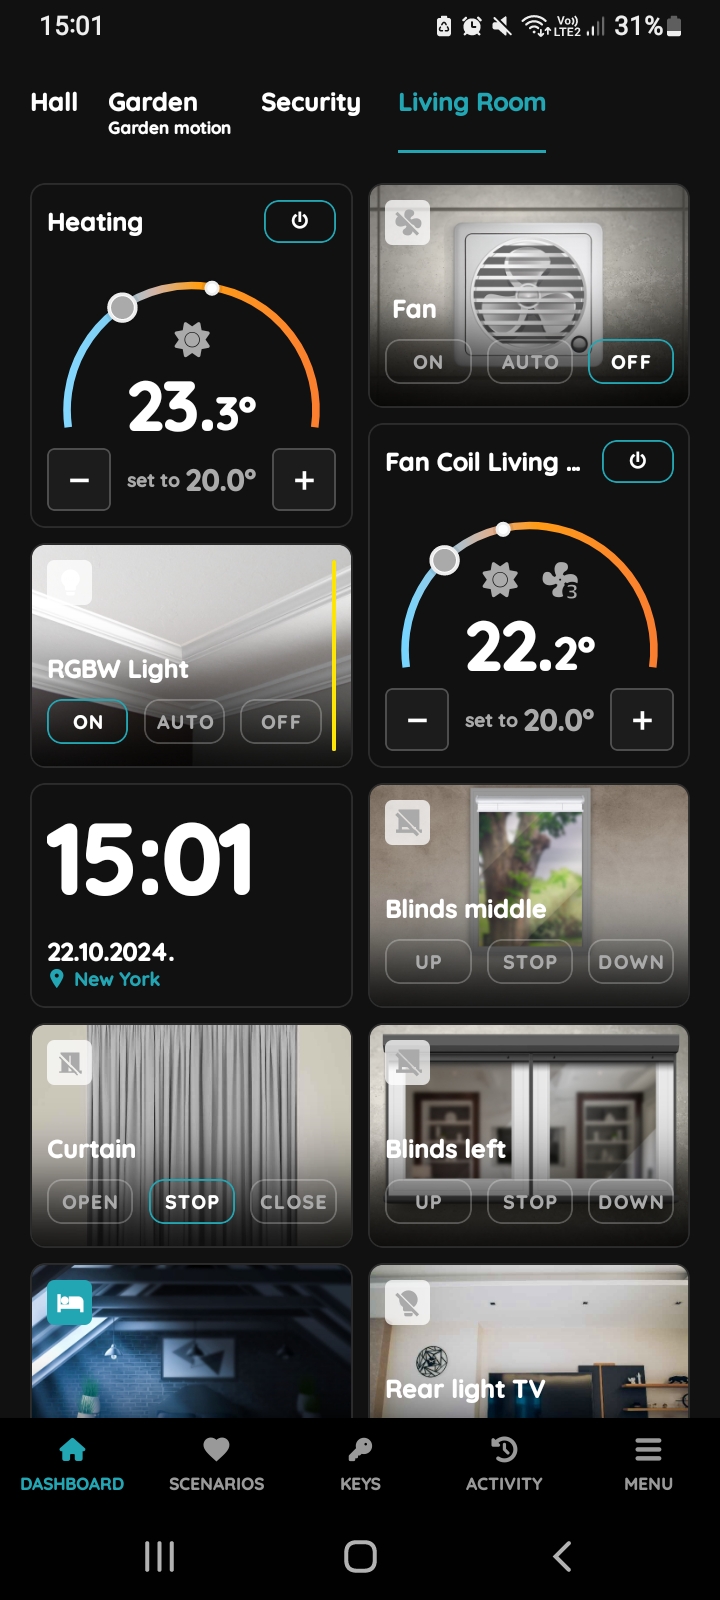
Turn the Fan Off
To turn the Fan Off, tap the Off button.
The icon turns grey and picture of the Fan will change, indicating it has been turned Off.
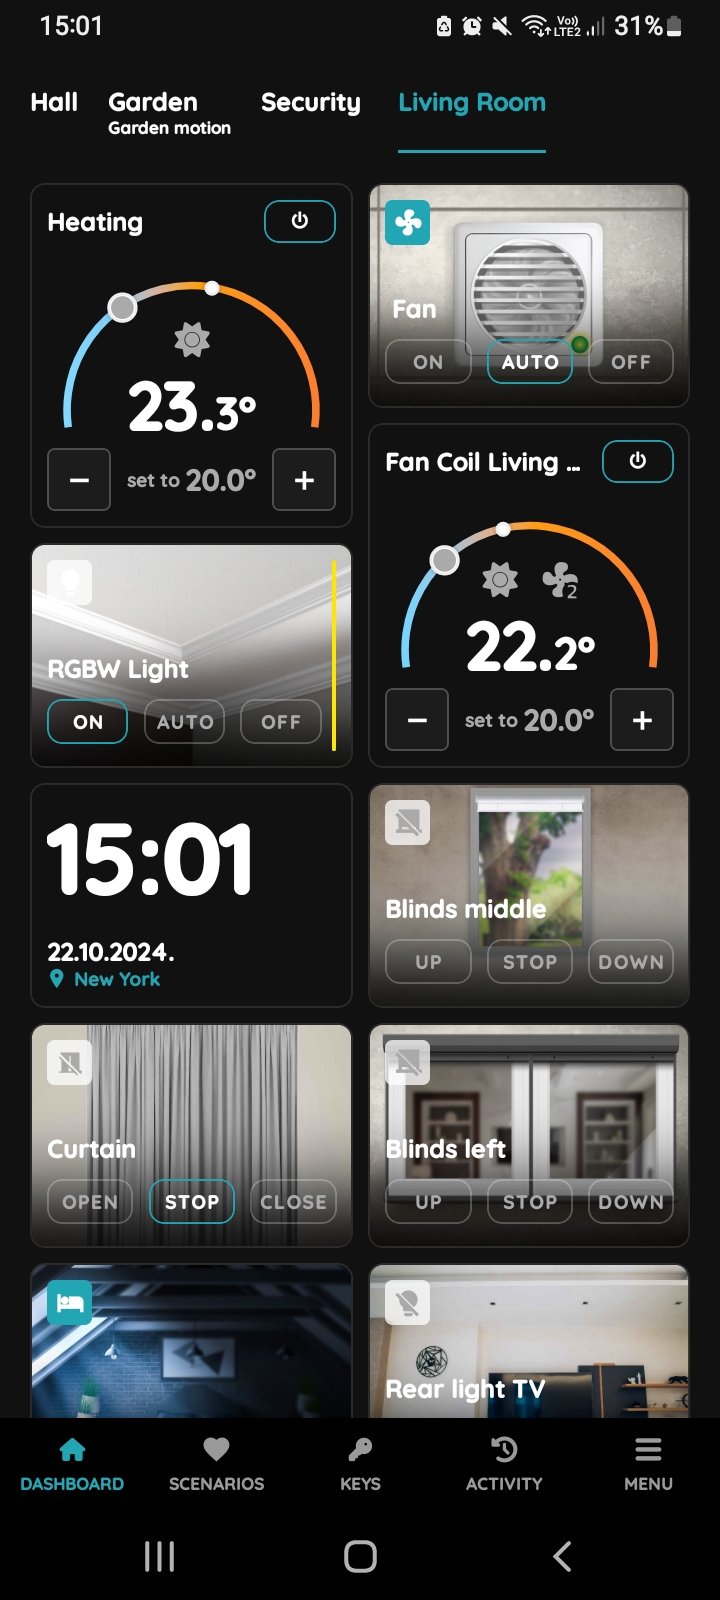
Set Fan to Auto Mode
If you tap the Auto button, the previously created automation for the Fan will be activated if all conditions are met. The icon will turn blue and picture will update to reflect the On status.
If you tap the Auto button and some conditions from the automation are not met, the Fan will not activate. The icon turns grey and the picture will change to reflect the Off status. All conditions must be fulfilled for the automation to work.
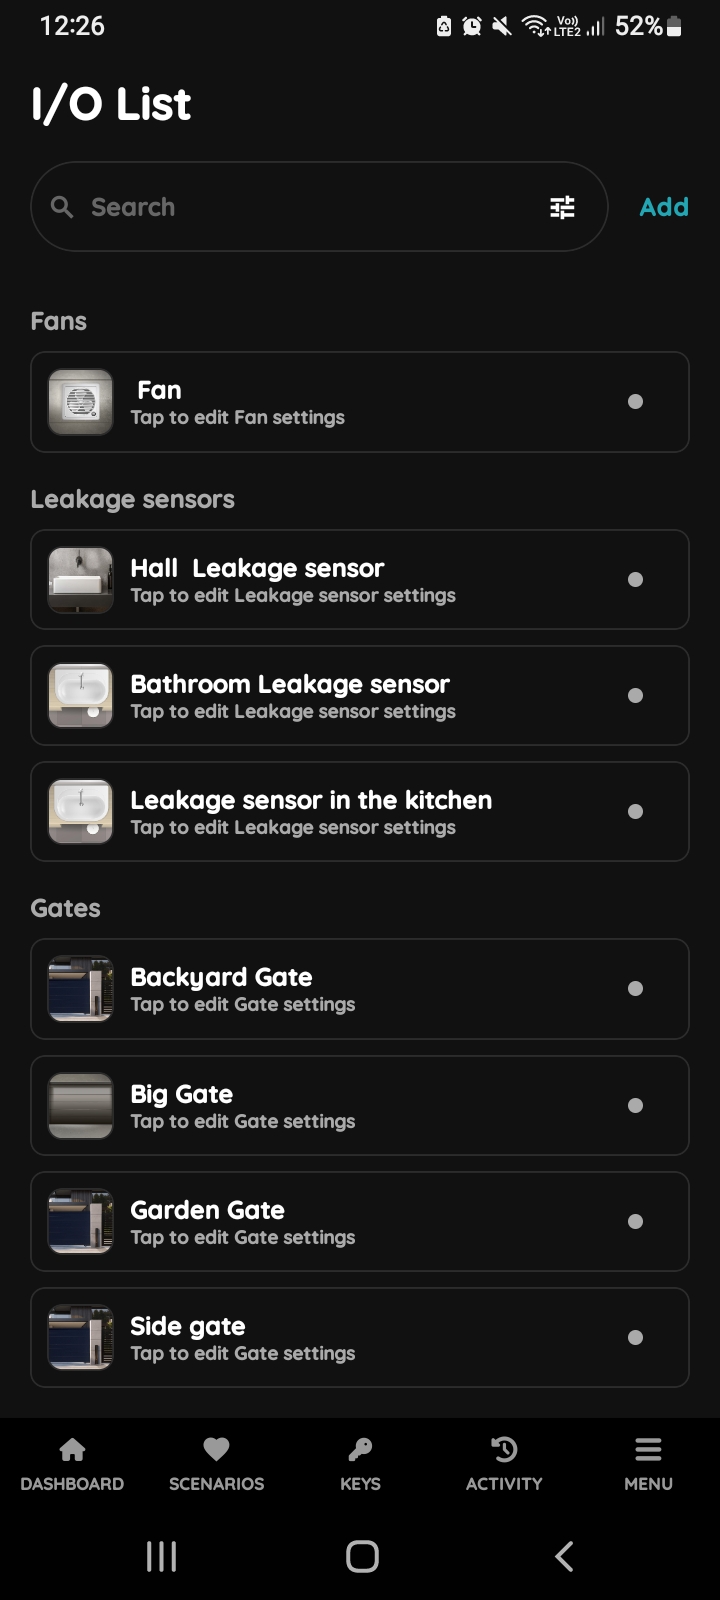
Open I/O list - Fan
The Fan can be edited in just a few steps.
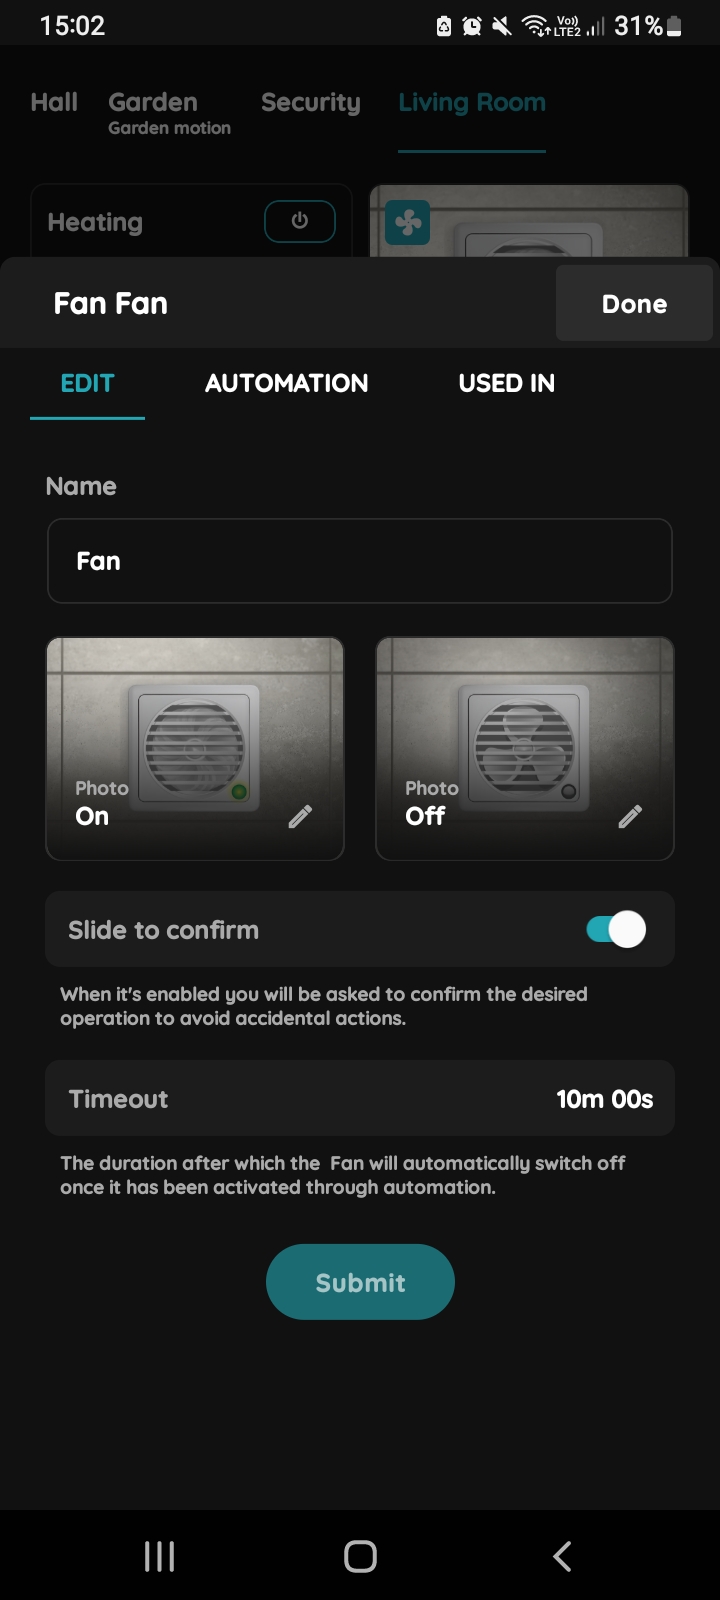
Edit Fan
Fill out the following form:
- Name - Edit the name of the Fan.
- Photo - Choose the source of the photo for both On and Off statuses.
- Slide to confirm - When enabled, you'll be asked to confirm the operation to avoid accidental actions.
- Timeout - Set the duration for how long the Fan will remain On in auto mode.
Tap Submit/Done to save the changes.
GOOD TO KNOW:
The Fan can be edited by long-pressing the Fan card on the Dashboard or by tapping it in the I/O list.
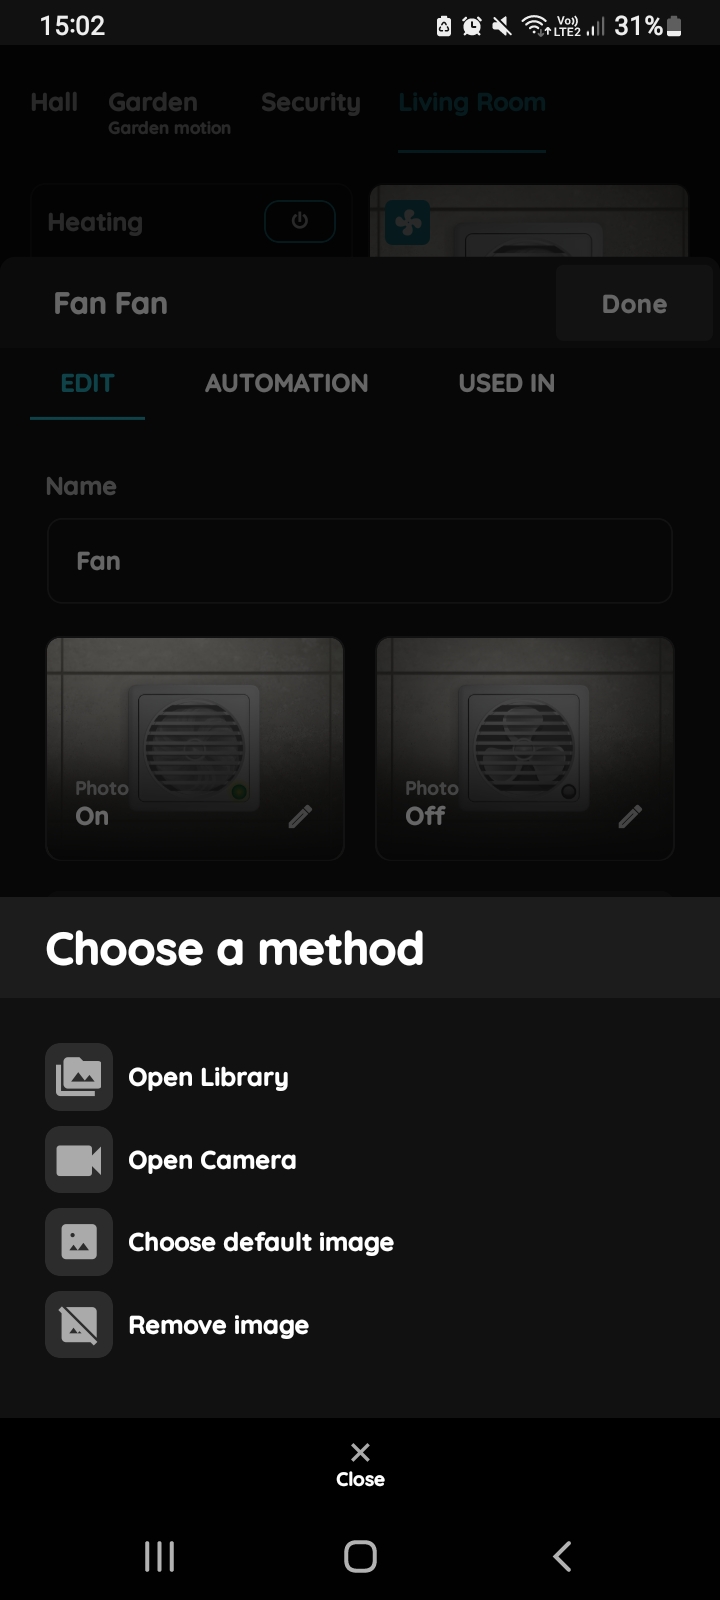
Change photo - Fan
Tap the photo of the Fan. You have four options:
- Open Library - The phone’s Library will open. It is recommended to take pictures from the same angle for both Fan statuses to achieve a complete and consistent view.
- Open Camera - You can take a picture using your smartphone. For a consistent view, it’s recommended to capture both Fan statuses from the same angle.
- Choose default image - These images are prepared in advance to provide a seamless experience.
- Remove image - Removes the existing image.
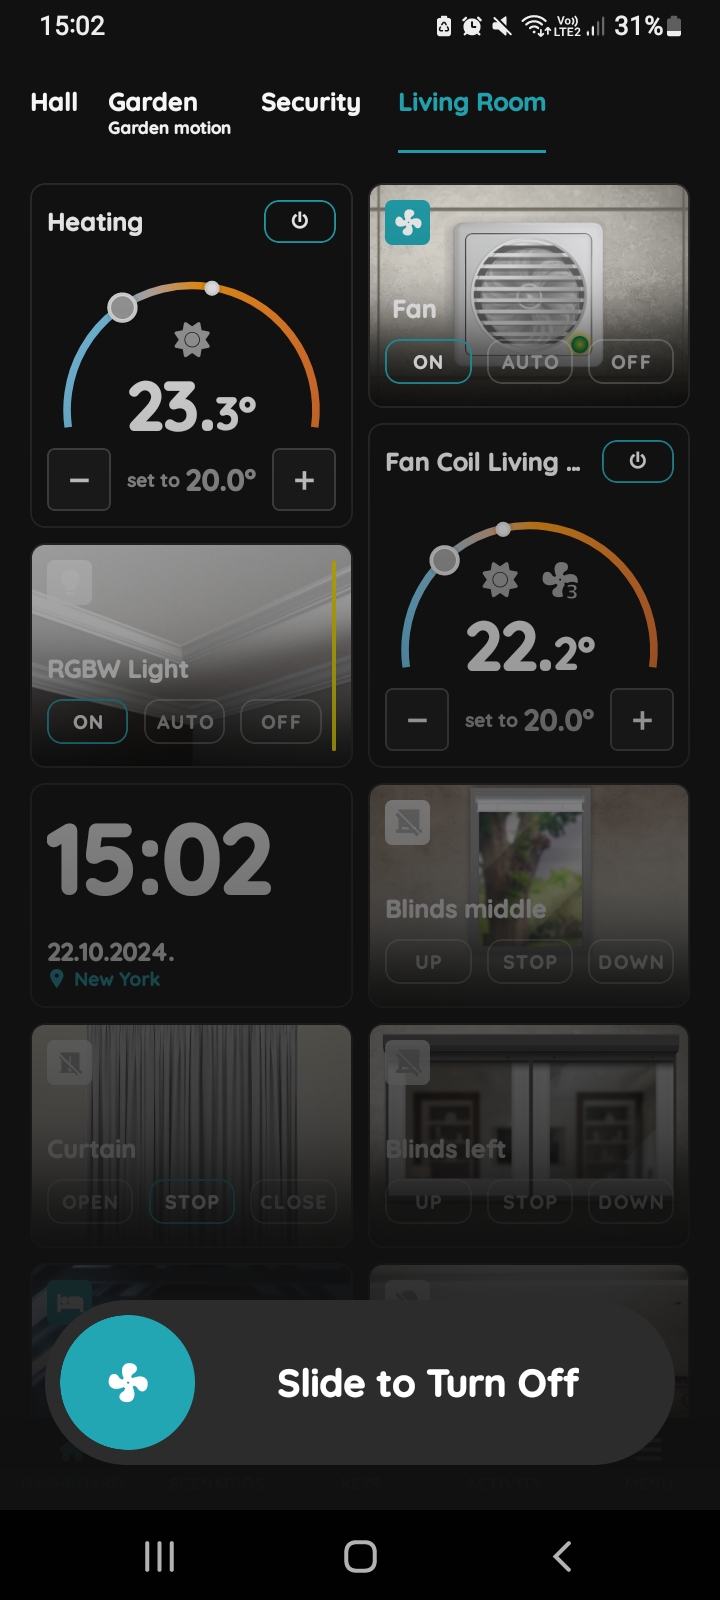
Slide to confirm - Fan
The Slide to confirm feature enhances security by reducing the risk of accidental actions.
It prompts you to confirm your choice before proceeding.
For example, if you want to turn off the Fan, tap the Off button and slide to turn Off from left to right to confirm the action.
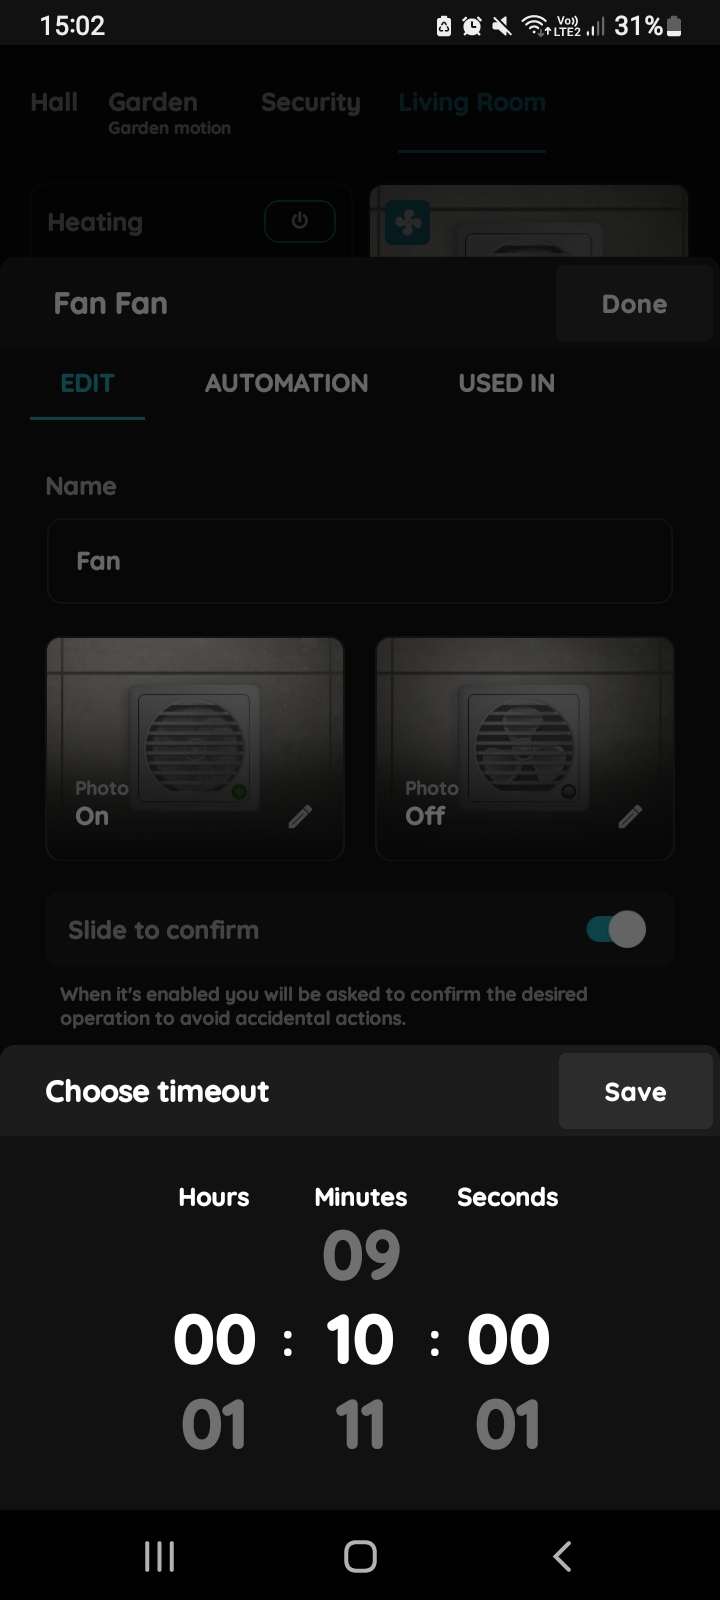
Timeout - Fan
Choose Timeout - scroll through columns for the Hours, Minutes, Seconds.
In this case, Timeout is set on 10 minutes.
Tap Save button.
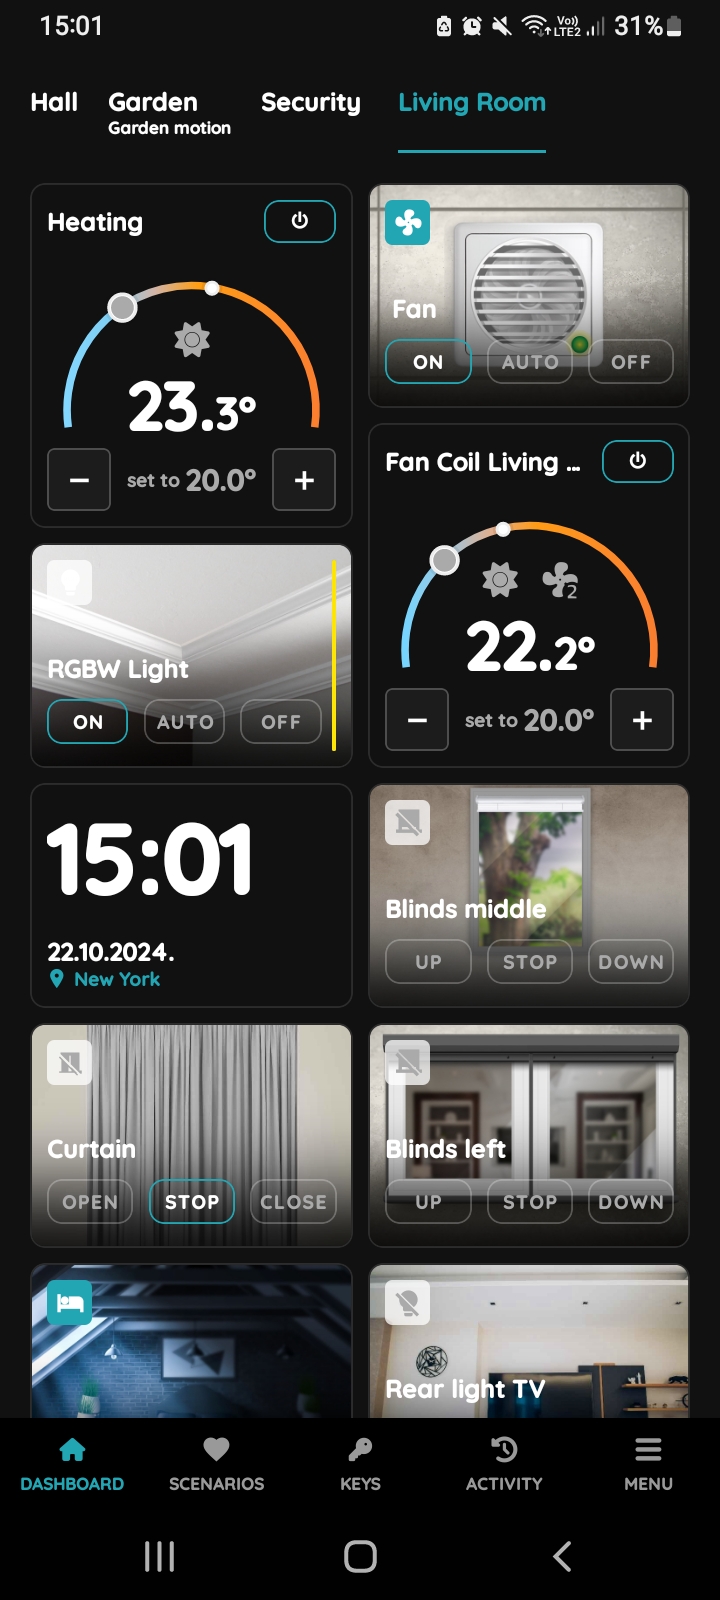
Find the Fan on the Dashboard
Set the Fan to automatically turn On when motion is detected in the room, but only during a specific time range. For example, between 3:00 AM and midnight if the Motion sensor detects movement in the living room, the Fan will turn On for ventilation. If no motion is detected for 15 minutes, the Fan will turn Off.
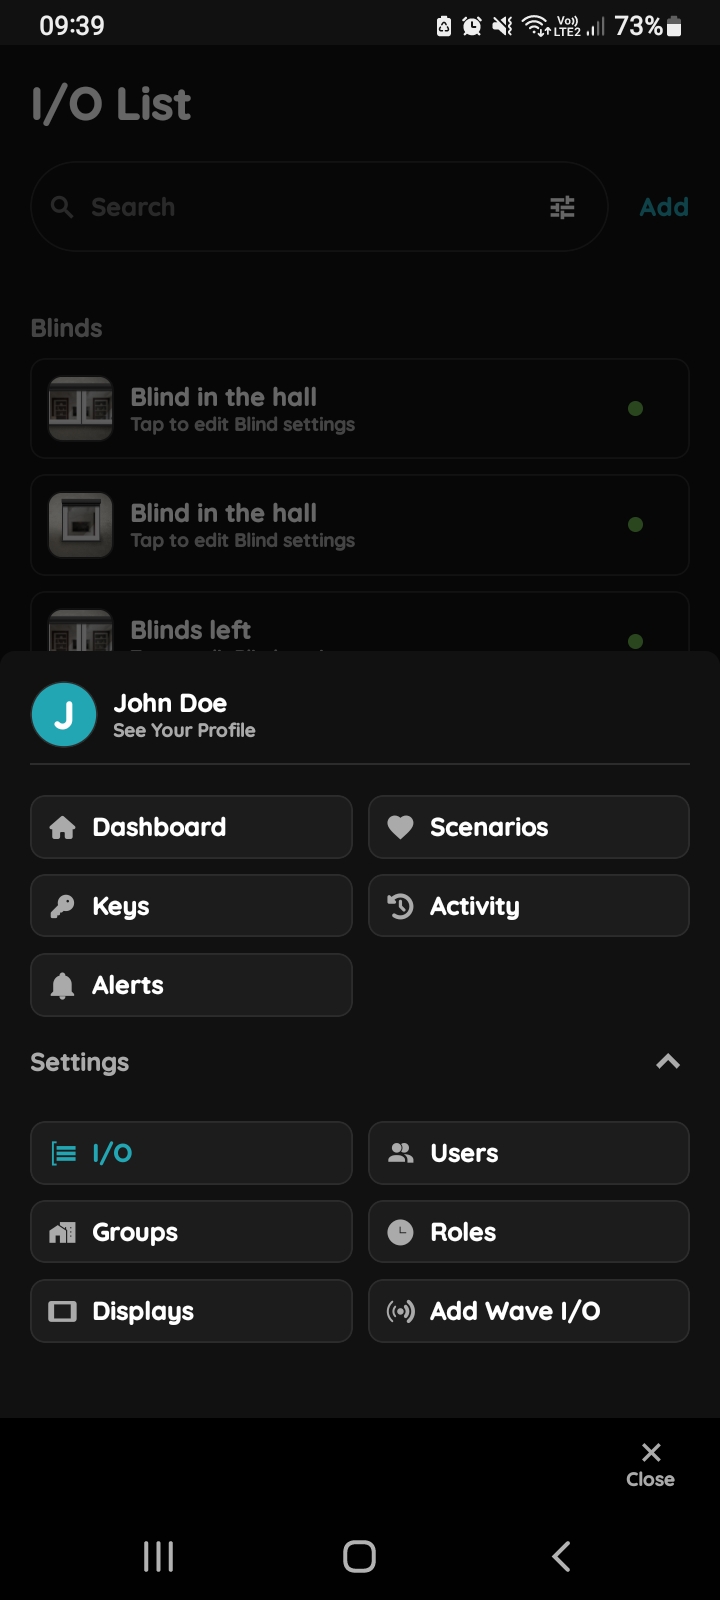
Open I/O
In the Menu, under Settings, tap on the I/O.
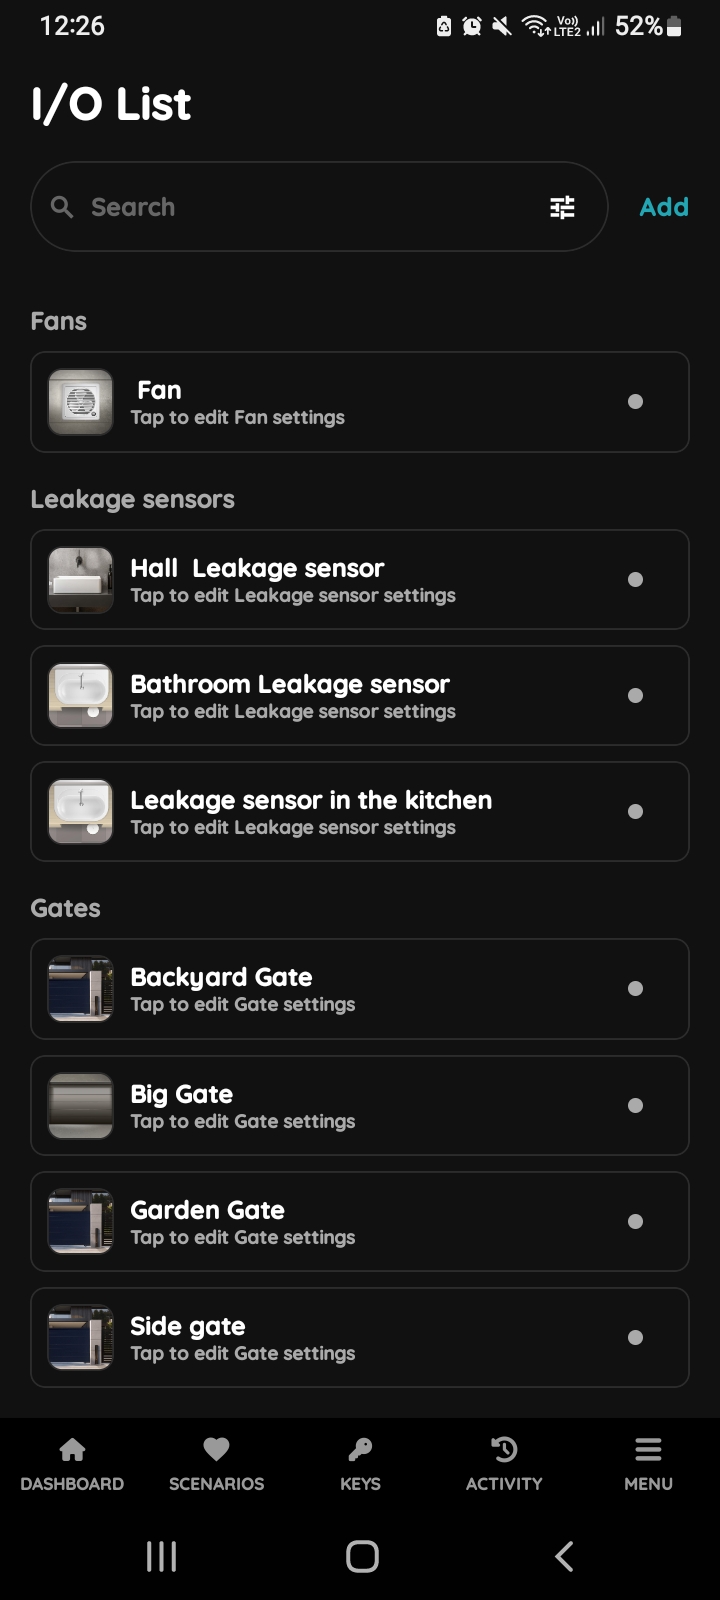
Open I/O list - Fan
Open I/O list, scroll to the Fans and tap on the desired Fan from the list.
In this case, Fan.
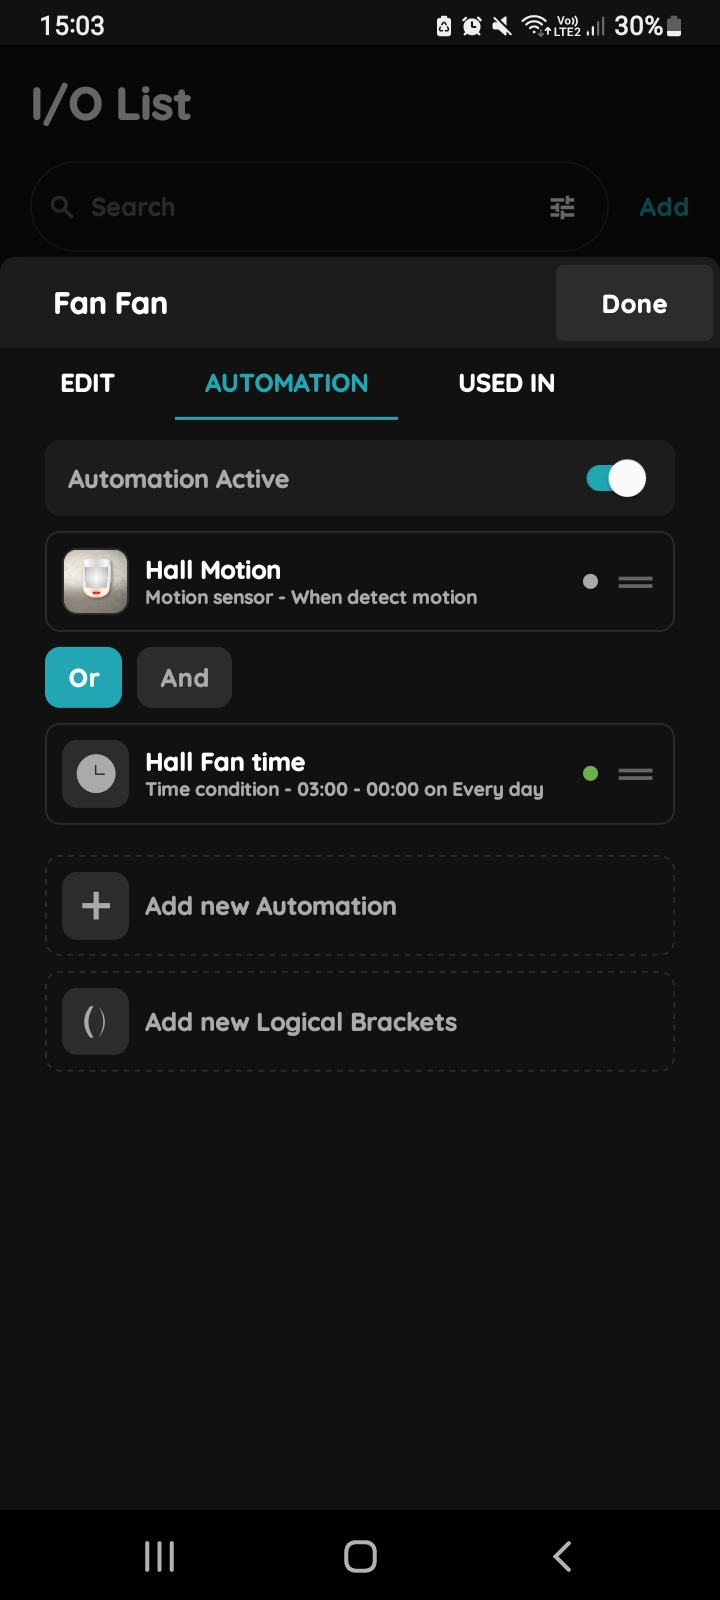
+ Add new Automation - Fan
Tap on tab Automation and than on + Add new Automation.
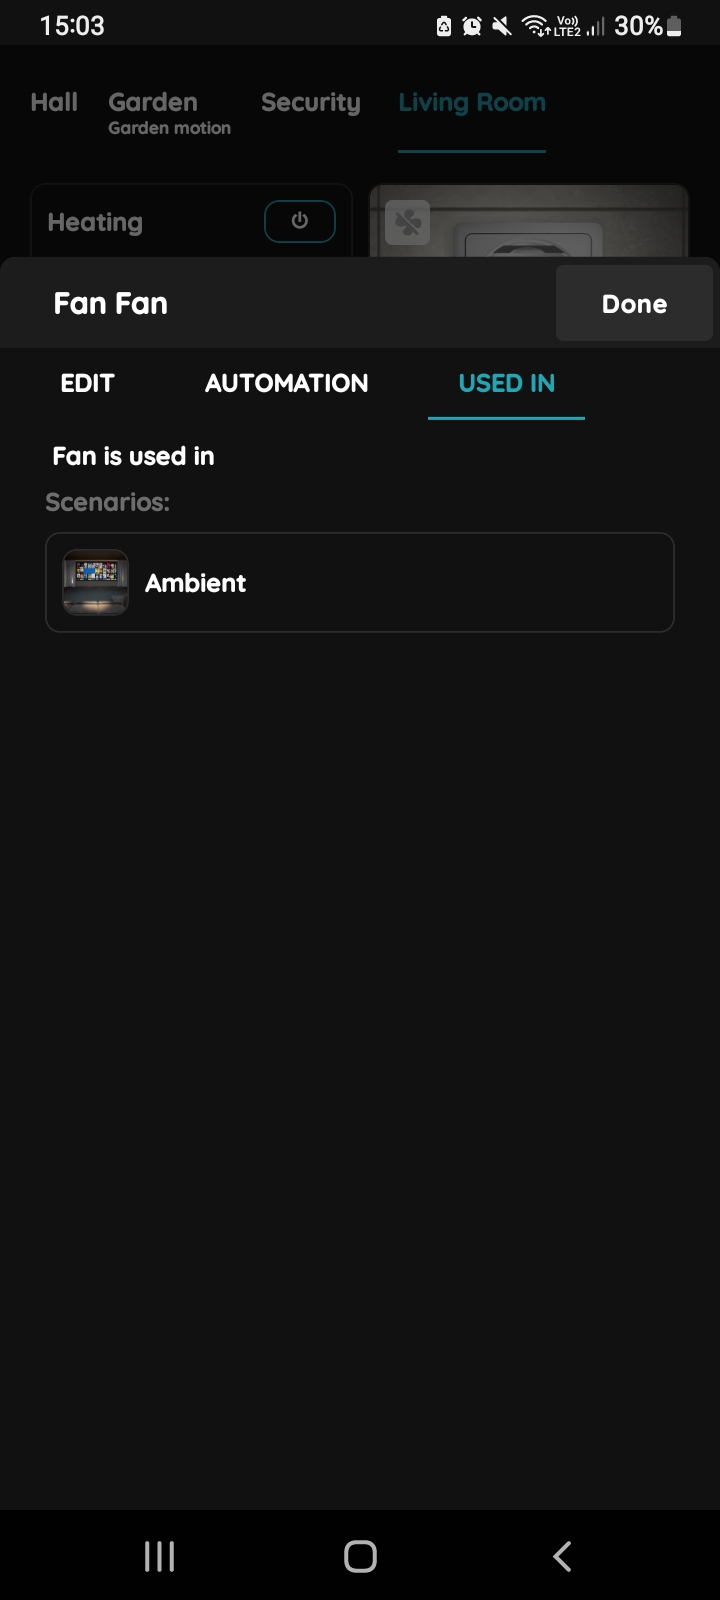
Used In - Fan
The Used In tab shows all the scenarios and automations where the Fan is applied, making it easy to see where this I/O is used without the need to search manually. If it isn't used in any, the list will be empty, and a message will display: "This I/O is not in use anywhere." This feature consolidates all relevant information in one place.