
Smart Control Panel - Helsinki 6"
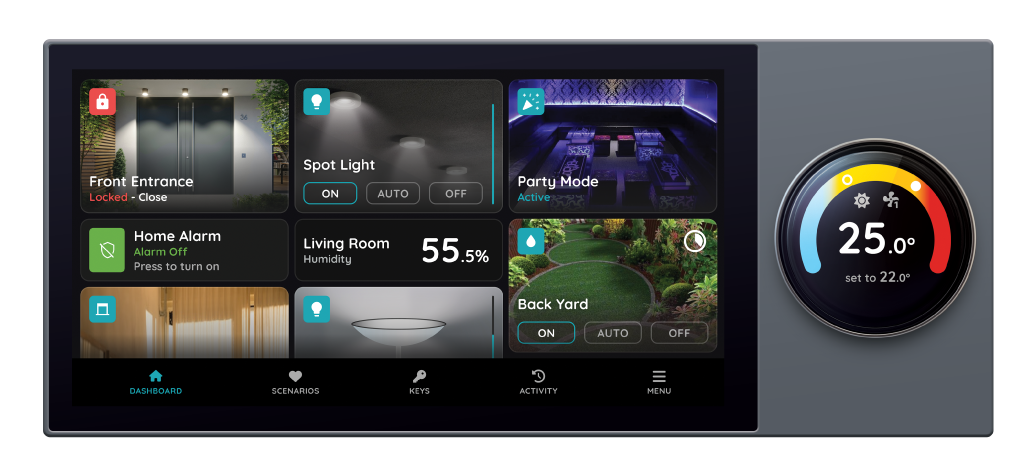
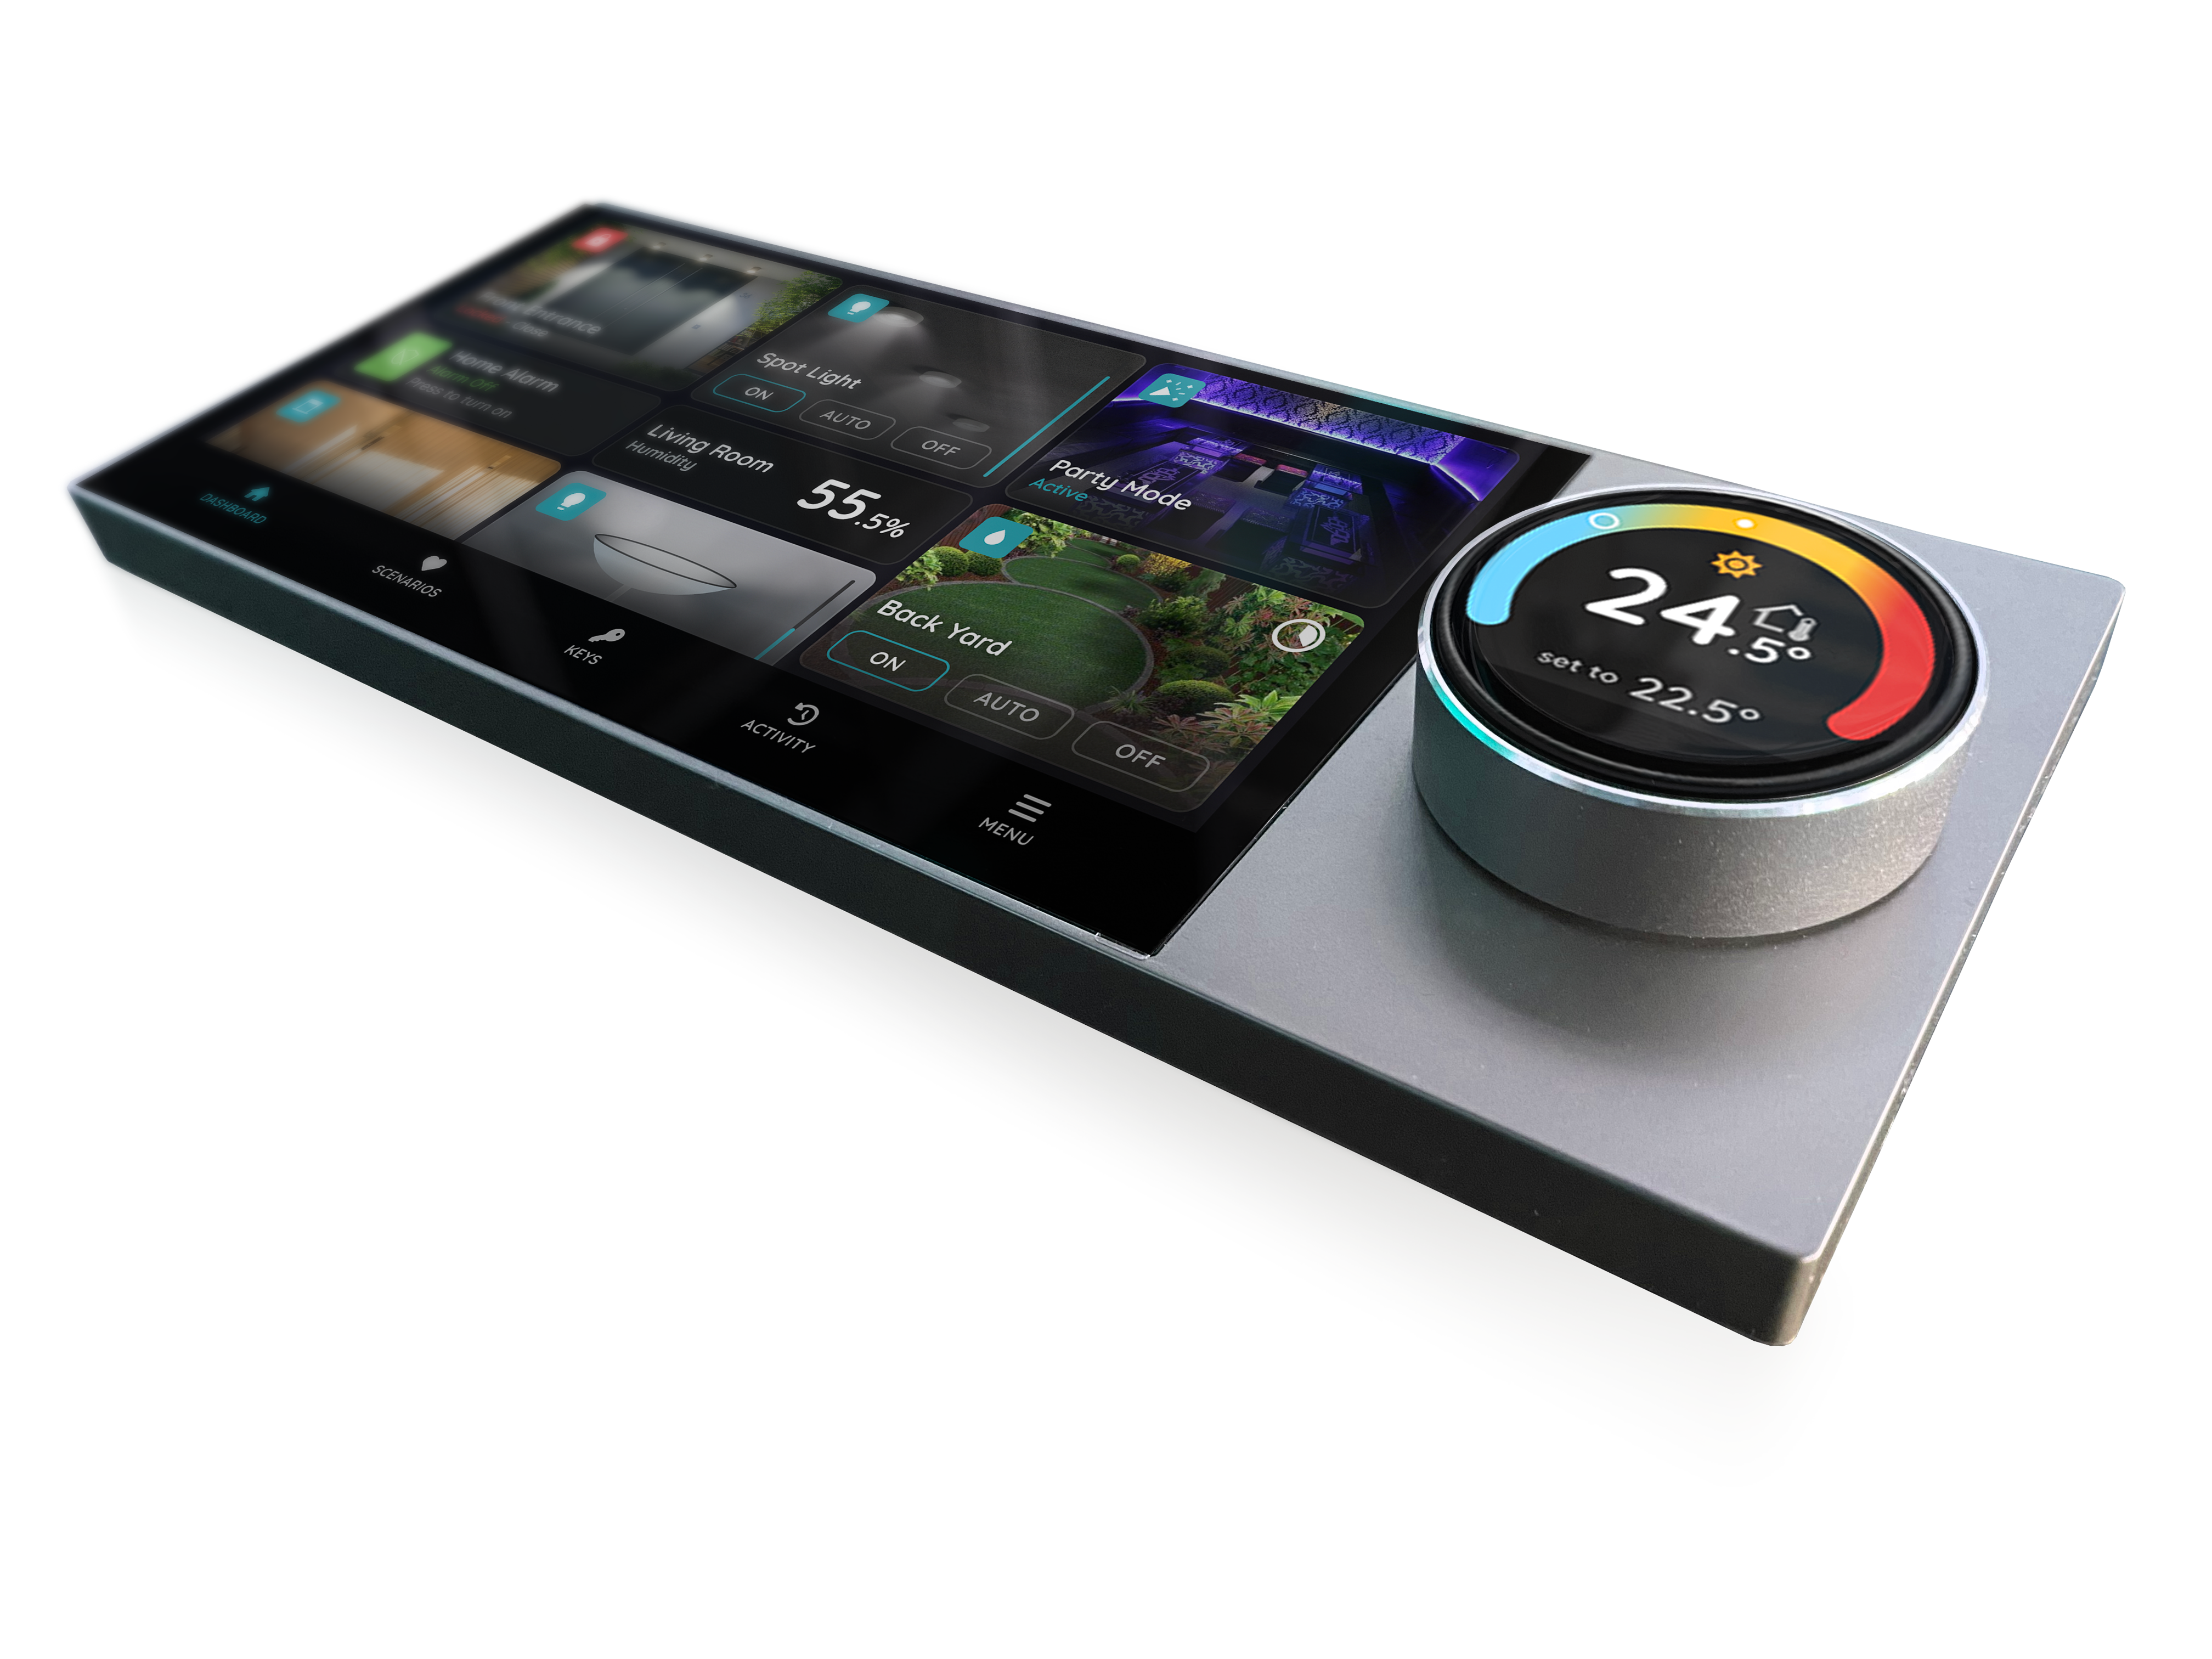
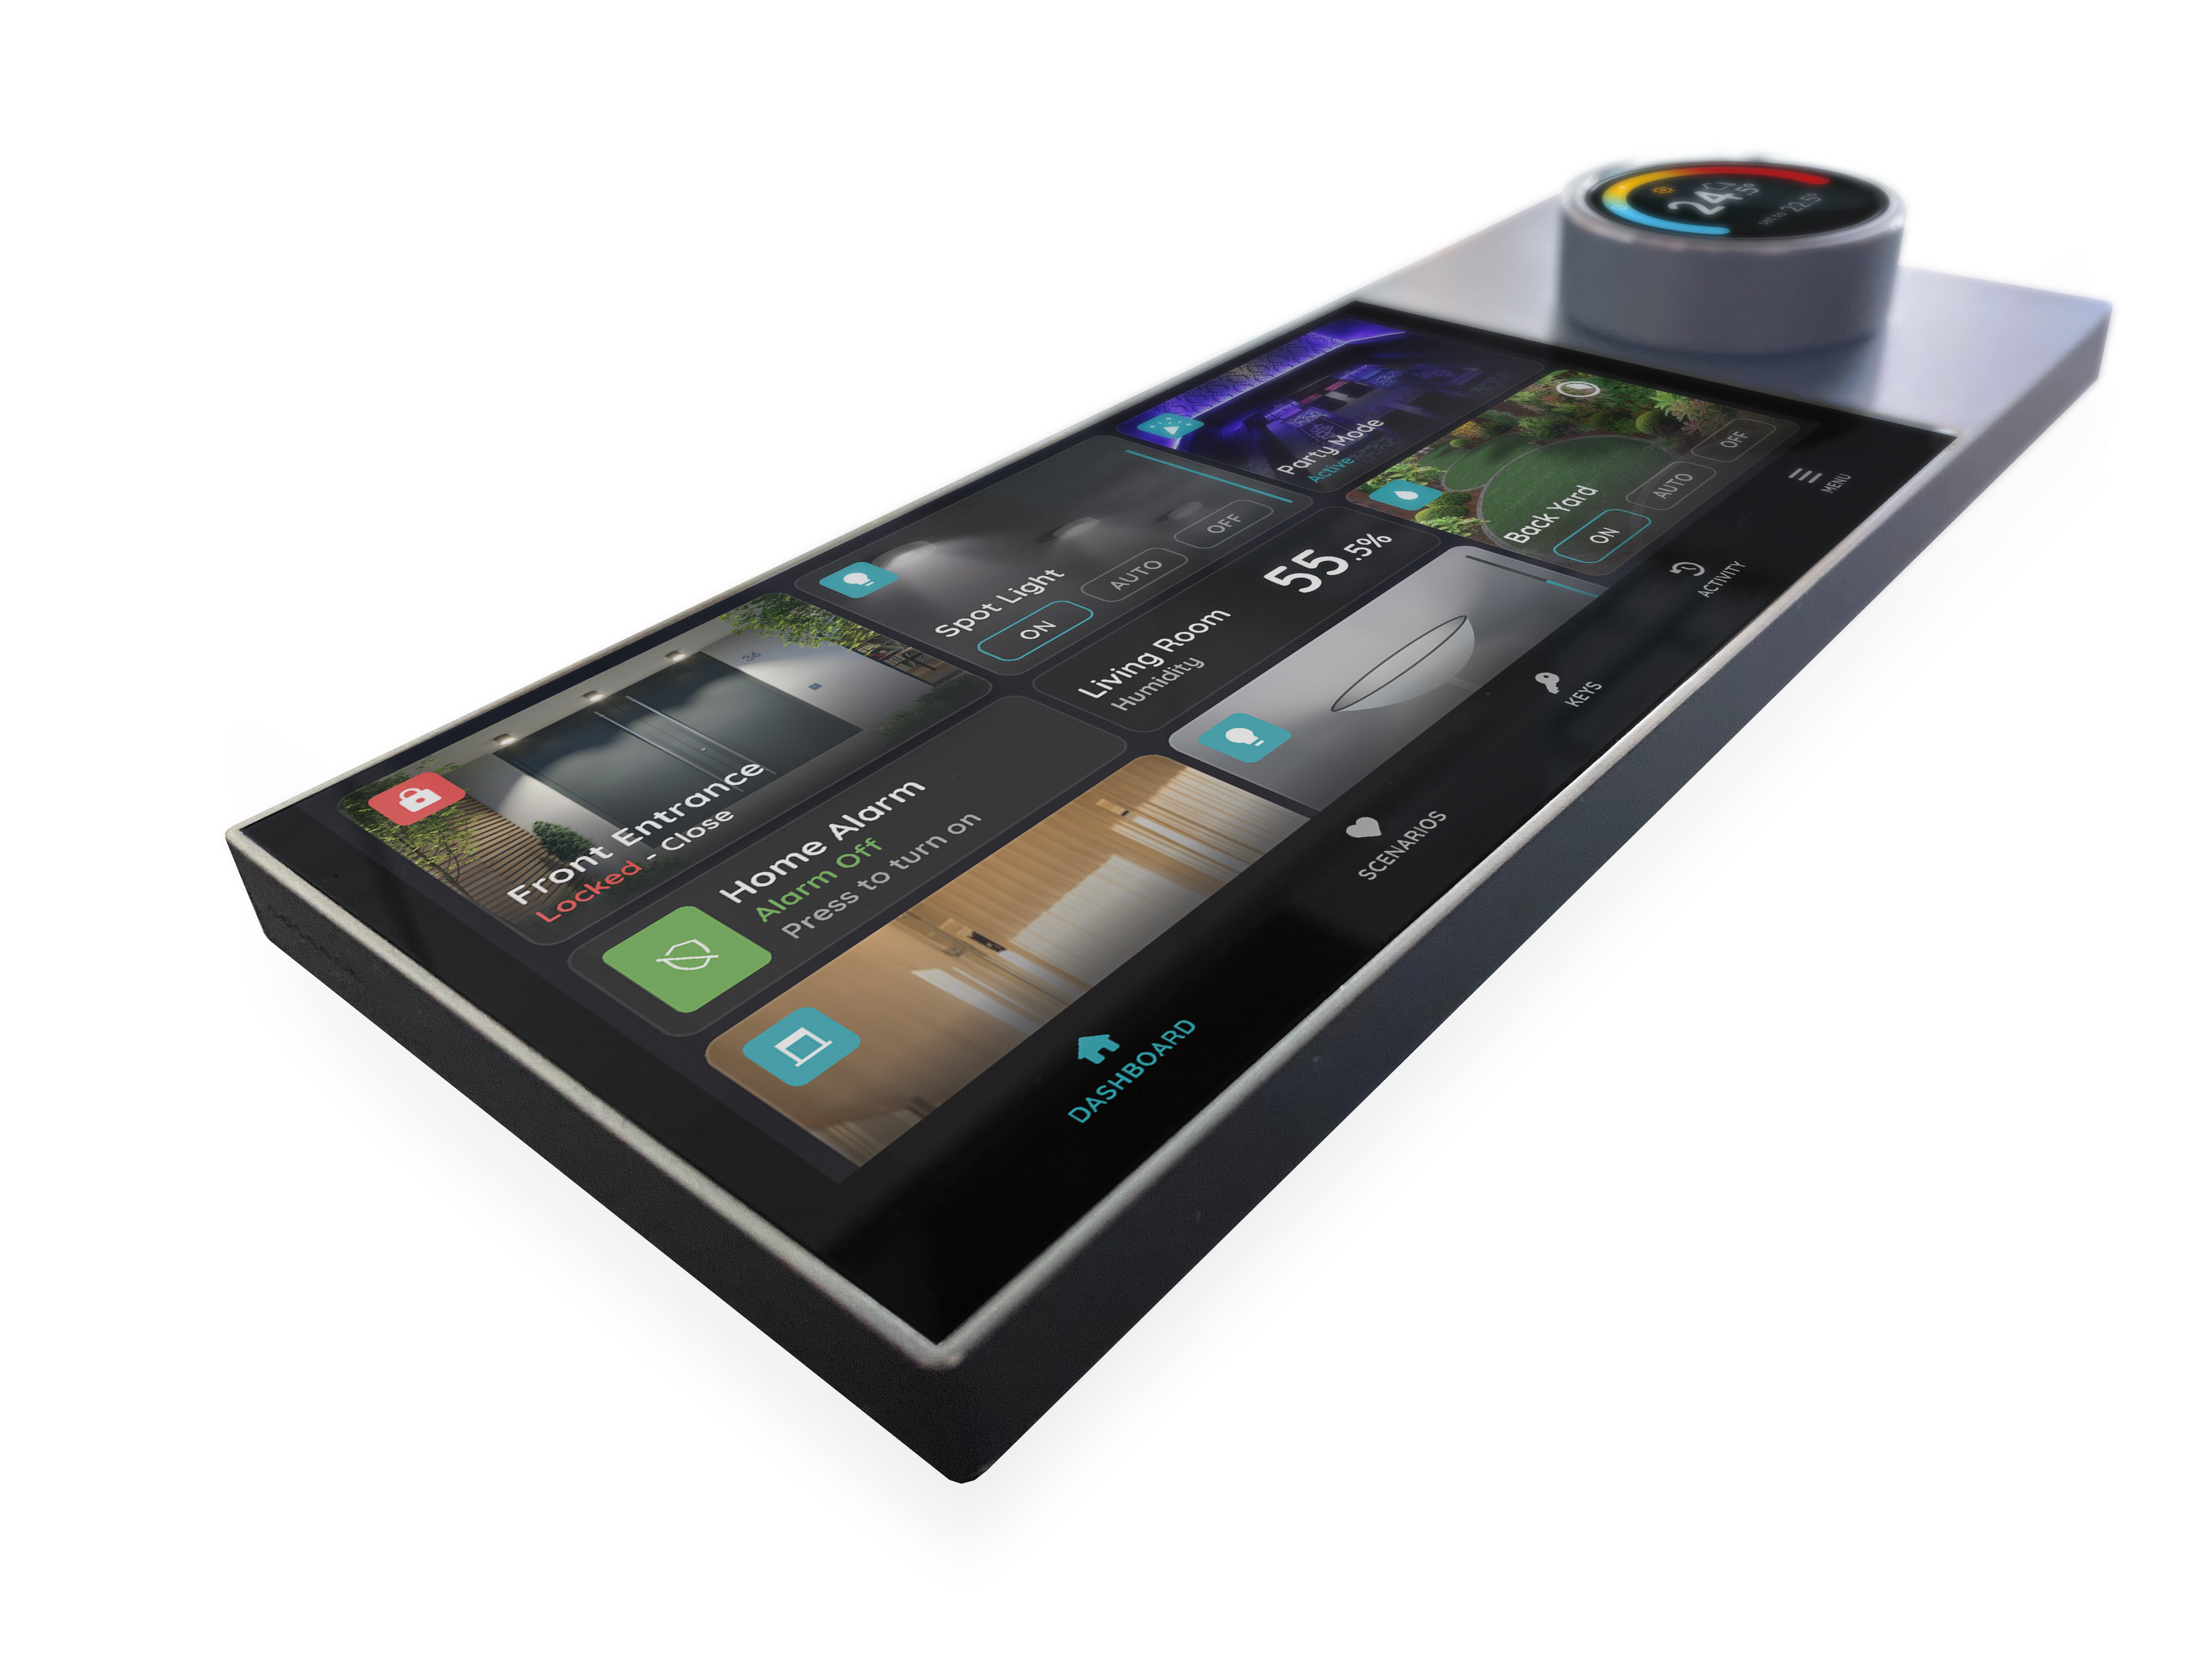
| SKU | P-DSP-HEL |
|---|---|
| Product line | PIERRE Pro, PIERRE Wave |
| Category | Displays |
| Manufacturer | Smatek |
| Manufacturer SKU | Model: S8-NZE |
| GTIN / EAN | 8606034720062 |
| HS code | 8537109100 |
Overview
The Room Control Display Helsinki 6" replaces a conventional switch plate and runs the room from one screen. It is built on a PX30 quad-core Cortex-A35 with 2 GB RAM and 8 GB storage, behind a 6-inch portrait touch screen at 720x1440.
The two built-in relays provide an option for direct ON/OFF control. Two relay circuits rated 200 W each are built in, so the panel can switch the room’s own lighting rather than only issuing commands to other devices. The Modbus port allows the display to control fan coils, heat pumps, and other plant equipment directly, without requiring a separate gateway in the room.
The integrated brightness and temperature sensors add another layer of possibilities for advanced automation. By using the display’s built-in outputs, including relays and Modbus, users can create customized sensor-based automations.
The control knob and knob display provides a more familiar thermostat-like experience and can also be configured to control selected I/Os from the system’s I/O list.
For installation: the Helsinki takes an 86x86x50 mm back box with 60 mm fixing centres. That 50 mm depth is not optional — specify the Room Control - Recessed Wall Mounting Box for the wall construction on site. It is rated IP20 and runs from 0 °C to +40 °C at 5–90% RH non-condensing.
Key features
- 6-inch touch screen
- PX30 quad-core Cortex-A35, 2 GB RAM, 8 GB ROM
- Ethernet and Wi-Fi
- Gateway for PIERRE Wave (Zigbee 3.0)
- Direct Modbus control
- Two built-in relay circuits, 200 W each
- Rotary control knob with its own display
Technical specifications
| Control | |
|---|---|
| Relay Type | 2-way relay 200W per circuit None |
| Display | |
| Touch Screen Dimension | 6 inch |
| Touch Screen Resolution | 720x1440px pixels |
| Electrical | |
| Power Supply | 100-240V AC 50-60Hz |
| Input Power | 230V AC 50-60Hz 0.3A |
| Power Consumption | 10.0 W |
| Current | 10.0 A |
| Max Load | 10A |
| Environmental | |
| Operating Temperature | +32°F - +104°F |
| Operating Temperature (°C) | 0 - +40 |
| Operating Humidity | 5% - 90% RH Non-condensing % RH |
| IP Rating | IP20 |
| Features | |
| LED Indicators | Yes |
| Hardware | |
| CPU | PX30 Quad core Cortex-A35 |
| Operating System | Android |
| OS Version | 8 |
| Memory (RAM) | 2 GB |
| Memory (ROM) | 8 GB |
| Physical | |
| Panel Material | PC material |
| Product Color | Grey |
| Mounting Type | Wall mount |
| Mounting Box | 86x86x50mm |
| Bolt Hole Distance | 60 mm |
| Connectivity | |
| Connectivity | 10M/100M Ethernet RJ45, 2.4GHz Wi-Fi (802.11 b/g/n), Zigbee, Modbus |
| Safety | |
| Safety Features | Overload protection, Short circuit protection, Thermal protection, Surge protection |
| Sensors | |
| Built-in Sensors | Temperature, Brightness |
Pin layout
| Pin | Label | Type | Position |
|---|---|---|---|
| 1 | L | power_line | bottom |
| 2 | N | power_neutral | bottom |
| 3 | ETH | ethernet_in | top |
| 4 | L1 | control_L_out | top |
| 5 | L2 | control_L_out | top |
Physical & packaging
| Dimensions (L × W × H) | 205 × 10 × 86 mm |
|---|---|
| Weight | 345 g |
| Box dimensions (L × W × H) | 238 × 67 × 115 mm |
| Box weight | 459 g |
User manual
- 1. Dimensions
- 2. Interface and Ports
- 3. Product specifications
- 4. Installation instructions
- 5. Wiring instructions
- 6. Add Display
- 7. Video
- 8. FAQ
1. Dimensions
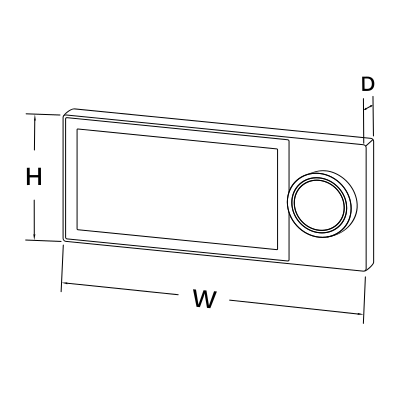
- W: 20.5 cm
- H: 8.6 cm
- D: 1 cm
2. Interface and Ports
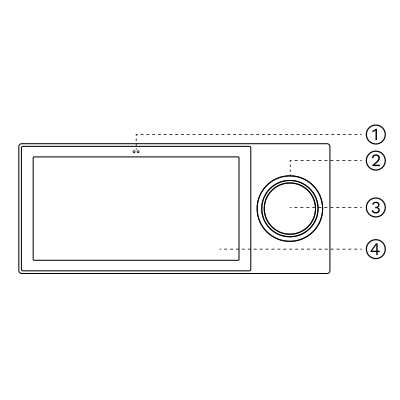
- Light/distance sensor
- Knob switch
- Shortcut display
- Main display
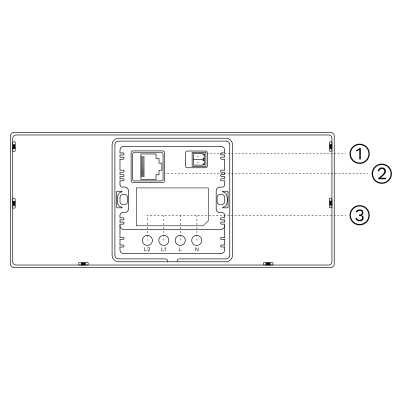
- RS485 port
- Ethernet RJ45 port
- L & N wires
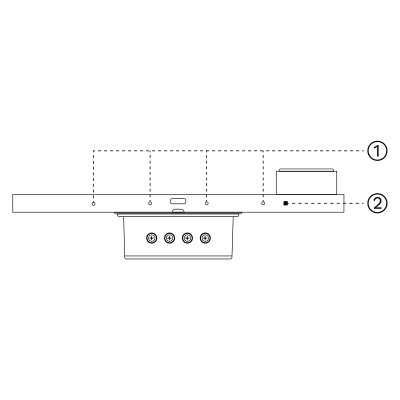
- Quadruple array microphone
- Temperature and humidity sensor
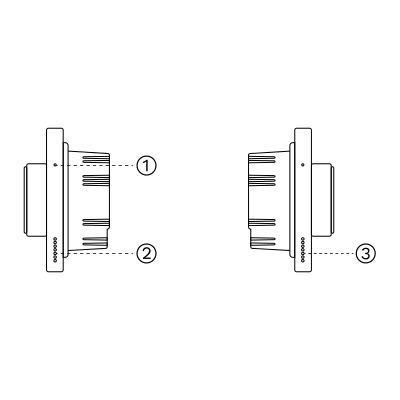
- Reset
- Speaker
- Speaker
3. Product specifications
4. Installation instructions
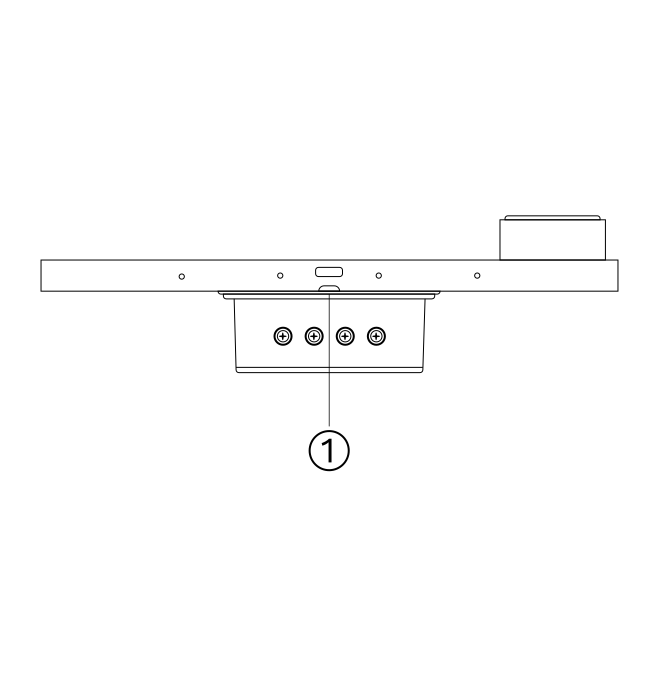
Turn off the main power in the electric box and make sure the live wire in the wall box is not live.
Remove the base of the display and install it in the wall box.
- Pry the base off with a flat screwdriver
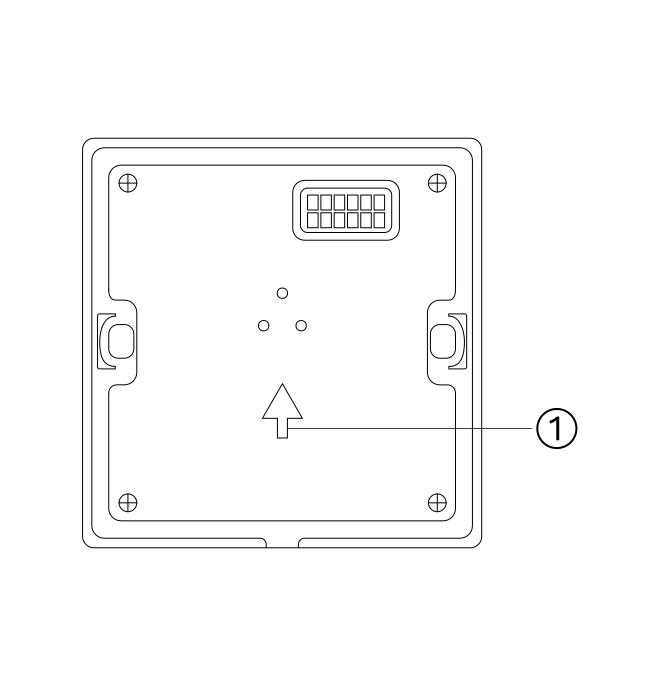
- Install upwards as shown in the picture
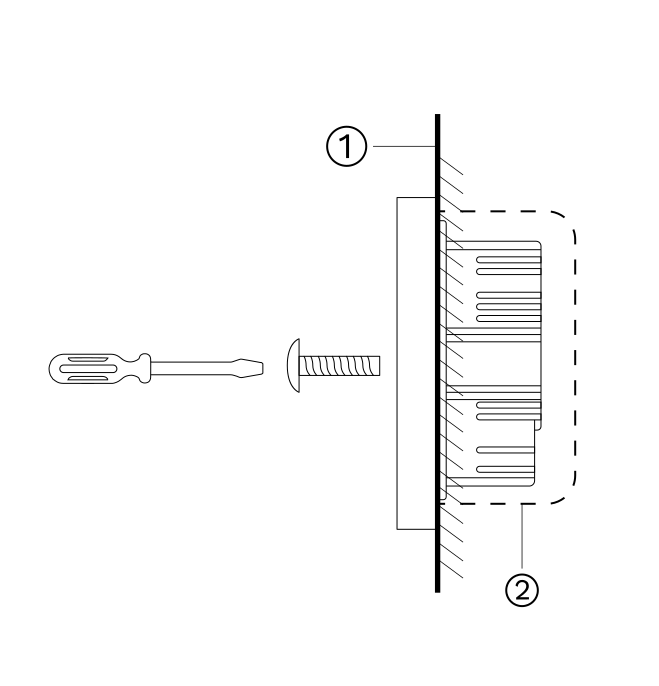
Fasten the base to the wall box with the mounting screws and fix the display back onto the base.
If the display is not flat after installation, do not press on the screen. Check the wall box and base installation first.
Do not overtighten the screws; this can deform or damage the screen and hardware.
- Wall
- Wall box
5. Wiring instructions
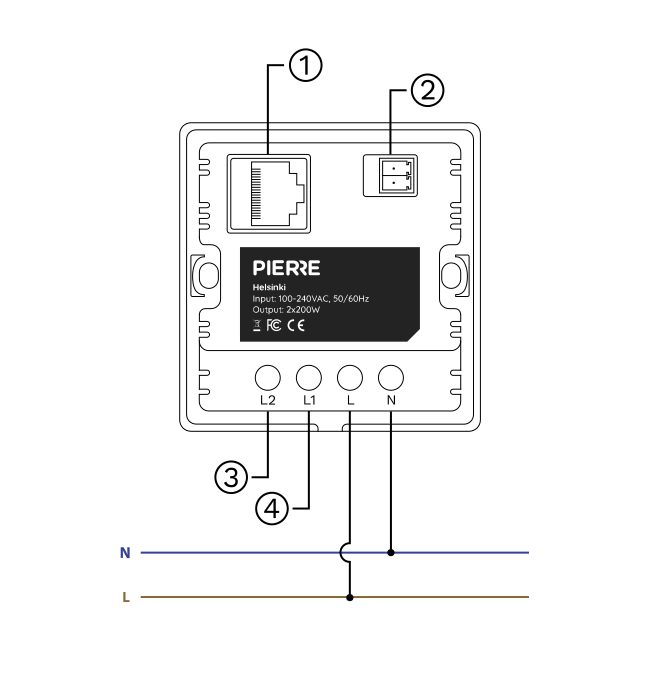
- Ethernet RJ45 port
- RS485 port
- Output live wire 2 – max 200 W
- Output live wire 1 – max 200 W
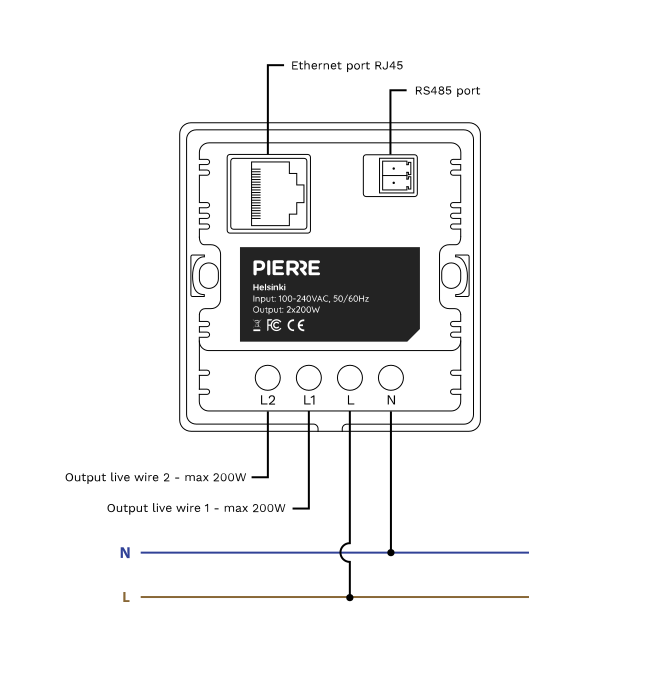
PIERRE Helsinki 6" display – wiring diagram
| Run | Wires | Cross-section | Cable type | Conductors |
|---|---|---|---|---|
| From PIERRE Display to Electric box (Required) | 2 | 1.5 mm² | NYM-O | L, N |
| From PIERRE Display to Consumer (Optional) | 3 | 1.5 mm² | NYM-O | L1, L2, N |
| From PIERRE Display to Network Switch (Recommended) | 1 | - | Cat 5e U/UTP | - |
| From PIERRE Display to Modbus (Optional) | 2 | 0.5 mm² | Shielded twisted pair | A+, B- |
6. Add Display
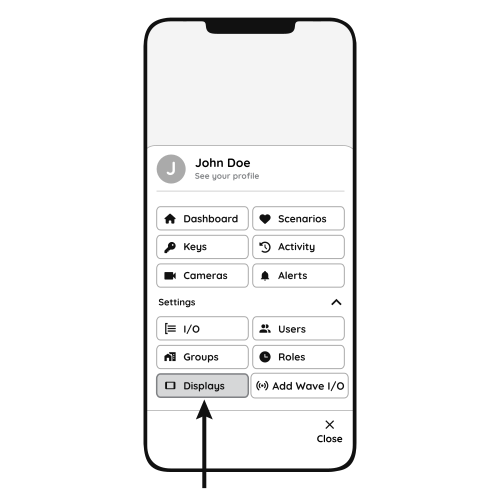
Follow the steps below to add the Helsinki display.
- Open Displays
- Open the Menu and, under Settings, tap Displays.
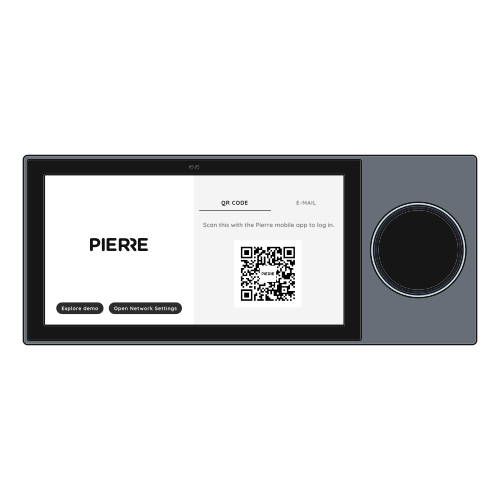
- QR code
- Scan the QR code shown on the display with your smartphone to add the Helsinki display, then follow the steps on the screen.
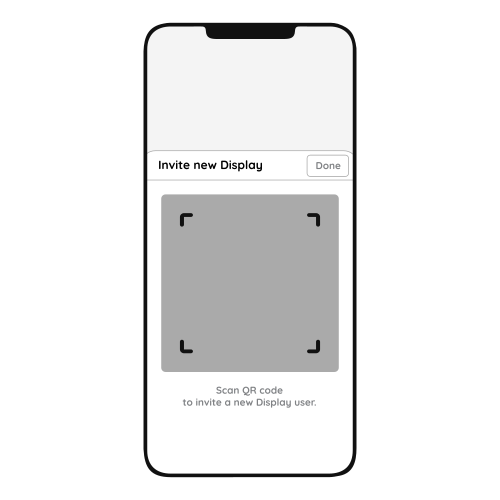
- Invite New Display
- Scanning the QR code invites the new Helsinki display to the system.
- Tap Done to confirm.
7. Video
PIERRE Academy - Full Display Integration & Automation Guide. https://www.youtube.com/watch?v=XPsZkIxCtJE
8. FAQ
Q1: Can the knob control anything other than heating?
The knob on the Helsinki display controls the heating (target temperature). It can also be used to set a timer, switch dimmable lights on and off, and adjust their brightness.
These features are available on the latest display software version. Please check whether an update is available for your display and install it if necessary.
Q2: Can the display’s sound be adjusted?
Yes. Swipe down from the top of the display to open the menu, where you find the sound settings.
Q3: Do displays need to be connected to a controller?
No. Displays connect to the system through the network, wired or wireless, and do not need a direct connection to the Controller.
Q4: Can the display size be upgraded?
Yes. A smaller display can be replaced with a larger one.
Q5: Are the displays waterproof?
No. The displays are not waterproof and are not suitable for areas exposed to moisture or rain.
Q6: Is a thermostat required?
No. A temperature sensor integrated in the PIERRE system can monitor the room temperature and control the heating/cooling devices.
Q7: Does PIERRE have its own thermostat?
Yes. PIERRE offers its own smart thermostats; see the thermostat product category.
Q8: Can the Helsinki display work as a thermostat?
Yes. The Helsinki display has a built-in temperature and humidity sensor and two relays, so it can control heating/cooling devices like a thermostat.
Q9: If I remove an old thermostat, can I replace it with a PIERRE display for heating control?
Yes. The Helsinki display has a built-in temperature sensor and can replace an old thermostat.
Q10: Can the display relay control underfloor heating valves?
Yes. The display relays can control underfloor heating valves as well as other heating and cooling devices.
Q11: How accurate is the temperature sensor?
PIERRE temperature sensors are available in wired and wireless versions; see the product specifications for the accuracy of each sensor.
Q12: How many temperature sensors do I need?
At least one sensor for basic heating/cooling control. Install a sensor in every heating/cooling zone or room where you want individual temperature control.
Q13: What is required for connecting displays?
A mains supply (2 × 1.5 mm², L and N) and a network connection through a UTP (Cat 5e) cable.
Q14: How can heat quantity measurement be solved with the PIERRE system?
With a PIERRE Pro Controller and an M-Bus to Modbus converter. The heat meters are connected to the M-Bus side of the converter.
Q15: Can I adjust different temperatures in different rooms?
Yes. The temperature can be controlled room by room.
Q16: Is it necessary to calibrate the temperature sensor?
Not always, but it is often useful.
Not necessary if: the sensor is factory-calibrated (±0.5 °C or better); the application does not need high precision (comfort heating/cooling in a home); the installation location is good (away from direct sun, drafts and heat sources).
Useful if: the displayed temperature does not match a reliable reference thermometer; the device is installed where it is affected by heat from electronics, sunlight or poor airflow; the system needs precise control (HVAC, energy optimisation).
In the Smart PIERRE app, calibration is optional. You can add or subtract an offset to fine-tune the reading.