PIERRE Partner - Blinds
Description
The Blinds output type is used to control motorized blinds, shutters, and similar window covering systems within the PIERRE system.
Adding Blinds
To add a new blind output:
-
Select the desired Controller.
-
Navigate to the Outputs tab.
-
Create a new output and select Blinds as the output type.
-
Configure the required parameters.
-
Save the configuration.
Configuration Parameters
The following parameters can be configured:
-
Name
-
Role
-
Group
-
Up Position Photo
-
Closed Position Photo
-
Up Direction
-
Down Direction
-
Collapse Time
-
Level Control
-
Hide Activity
-
Button Up
-
Button Down
Collapse Time
The Collapse Time defines the total travel time required for the blind to move between its fully open and fully closed positions. This value is used for position control calculations.
Level Control
Level Control enables position-based operation, allowing the blind to move to intermediate positions instead of operating only in fully open or fully closed states.
Editing Blinds
Existing blind outputs can be modified from the Outputs tab of the assigned Controller.
The following settings can be updated:
-
Name
-
Role
-
Group
-
Photos
-
Identifier
-
Up Direction
-
Down Direction
-
Collapse Time
-
Level Control
-
Hide Activity
-
Button Assignments
Automation Integration
Blind outputs can be integrated into automation rules and scenes.
Typical applications include:
- Time-based schedules.
-
Brightness-based automation.
-
Temperature-based automation.
-
Presence-based automation.
-
Security-related automation.
-
Scene control.
System Integration
Blinds can interact with other PIERRE functions, including:
-
Lighting control
-
HVAC systems
-
Presence sensors
-
Brightness sensors
-
Security systems
-
Automation scenarios
Benefits
-
Automated blind control.
-
Position-based operation.
-
Improved occupant comfort.
-
Enhanced privacy.
-
Increased energy efficiency.
-
Seamless integration with the PIERRE automation system.
Add Blind
Add new Blind in a few steps.
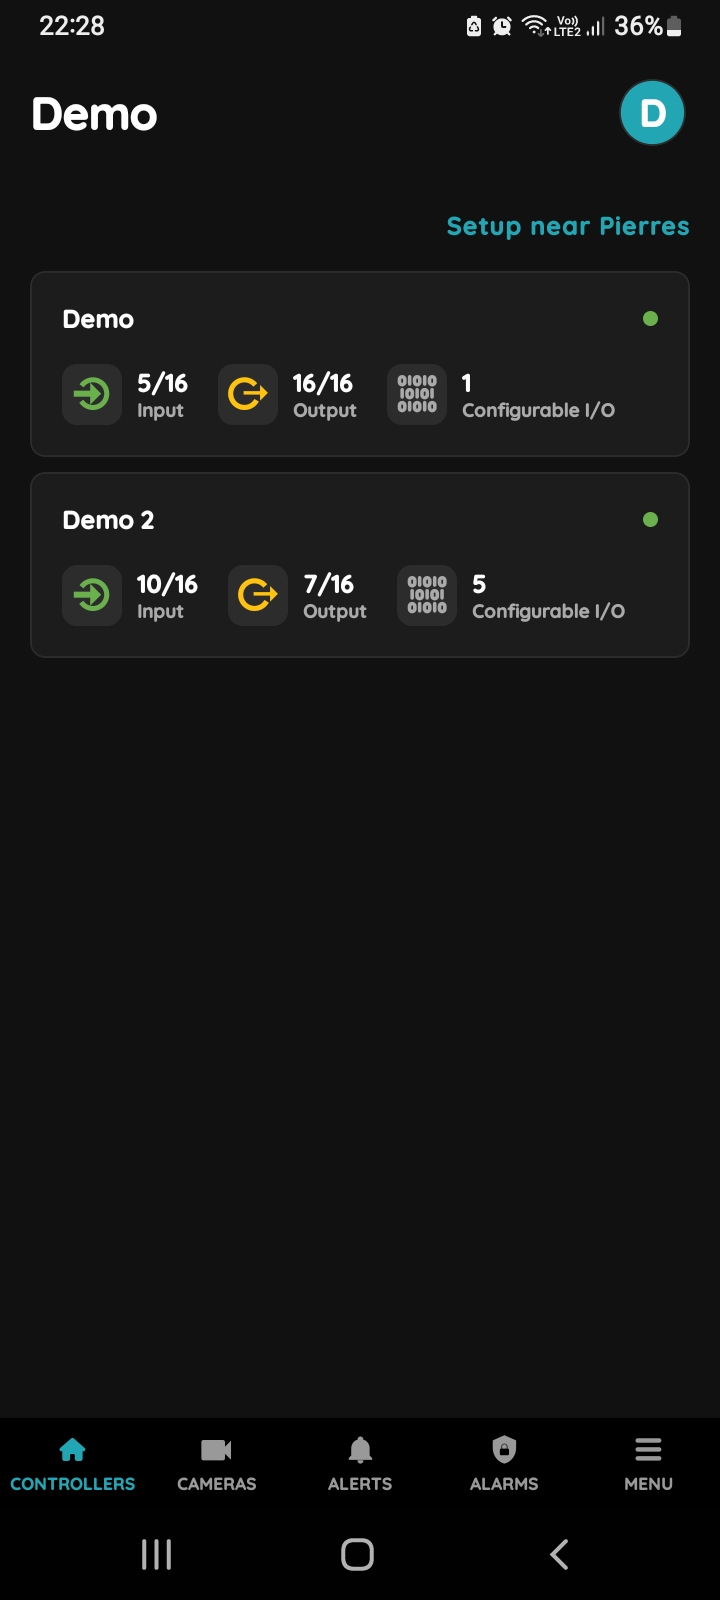
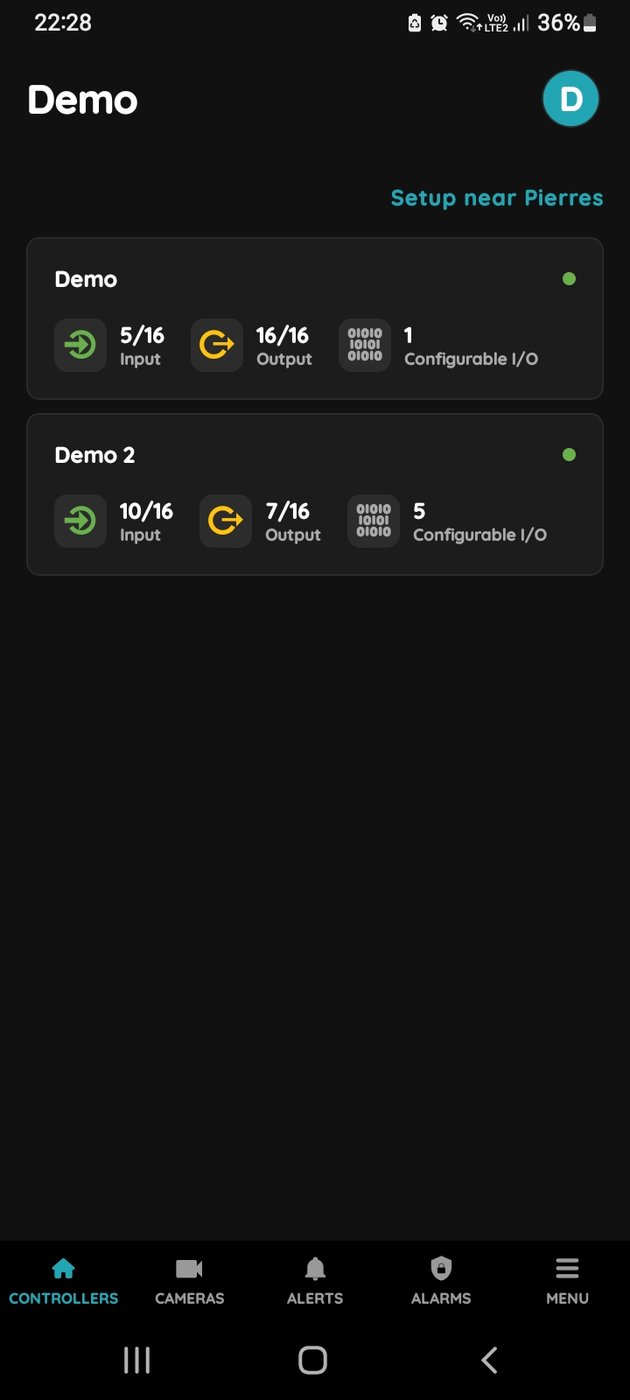
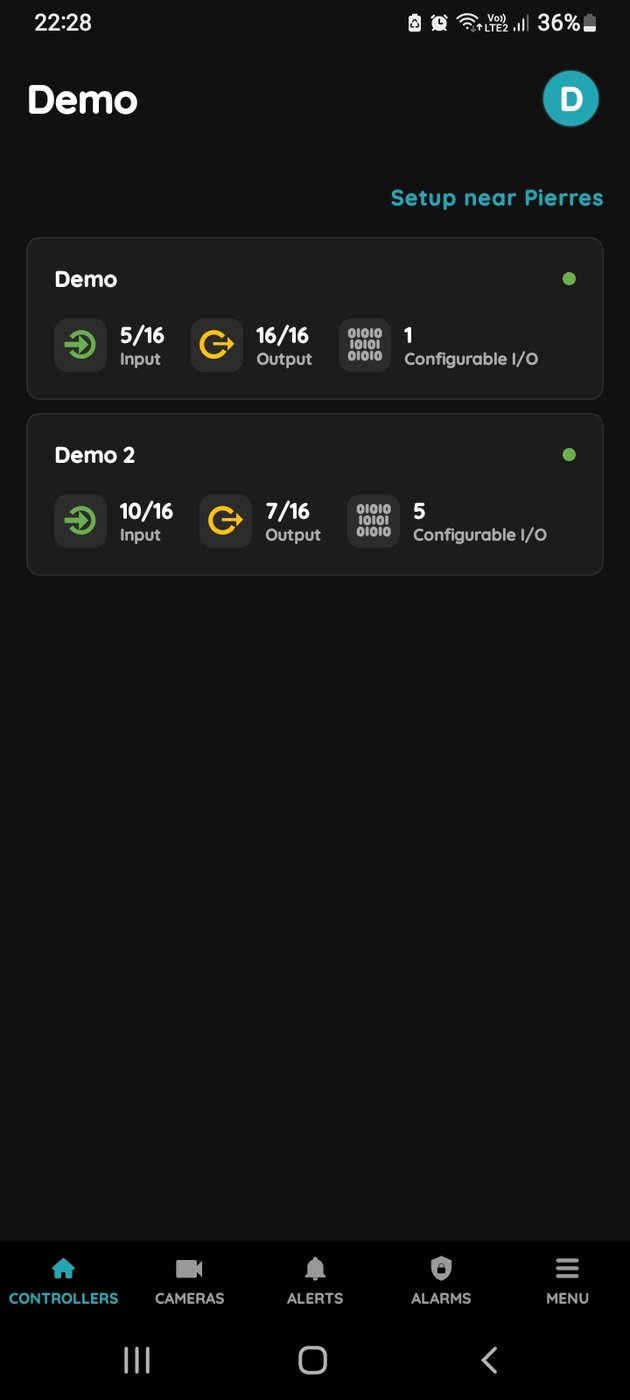
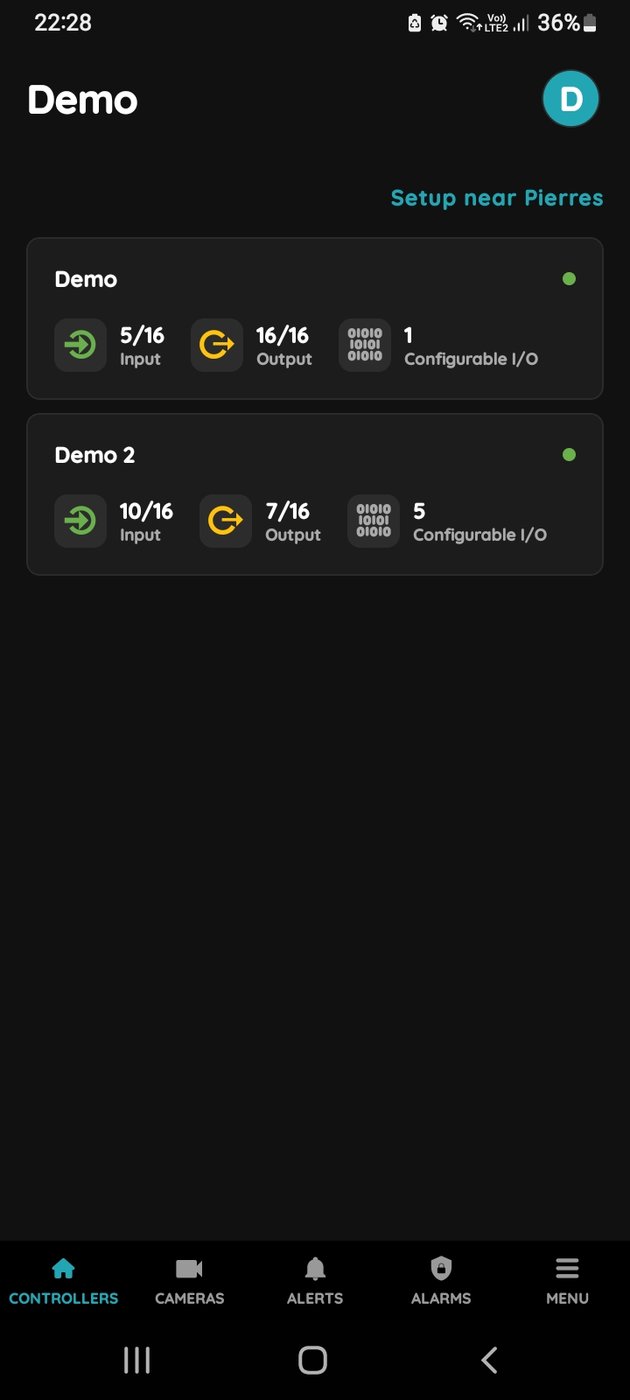
Choose Controller
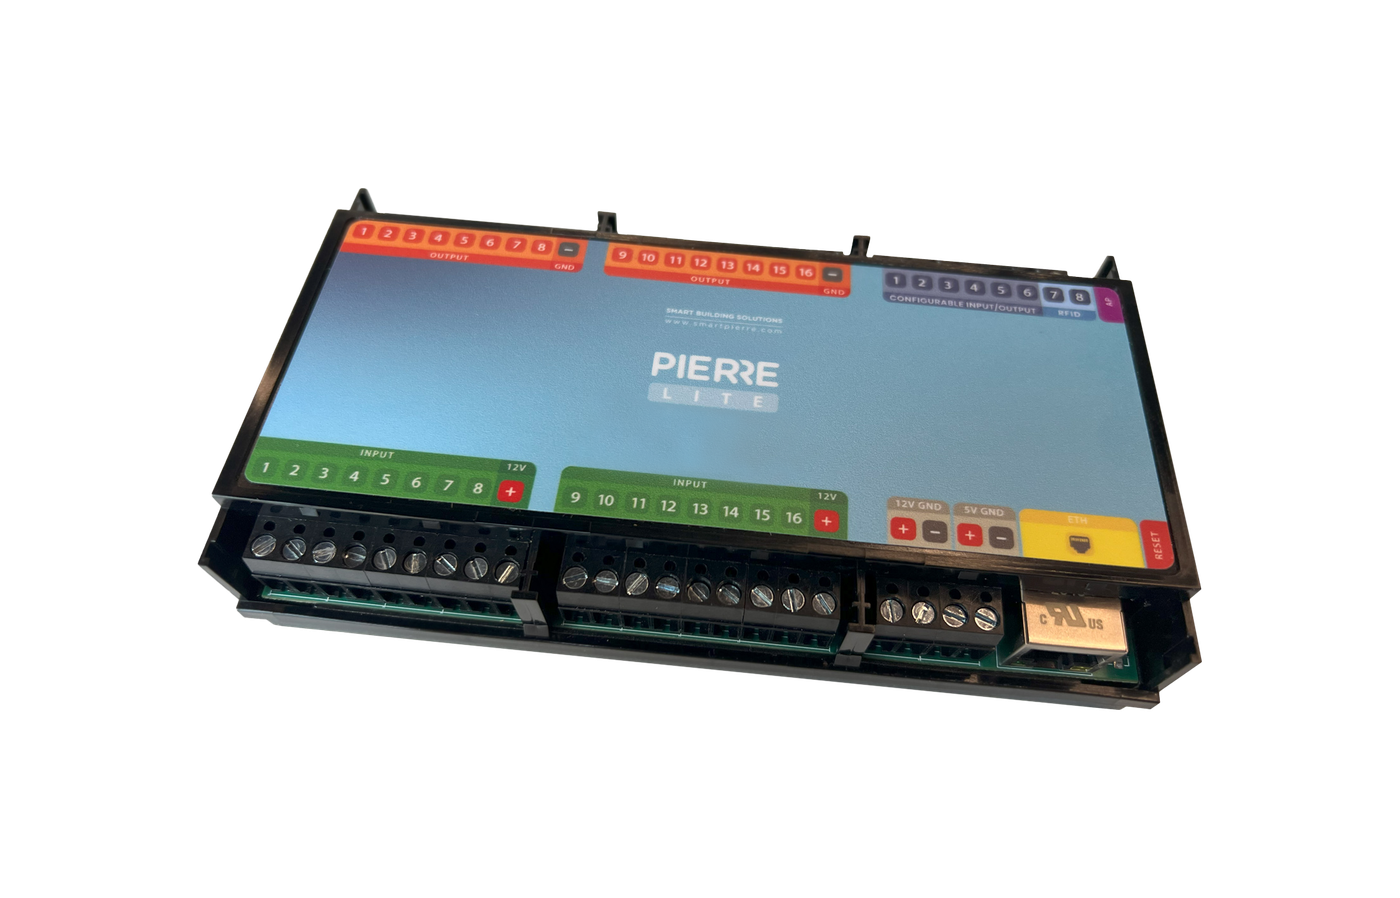
Tap the Controller to which you would like to add a new I/O.
To edit the I/O, click on the Controller to which the I/O is added.
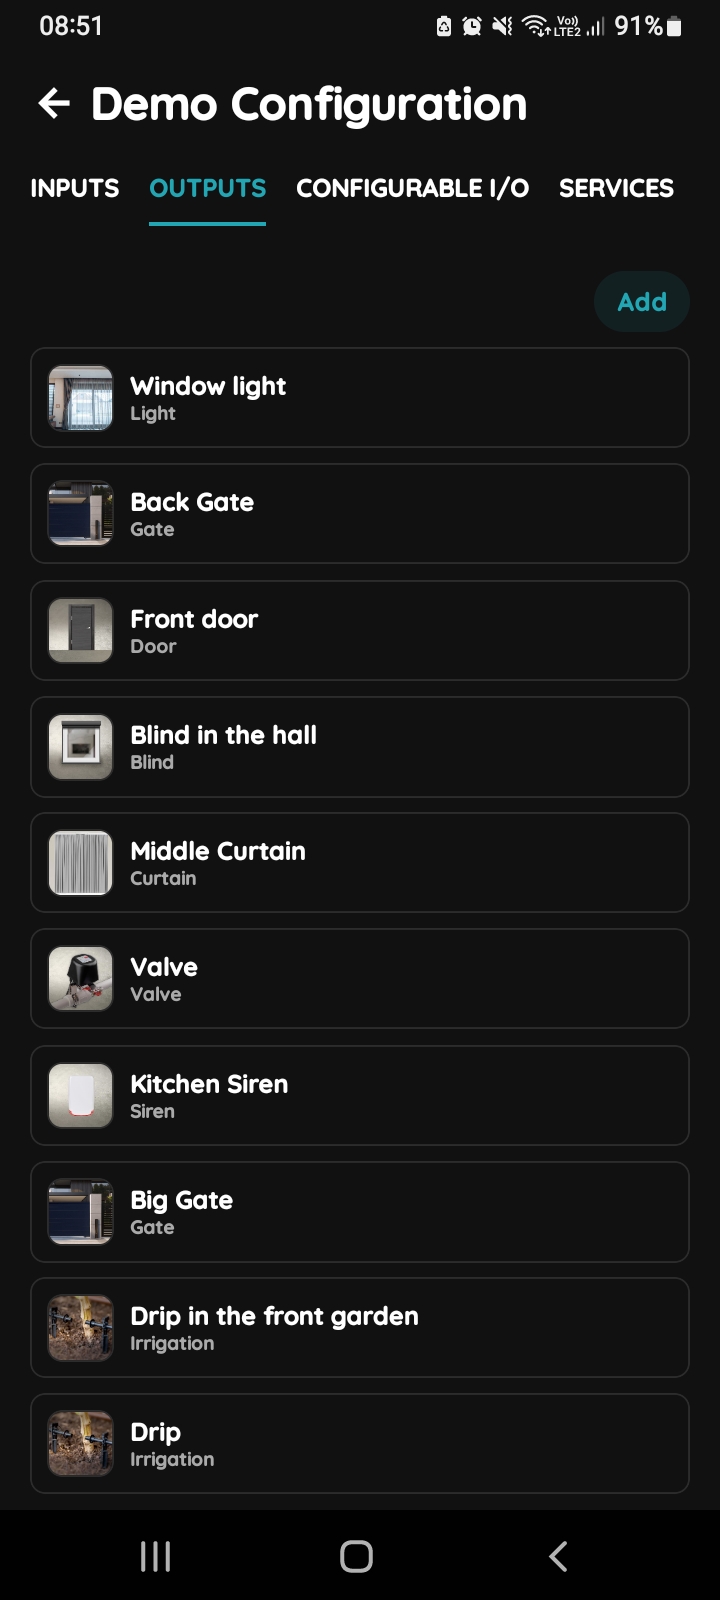
Outputs - Add button
Tap the Outputs at the top and tap on the button Add.
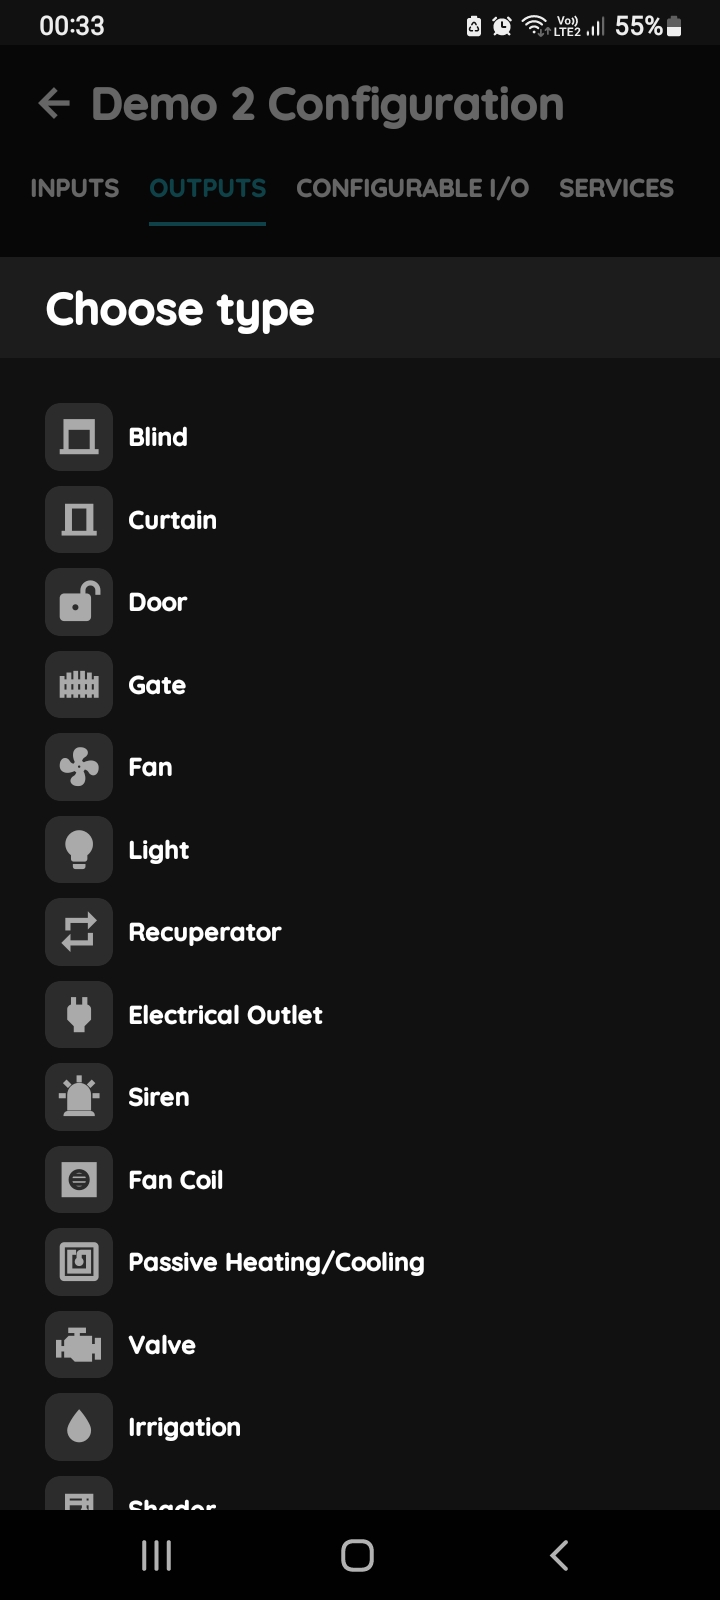
Choose type - Outputs
Tap on the type of the desired I/O that you would like to add.
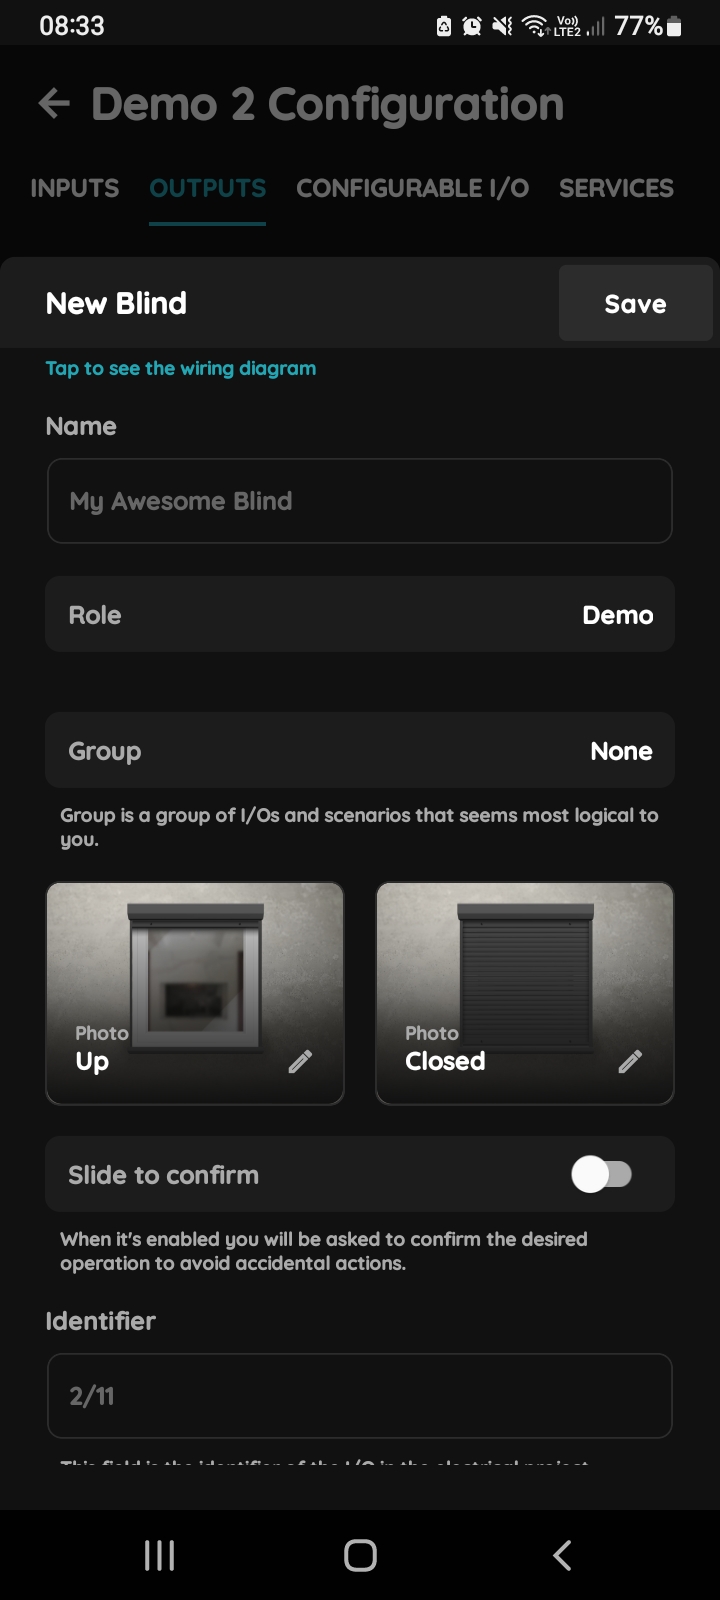
New Blind
In this step fill following form in order to add New Blind.
- Name - Write the name of the Blind.
- Role - Choose role from the list.
- Dashboard - Choose dashboard from the list.
- Photo - Choose photo for the Blind (Up, Closed).
- Slide to confirm - When it is enabled you will be asked to confirm the desired operation to avoid accidental actions.
- Identifier - This field is the identifier of the I/O in the electrical project.
- Hide Activity - This field is used for hiding I/O activity from the Activity tab.
- Level control - This field indicates whether the Blind has control over intensity.
- Up Direction
Output - Choose Pin.
To confirm choice click on button Done/Save.
Timeout - Choose timeout.
(Time in seconds which is needed for the Blind to go up completely.)
When you are satisfied with your choice tap on the button Save. - Down Direction
Output - Choose Pin.
To confirm choice click on button Done/Save.
Timeout - Choose timeout.
(Time in seconds which is needed for the blind to go down completely.)
When you are satisfied with your choice tap on the button Save. - Collapse Time - Time in seconds which is needed for the Blind to collapse or open every lamella.
- Button up
Add a new Button - Choose Button.
Tap on the desired button.
When you are satisfied with your choice tap on the button Done. - Button down
Add a new Button - Choose Button.
Tap on the desired button.
When you are satisfied with your choice tap on the button Done. - When you want to confirm your choice tap on button Save and Submit.
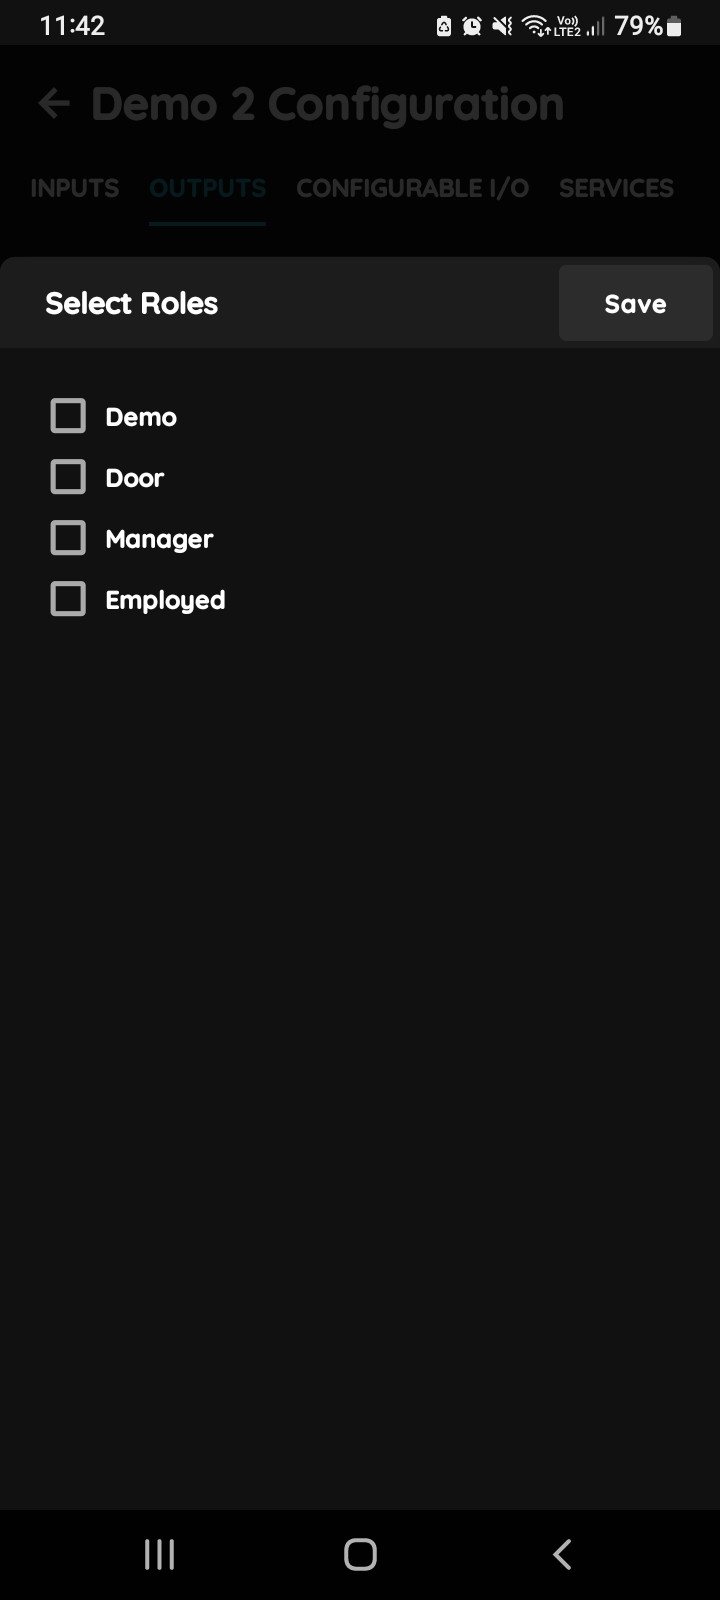
Select Roles
You can select desired Role or Roles - multiple choice if you tap on the checkboxes next to them.
Tap on Save/Done.
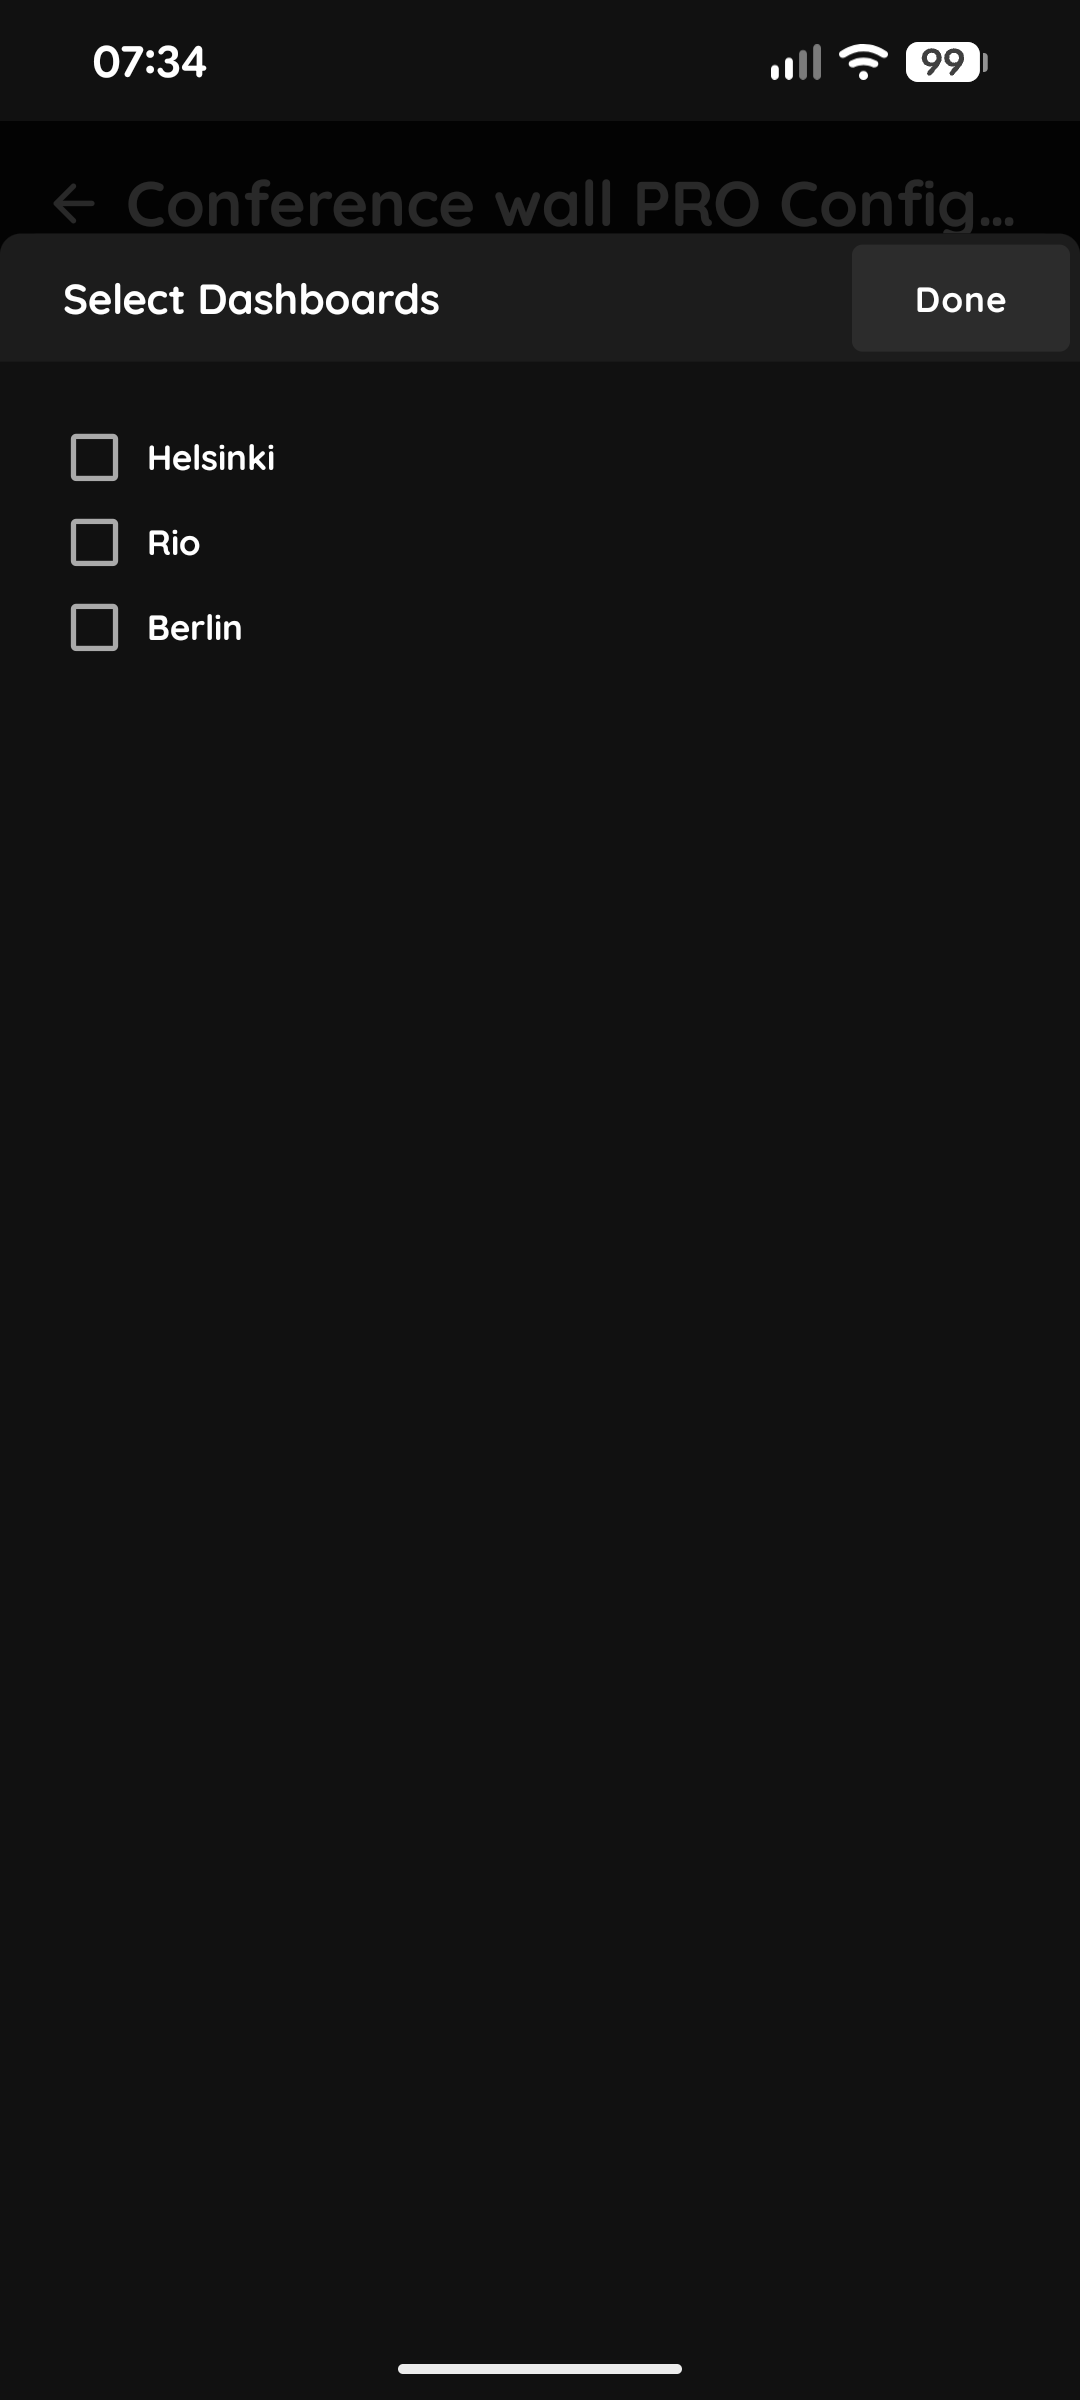
Select Dashboards
In this step you select the Dashboard: the PIERRE display or displays on which the I/O will be shown. Select the check box next to the desired Dashboard or Dashboards from the list.
When you want to confirm your choice tap Done.
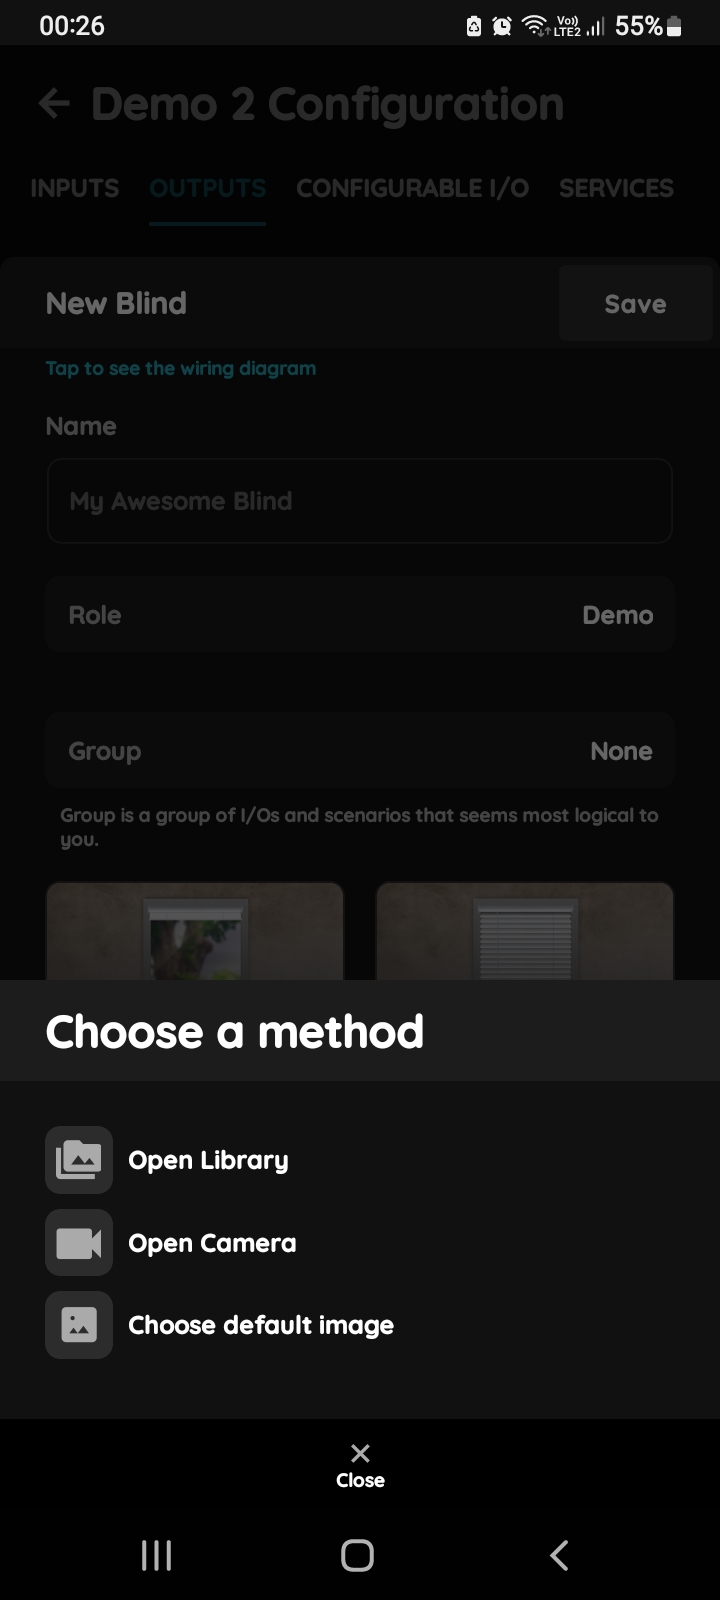
Change photo - Blind in PIERRE Partner app
Tap photo of the Blind.
You have three options:
- Open Library - The phone’s Library will open. It is recommended to take pictures from the same angle for both Blind statuses to achieve a complete and consistent view.
- Open Camera - You can take a picture using your smartphone. For a complete and consistent view, it’s recommended to capture both Blind statuses from the same angle.
- Choose default image - These images are prepared in advance to provide a complete and seamless experience.
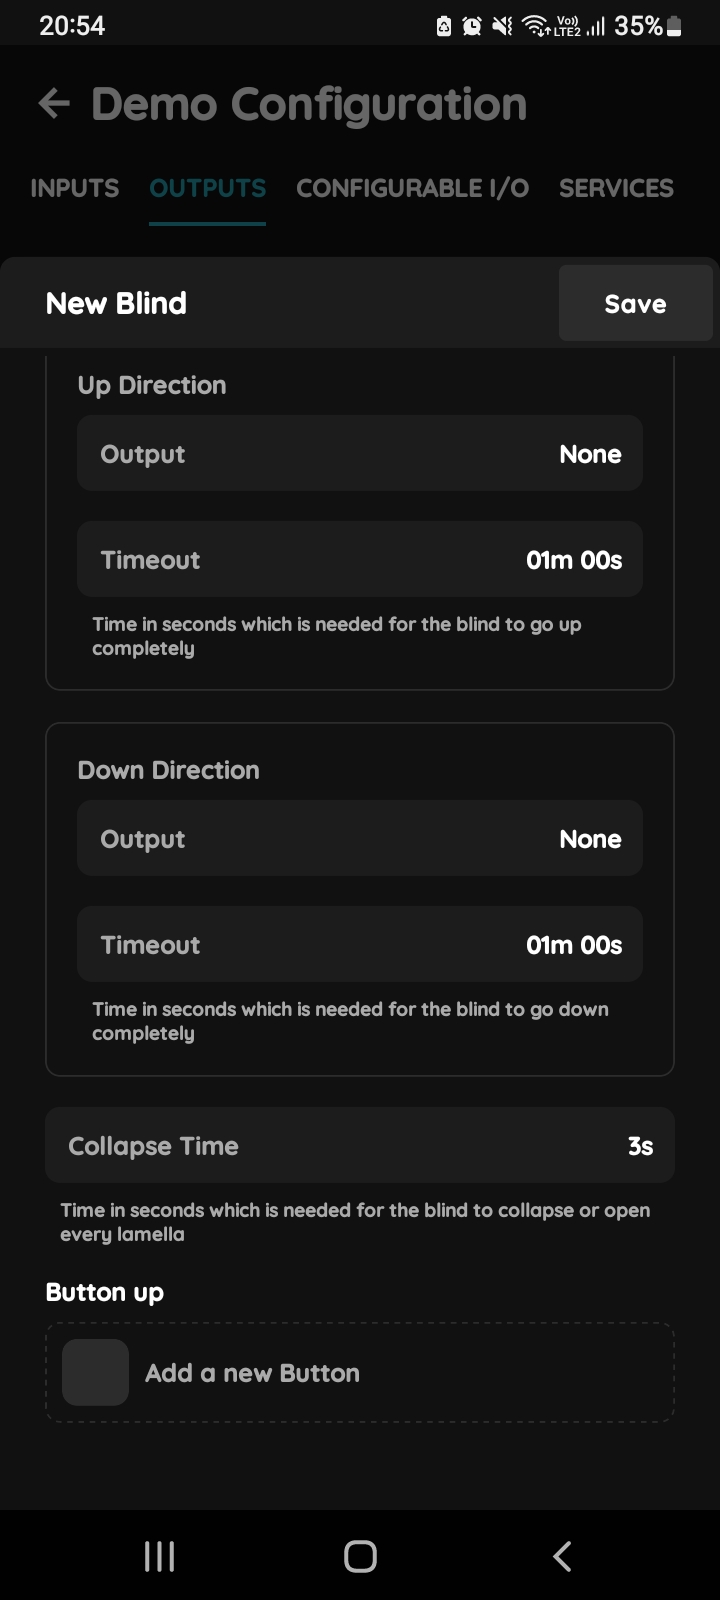
Up Direction/Down Direction
Tap in the fields:
- Output - Choose Pin and confirm by tapping button Done/Save.
- Timeout - Choose timeout and tap button Save.
(Time in seconds which is needed for the Blind to go up/down completely.)
For more details follow next steps.
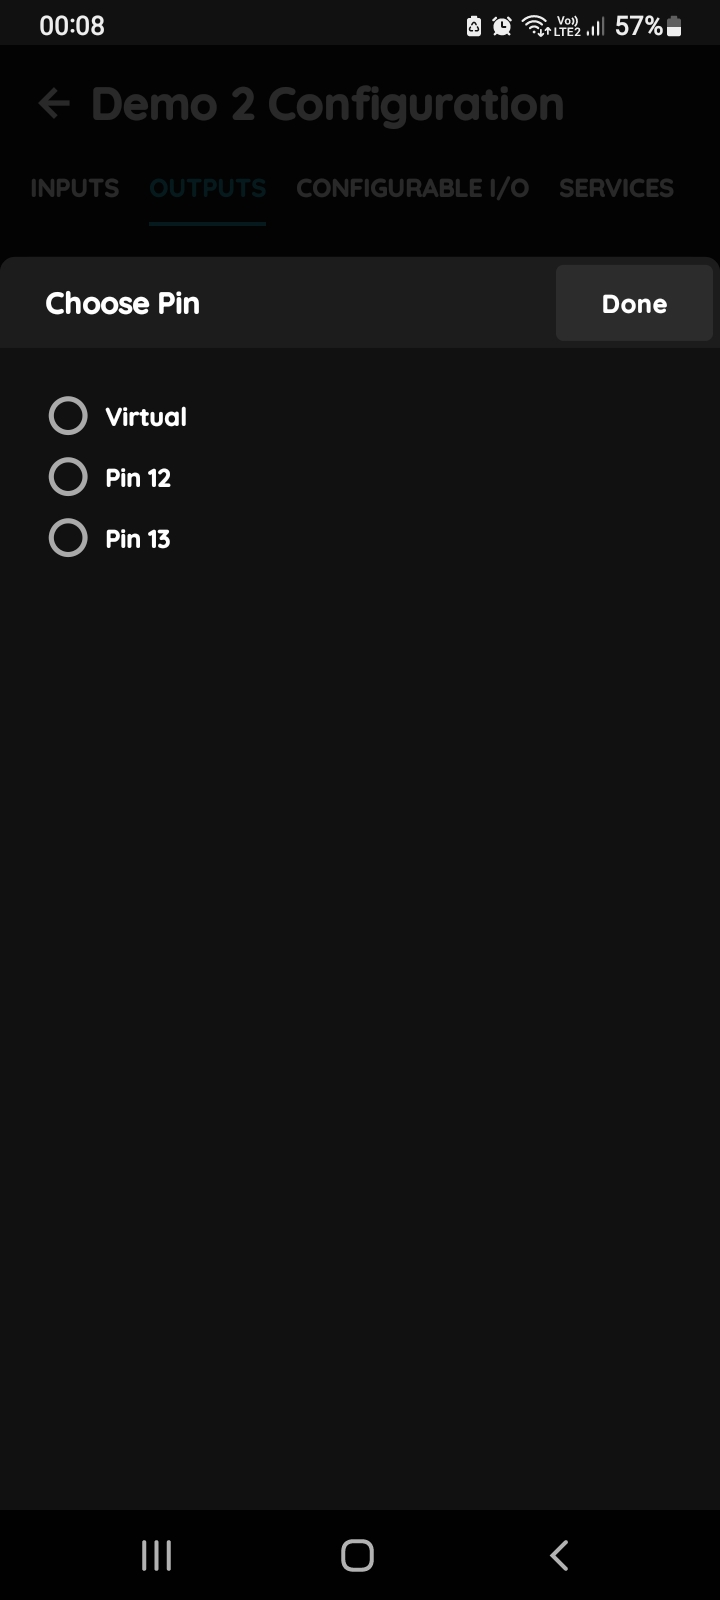
Output - Choose Pin
Tap in the Output field and tap on the radio button next to the Pin you would like to choose.
Tap Done/Save.
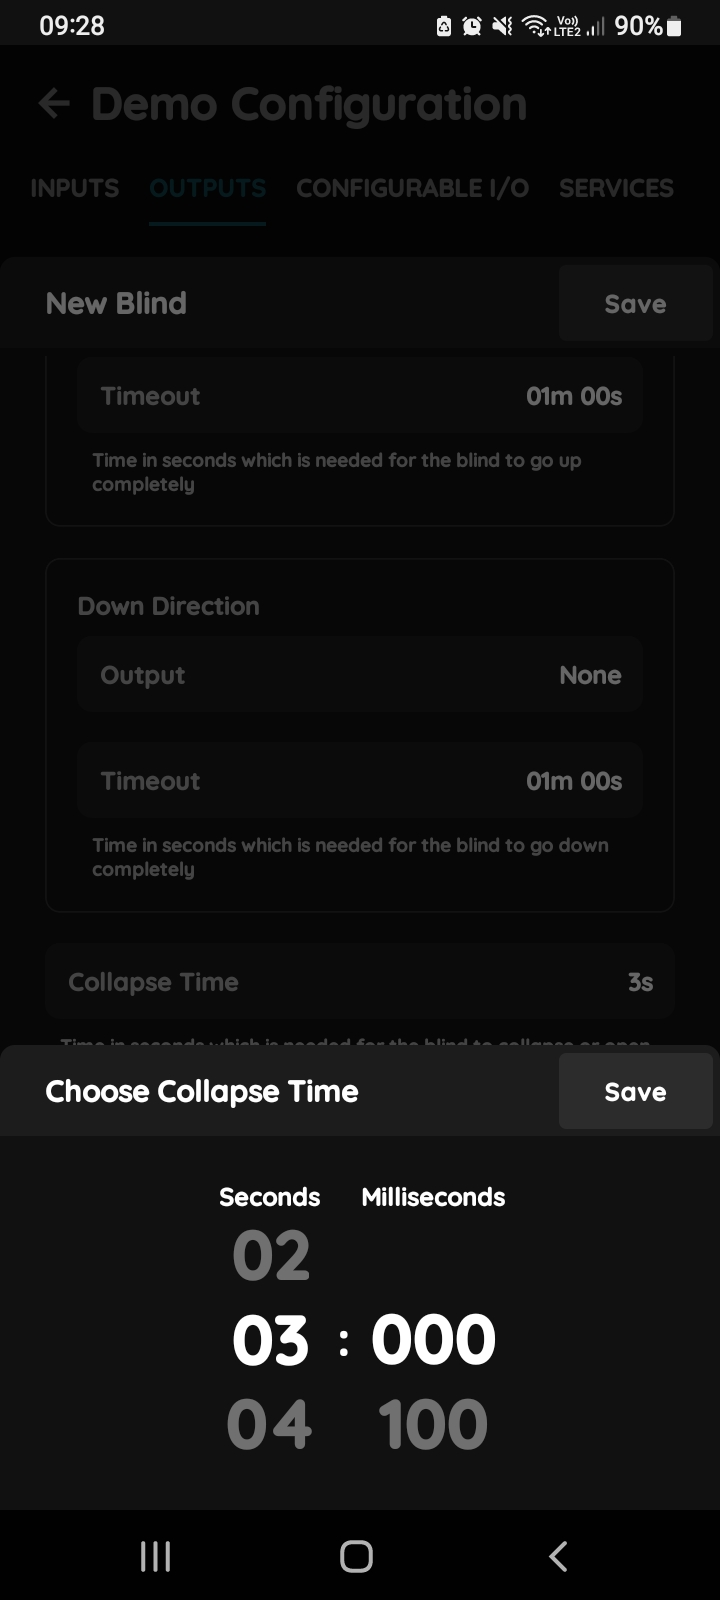
Choose Collapse Time
Collapse time - Measure the time for the Blinds to collapse or for each lamela to open, and enter the time.
In this step you should choose Collapse Time by tapping in the Collapse Time field.
You have two columns for seconds and miliseconds.
Scroll through each column, set collapse time and tap the button Save.
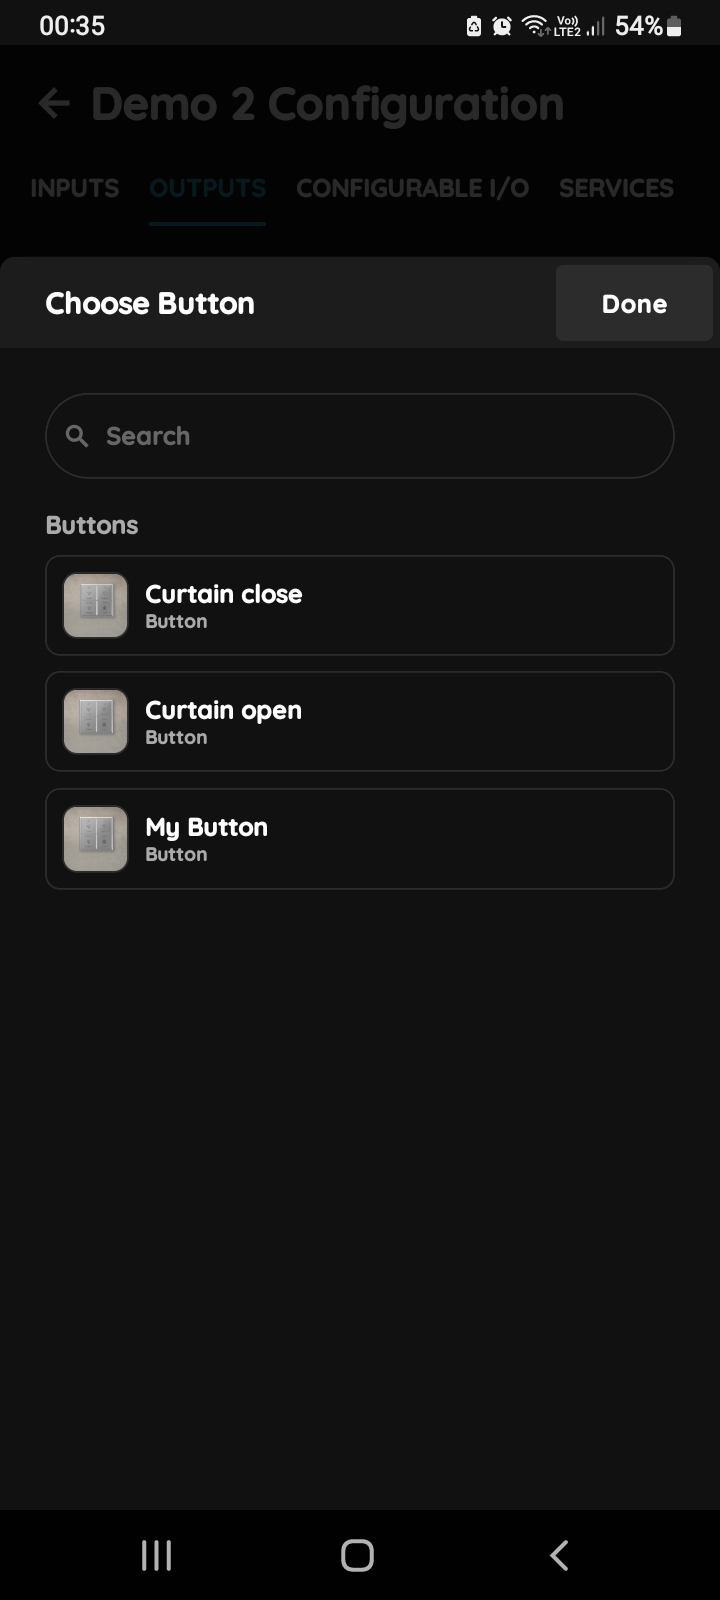
Choose Button
In this step you should choose add button for the Button up/Button down.
Tap on the Add new Button and Choose Button.
Tap on the desired button from the list.
To confirm tap button Done.
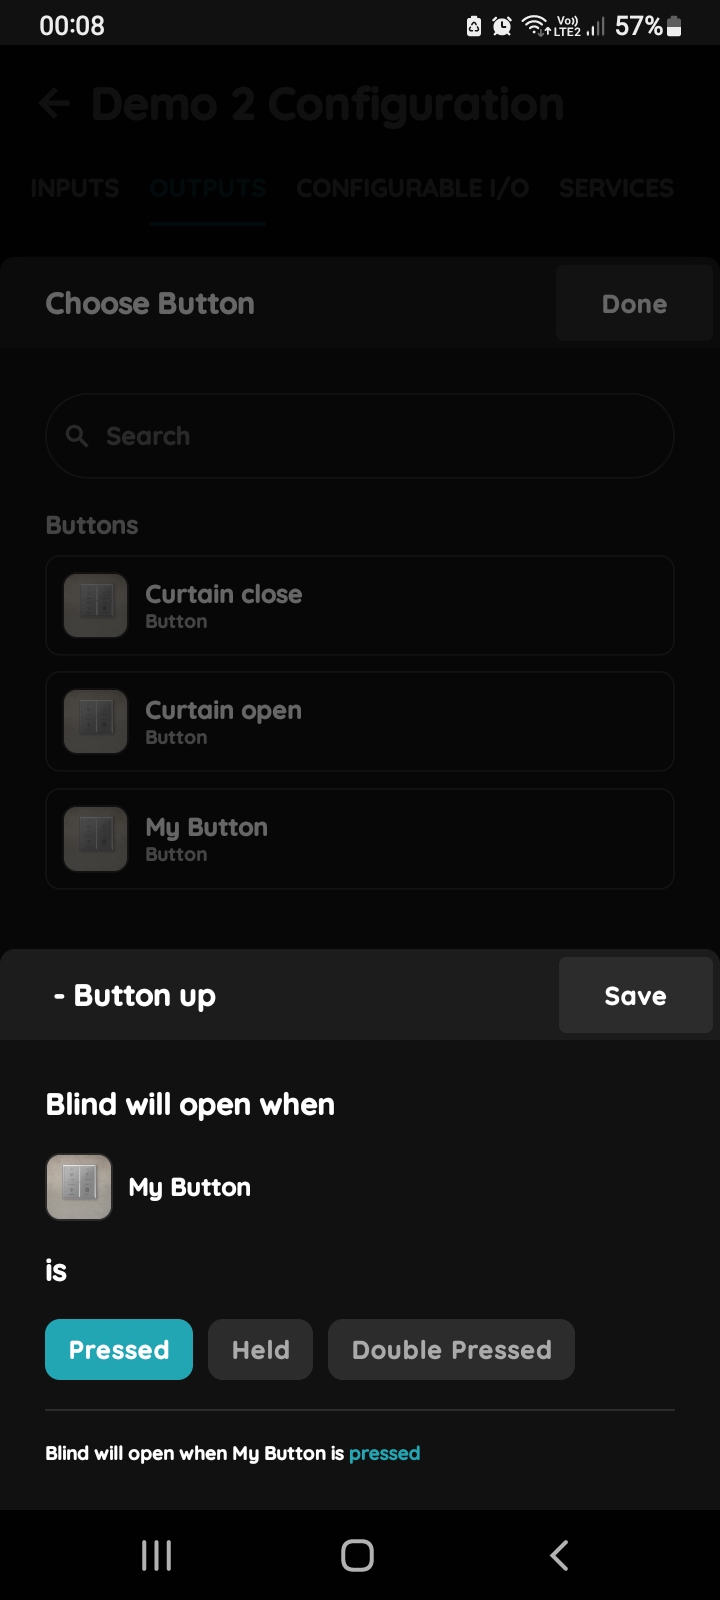
Button Up
Blind will go up when button is Pressed.
Tap button Save.
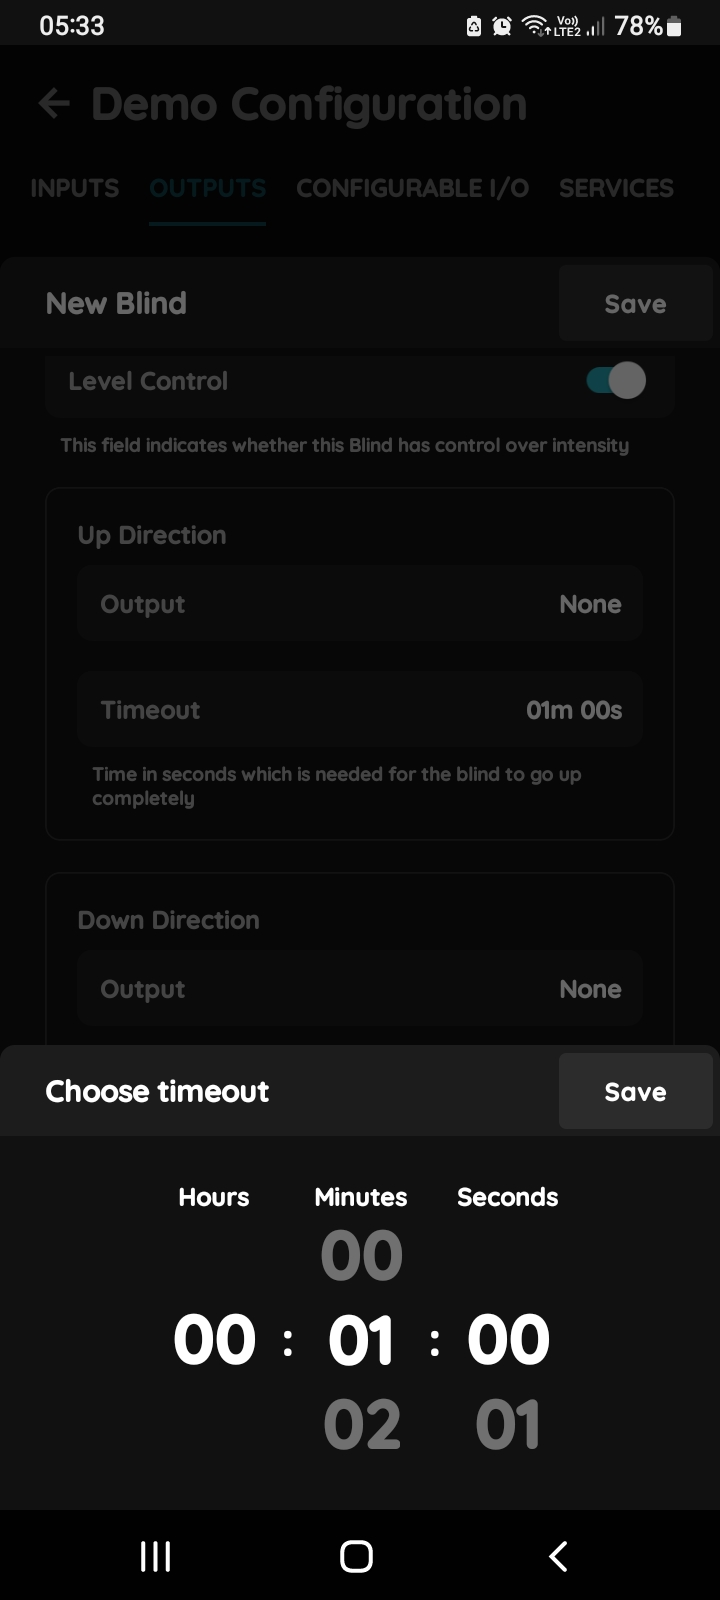
Chose timeout - Blind
In order to set hours, minutes and seconds - Timeout, you should scroll through each of these columns and when you are satisfied with your choice tap Save button.
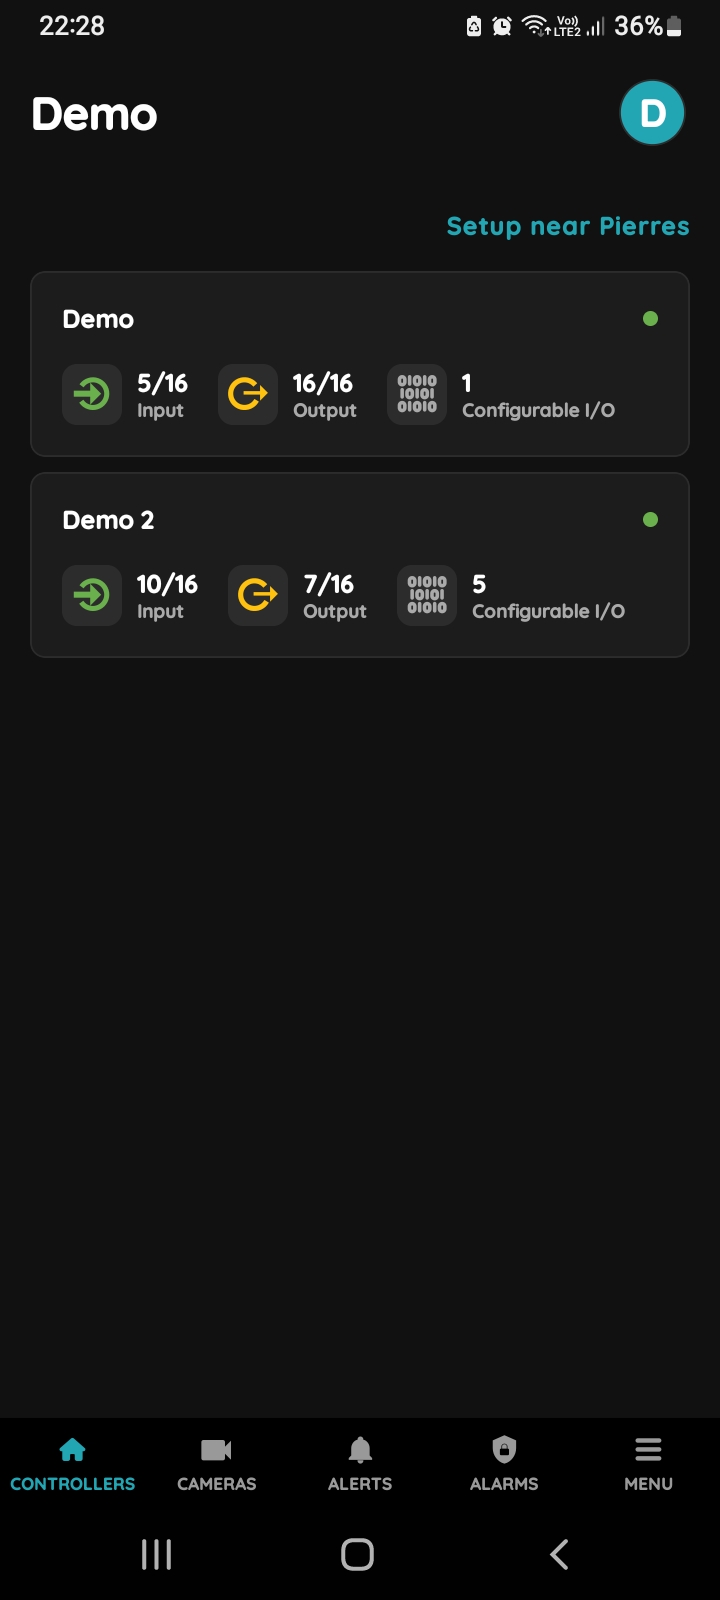
Choose Controller
Edit Blind in few steps.
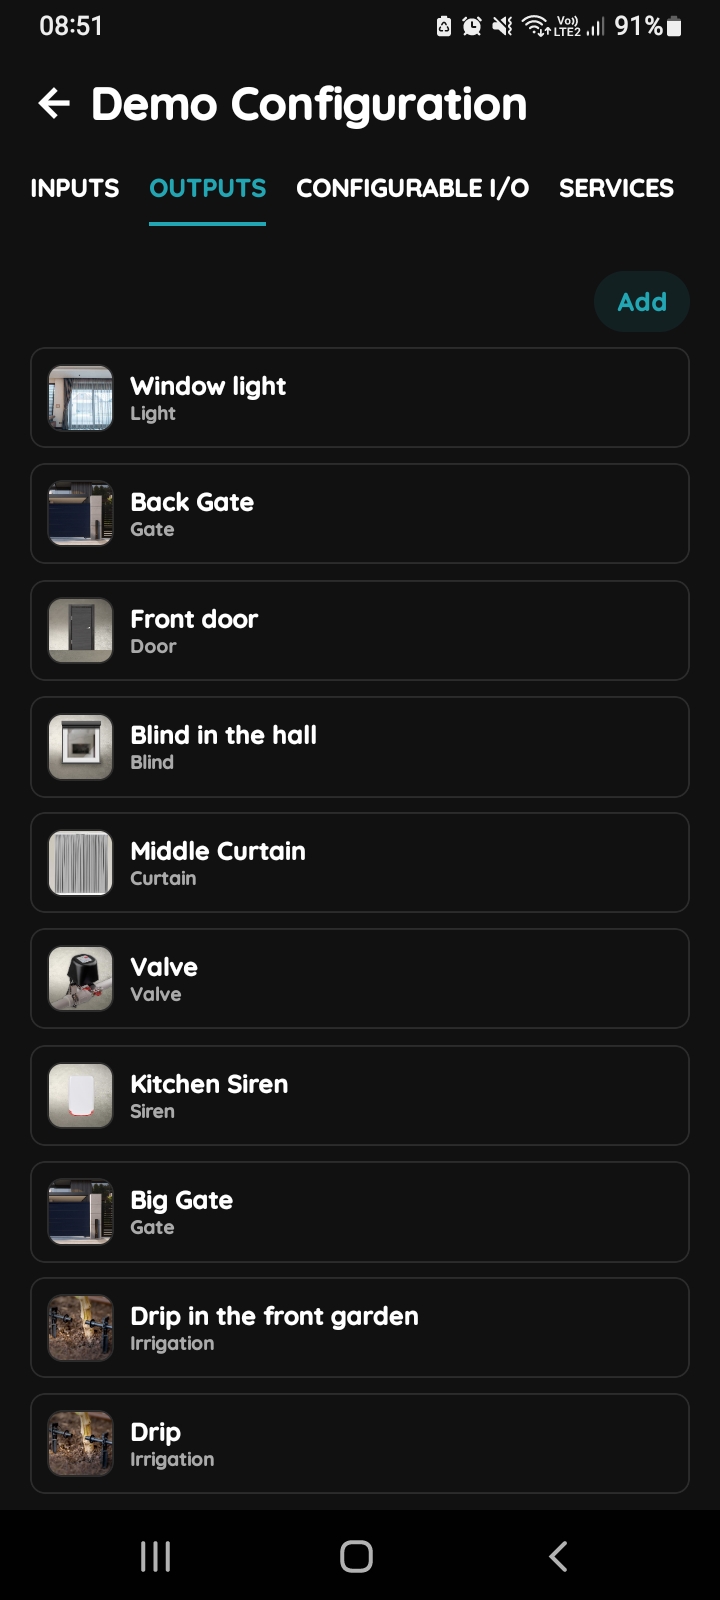
Outputs - Choose I/O
Tap on the Outputs tab, scroll to the desired I/O from the list and tap on it.
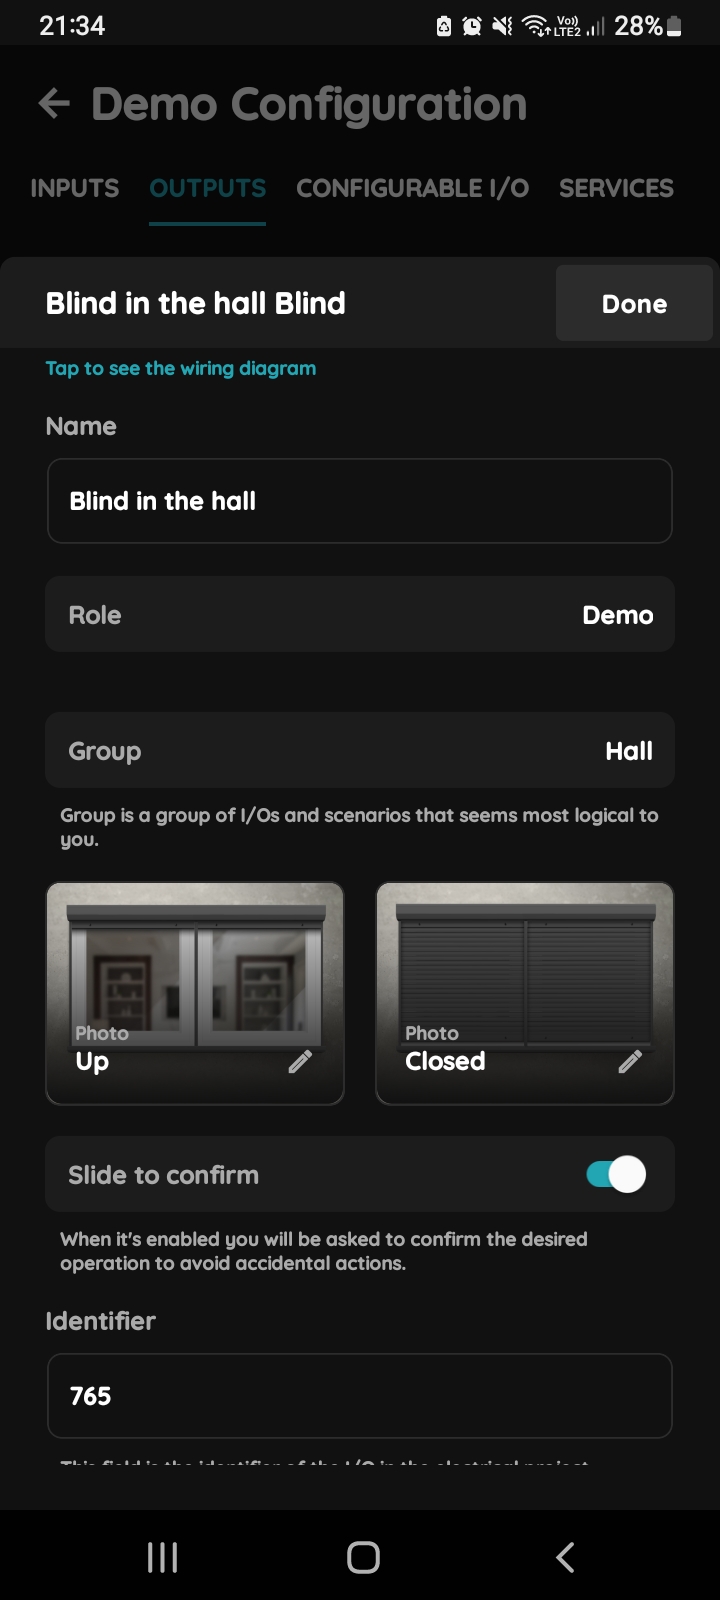
Edit Blind in the PIERRE Partner appliation
Edit the following form:
- Name - Write the name of the Blind.
- Role - Choose a role from the list.
- Group - Choose group from the list.
Group is a group of I/O and scenarios that seem most logical to you. - Photo - Choose photo for the Blind (Up, Closed).
- Slide to confirm - When it is enabled you will be asked to confirm the desired operation to avoid accidental actions.
- Identifier - This field is the identifier of the I/O in the electrical project.
- Hide Activity - This field is used for hiding I/O activity from the Activity tab.
- Level control - This field indicates whether the Blind has control over intensity.
- Up Direction
Output - Choose Pin.
To confirm choice click on the button Done/Save.
Timeout - Choose timeout.
(Time in seconds which is needed for the Blind to go up completely.)
When you are satisfied with your choice tap on the button Save. - Down Direction
Output - Choose Pin.
To confirm choice click on the button Done/Save.
Timeout - Choose timeout.
(Time in seconds which is needed for the blind to go down completely.)
When you are satisfied with your choice tap on the button Save. - Collapse Time - Time in seconds that is needed for the Blind to collapse or open every lamella.
- Button up
Add a new Button - Choose Button.
Tap on the desired button.
When you are satisfied with your choice tap on the button Done. - Button down
Add a new Button - Choose Button.
Tap on the desired button.
When you are satisfied with your choice, tap on the button Done.
For more details, follow next steps. - When you want to confirm your choice tap on the button Save and Submit or when you want to delete Blind tap button Delete.