Smart PIERRE - Blinds and Curtains automations and scenarios
Description
The Blinds and Curtains Automation feature allows blinds and curtains to be controlled automatically based on sensor inputs, schedules, and automation rules.
Automation Triggers
Blinds and curtains can be automated using one or more of the following conditions:
-
Brightness sensors
-
Presence sensors
-
Time-based schedules
-
Day period conditions
-
Custom automation logic
Brightness-Based Automation
Brightness sensors can be used to adjust blinds and curtains according to ambient light levels.
Typical applications include:
-
Lowering blinds during periods of intense sunlight.
-
Opening blinds when daylight levels decrease.
-
Reducing glare in occupied rooms.
-
Improving energy efficiency by reducing cooling requirements.
Presence-Based Automation
Presence sensors can be used to adjust blinds and curtains based on room occupancy.
Typical applications include:
-
Opening blinds when a room becomes occupied.
-
Adjusting shading based on user presence.
-
Supporting comfort and energy-saving strategies.
Time-Based Automation
Blinds and curtains can be controlled according to predefined schedules.
Examples include:
-
Opening in the morning.
-
Closing in the evening.
-
Day and night operation modes.
-
Weekday and weekend schedules.
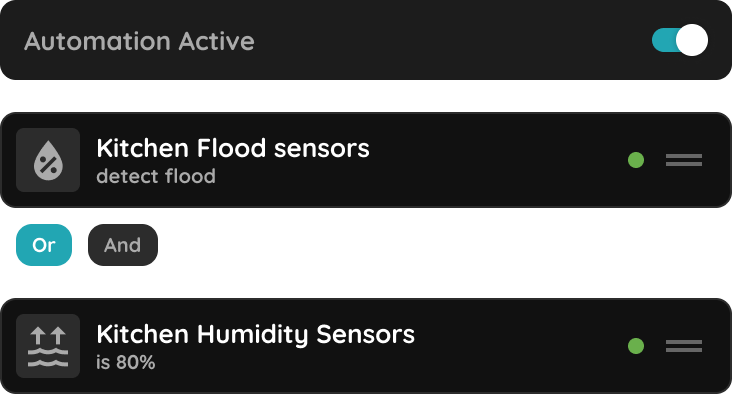
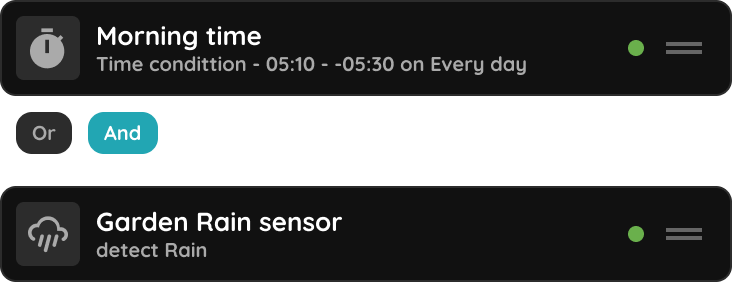
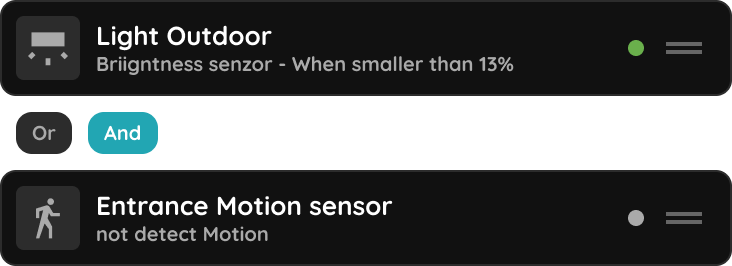
Multiple conditions can be combined to create advanced automation scenarios tailored to the requirements of the installation.
Benefits
-
Automatic daylight management.
-
Improved occupant comfort.
-
Enhanced privacy.
-
Increased energy efficiency.
-
Reduced manual operation.
-
Seamless integration with the PIERRE automation system.
Automated Scenario - Blinds/Curtains
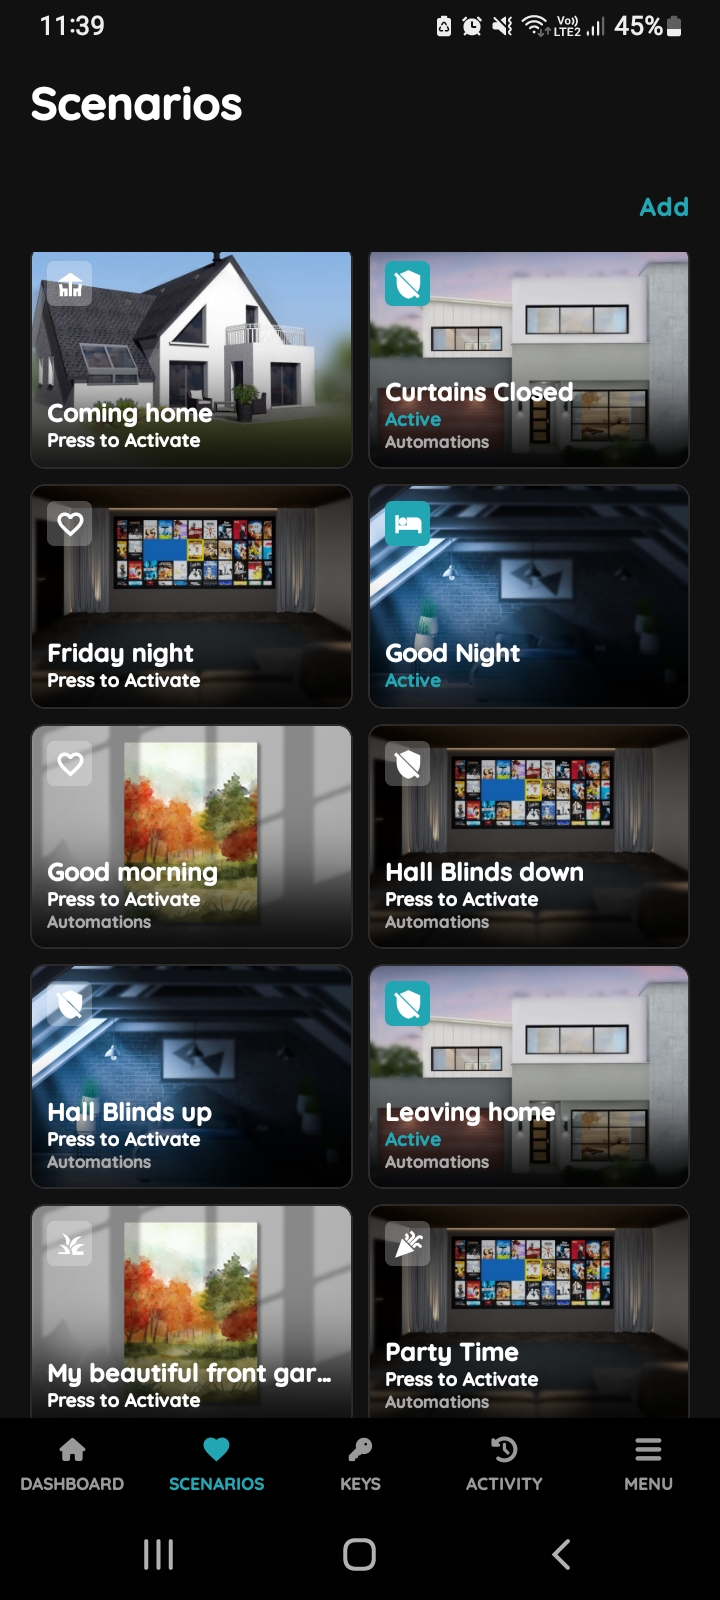
You can create scenario for the Blinds/Curtains from Taskbar or from the Menu.
Creating a scenario for the Blinds/Curtains is important because it allows seamless automation, improving convenience, energy efficiency, and security. Scenarios can adjust multiple Blinds/Curtains simultaneously based on time, weather, or light levels, helping to personalize your smart home experience and reduce the need for manual control. In this case automation is created based on the Brightness sensor in case when it detects level of light intensity lower than 75 %.
Scenarios from the Taskbar
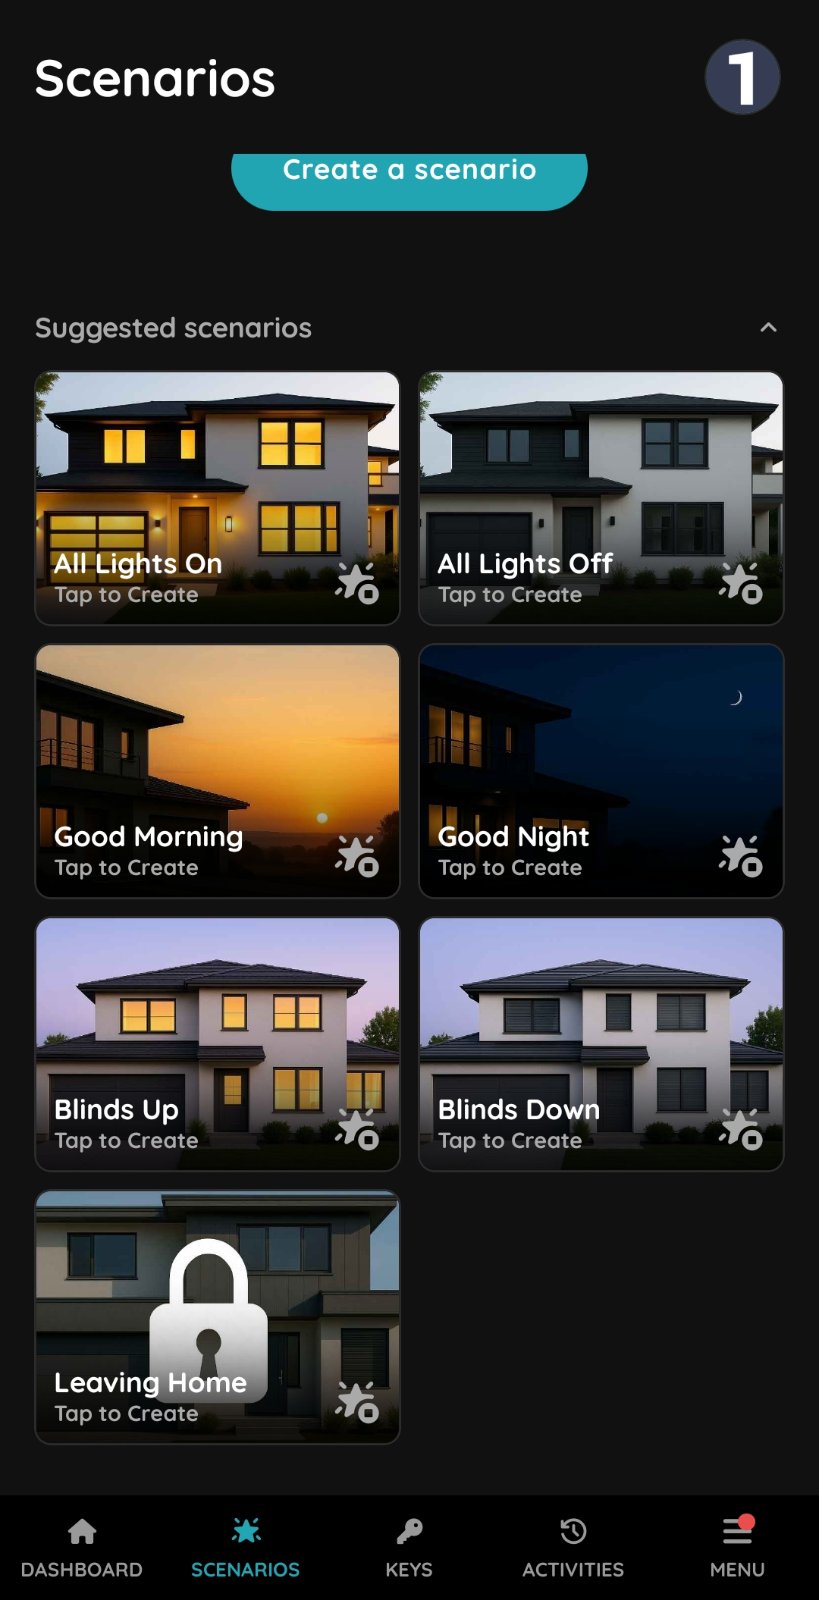
Tap on the Scenarios on the Taskbar.
Scenarios page will be open.
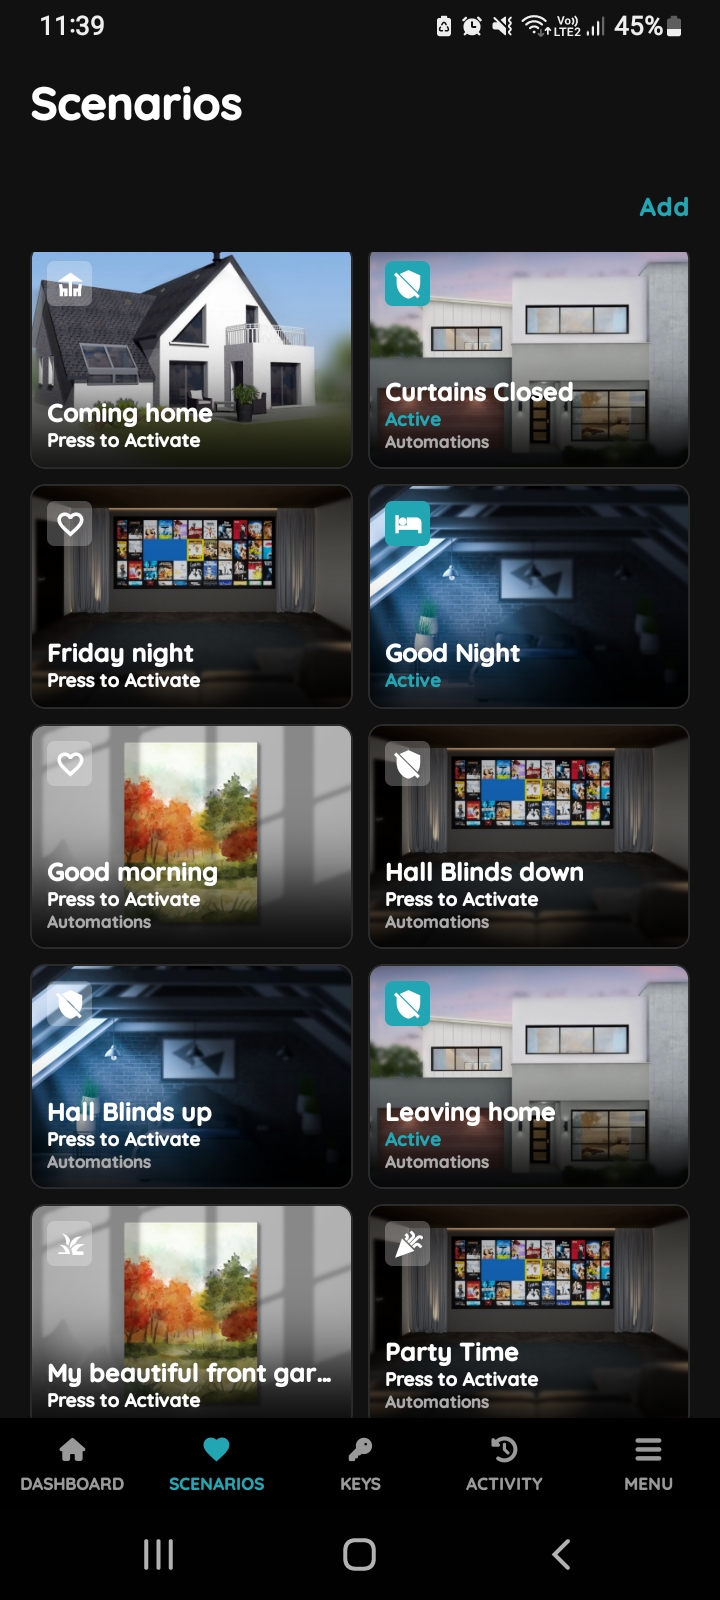
Scenarios - Add button
Tap on the button Add in order to create Scenario.
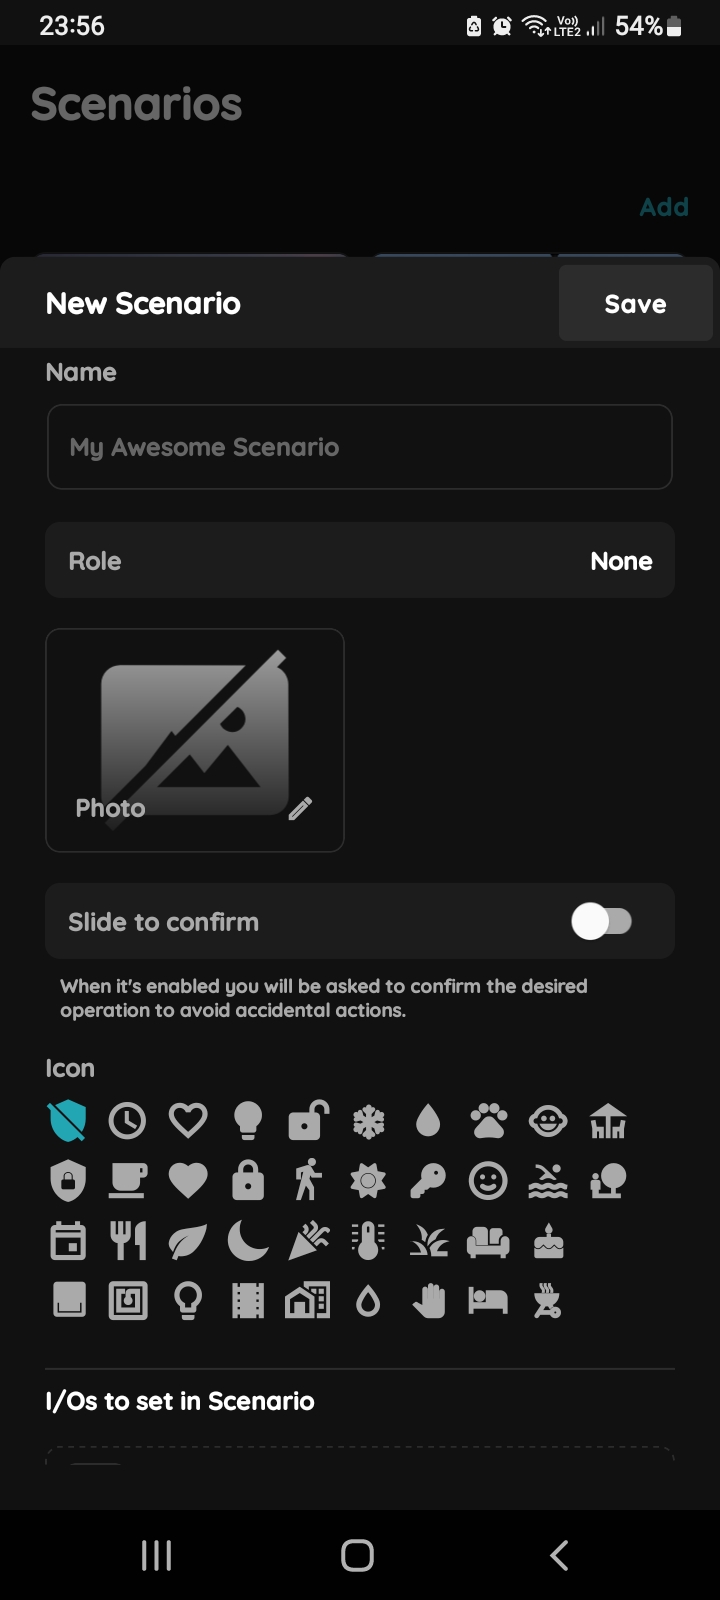
New Scenario
Fill following form:
- Name – Enter the name of the Scenario.
- Role – Select the appropriate role for the Scenario.
- Photo – Choose a photo to represent the Scenario.
- Slide to confirm – When enabled, you will be asked to confirm the operation to avoid accidental actions.
- Icon – Select an icon for the Scenario.
- Add a new I/O – Tap this field to add new I/Os to the Scenario.
Tap Submit/Save to finalize your changes.
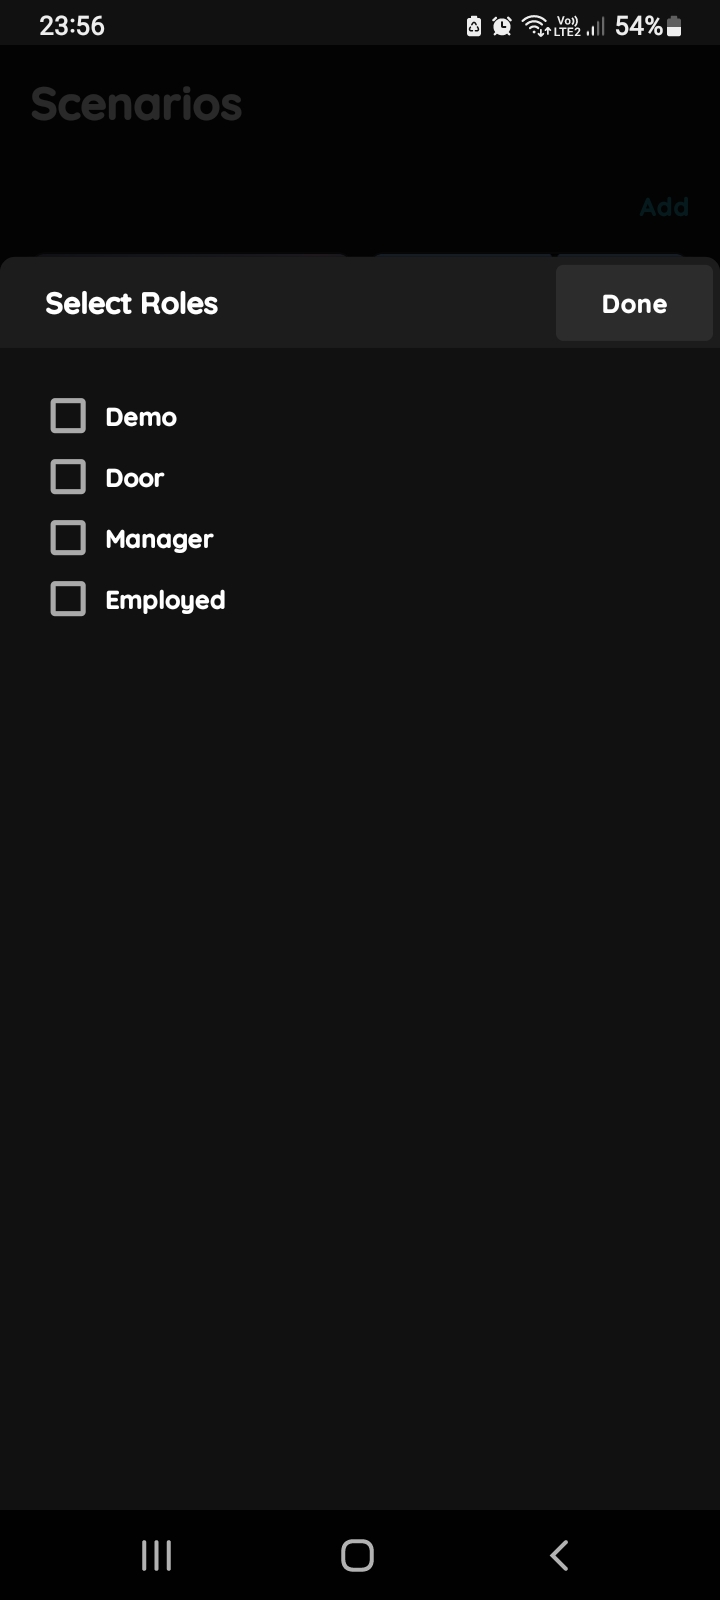
Select Roles
Select checkbox/checkboxes next to the desired Role/Roles (multiple choice).
Tap Save/Done.
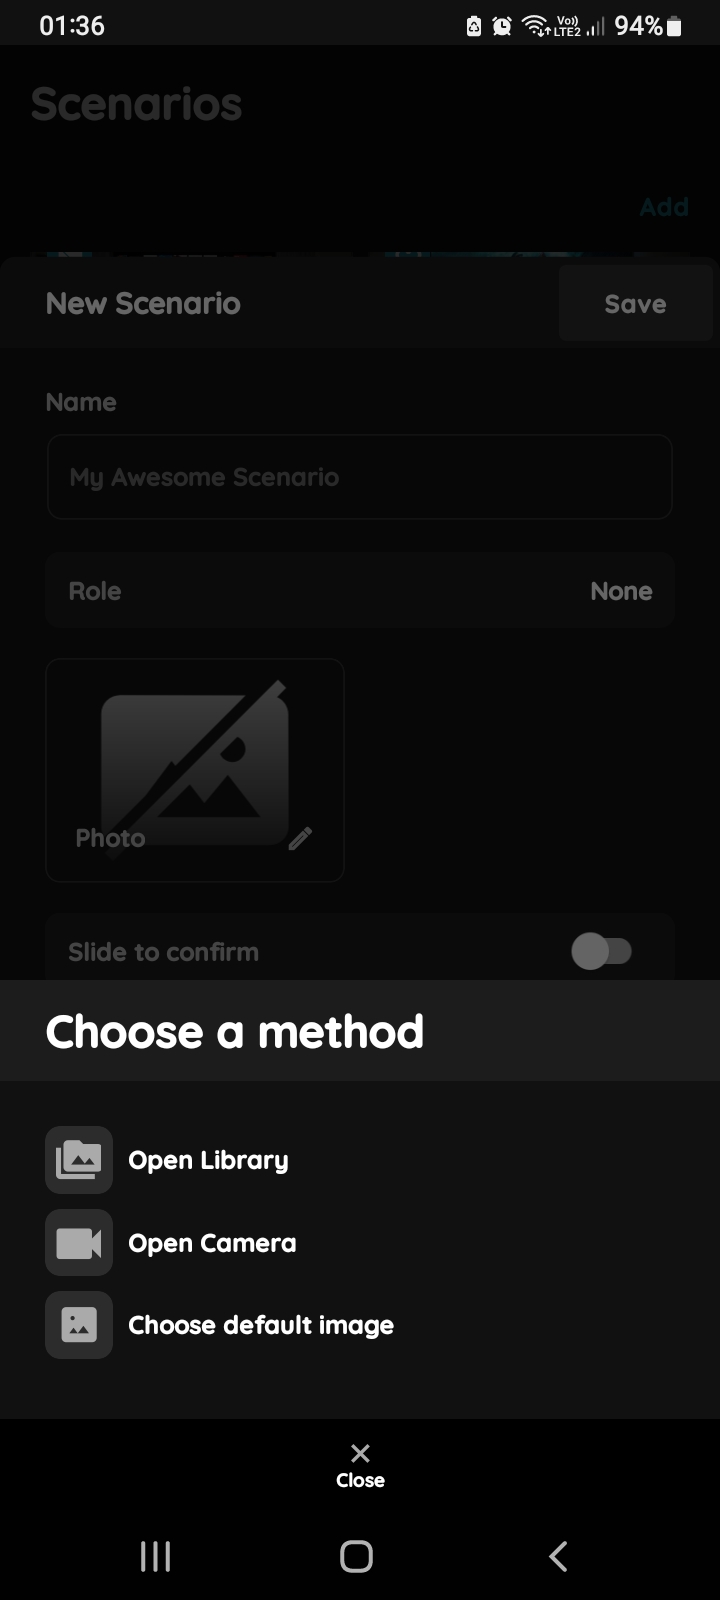
Change photo - Scenario
Tap the photo of the Scenario. You have three options:
Open Library - The phone’s Library will open.
Open Camera - You can take a picture using your smartphone.
Choose default image - These images are prepared in advance in order to provide a complete and seamless experience.
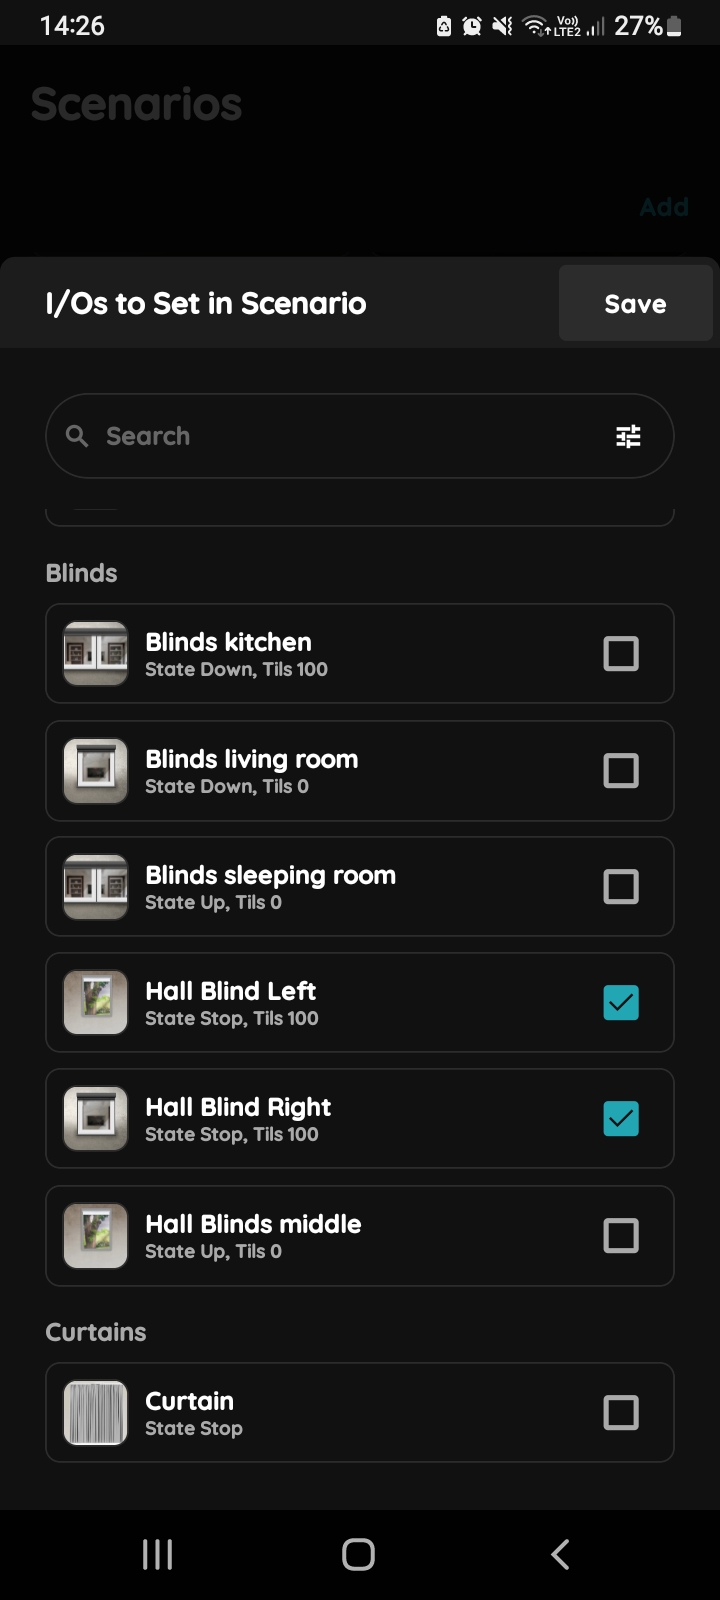
Add a new I/O - Scenario
You can search I/Os if you tap in the field Search and write the name of the I/O that you want to find, or to tap on the filter icon in the up right corner of the Search bar.
Tap on the checkbox/checkboxes next to the desired I/Os that you would like to add to the Scenario from the I/Os to Set in Scenario list.
Under each of the I/Os on this list is shown its current status.
The statuses are always those that have been set, and they can be changed later by tapping on the I/O.
Tap Save.
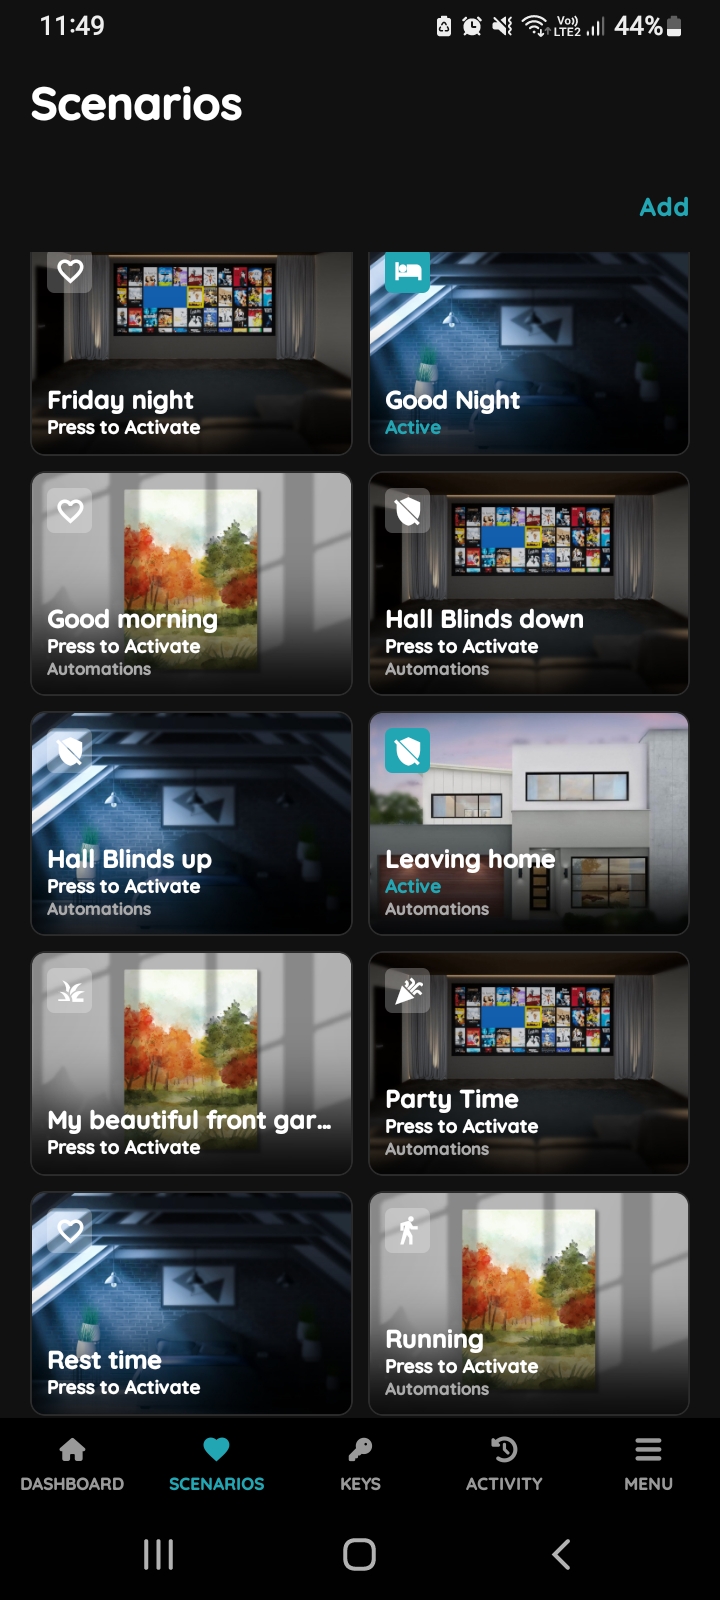
Find Scenario
Find Scenario Hall Blinds down and tap its card.
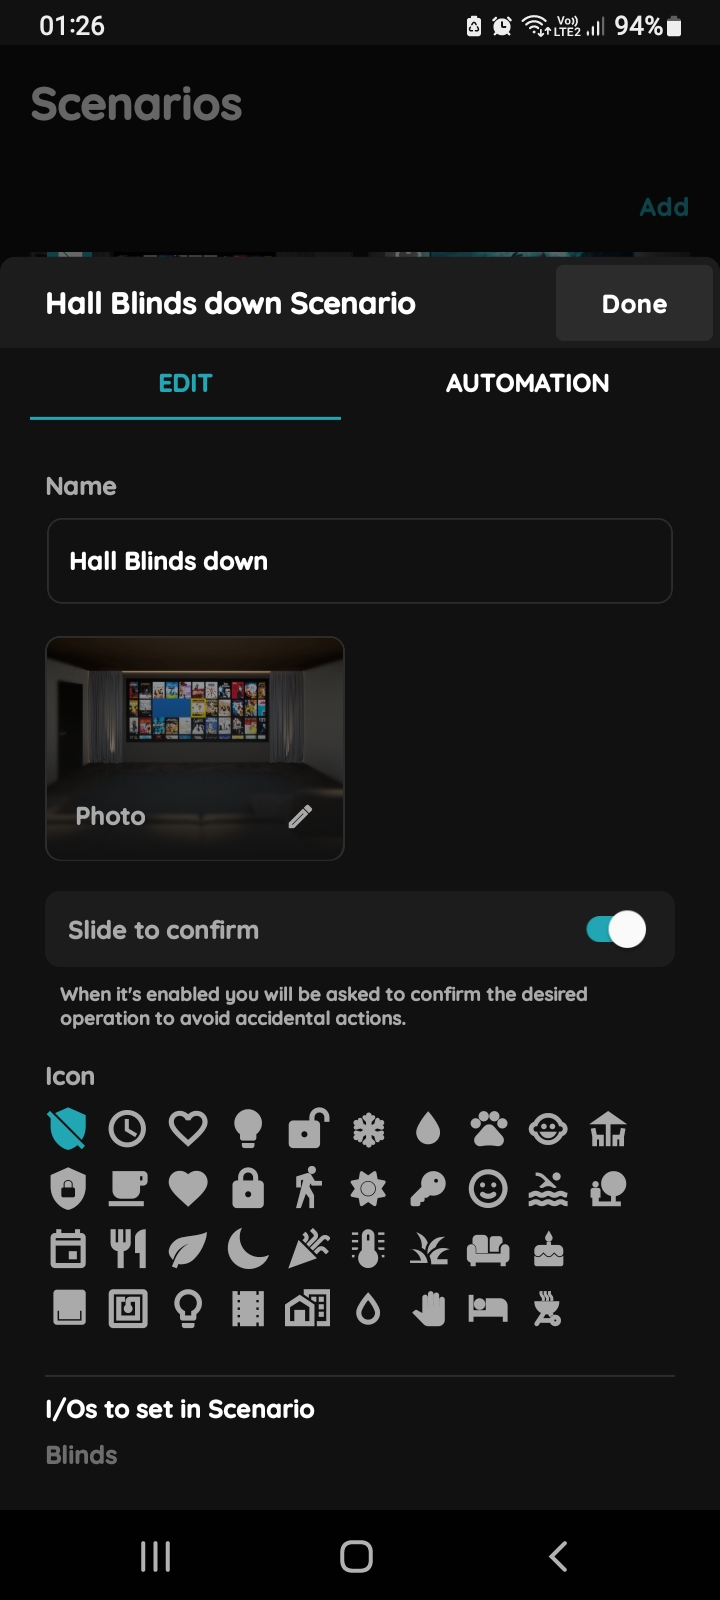
Edit, Automation - Automated Scenario Blinds and Brightness sensor
Tab Edit is selected.
Tap on the tab Automation.
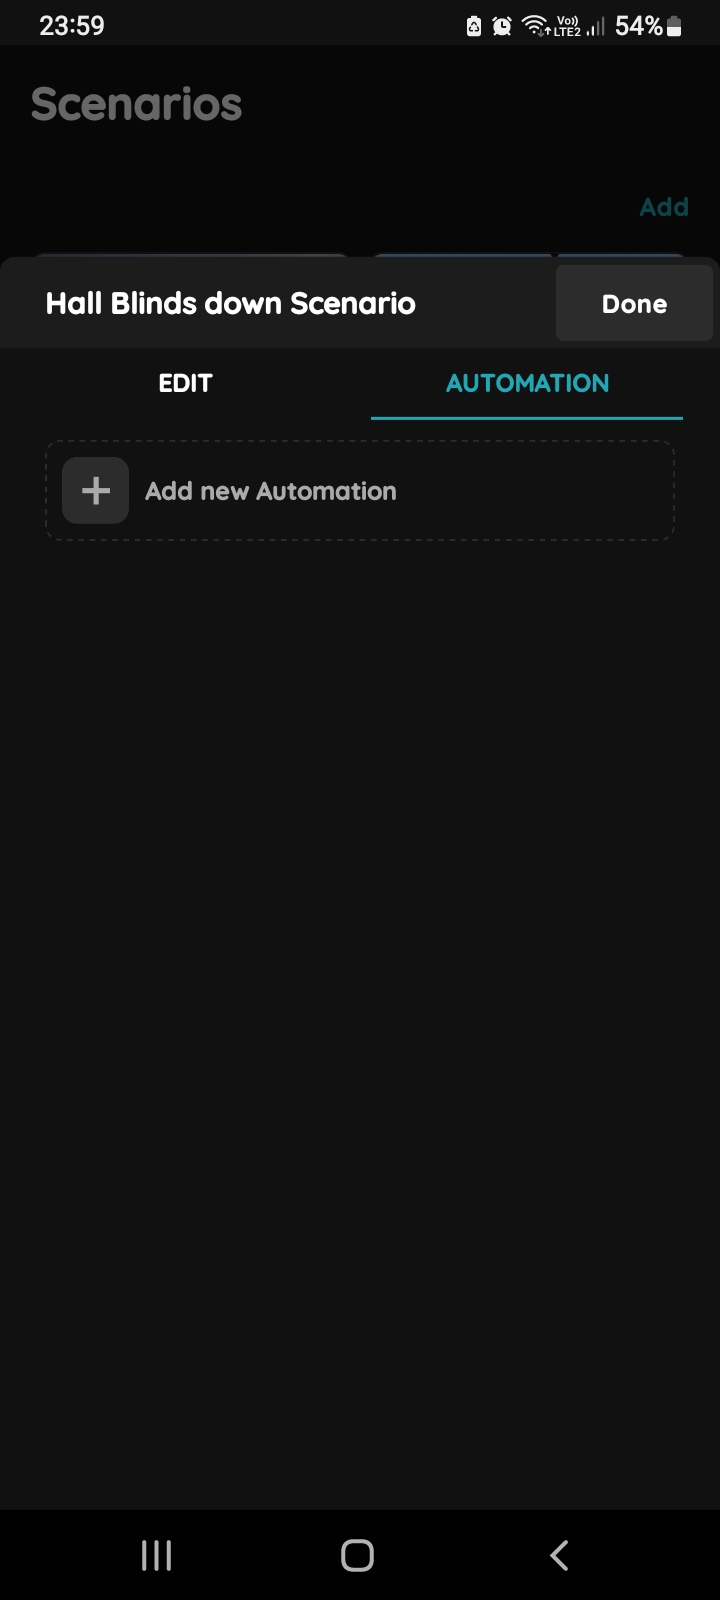
Add new Automation - Automated Scenario Blinds and Brightness sensor
Tap on +Add new Automation.
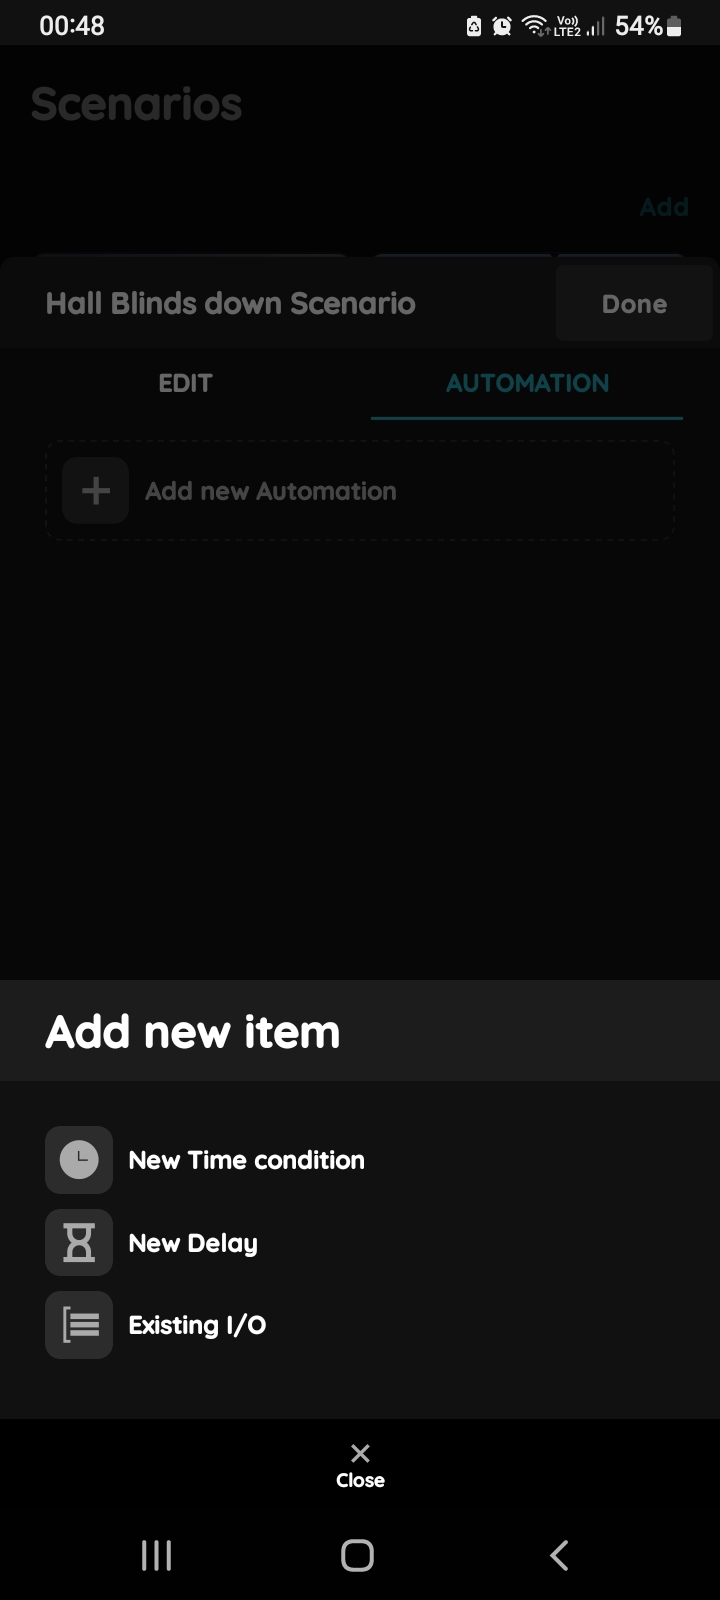
Add new item - Automated scenario Blinds and Brightness sensor
There is possibility to add:
- New Time condition,
- New Delay,
- Existing I/O.
Tap on the Existing I/O.
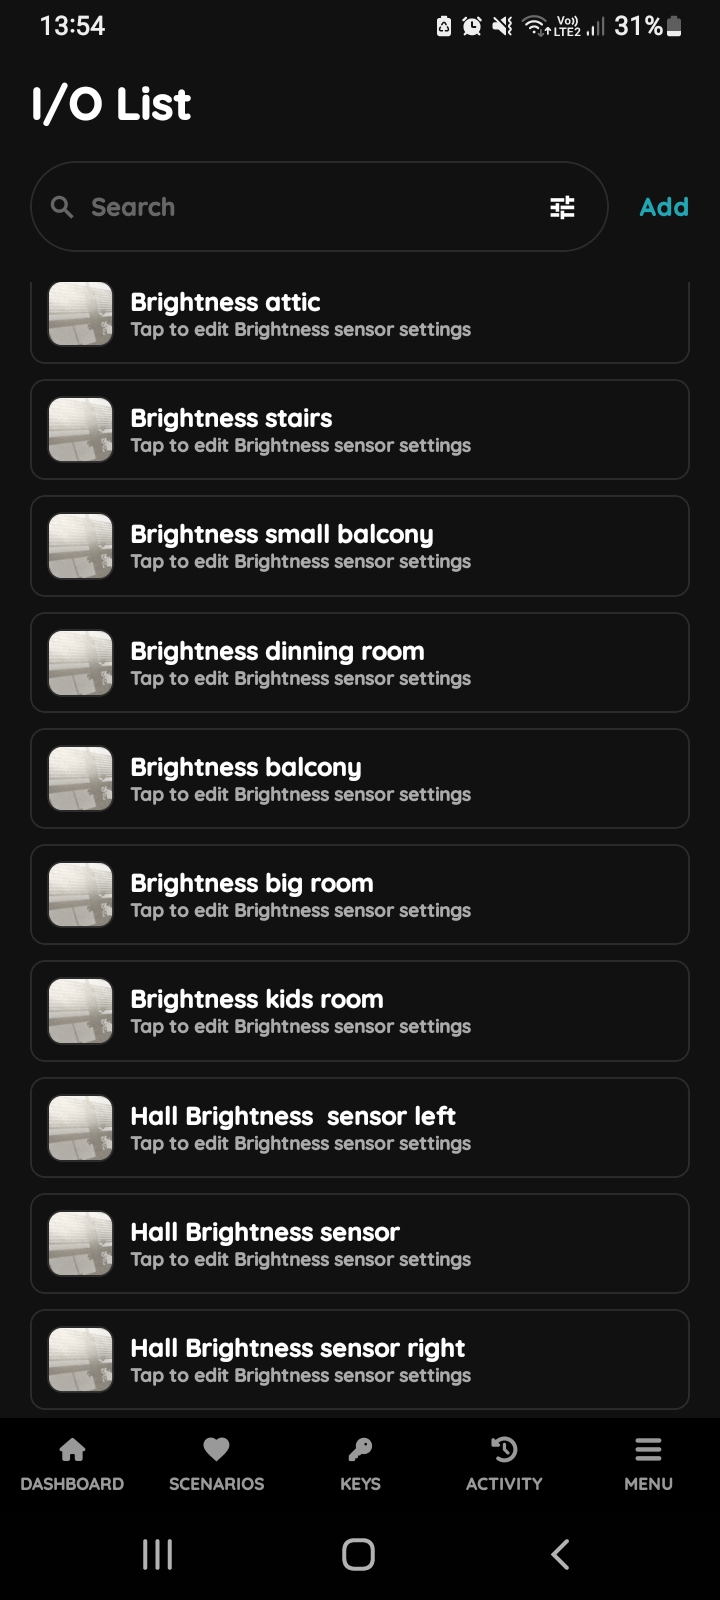
Brightness sensor on the I/O list
Scroll to Brightness sensors on the list and tap on the desired I/O from the list, in this case Hall Brightness sensor.
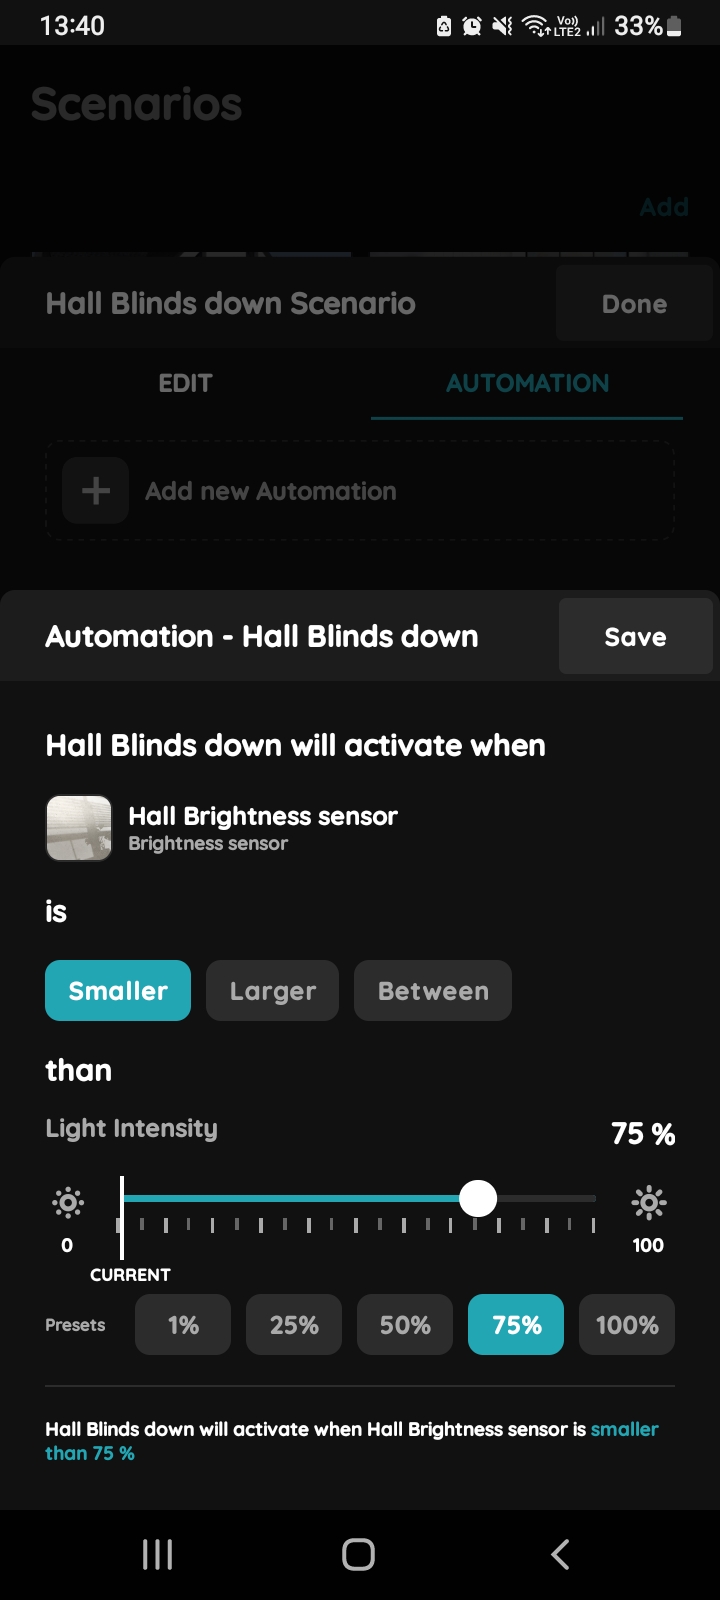
Automation Blinds and Brightness sensor
Hall Blinds down scenario will be activated when Hall Brightness sensor shows light intensity smaller than 75%.
You can use slider to set the desired light intensity or use Presets (tap desired one).
Tap the Save button.
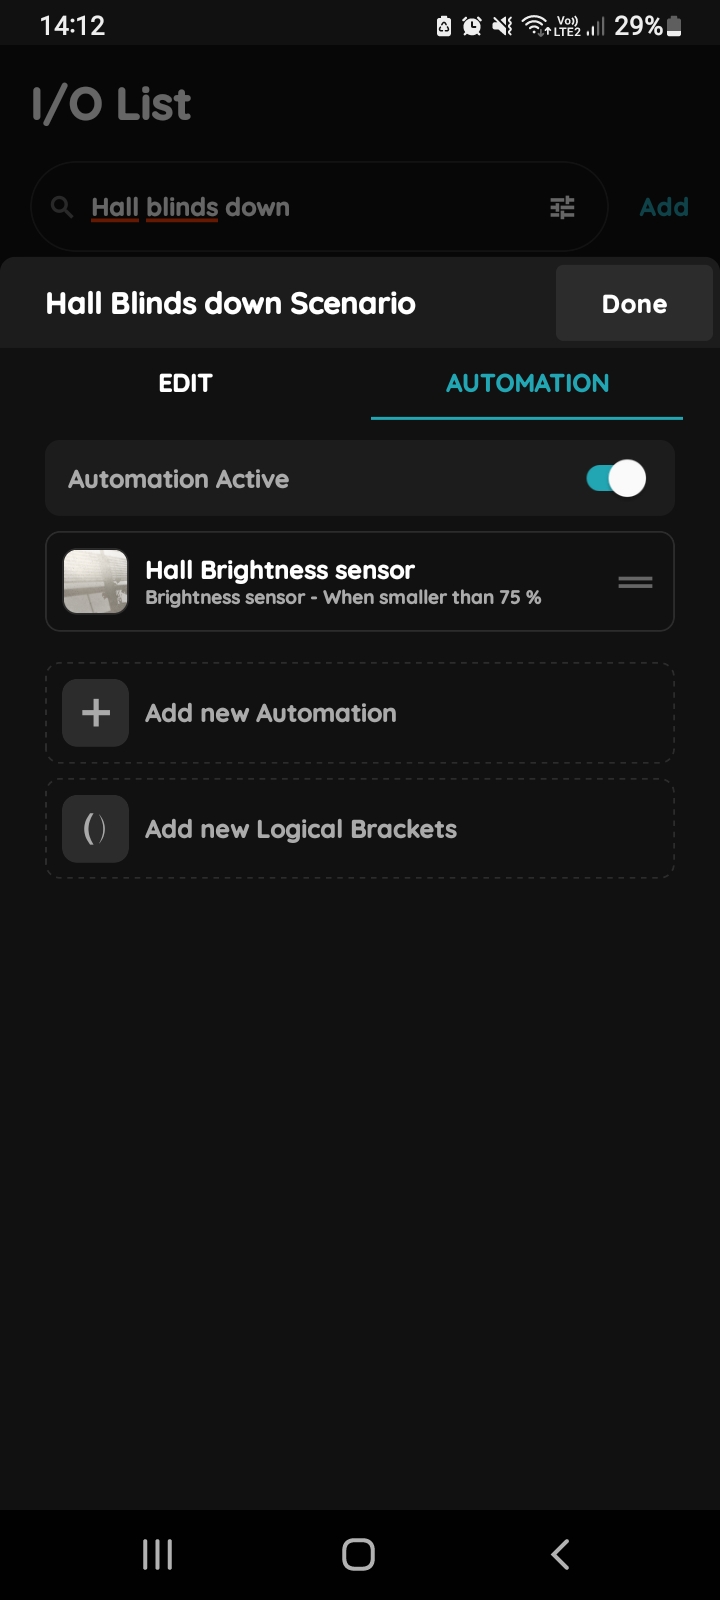
Confirm Automated Scenario settings for Blinds and Brightness sensor
To confirm settings of the Automated Scenario tap the button Done.
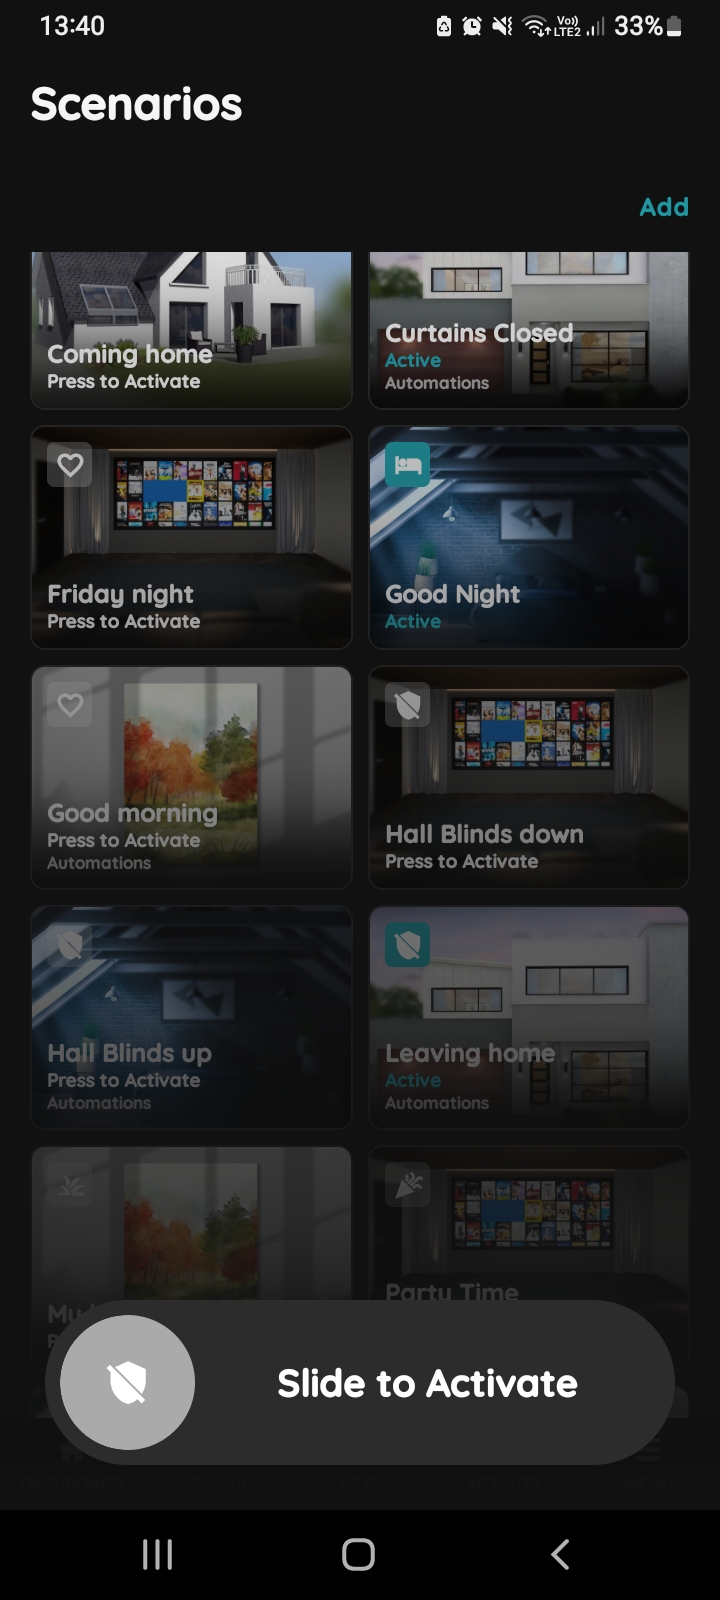
Slide to confirm - Automated Scenario Blinds and Brightness sensor
The Slide to confirm feature adds an extra layer of security, requiring you to confirm your action before activating the scenario. This helps prevent scenarios from being triggered accidentally.
To activate the Automated Scenario manually, tap on the card of the desired Scenario, use button Slide to Activate and slide from left to the right side.
The icon of the Automated Scenario gets blue, and status is changed to Active.
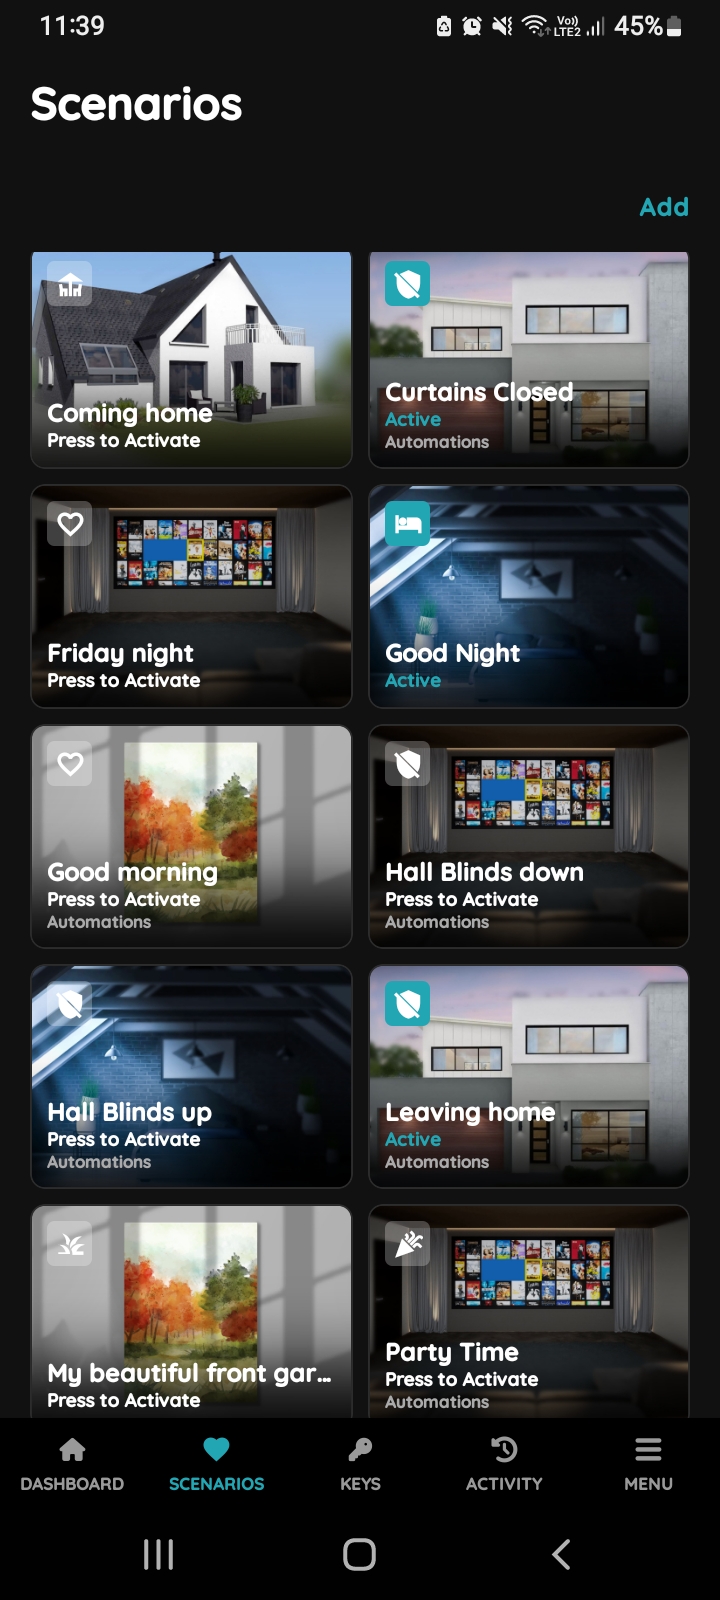
Scenarios from the Taskbar
You can create scenario for the Curtains from Taskbar or from the Menu.
An automated scenario for the Curtains is convenient because it allows them to adjust automatically based on time, light levels, or room activity, enhancing comfort without manual effort. It can help regulate natural light, reduce glare, and improve privacy, creating an ideal indoor environment throughout the day. Additionally, automated Curtain control can contribute to energy efficiency by keeping rooms cooler in the summer or warmer in the winter, depending on the sunlight.
In this case Automated Scenario Curtains Closed will be activated every day from 7 o'clock.
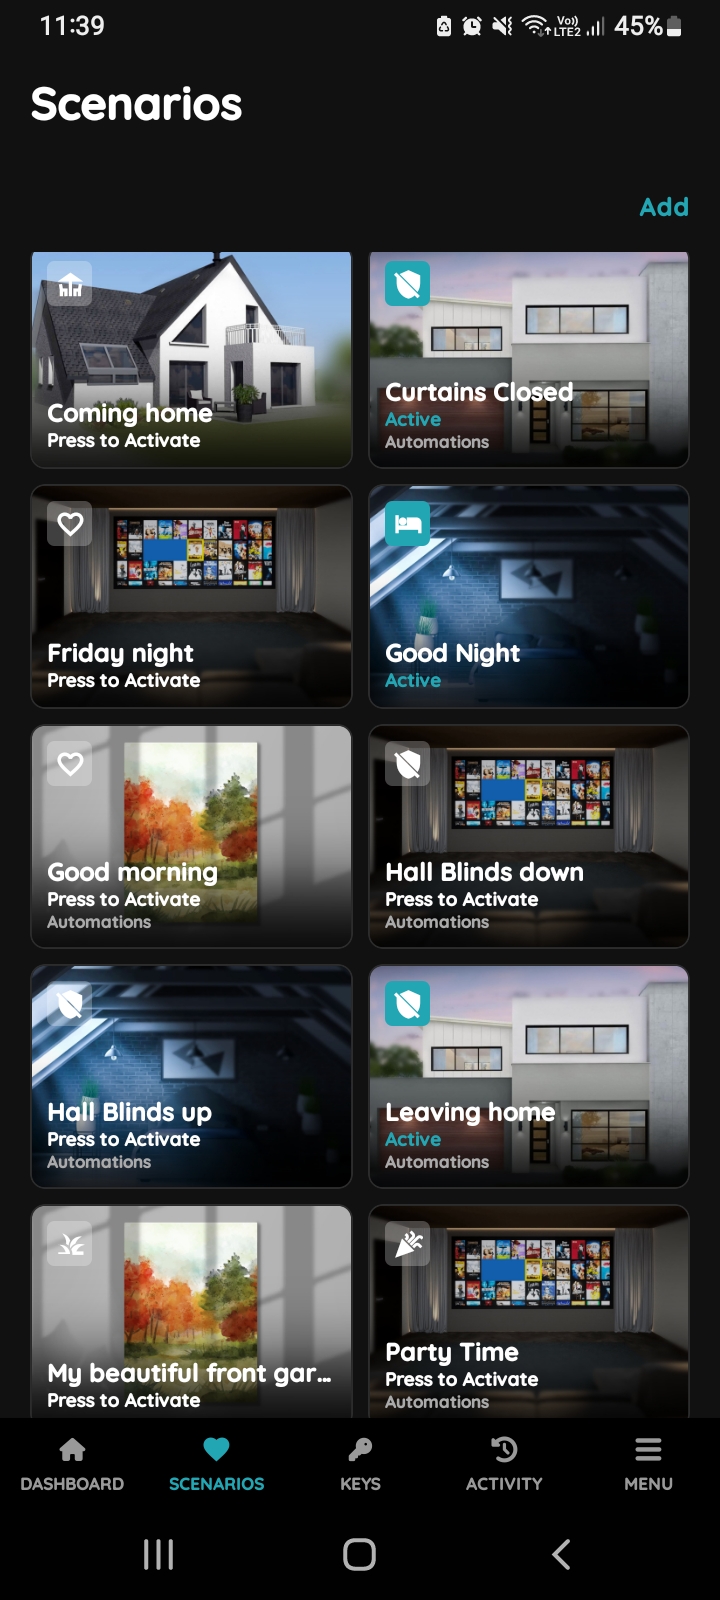
Scenarios - Add button
Tap on the button Add in order to create Scenario.
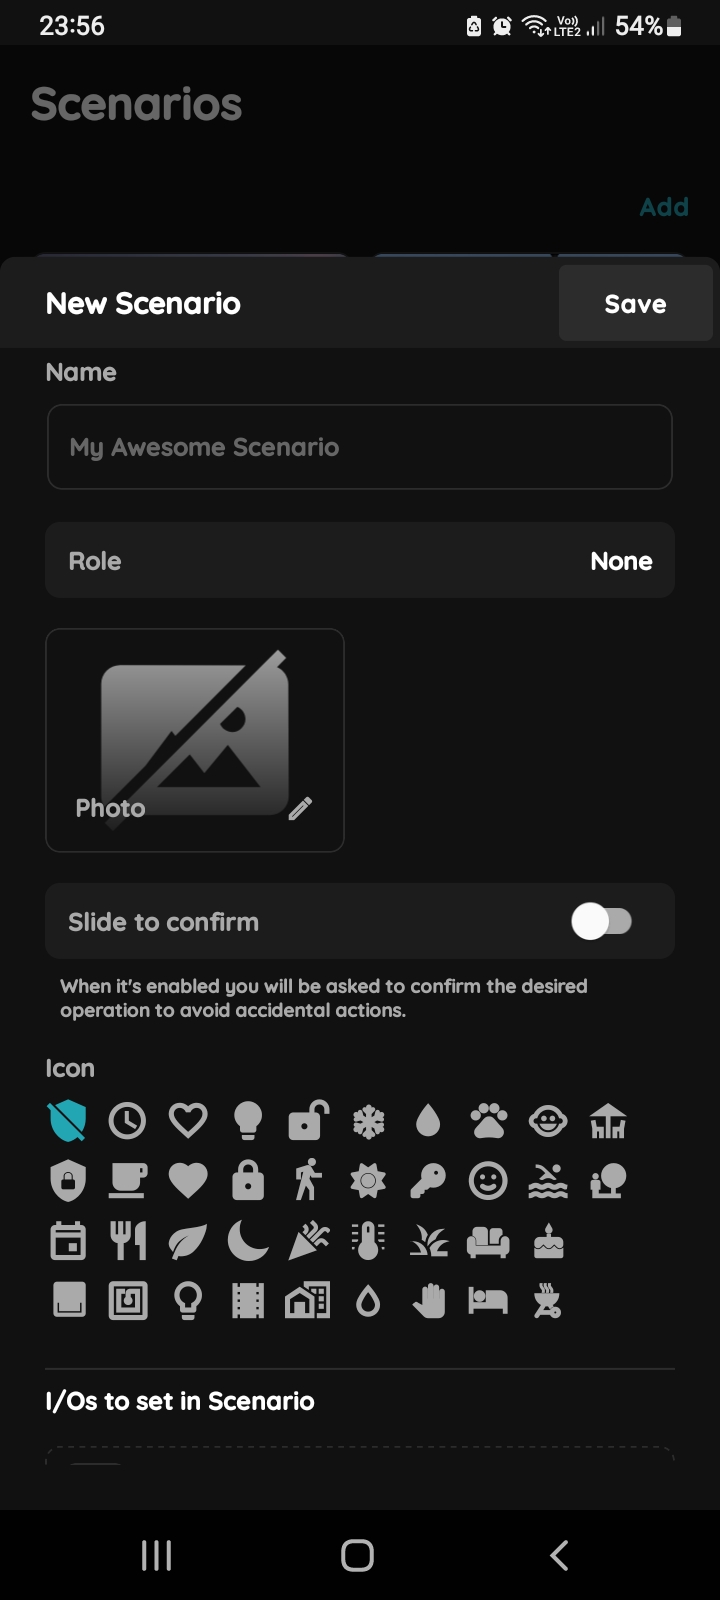
New Scenario
Fill following form:
- Name – Enter the name of the Scenario.
- Role – Select the appropriate role for the Scenario.
- Photo – Choose a photo to represent the Scenario.
- Slide to confirm – When enabled, you will be asked to confirm the operation to avoid accidental actions.
- Icon – Select an icon for the Scenario.
- Add a new I/O – Tap this field to add new I/Os to the Scenario.
Tap Submit/Save to finalize your changes.
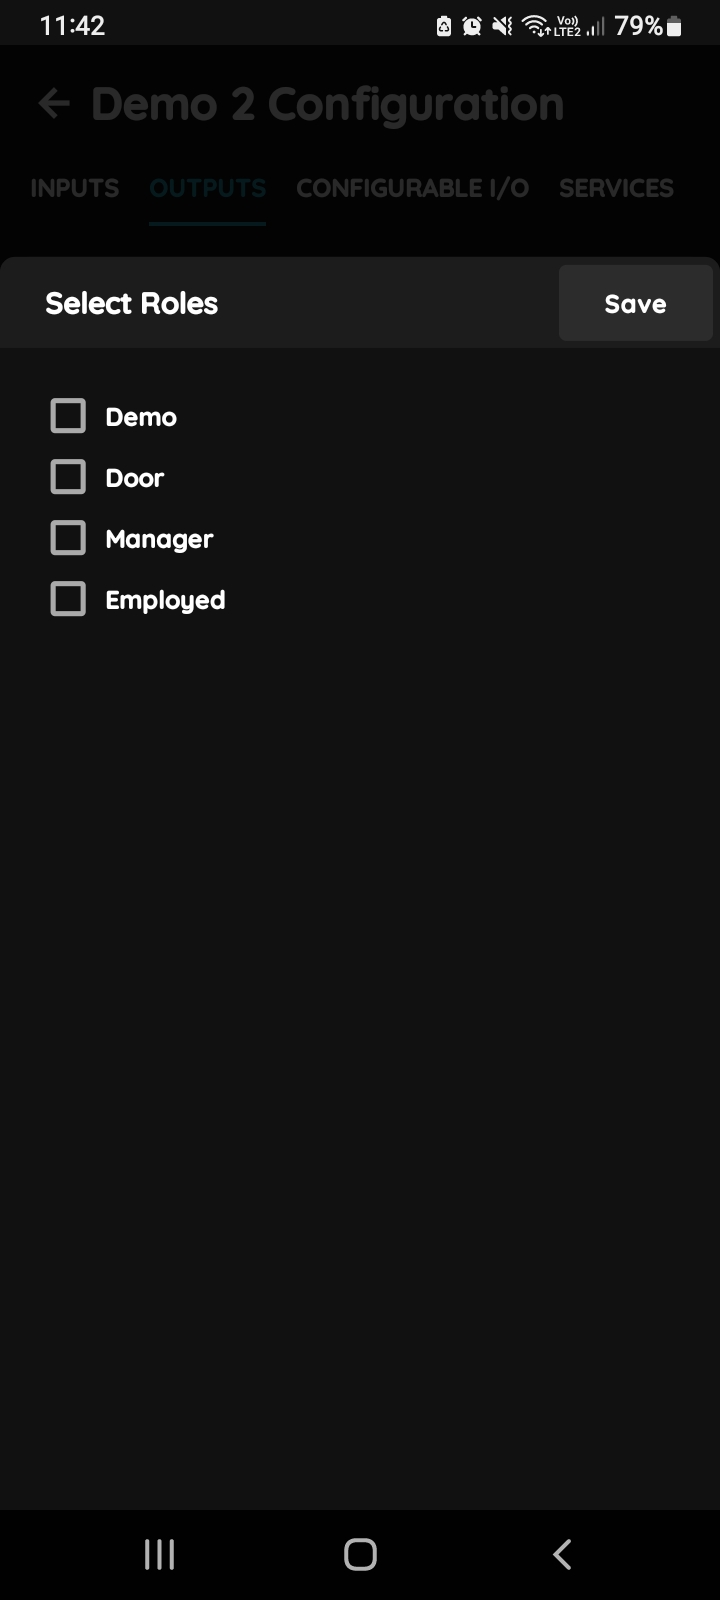
Select Roles
Tap in the field Role and after tap on the checkbox/checkboxes to select Role/Roles - multiple choice.
Tap Save/Done.
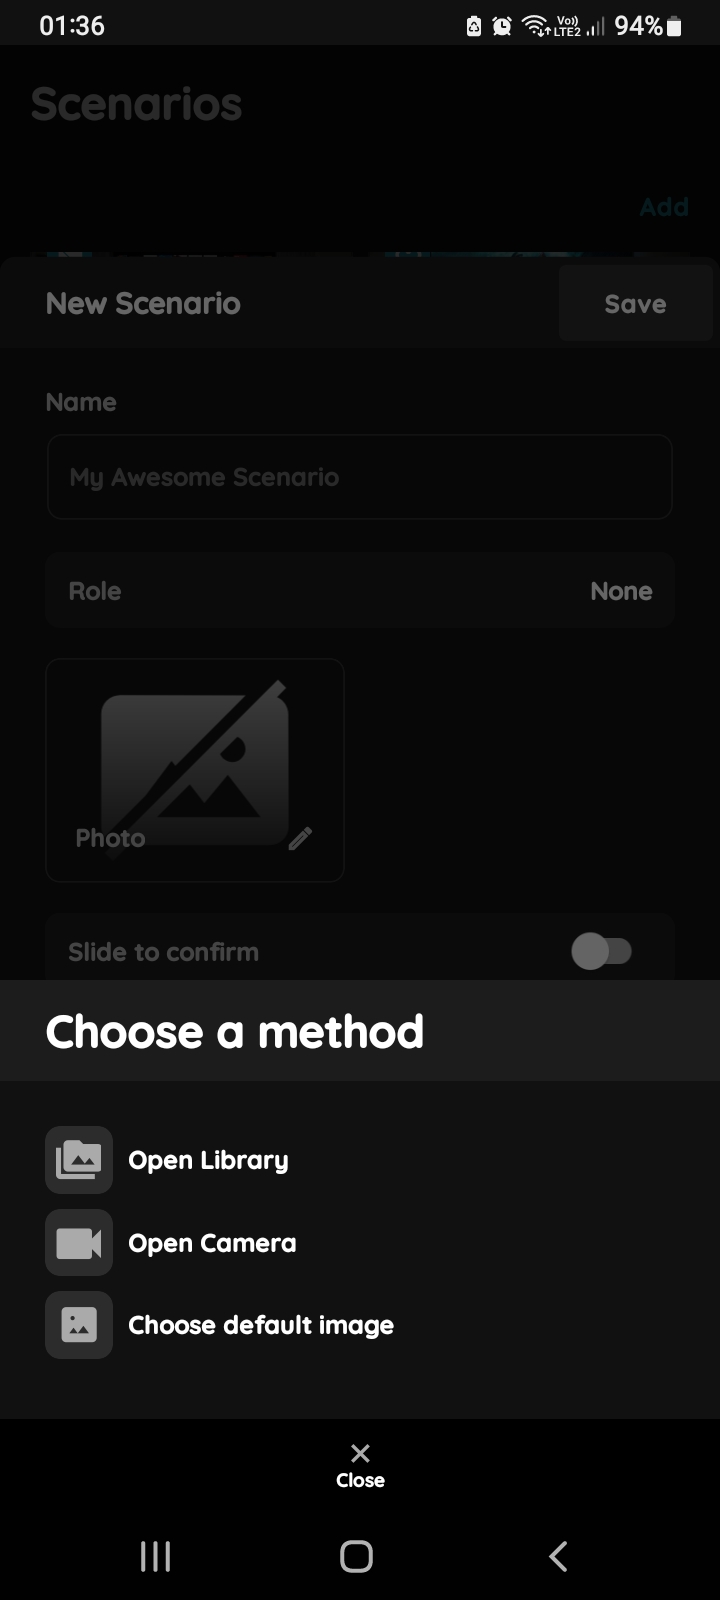
Change photo - Scenario
Tap the photo of the Scenario. You have three options:
Open Library - The phone’s Library will open.
Open Camera - You can take a picture using your smartphone.
Choose default image - These images are prepared in advance in order to provide a complete and seamless experience.
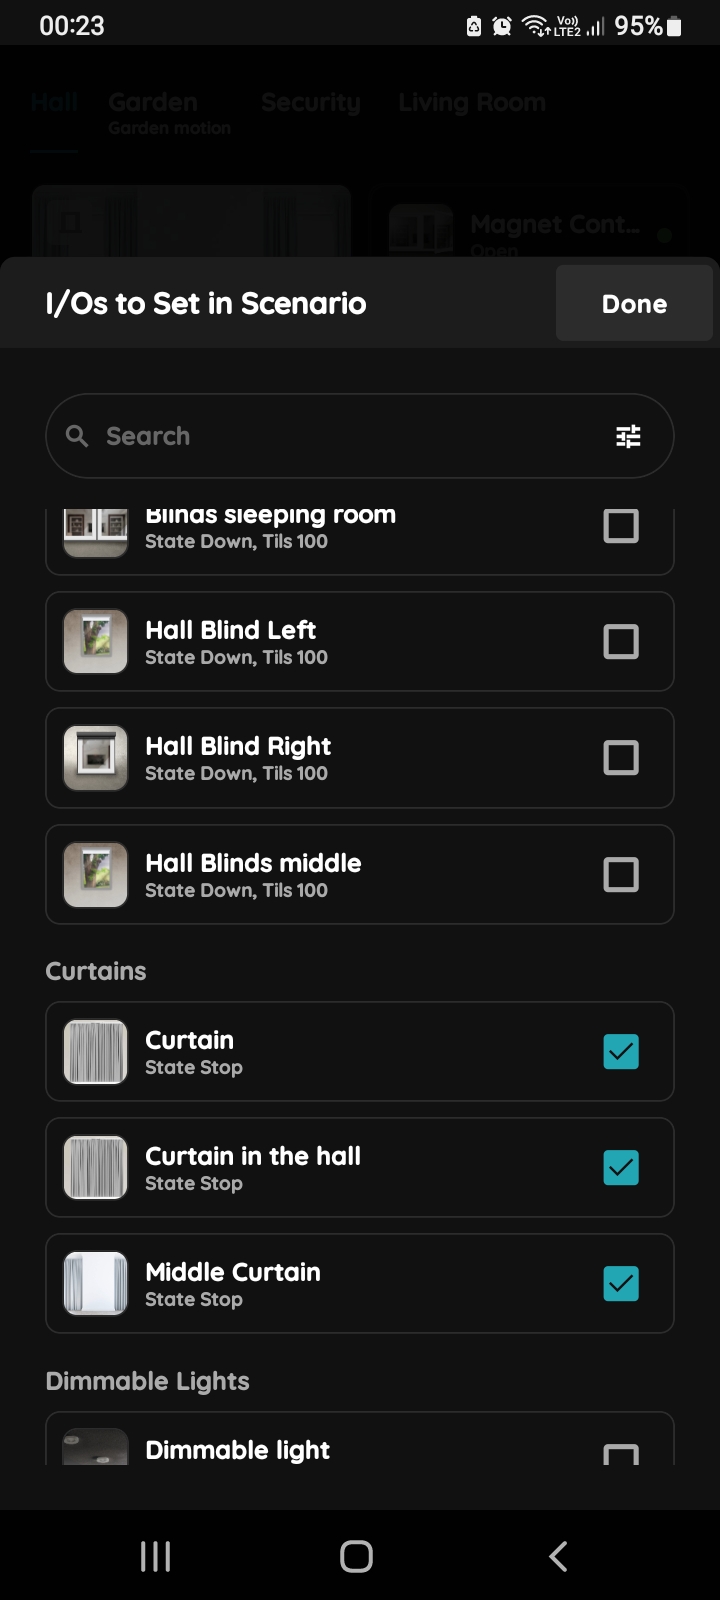
Add New I/O - Scenario for the Curtains
Tap on the checkbox/checkboxes next to the desired I/Os that you would like to add to the Scenario from the I/Os to Set in Scenario list.
In this case tap on the checkboxes next to the Curtains that you want to to include into the Scenario.
Tap Save/Done.
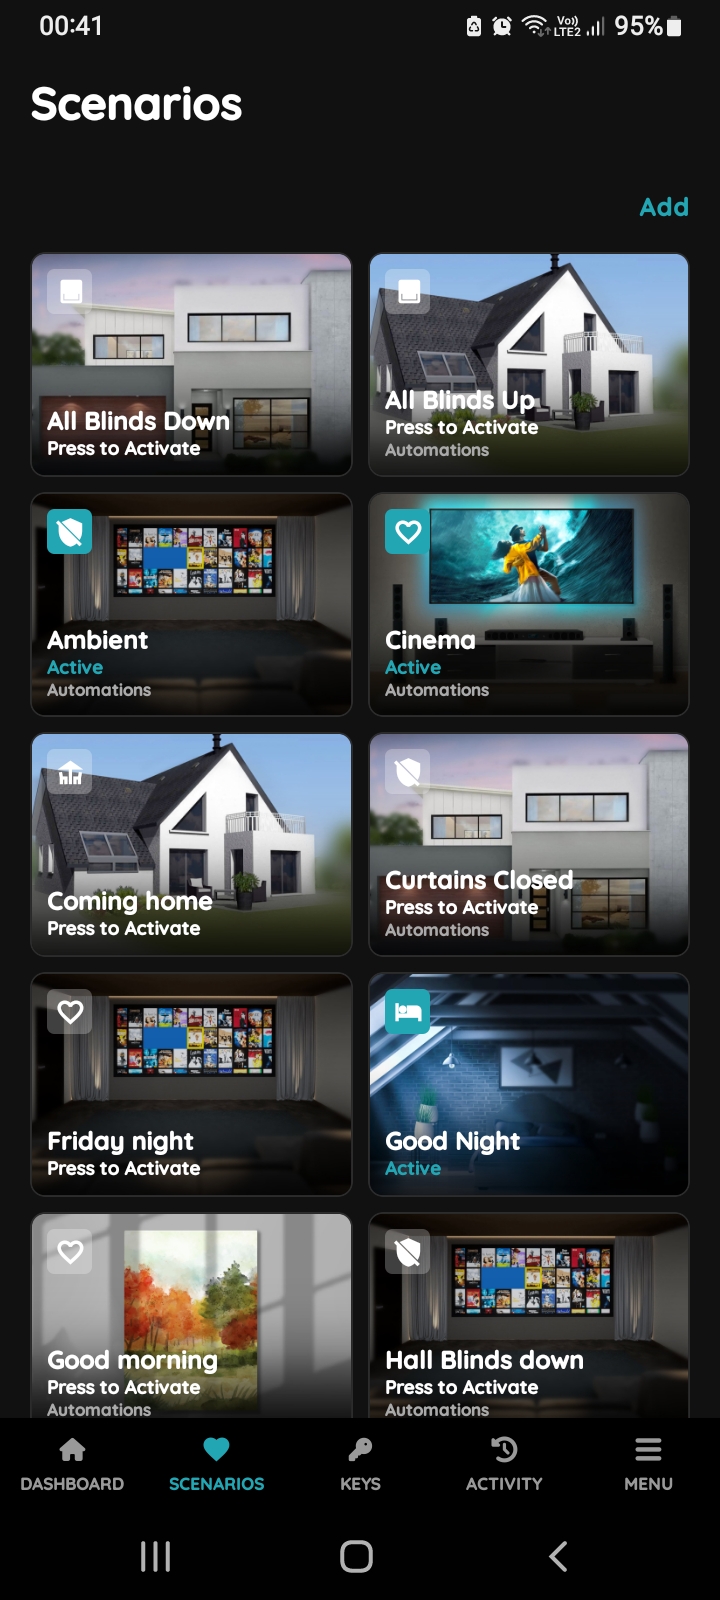
Find Scenario Curtains Closed
Find Scenario Curtains Closed and tap its card.
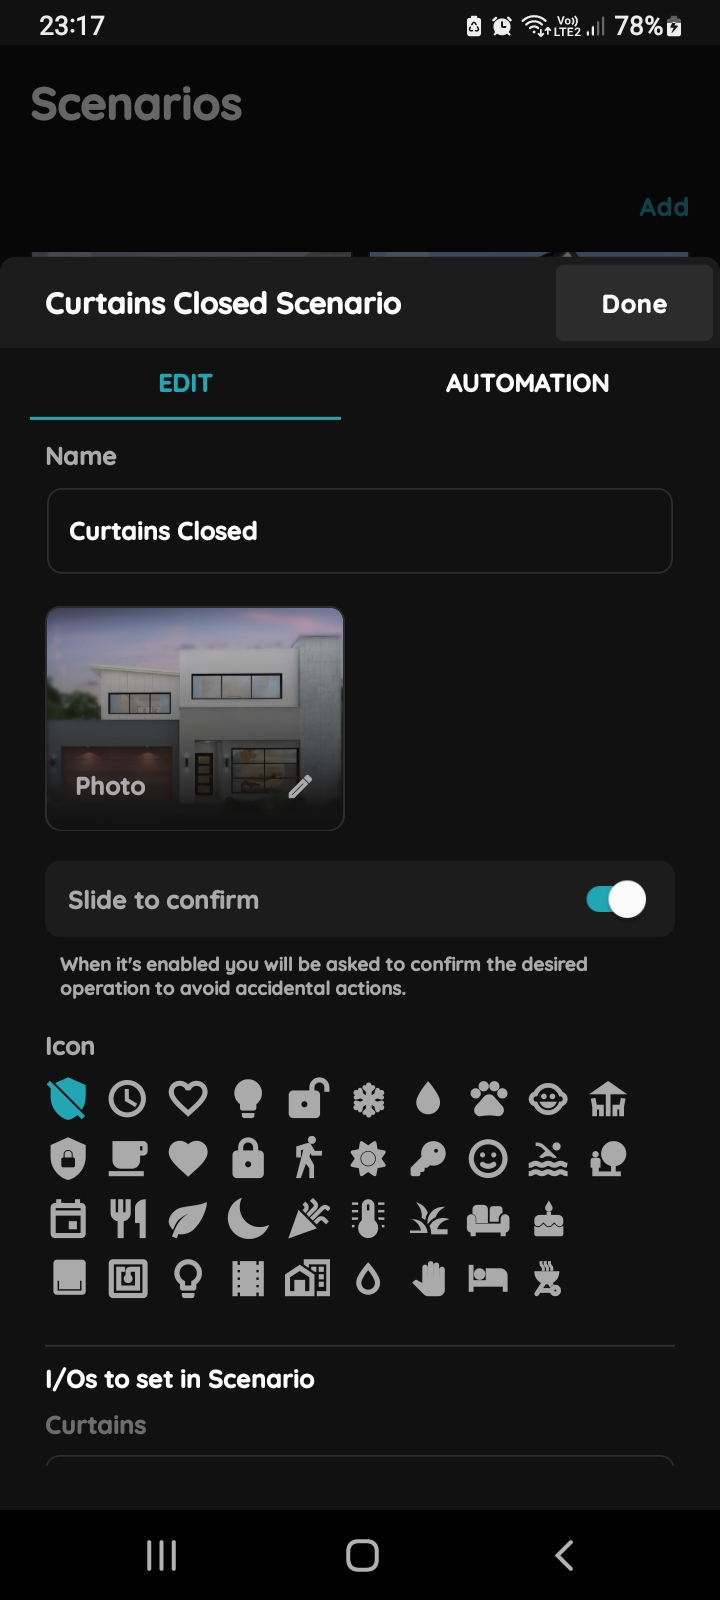
Edit, Automation - Automated Scenario Curtains
Tap on the tab Automation.
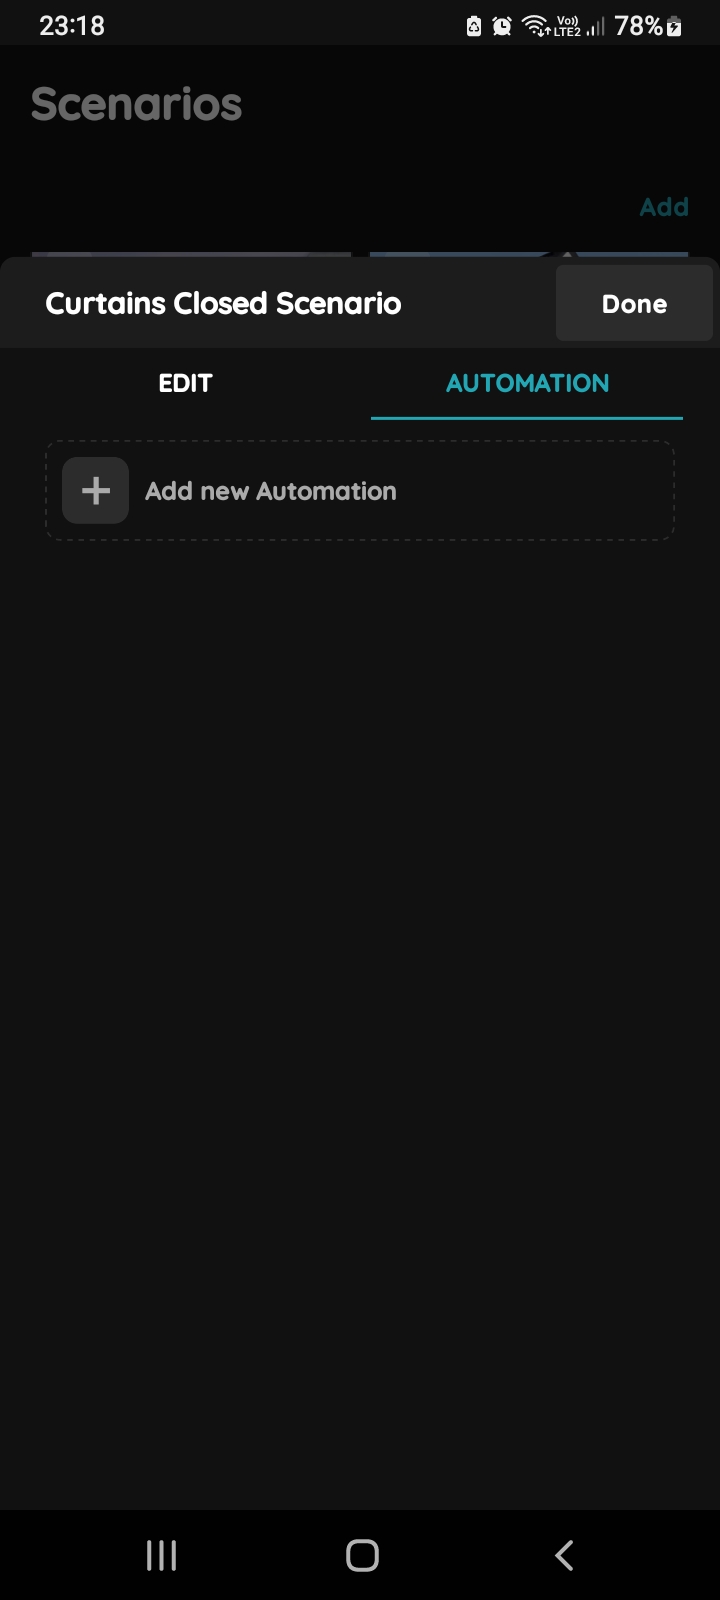
Add new Automation - Automated Scenario Curtains
Tap on the +Add new Automation.
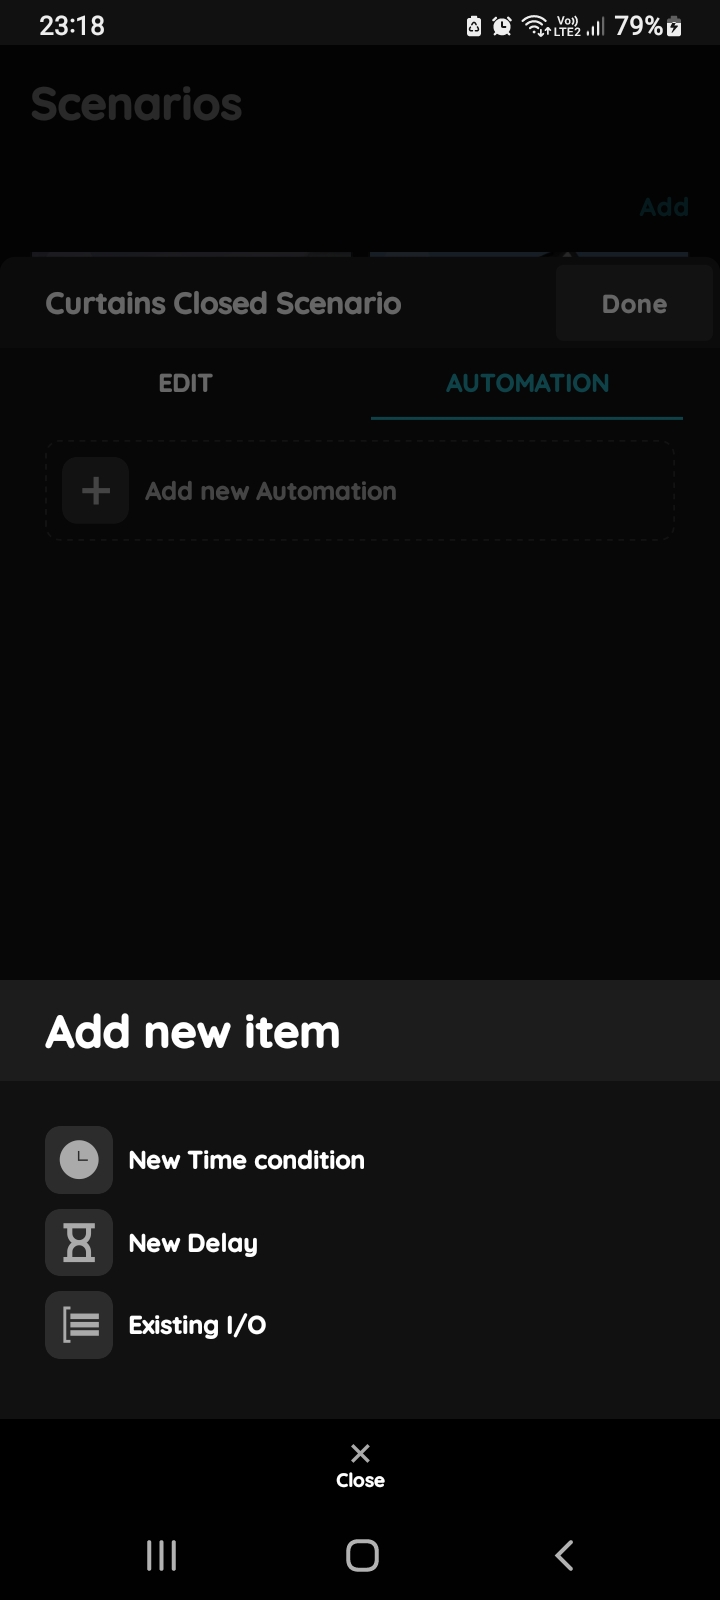
Add new item - Automated scenario Curtains
There is possibility to add:
- New Time condition,
- New Delay
- Existing I/O.
Tap on the New Time condition.
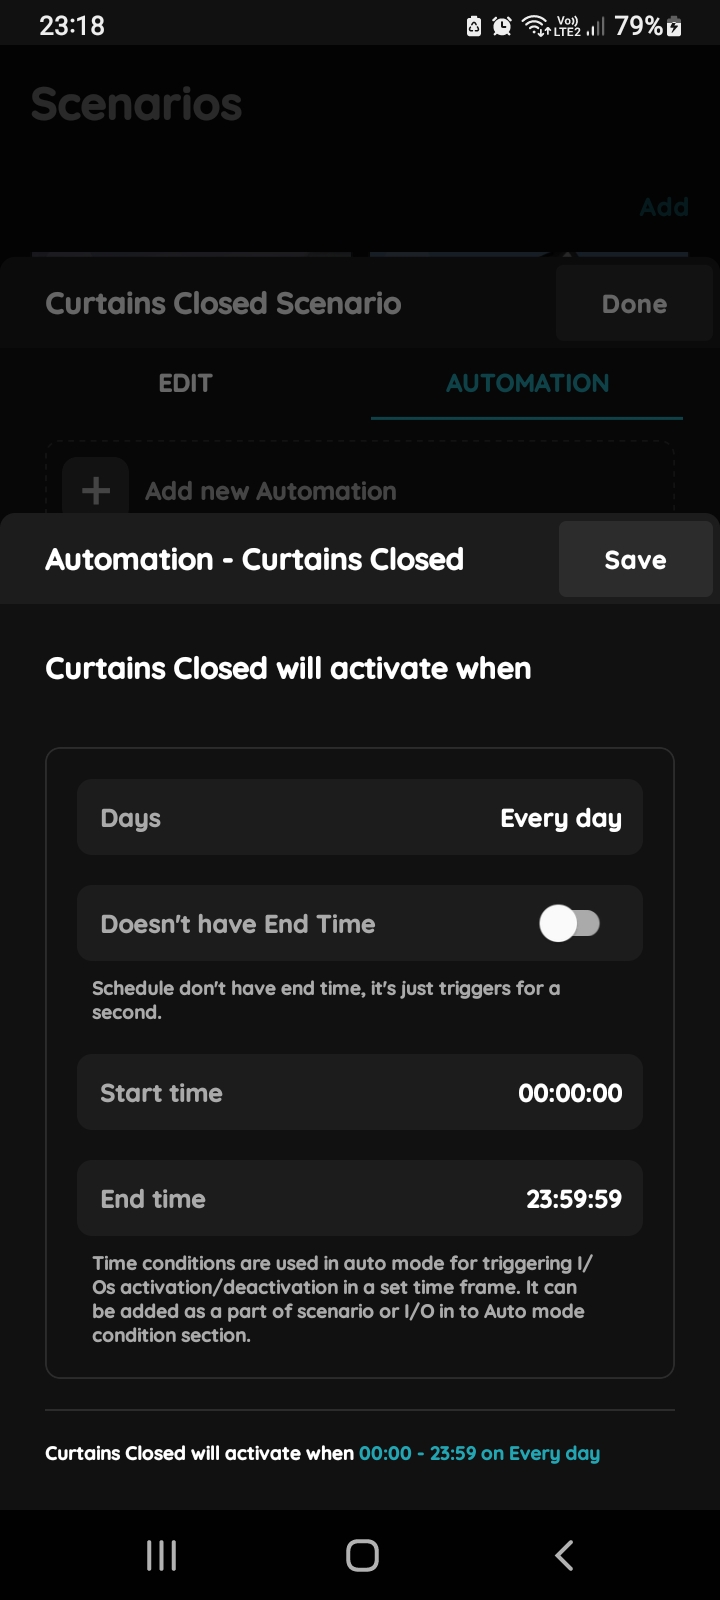
Automation Curtains
You should set Days, Start time and End time in this step.
Tap in the field of each of them to set them.
If Doesn't have End Time button is enabled it means that schedule don't have end time, it's just triggers for a second.
For more details follow next steps.
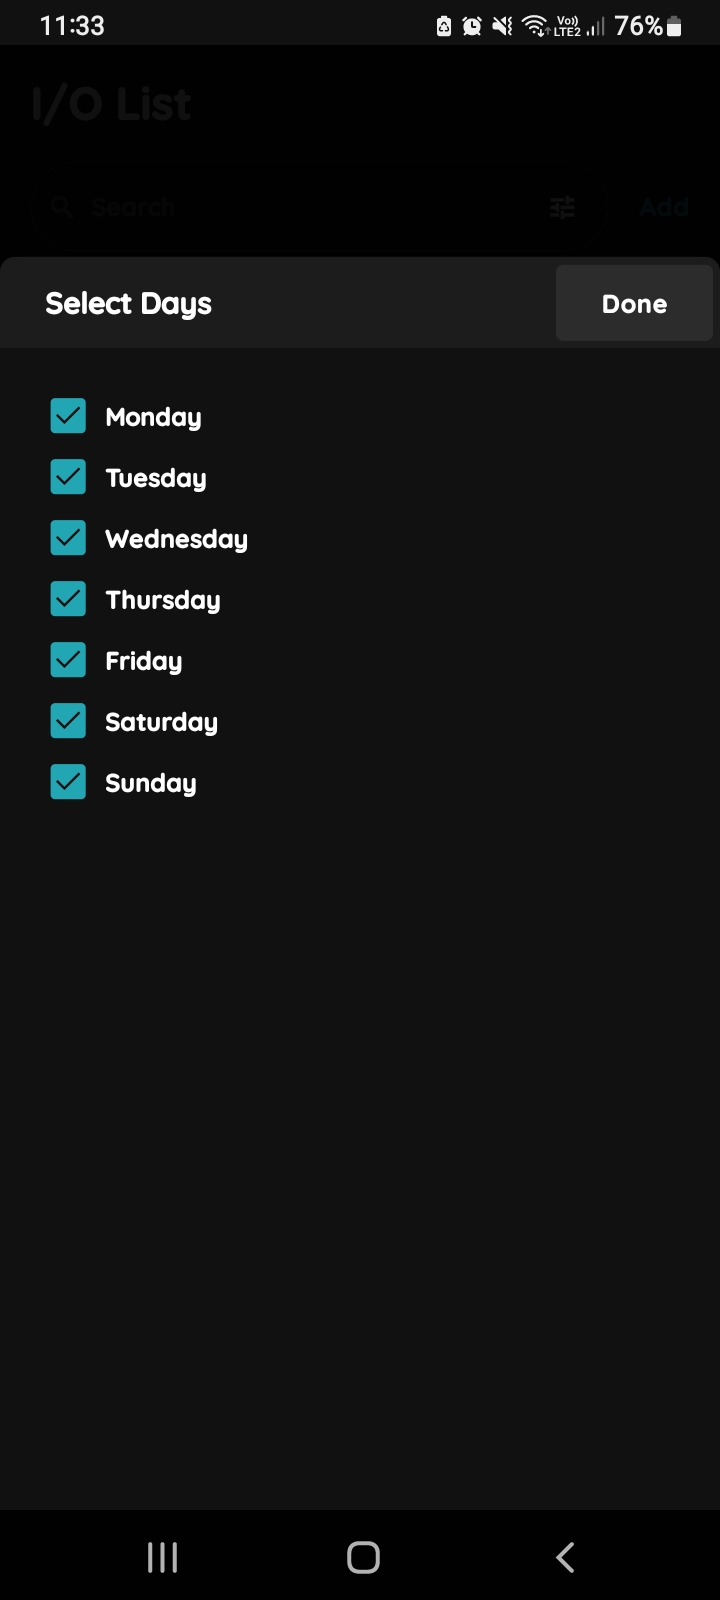
Select Days
Select Days when the I/O will be active by clicking on the check box/check boxes next to the days from the list.
In this case select all days from Monday to Sunday.
Tap button Done.
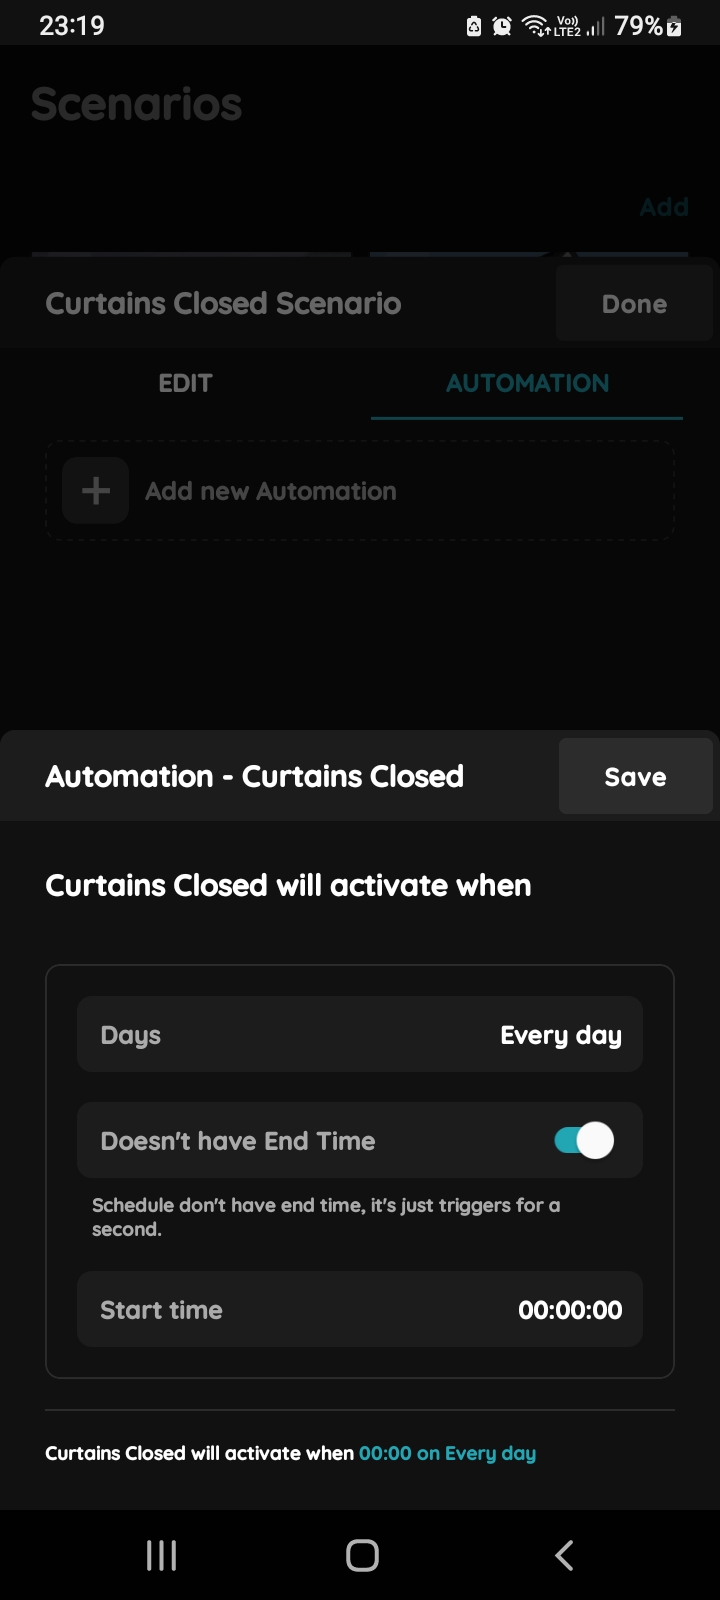
Doesn't have End Time enabled
Enable slide button Doesn't have End Time.
Tap in the field Start time to set it.
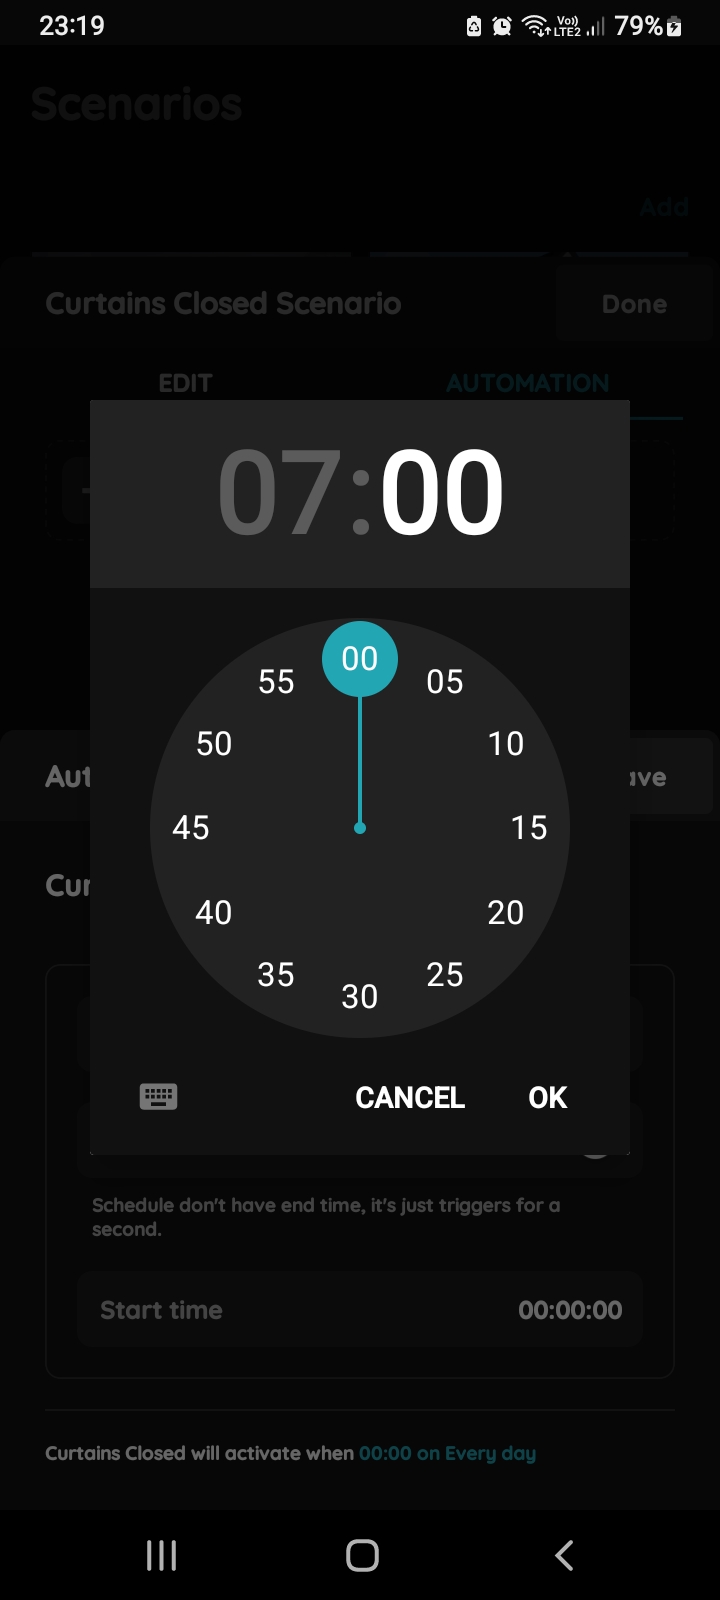
Start time - Automated Scenario - Curtains
In this step use clock or icon of the keyboard in order to set this parameter.
In this case set start time at 7 o'clock.
Tap the button OK. In case that you want to cancel it tap the button Cancel.
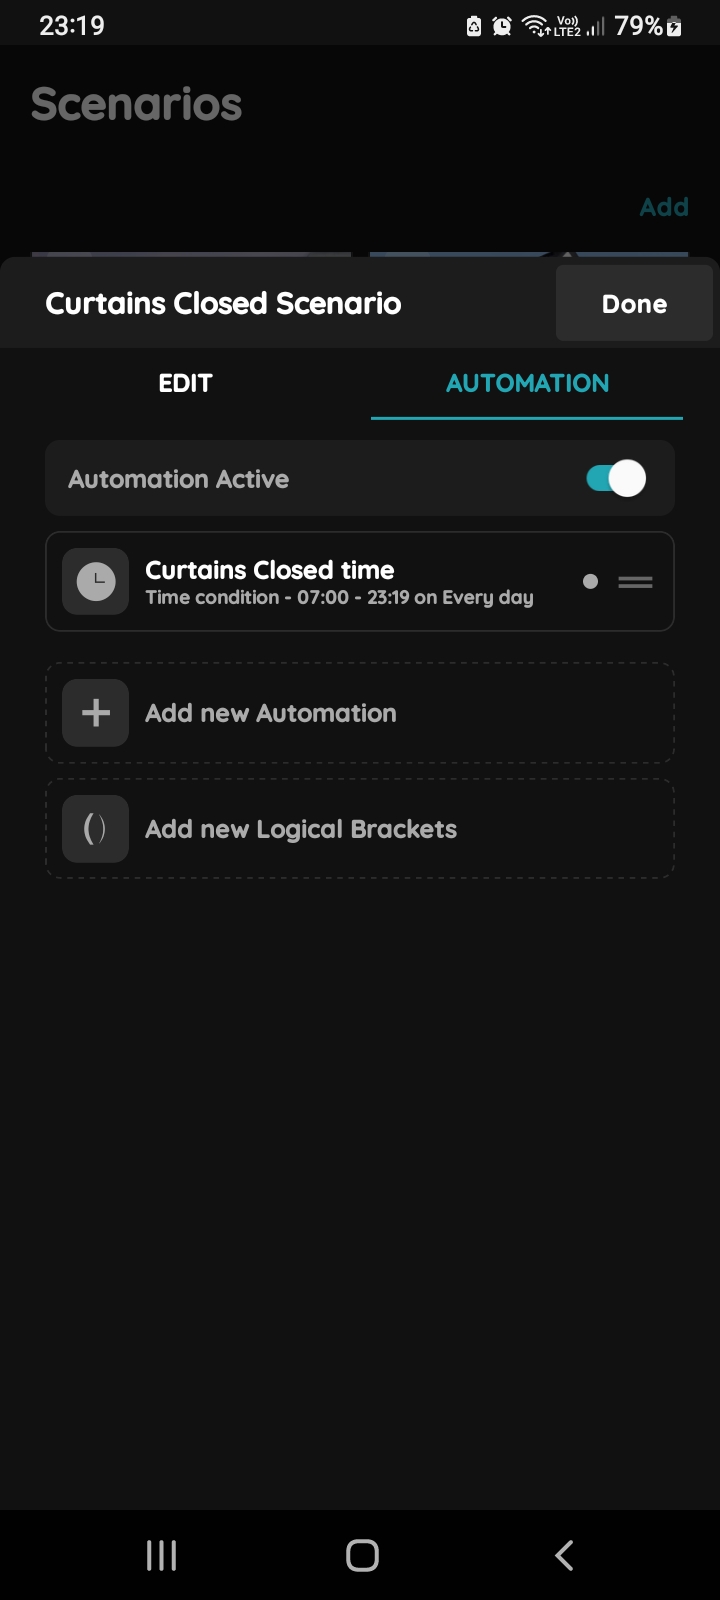
Confirm Automated Scenario settings for Curtains
To confirm settings of the Automated Scenario tap the button Done.
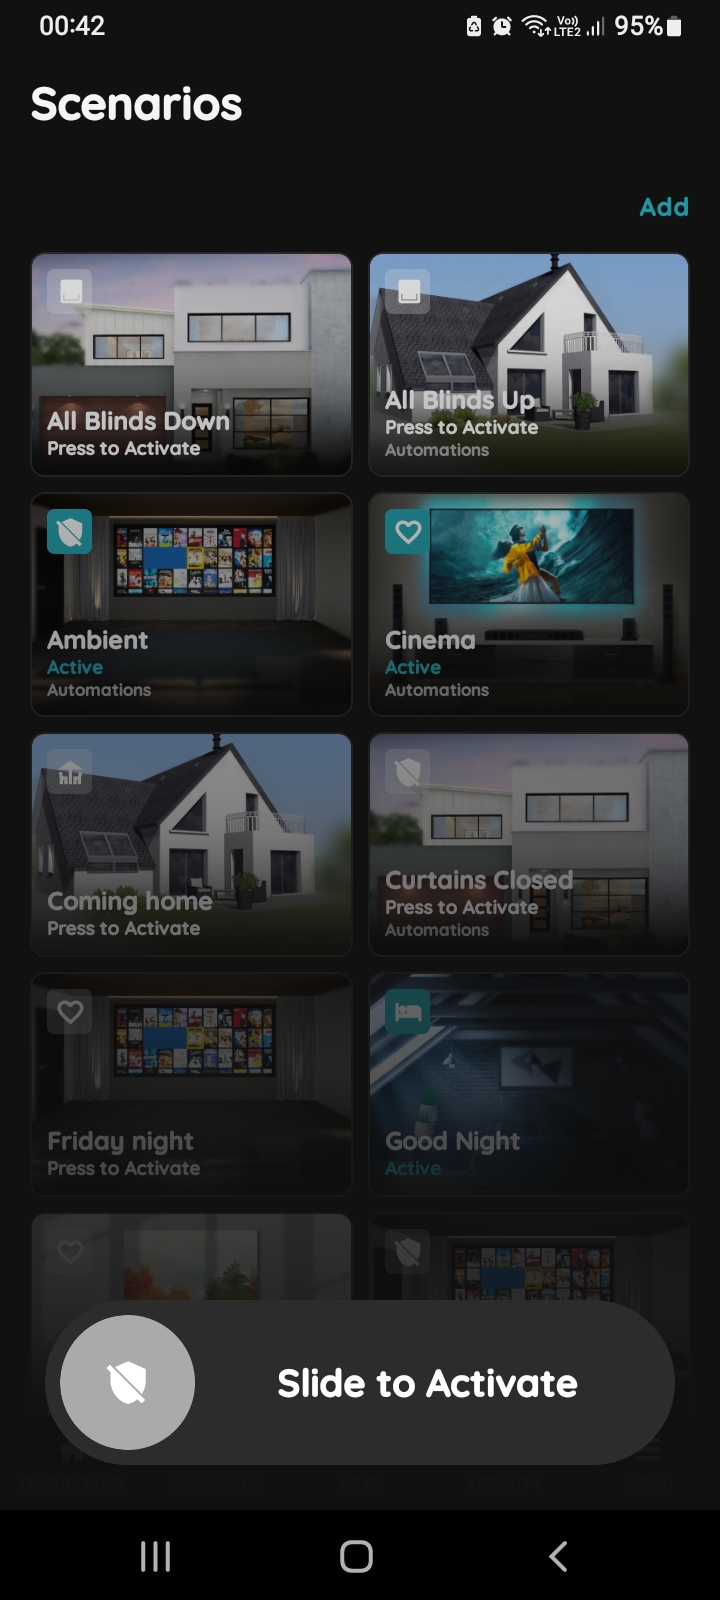
Slide to Activate - Automated Scenario Curtains
To activate the Automated Scenario Curtains Closed manually, slide from left to the right side.
The icon gets blue, and status is changed to Active.