Smart PIERRE - Delay Function
Description
The Delay function adds time-based logic to an automation. Instead of an action being executed immediately when a condition is met, you can define a delay before the action is triggered.
This allows you to create more flexible automations, such as filtering out short-lived conditions, delaying an action for safety, or creating timed sequences.
Delay Function Options
Delay in Seconds
Sets the amount of time to wait before the output (I/O) is activated. The remaining time is displayed while the countdown is running.
Clear Delay
Determines whether the countdown is cancelled when the condition becomes false before the delay has elapsed.
- Enabled – The countdown is cancelled if the condition becomes false before the delay ends.
- Disabled – The countdown continues and the action is executed after the delay, even if the condition becomes false.
UI Text: Clear delay when conditions are changing to false.
Start Delay on Condition Change
Determines which condition change starts the delay countdown.
- Enabled – The countdown starts when the condition becomes true.
- Disabled – The countdown starts when the condition becomes false.
Inverted
Inverts the logic of the condition.
For example, instead of triggering an action when a condition is true, the automation can trigger when the condition is false.
Typical Uses
- Turn on a light only if motion is continuously detected for a certain period.
- Keep a fan running for a defined period after humidity conditions change.
- Close a gate a fixed time after it has been opened.
- Trigger an alert if a door remains open for a defined period.
- Add a safety delay before activating an alarm siren.
Usage Tips
- Use Clear Delay = Enabled when the condition must remain active for the entire delay period.
- Use Start Delay on Condition Change = Disabled when the action should be triggered after the condition becomes false.
- Use Inverted when the automation should respond to the opposite state of a condition.
- Test delayed automations from different starting conditions to ensure they behave as expected.
DELAY FUNCTION OPTIONS
1. Enter Delay in Seconds
- Function: Sets the delay time before the output (I/O) is activated.
- UI Text: Displays (in seconds) the remaining time before the I/O is activated.
- Use Case: Useful when you want to delay device activation for safety, confirmation, or timing optimization.
2. Clear Delay (Checkbox)
- Function:
- Enabled: The delay countdown will reset or cancel if the condition becomes false before the delay ends.
- Disabled: The delay will complete regardless of whether the condition stays true.
- UI Text: Clear delay when conditions are changing to false.
3. Start Delay on Condition Change (Checkbox)
- Function: Determines when the delay countdown should begin:
- Enabled: Delay starts when condition becomes true (activated).
- Disabled: Delay starts when condition becomes false (deactivated).
- UI Text:
- If enabled, the delay countdown starts when the condition is activated.
- If disabled, the delay countdown starts when the condition is deactivated.
4. Inverted (Checkbox)
- Function: Inverts the logic of the condition. For example, instead of triggering on condition true, it triggers on false.
- Use Case: Useful when you want to act when something stops happening, such as a door being closed rather than opened.
Example 1 – Light delay ON after motion
In this example, the delay is used to turn the light ON only when motion remains detected for a specific period.
- Select the motion sensor as the condition.
- Set the condition to the required state.
The motion sensor must detect movement for the delay to continue. - Set the Delay to 10 seconds.
The light will be turned ON only if motion remains detected for 10 seconds. - Enable Clear Delay.
If motion stops before the 10-second countdown expires, the countdown is cancelled. - Enable Start Delay on Condition Change.
The countdown starts when motion is detected. - Disable Inverted.
The delay operates according to the normal condition logic.
As a result, when motion is detected, the 10-second countdown starts. If motion stops before the countdown finishes, the delay is cancelled and the light remains OFF. If motion remains detected for the full 10 seconds, the light is turned ON.
Example 2 – Turn OFF ventilation when a window remains open
In this example, the ventilation is allowed to operate only when the window is closed. If the window remains open for more than 5 minutes, the ventilation is turned OFF.
- Select the window magnetic contact as the condition.
- Set the magnetic contact condition to
When Open.
The delay condition will be based on the window being open. - Set the Delay to 300 seconds.
The ventilation will be turned OFF if the window remains open for 300 seconds. - Enable Clear Delay.
If the window is closed before the 300-second countdown expires, the countdown is cancelled and the ventilation remains ON. - Enable Start Delay on Condition Change.
The countdown starts when the magnetic contact changes to the Open state. - Enable Inverted.
The condition logic is inverted, meaning that the ventilation is allowed to operate when the window is closed. When the window is opened, the inverted condition becomes inactive and the delay starts.
As a result, the ventilation operates normally while the window is closed. When the window is opened, the 300-second countdown starts. If the window is closed before the countdown finishes, the delay is cancelled and the ventilation continues to operate. If the window remains open for the full 300 seconds, the ventilation is turned OFF.
Example 3 – Safety delay before alarm siren
In this example, the delay is used to give the user time to cancel an alarm condition before the siren is activated.
- Select the intrusion sensor as the condition.
- Set the condition to the required state.
The intrusion condition must remain active for the delay to continue. - Set the Delay to 30 seconds.
The siren will be activated only if the intrusion condition remains active for 30 seconds. - Enable Clear Delay.
If the intrusion condition clears before the 30-second countdown expires, the countdown is cancelled. - Enable Start Delay on Condition Change.
The countdown starts when the intrusion condition becomes active. - Disable Inverted.
The delay operates according to the normal condition logic.
As a result, when an intrusion is detected, the 30-second countdown starts. If the intrusion condition clears before the countdown finishes, the delay is cancelled and the siren remains OFF. If the condition remains active for the full 30 seconds, the siren is activated.
Example 4 – Notify if door stays open
In this example, the delay is used to send a notification only when a door remains open for a specific period.
- Select the door magnetic contact as the condition.
- Set the condition to the required state.
The door must remain open for the delay to continue. - Set the Delay to 60 seconds.
The notification will be triggered only if the door remains open for 60 seconds. - Enable Clear Delay.
If the door is closed before the 60-second countdown expires, the countdown is cancelled. - Enable Start Delay on Condition Change.
The countdown starts when the door is opened. - Disable Inverted.
The delay operates according to the normal condition logic.
As a result, when the door is opened, the 60-second countdown starts. If the door is closed before the countdown finishes, the delay is cancelled and no notification is sent. If the door remains open for the full 60 seconds, the system sends a notification.
USAGE TIPS
- Use Clear Delay = Enabled when actions should be skipped if the triggering condition doesn’t last long enough.
- Use Start Delay = Disabled for actions that happen after a condition ends (like cooldowns).
- Use Inverted to reverse the logic of the condition — helpful for off-state monitoring.
Delay setup
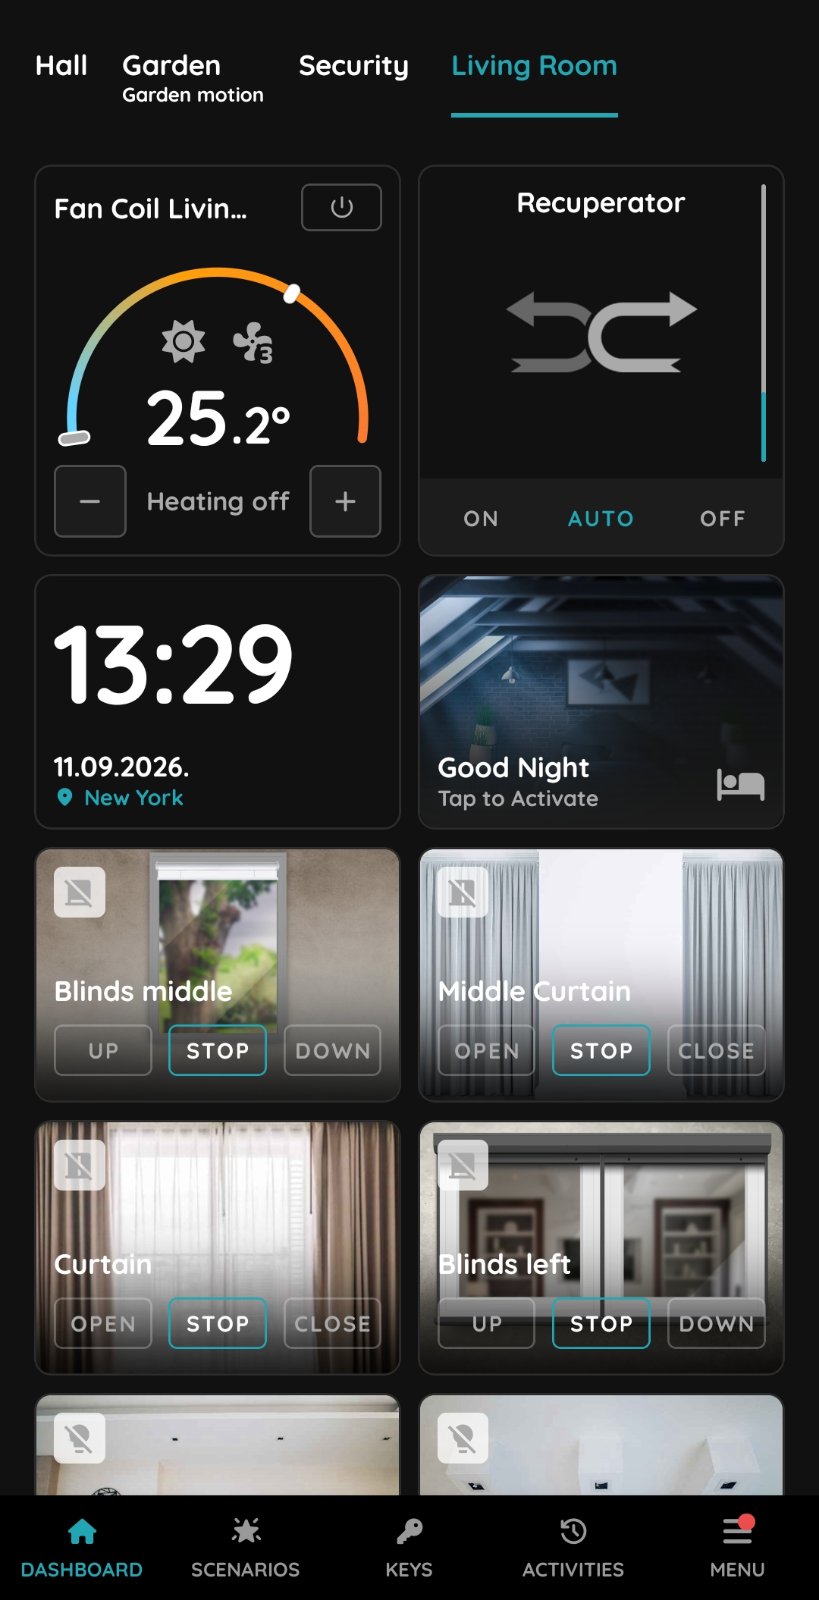
Select device
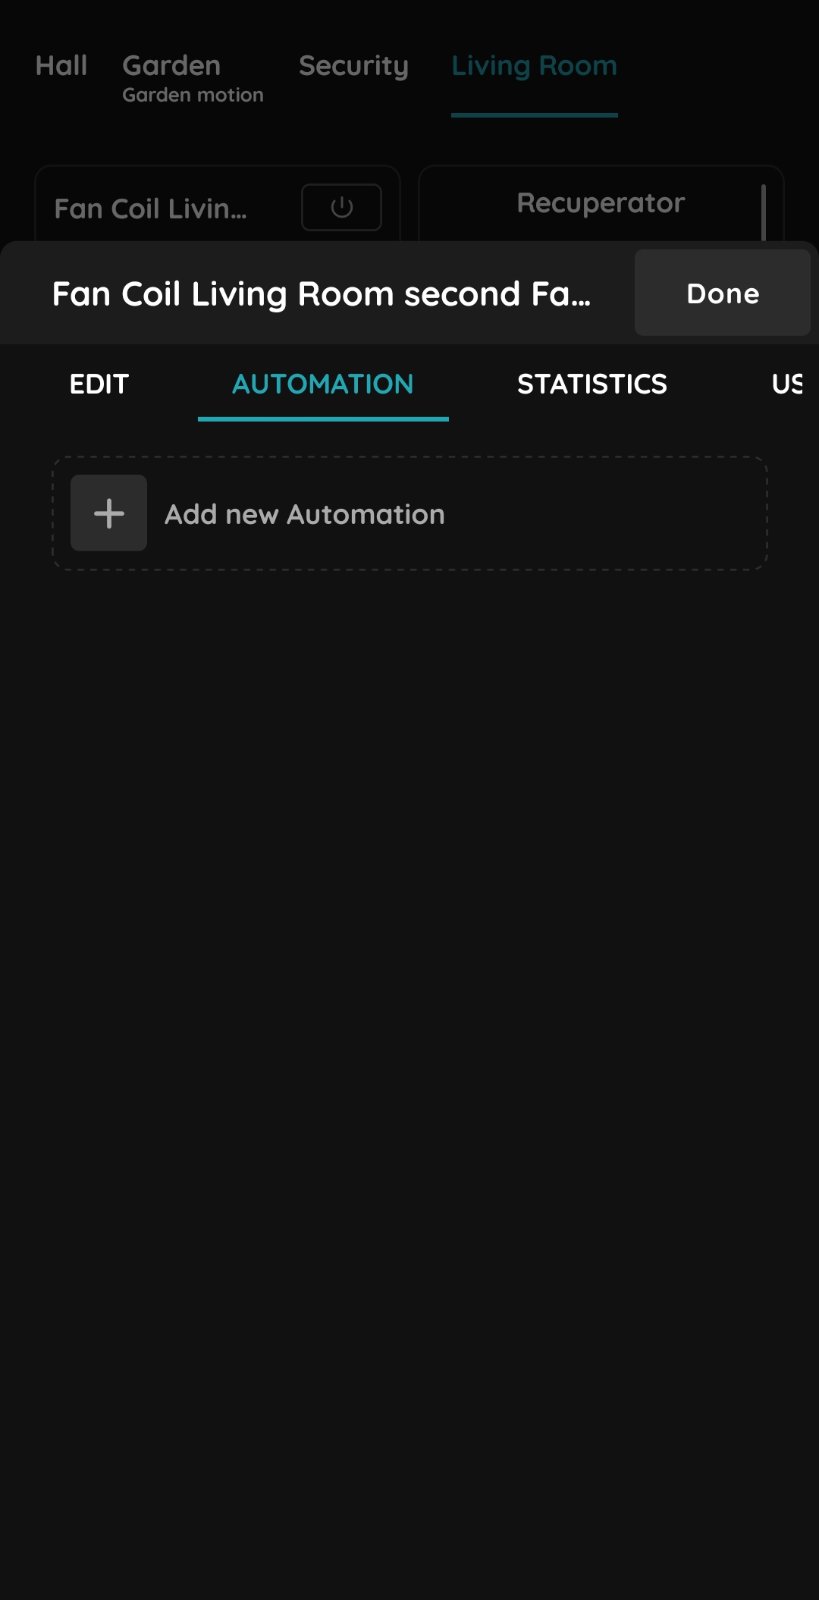
Automation
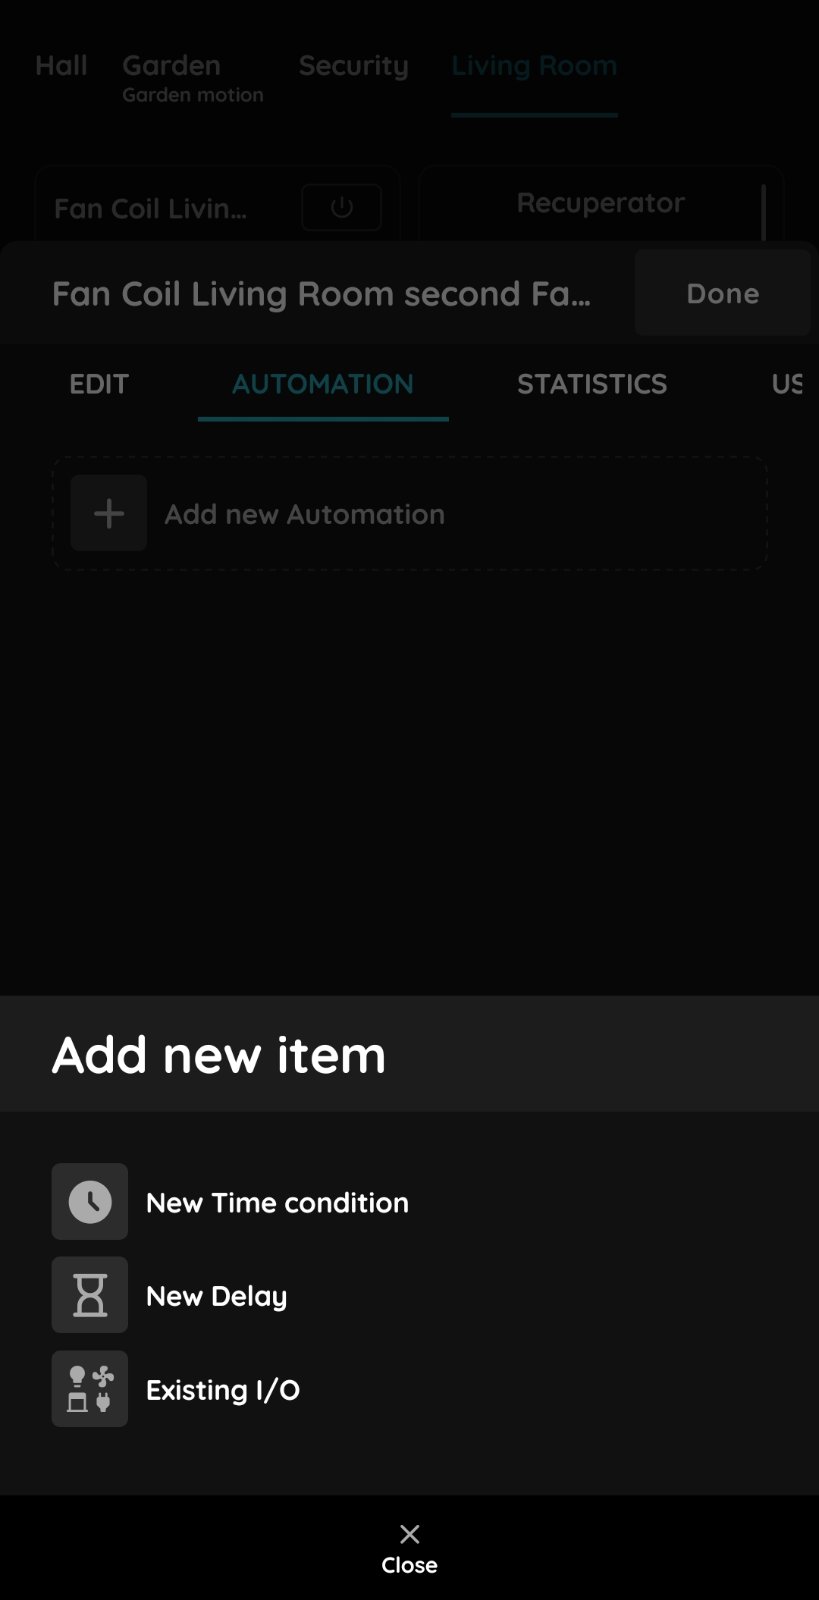
New Delay
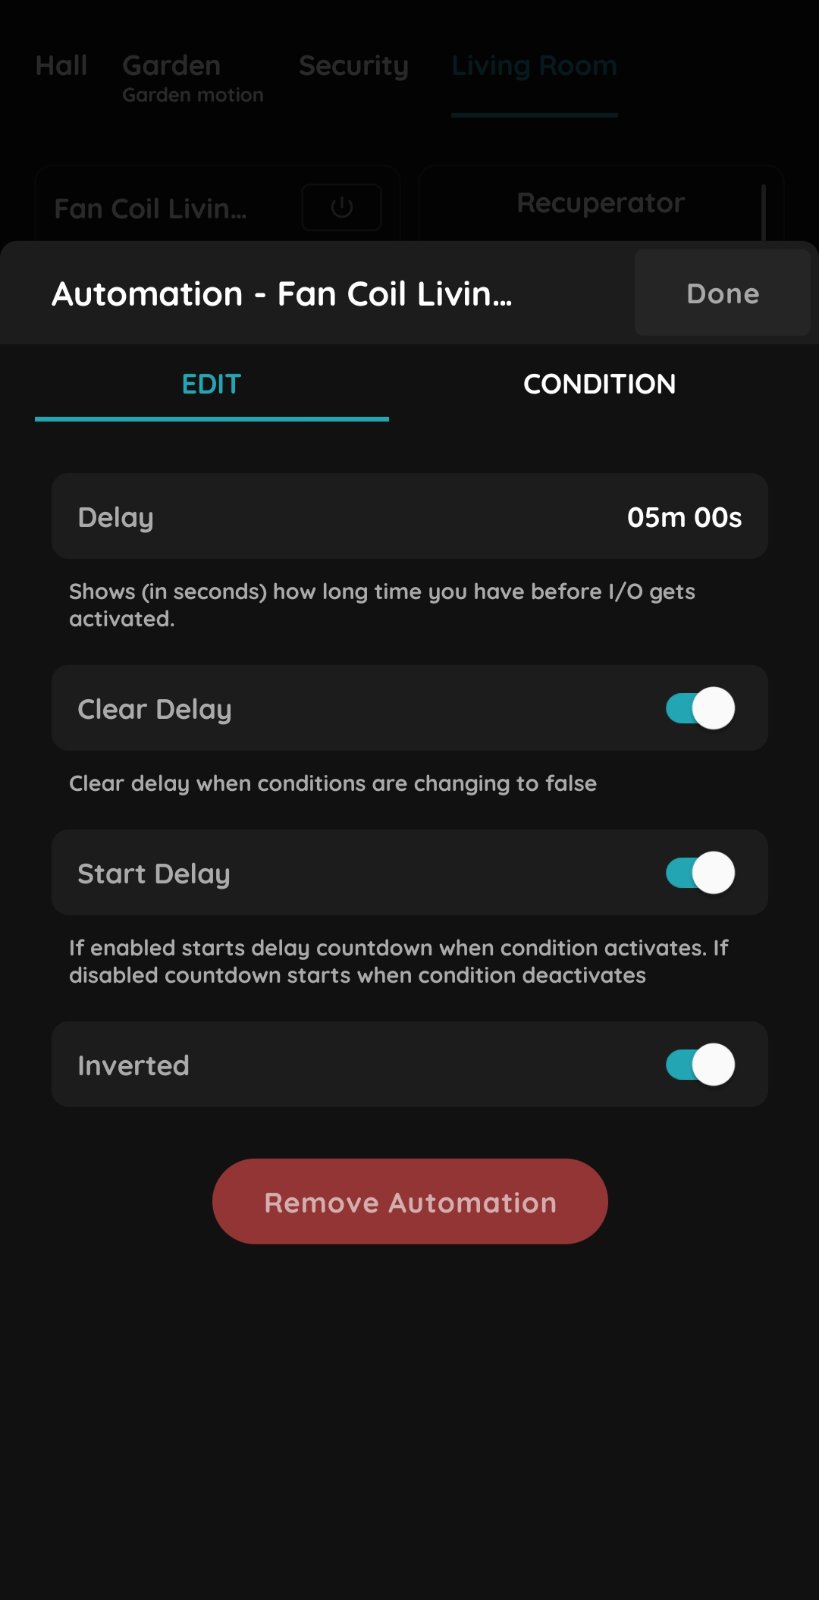
Delay setup
- Set the Delay to 5 minutes.
The ventilation will be turned OFF if the window remains open for 5 minutes. - Enable Clear Delay.
If the window is closed before the 5 minutes countdown expires, the countdown is cancelled and the ventilation remains ON. - Enable Start Delay on Condition Change.
The countdown starts when the magnetic contact changes to the Open state. - Enable Inverted.
The condition logic is inverted, meaning that the ventilation is allowed to operate when the window is closed. When the window is opened, the inverted condition becomes inactive and the delay starts.
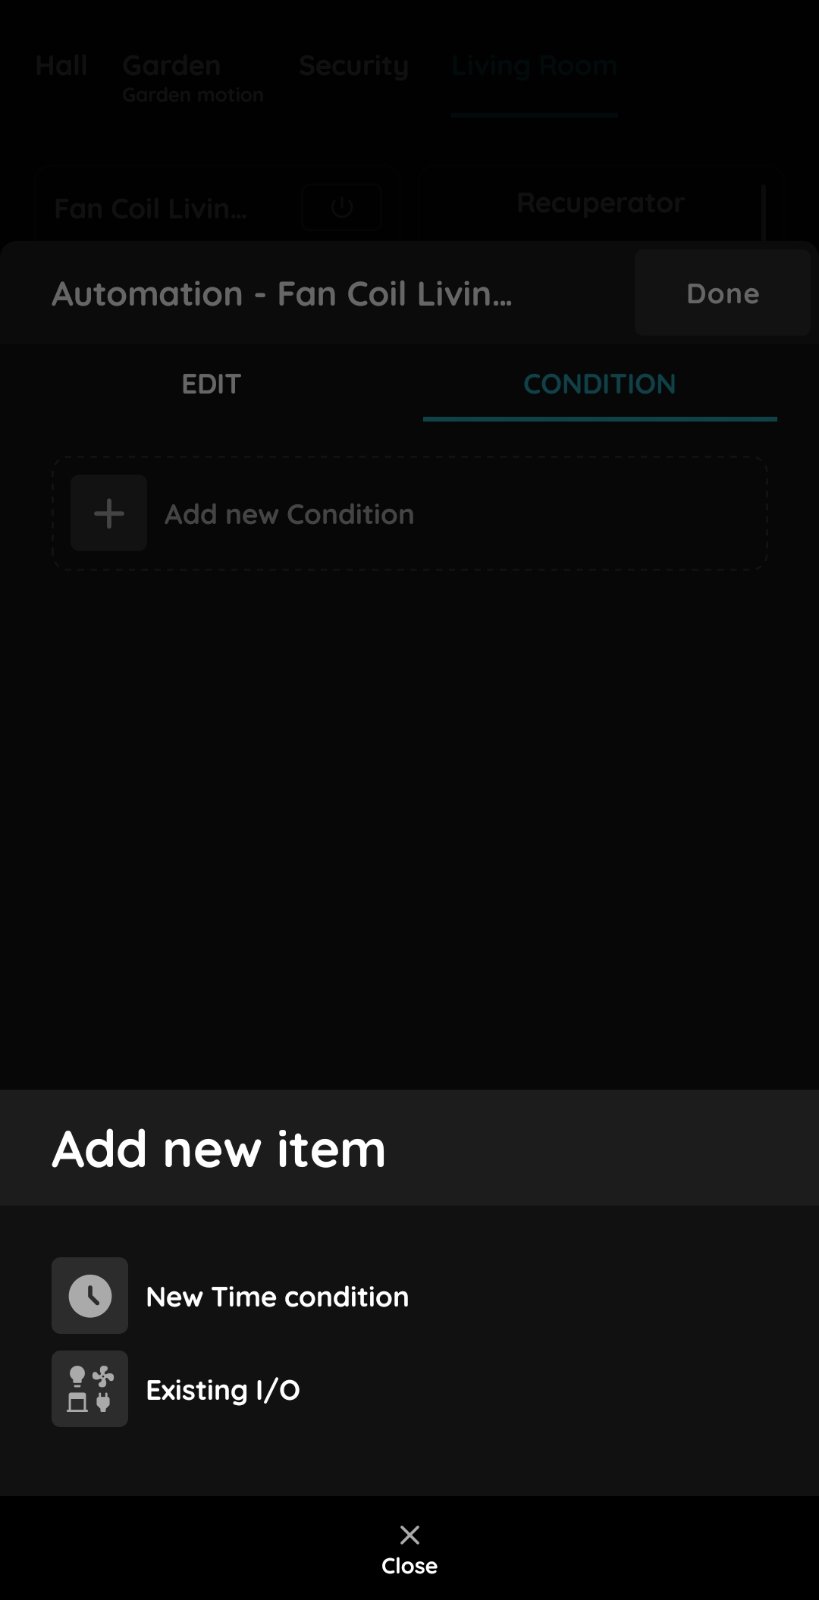
Select existing I/O
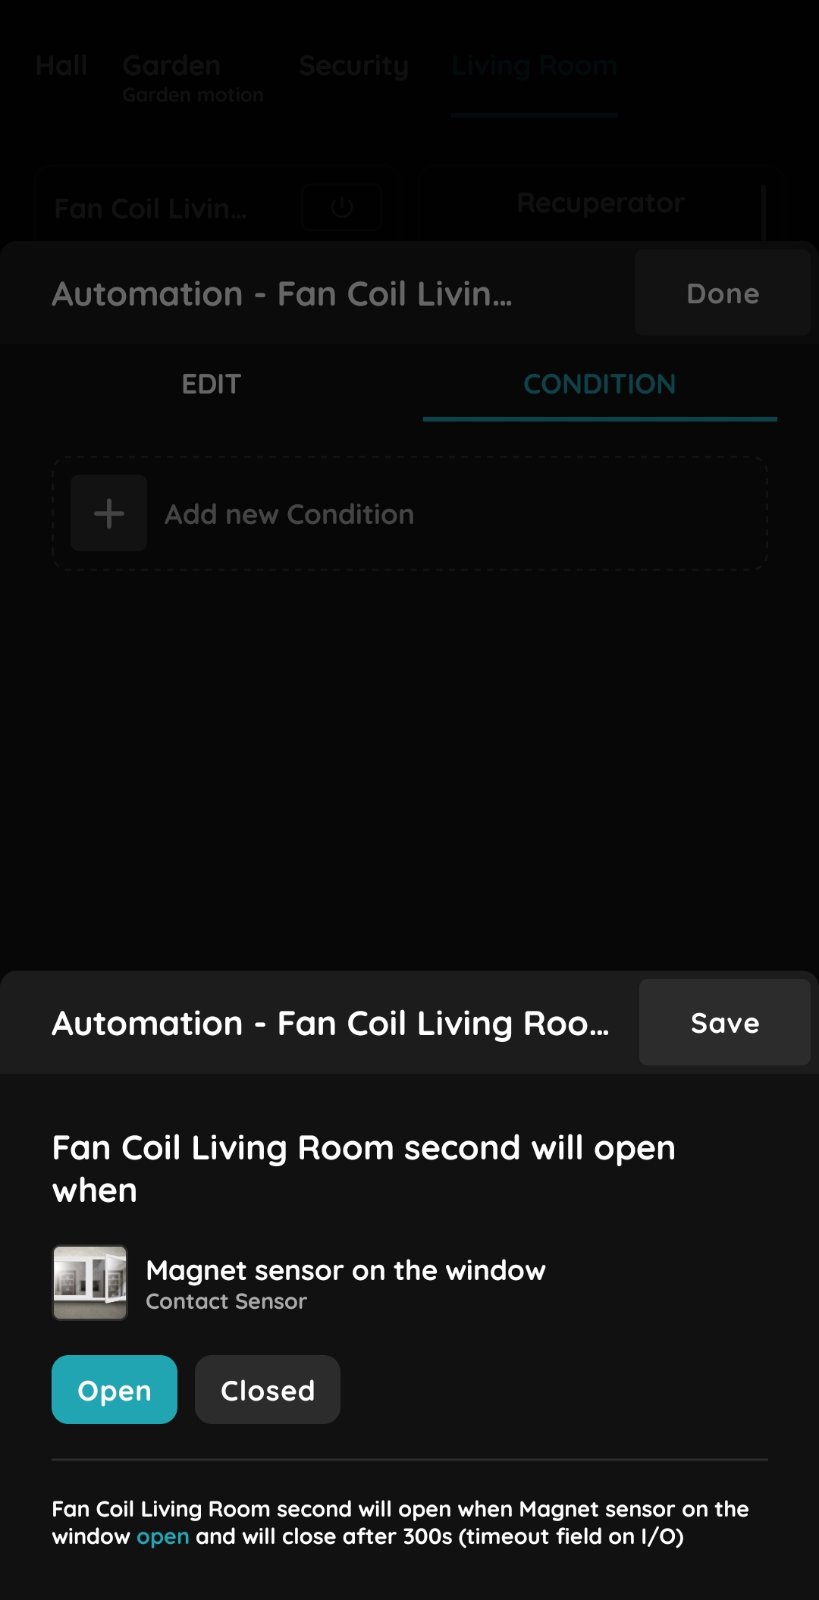
Magnetic contact sensor
In this example, we use the magnetic contact sensor (when Open) as the condition for the delay.
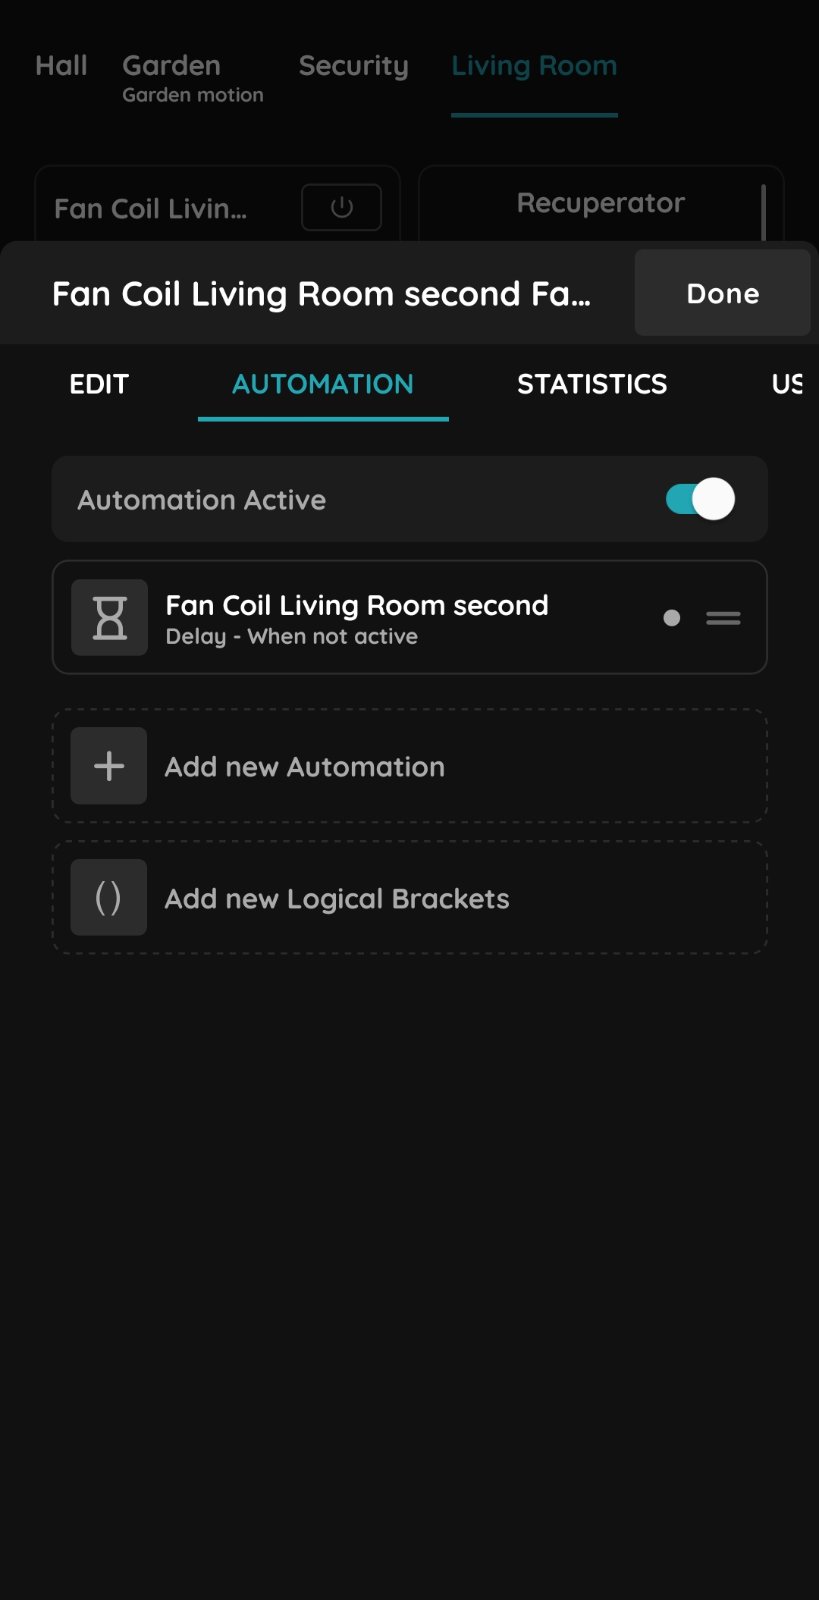
Automation
Activate Automation.