Smart PIERRE - Irrigation Automation
Description
Irrigation automation runs the watering system from real conditions instead of manual operation. An Irrigation is a controller output that drives a valve or pump through a relay; several rules can be combined on it in one project.
How the Irrigation Card Works
- The card has three states: Off, On and Auto. Off and On are manual. In Auto the output follows its automation rules.
- The Timer tab runs the irrigation for a chosen duration: set the time, tap Start timer, and when it runs out the output returns to the state it had before. Use it for a one-off watering without touching the rules. The Timer tab needs a controller firmware that supports it; the app shows a notice if the controller is too old.
- The Automation tab holds the rules, with an Automation active switch that turns the whole rule set on or off without deleting it.
- The Timeout set in the PIERRE Partner app defines, in Auto, how long watering continues after the triggering condition ends. With a schedule as the condition it is normally left at 0, so watering stops at the end time.
Automation Methods
- Time-based – New Time Condition with the days, a start time and an end time. Watering runs inside that window, for example early morning or the cooler evening hours.
- Rain sensor – Existing I/O with the rain sensor set to "not active". Watering is allowed only while no rain is detected, so a cycle is not run into wet ground.
- Soil moisture sensor – Existing I/O with the moisture value set to "smaller than" the chosen level. Watering starts when the soil is drier than the threshold and stops when it is reached again. This is the method that actually matches water use to need.
- Motion sensor – Existing I/O with the sensor set to "does not detect motion", so watering pauses while someone is on the path or in the garden.
- Delay – New Delay, for example to start a second zone a set time after the first one finished.
- Manual remote control – the output can always be switched from the app, and the Timer tab gives a timed manual run.
Combining Conditions
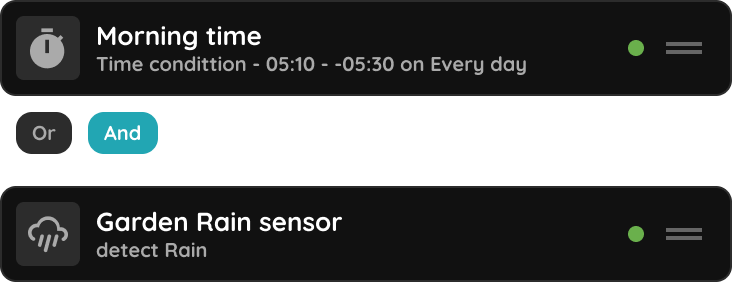
The most reliable setup uses a schedule as the frame and sensors as the permission: watering may only start within the allowed hours, and only if the soil is actually dry and it is not raining. Add the time condition first, then the rain sensor and the moisture sensor as Existing I/O, and combine them with And. Or is used to allow several alternative windows or triggers. Conditions can be grouped with brackets when a rule needs both.
Where to Set It Up
- In the Smart PIERRE app, hold the irrigation card on the Dashboard, or open Menu, Settings, I/O and pick it from the Irrigations list.
- Open the Automation tab and switch Automation active on.
- Tap Add Automation and choose New Time Condition. Select the days, the start time and the end time. Save.
- Tap Add Automation again, choose Existing I/O, pick the rain sensor and set it to not active. Save.
- For a moisture-controlled zone, add the soil sensor the same way with "smaller than" and the threshold measured for that zone.
- Set the card to Auto. The step-by-step screenshots below walk through the time condition and the rain sensor.
The rules run on the controller, so watering continues on schedule without an internet connection. Changing the rules needs the connection.
Technical Notes
- One soil moisture sensor represents one zone. Areas with different soil, sun exposure or planting need their own sensor and their own output.
- Take a reading right after watering and again when the soil is dry, and set the threshold from those measured values rather than from a guess.
- Keep the zones separate. Opening several valves at once divides the water pressure between them; use a delay between zones instead of one shared window.
- The irrigation output is a wired controller output. There is no Wave irrigation valve; a wireless installation controls the valve through a Wave switch module or plug added as a valve or outlet instead.
- Review the schedule with the season; a summer cycle run in autumn wastes water.
Automating an Irrigation System Based on Rain Sensor and Time
Automate your irrigation system in the PIERRE app by setting conditions based on the rain sensor and time. This ensures the system waters the garden only when needed, preventing unnecessary water use.
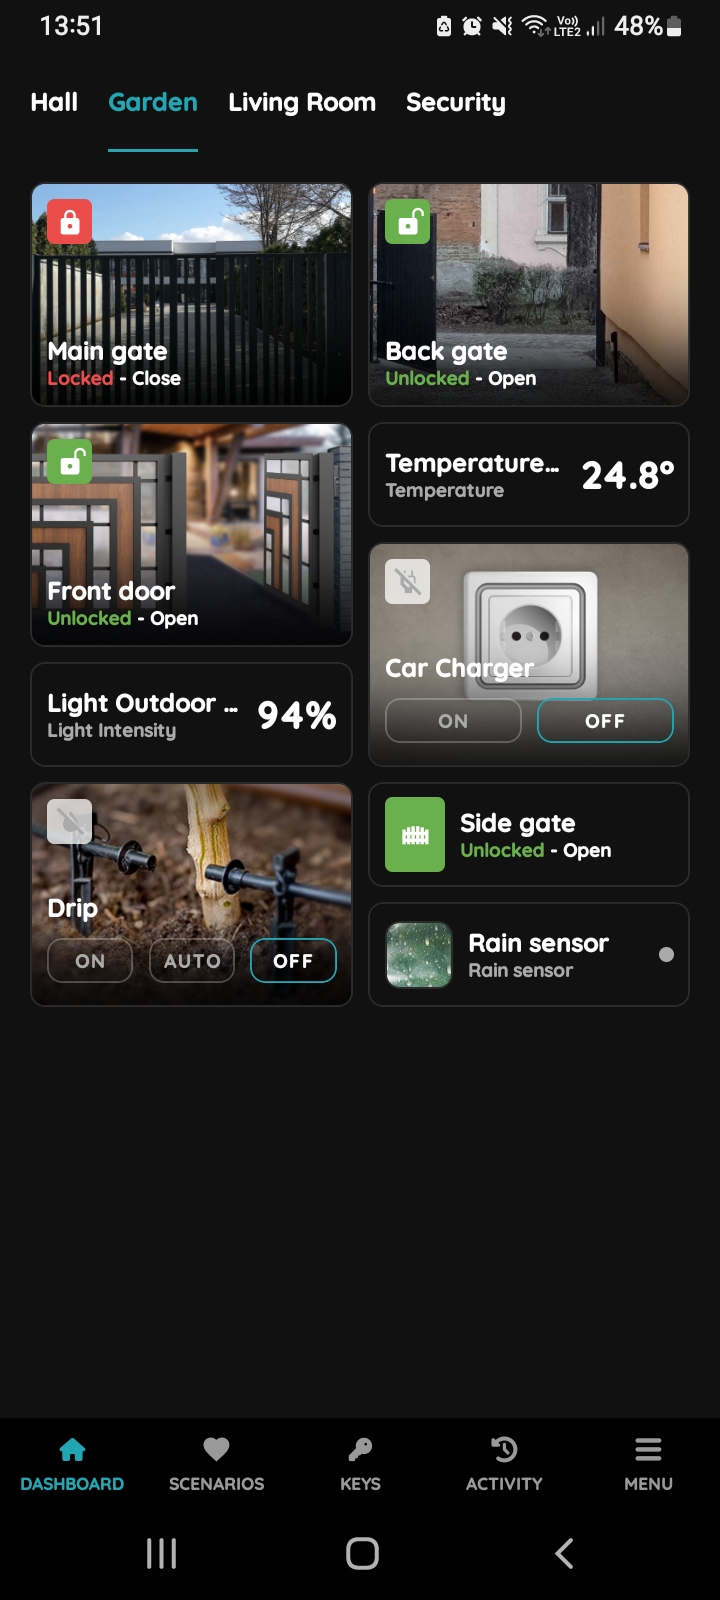
Find the Irrigation on the Dashboard
Open the Dashboard, find the Irrigation and log press its card.
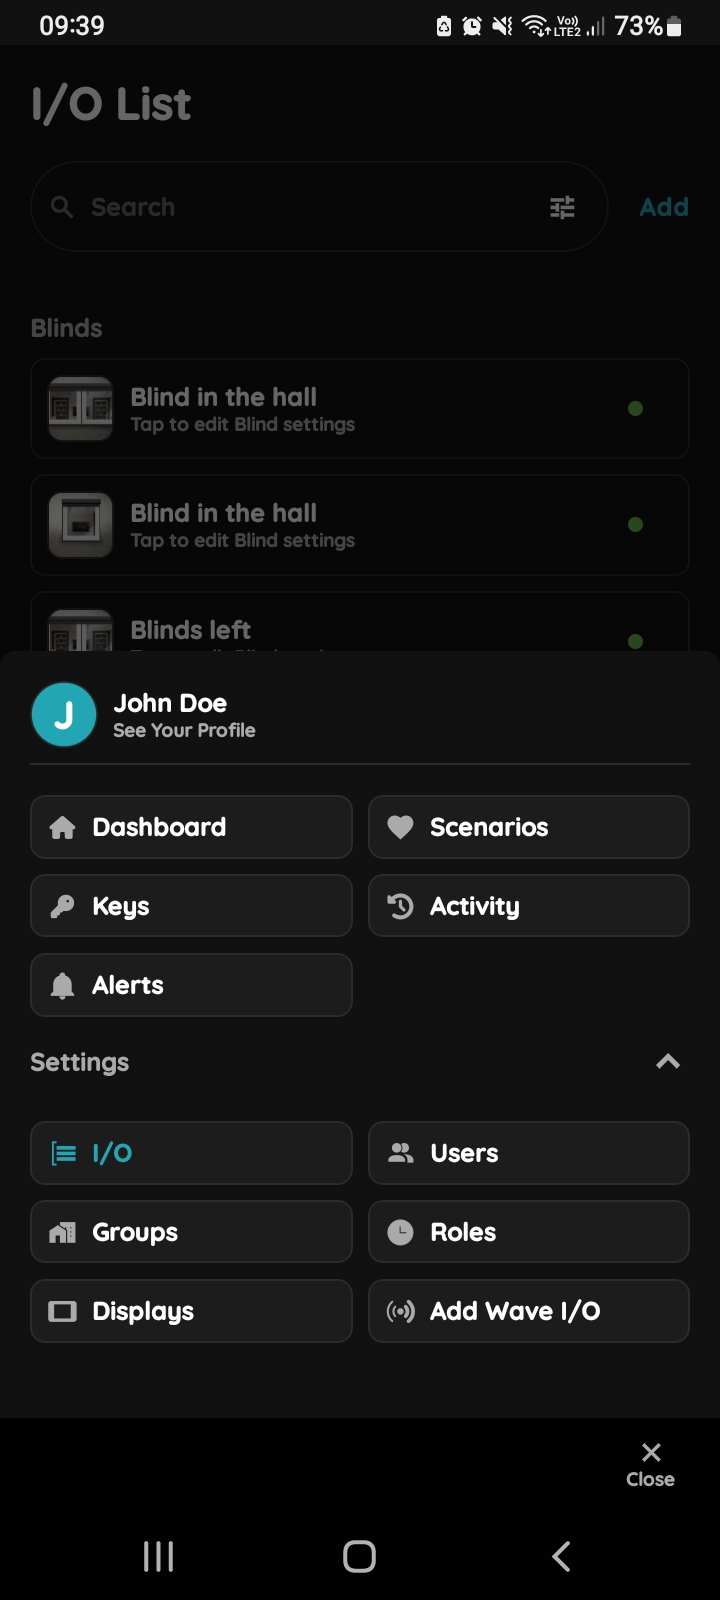
Open I/O
In the Menu, under Settings, tap on the I/O.
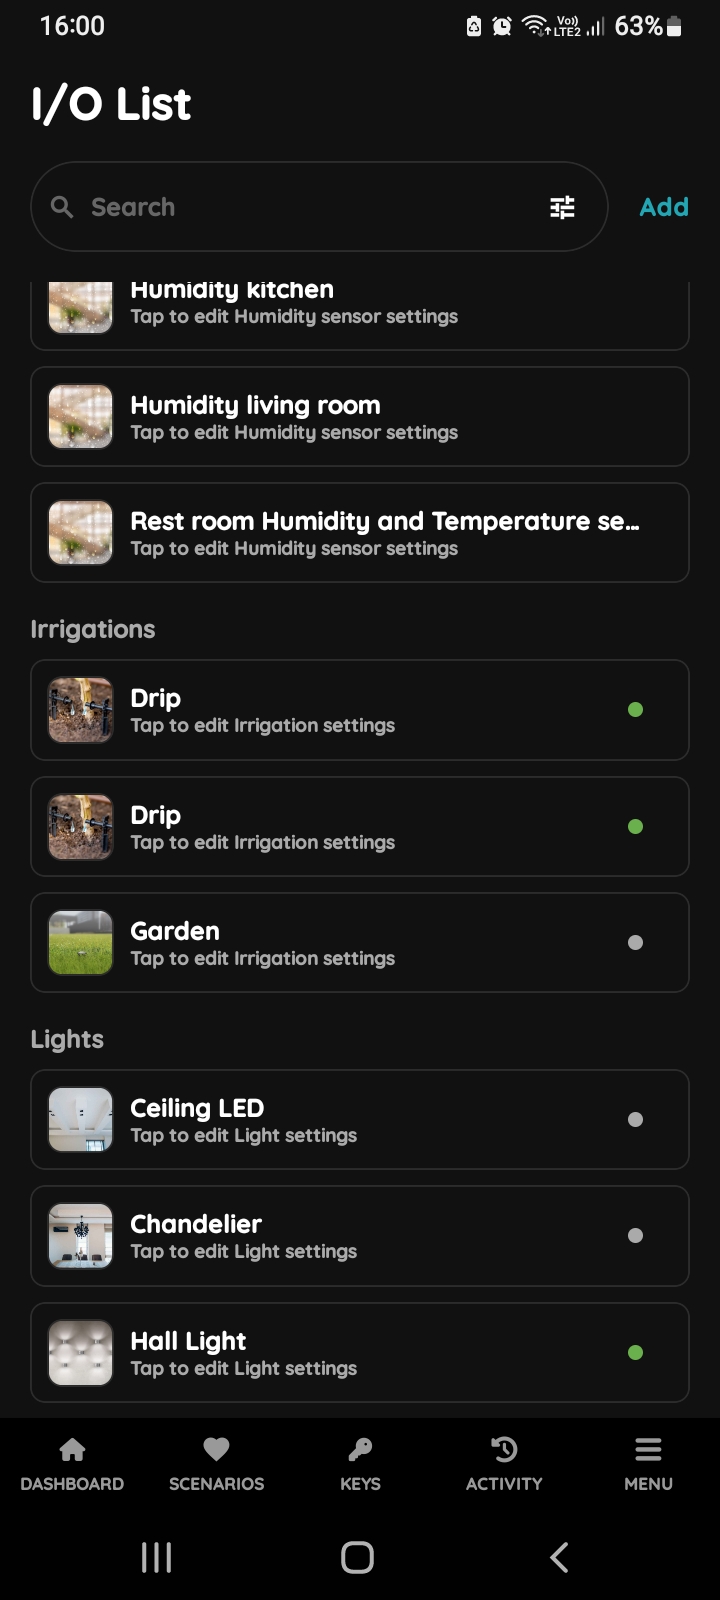
I/O list - Irrigation
Open I/O list, scroll to the Irrigations and tap on the card of the Irrigation, in this case on the Drip.
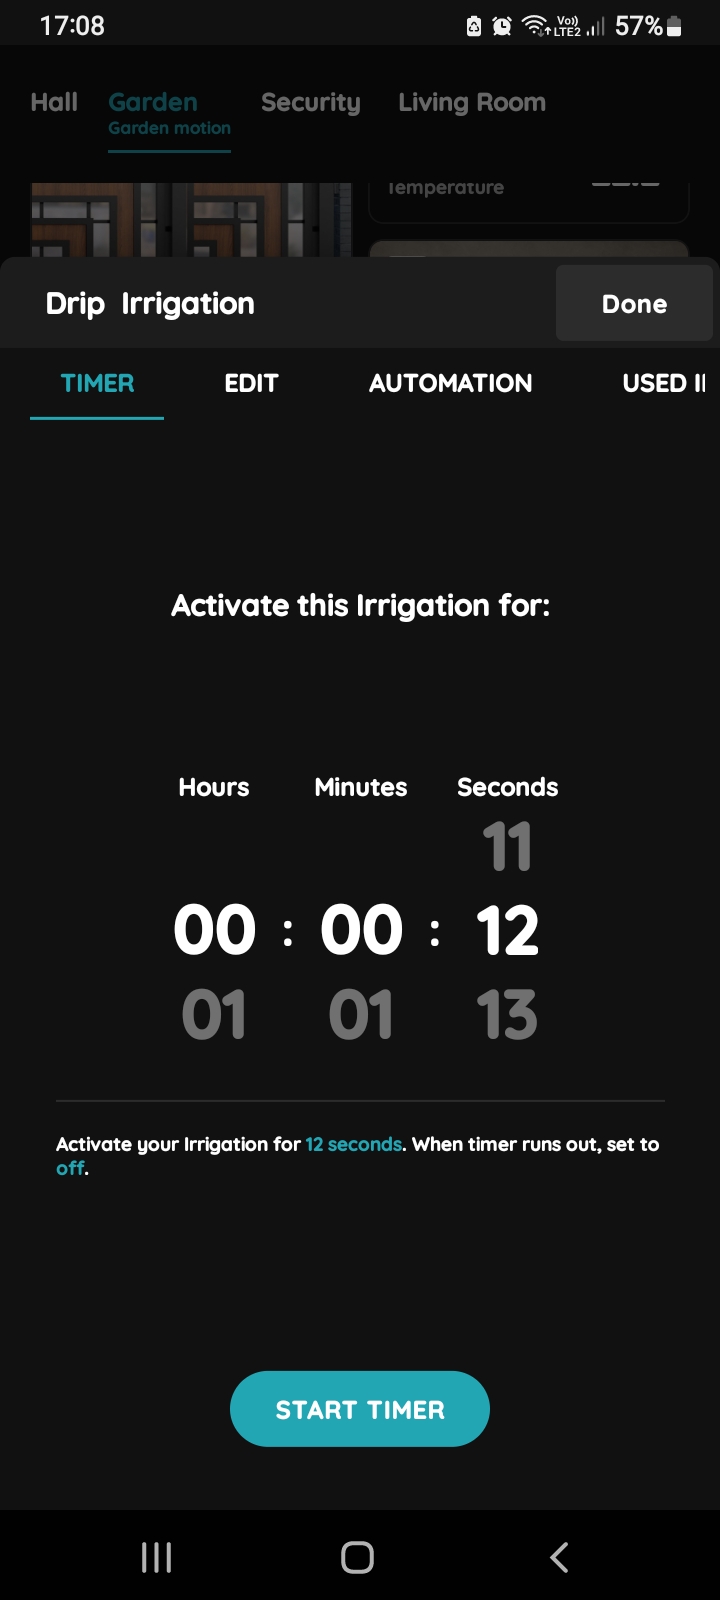
Timer, Edit, Automation, Used In - Irrigation
Tap on the tab Automation.
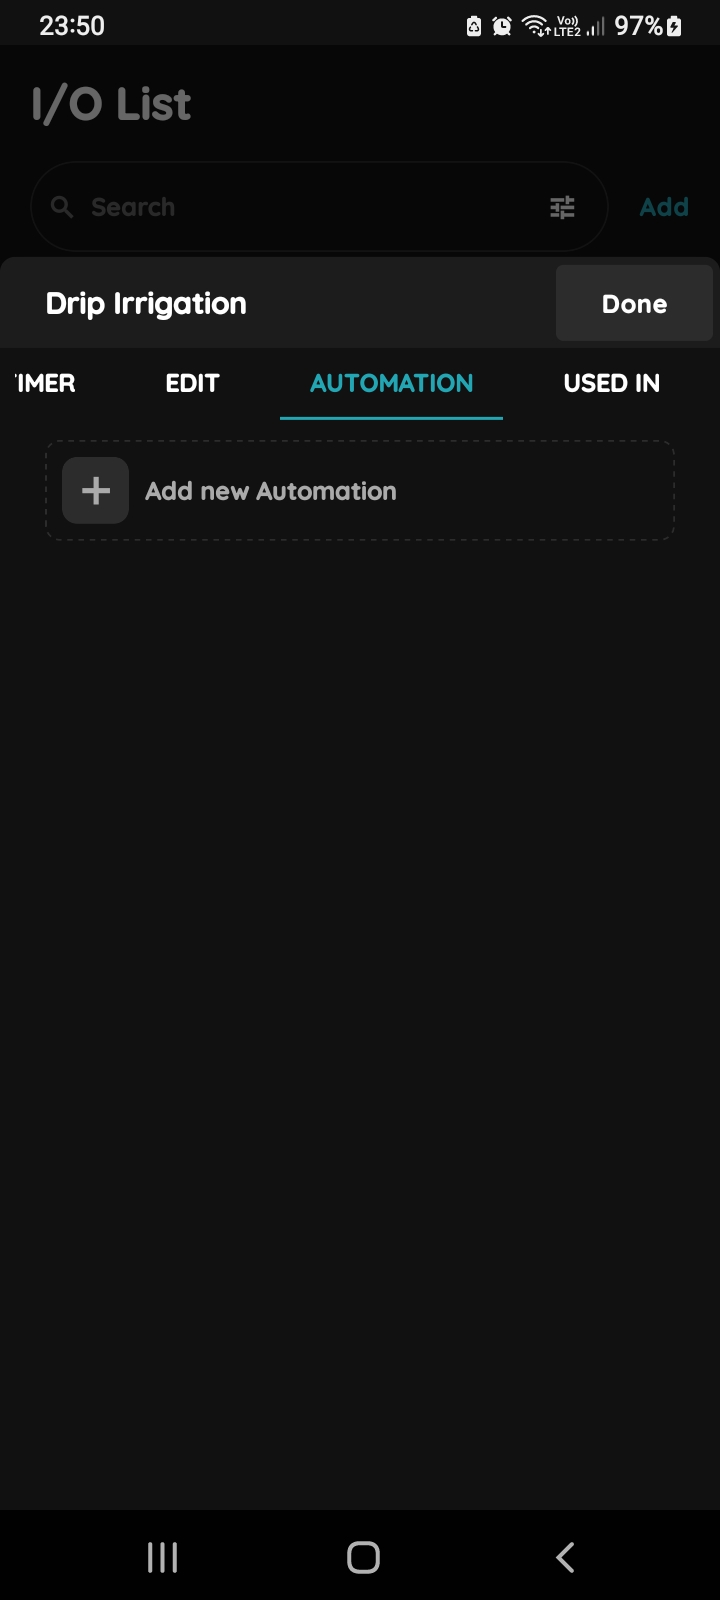
Add new Automation - Irrigation and Rain sensor
Tap the +Add Automation in order to add automation for the Irrigation.
In this case we will create automation for the Irrigation that will be active every day in period of time from 12 o'clock to 3 o'clock, when Rain sensor is inactive.
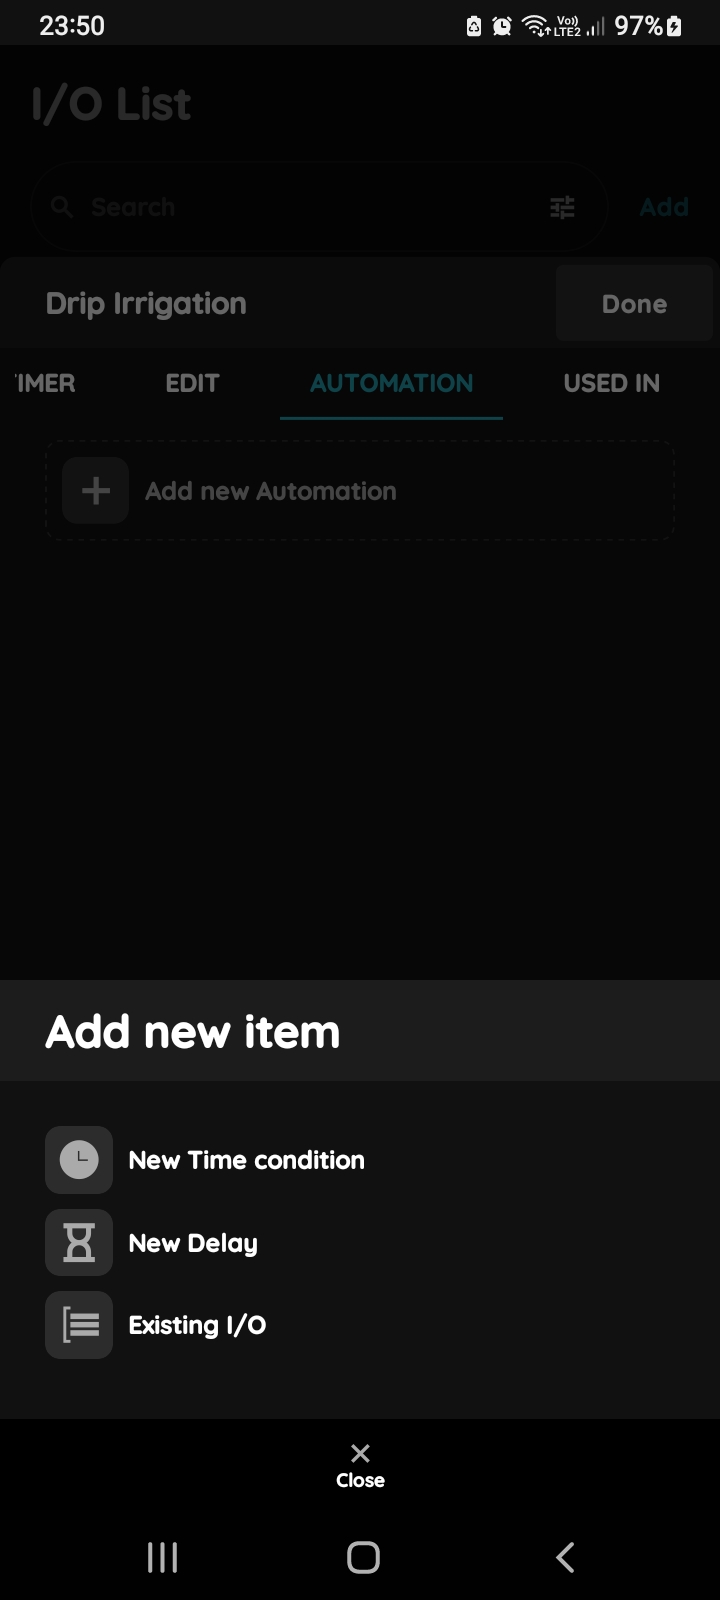
Add new item for the Irrigation - New Time condition
There is possibility to add:
- New Time condition,
- New Delay
- Existing I/O.
Tap the New Time condition.
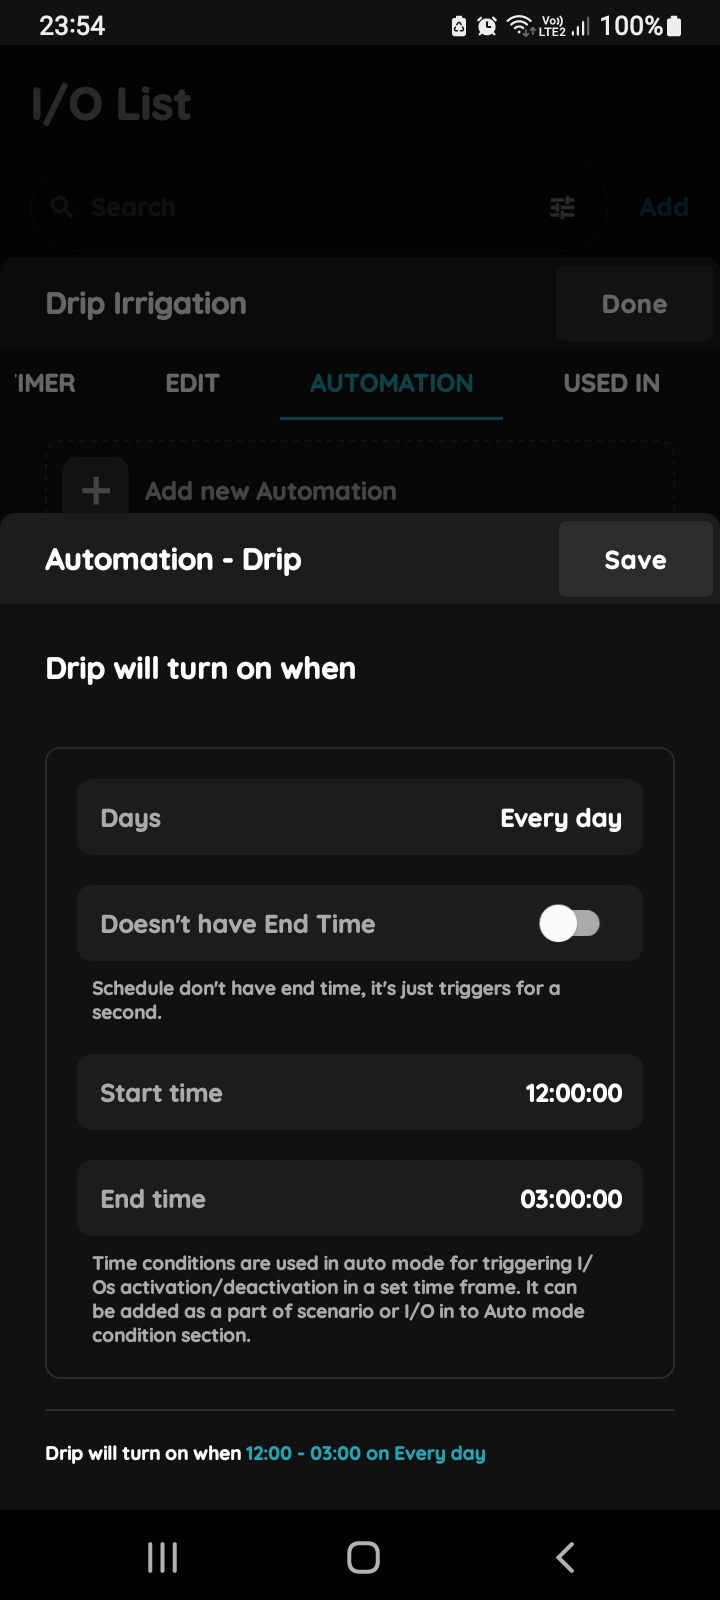
New Time Condition - Irrigation
You should set Days, Start time and End time in this step.
Tap in the field of each of them to set them.
For more details follow next steps.
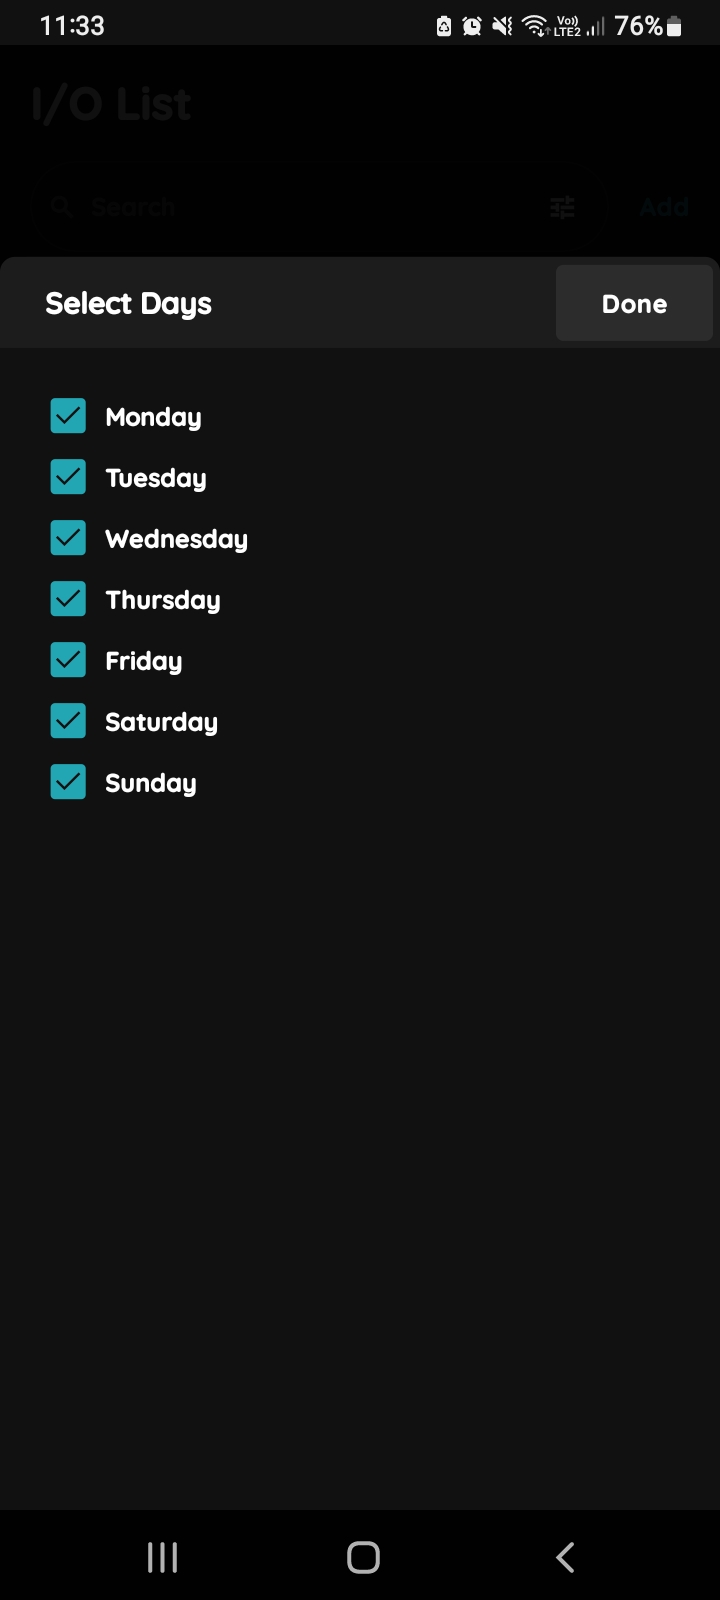
Select Days
Select Days when the I/O will be active by clicking on the check box/check boxes next to the days from the list.
In this case select all days from Monday to Sunday.
Tap button Done.
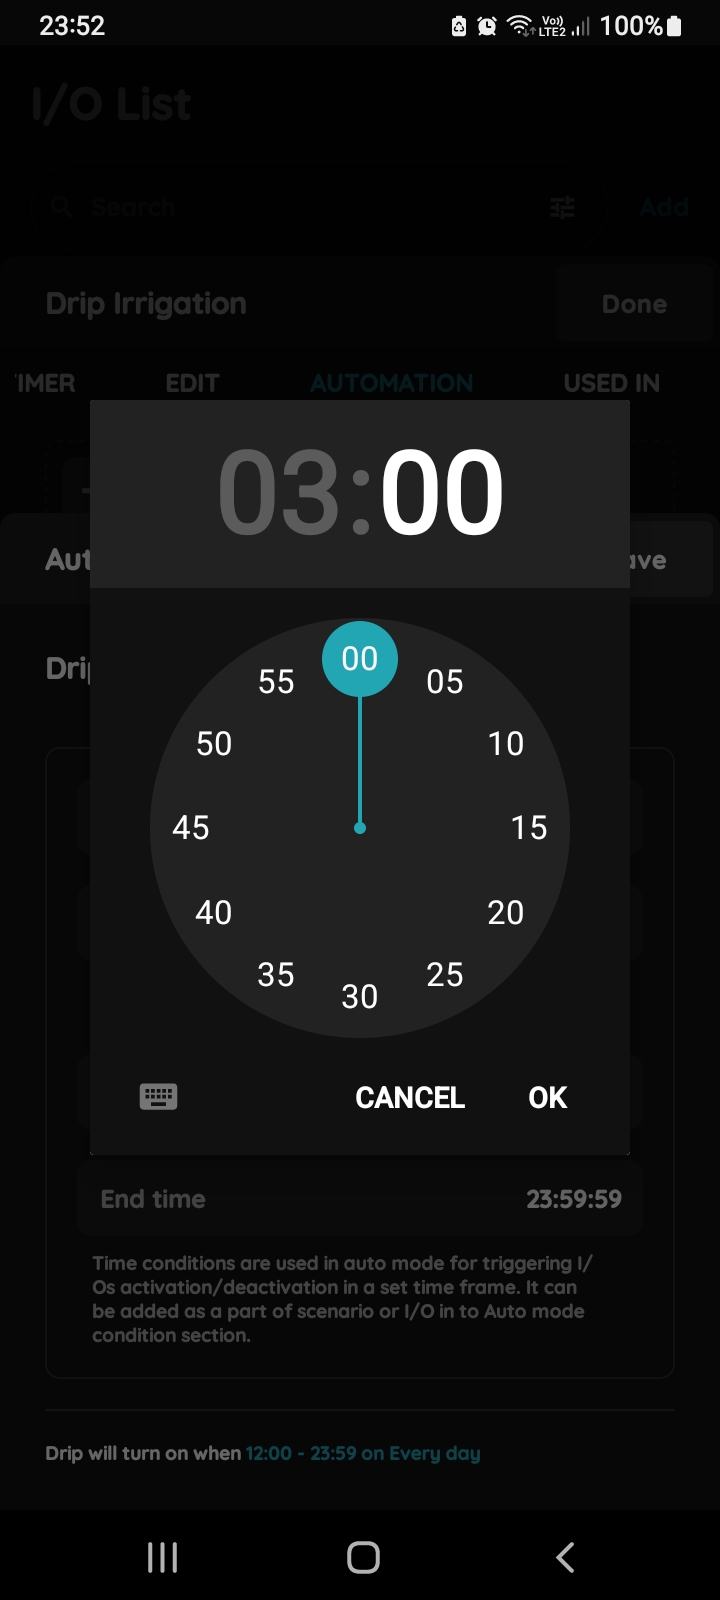
Start time and End time
Start time and End time fields will show you clock and icon of the keyboard in order to set these two parameters.
Tap the button OK. In case that you want to cancel it tap the button Cancel.
(Time conditions are used in auto mode or triggering I/Os activation/deactivation in a set time frame. It can be added as a part of the scenario or I/O in to Auto mode condition section.)
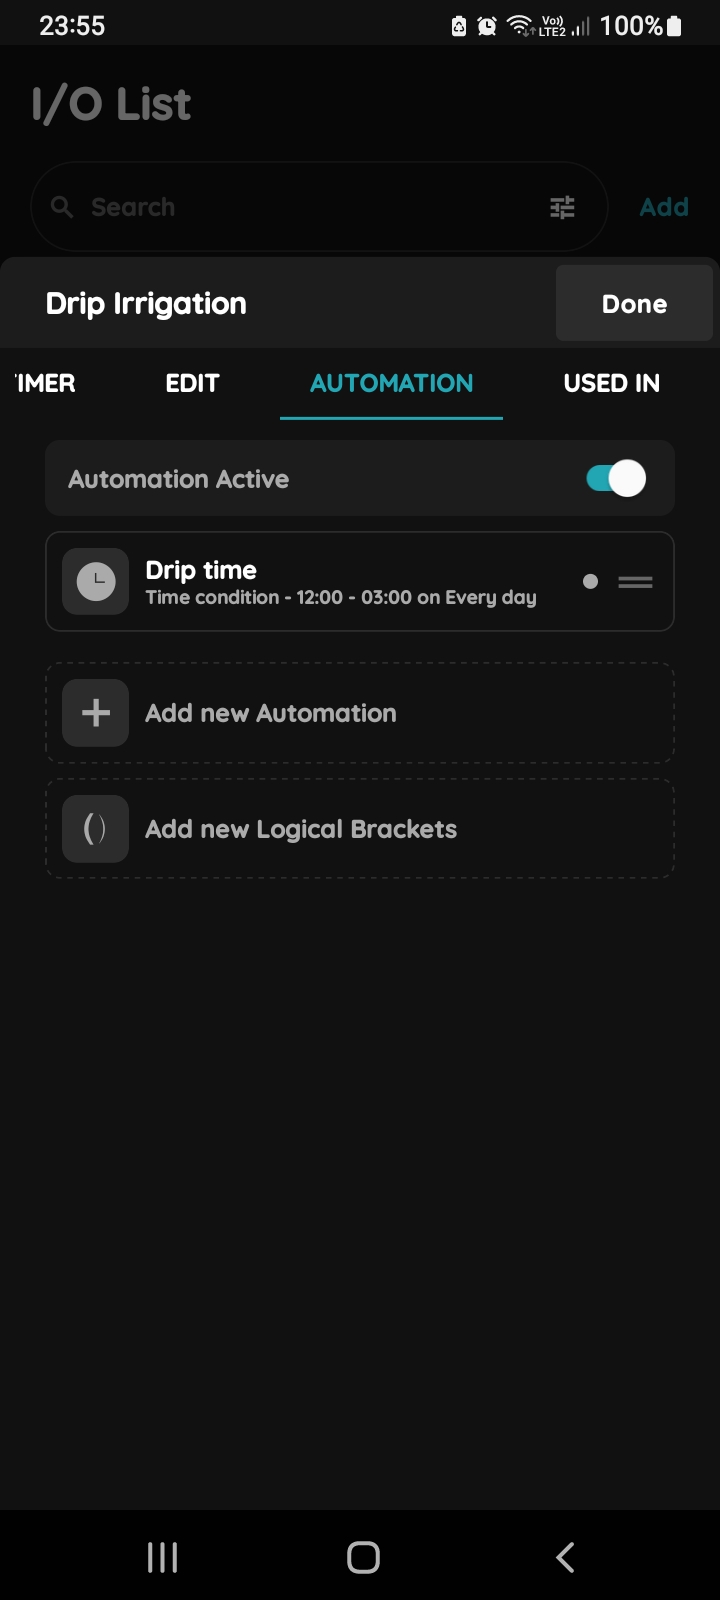
Add new Automation for the Irrigation
In order to add Rain sensor to this automation tap the +Add new Automation.
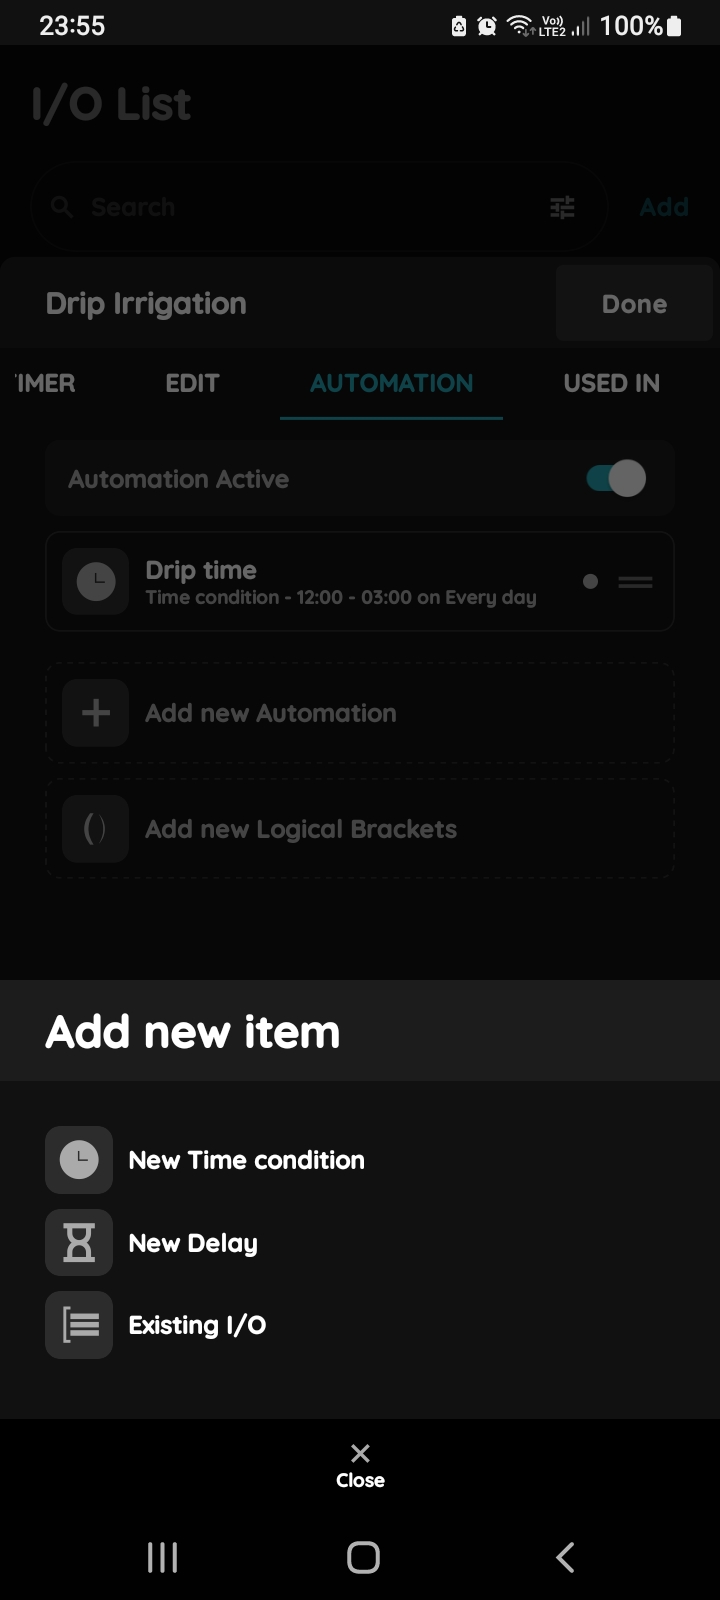
Add new item for the Irrigation
In this step you should add new item.
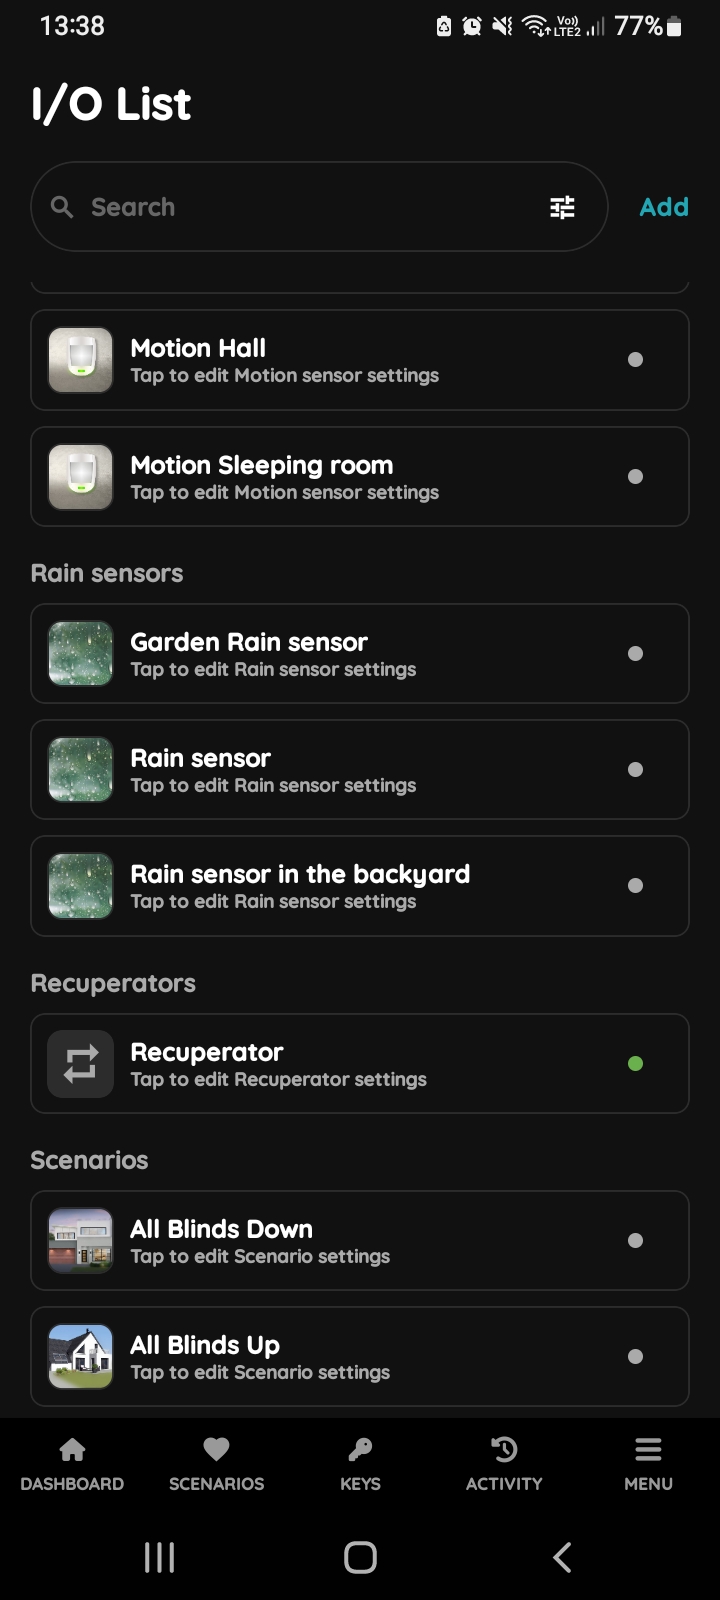
Tap the Existing I/O.
Existing I/O - Rain sensor
Scroll through I/O list and find desired I/O from the list.
Tap on the Rain sensor in order to add it to this automation.
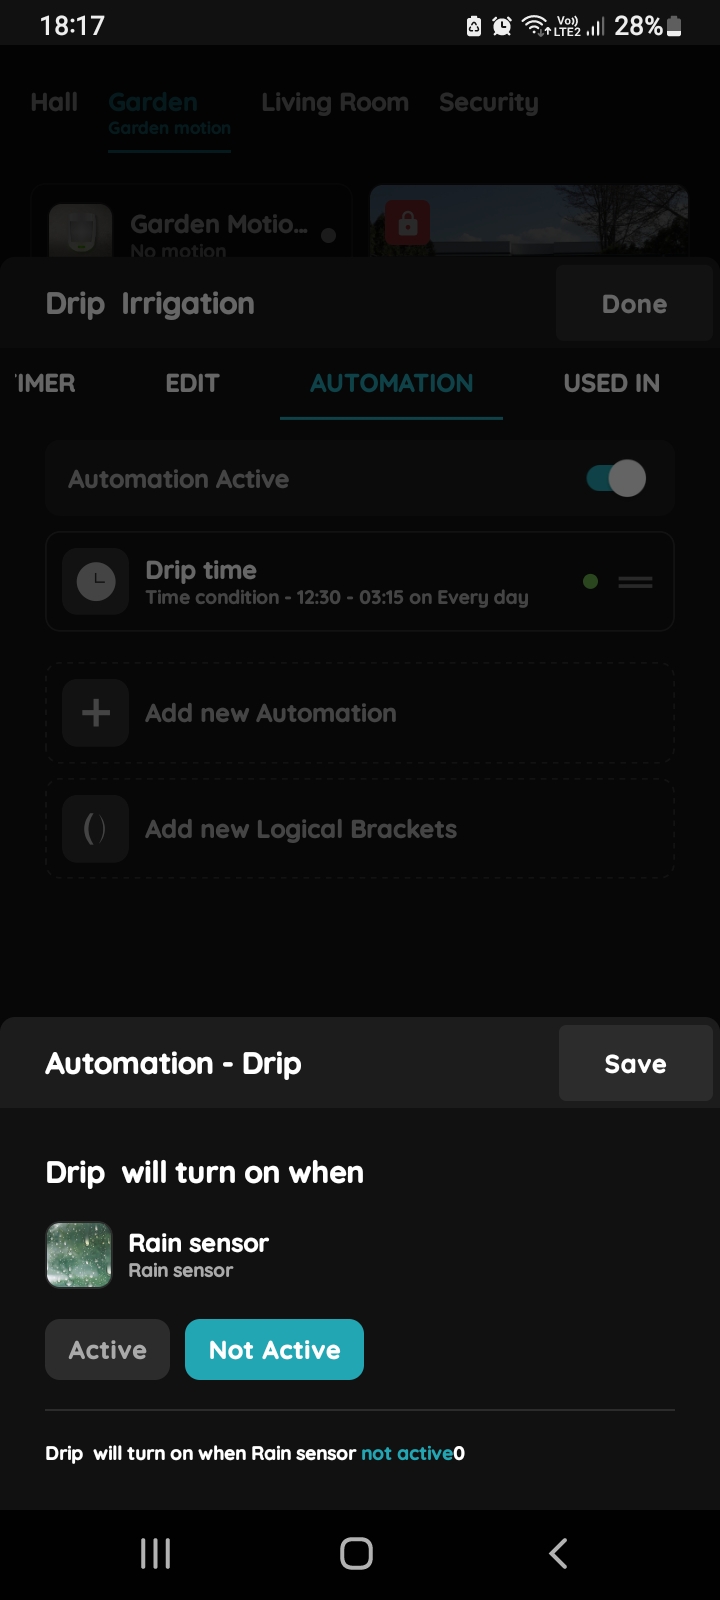
Existing I/O - Rain sensor - status
Irrigation will be turned On in case that Rain sensor is not active.
Tap the button Not active.
Tap the button Save.
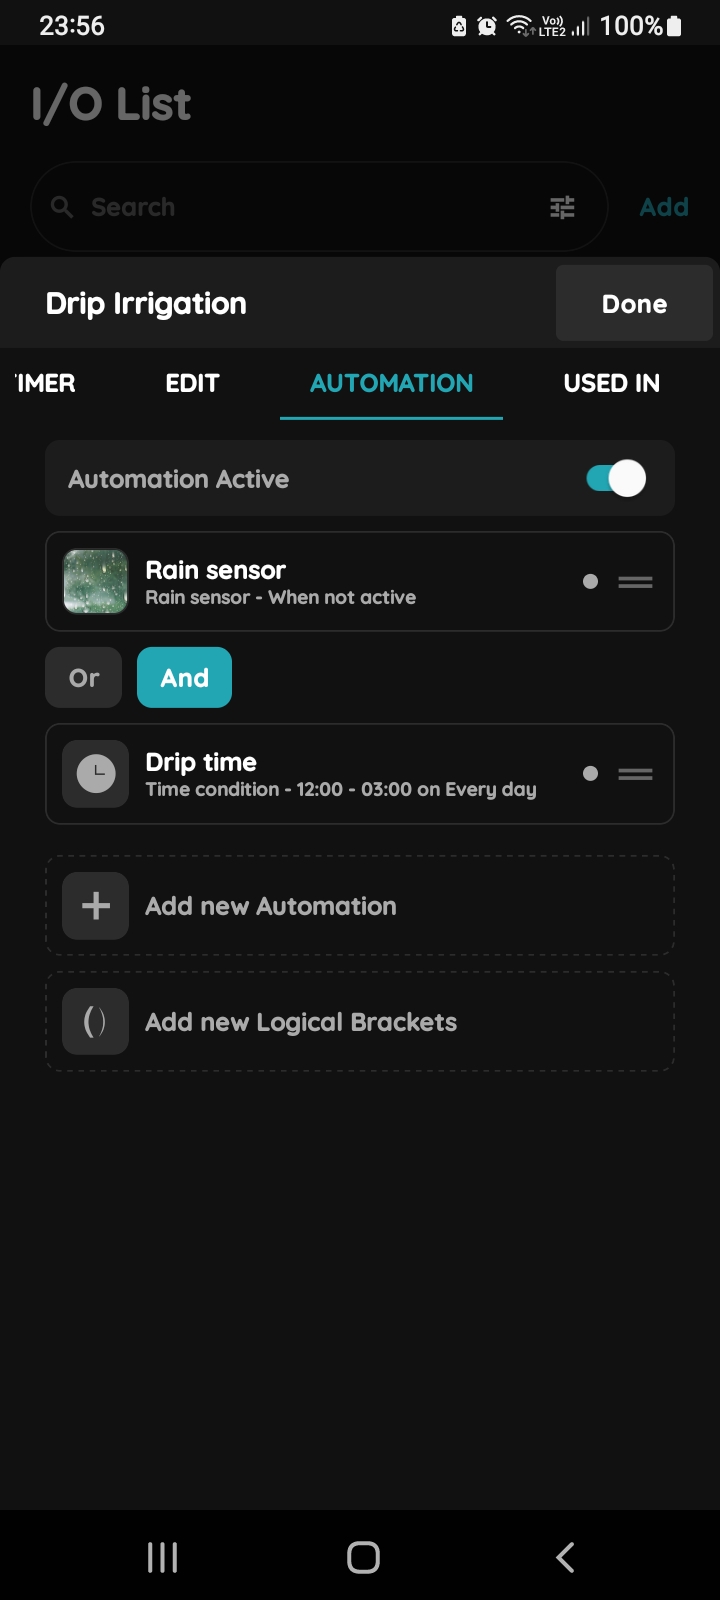
And
Tap And button.
You can use drag and drop to change the order of the I/Os on the list.
In this case both I/Os will be included, because we use And button.
Tap the button Done.