Smart PIERRE - Scenarios
Description
A Scenario sets several I/O devices at once. It stores a predefined state for each device it contains, and when it runs, every included device is set to that state.
Manual Activation
Scenarios can be run manually from the Dashboard or from the Scenarios menu. All included devices act at the same time. Examples:
- Turn off all lights.
- Close all blinds and curtains.
- Activate a "Good Night" mode.
- Activate a "Leave Home" mode.
Automation
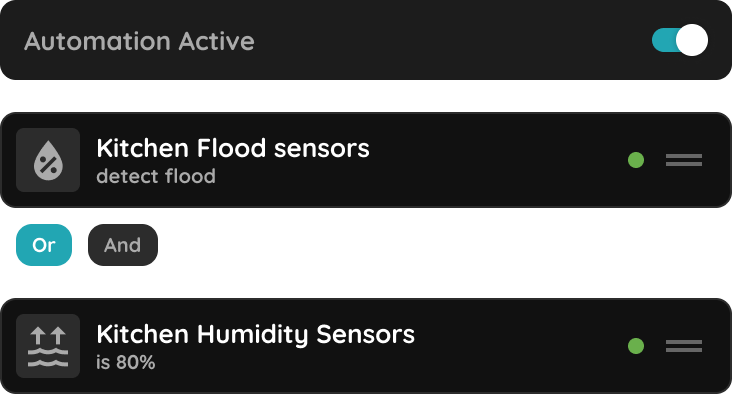
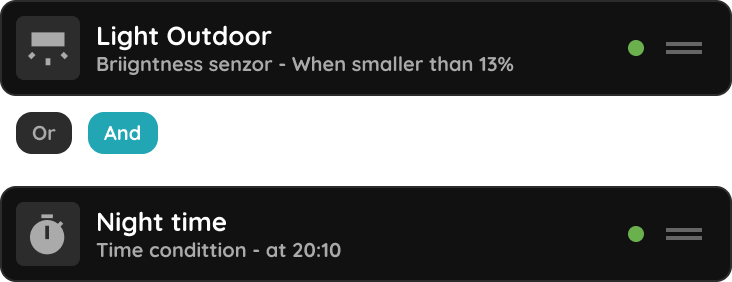
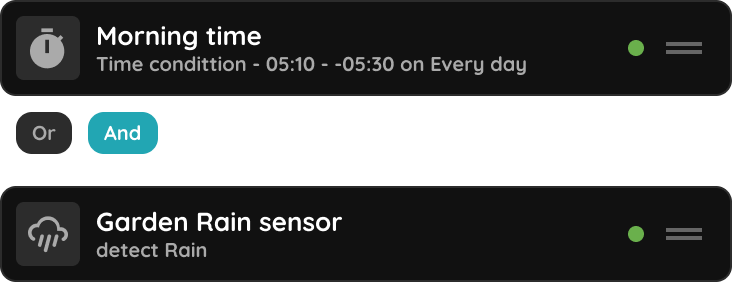
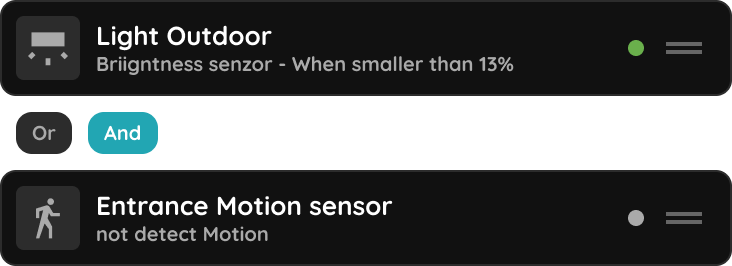
A Scenario can also run automatically when its configured conditions are met, without user interaction. Typical triggers:
- Time schedules.
- Device states.
- Sensor values.
- Presence detection.
- Custom automation conditions.
What Automation of Scenario Can Contain
- I/O actions.
- Delays.
- Time conditions.
This allows a sequence rather than a single simultaneous action — for example closing a gate, waiting, then arming the alarm.
System Scenarios
A Scenario can be marked as a System Scenario. It stays fully functional but is hidden from the standard Scenario list. This is useful when:
- The project contains a large number of Scenarios.
- A Scenario exists only to be called by an automation.
- Users should not have direct access to a specific Scenario.
Suggested Scenarios
The application automatically shows scenarios that are relevant to the devices available in your home and that have not yet been created.
When you select a suggested scenario, a window opens where you can edit the scenario name and image. After saving, the scenario is created automatically and includes all compatible devices available in your home.
Available Suggested Scenarios
| Suggested Scenario | What it does | When it is available |
|---|---|---|
| All Lights On | Turns all lights on. | When at least 2 lights are available. |
| All Lights Off | Turns all lights off. | When at least 2 lights are available. |
| Good Morning | Turns the lights off and raises the blinds. | When at least 1 light and 1 blind are available. |
| Good Night | Turns the lights off and lowers the blinds. | When at least 1 light and 1 blind are available. |
| Blinds Up | Raises all blinds. | When at least 2 blinds are available. |
| Blinds Down | Lowers all blinds. | When at least 2 blinds are available. |
| Leaving Home | Turns all lights off and activates the alarm. | When at least 1 light and 1 alarm are available. |
| Watering On | Turns all irrigation devices on. | When at least 2 irrigation devices are available. |
| Watering Off | Turns all irrigation devices off. | When at least 2 irrigation devices are available. |
Supported Devices
The suggested scenarios take into account different types of devices.
Lights include standard lights, dimmable lights, RGB, RGBW and RGBCW lights.
Blinds include blinds, curtains and shutters, including compatible Zigbee versions.
Alarms include both software-based and physical alarm devices.
Suggested scenarios are displayed automatically based on the devices available in your home.
Important Notes
When a Scenario runs, every included device is set to the state stored in it. A Scenario does not restore devices to their previous state afterwards. The states remain active until another action, automation or Scenario changes them.
Technical Notes
- Include only the devices the Scenario is meant to change. A device added "for completeness" will be forced to that state every time the Scenario runs.
- Mark automation-only Scenarios as System Scenarios, otherwise the user's Scenario list fills with entries that mean nothing to them.
- Test a Scenario from several starting states, not only from the one it was built in.
Open Scenarios
Scenarios can be open from the Taskbar from the Dashboard and from the Menu list.
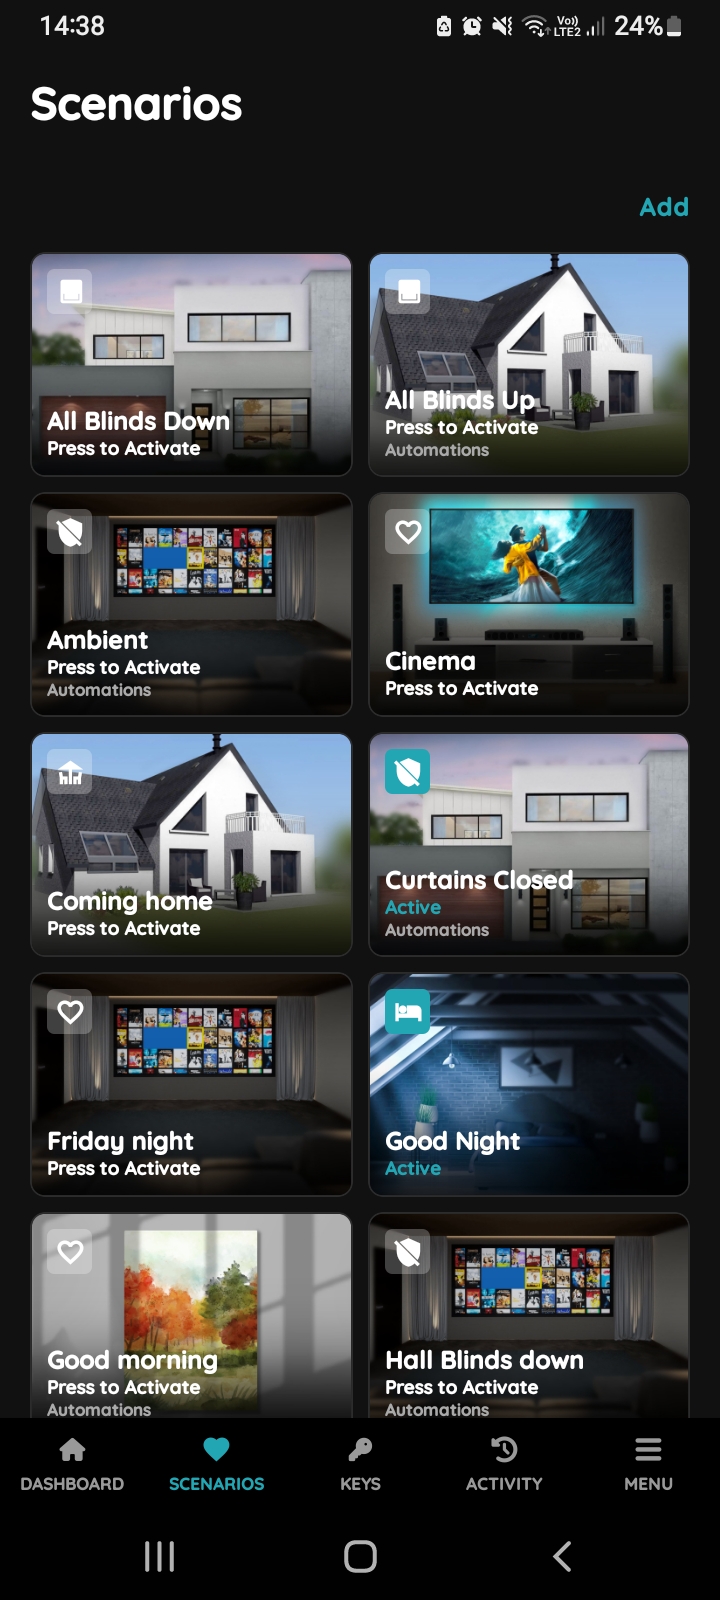
Open Scenarios
In this case open Scenarios from the Dashboard, tap on the Scenarios from the Taskbar.
Scenarios page will be open.
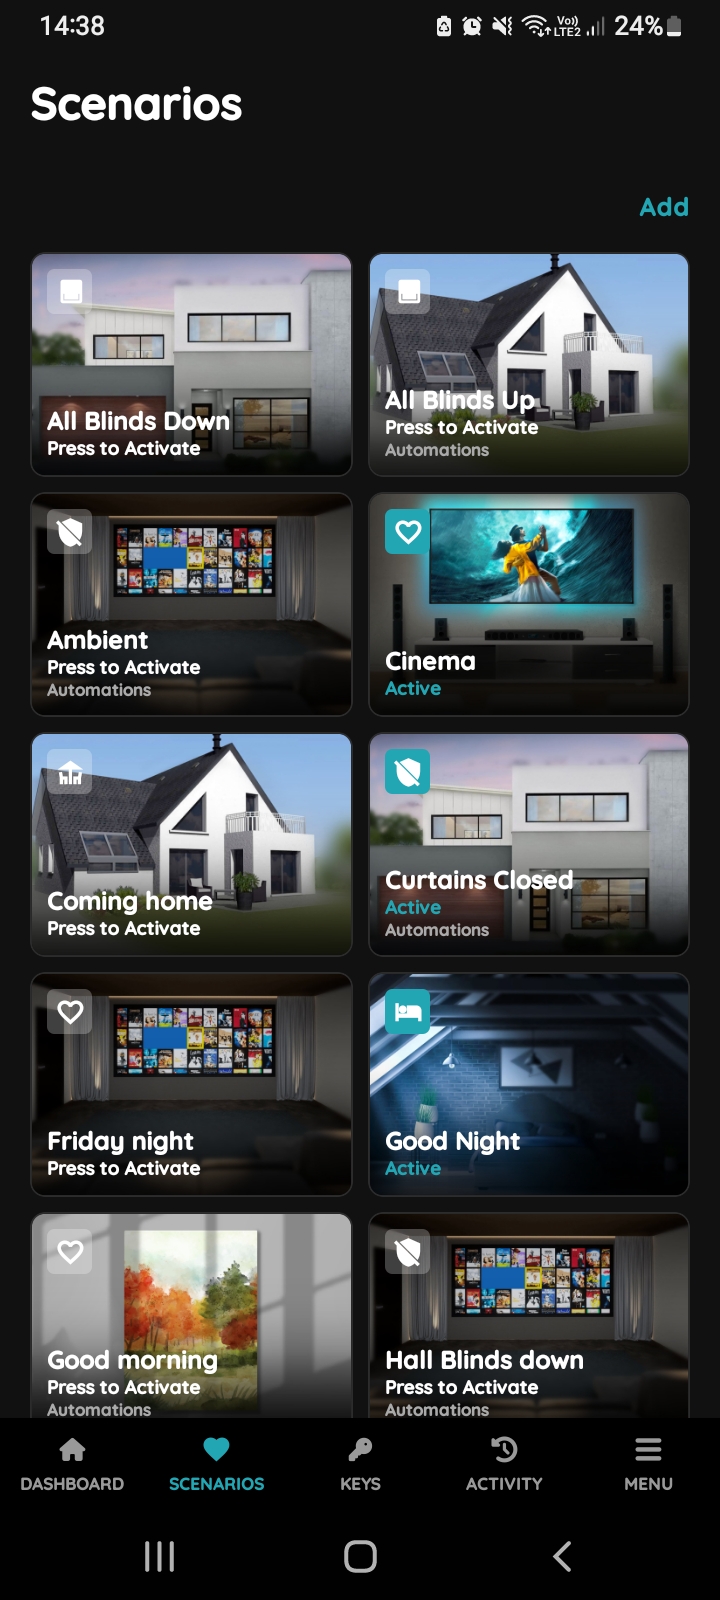
Scenario Activated
When the scenario is activated, Cinema in this case, the icon of the Scenario turns from grey to blue.
Status is changed to Active.
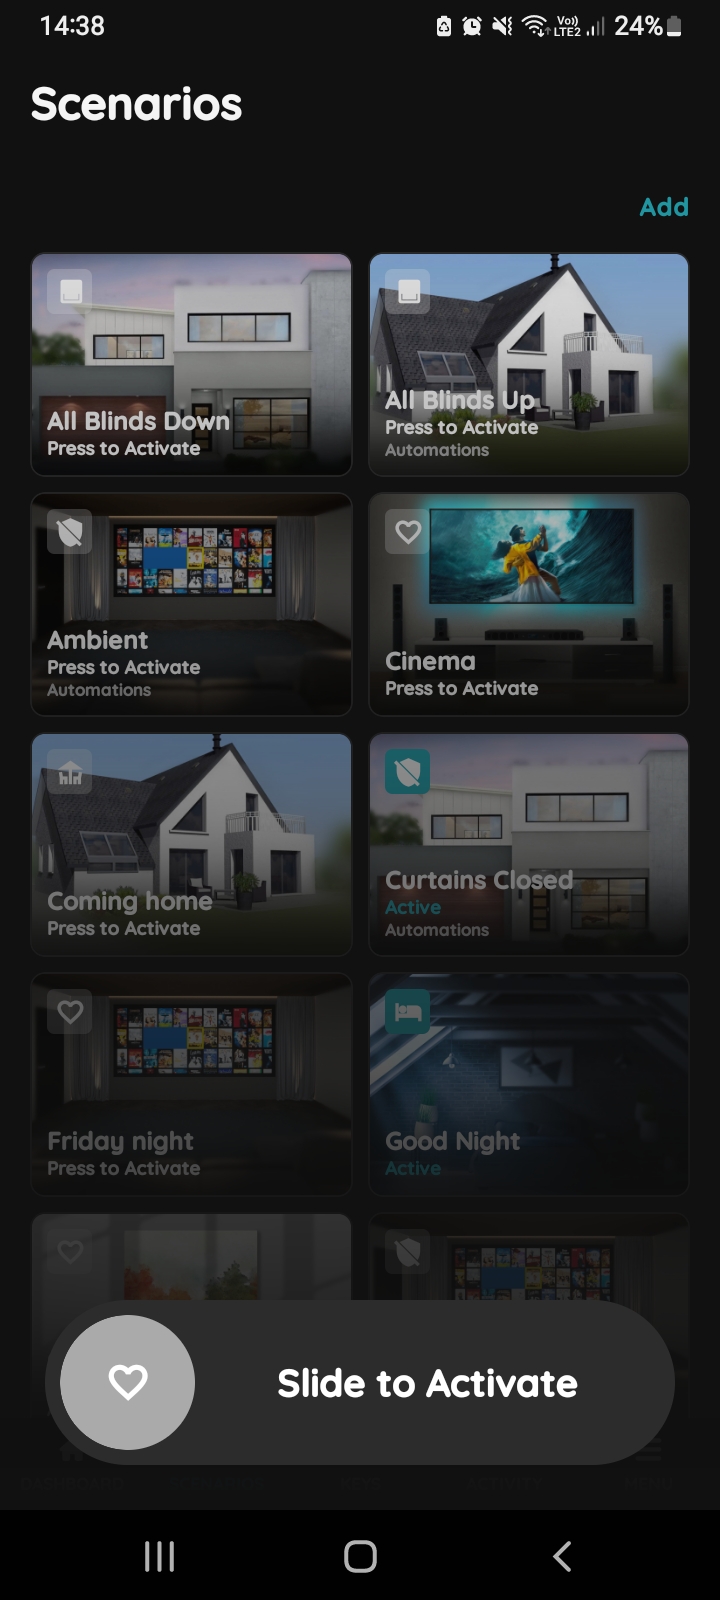
Slide to Activate Scenario
The Slide to confirm feature adds an extra layer of security, requiring you to confirm your action before activating the scenario. This helps prevent scenarios from being triggered accidentally.
To activate the Automated Scenario manually, tap on its card, use button Slide to Activate and slide from left to the right side.
Icon of the Scenario will turn from grey to blue and status of the Scenario will be changed to Active.
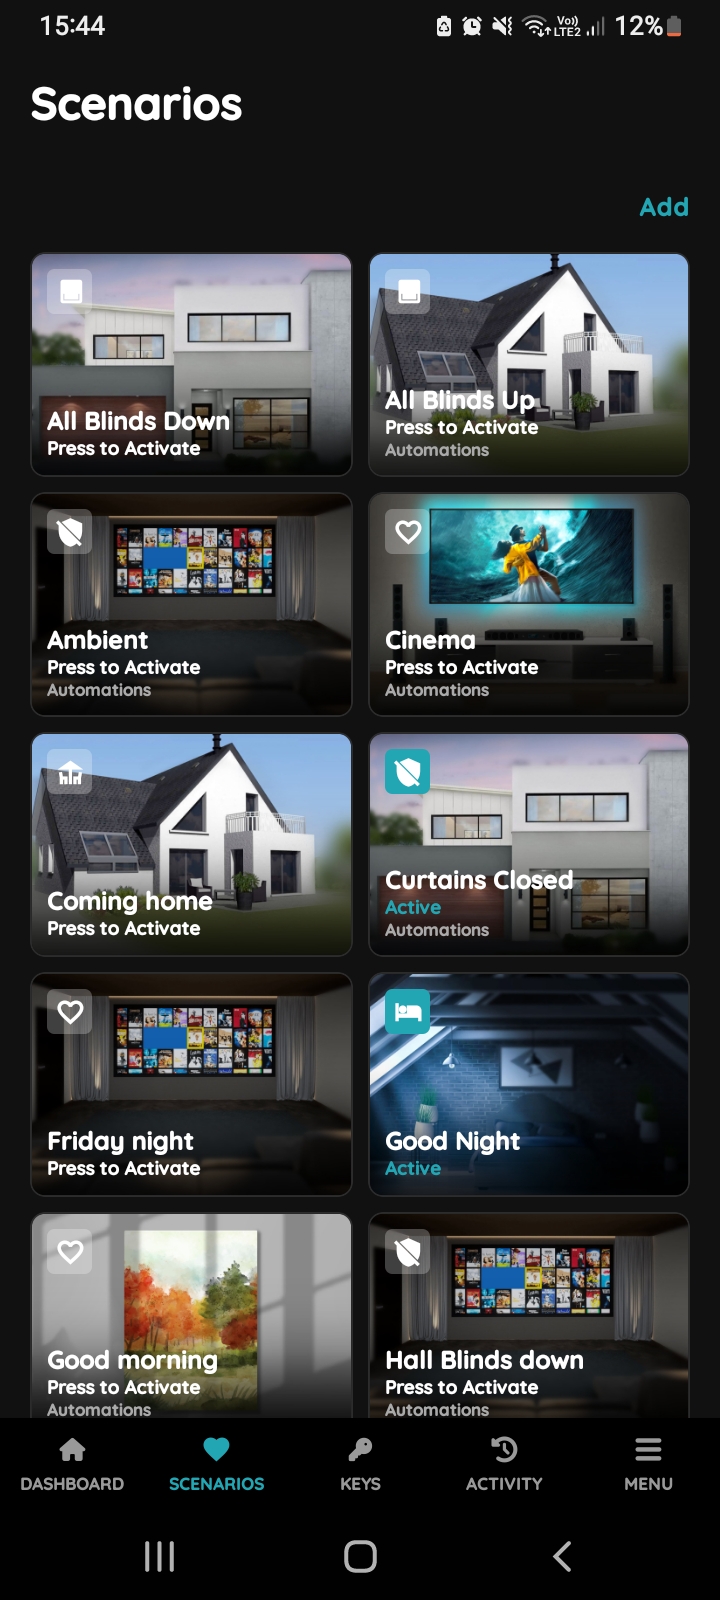
Automations Scenario
If the scenario is automated, Automations will appear under its status on the card.
It will trigger automatically when the automation conditions are met.
You can also activate it manually by pressing the card of the scenario.
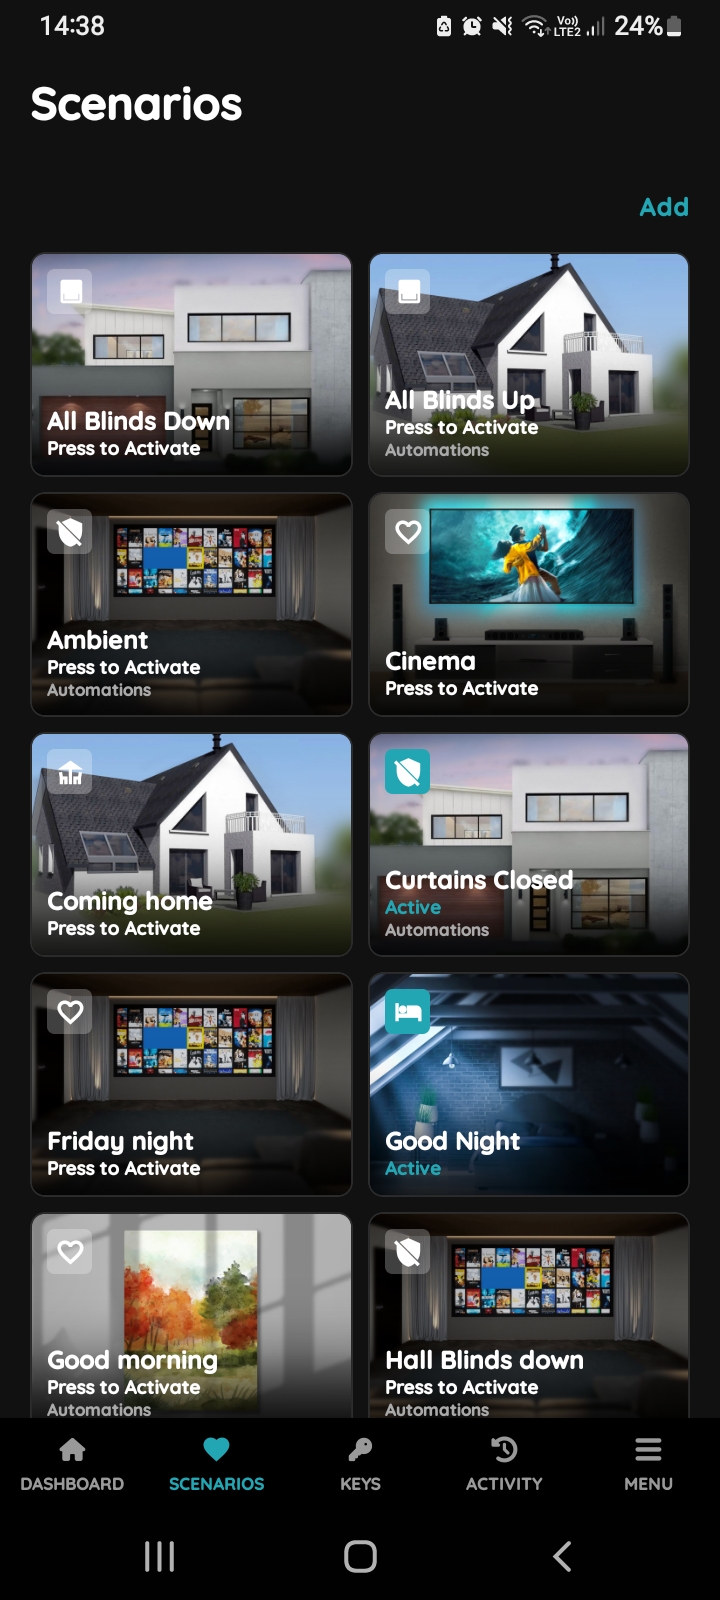
Add Scenario
Tap on the Add button in order to add new Scenario.
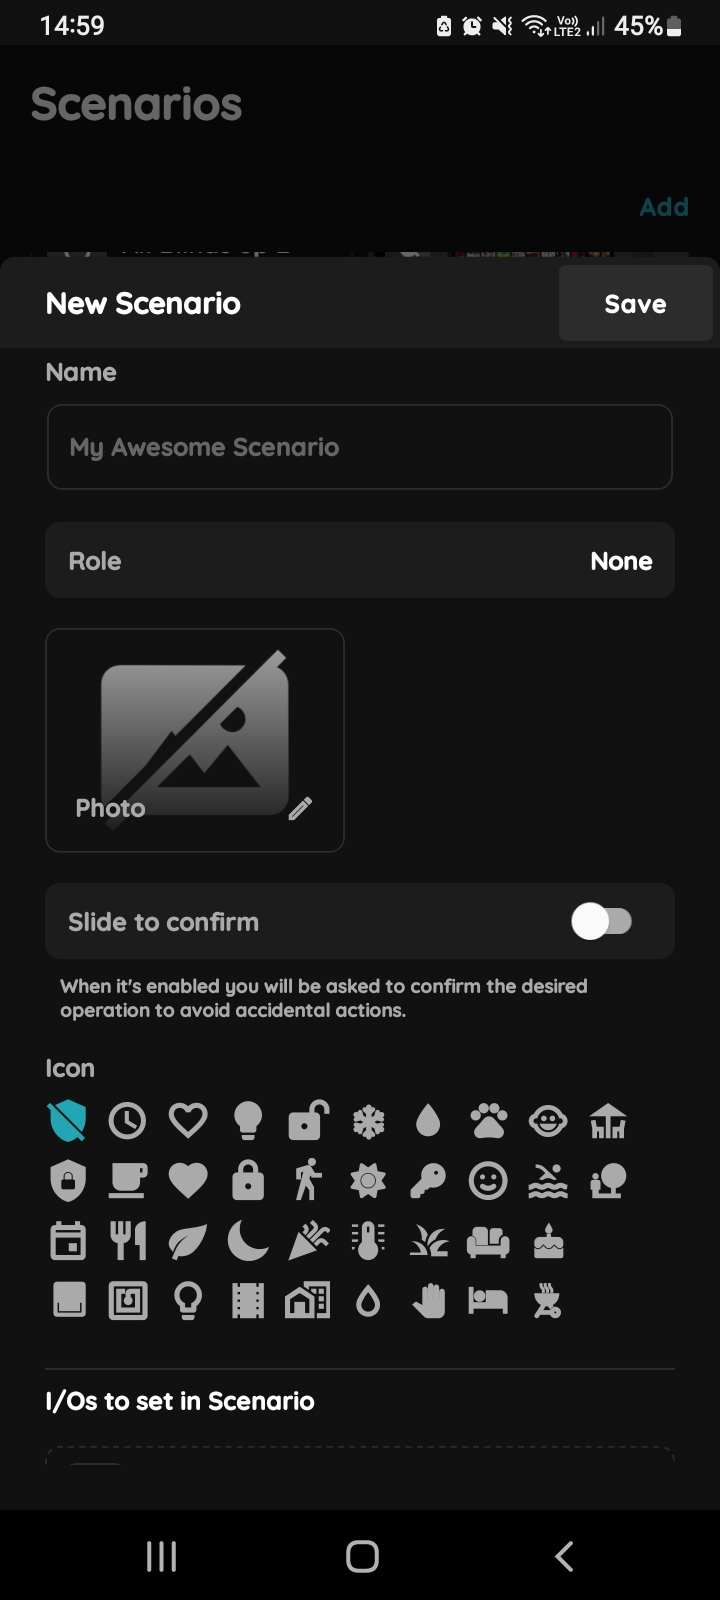
New Scenario
In order to add new Scenario fill the following form:
- Name - Write the name of the Scenario.
- Role - Select the Role/Roles (in case of multiple choice) from the list.
- Slide to confirm - When enabled, you will be asked to confirm the operation to avoid accidental actions.
- Photo - Choose a source of the photo.
- Icon - Select the icon from the list that will represent your scenario by tapping on it.
- Add a new I/O - Select the checkbox/checkboxes (for multiple choice) next to I/Os that you want to add to the Scenario.
To confirm tap Submit and Done.
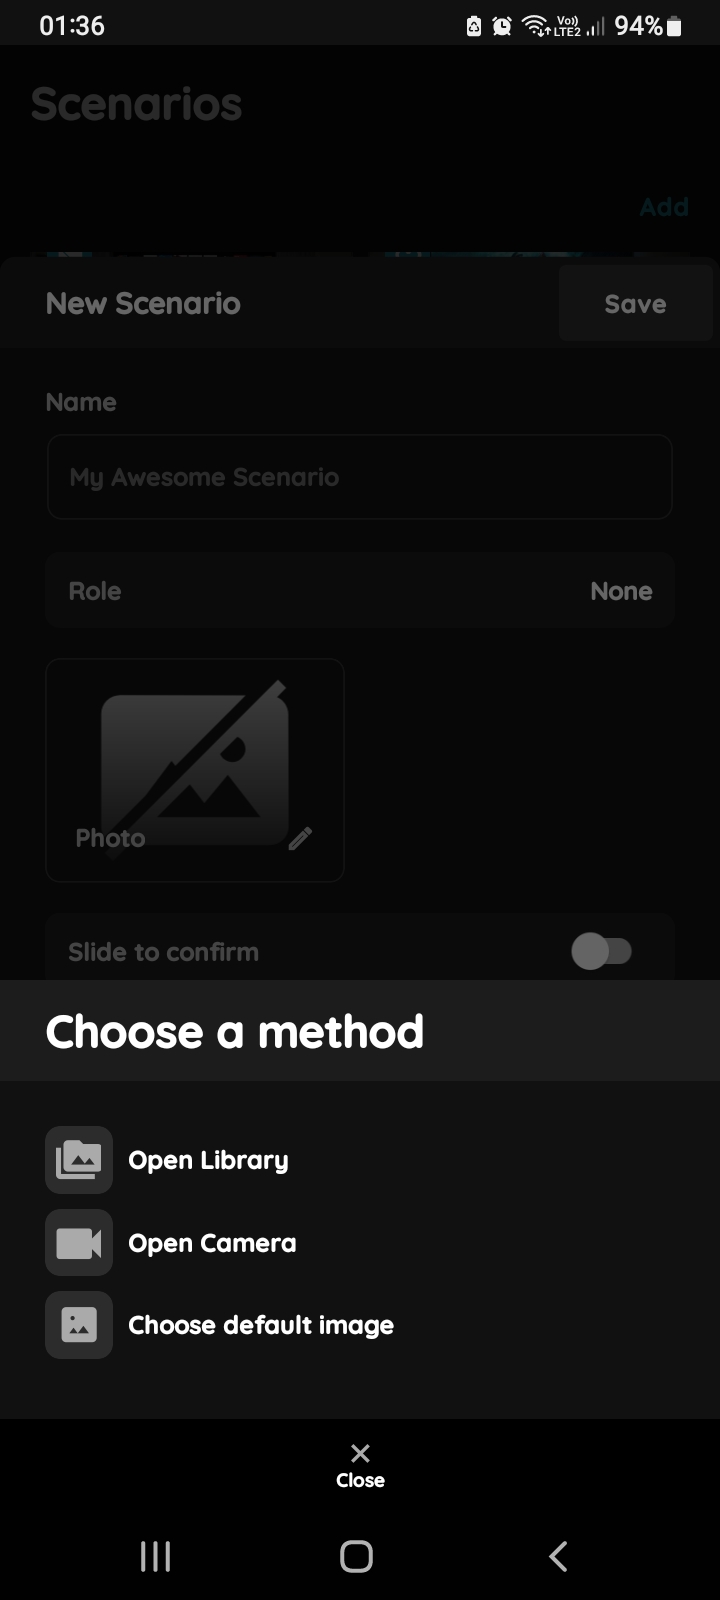
Change photo - Scenario
Tap the photo of the Scenario. You have three options:
Open Library - The phone’s Library will open.
Open Camera - You can take a picture using your smartphone.
Choose default image - These images are prepared in advance in order to provide a complete and seamless experience.
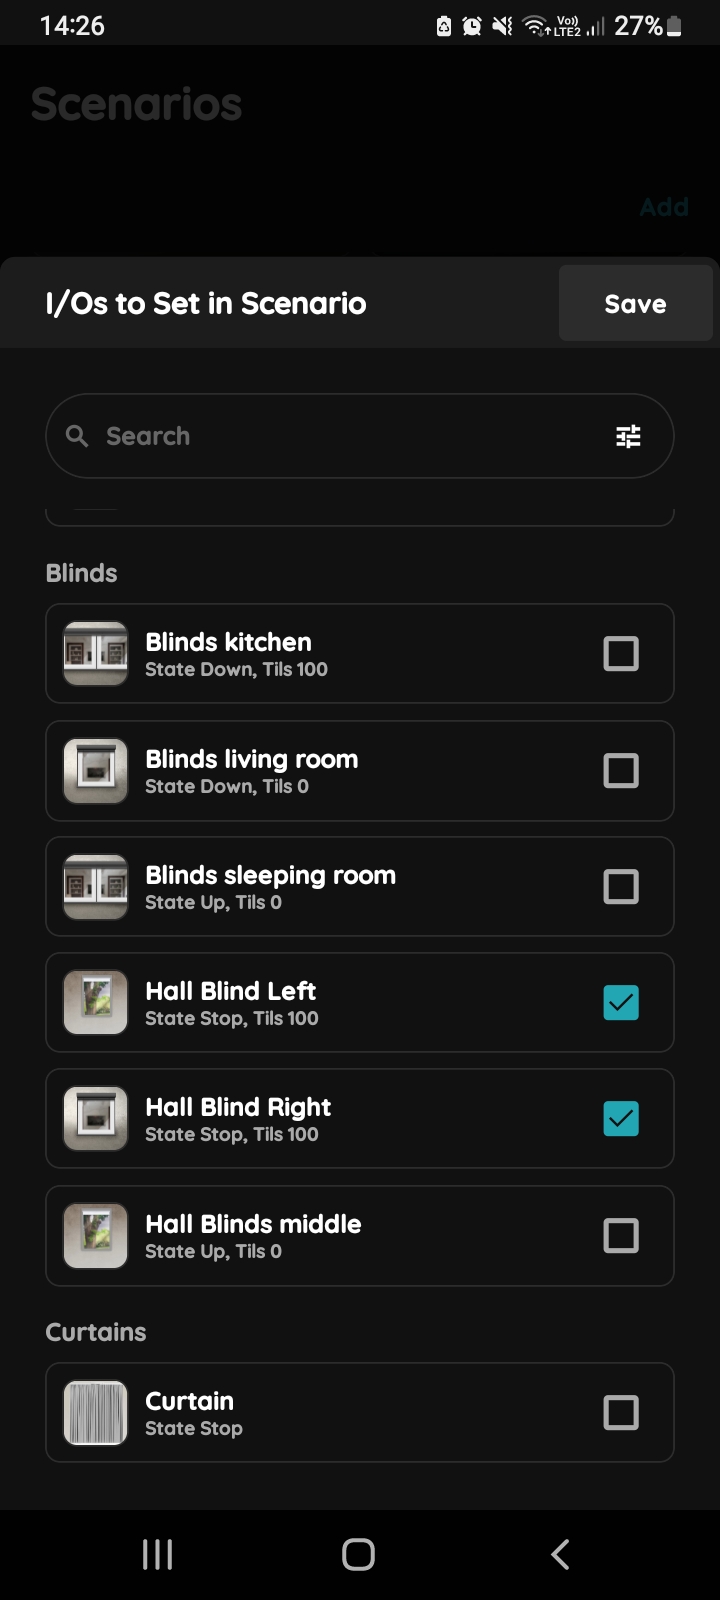
Add a new I/O - Scenario
You can search for I/Os by tapping the Search field and entering the name of the I/O you want to find. You can also tap the filter icon in the upper-right corner of the Search bar to filter the available I/Os.
From the I/Os to Set in Scenario list, select the I/O you want to add to the Scenario.
Before selecting the I/O, tap on the I/O to open its settings. Each I/O type has different settings and possible states. Here, you can define exactly which function or state should be activated when the Scenario is started.
For example, depending on the I/O type, you may be able to set:
- Light: On or Off
- Dimmable Light: On, Off, or a specific brightness level
- Blind: Open, Closed, or a specific position
- Heating: Set the desired temperature or operating mode
- Switch: On or Off
- RGB/RGBW: Colour, brightness, and other available settings
The selected settings will be applied to the I/O when the Scenario is started.
After configuring the desired I/O settings, select the checkbox next to the I/O to add it to the Scenario.
You can repeat this process for multiple I/Os. Each I/O can have its own settings and activation state within the Scenario.
Tap Save to save the Scenario.
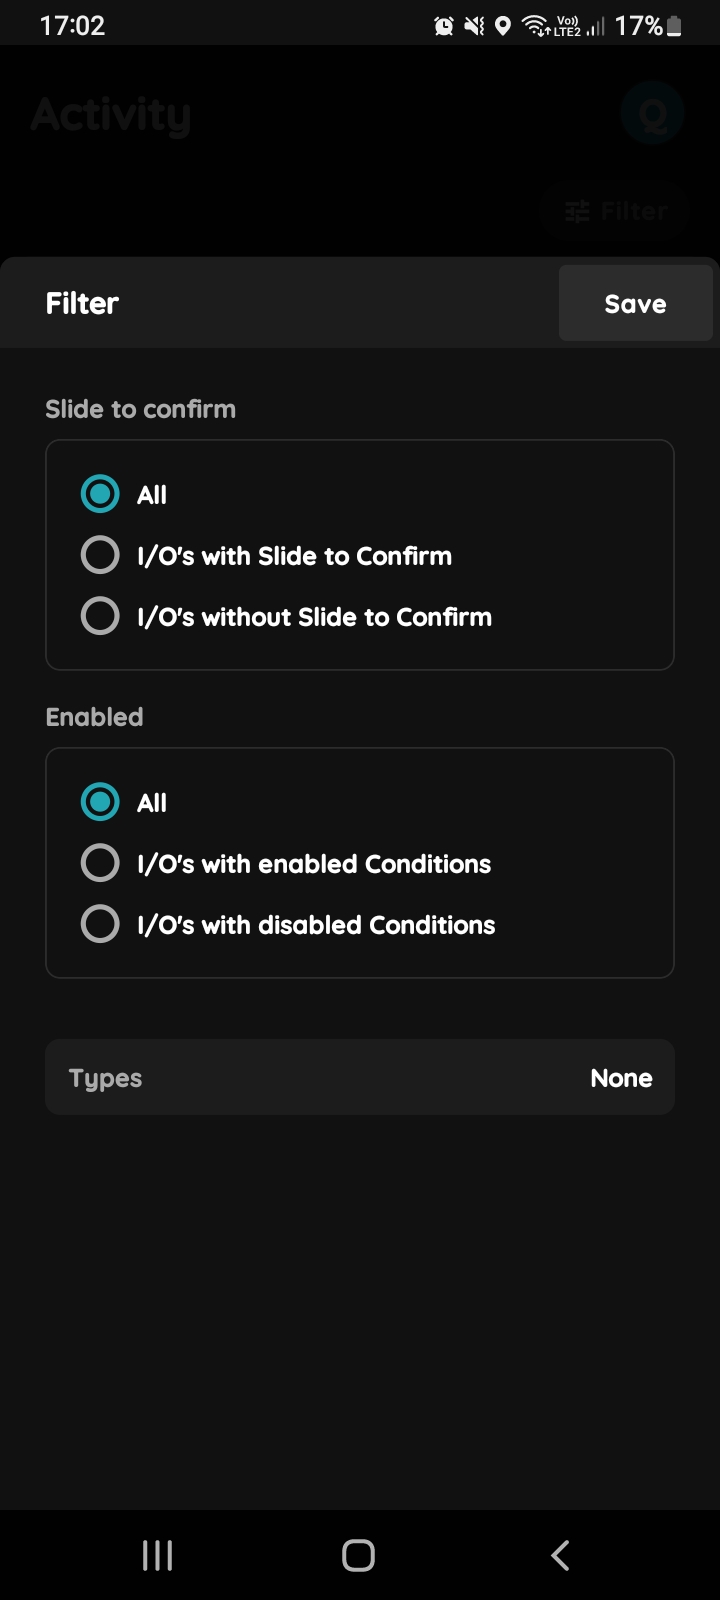
Filter I/O's
There are options to filter I/O's.
There are two groups of the I/O's - Slide to confirm and Enabled.
Also, you can choose Types of the I/O's here.
Tap on the button Save.
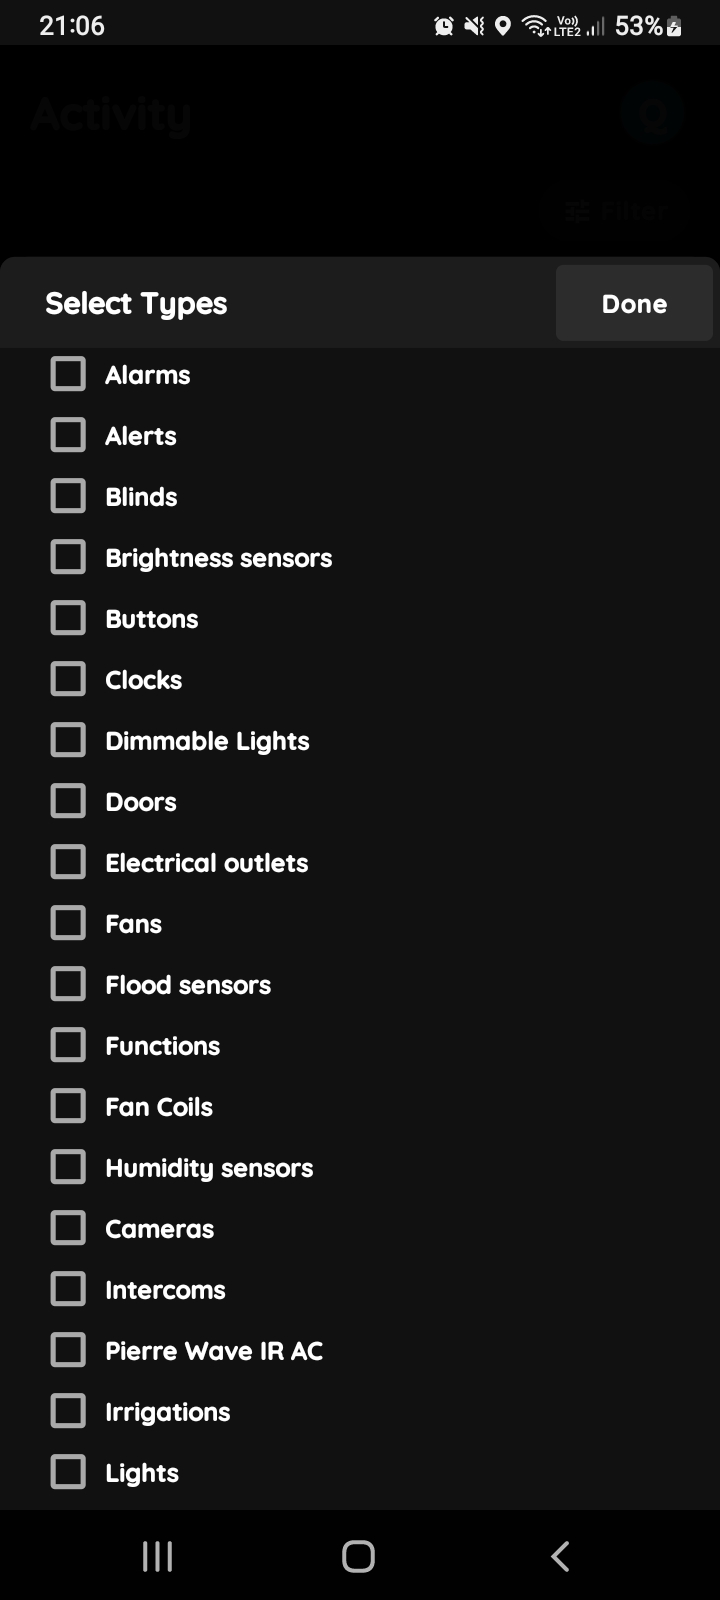
Select Types
You can select types of the I/Os by tapping in the check box/checkboxes - for multiple choice, next to the desired I/Os.
Tap on Save/Done.
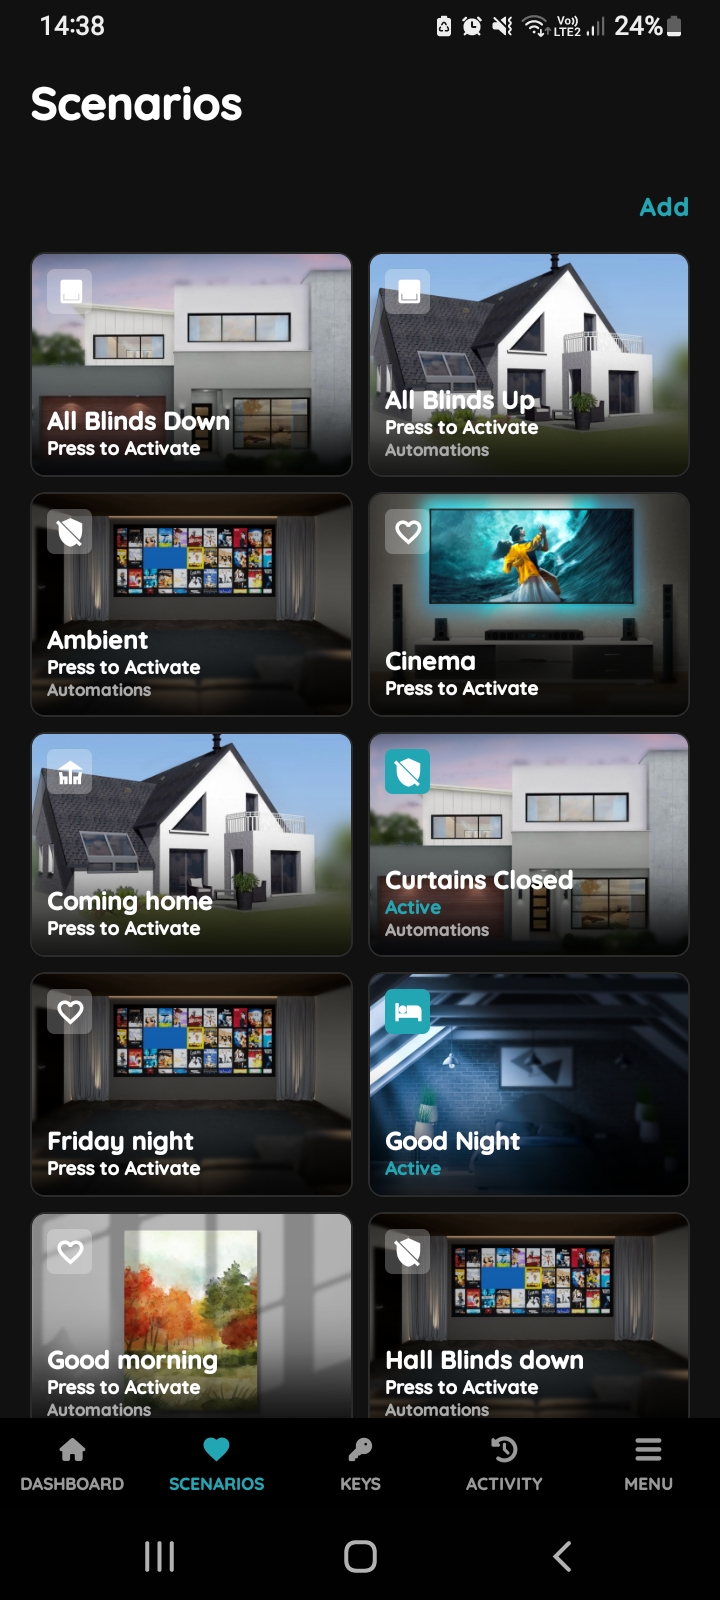
Open Scenarios
Follow next steps to edit Scenario.
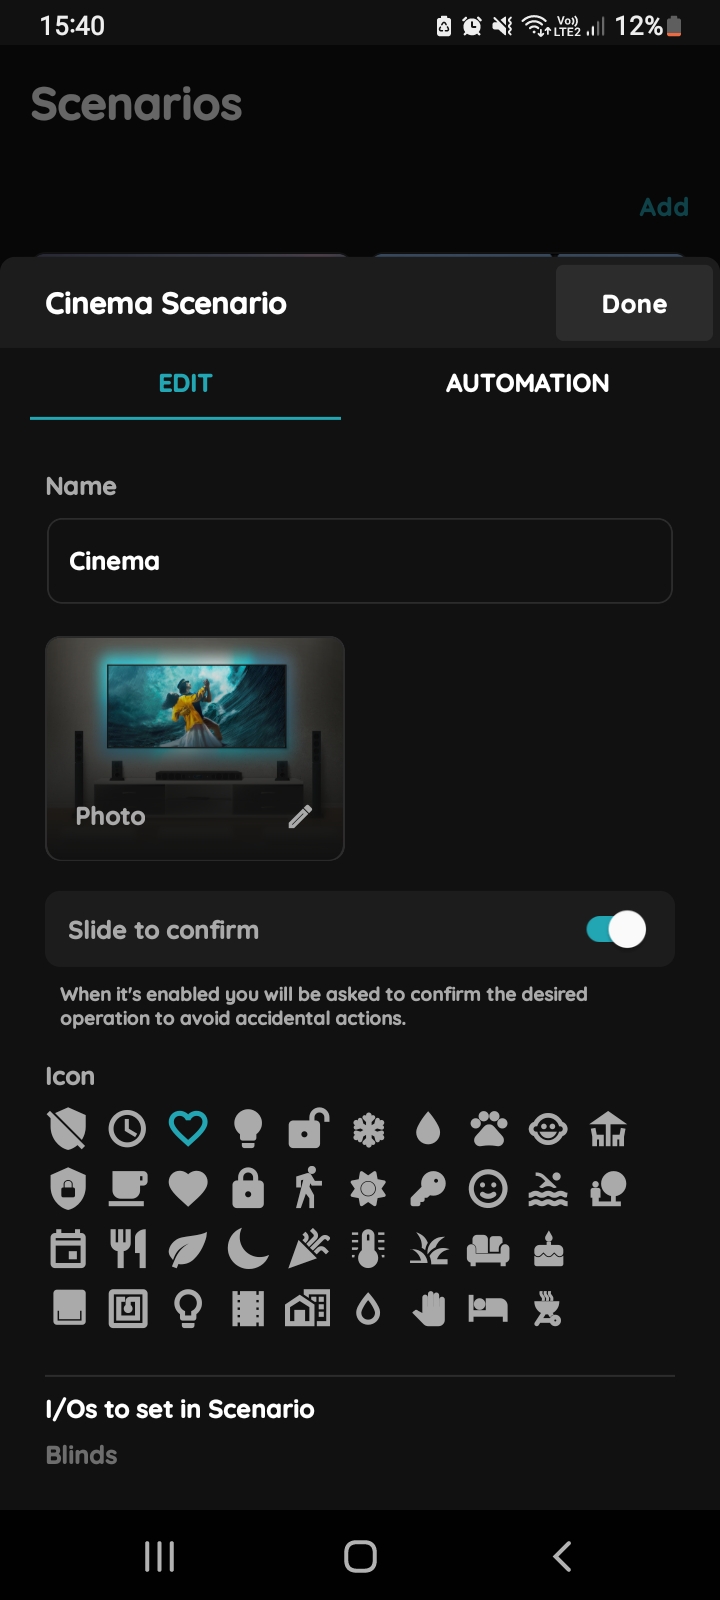
Edit Scenario
Edit the following form:
- Name - Edit the name of the Scenario.
- Role - Select the Role/Roles (in case of multiple choice) from the list.
- Slide to confirm - When enabled, you will be asked to confirm the operation to avoid accidental actions.
- Photo - Choose a source of the photo.
- Icon - Select the icon that will represent your scenario by tapping on it.
- I/Os to set in Scenario - It is a list of I/Os that are included into the Scenario.
- Show All I/Os - It is a list of all I/Os.
- Add a new I/O - Select the checkbox/checkboxes (for multiple choice) next to I/Os that you want to add to the Scenario.
To confirm tap Submit and Done, or if you want to delete the Scenario tap button Delete.
Scenario with Automation - Blinds/Curtains
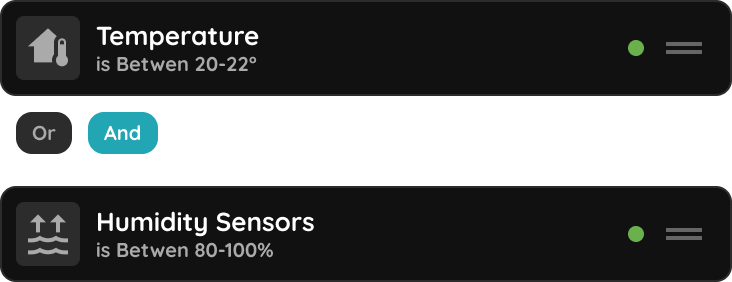
For example, you can create an automation that controls the Blinds/Curtains based on the Brightness Sensor.
In this example, the automation is triggered when the detected light intensity falls below 75%. When this condition is met, the selected Blinds/Curtains can be automatically adjusted to the desired position.
This allows the Blinds/Curtains to respond automatically to changing light conditions without requiring manual control.
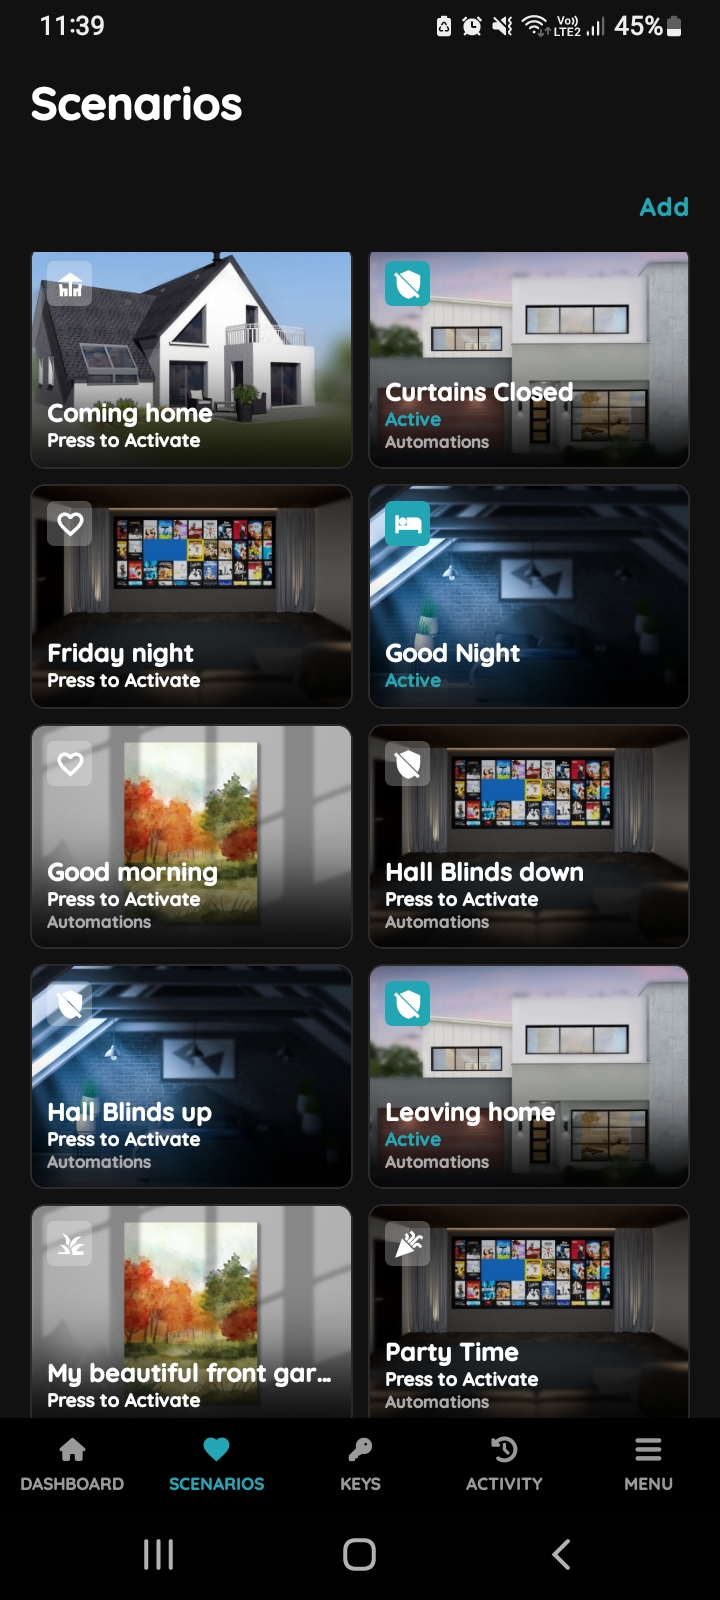
Scenarios from the Taskbar
Tap on the Scenarios on the Taskbar.
Scenarios page will be open.
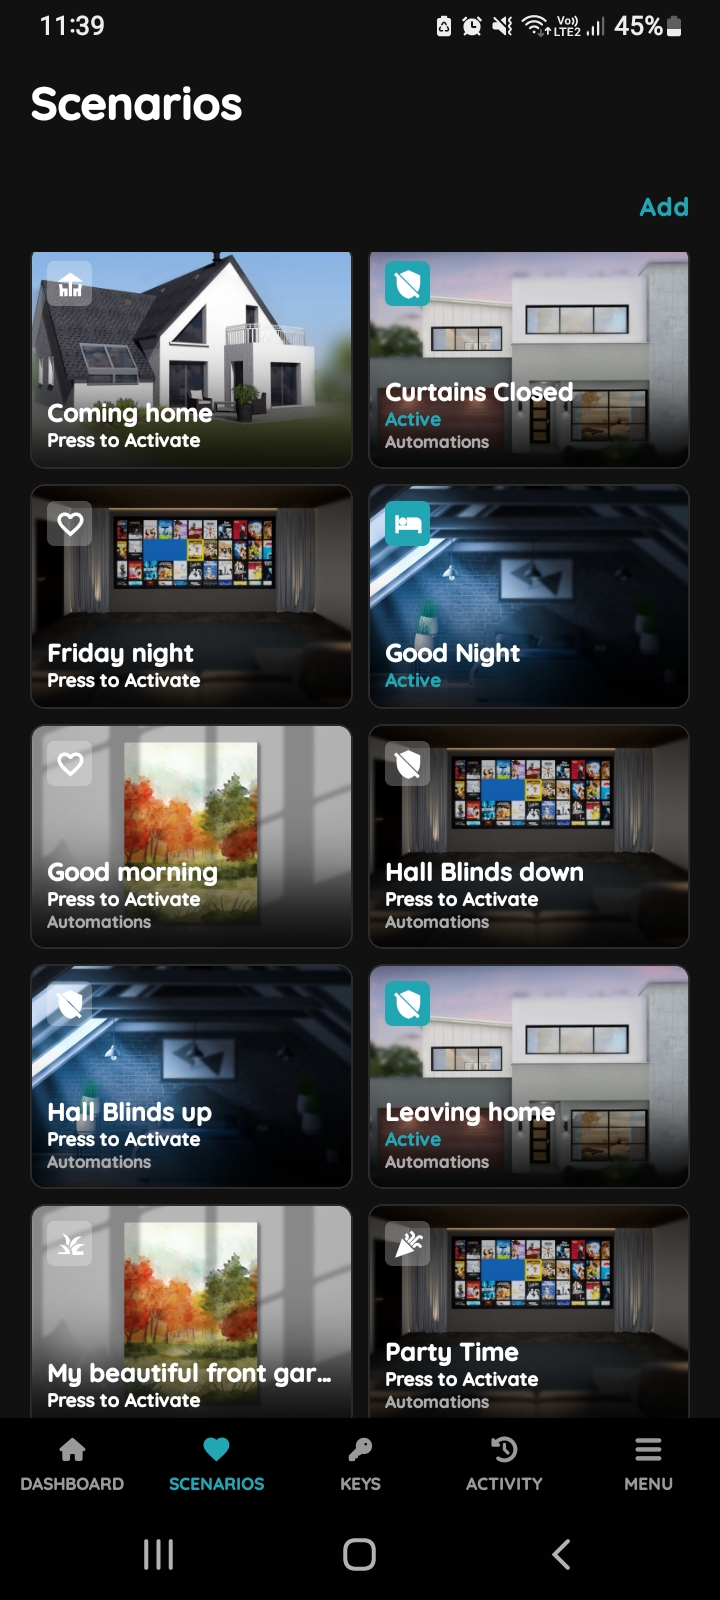
Scenarios - Add button
Tap on the button Add in order to create Scenario.
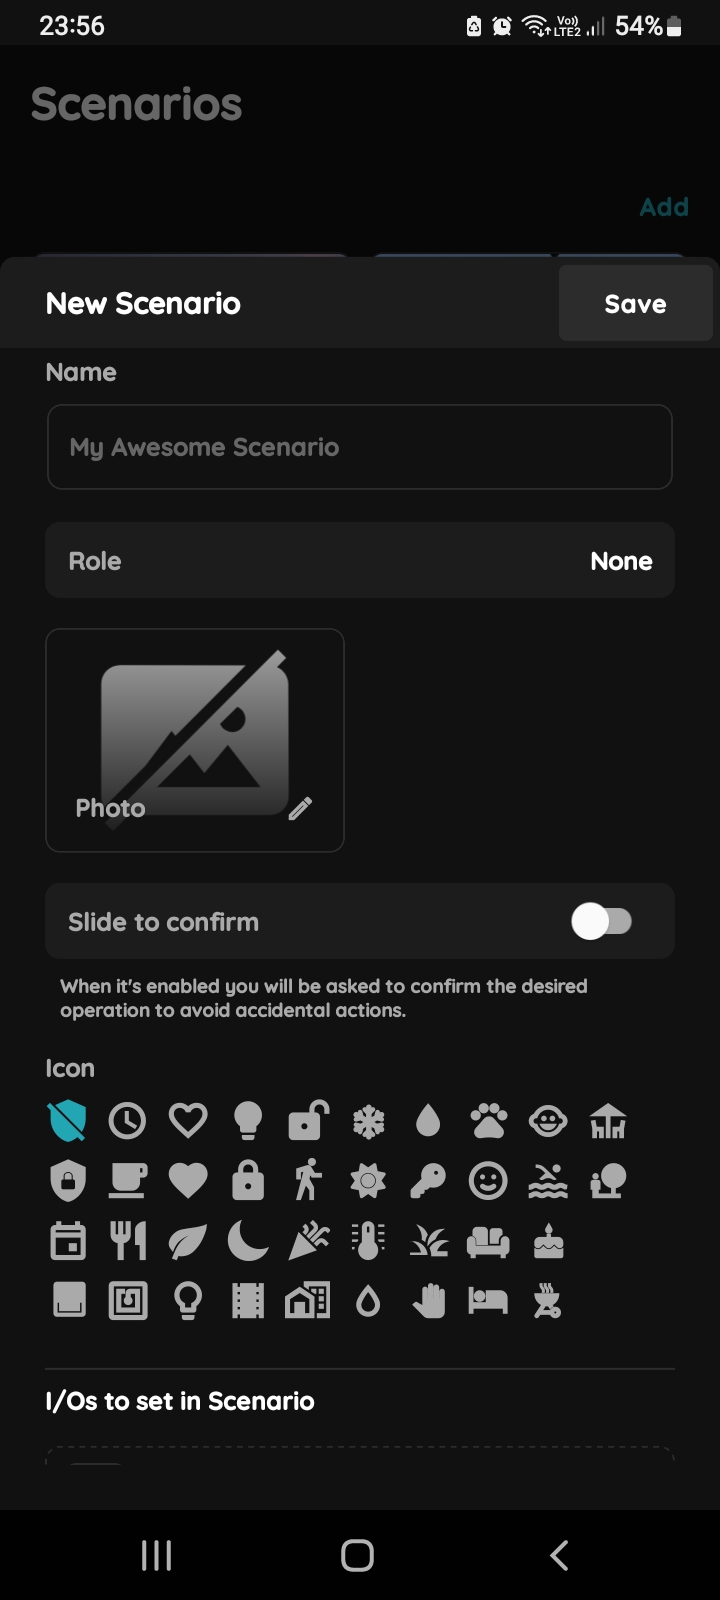
New Scenario
Fill following form:
- Name – Enter the name of the Scenario.
- Role – Select the appropriate role for the Scenario.
- Photo – Choose a photo to represent the Scenario.
- Slide to confirm – When enabled, you will be asked to confirm the operation to avoid accidental actions.
- Icon – Select an icon for the Scenario.
- Add a new I/O – Tap this field to add new I/Os to the Scenario.
Tap Submit/Save to finalize your changes.
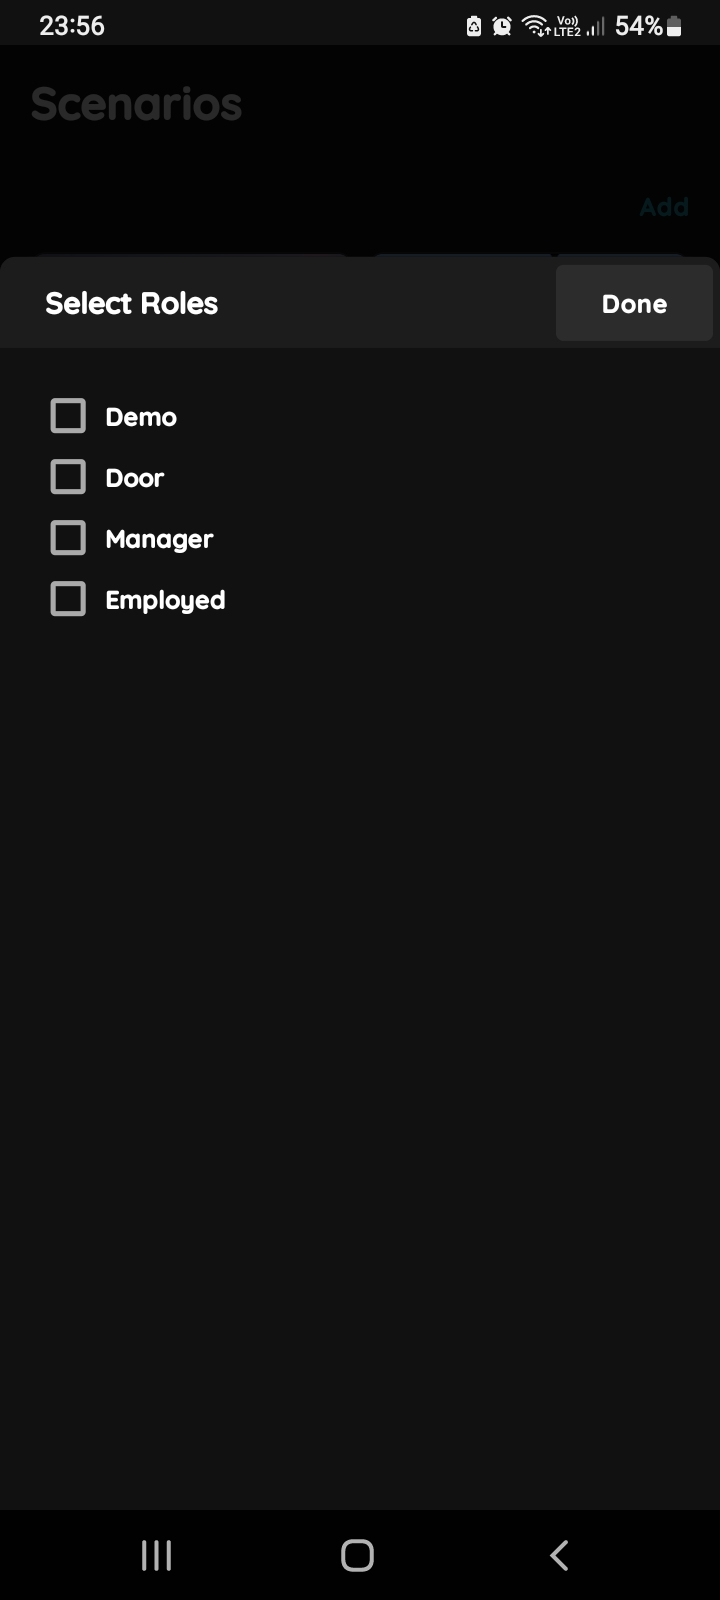
Select Roles
Select checkbox/checkboxes next to the desired Role/Roles (multiple choice).
Tap Save/Done.
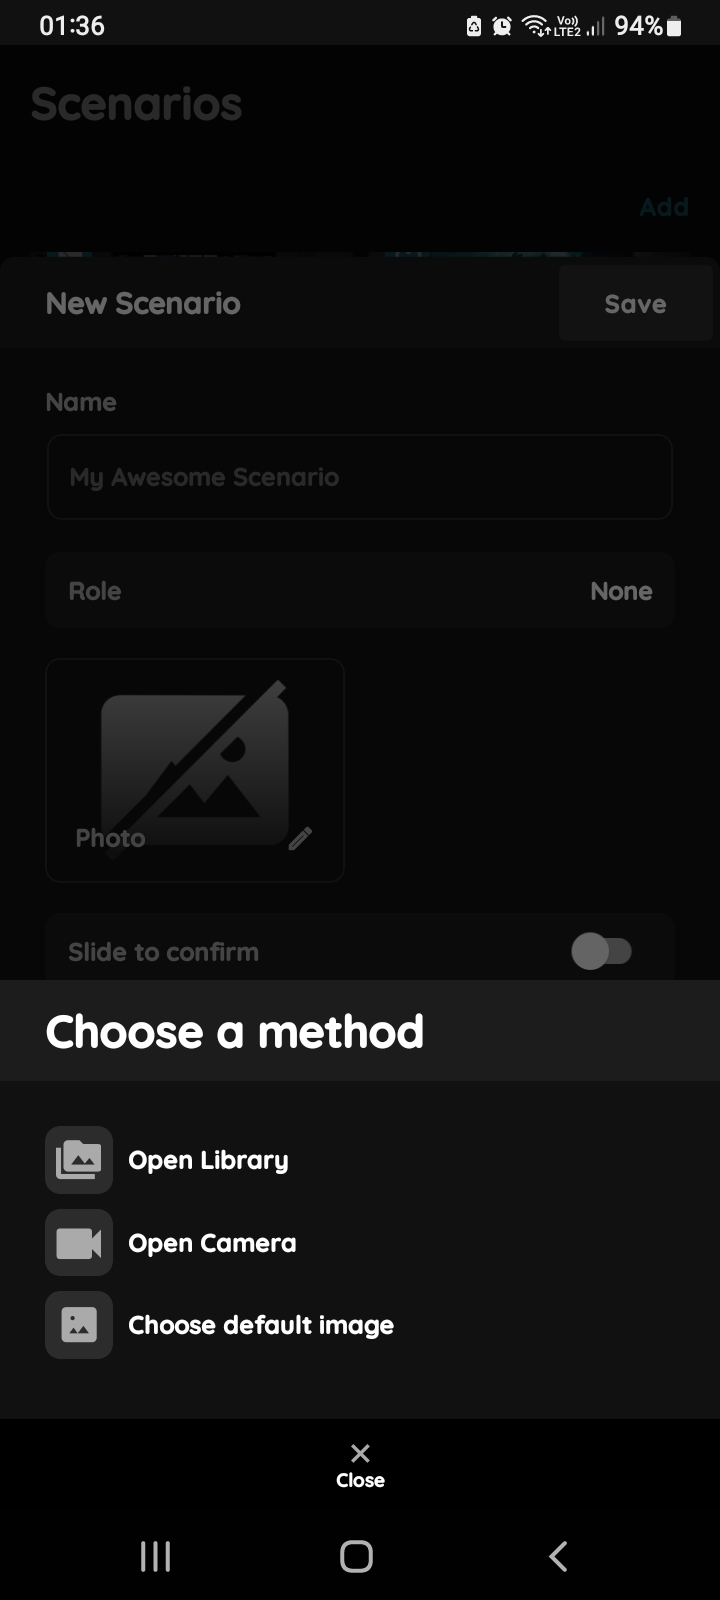
Change photo - Scenario
Tap the photo of the Scenario. You have three options:
Open Library - The phone’s Library will open.
Open Camera - You can take a picture using your smartphone.
Choose default image - These images are prepared in advance in order to provide a complete and seamless experience.
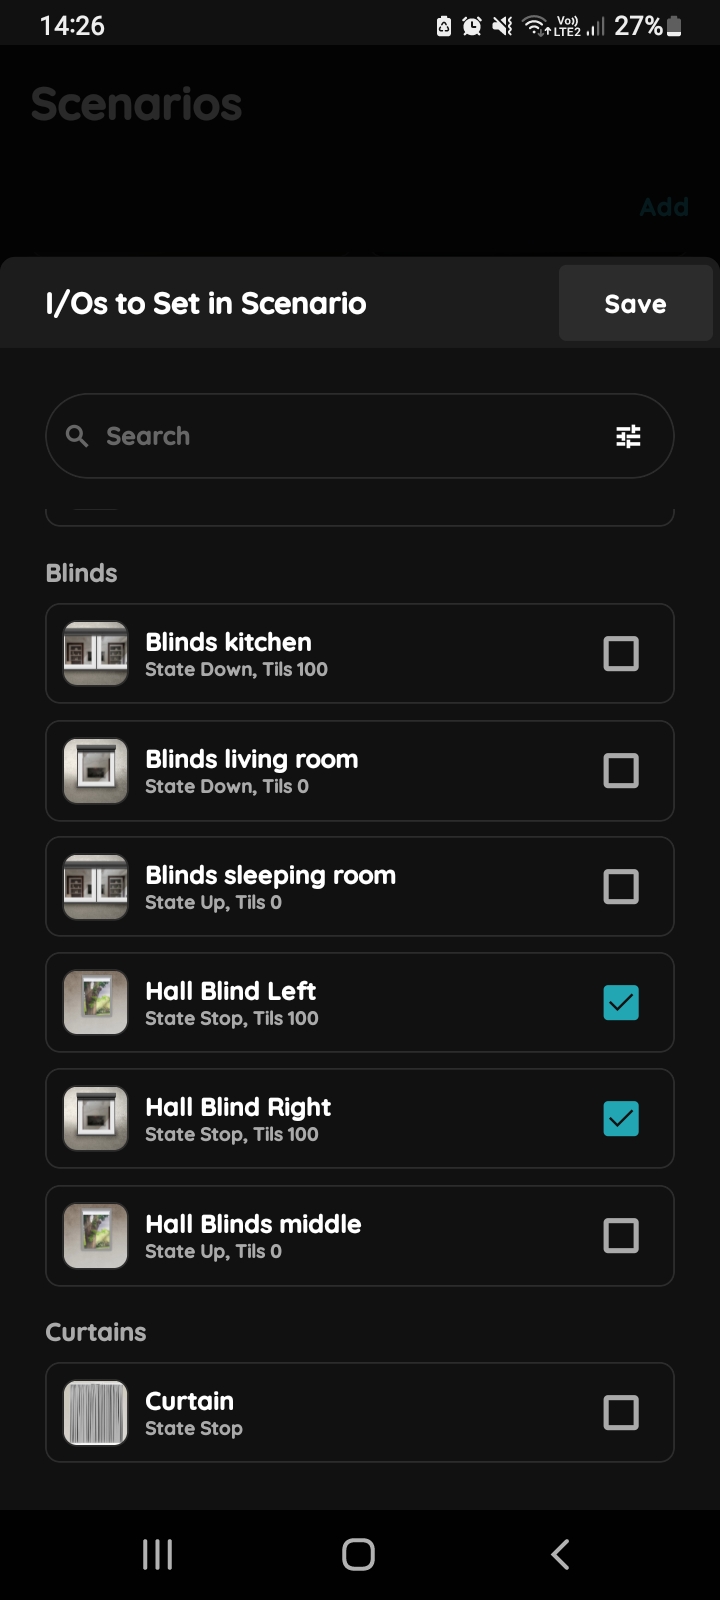
Add a new I/O - Scenario
You can search I/Os if you tap in the field Search and write the name of the I/O that you want to find, or to tap on the filter icon in the up right corner of the Search bar.
Tap on the checkbox/checkboxes next to the desired I/Os that you would like to add to the Scenario from the I/Os to Set in Scenario list.
Under each of the I/Os on this list is shown its current status.
The statuses are always those that have been set, and they can be changed later by tapping on the I/O.
Tap Save.
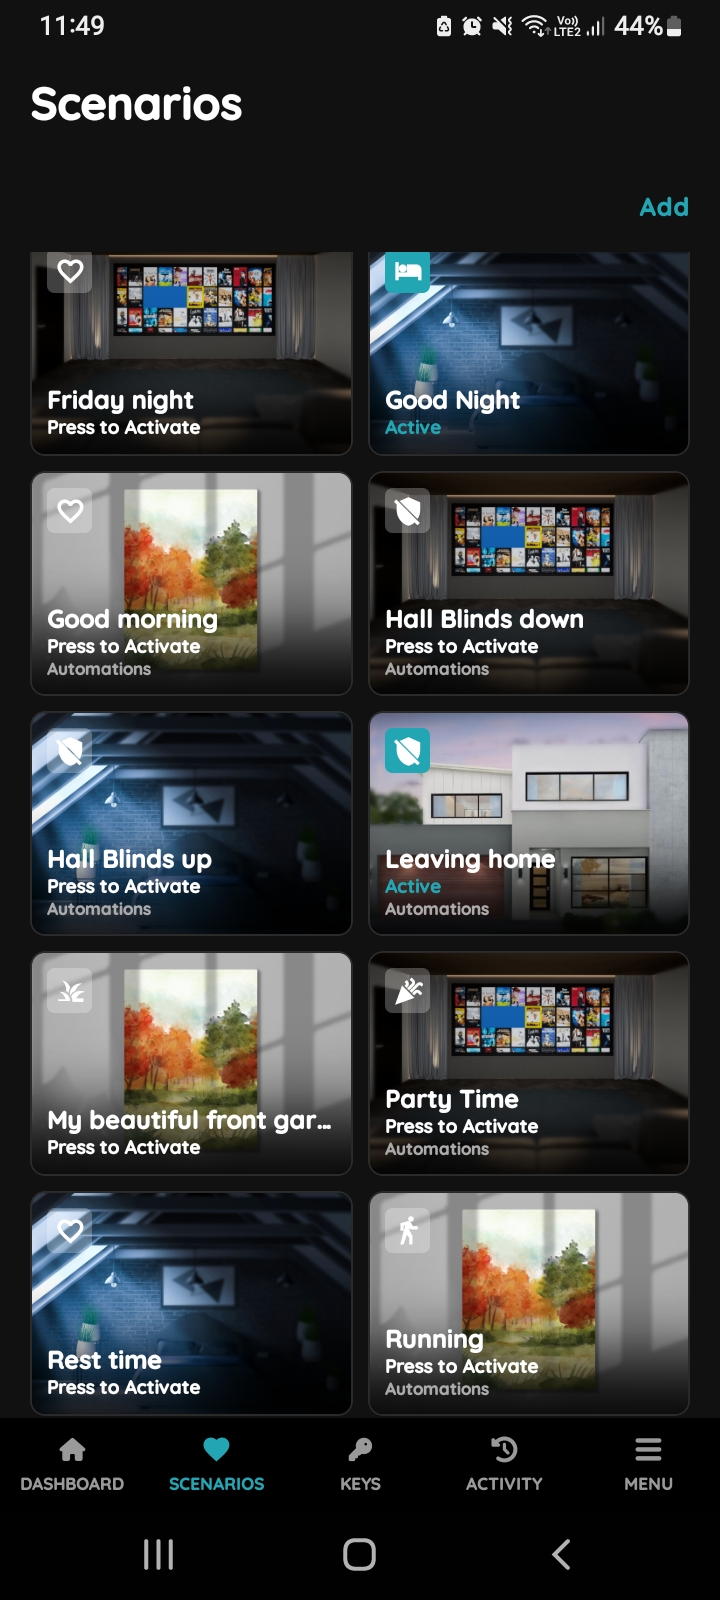
Find Scenario
Find Scenario Hall Blinds down and tap its card.
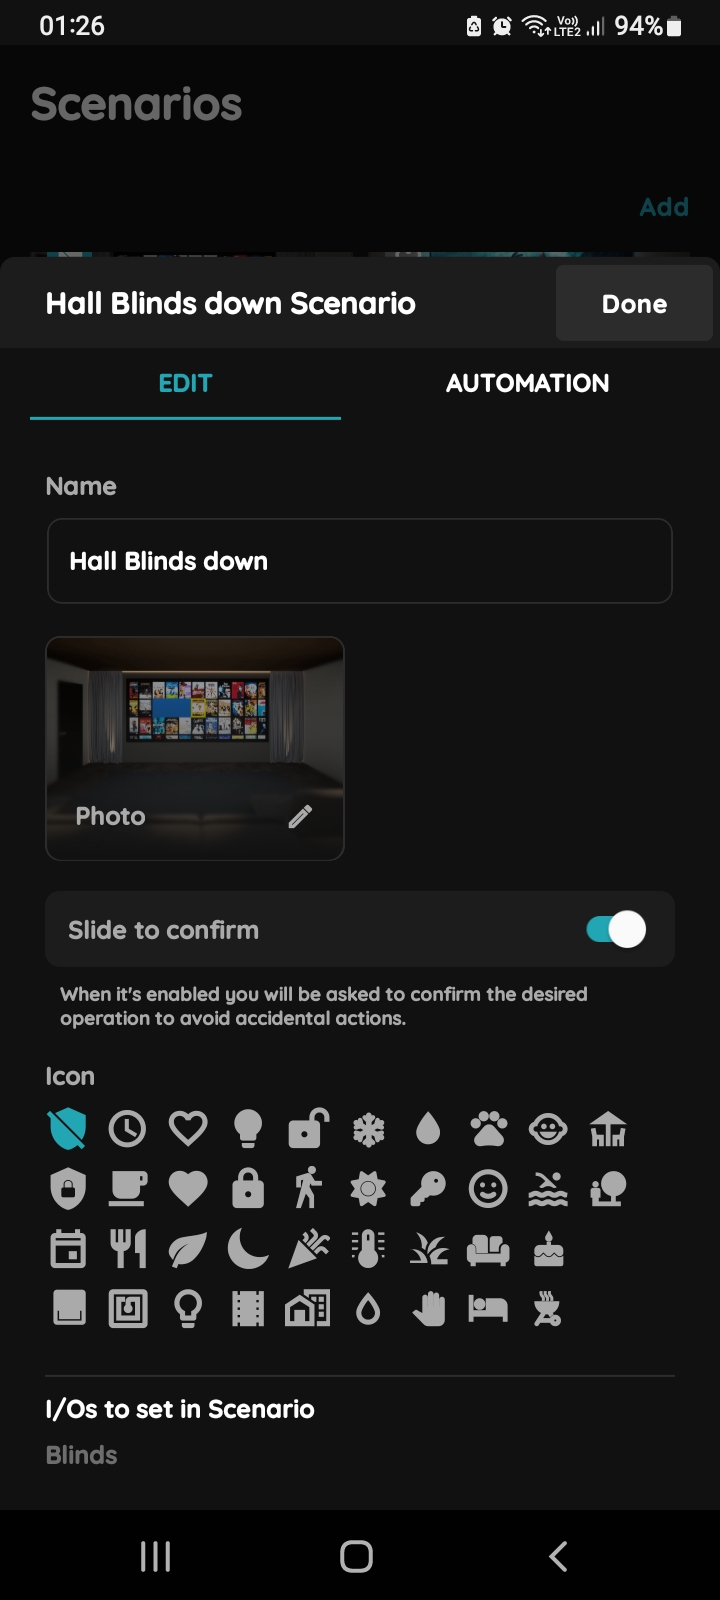
Edit, Automation - Automated Scenario Blinds and Brightness sensor
Tab Edit is selected.
Tap on the tab Automation.
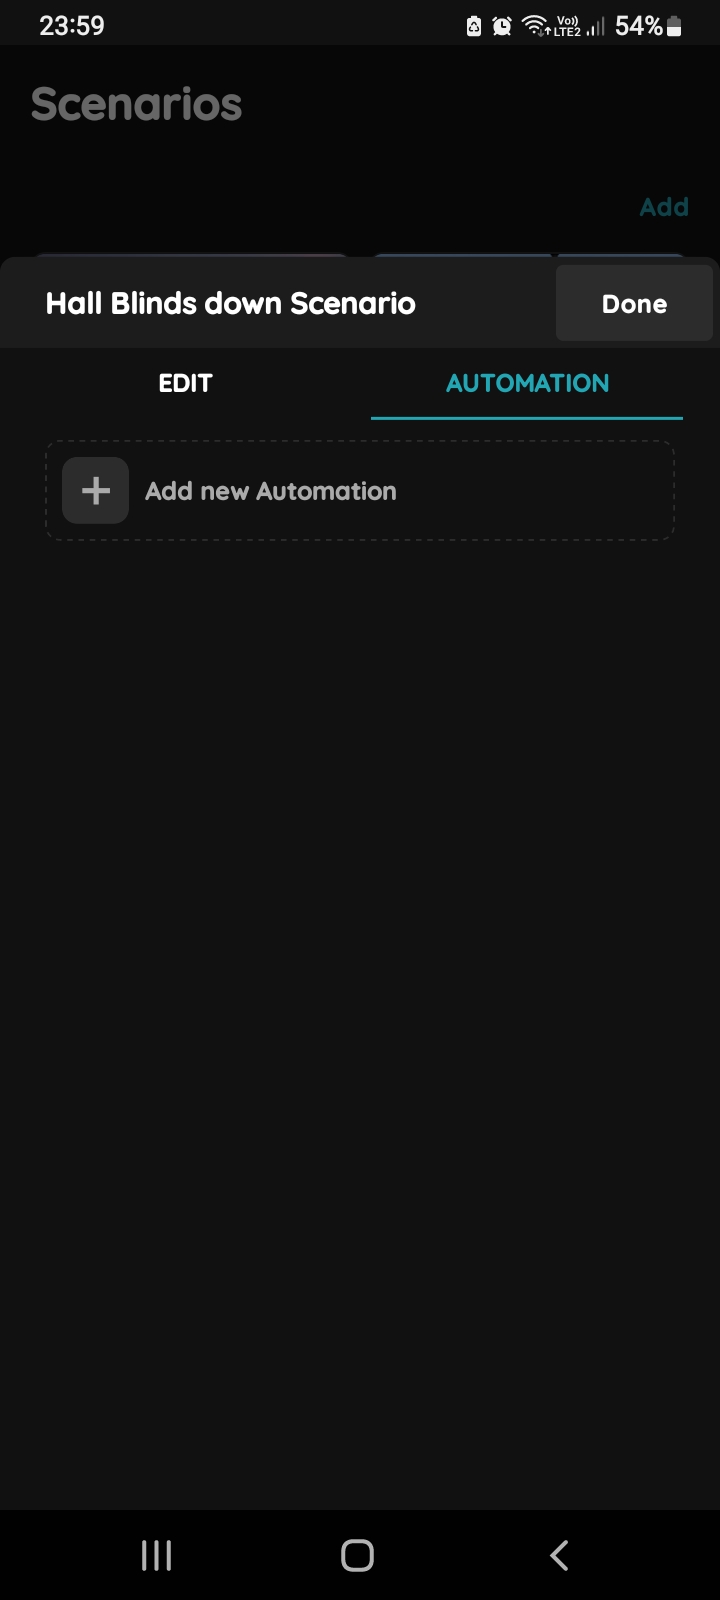
Add new Automation - Automated Scenario Blinds and Brightness sensor
Tap on +Add new Automation.
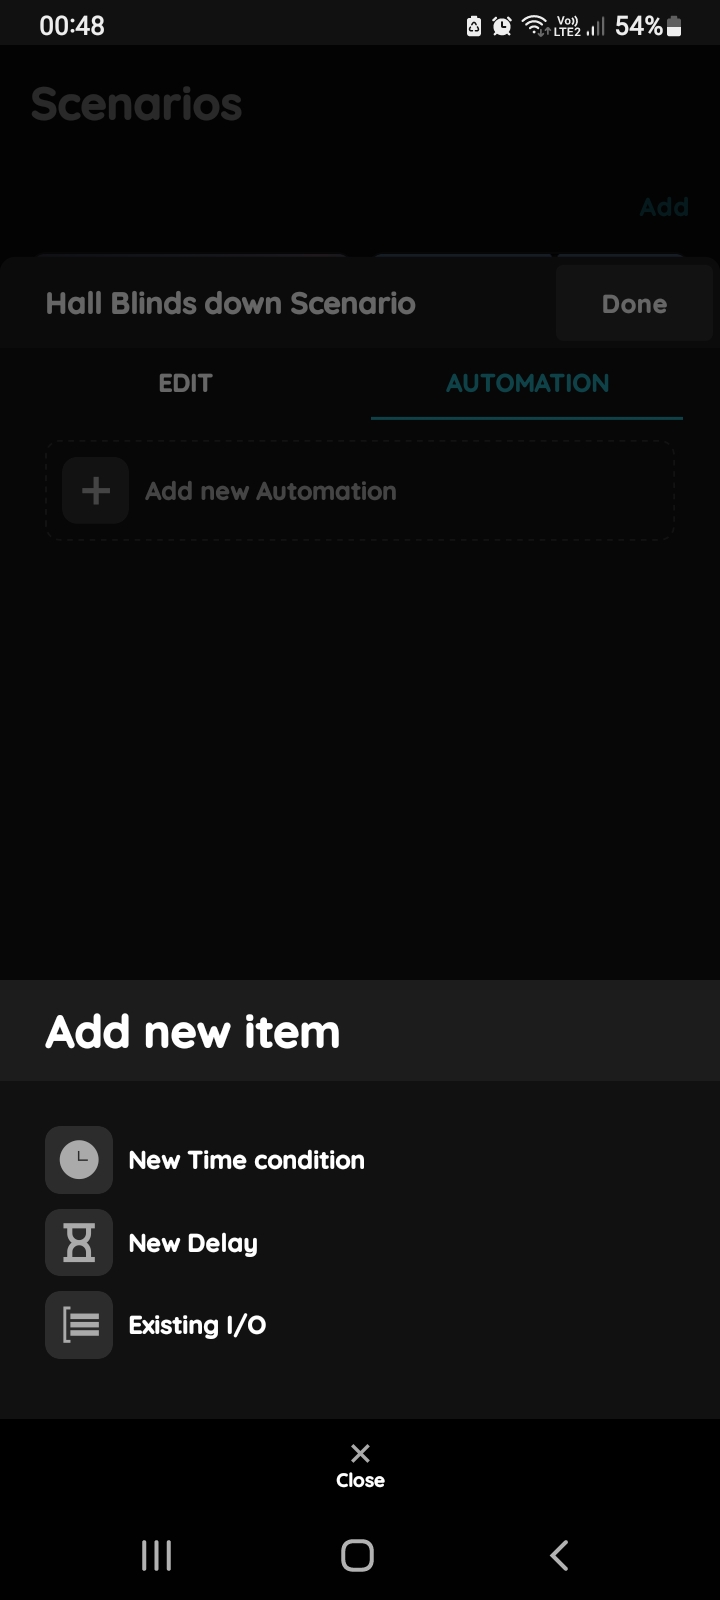
Add new item - Automated scenario Blinds and Brightness sensor
There is an option to add:
- New Time condition,
- New Delay,
- Existing I/O.
Tap on the Existing I/O.
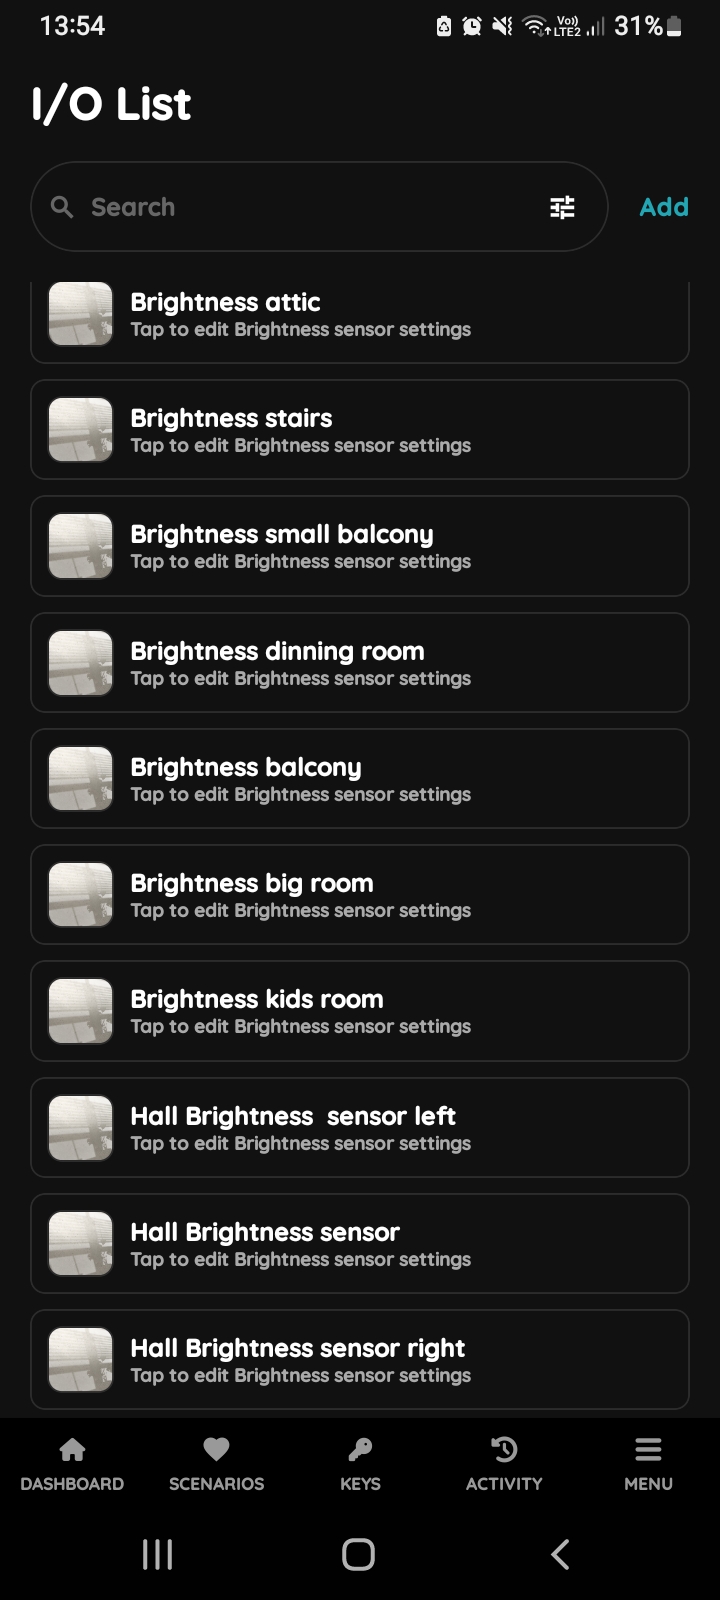
Brightness sensor on the I/O list
Scroll to Brightness sensors on the list and tap on the desired I/O from the list, in this case Hall Brightness sensor.
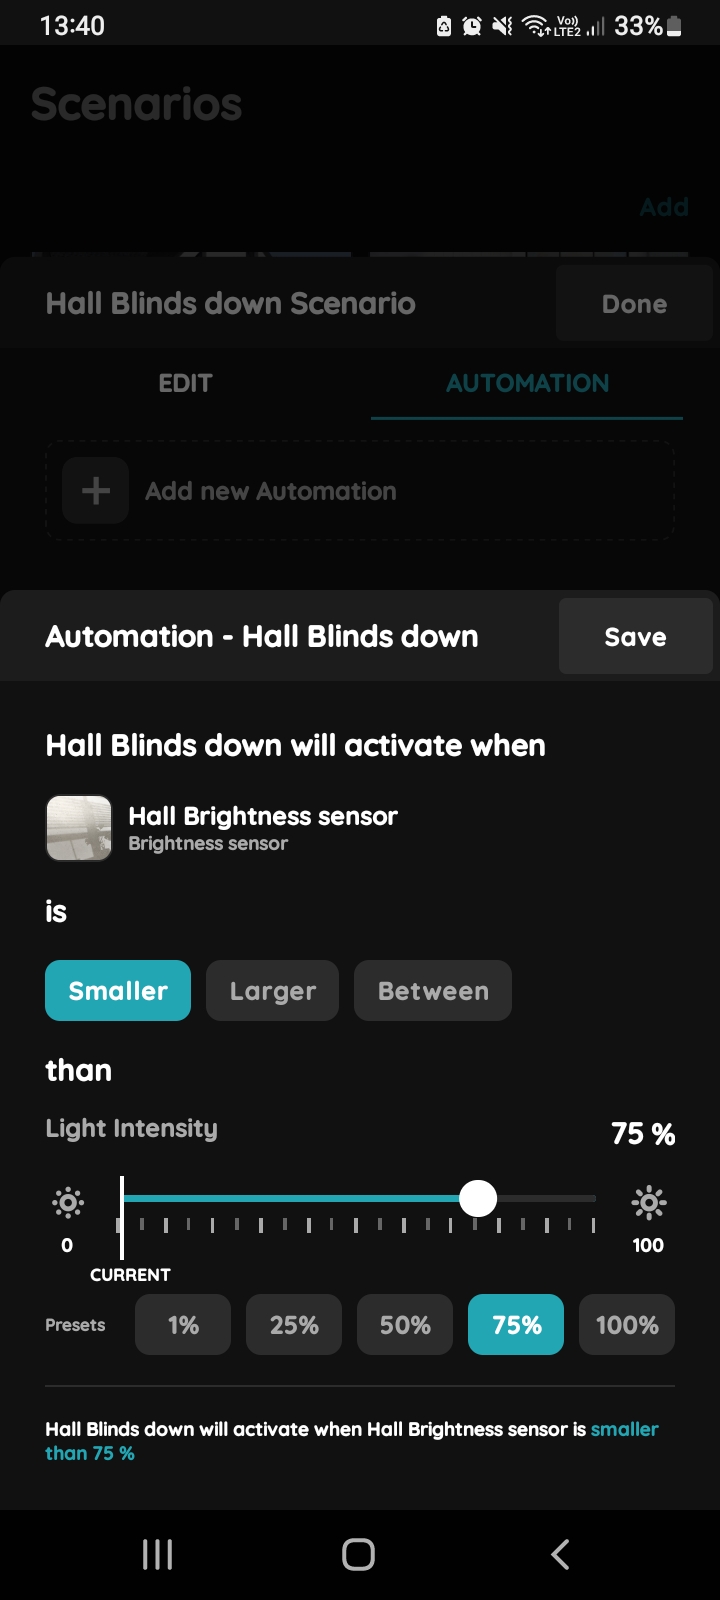
Automation Blinds and Brightness sensor
Hall Blinds down scenario will be activated when Hall Brightness sensor shows light intensity smaller than 75%.
You can use slider to set the desired light intensity or use Presets (tap desired one).
Tap the Save button.
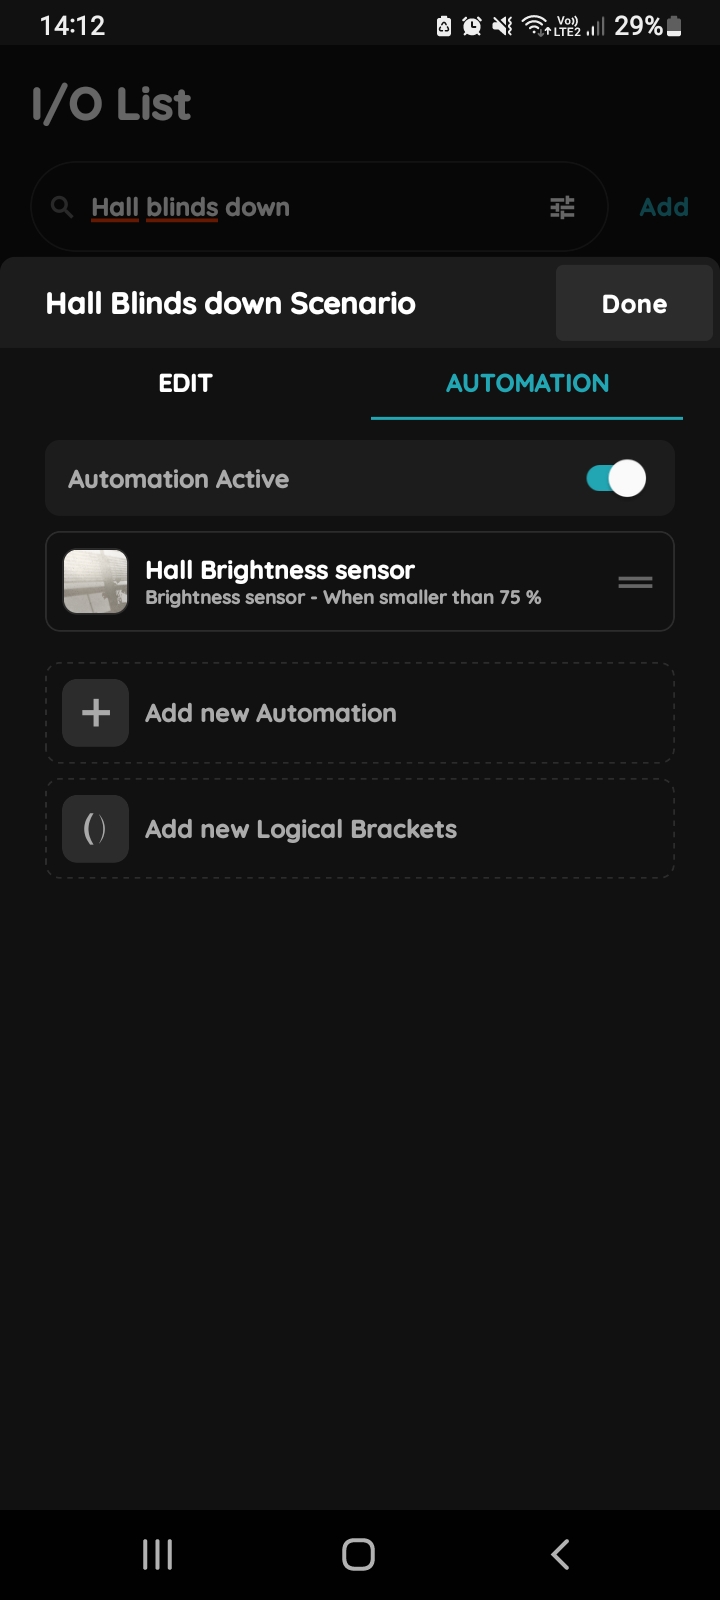
Confirm Automated Scenario settings for Blinds and Brightness sensor
To confirm settings of the Automated Scenario tap the button Done.
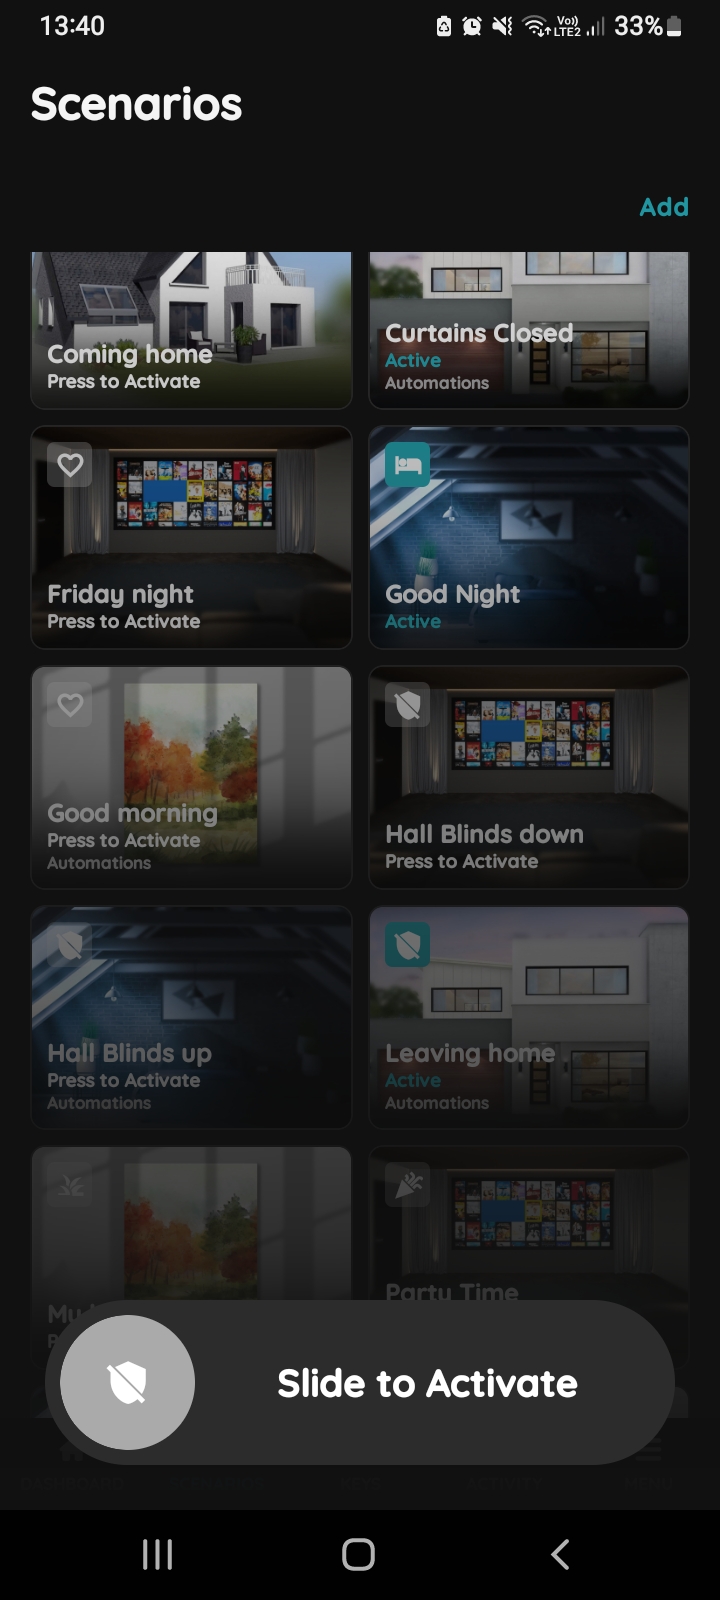
Slide to confirm - Automated Scenario Blinds and Brightness sensor
The Slide to confirm feature adds an extra layer of security, requiring you to confirm your action before activating the scenario. This helps prevent scenarios from being triggered accidentally.
To activate the Automated Scenario manually, tap on the card of the desired Scenario, use button Slide to Activate and slide from left to the right side.
The icon of the Automated Scenario gets blue, and status is changed to Active.
System scenarios
Tap Filter on the main Scenarios page to view and configure System Scenarios.
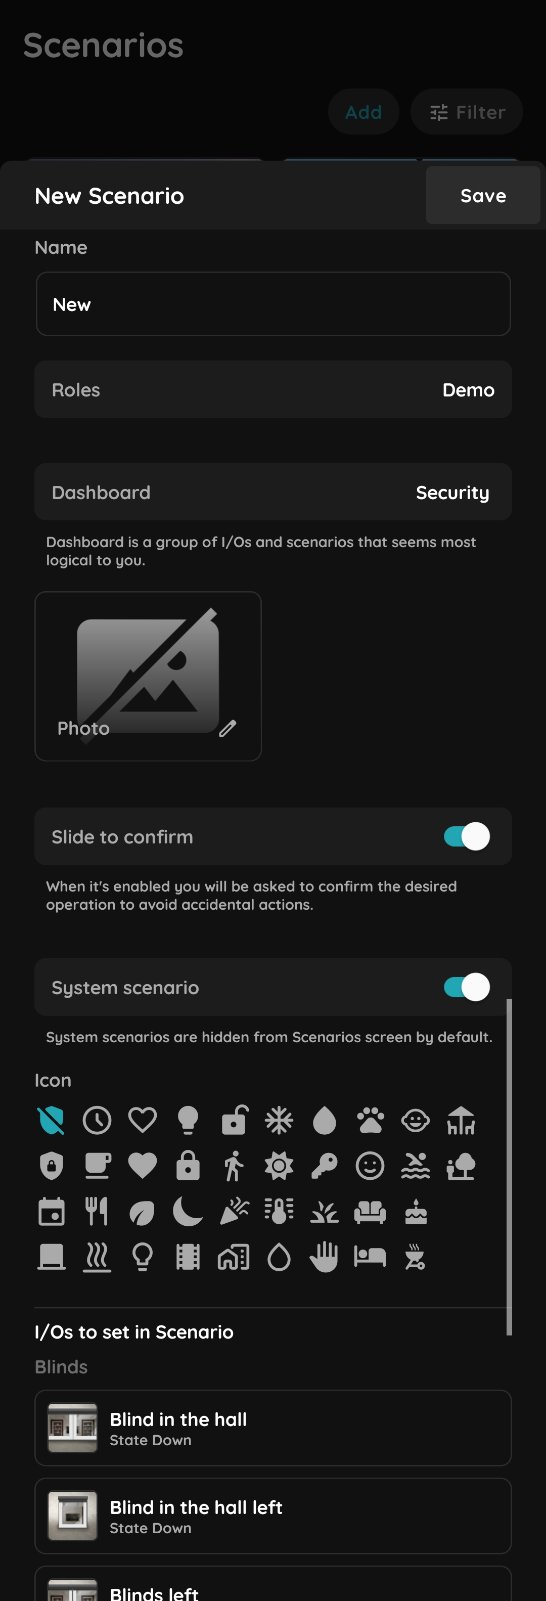
Create new system scenario
Fill following form:
- Name – Enter the name of the Scenario.
- Role – Select the appropriate role for the Scenario.
- Dashboard - Select the dashboard where to Scenario will be placed.
- Photo – Choose a photo to represent the Scenario.
- Slide to confirm – When enabled, you will be asked to confirm the operation to avoid accidental actions.
- System scenario – Mark the Scenario as system, hiding it from Scenarios screen by default.
- Icon – Select an icon for the Scenario.
- Add a new I/O – Tap this field to add new I/Os to the Scenario.
Tap Submit/Save to finalize your changes.
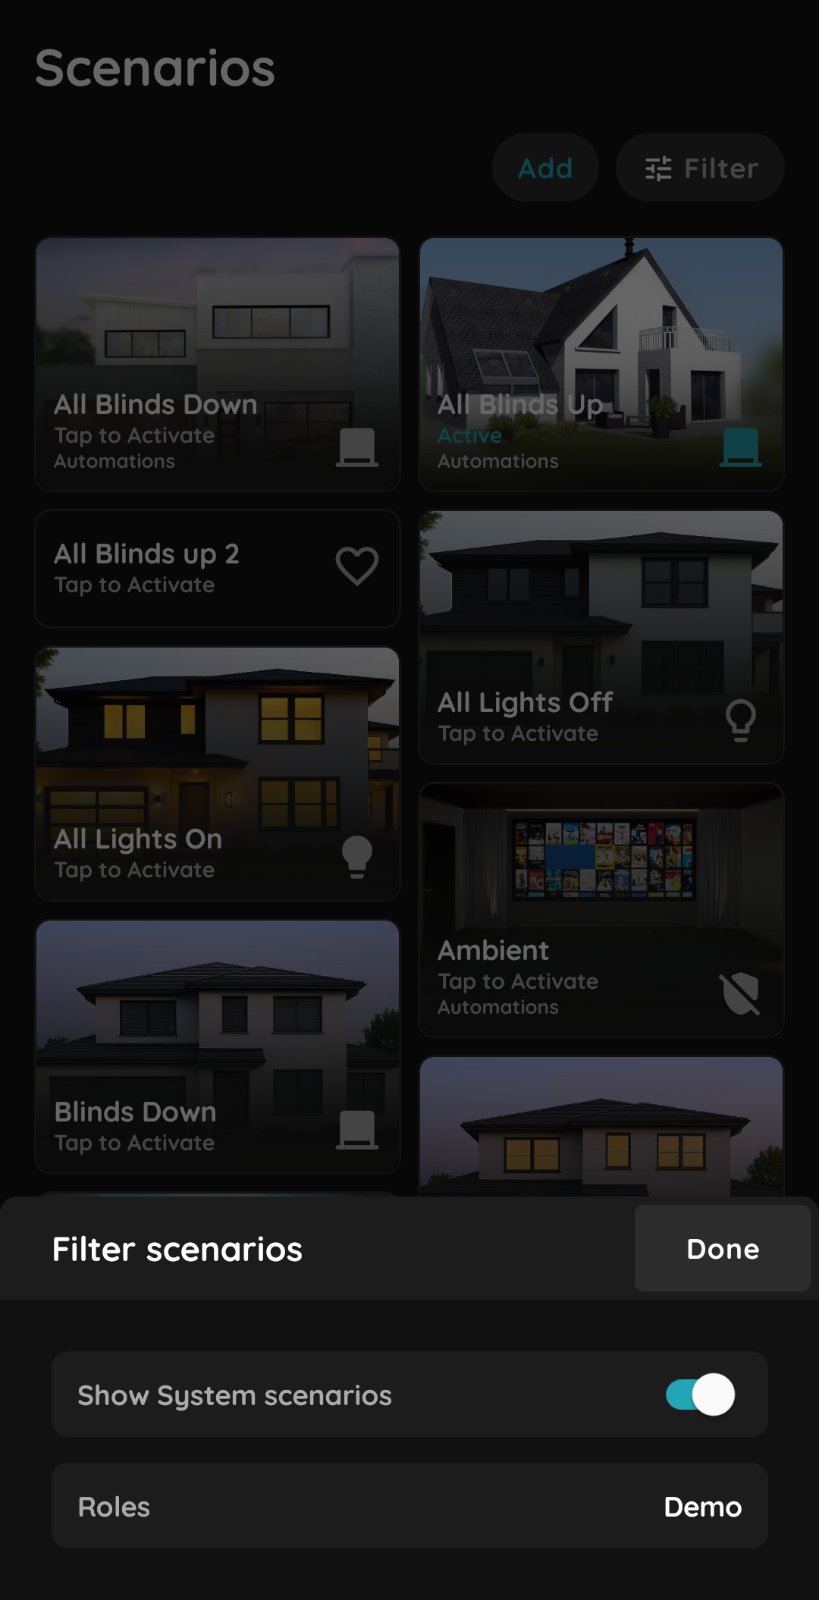
Use filter to show System Scenarios
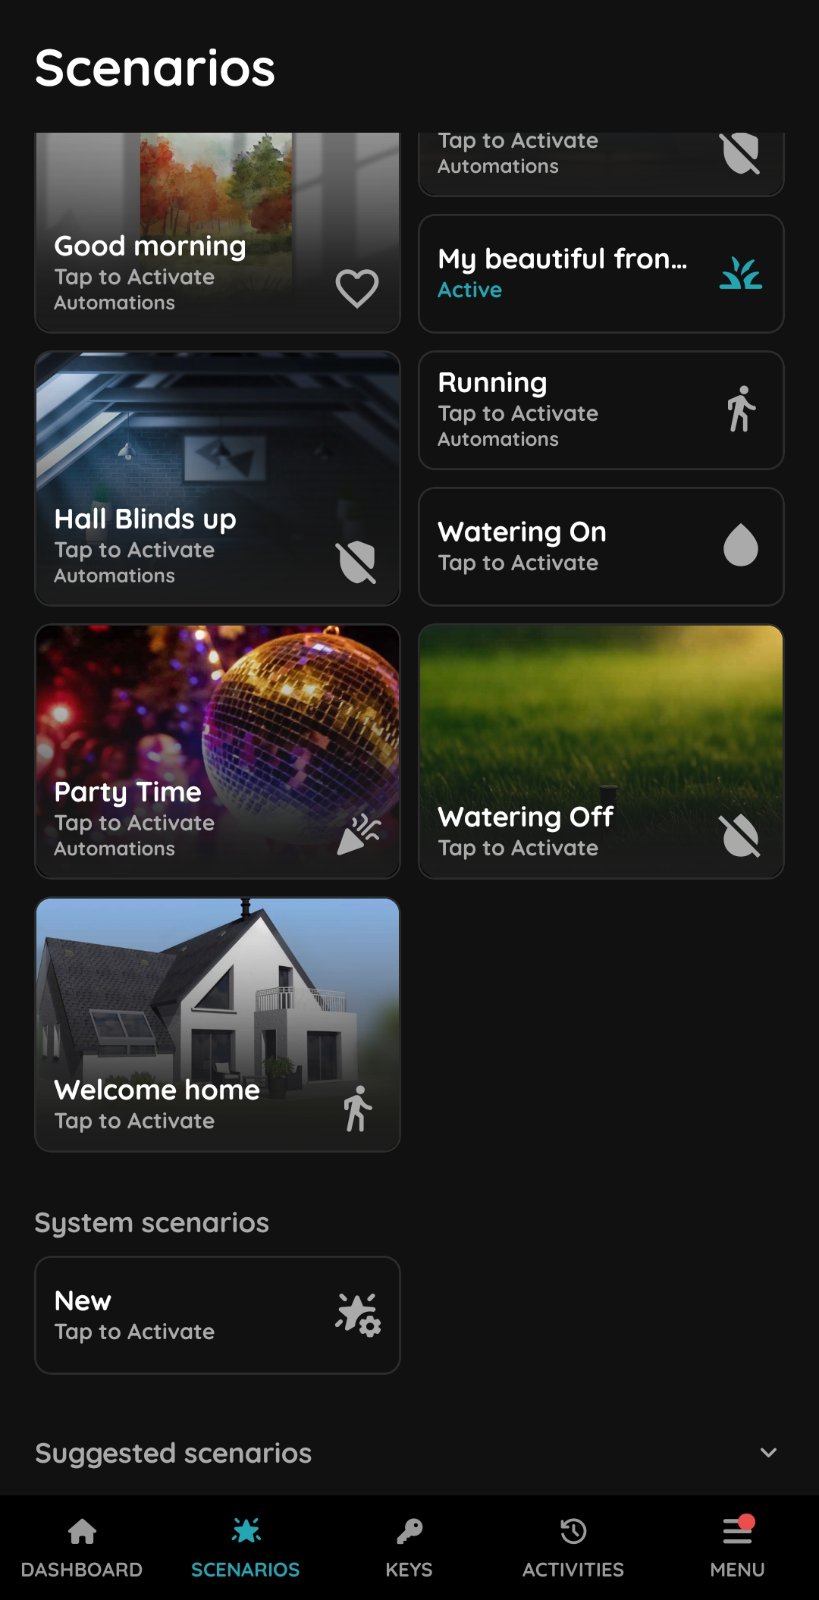
System Scenarios
Suggested scenarios
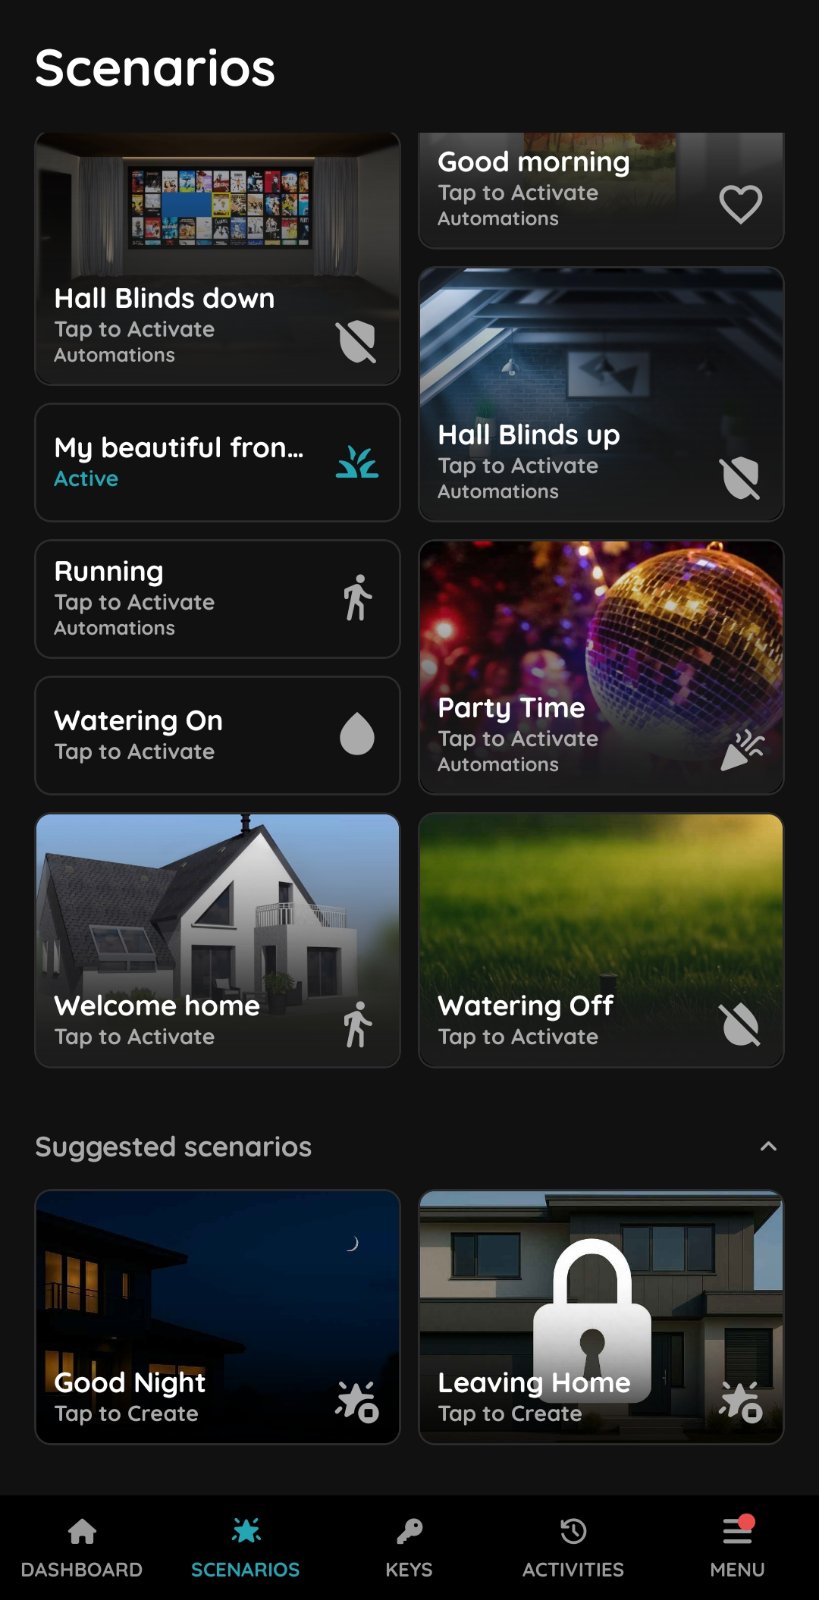
Suggested Scenarios
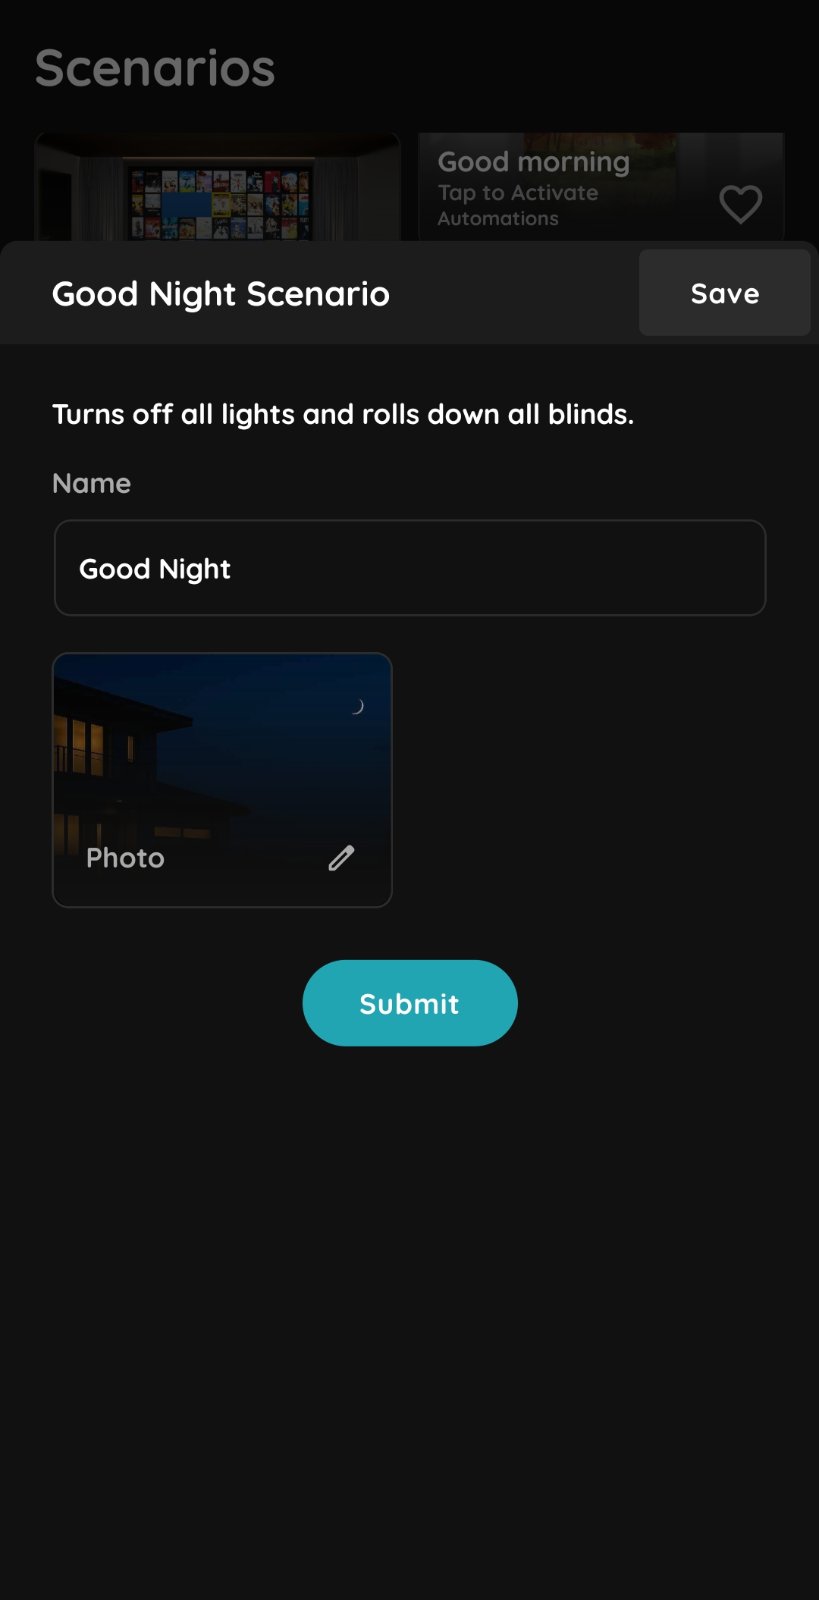
Create a Suggested Scenario
Change the name or image if needed.
Tap Submit to create the Scenario.
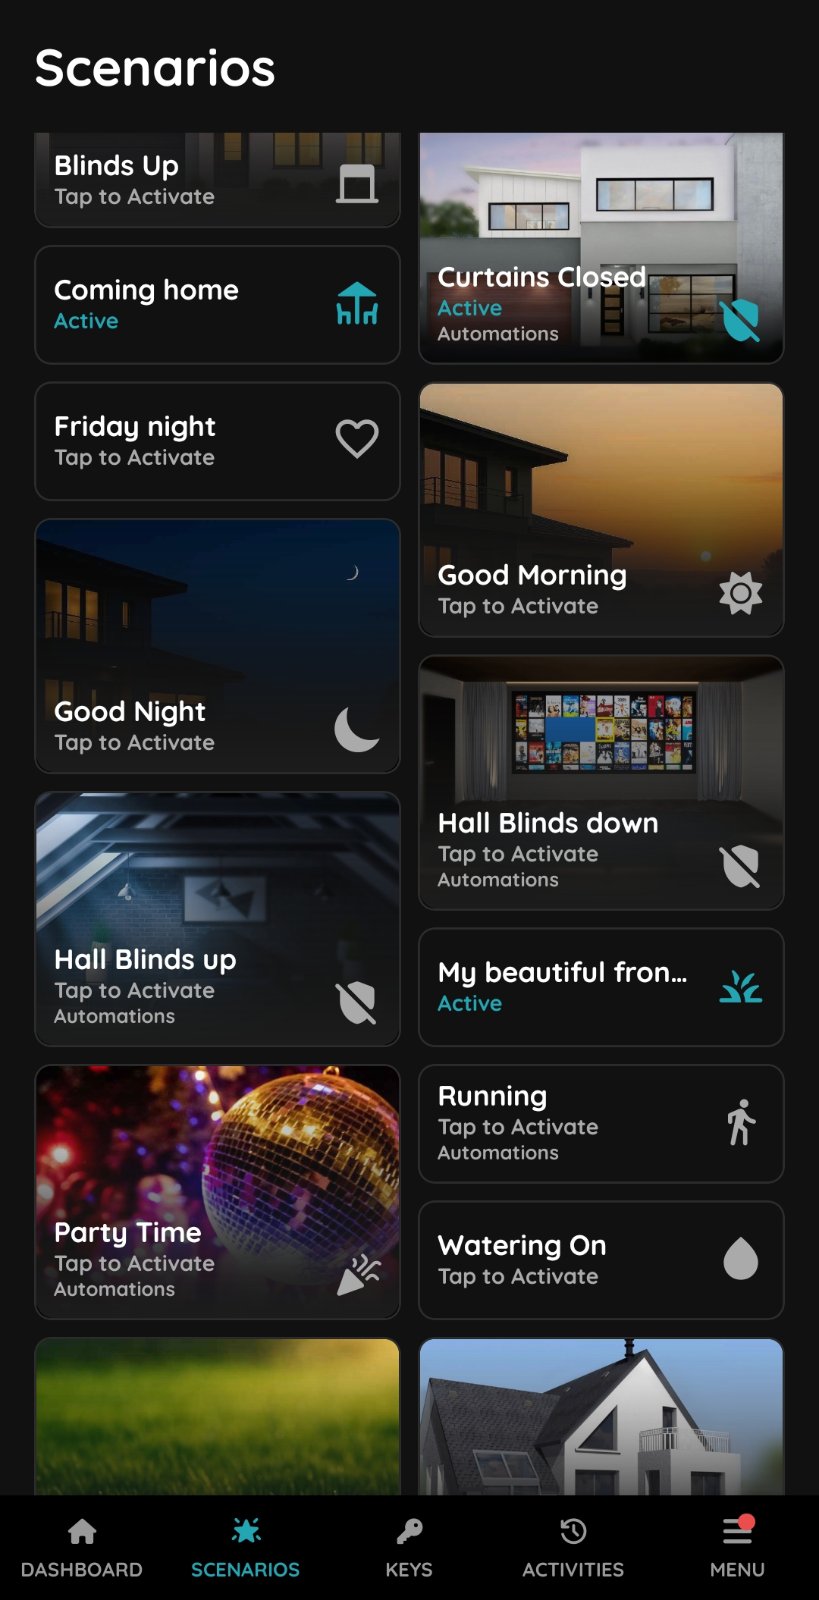
Using the Scenario
See the Good Night Scenario as an example.
Tap on the Scenario to use it.
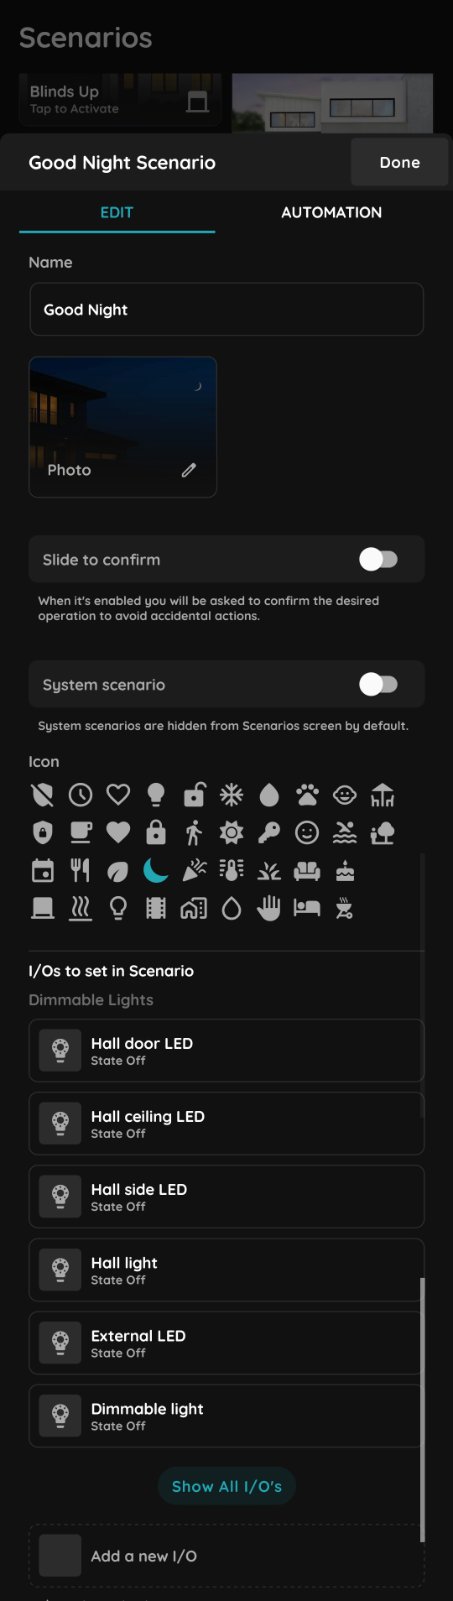
Edit the Scenario
Tap and hold to edit the Scenario.
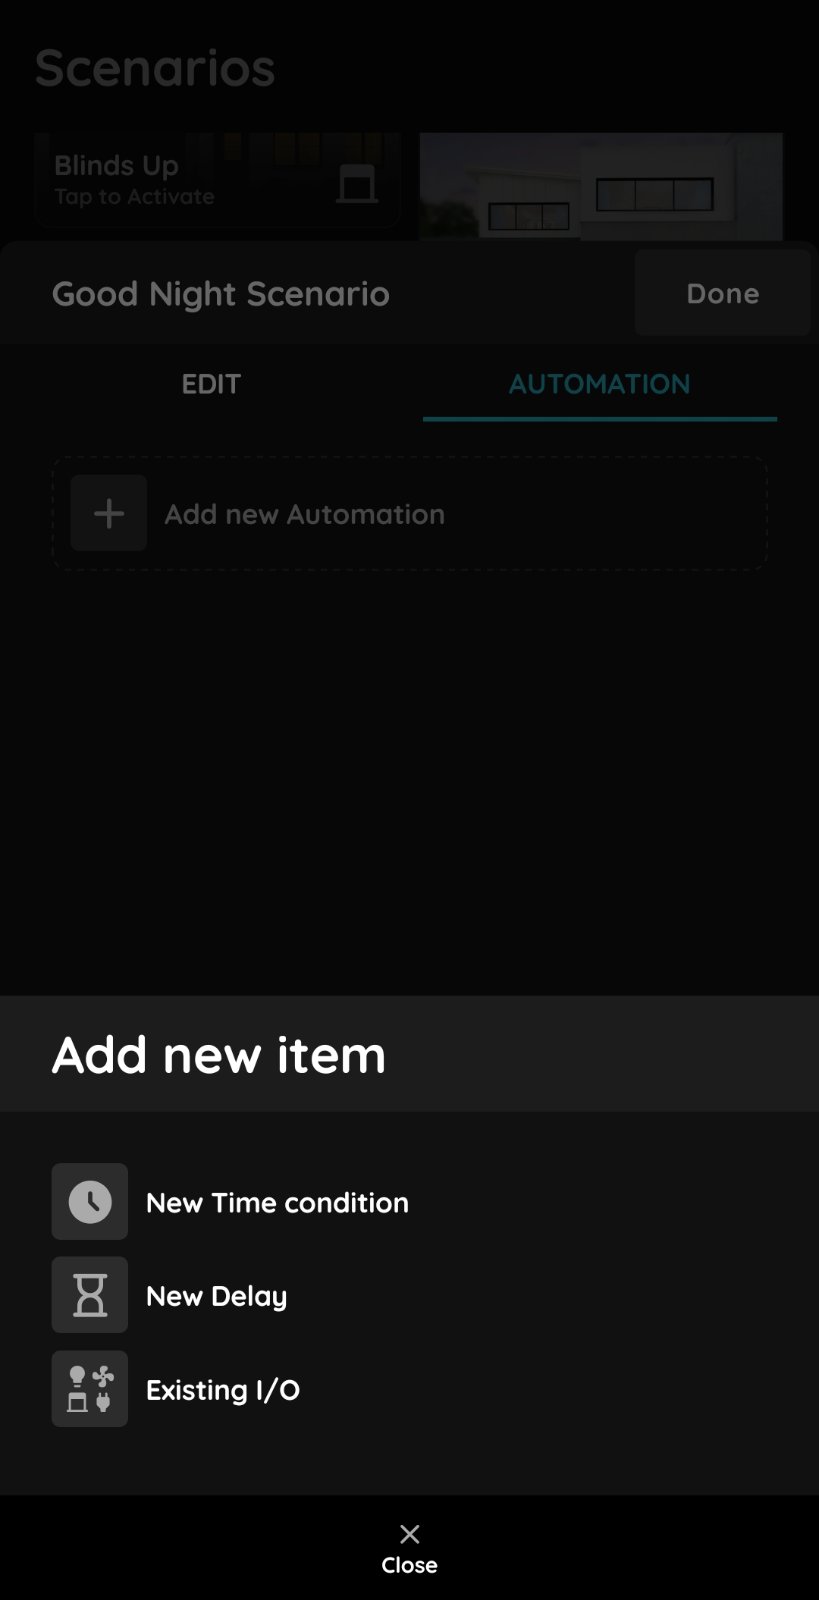
Automation
Tap on +Add new Automation.
There is an option to add:
- New Time condition,
- New Delay,
- Existing I/O.
Tap on the Existing I/O.