Smart PIERRE - Blind control
Description
The Blinds feature in the Smart PIERRE app allows users to manage and customize their blinds. Blinds are displayed on the Dashboard and in the I/O list from the Menu.
Key benefits of the Blinds system include:
1. Control via the Dashboard:
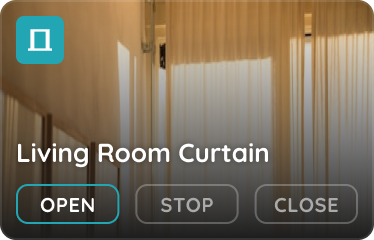
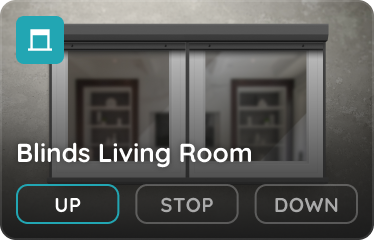
- Blinds can be easily controlled using the Up, Stop, and Down buttons on the Dashboard. The Blind’s icon and picture change according to the current status of the Blind, providing clear visual feedback.
2. Intensity Tab:
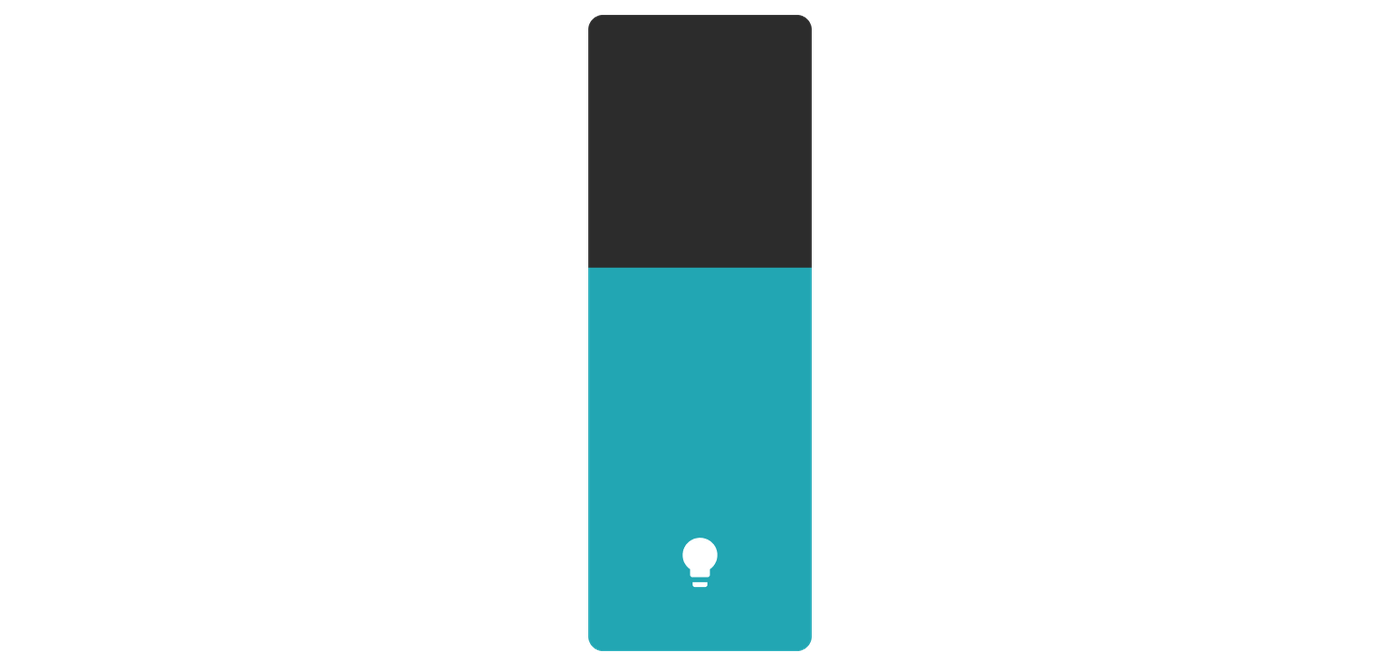
- The Intensity tab allows users to set the position of the Blinds by sliding their finger on the slider, tapping on the Presets, or by using the buttons Up, Stop, and Down for precise adjustments.
3. Edit and Calibration:
- Users can edit the Blinds’ settings, including the name, updated photos for both statuses, and setting the Lifting Time, Release Time, and Collapse Time for precise operation. Slide to confirm can be enabled or disabled. When it's enabled you will be asked to confirm the desired operation to avoid accidental actions.
- Calibration is required to ensure smooth operation:
Lifting Time: Measure the time in seconds needed for the Blinds to fully open and enter it in this field.
Release Time: Measure the time in seconds for the Blinds to fully close and enter it in this field.
Collapse Time: Measure the time in seconds required for the Blinds to collapse or open every lamella and enter it in this field.
4. Automation and Scenarios:
- The Used In tab displays the scenarios and automated scenarios where the Blinds have been added. For example, an automated scenario could raise all the Blinds in the living room when the Brightness sensor detects that the light intensity is lower than 45%.
The Blinds system is fully integrated with the PIERRE smart home platform, providing seamless control and the ability to create custom automations that match your daily routines and preferences.
Control of the Blinds
Blinds control is quick and simple, managed directly from the Dashboard. Follow the example of Blinds middle.
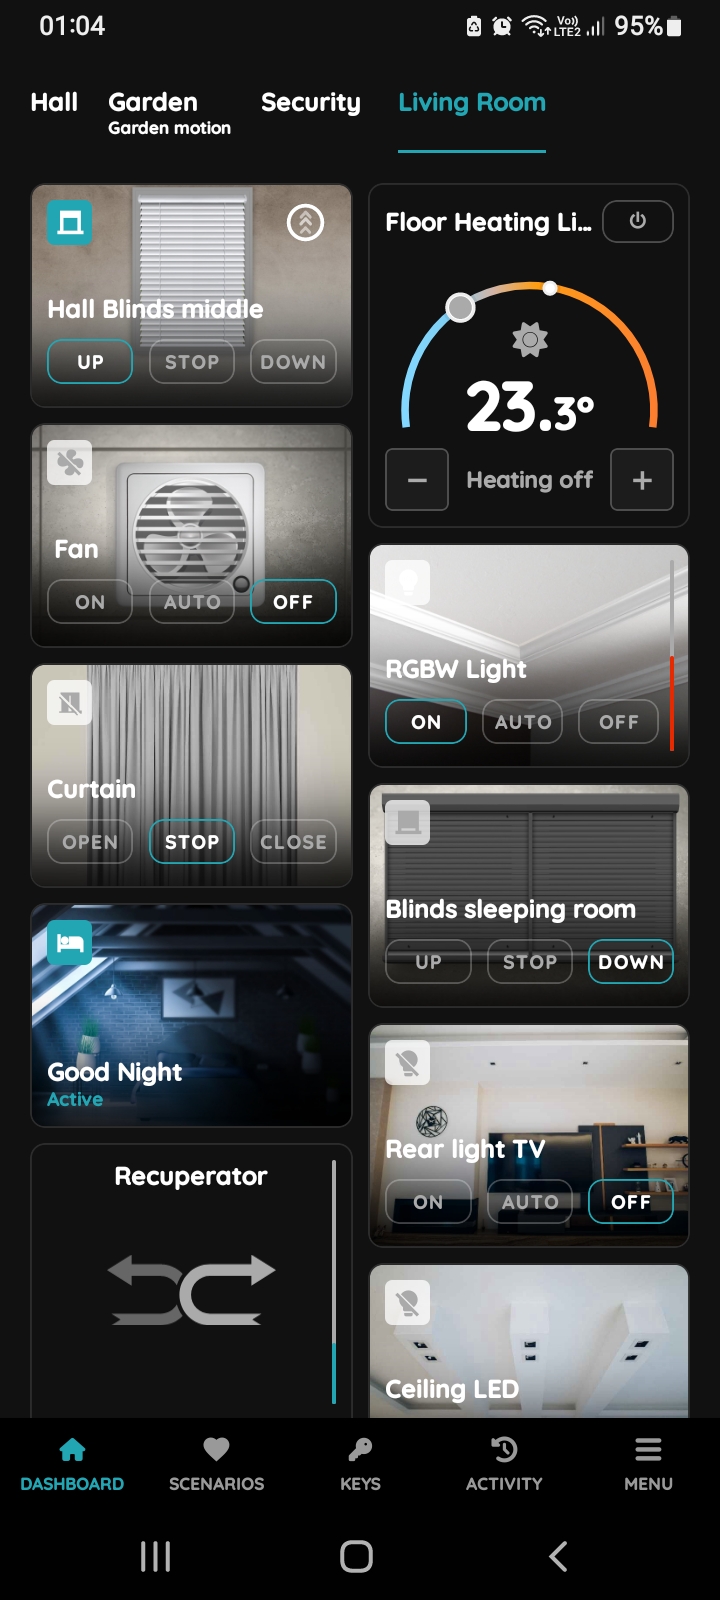
Up, Stop, Down
There are three buttons for the control of the Blinds:
- Up - Tap on this button in order to Blinds go up.
- Stop - Tap on this button in order to stop Blinds.
- Down - Tap on this button in order to Blinds go down.
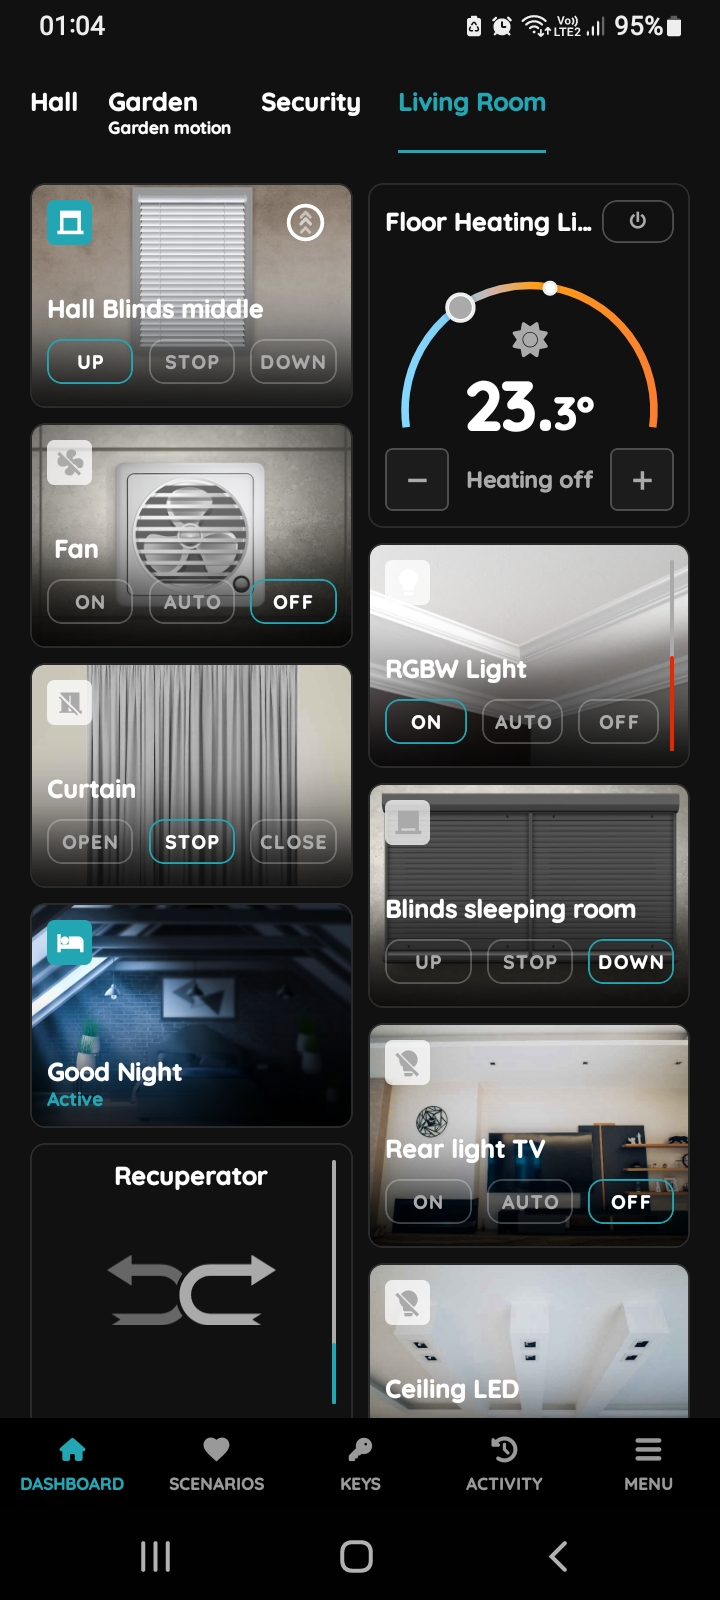
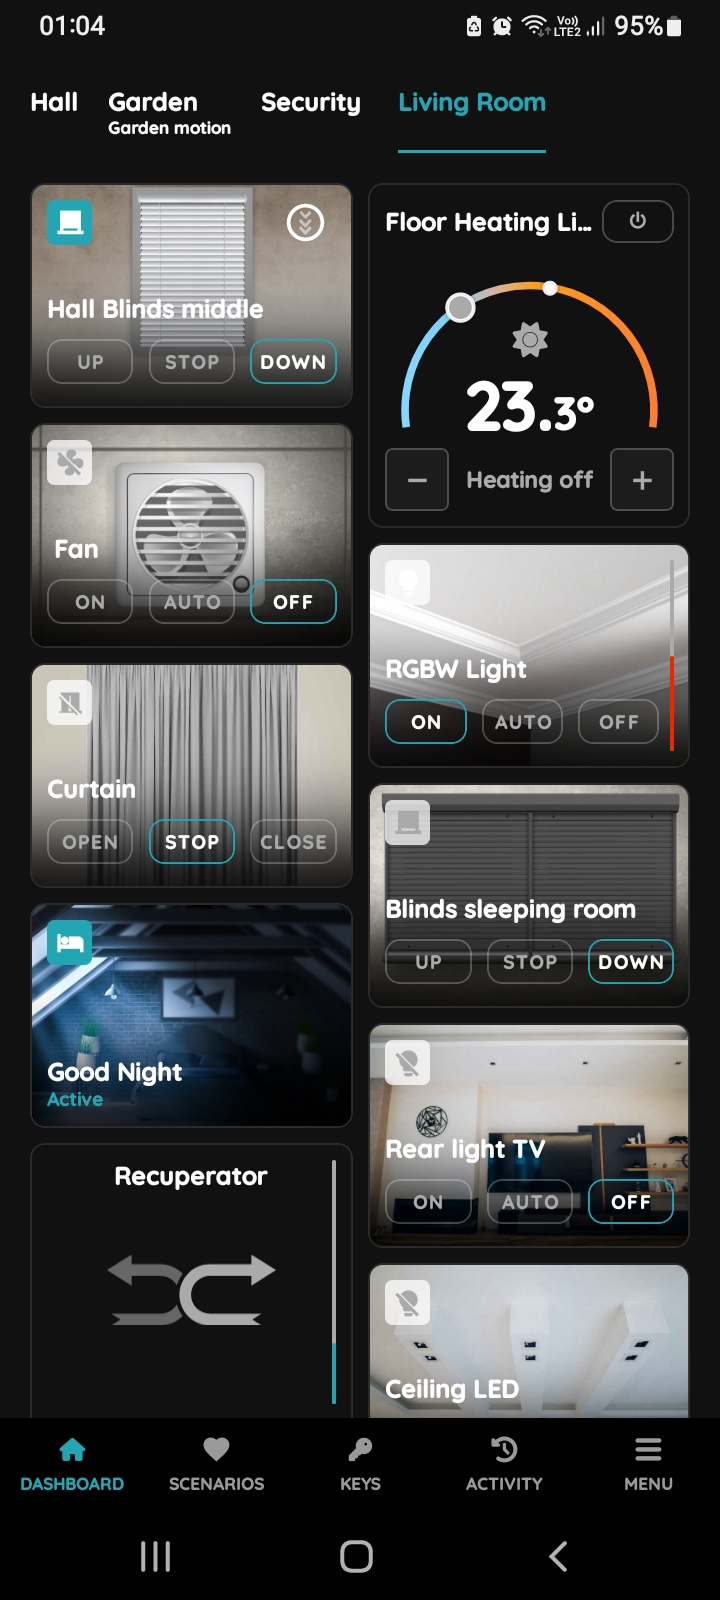
Blinds Up
In order to Blinds go up tap the button Up.
The icon of the Blinds turns blue and picture of the Blinds will be changed according to the status Up.
Blinds Down
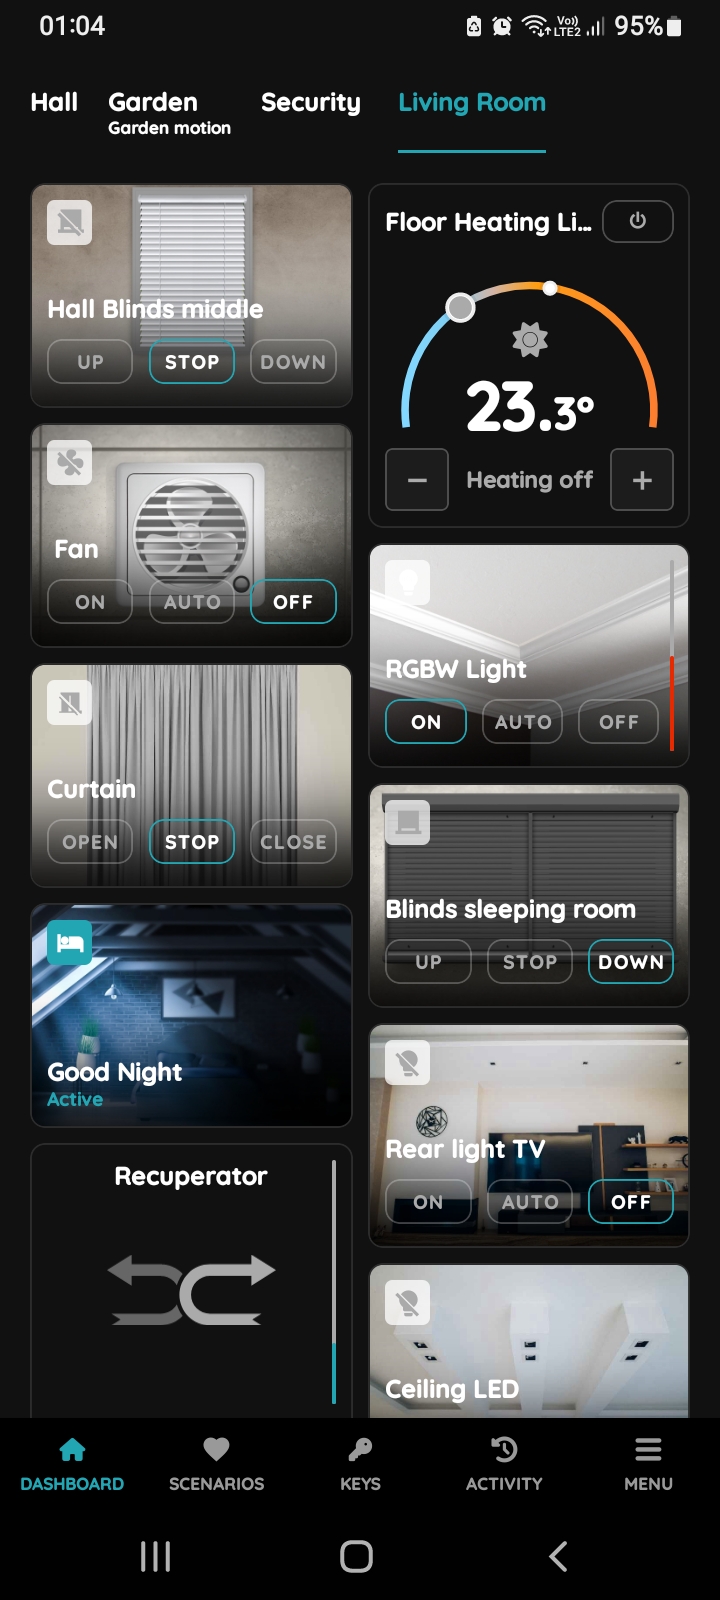
In order to Blinds go down tap the button Down.
Picture of the Blinds and icon will be changed according to the status Down.
Stop Blinds
In order to stop Blinds tap the button Stop, the icon and the picture of the Blinds will be changed.
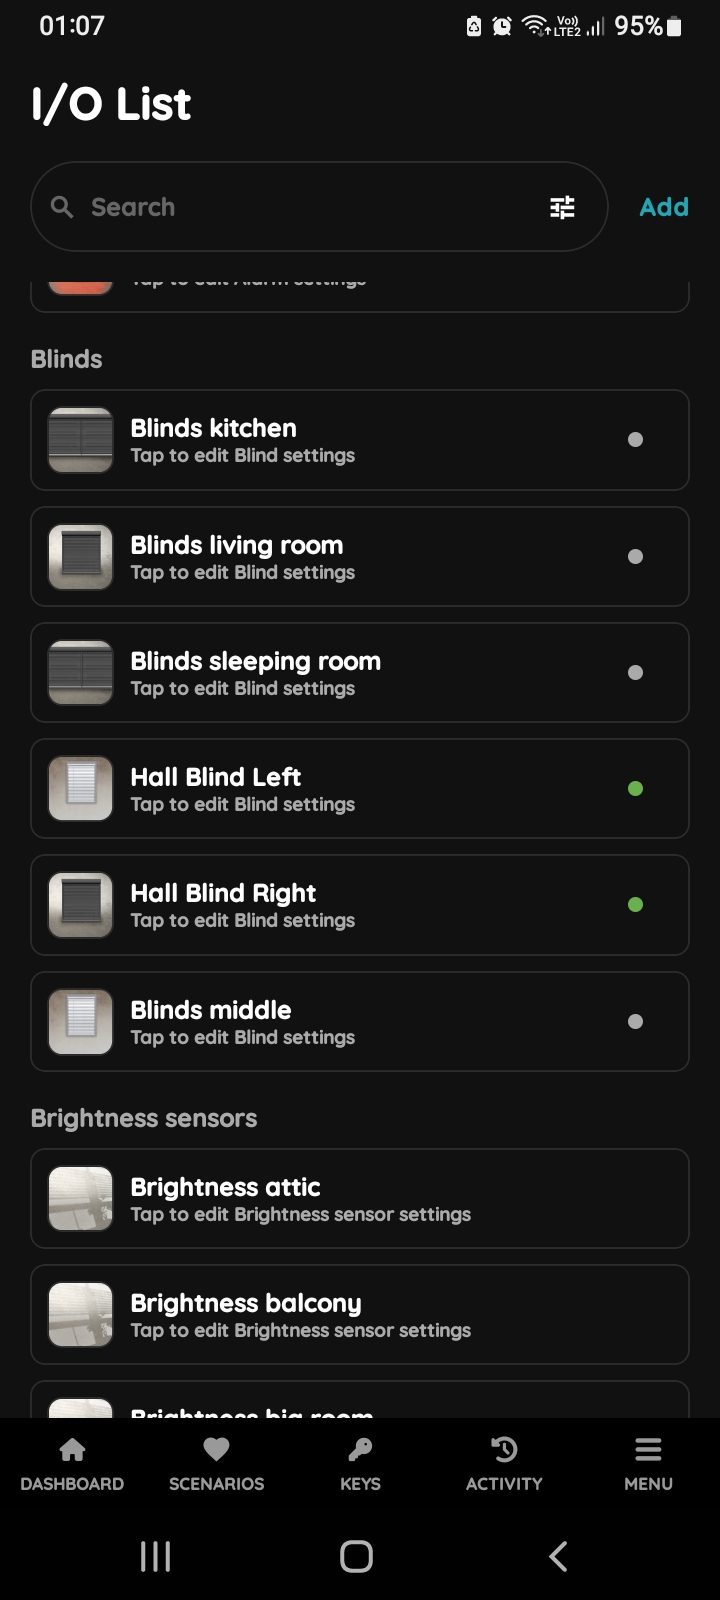
Open I/O list - Blinds
To edit the Blind's settings, scroll and tap on it in the I/O list.
Edit Blinds
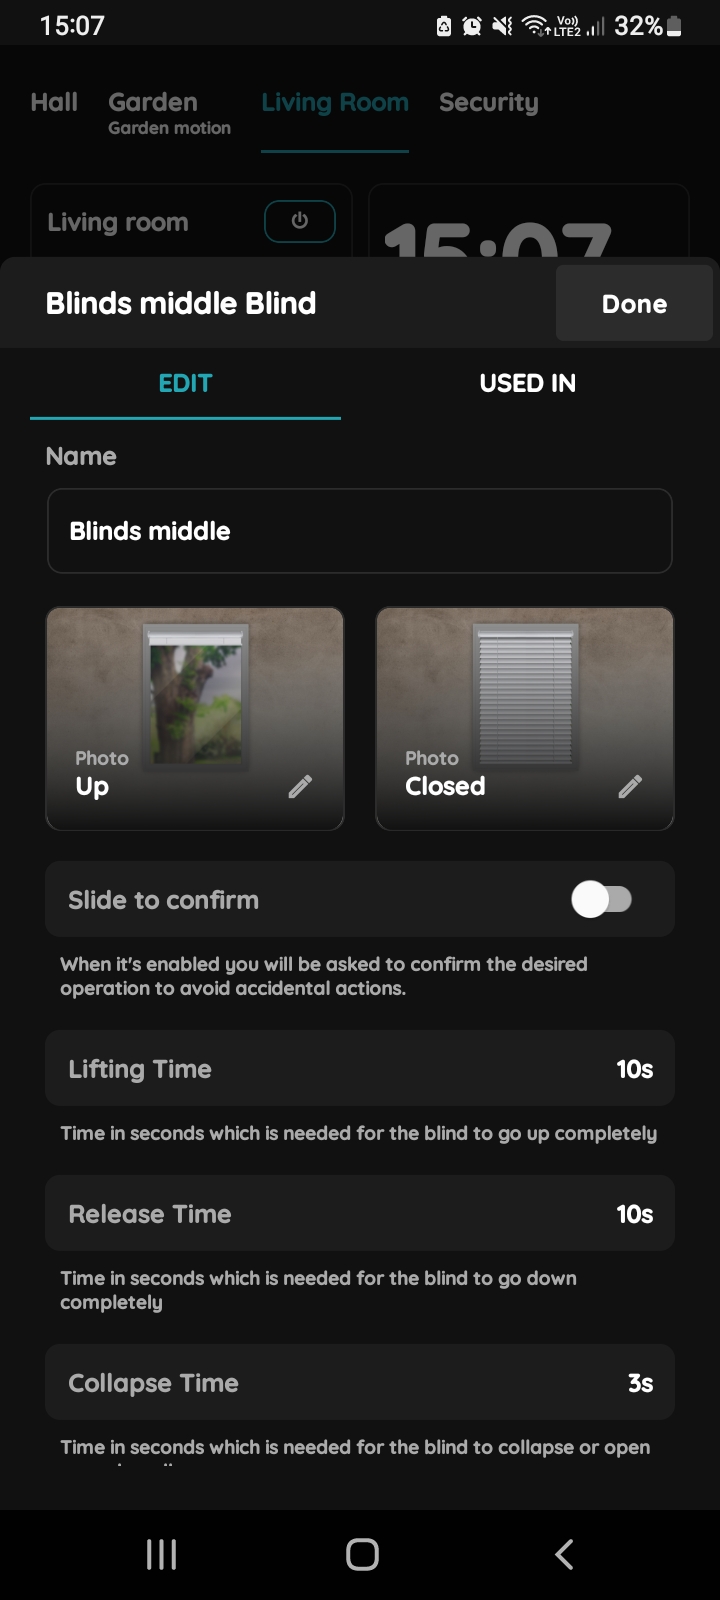
Edit following form:
- Name - Edit the name of the Blinds.
- Photo - Choose photos for both the open and closed statuses of the Blinds.
- Slide to confirm - When it is enabled you will be asked to confirm the desired operation to avoid accidental actions.
Calibration - Used to accurately determine the position of the Blinds, either as a percentage or with a slider. Measurements are required to enter the appropriate times for lifting, releasing, and collapsing.
- Lifting time - Measure the time in seconds for the Blinds to fully raise, and enter this value.
- Release time - Measure the time in seconds for the Blinds to fully lower, and input this value.
- Collapse time - Measure the time for the Blinds to collapse or for each lamella to open, and enter this time in seconds.
Tap Submit and Done to save the settings, or if you want to delete the Blinds tap the button Delete.
Follow next steps for more details.
GOOD TO KNOW:
Blinds can be edited by long-press the Blinds' card on the Dashboard or tapping them in the I/O list.
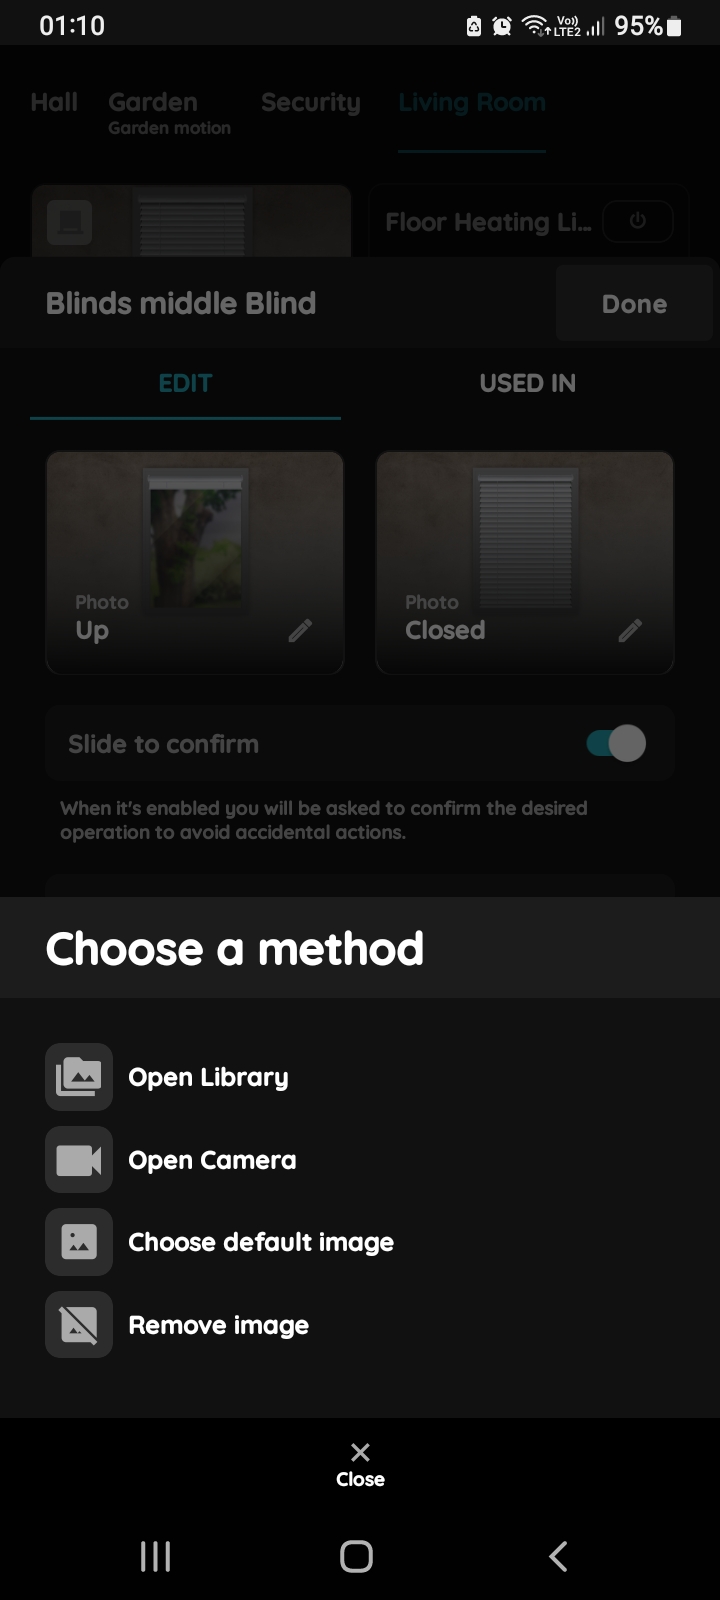
Choose a photo - Blinds
You have four options:
- Open Library - The phone’s Library will open. It is recommended to take pictures from the same angle for all Blinds statuses to achieve a complete and consistent view.
- Open Camera - You can take a picture using your smartphone. For a complete and consistent view, it’s recommended to capture all Blinds' statuses from the same angle.
- Choose default image - These images are prepared in advance in order to provide a complete and seamless experience.
- Remove image - Removes existing image.
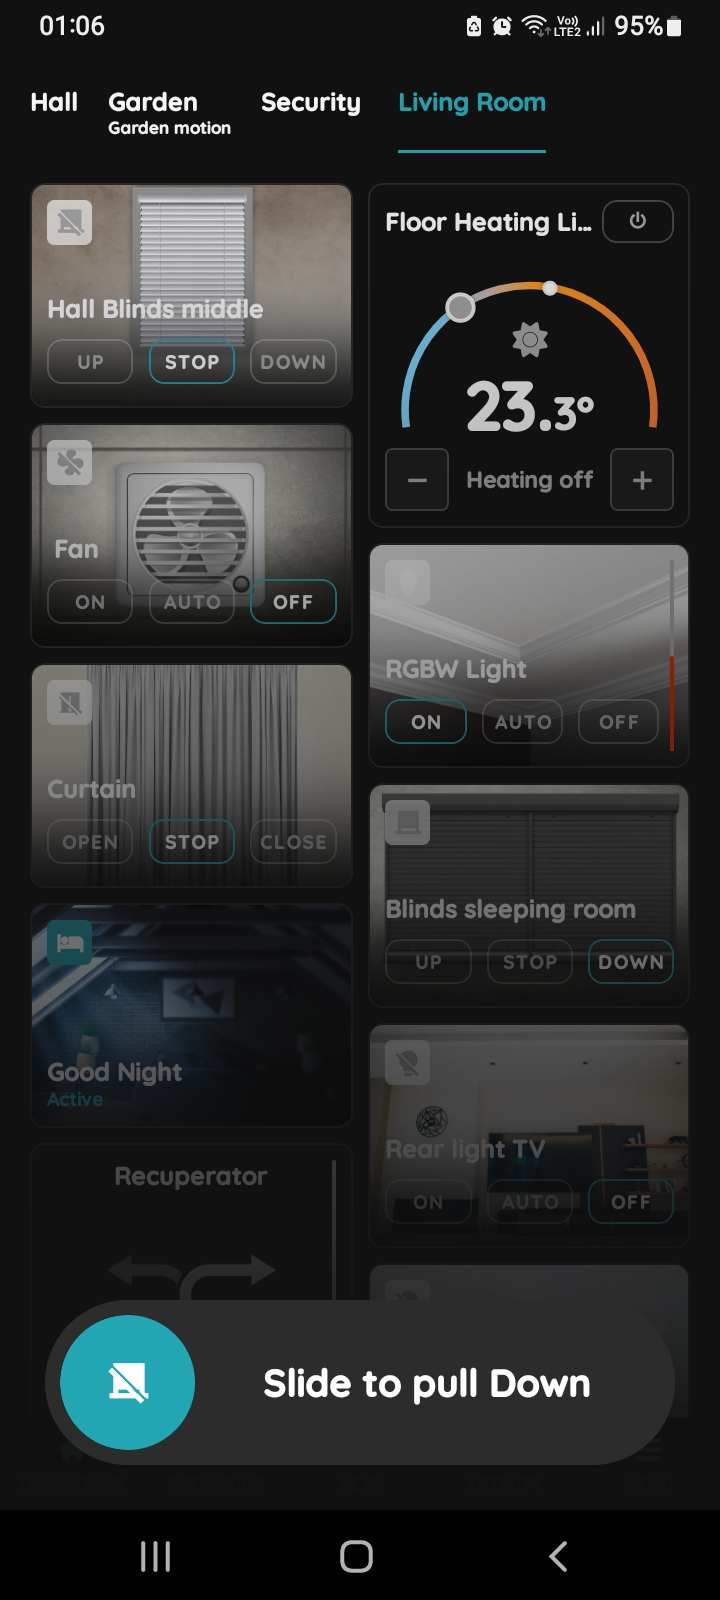
Slide to confirm - Blinds
Slide to confirm feature adds an extra layer of security, preventing accidental actions.
It asks you to confirm your choice once more.
Here's an example of how Slide to confirm feature is applied.
If you want Blinds to pull Down tap the button Slide to pull Down and slide from the left to the right side.
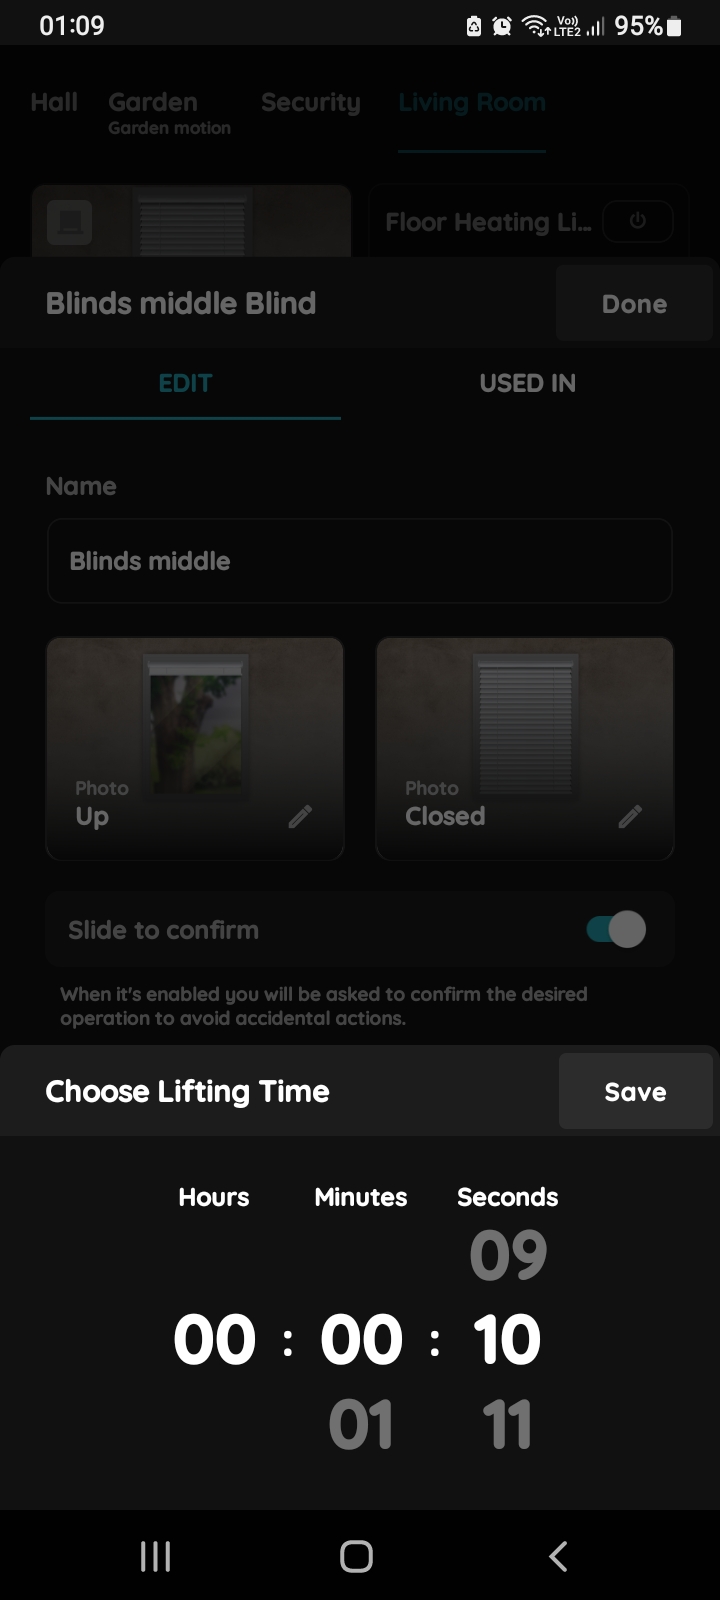
Choose Lifting Time - Curtains
Lifting time - Measure the time it takes for the Blinds to fully raise and enter this time in seconds.
You have three columns: hours, minutes, seconds to choose lifting time for the Blinds.
Scroll through each one to set lifting time and tap the button Save.
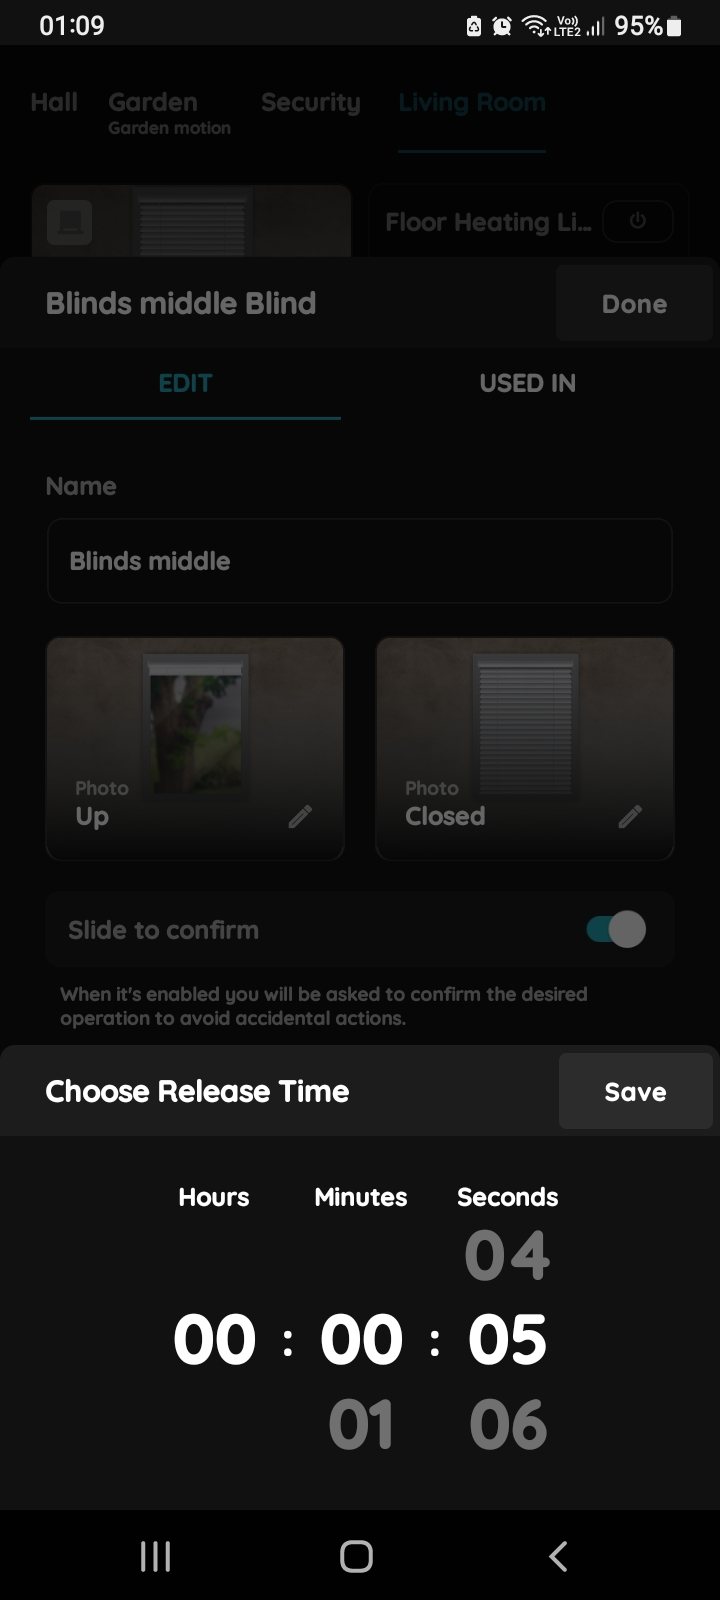
Choose Release Time - Curtains
Release time - Measure how long it takes for the Blinds to go down completely and enter the required seconds.
Tap in the Release Time field to set it.
You have three columns: hours, minutes, seconds to set it.
Scroll through each one to set release time and tap button Save.
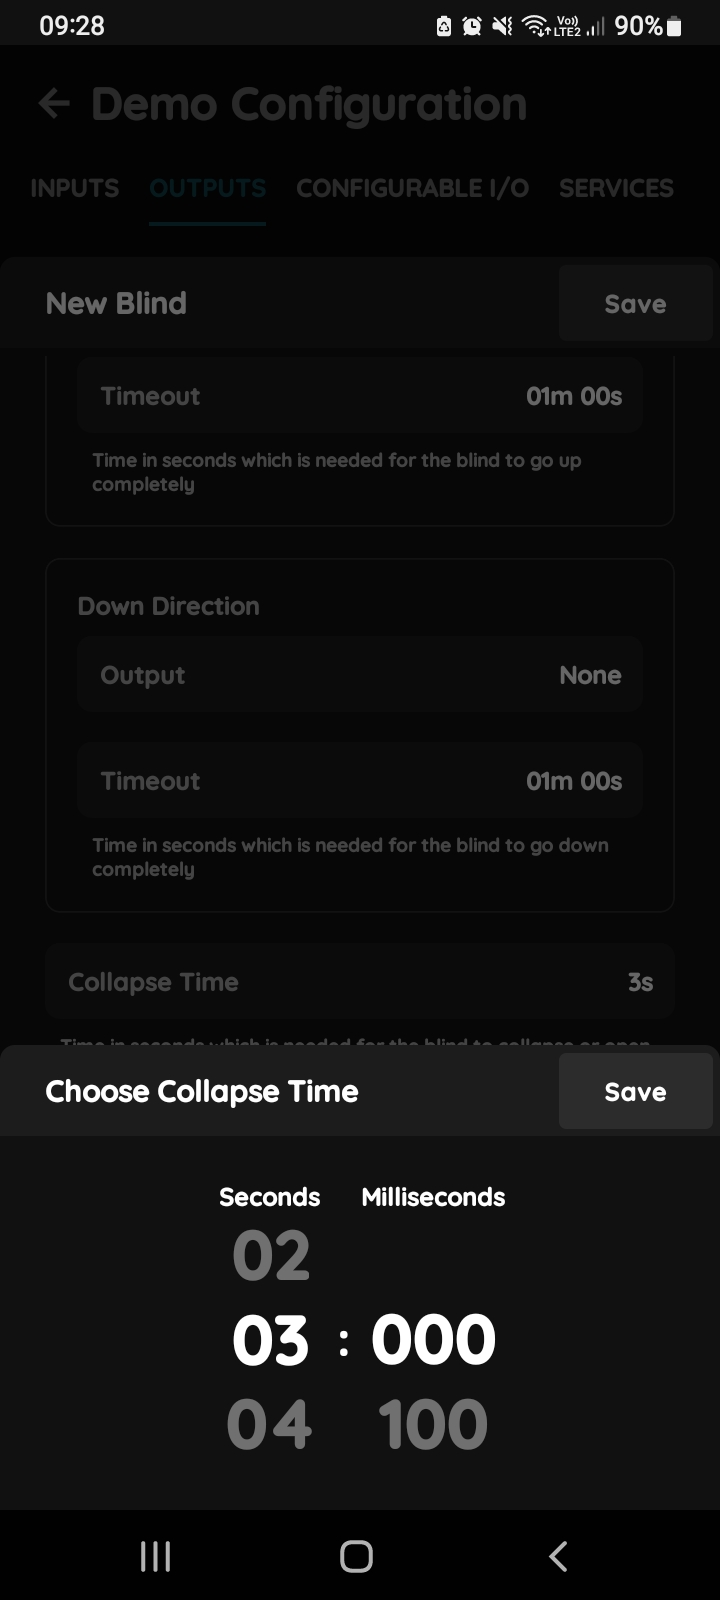
Choose Collapse Time
Collapse time - Measure the time for the Blinds to collapse or for each lamela to open, and enter the time.
In this step you should choose Collapse Time by tapping in the Collapse Time field.
You have two columns for seconds and miliseconds.
Scroll through each column, set collapse time and tap the button Save.
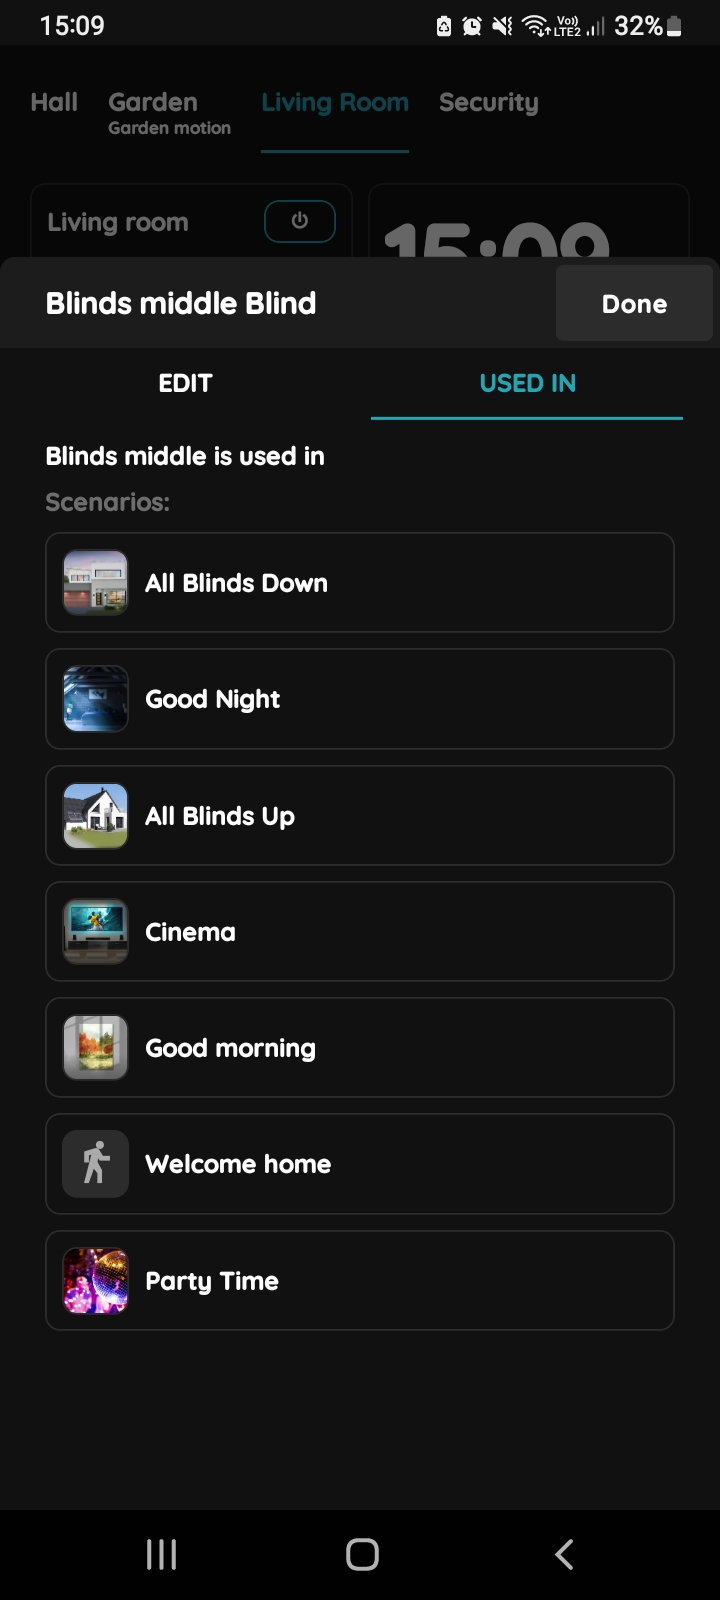
Used In - Blinds
The Used In tab shows all the scenarios and automations where Blinds are applied, making it easy to see where this I/O is used without the need to search manually. If it isn't used in any, the list will be empty, and a message will display: "This I/O is not in use anywhere." This feature is particularly useful as it consolidates all relevant information in one place.
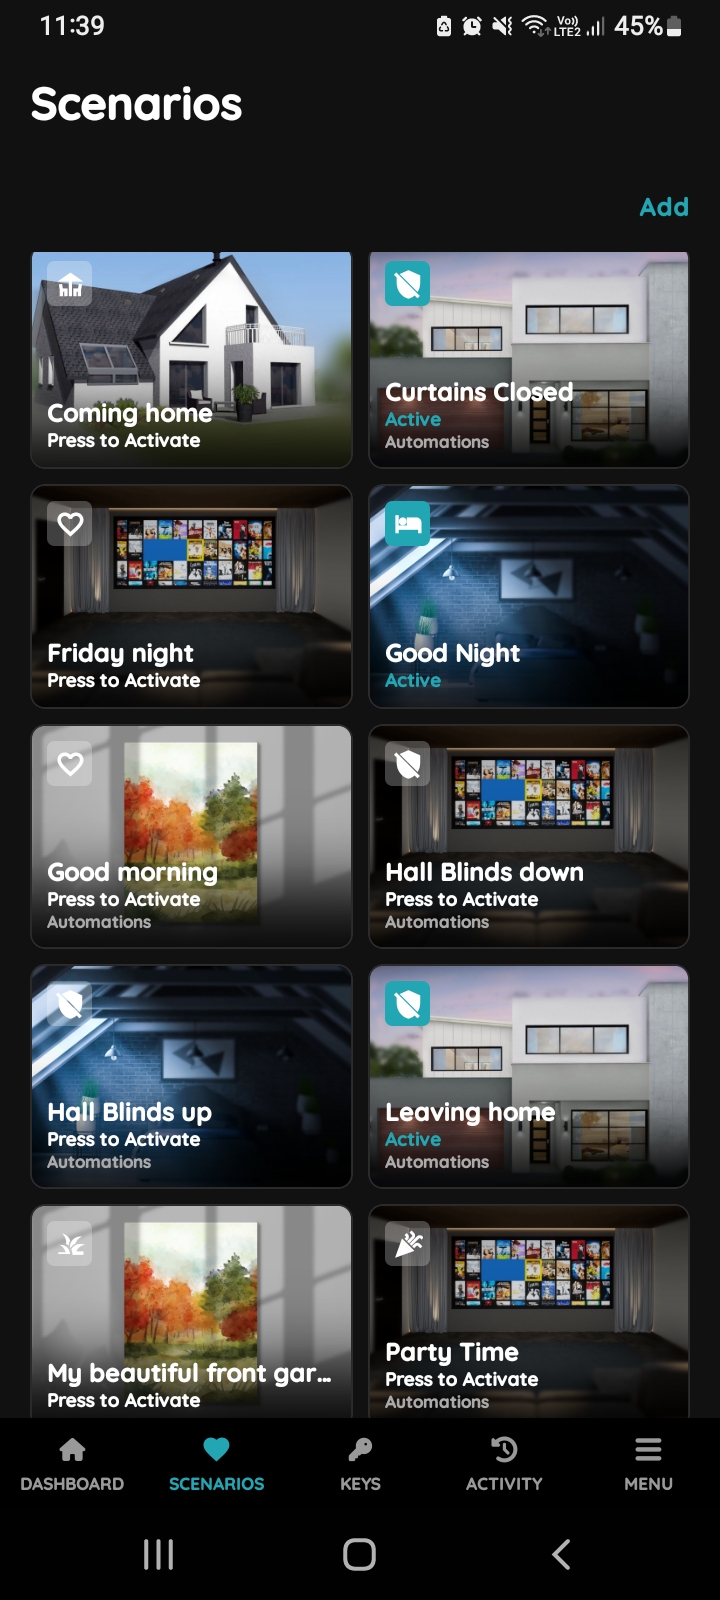
Scenarios from the Taskbar
You can create a Blinds/Curtains automation from the Taskbar or the Menu.
In this example, the automation closes the Blinds/Curtains when the Brightness Sensor detects a light level below 75%.
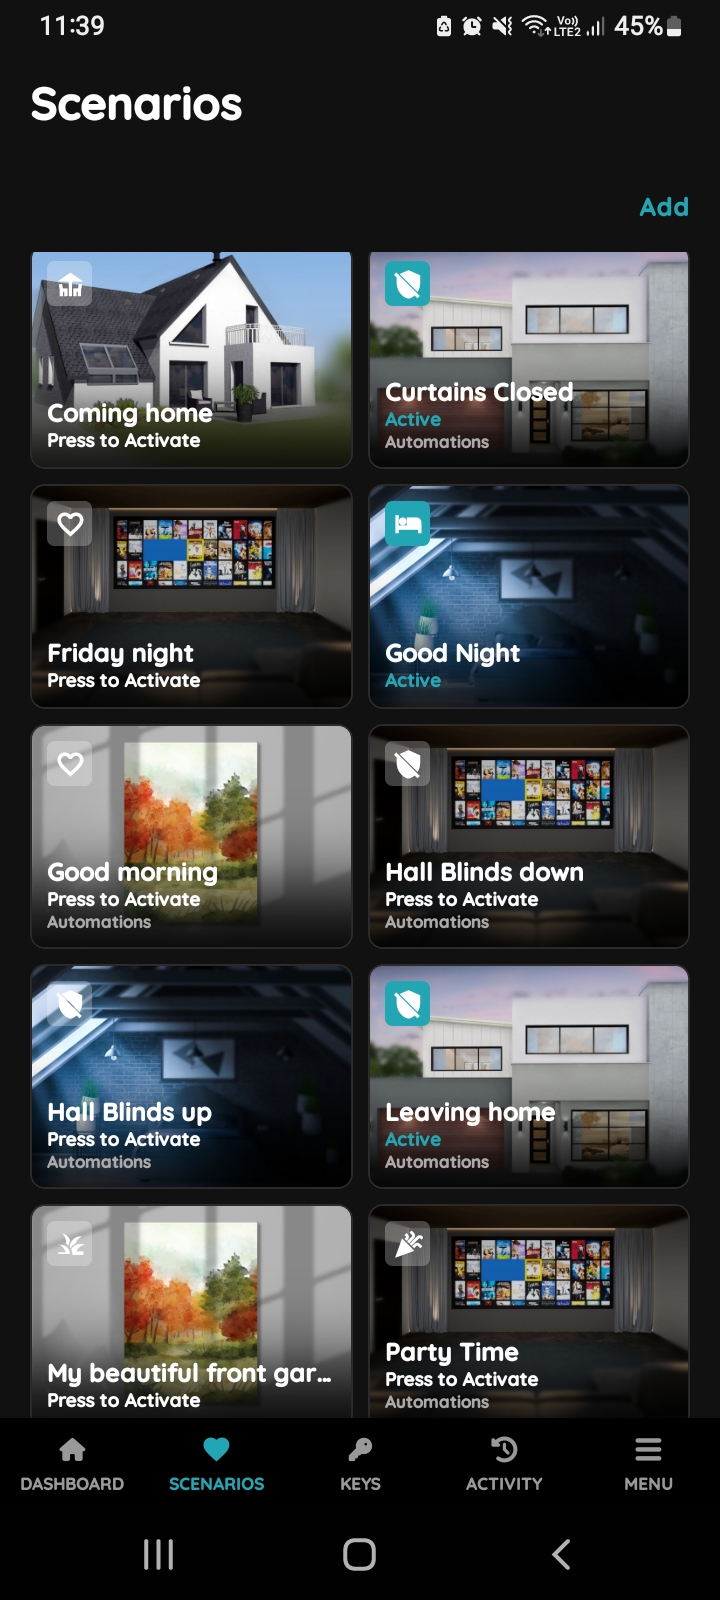
Scenarios - Add button
Tap on the button Add in order to create Scenario.
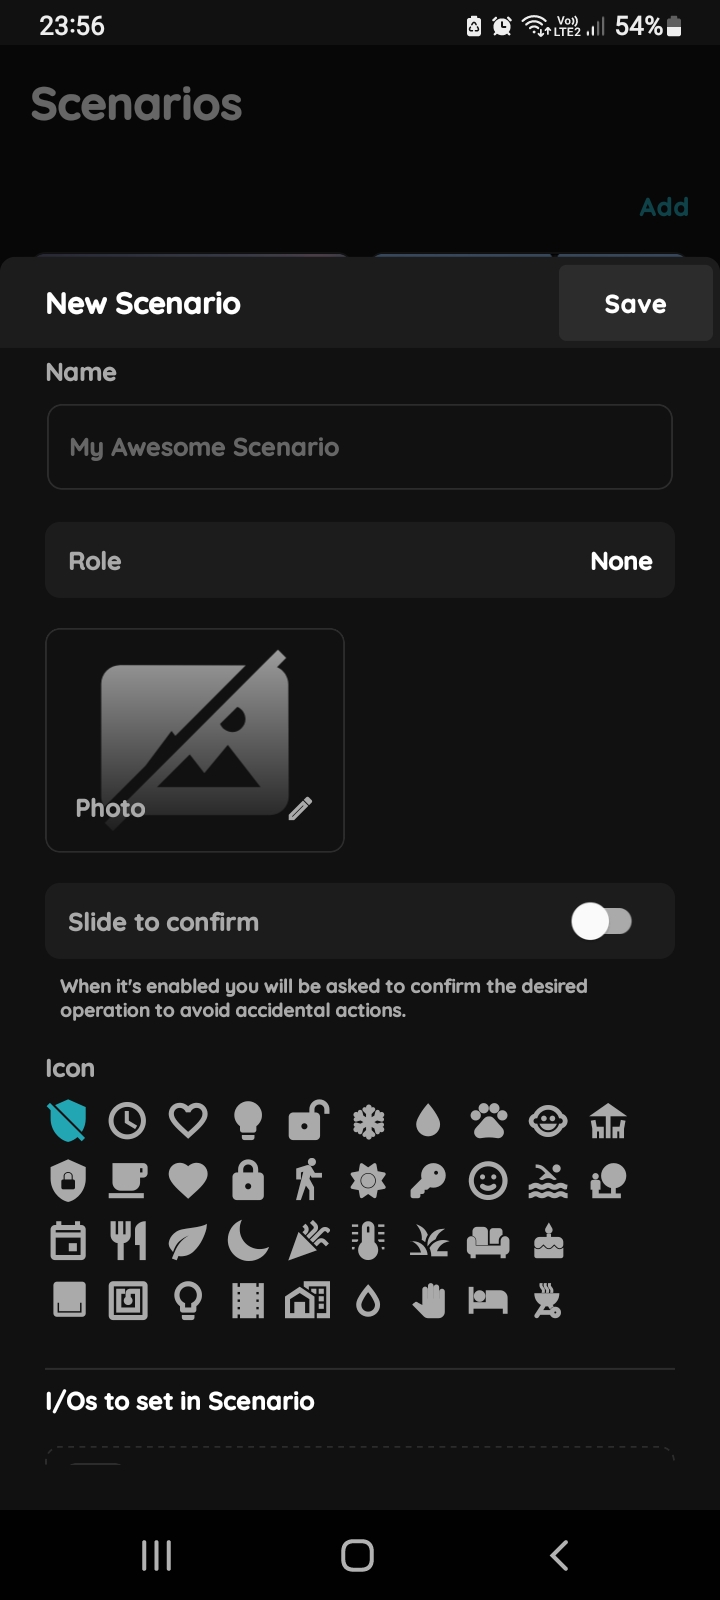
New Scenario
Fill following form:
- Name – Enter the name of the Scenario.
- Role – Select the appropriate role for the Scenario.
- Photo – Choose a photo to represent the Scenario.
- Slide to confirm – When enabled, you will be asked to confirm the operation to avoid accidental actions.
- Icon – Select an icon for the Scenario.
- Add a new I/O – Tap this field to add new I/Os to the Scenario.
Tap Submit/Save to finalize your changes.
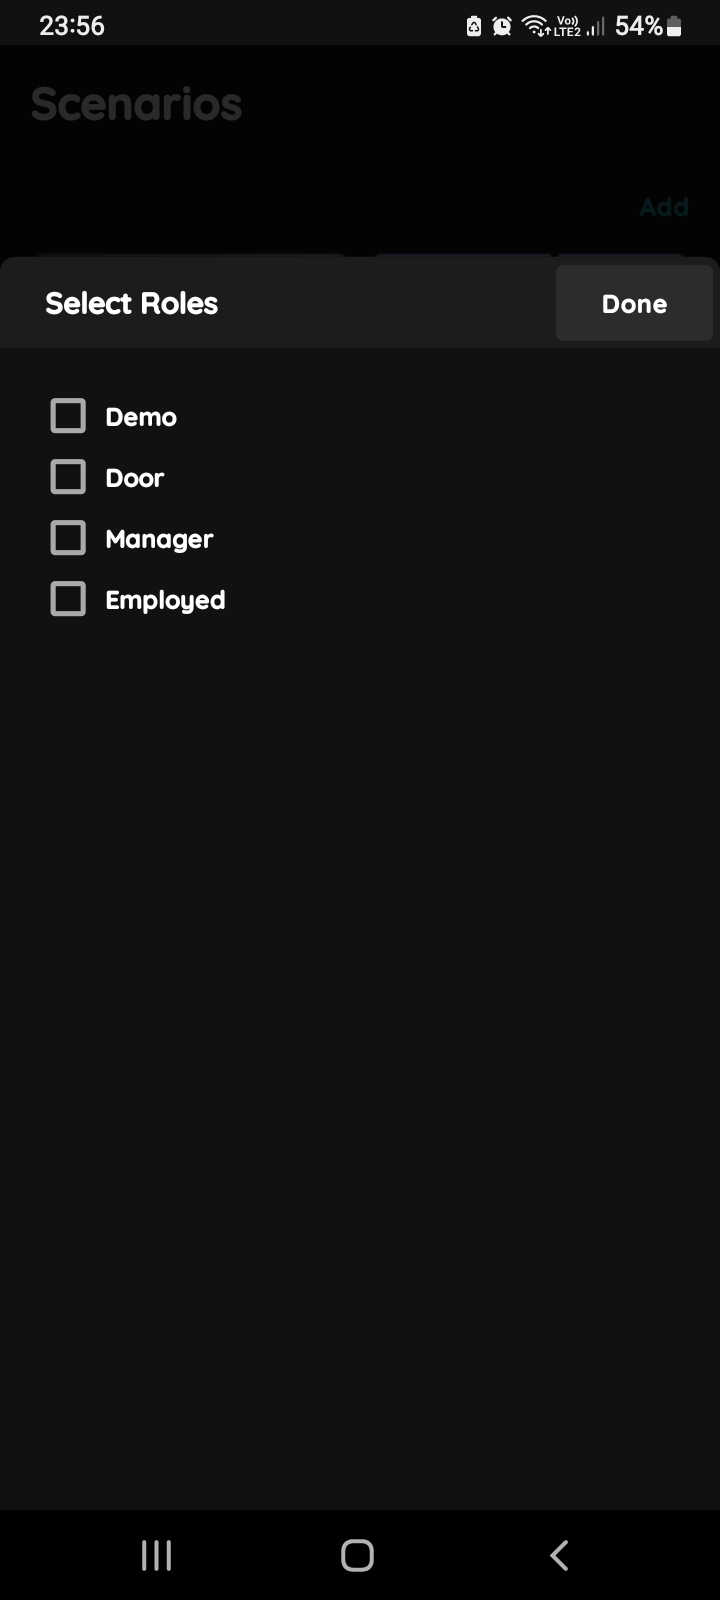
Select Roles
Select checkbox/checkboxes next to the desired Role/Roles (multiple choice).
Tap Save/Done.
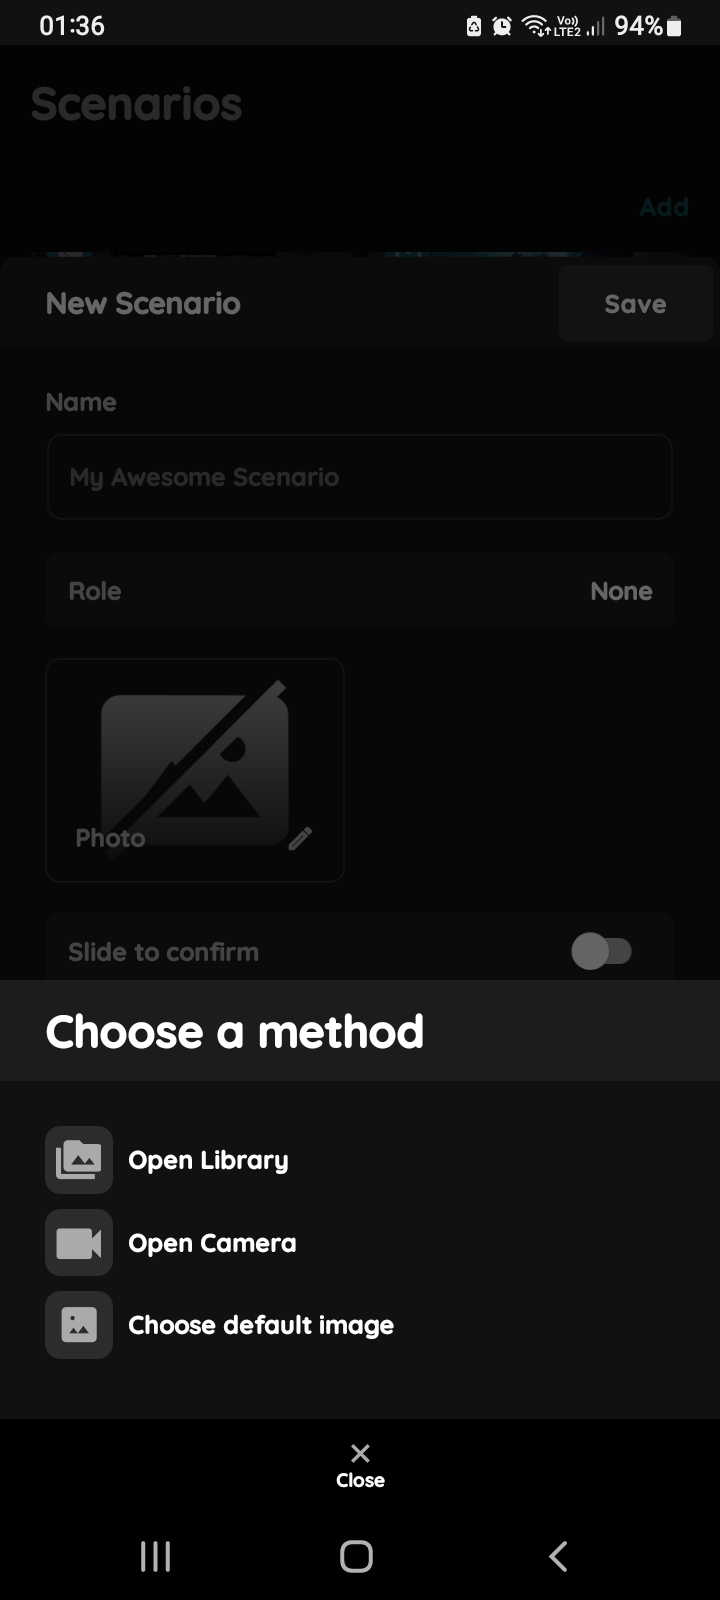
Change photo - Scenario
Tap the photo of the Scenario. You have three options:
Open Library - The phone’s Library will open.
Open Camera - You can take a picture using your smartphone.
Choose default image - These images are prepared in advance in order to provide a complete and seamless experience.
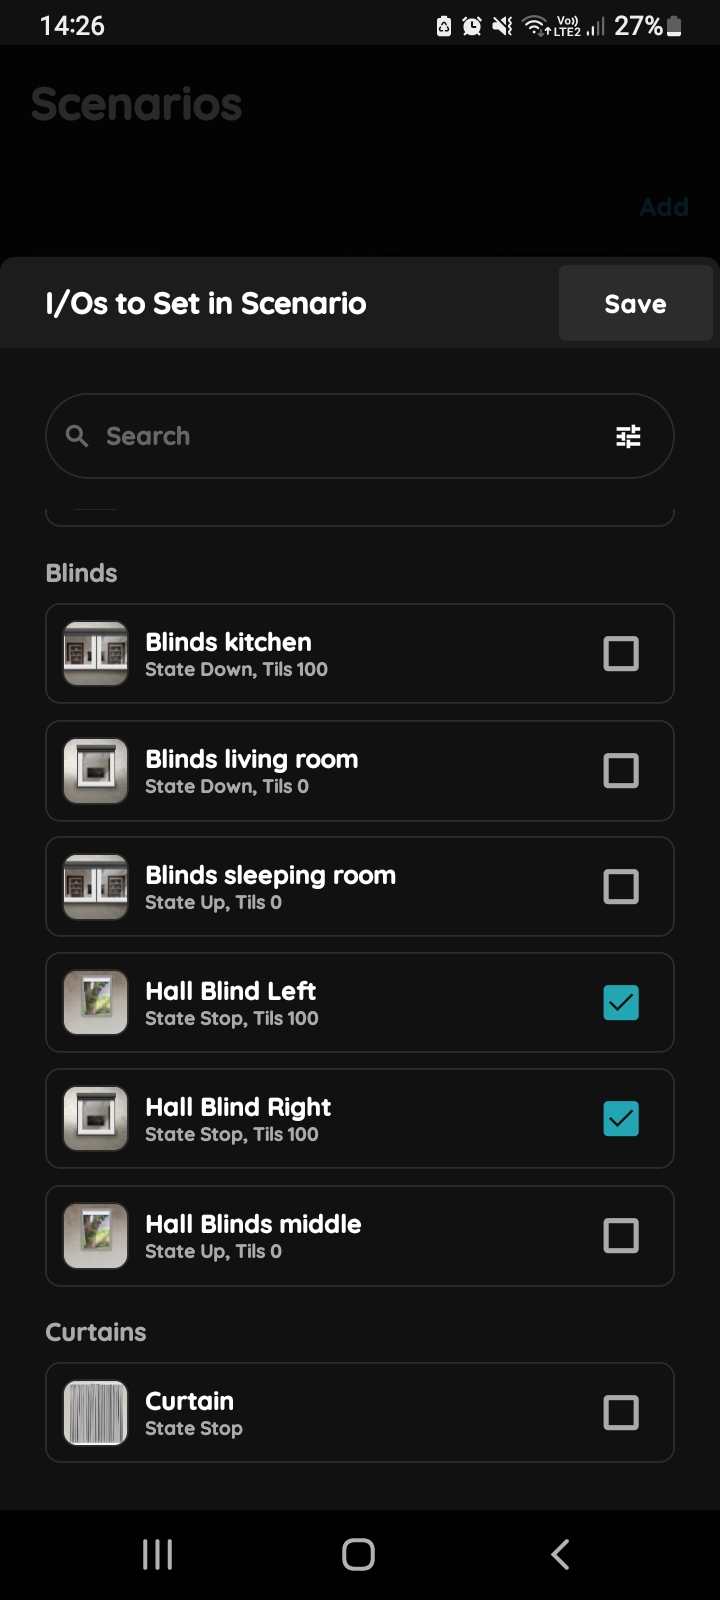
Add a new I/O - Scenario
You can search I/Os if you tap in the field Search and write the name of the I/O that you want to find, or to tap on the filter icon in the up right corner of the Search bar.
Tap on the checkbox/checkboxes next to the desired I/Os that you would like to add to the Scenario from the I/Os to Set in Scenario list.
Under each of the I/Os on this list is shown its current status.
The statuses are always those that have been set, and they can be changed later by tapping on the I/O.
Tap Save.
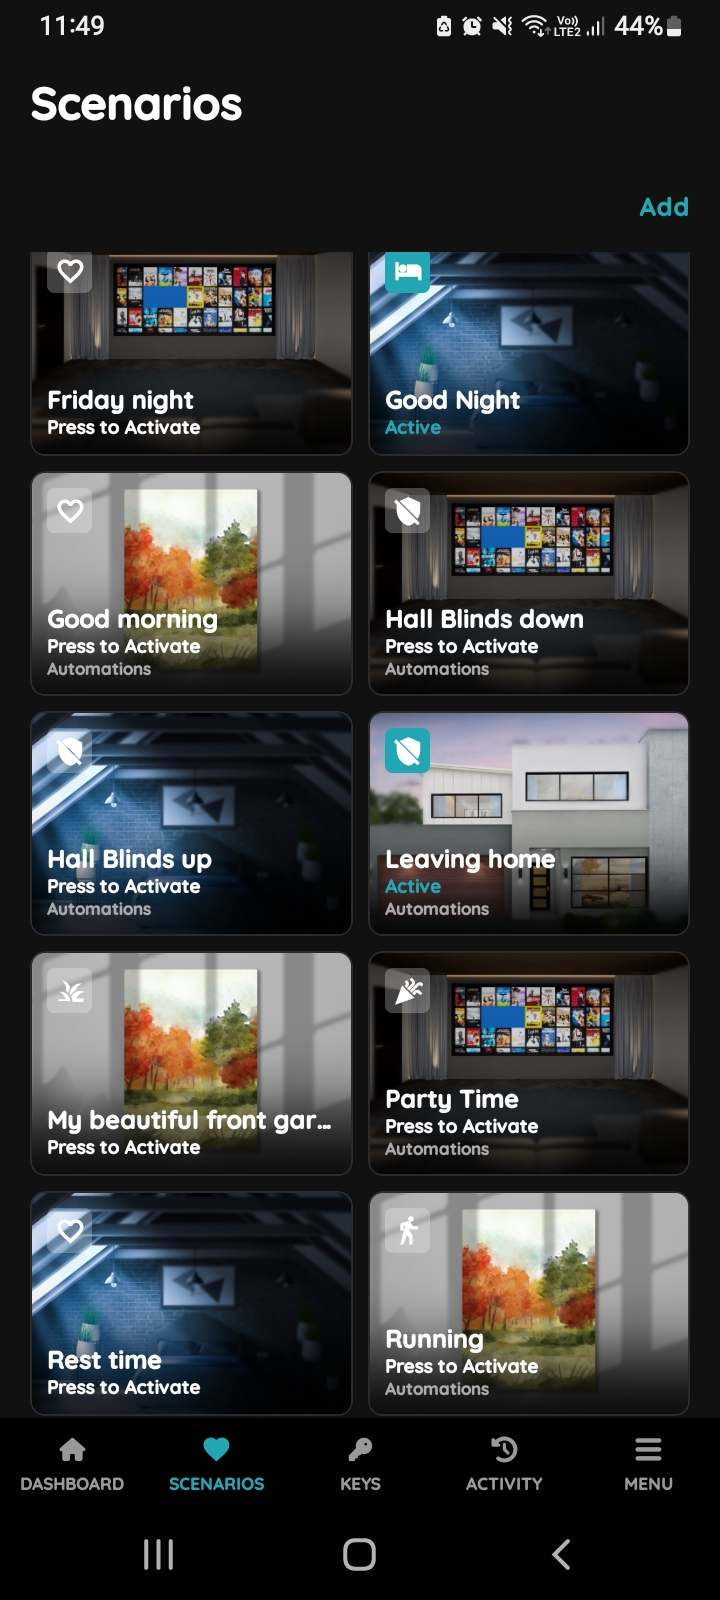
Find Scenario
Find Scenario Hall Blinds down and tap its card.
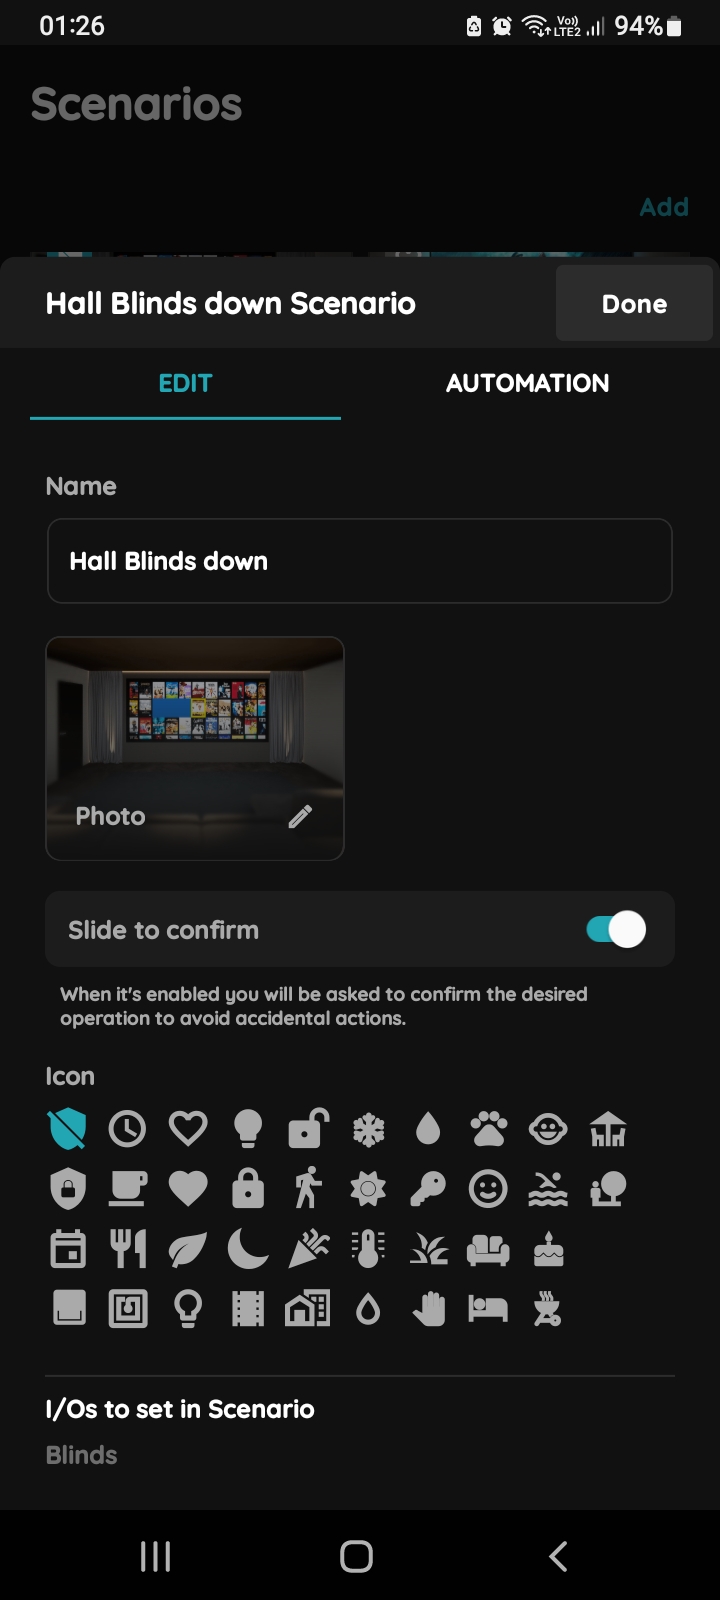
Edit, Automation - Automated Scenario Blinds and Brightness sensor
Press and hold the Scenario card on the Dashboard.
Tab Edit is selected.
Tap on the tab Automation.
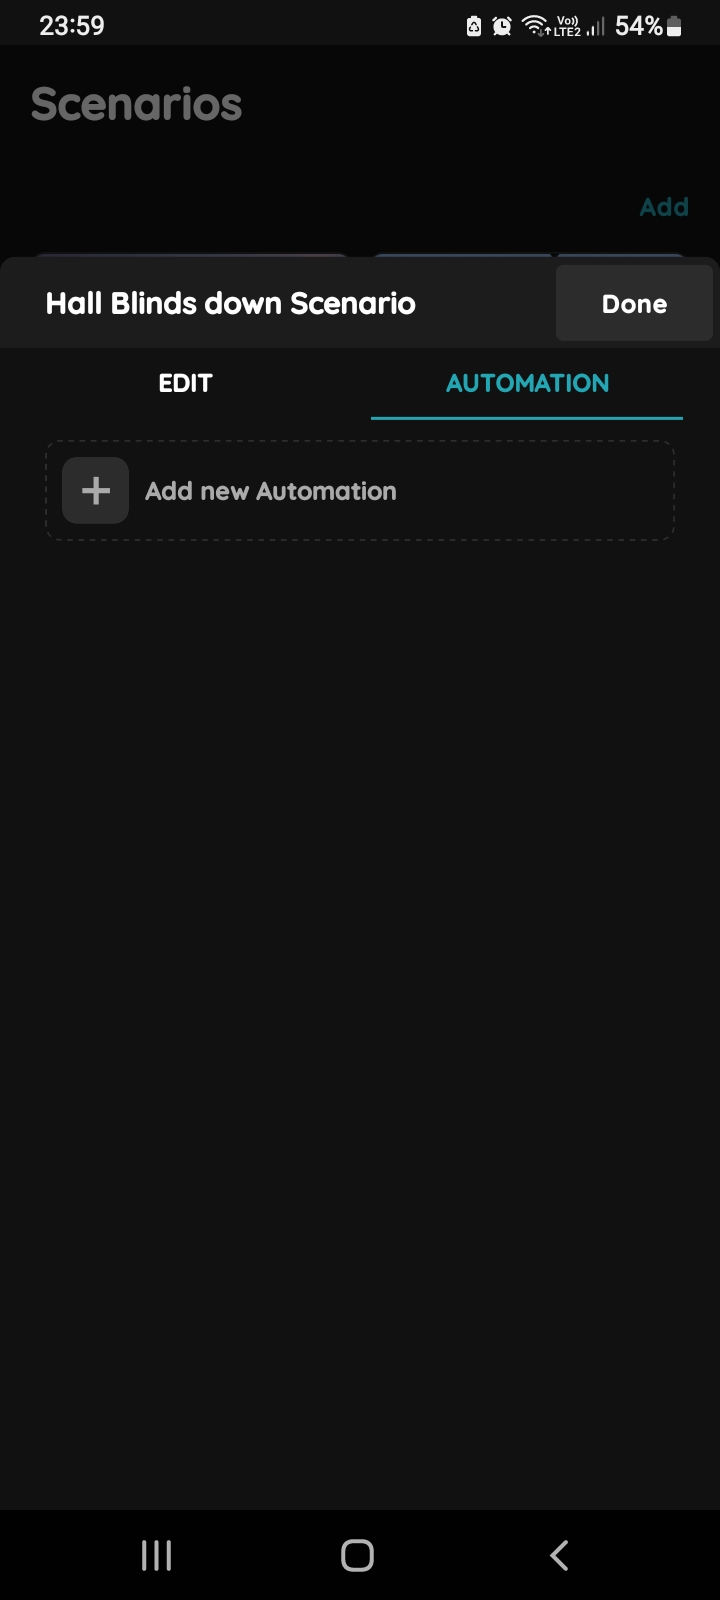
Add new Automation - Automated Scenario Blinds and Brightness sensor
Tap on +Add new Automation.
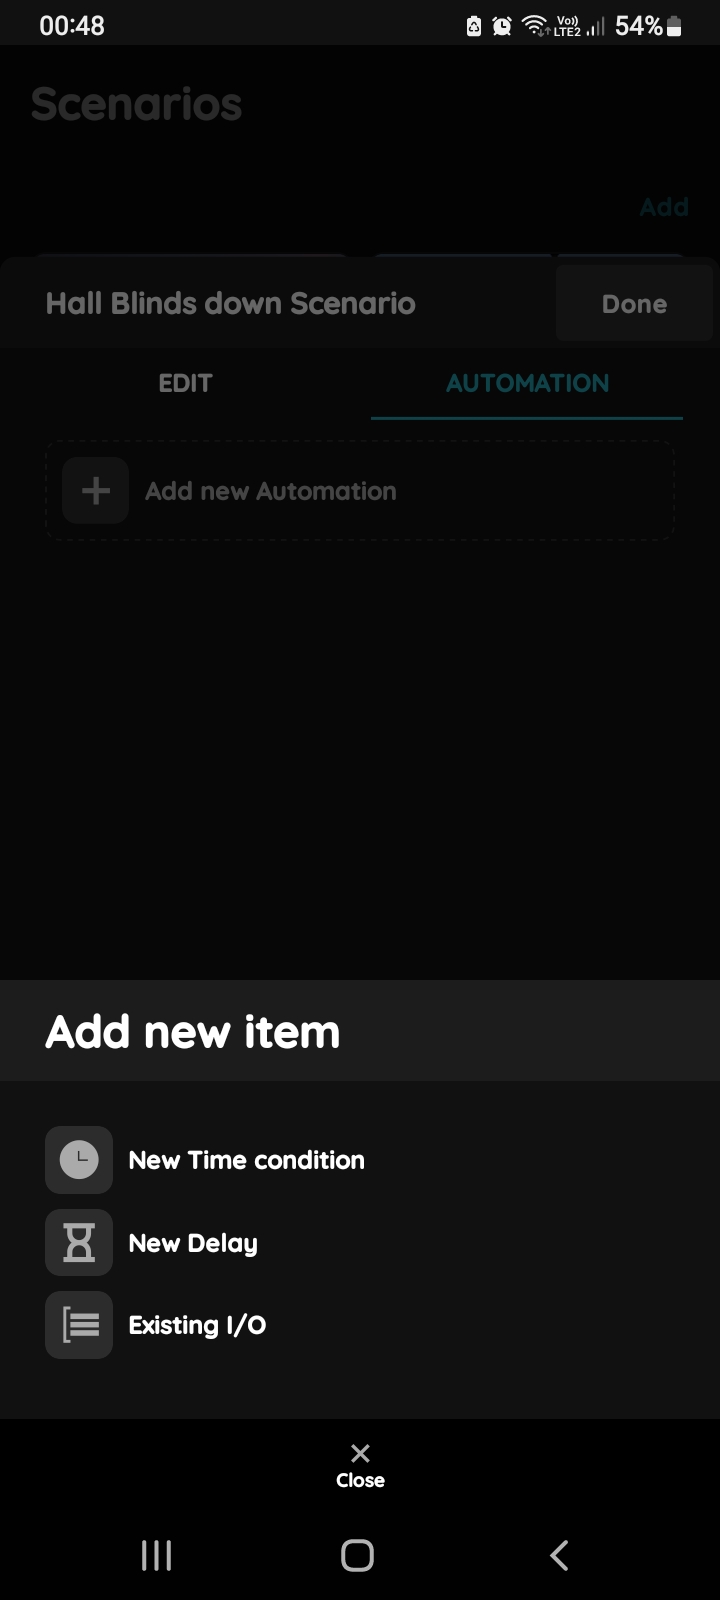
Add new item - Automated scenario Blinds and Brightness sensor
There is possibility to add:
- New Time condition,
- New Delay,
- Existing I/O.
Tap on the Existing I/O.
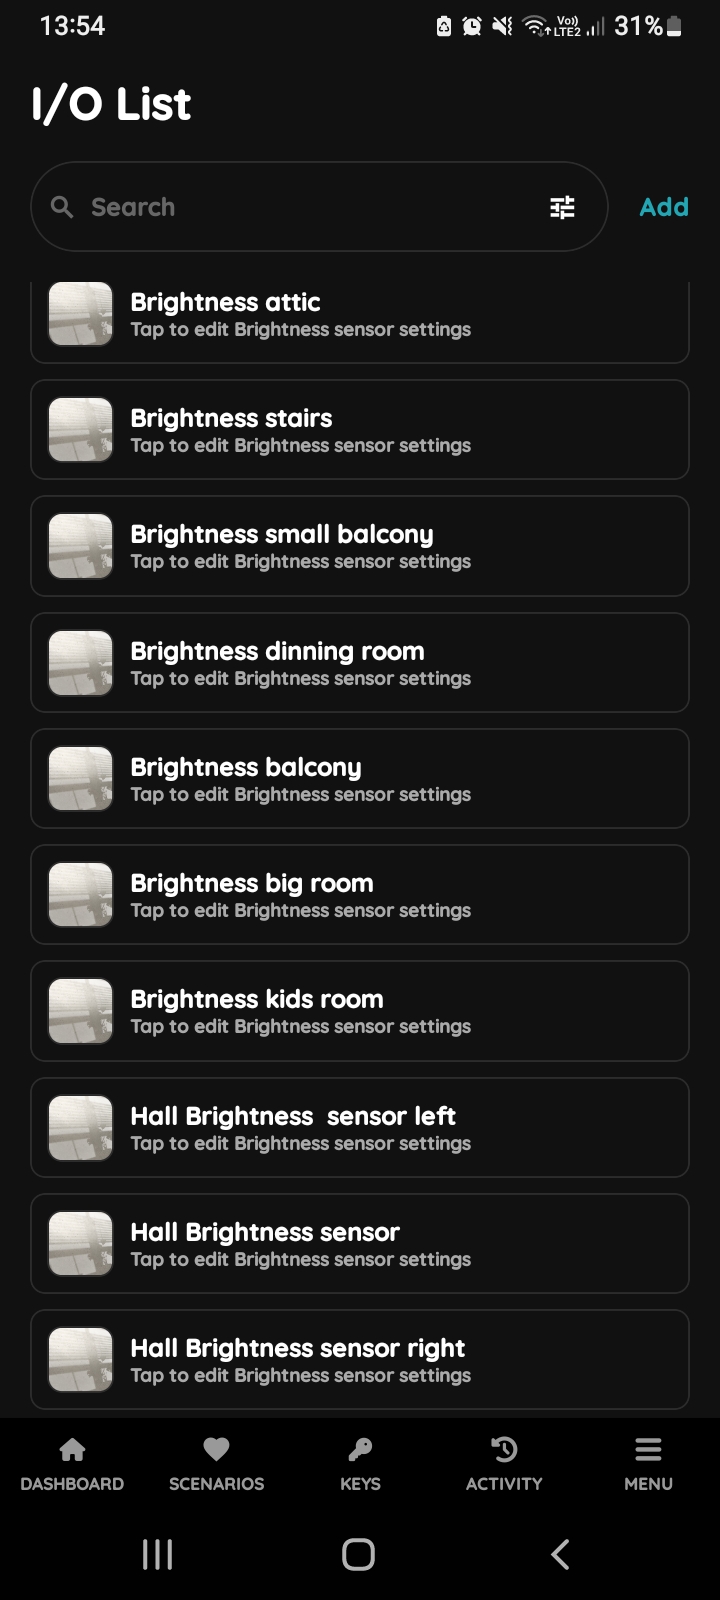
Brightness sensor on the I/O list
Scroll to Brightness sensors on the list and tap on the desired I/O from the list, in this case Hall Brightness sensor.
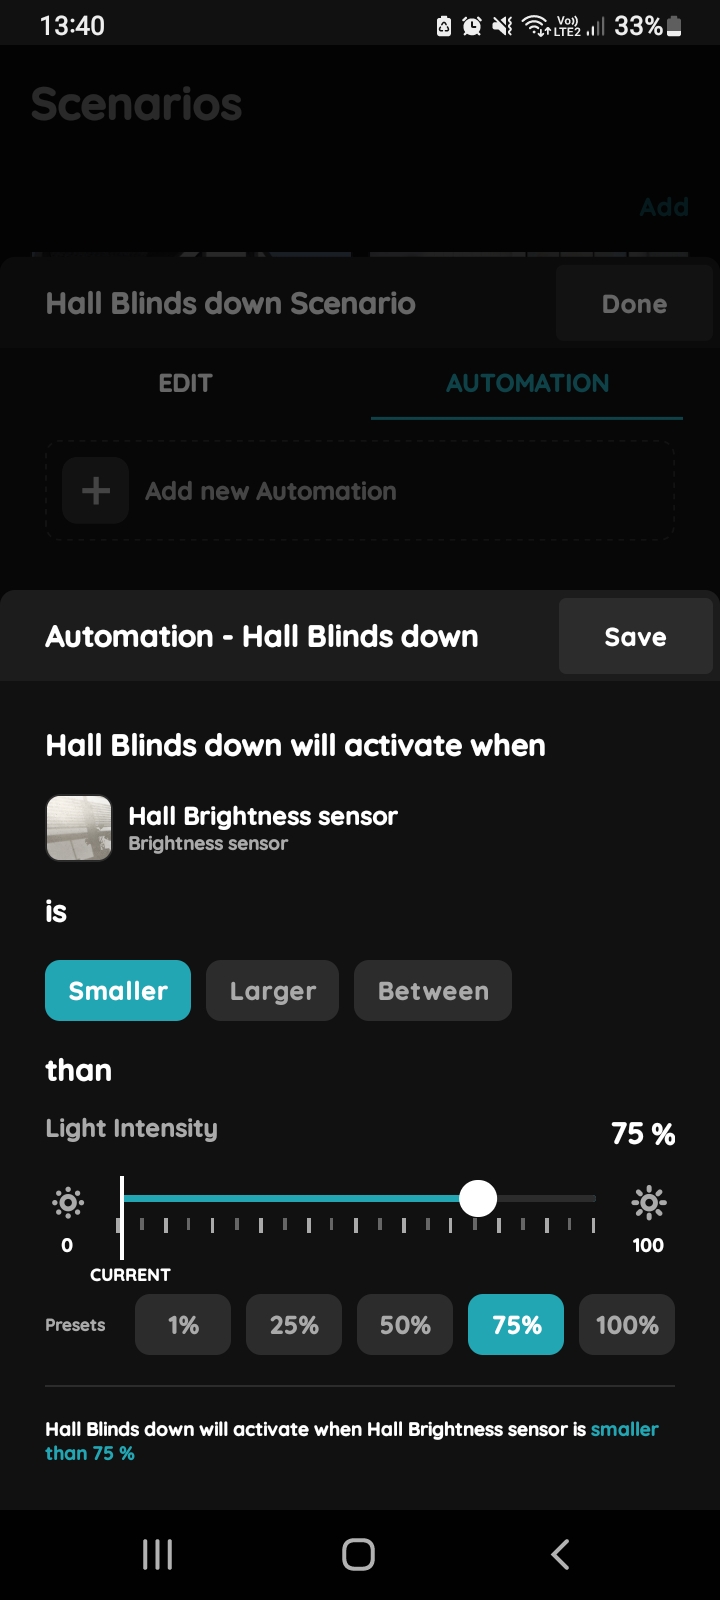
Automation Blinds and Brightness sensor
Hall Blinds down scenario will be activated when Hall Brightness sensor shows light intensity smaller than 75%.
You can use slider to set the desired light intensity or use Presets (tap desired one).
Tap the Save button.
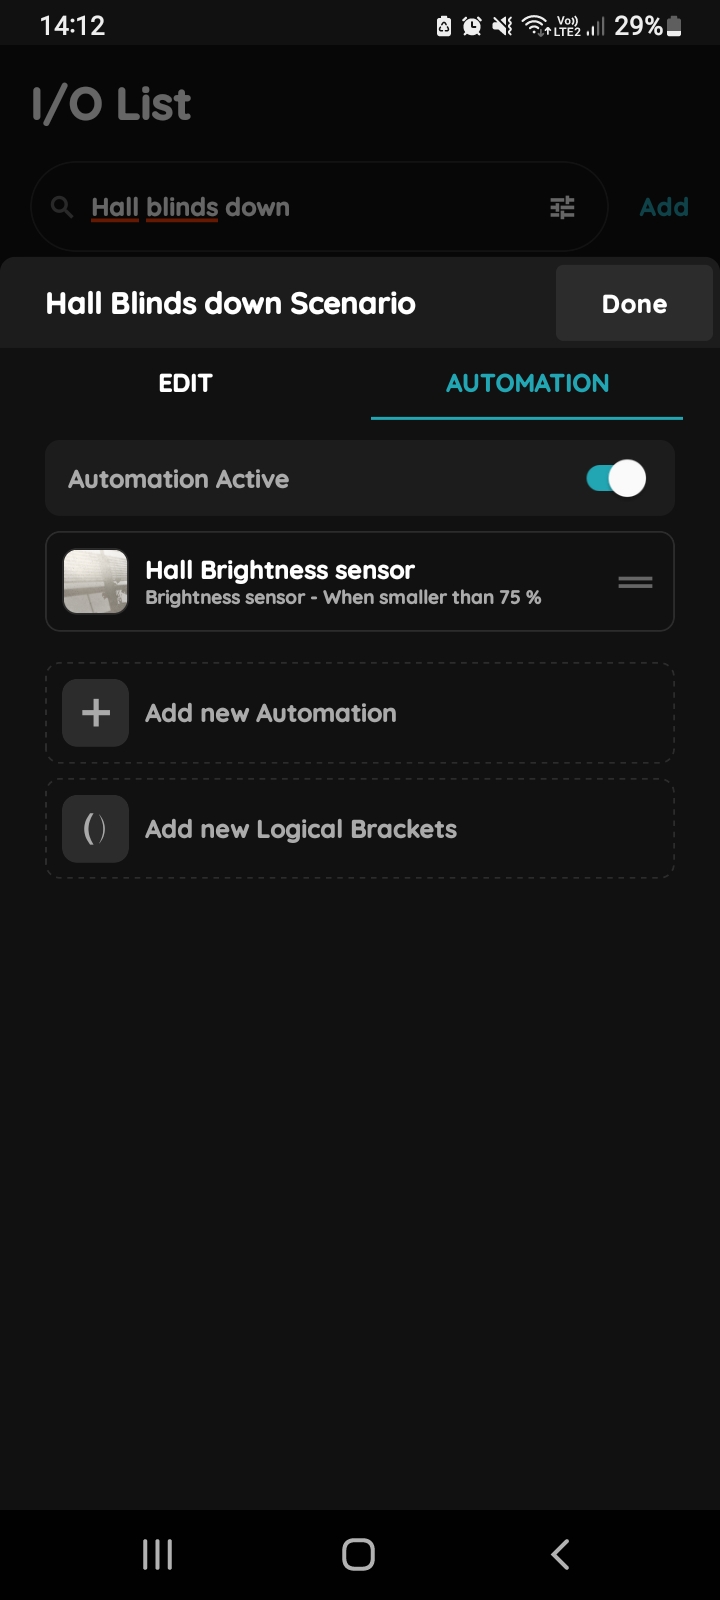
Confirm Automated Scenario settings for Blinds and Brightness sensor
To confirm settings of the Automated Scenario tap the button Done.
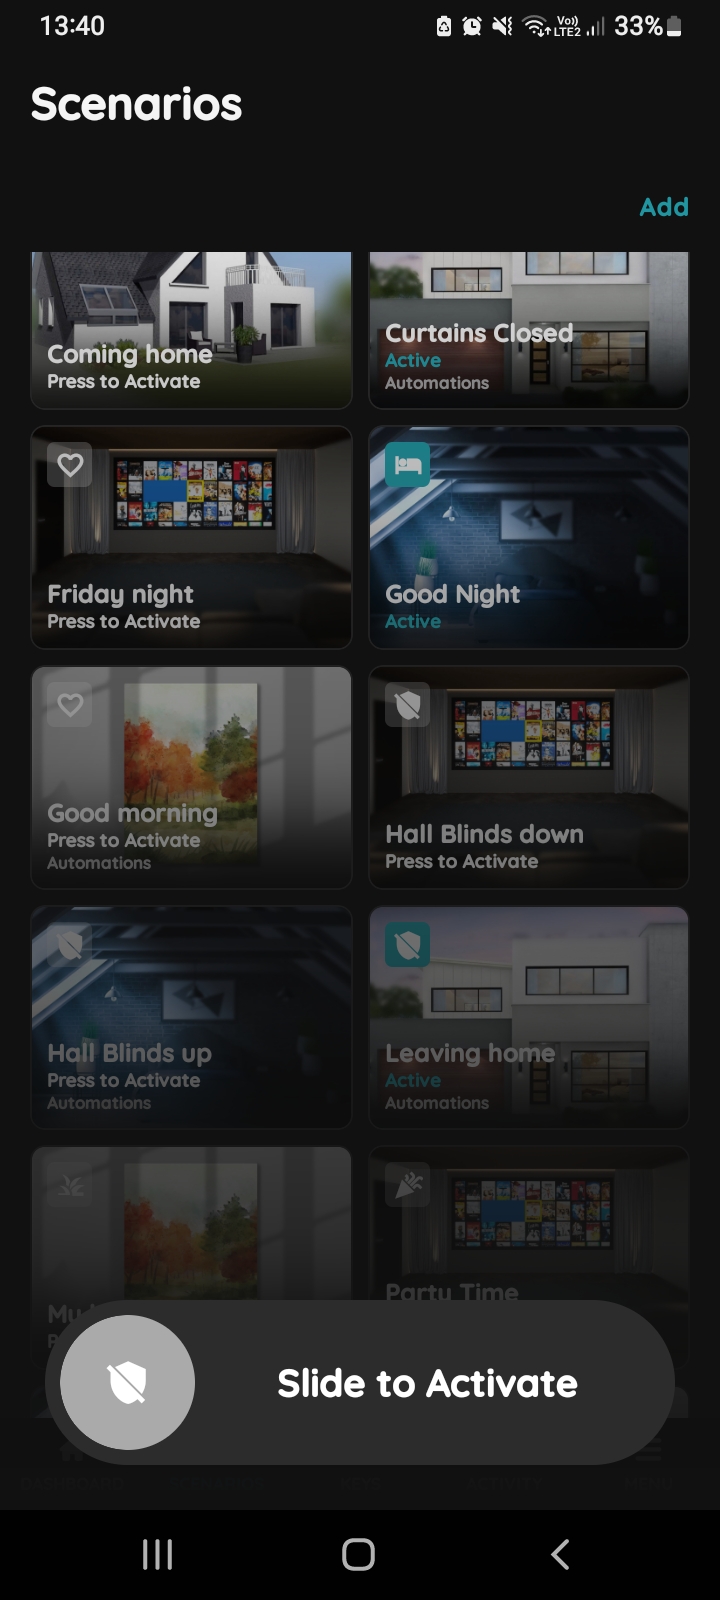
Slide to confirm - Automated Scenario Blinds and Brightness sensor
The Slide to confirm feature adds an extra layer of security, requiring you to confirm your action before activating the scenario. This helps prevent scenarios from being triggered accidentally.
To activate the Automated Scenario manually, tap on the card of the desired Scenario, use button Slide to Activate and slide from left to the right side.
The icon of the Automated Scenario gets blue, and status is changed to Active.