Smart PIERRE - Brightness Sensor
Description
The PIERRE system supports integration of BH1750 digital ambient light / illuminance sensors through the controller's I²C interface. The sensor measures ambient light levels and provides real-time illumination data for automation, monitoring, and energy management functions.
Purpose
The Brightness Sensor measures ambient illumination and provides lux values for monitoring, visualization, and automation functions.
Automation Integration
Brightness values can be used as conditions or triggers within automation logic.
Examples:
Lighting Control
-
Turn lights ON when brightness falls below a defined threshold.
-
Turn lights OFF when sufficient daylight is available.
Blind and Shading Control
-
Lower blinds when brightness exceeds a configured value.
-
Raise blinds when brightness decreases.
Energy Management
-
Optimize artificial lighting based on available natural daylight.
-
Reduce unnecessary energy consumption.
Editing a Brightness Sensor
To modify an existing sensor:
-
Open the corresponding Controller.
-
Navigate to Configurable I/O.
-
Select the desired Brightness Sensor.
-
Modify the required parameters.
-
Save the changes.
The sensor can also be removed from the system if it is no longer required.
Technical Notes
-
Sensor type: BH1750
-
Communication protocol: I²C
-
Requires SDA and SCL connections
-
Supports configurable I²C addressing
-
Measured values are available for dashboards, logic functions, and automation rules
-
Available functionality may depend on the controller model and firmware version
Use of the Brightness sensor
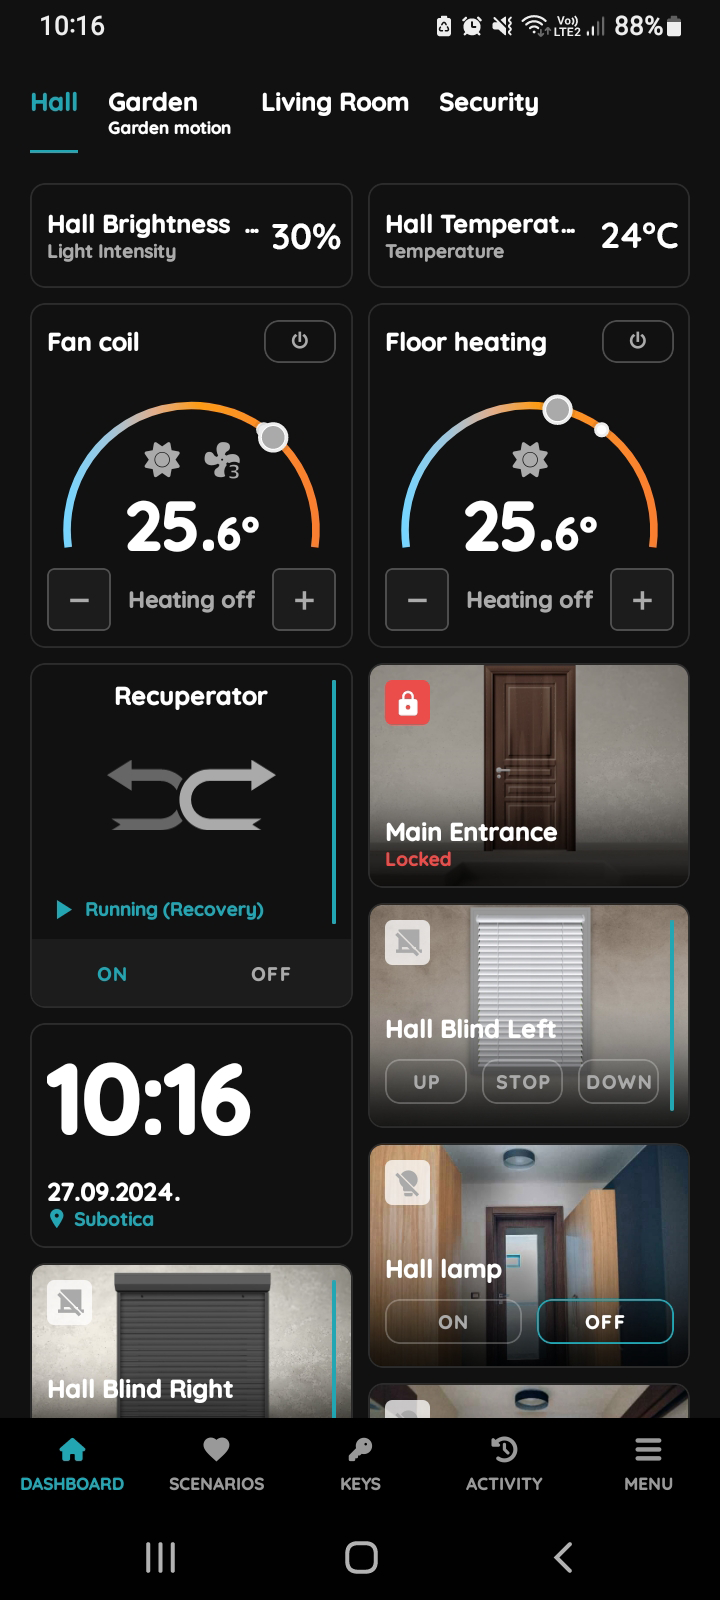
This sensor shows light intensity.
Use of the Brightness sensor
Follow the example of the Hall Brightness sensor.
It shows light intensity of 30 %.
Used In - Brightness sensor
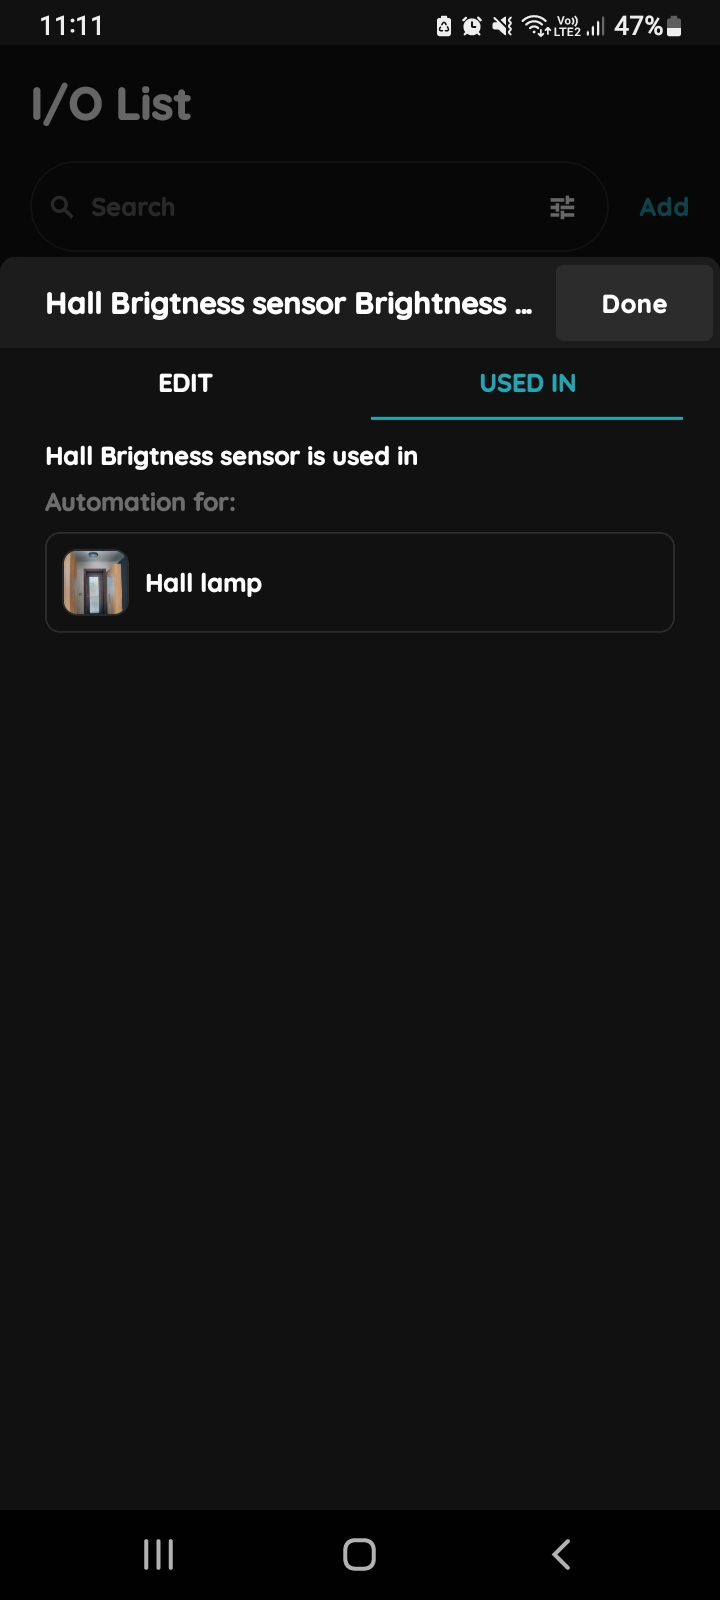
The Used In tab shows all the scenarios and automations where the Brightness sensor is applied. If it isn't used in any, the list will be empty, and a message will display: "This I/O is not in use anywhere." This feature is particularly useful as it consolidates all relevant information in one place.
Scenarios from the Taskbar
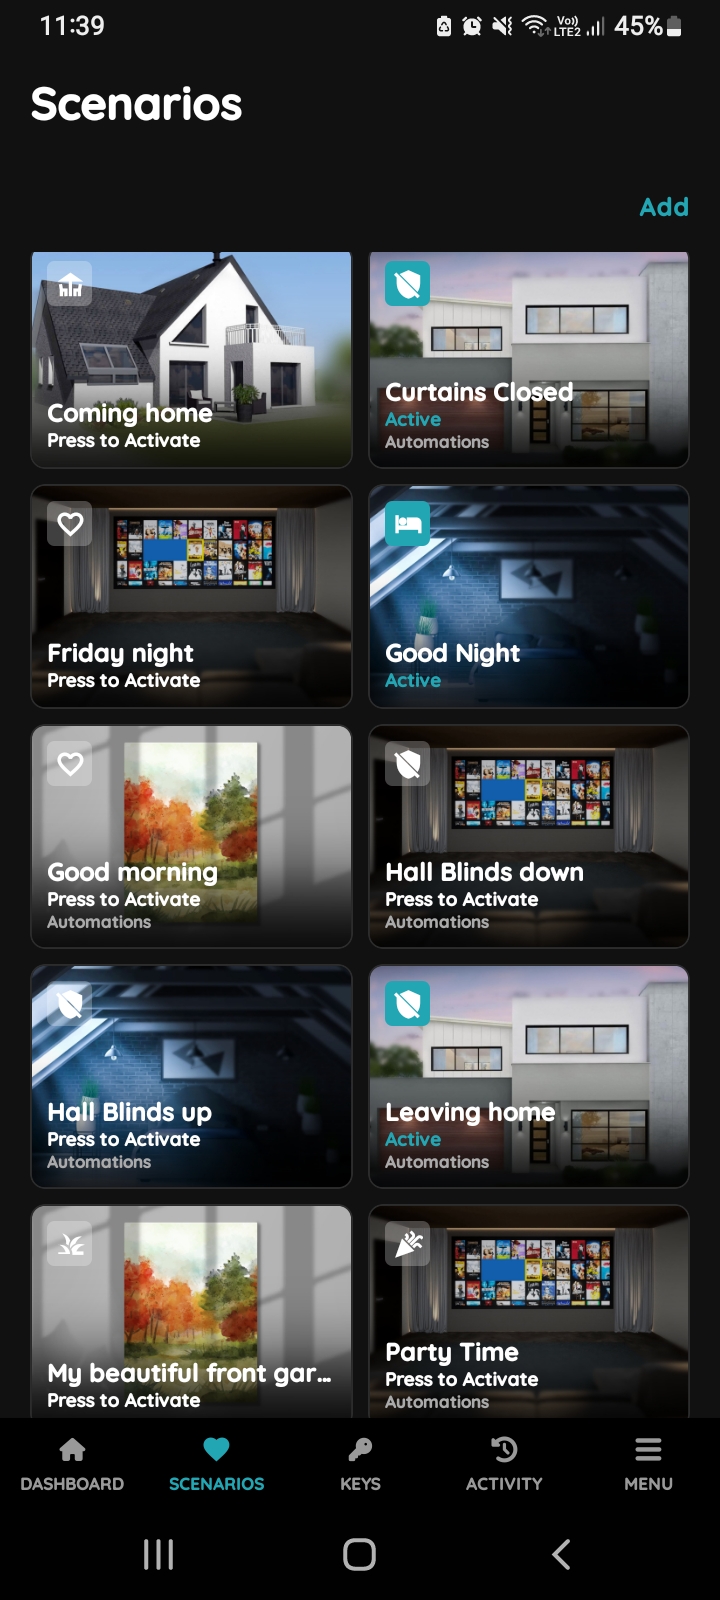
You can create scenario for the Blinds/Curtains from Taskbar or from the Menu.
Creating a scenario for the Blinds/Curtains is important because it allows seamless automation, improving convenience, energy efficiency, and security. Scenarios can adjust multiple Blinds/Curtains simultaneously based on time, weather, or light levels, helping to personalize your smart home experience and reduce the need for manual control. In this case automation is created based on the Brightness sensor in case when it detects level of light intensity lower than 75 %.
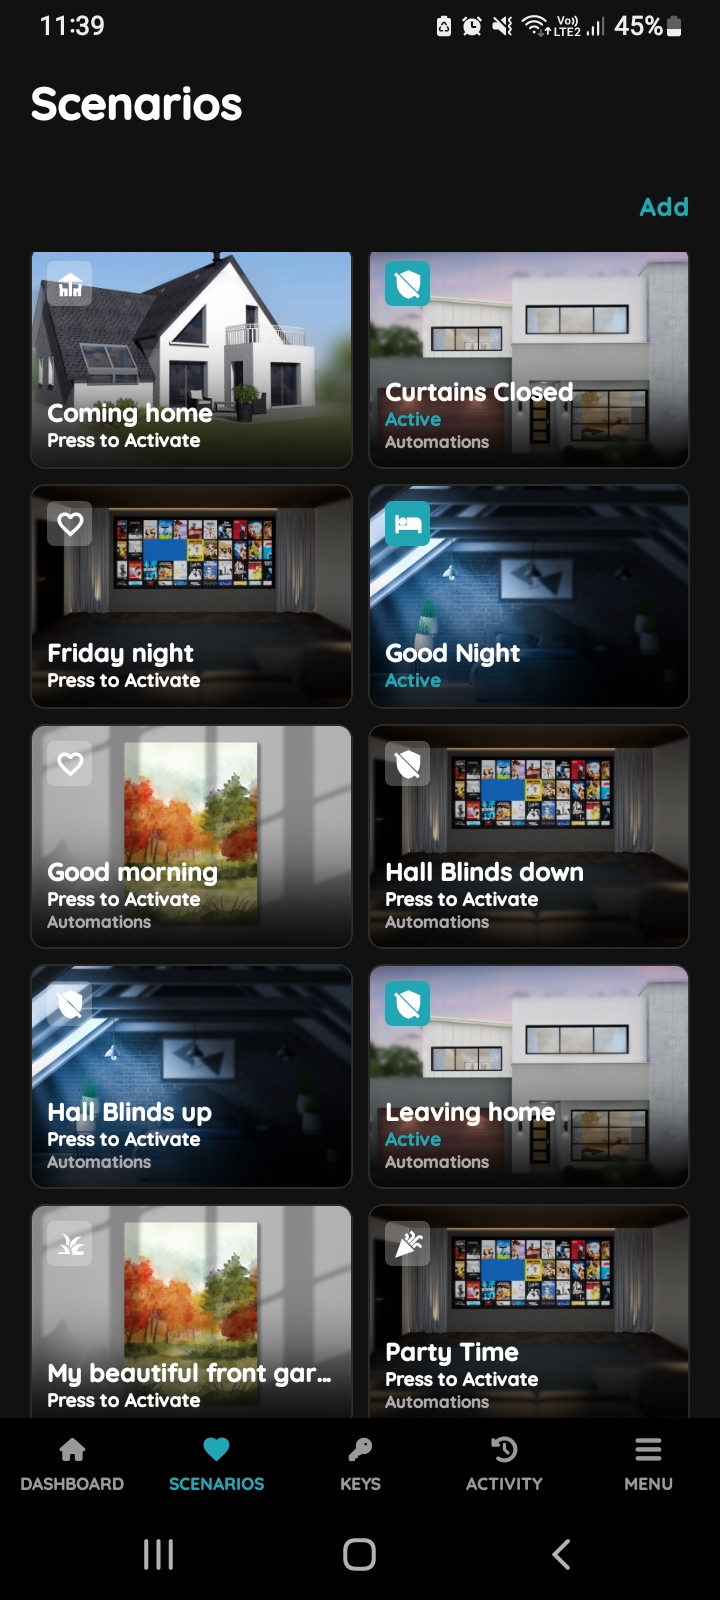
Scenarios - Add button
Tap on the button Add in order to create Scenario.
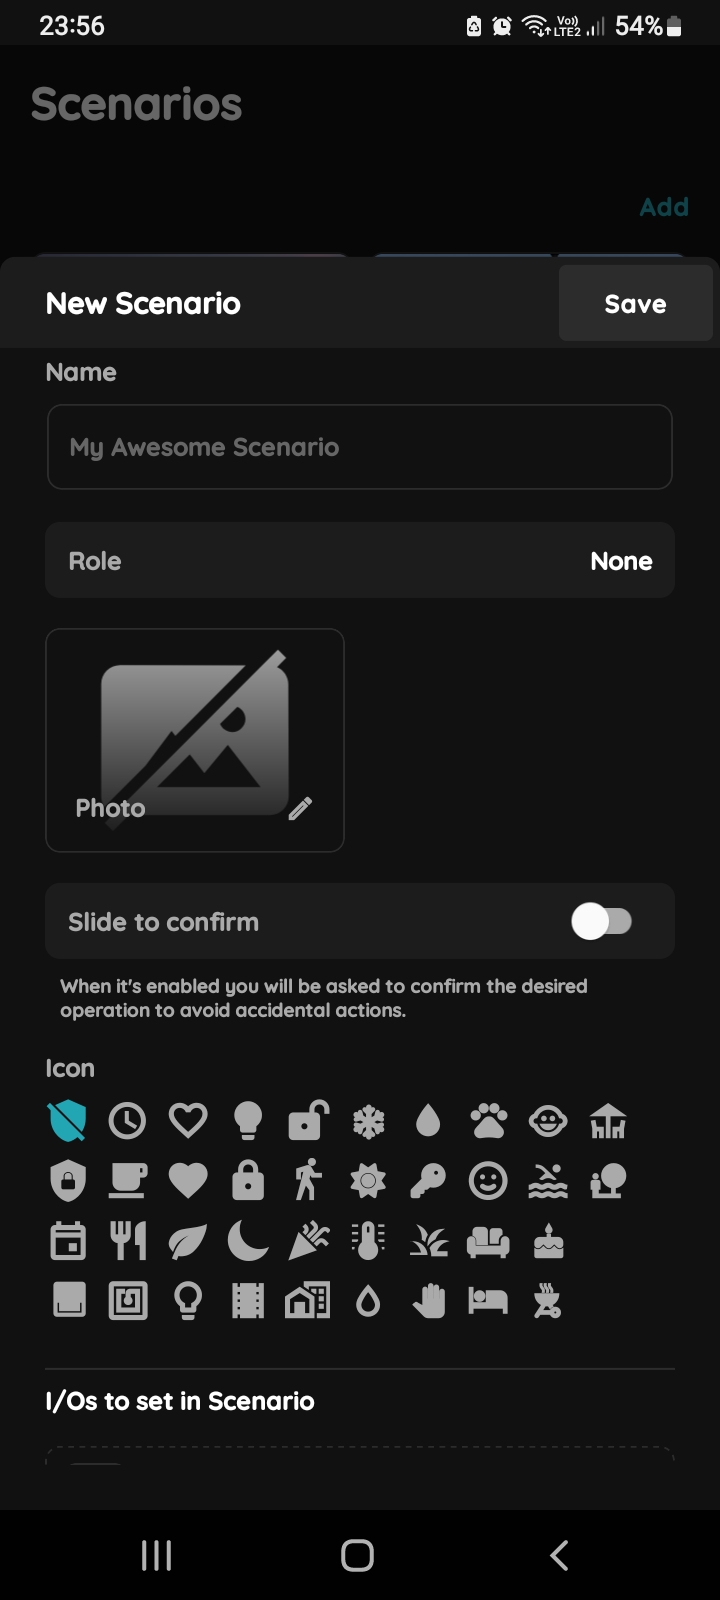
New Scenario
Fill following form:
- Name – Enter the name of the Scenario.
- Role – Select the appropriate role for the Scenario.
- Photo – Choose a photo to represent the Scenario.
- Slide to confirm – When enabled, you will be asked to confirm the operation to avoid accidental actions.
- Icon – Select an icon for the Scenario.
- Add a new I/O – Tap this field to add new I/Os to the Scenario.
Tap Submit/Save to finalize your changes.
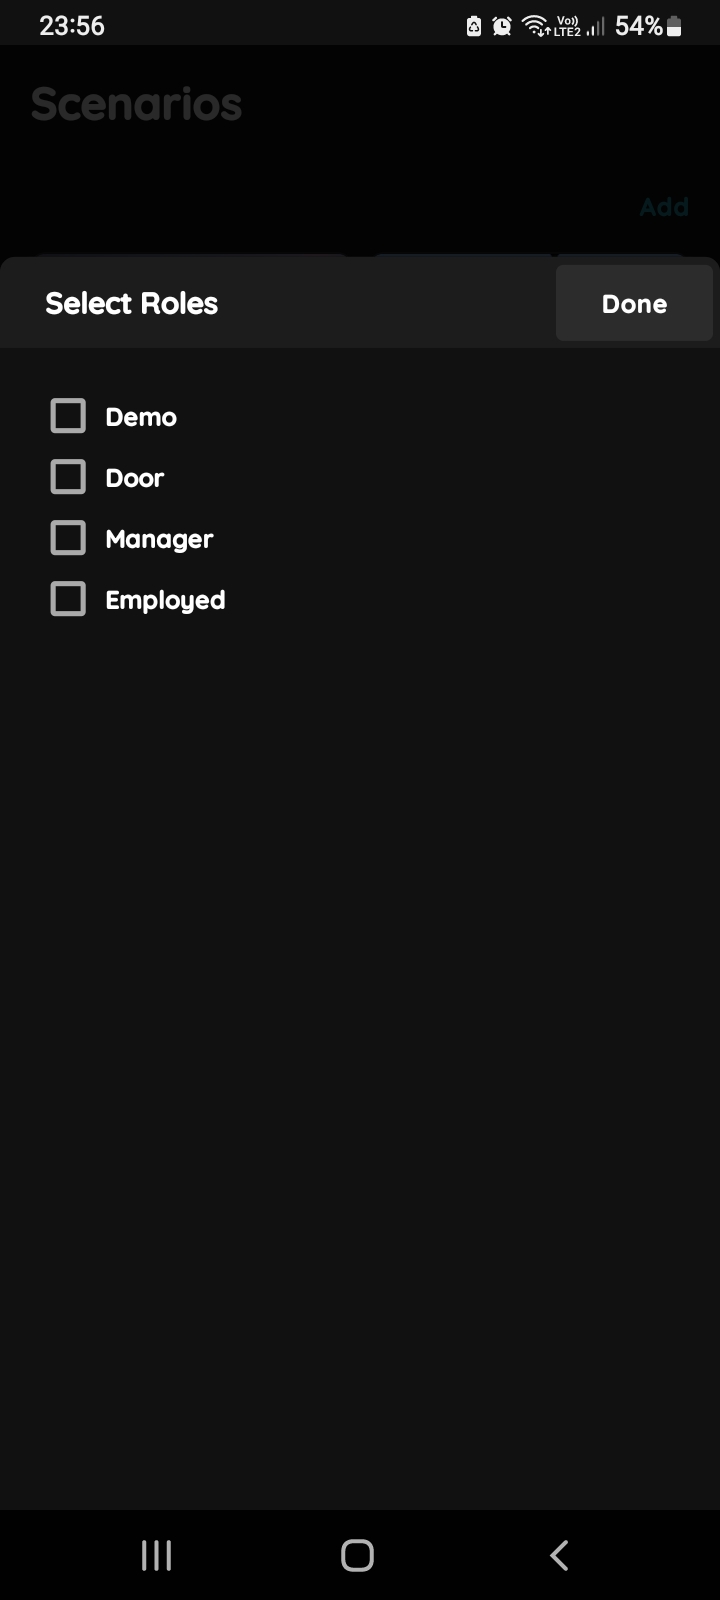
Select Roles
Select checkbox/checkboxes next to the desired Role/Roles (multiple choice).
Tap Save/Done.
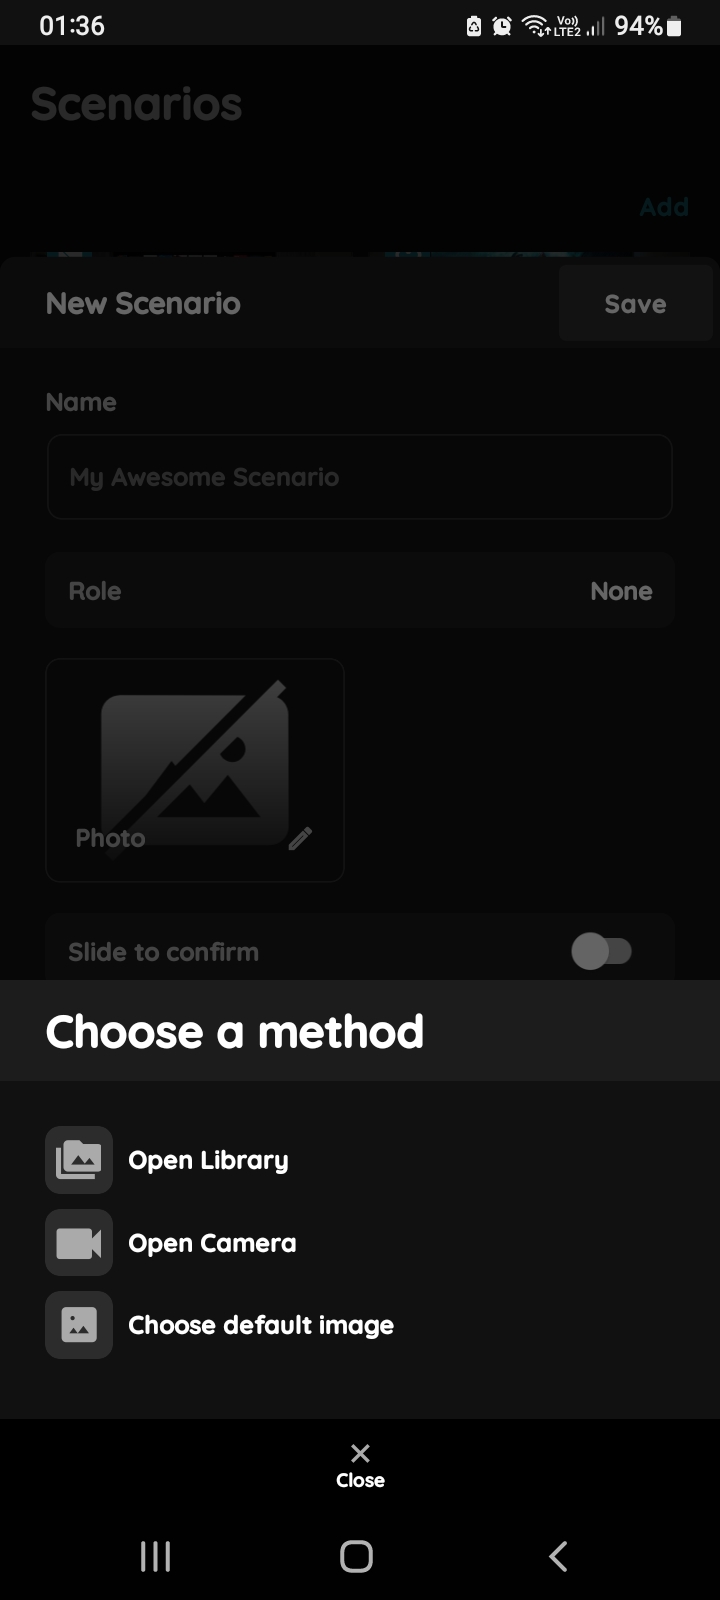
Change photo - Scenario
Tap the photo of the Scenario. You have three options:
Open Library - The phone’s Library will open.
Open Camera - You can take a picture using your smartphone.
Choose default image - These images are prepared in advance in order to provide a complete and seamless experience.
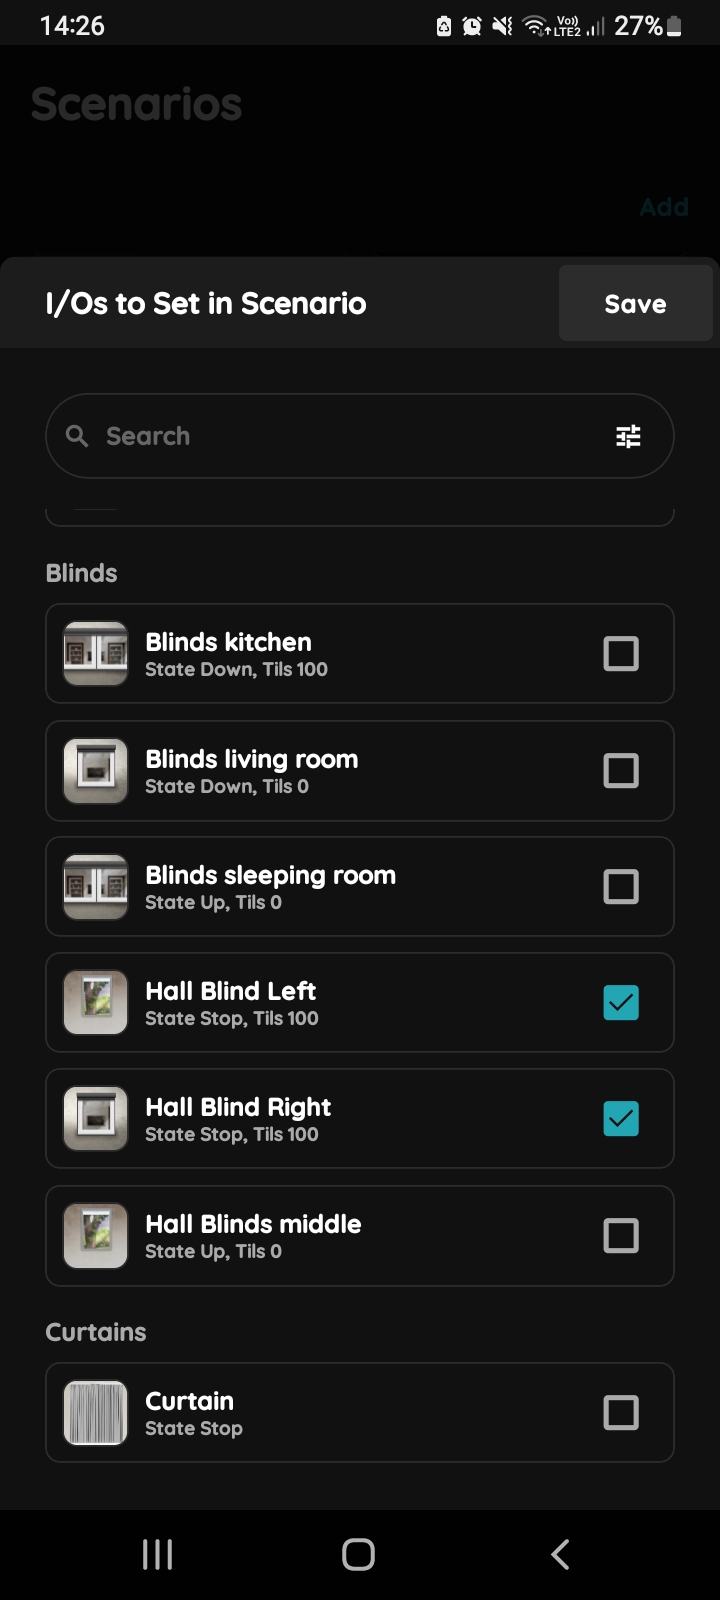
Add a new I/O - Scenario
You can search I/Os if you tap in the field Search and write the name of the I/O that you want to find, or to tap on the filter icon in the up right corner of the Search bar.
Tap on the checkbox/checkboxes next to the desired I/Os that you would like to add to the Scenario from the I/Os to Set in Scenario list.
Under each of the I/Os on this list is shown its current status.
The statuses are always those that have been set, and they can be changed later by tapping on the I/O.
Tap Save.
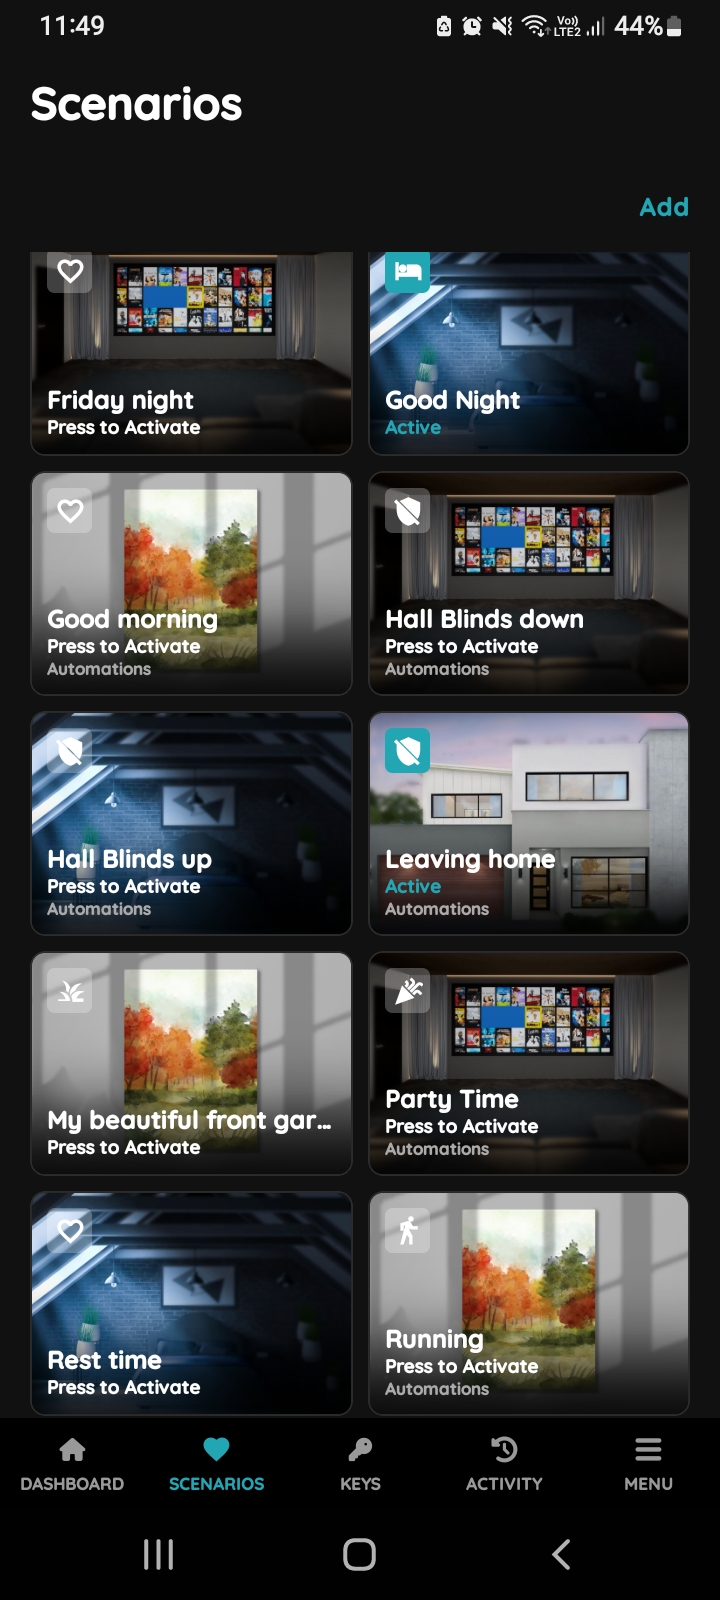
Find Scenario
Find Scenario Hall Blinds down and tap its card.
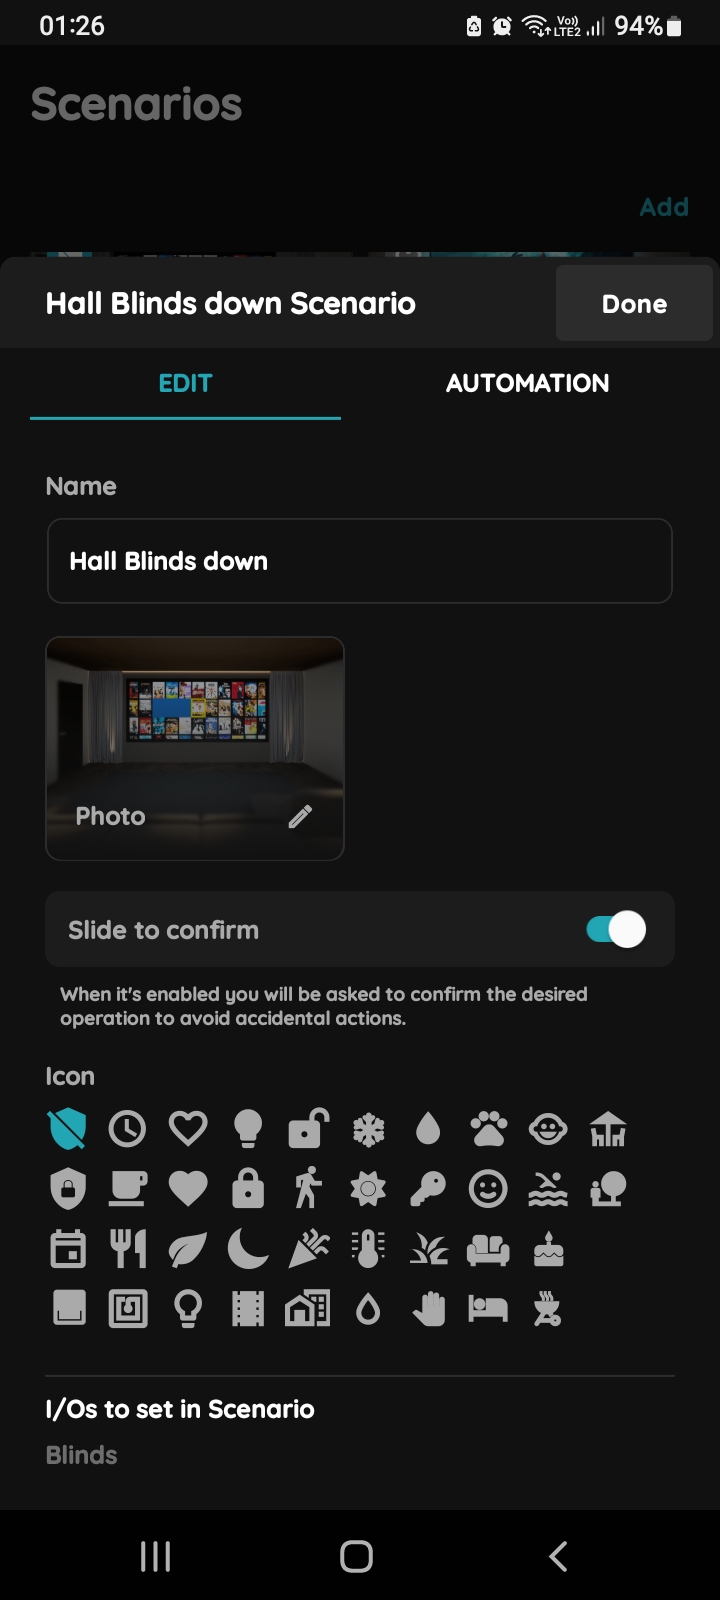
Edit, Automation - Automated Scenario Blinds and Brightness sensor
Tab Edit is selected.
Tap on the tab Automation.
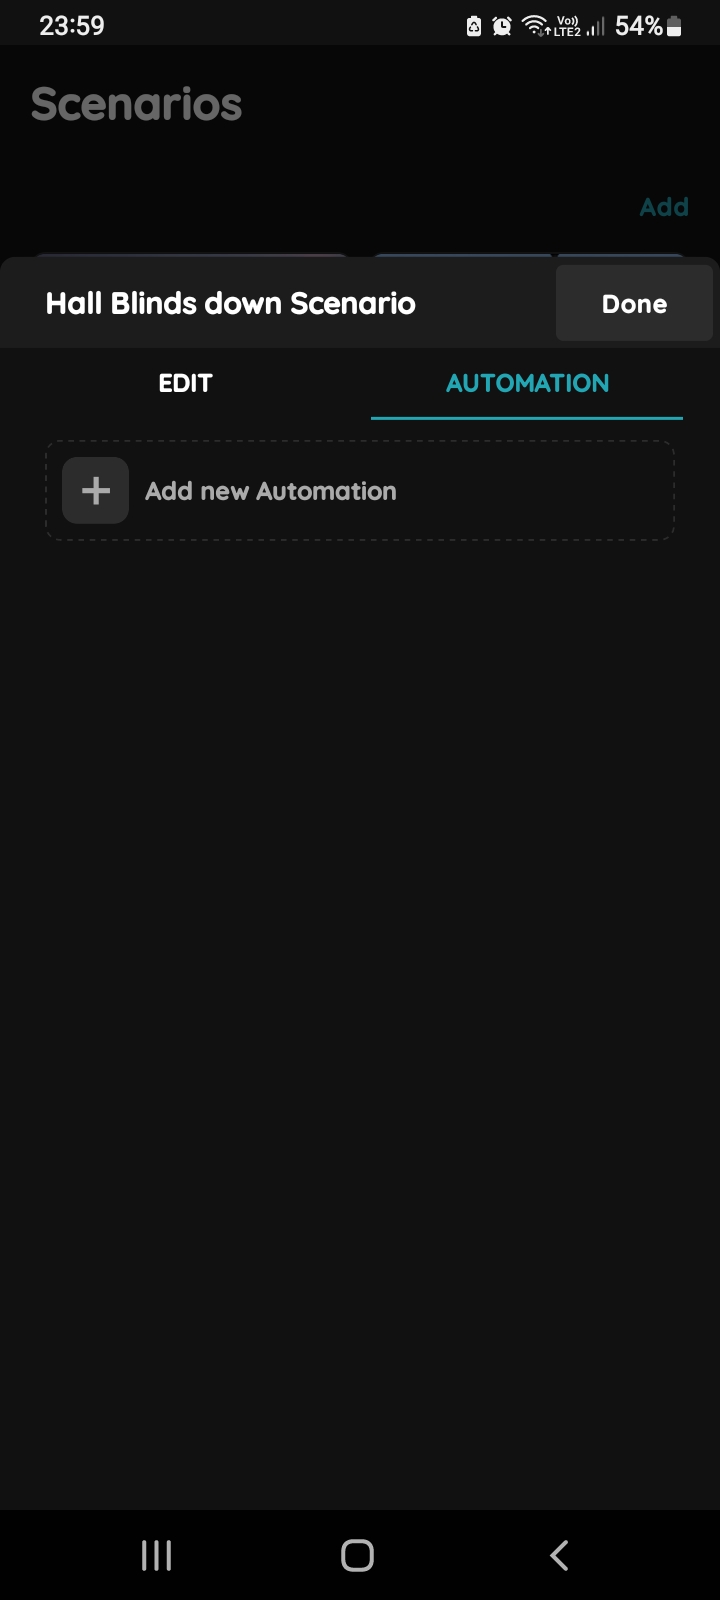
Add new Automation - Automated Scenario Blinds and Brightness sensor
Tap on +Add new Automation.
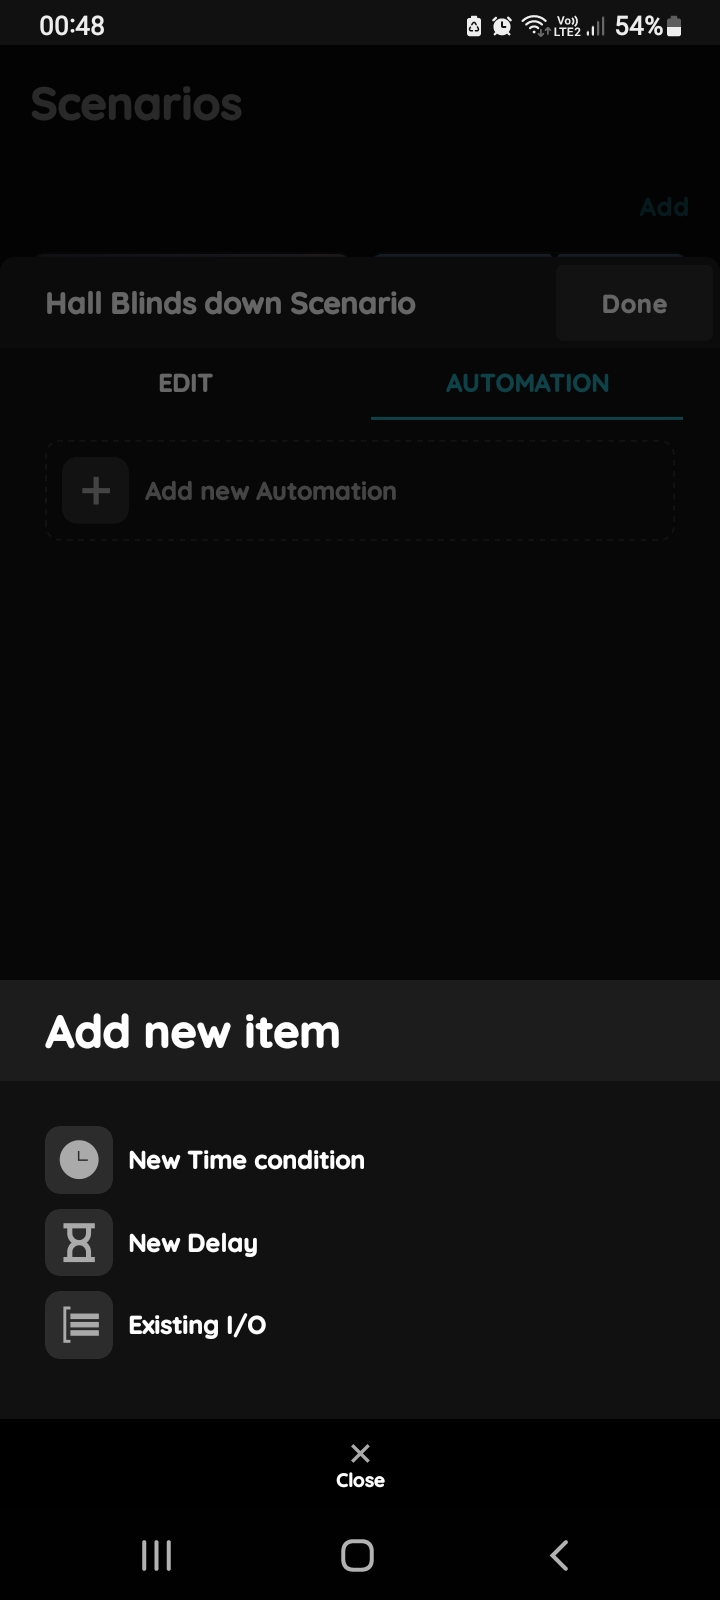
Add new item - Automated scenario Blinds and Brightness sensor
There is possibility to add:
- New Time condition,
- New Delay,
- Existing I/O.
Tap on the Existing I/O.
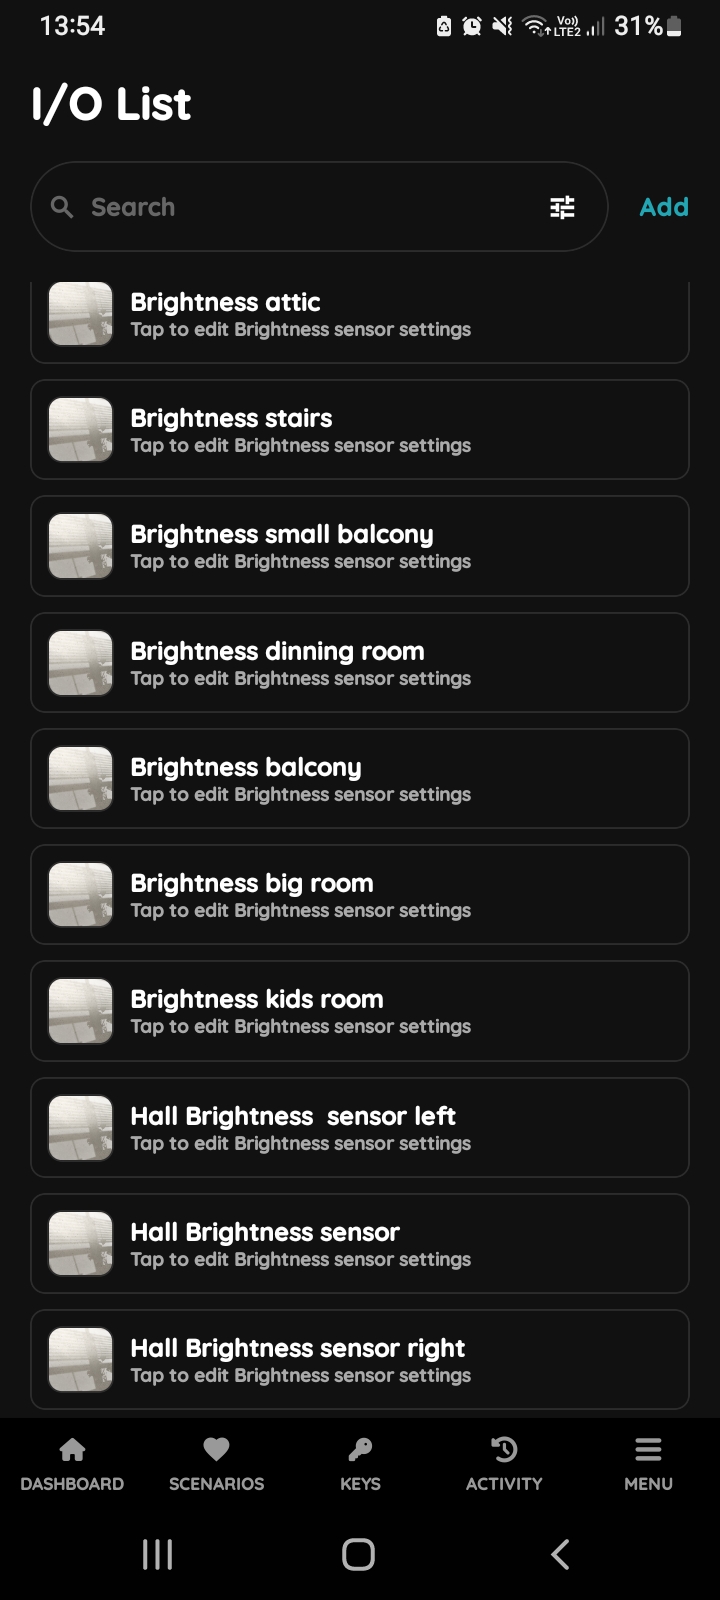
Brightness sensor on the I/O list
Scroll to Brightness sensors on the list and tap on the desired I/O from the list, in this case Hall Brightness sensor.
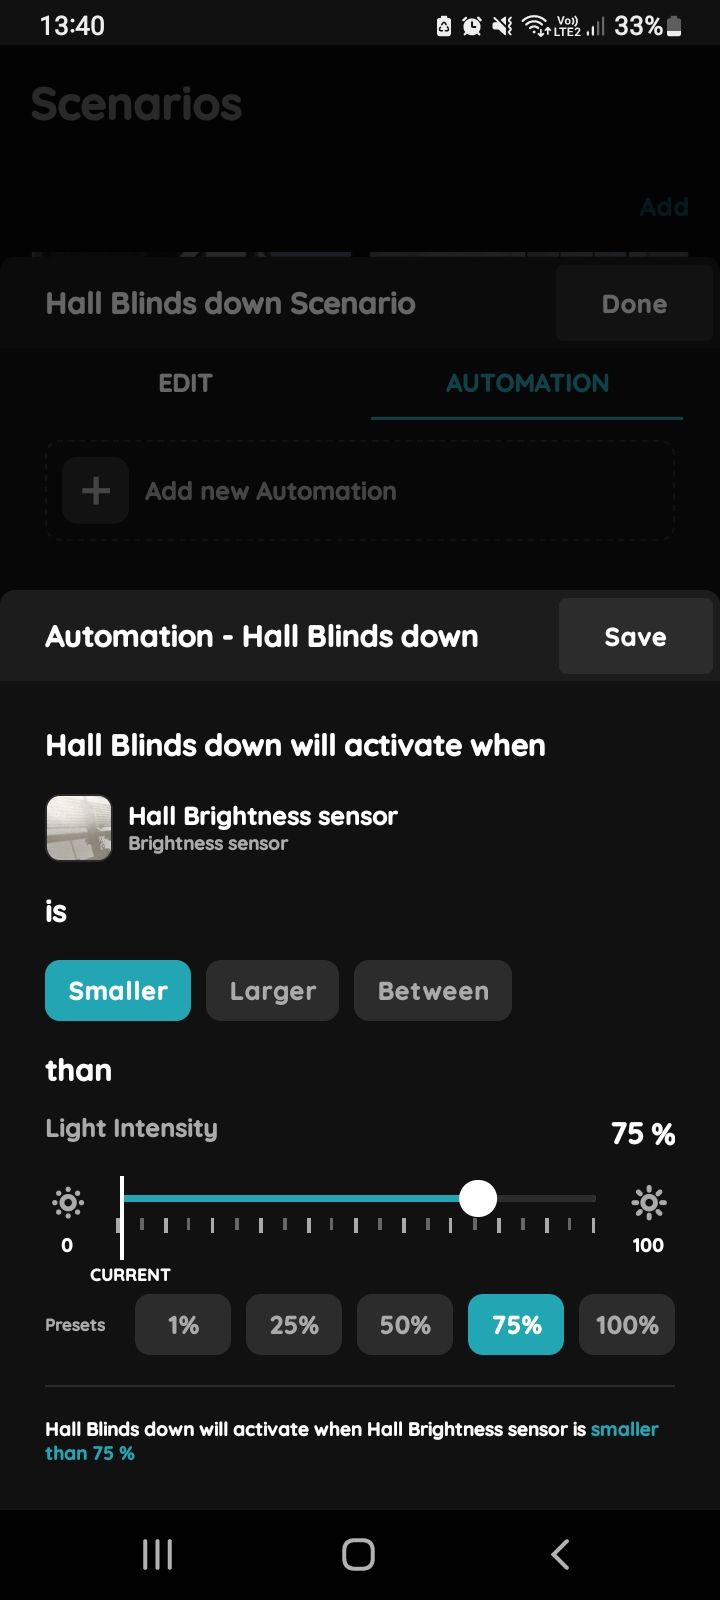
Automation Blinds and Brightness sensor
Hall Blinds down scenario will be activated when Hall Brightness sensor shows light intensity smaller than 75%.
You can use slider to set the desired light intensity or use Presets (tap desired one).
Tap the Save button.
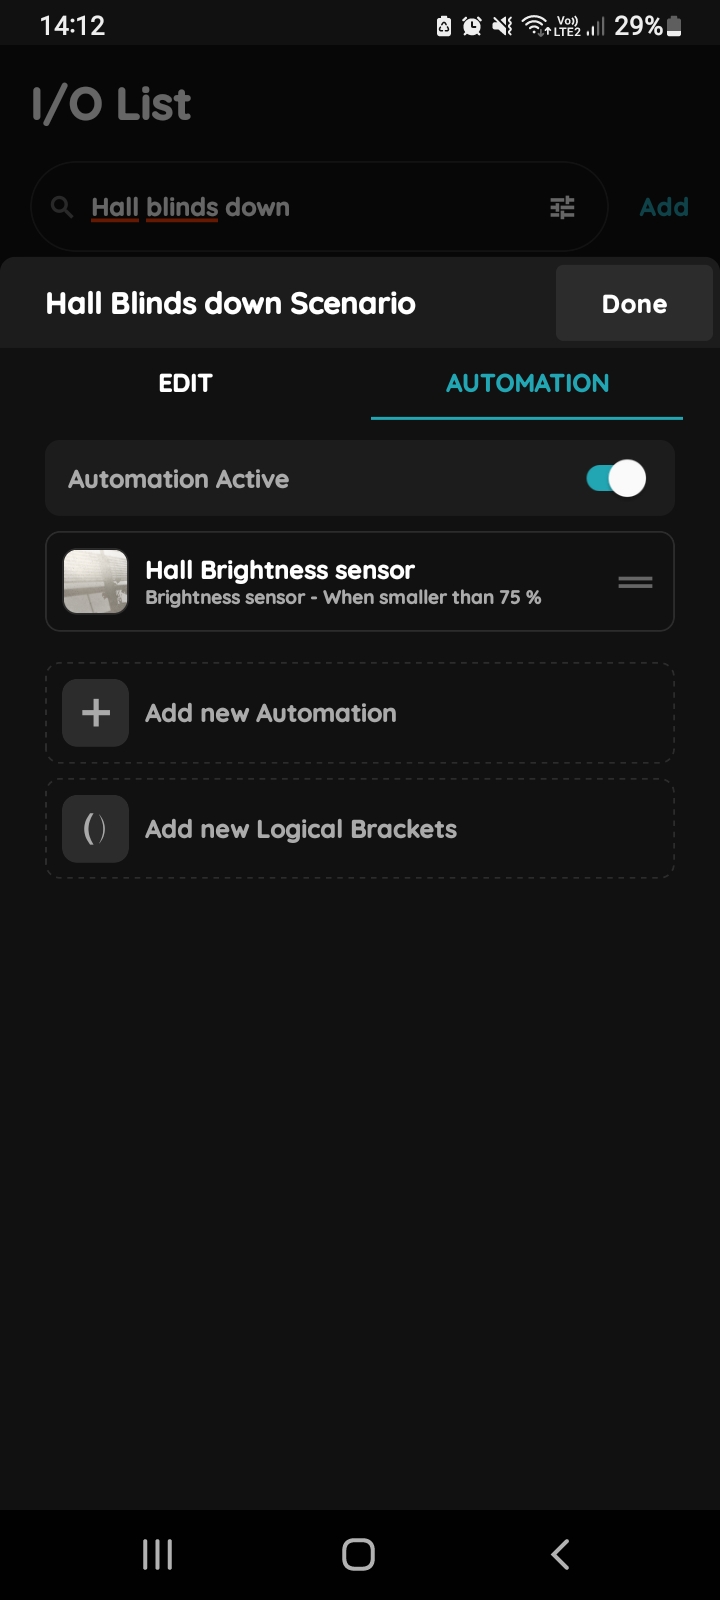
Confirm Automated Scenario settings for Blinds and Brightness sensor
To confirm settings of the Automated Scenario tap the button Done.
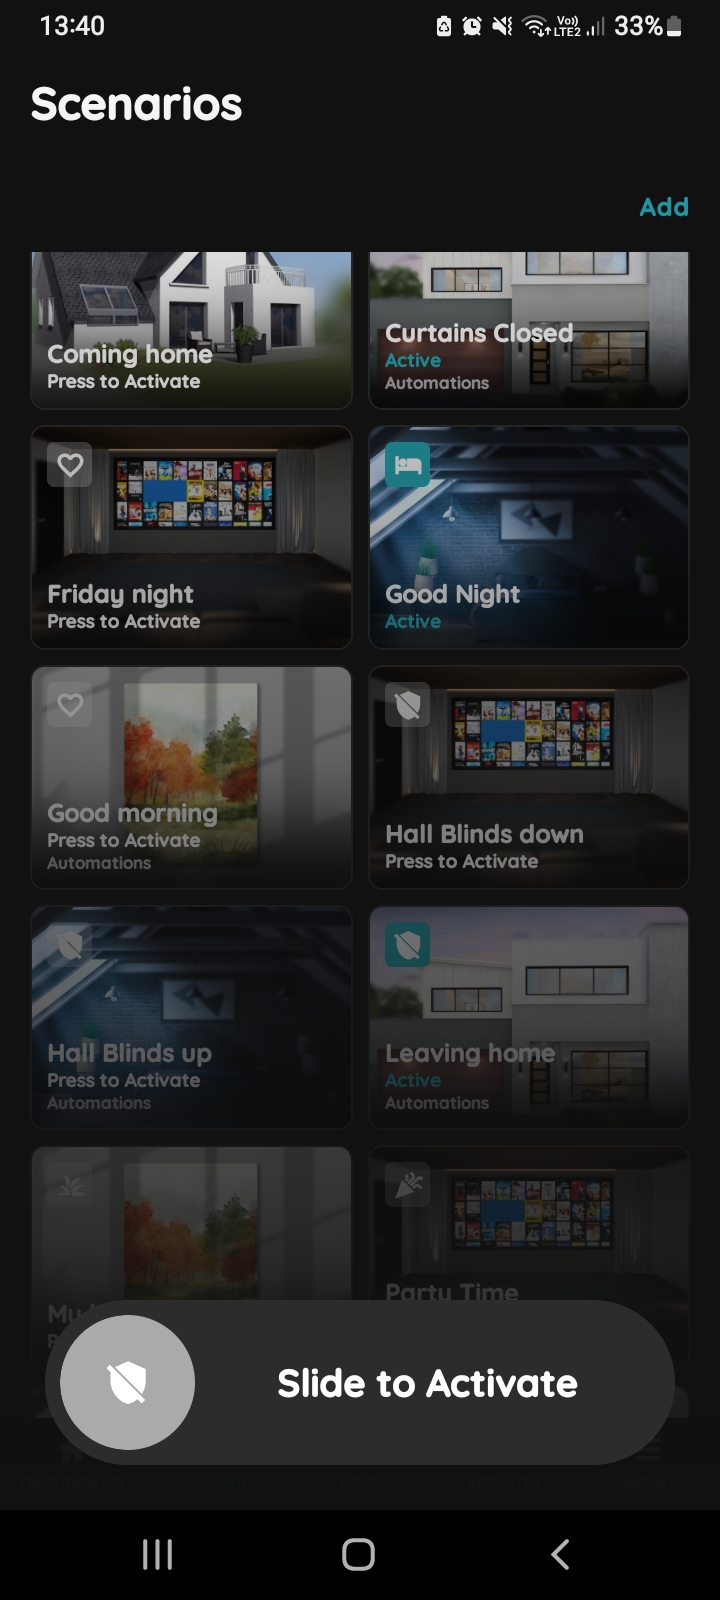
Slide to confirm - Automated Scenario Blinds and Brightness sensor
The Slide to confirm feature adds an extra layer of security, requiring you to confirm your action before activating the scenario. This helps prevent scenarios from being triggered accidentally.
To activate the Automated Scenario manually, tap on the card of the desired Scenario, use button Slide to Activate and slide from left to the right side.
The icon of the Automated Scenario gets blue, and status is changed to Active.