Smart PIERRE - Curtains
Description
The Curtains I/O type allows users to control and monitor motorized curtains within the PIERRE system.
Curtains are available on the Dashboard and in the I/O List of the Smart PIERRE application.
Control
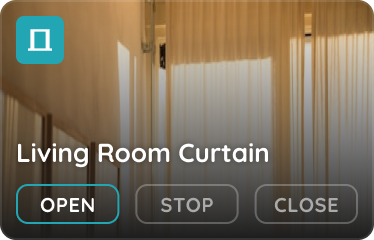
Curtains can be controlled directly from the Dashboard using:
-
Open
-
Stop
-
Close
The Curtain icon and image are updated according to the current state of the curtain.
Configuration
Press and hold the Curtain card to open the configuration page.
The following parameters can be configured:
-
Name
-
Open Position Photo
-
Closed Position Photo
-
Slide to Confirm
-
Open Time
-
Close Time
Open Time
The time, in seconds, required for the curtain to move from the fully closed position to the fully open position.
Close Time
The time, in seconds, required for the curtain to move from the fully open position to the fully closed position.
Slide to Confirm
When enabled, user actions must be confirmed with a slide gesture to prevent accidental operation.
Used In
The Used In tab displays all Scenes and Automations that use the selected Curtain.
This provides a quick overview of where the Curtain is used within the system.
Automation Integration
Curtains can be included in:
-
Scenes
-
Scheduled automations
-
Sensor-based automations
-
Security-related automations
Examples:
-
Open curtains at sunrise.
-
Close curtains at sunset.
-
Close curtains based on brightness levels.
-
Integrate curtains into "Good Night" or "Away" scenes.
Automations execute automatically when all configured conditions are met.
Scenes can also be activated manually from the Dashboard.
Control of the Curtains
Curtain control is quick and simple, managed directly from the Dashboard. Follow the example of the Middle Curtain.
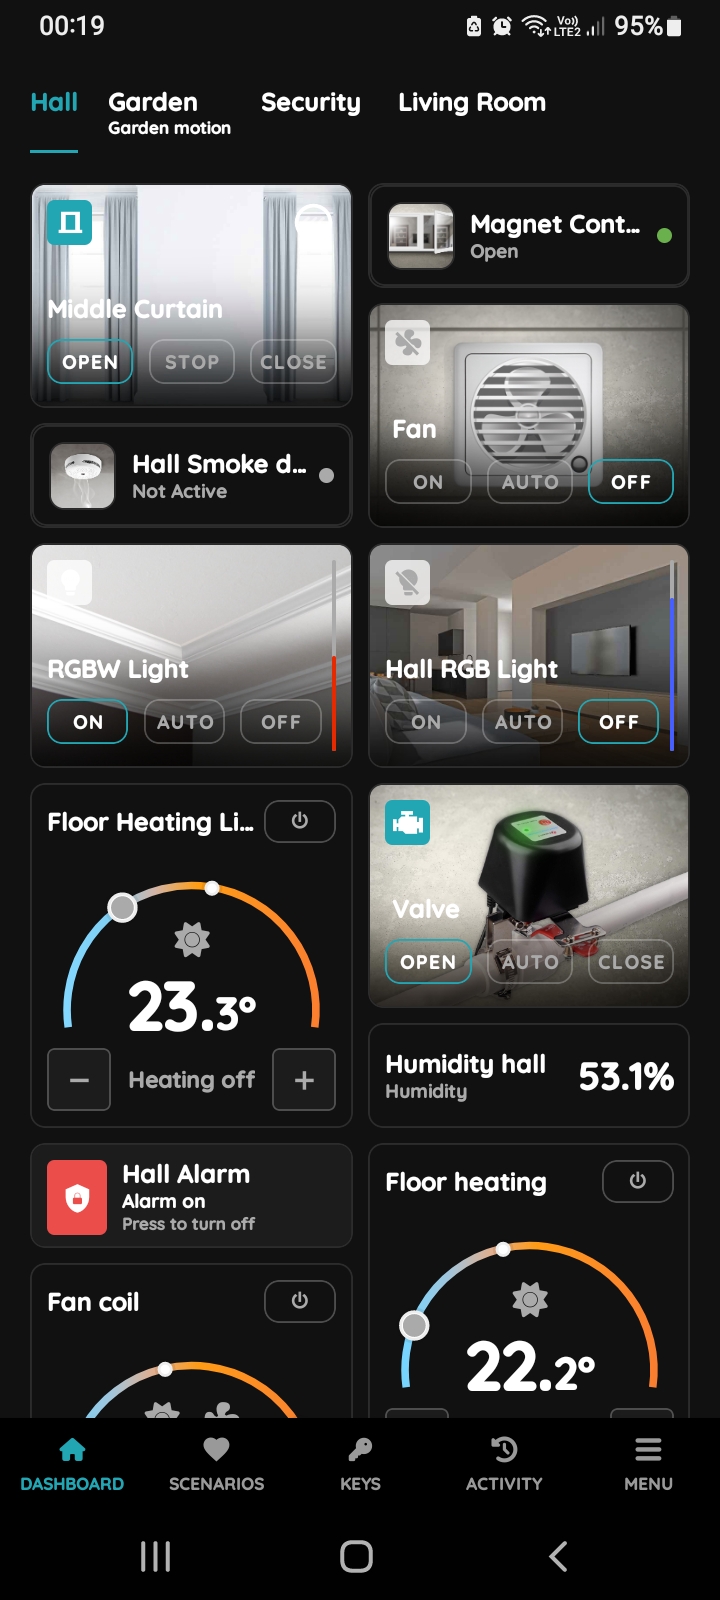
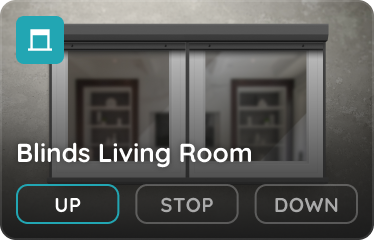
Open, Stop, Close
There are three buttons for control of the Curtains:
- Open - Tap this button to open the Curtains.
- Stop - Tap this button to stop the Curtains.
- Close - Tap this button to close the Curtains.
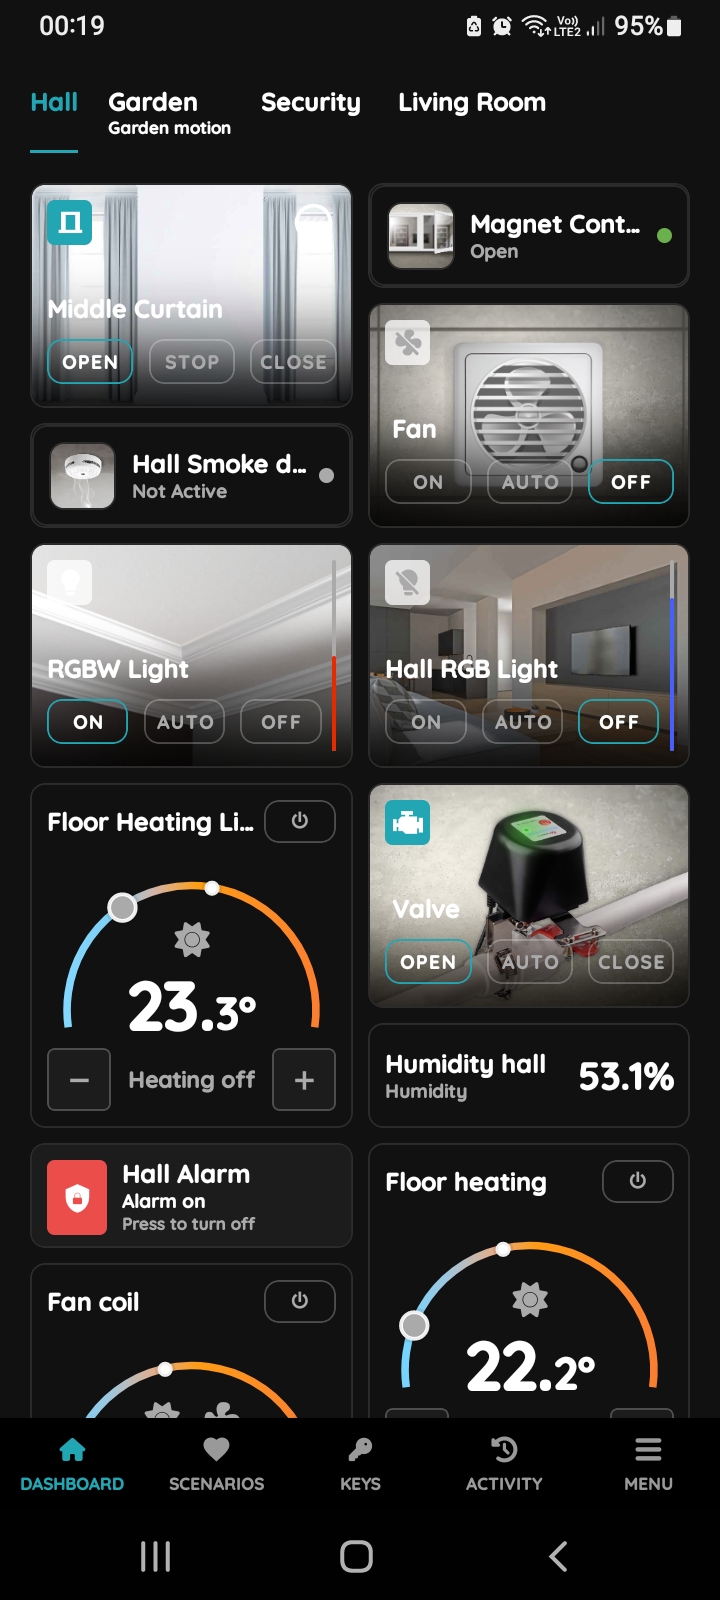
Open the Curtains
To open the Curtains tap the button Open.
The icon the Curtains turns blue and picture of the Curtains will be changed according to the status Open.
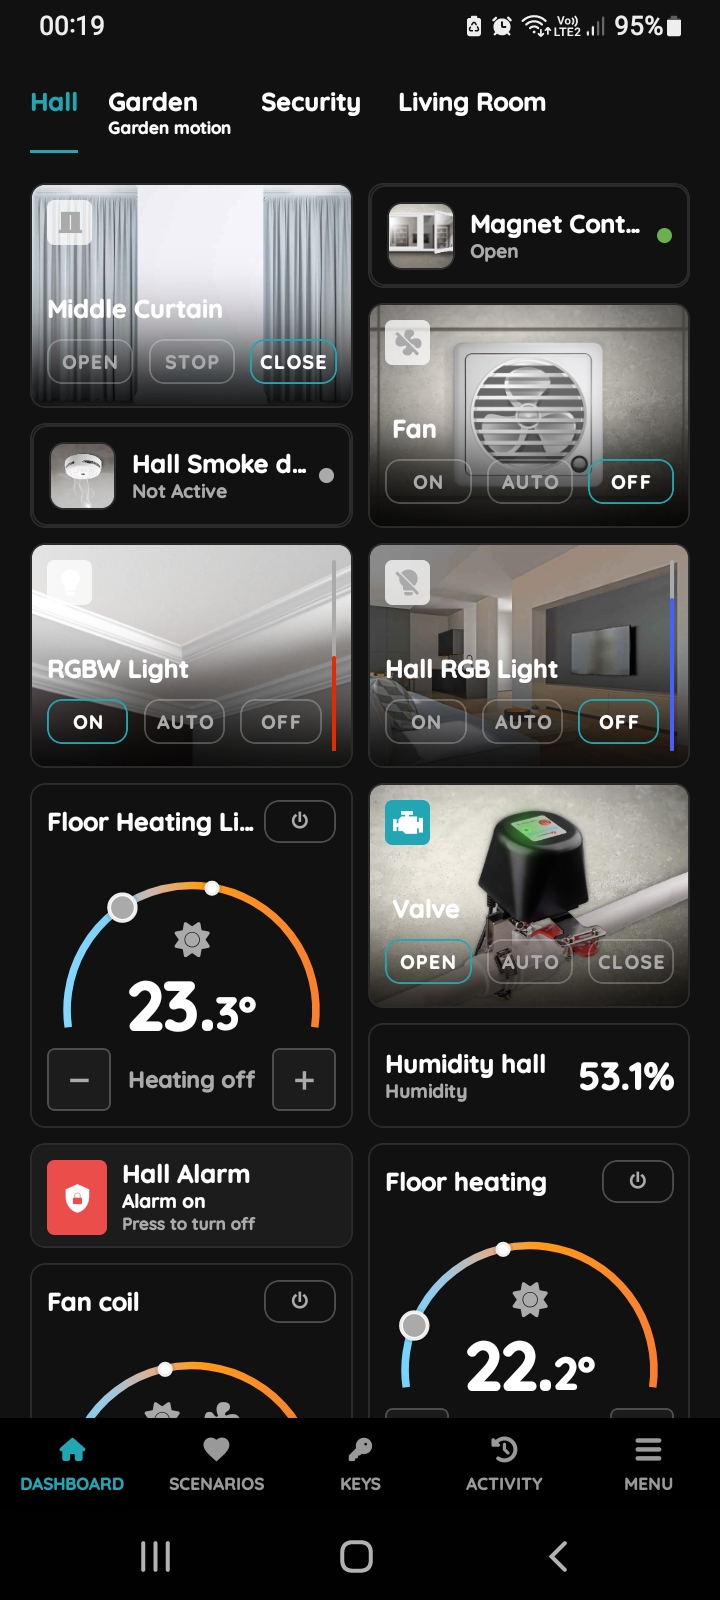
Stop Curtains
In order to stop Curtains tap the button Stop, the icon and the picture of the Curtains will be changed.
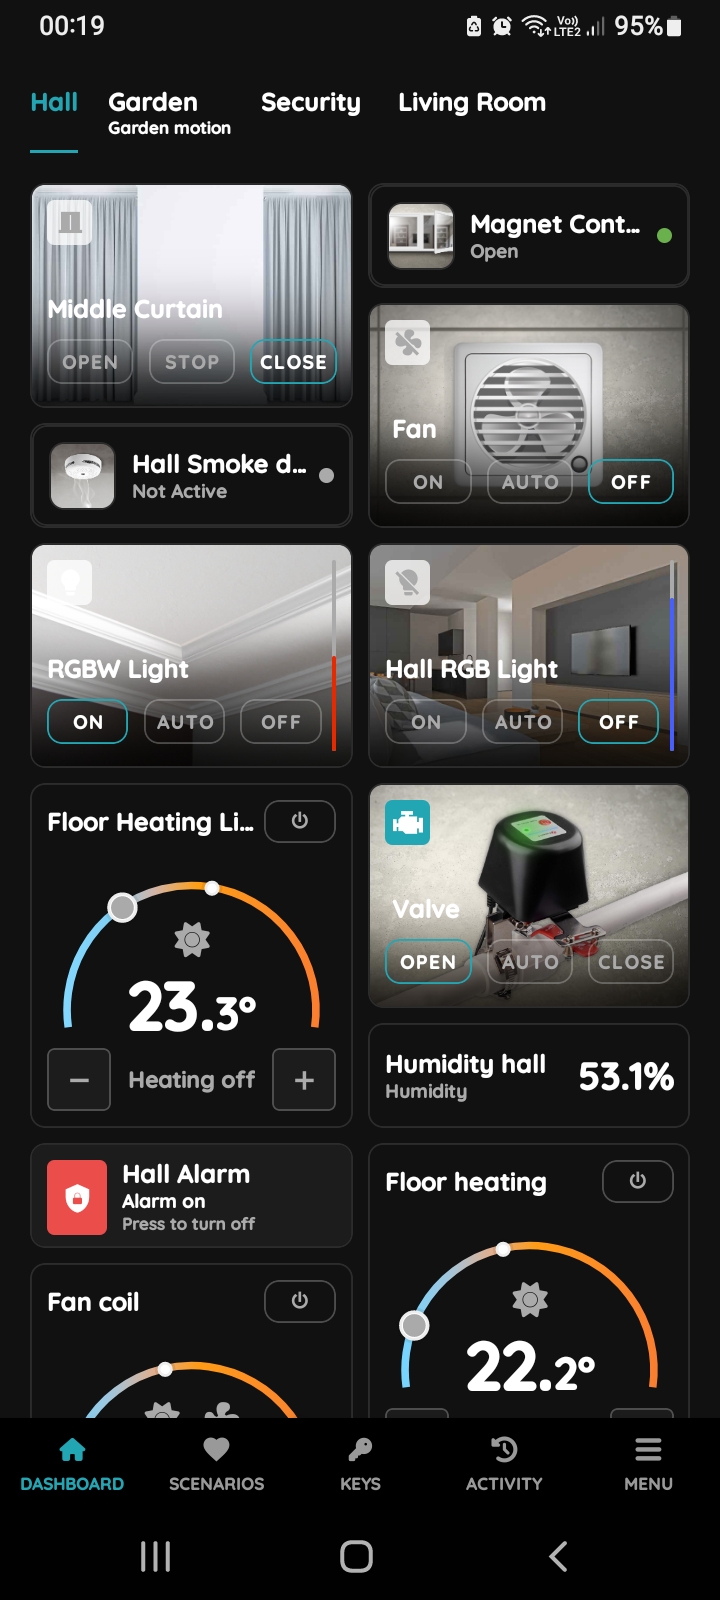
Close Curtains
To the close the Curtains tap the button Close.
The icon of the Curtains is turned grey and picture of the Curtains is changed according to the status Close.
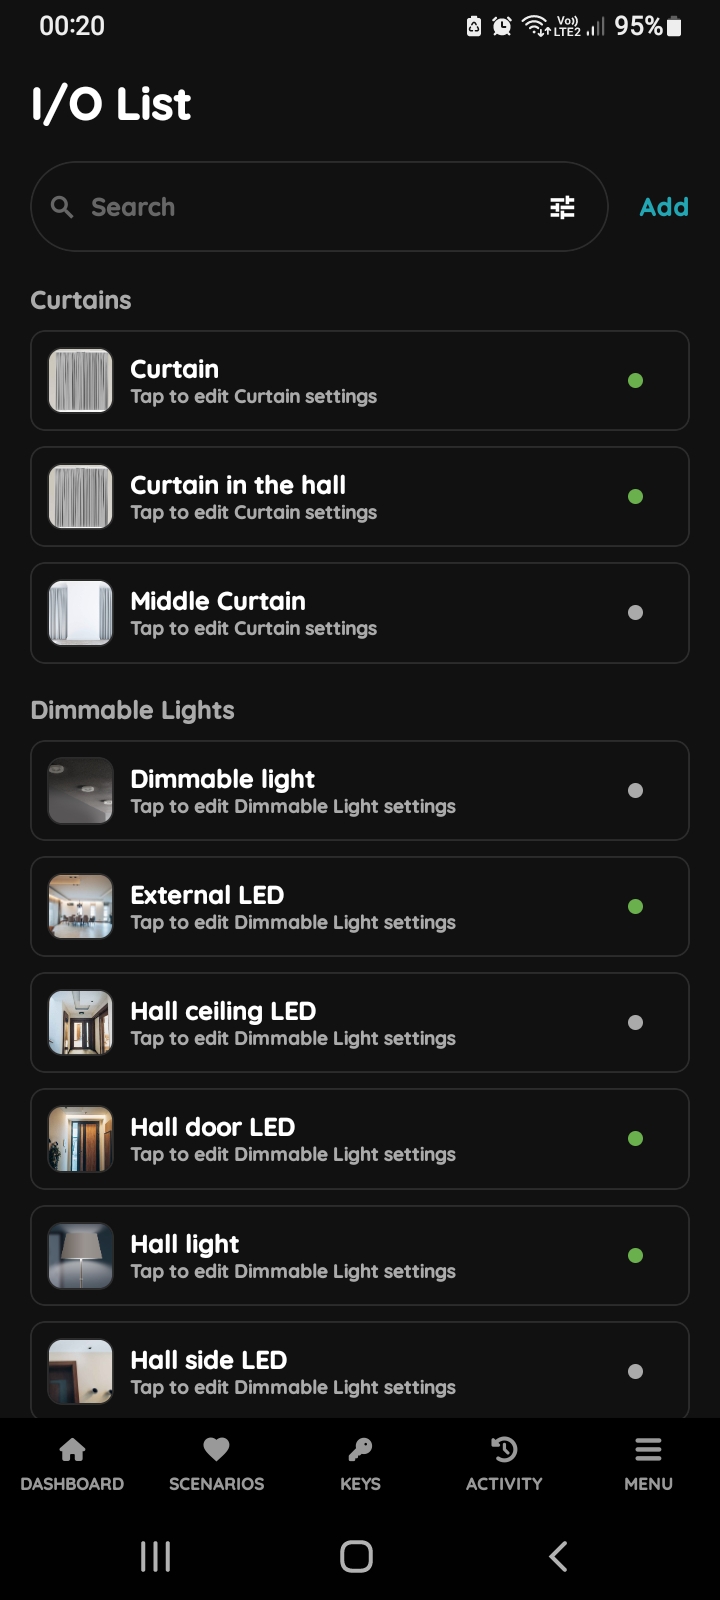
I/O list-Curtains
To edit the Curtains' settings, follow next steps.
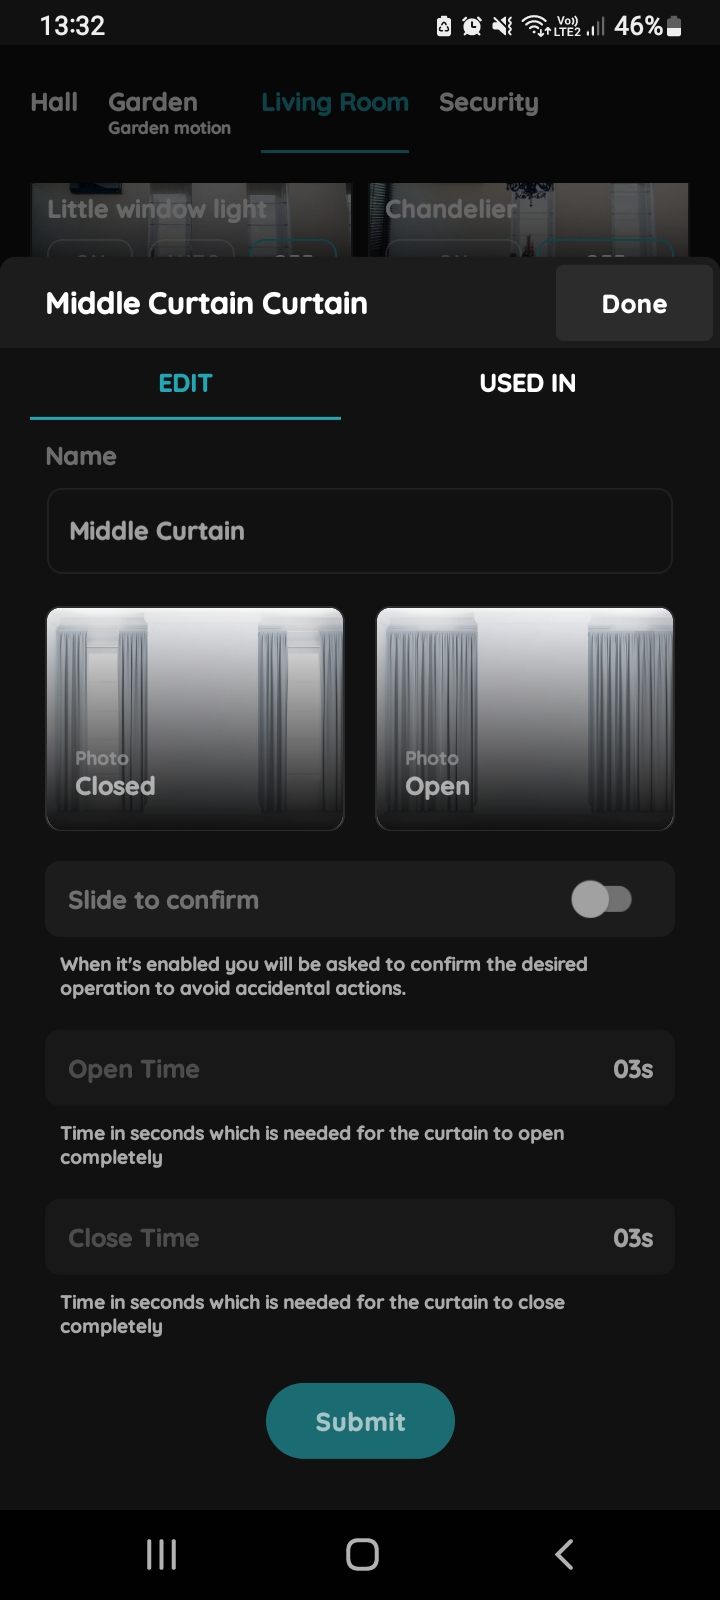
Edit Curtains
Edit following form:
- Name - Edit the name of the Curtain.
- Photo - Choose a photo for both the closed and opened states of the Curtain.
- Slide to confirm - When it is enabled you will be asked to confirm the desired operation to avoid accidental actions.
- Open Time - Set the time in seconds for the Curtain to fully open.
- Close Time - Set the time in seconds for the Curtain to fully close.
When you are satisfied with the choice tap the button Submit/Done, or if you want to delete Curtains tap button Delete.
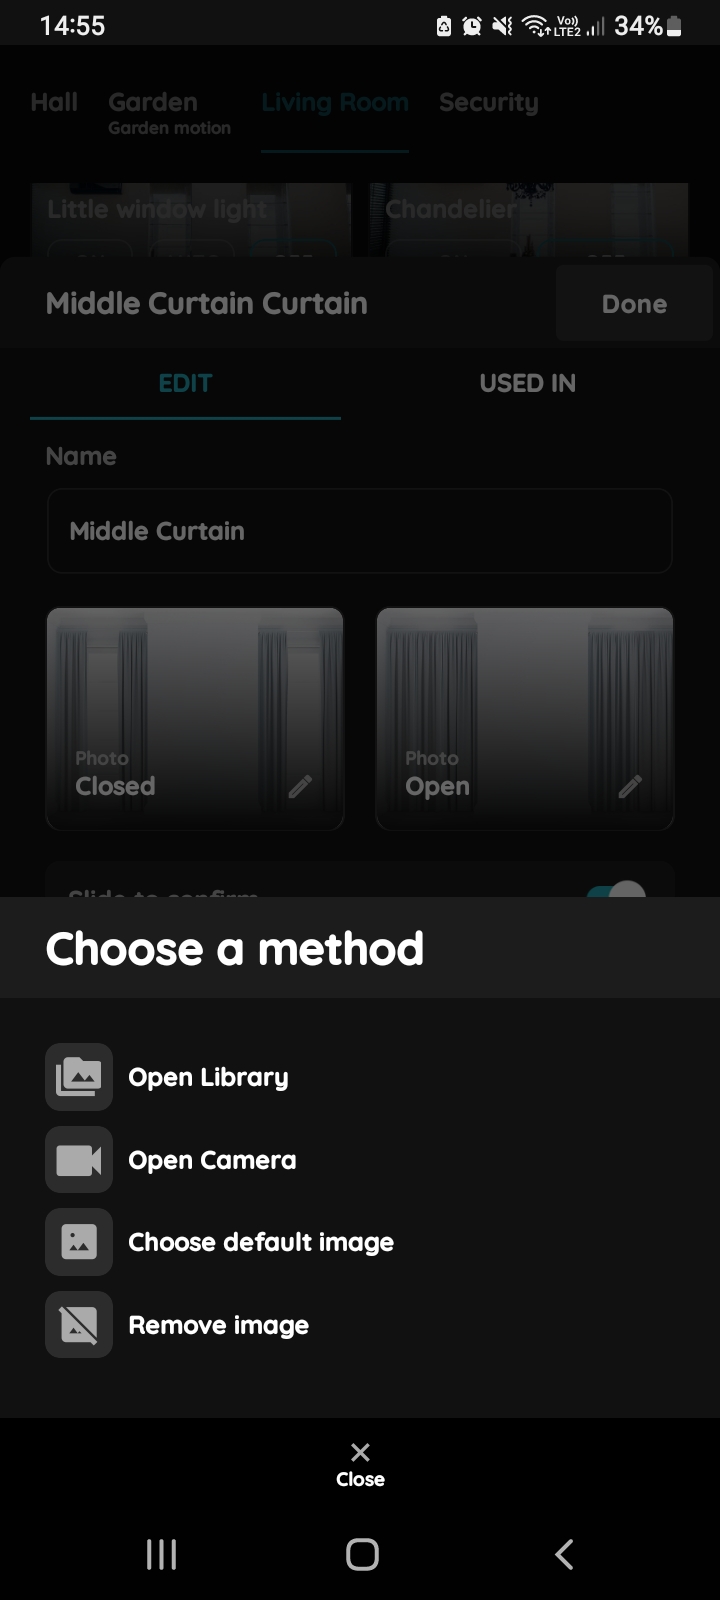
Change a picture - Curtain
You have four options:
- Open Library - The phone’s Library will open. It is recommended to take pictures from the same angle for both Curtains' statuses to achieve a complete and consistent view.
- Open Camera - You can take a picture using your smartphone. For a complete and consistent view, it’s recommended to capture both Curtains' statuses from the same angle.
- Choose default image - These images are prepared in advance in order to provide a complete and seamless experience.
- Remove image - Removes existing image.
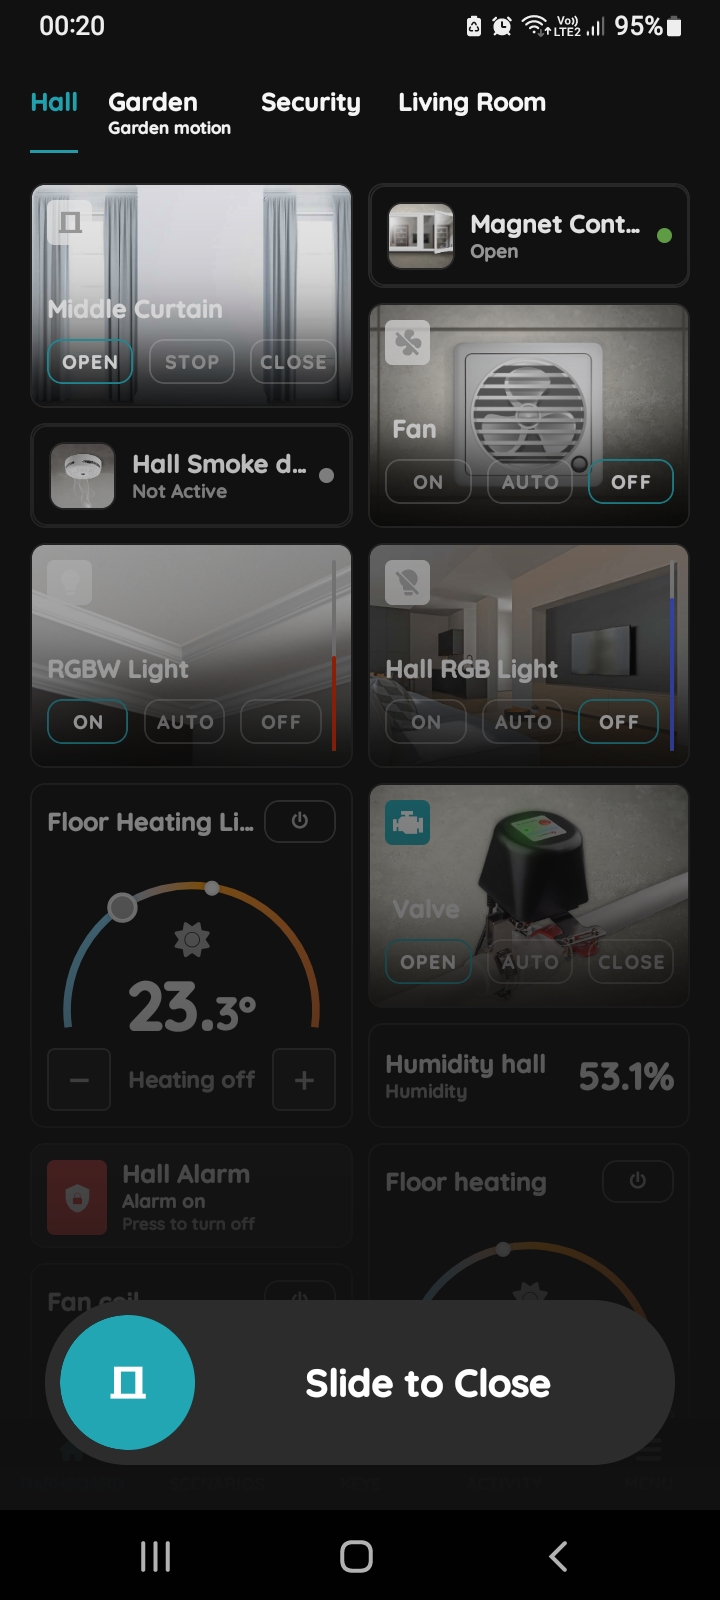
Slide to confirm - Curtains
The Slide to Confirm feature adds an extra layer of security by preventing accidental actions.
It requires you to confirm your choice by sliding the button.
If you want to close the curtain, tap Slide to Close and slide the button from left to right.
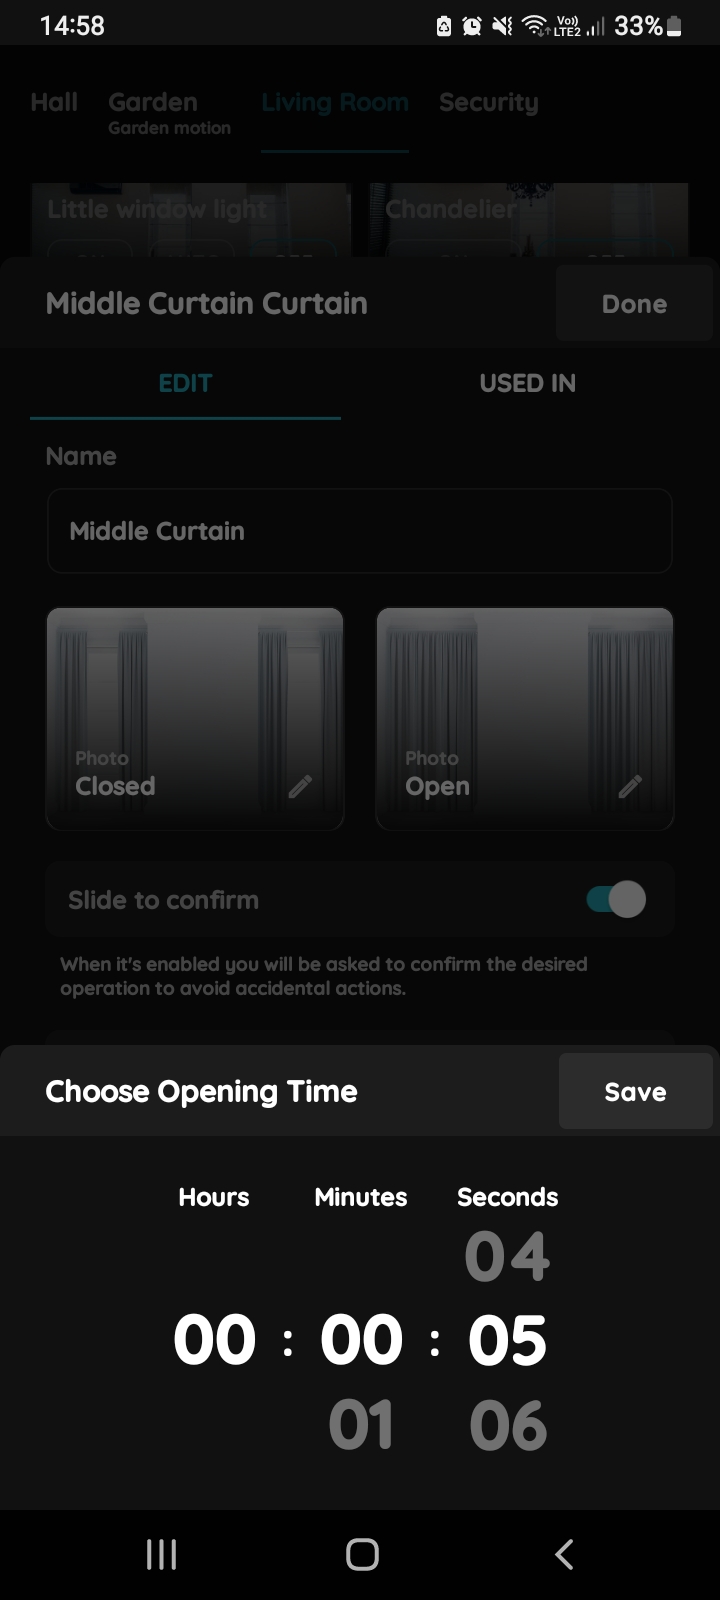
Choose Opening Time
Opening Time is time in seconds which is needed for the Curtain to open completely.
You have three columns for: hours, minutes, seconds to set opening time.
When you are satisfied tap the button Save.
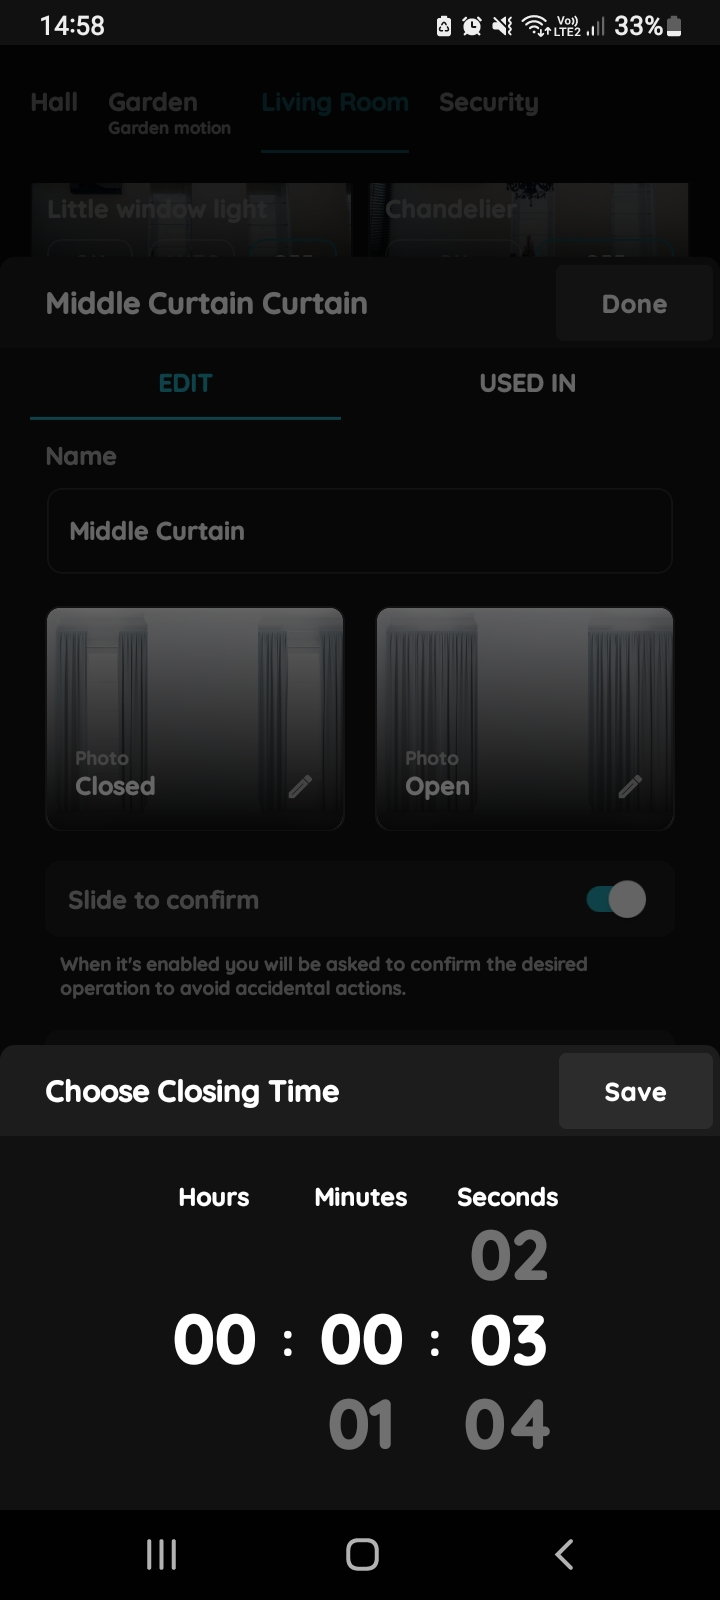
Choose Closing Time
Close Time is time in seconds which is needed for the Curtain to close completely.
You have three columns for: hours, minutes, seconds to set closing time.
When you are satisfied tap the button Save.
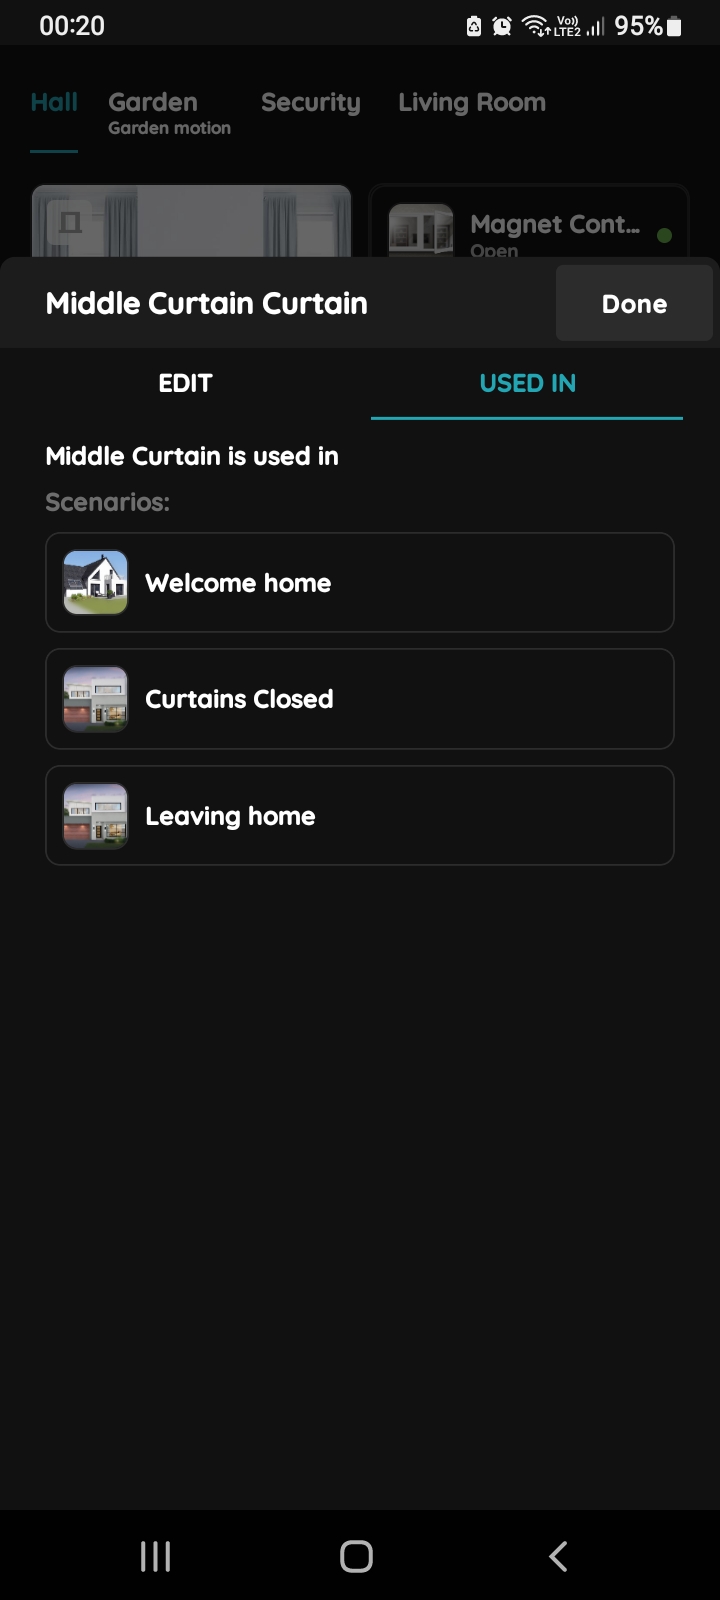
Used In - Curtains
The Used In tab shows all the scenarios and automations where Curtains are applied, making it easy to see where this I/O is used without the need to search manually. If it isn't used in any, the list will be empty, and a message will display: "This I/O is not in use anywhere." This feature is particularly useful as it consolidates all relevant information in one place.
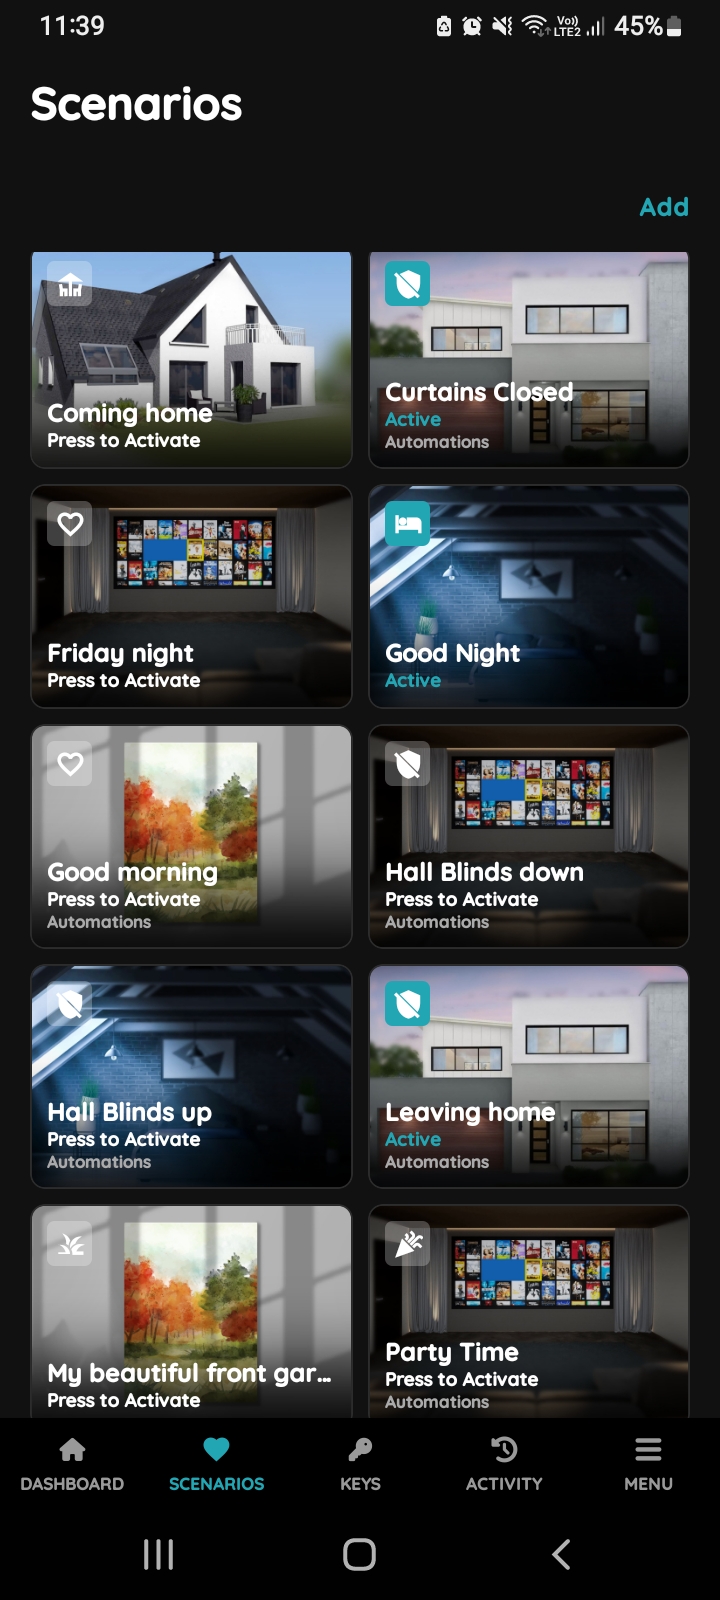
Scenarios from the Taskbar
You can create scenario for the Curtains from Taskbar or from the Menu.
An automated scenario for the Curtains is convenient because it allows them to adjust automatically based on time, light levels, or room activity, enhancing comfort without manual effort. It can help regulate natural light, reduce glare, and improve privacy, creating an ideal indoor environment throughout the day. Additionally, automated Curtain control can contribute to energy efficiency by keeping rooms cooler in the summer or warmer in the winter, depending on the sunlight.
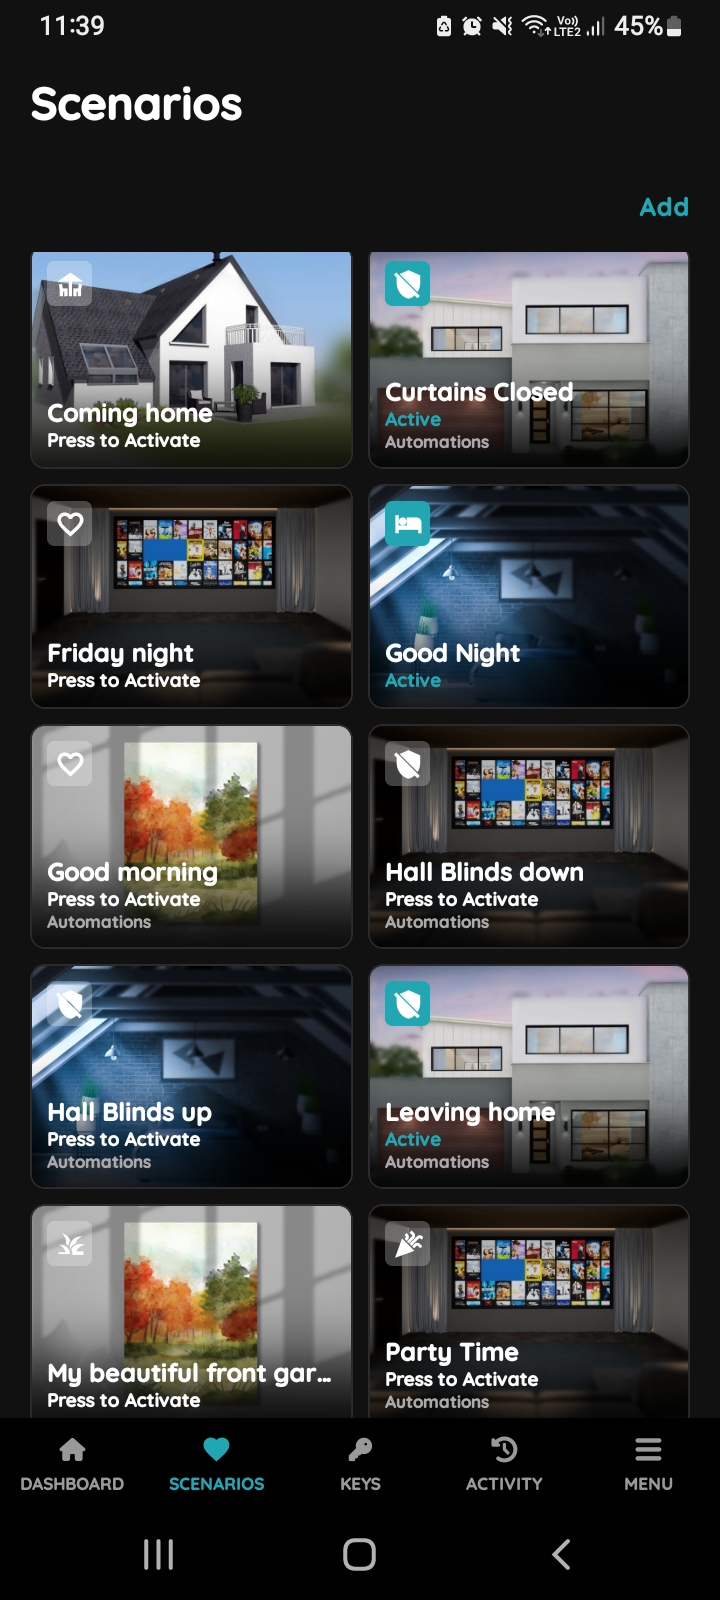
Scenarios - Add button
Tap on the button Add in order to create Scenario.
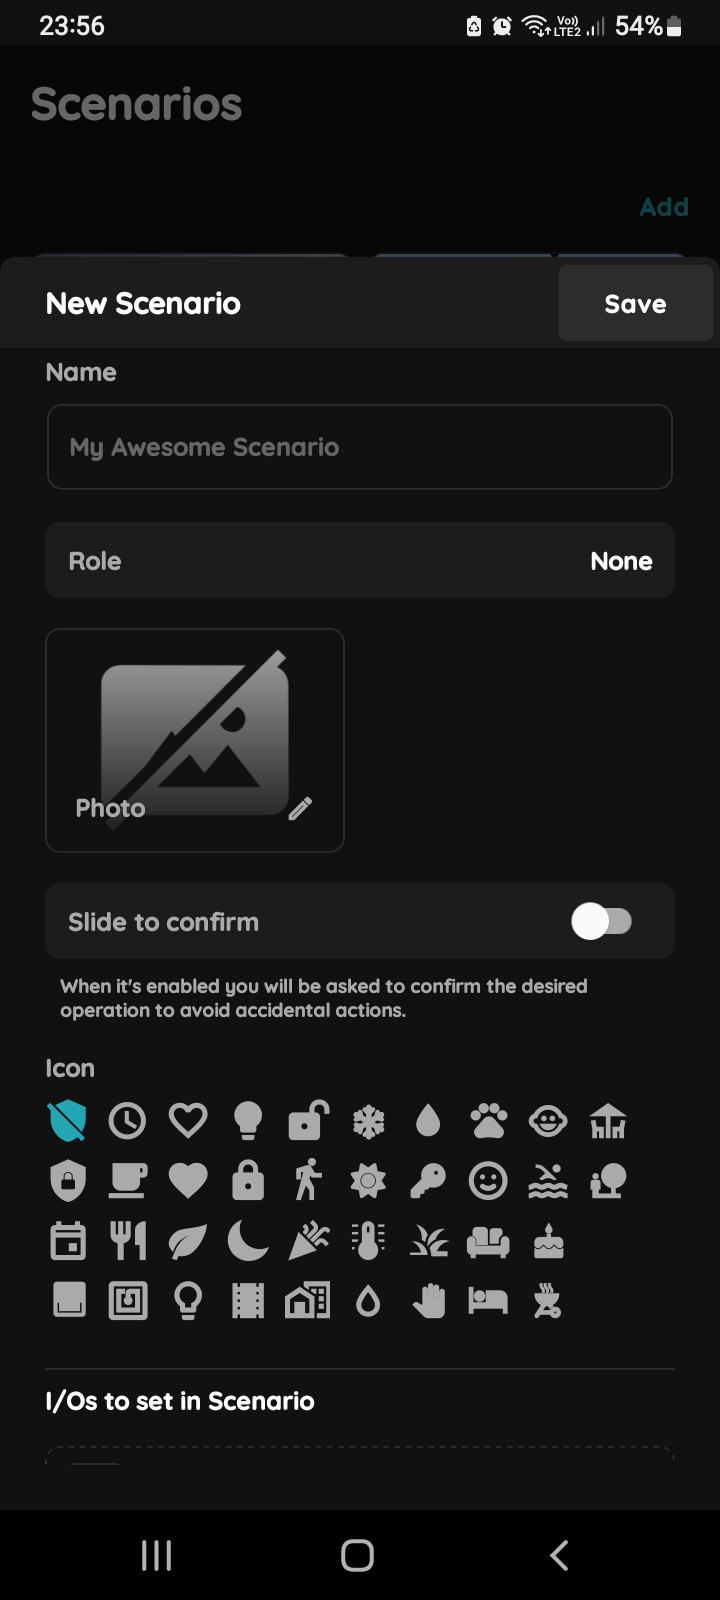
New Scenario
Fill following form:
- Name – Enter the name of the Scenario.
- Role – Select the appropriate role for the Scenario.
- Photo – Choose a photo to represent the Scenario.
- Slide to confirm – When enabled, you will be asked to confirm the operation to avoid accidental actions.
- Icon – Select an icon for the Scenario.
- Add a new I/O – Tap this field to add new I/Os to the Scenario.
Tap Submit/Save to finalize your changes.
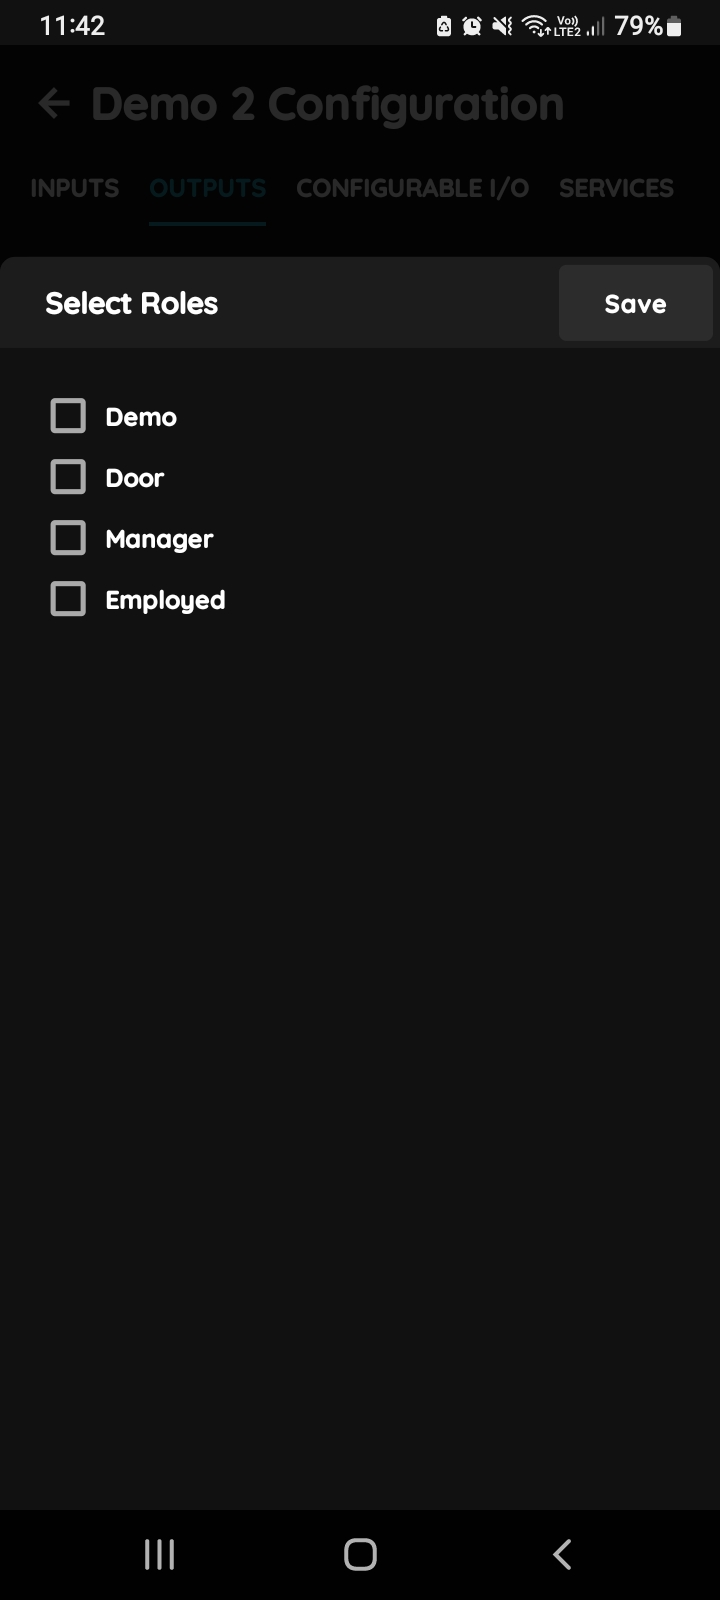
Select Roles
Tap in the field Role and after tap on the checkbox/checkboxes to select Role/Roles - multiple choice.
Tap Save/Done.
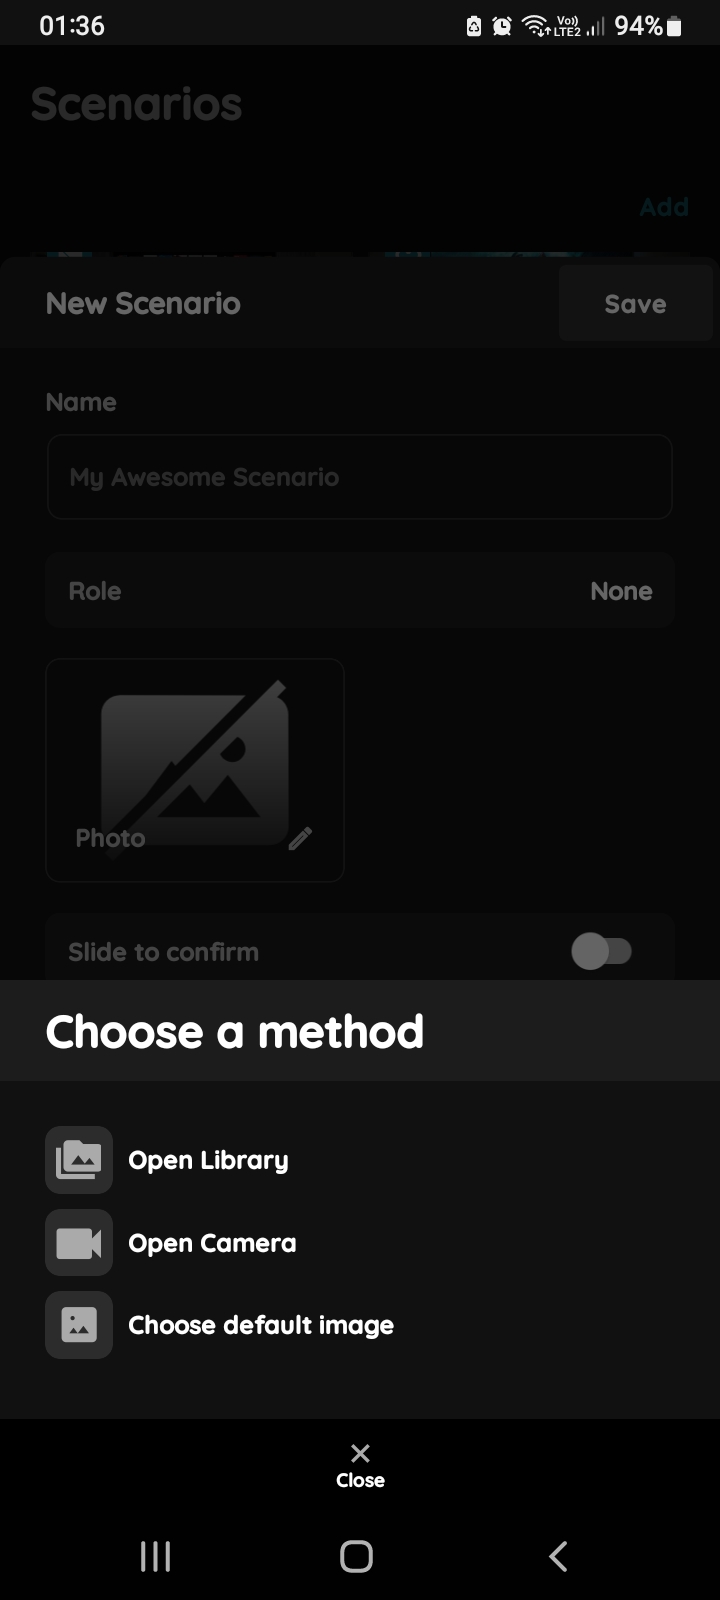
Change photo - Scenario
Tap the photo of the Scenario. You have three options:
Open Library - The phone’s Library will open.
Open Camera - You can take a picture using your smartphone.
Choose default image - These images are prepared in advance in order to provide a complete and seamless experience.
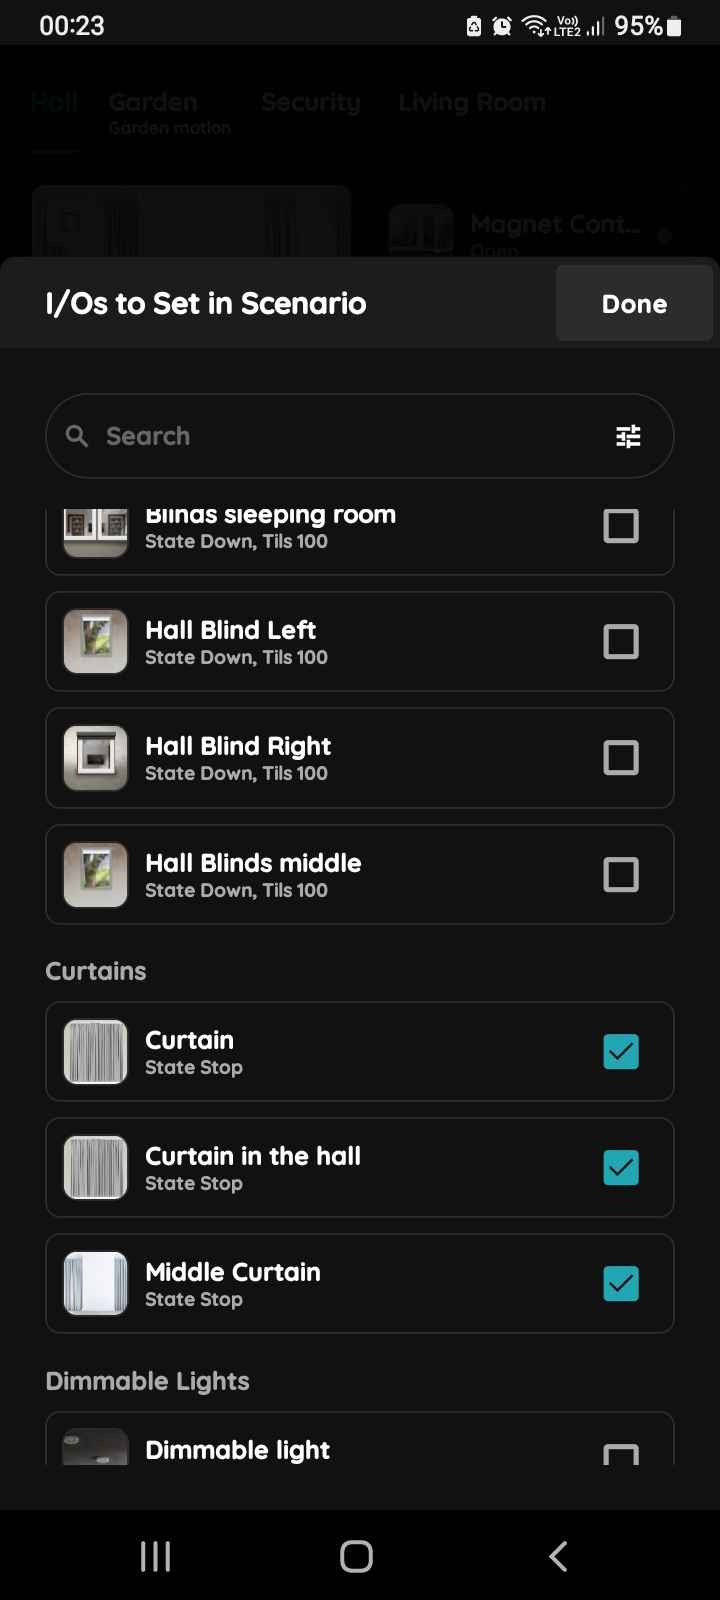
Add New I/O - Scenario for the Curtains
Tap on the checkbox/checkboxes next to the desired I/Os that you would like to add to the Scenario from the I/Os to Set in Scenario list.
In this case tap on the checkboxes next to the Curtains that you want to to include into the Scenario.
Tap Save/Done.
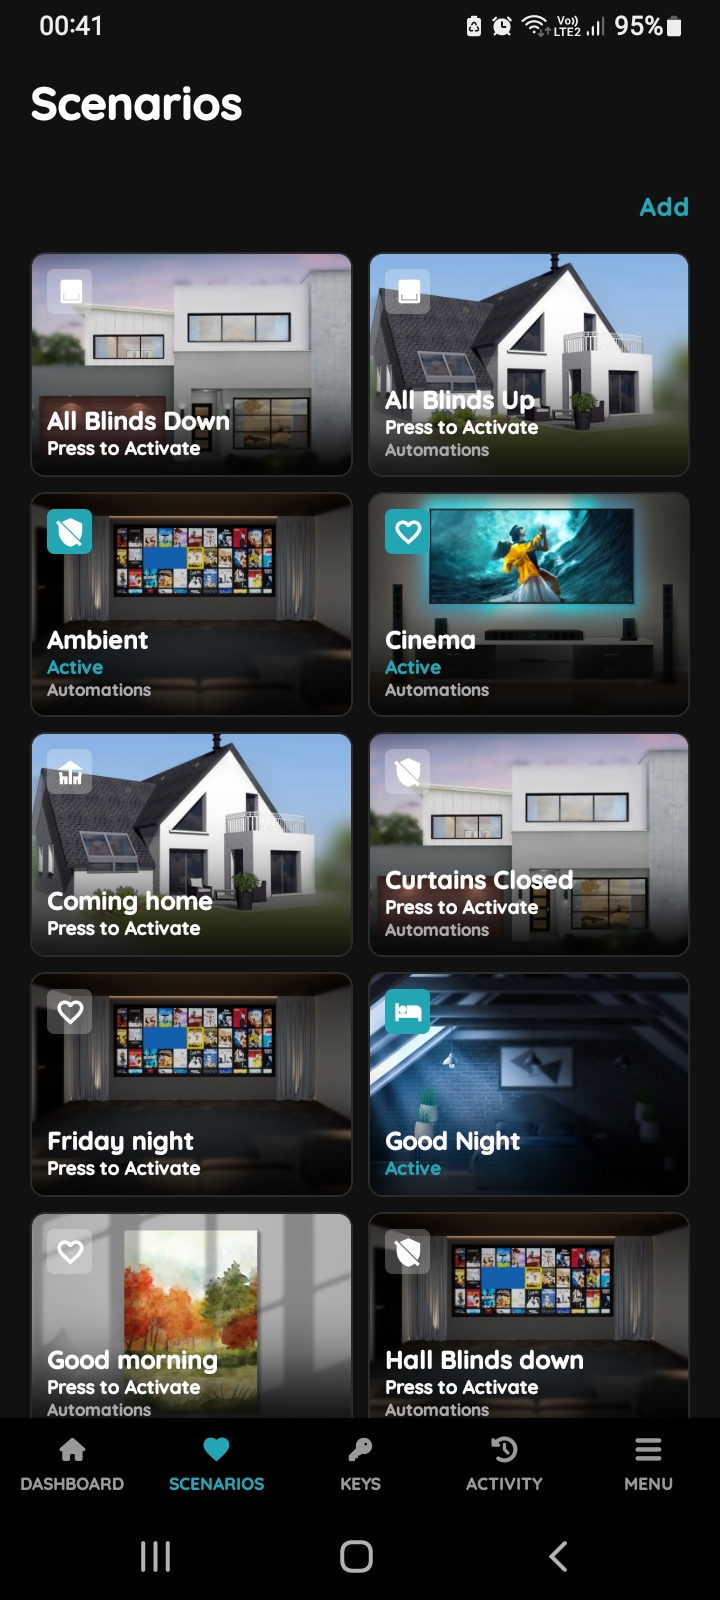
Find Scenario Curtains Closed
Find Scenario Curtains Closed and tap its card.
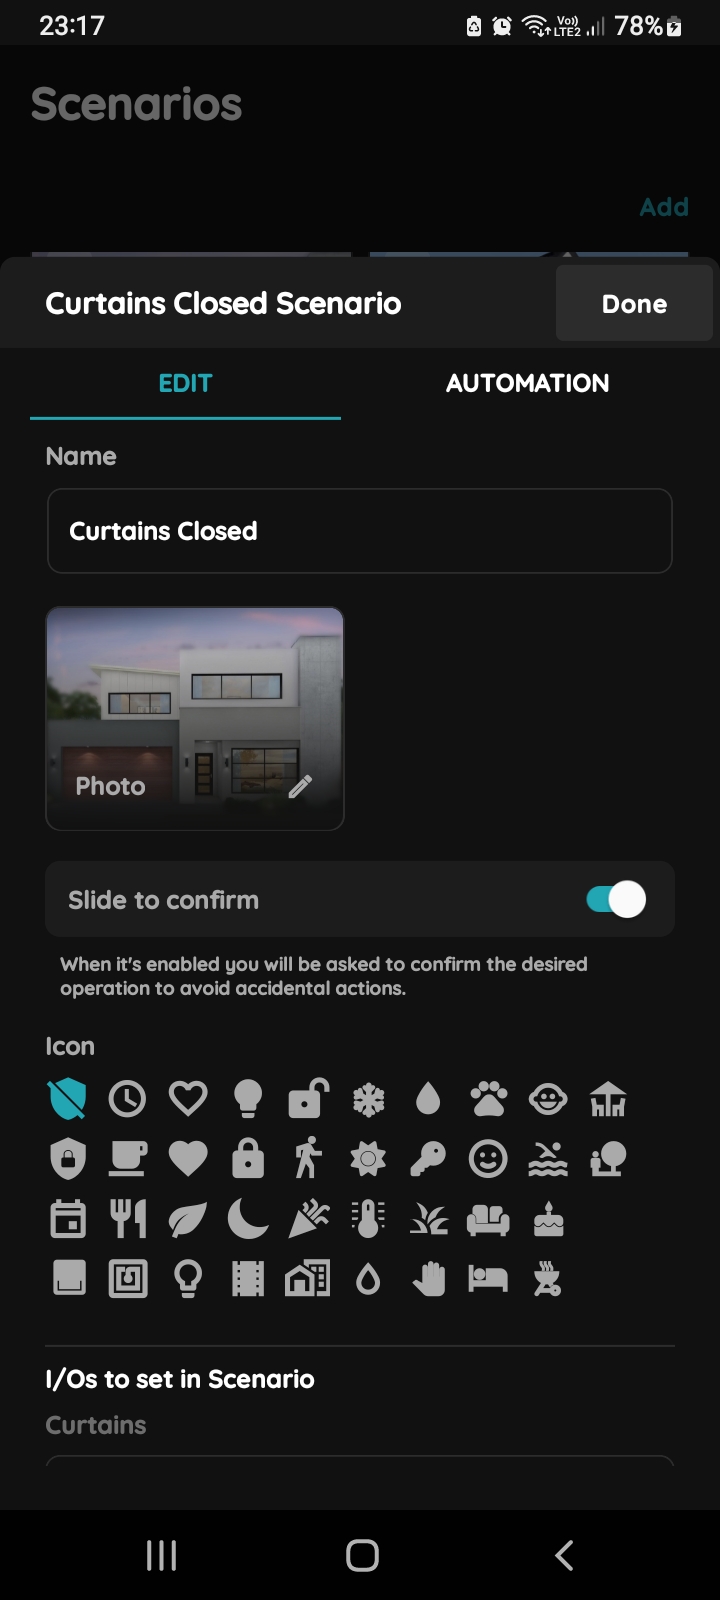
Edit, Automation - Automated Scenario Curtains
Tap on the tab Automation.
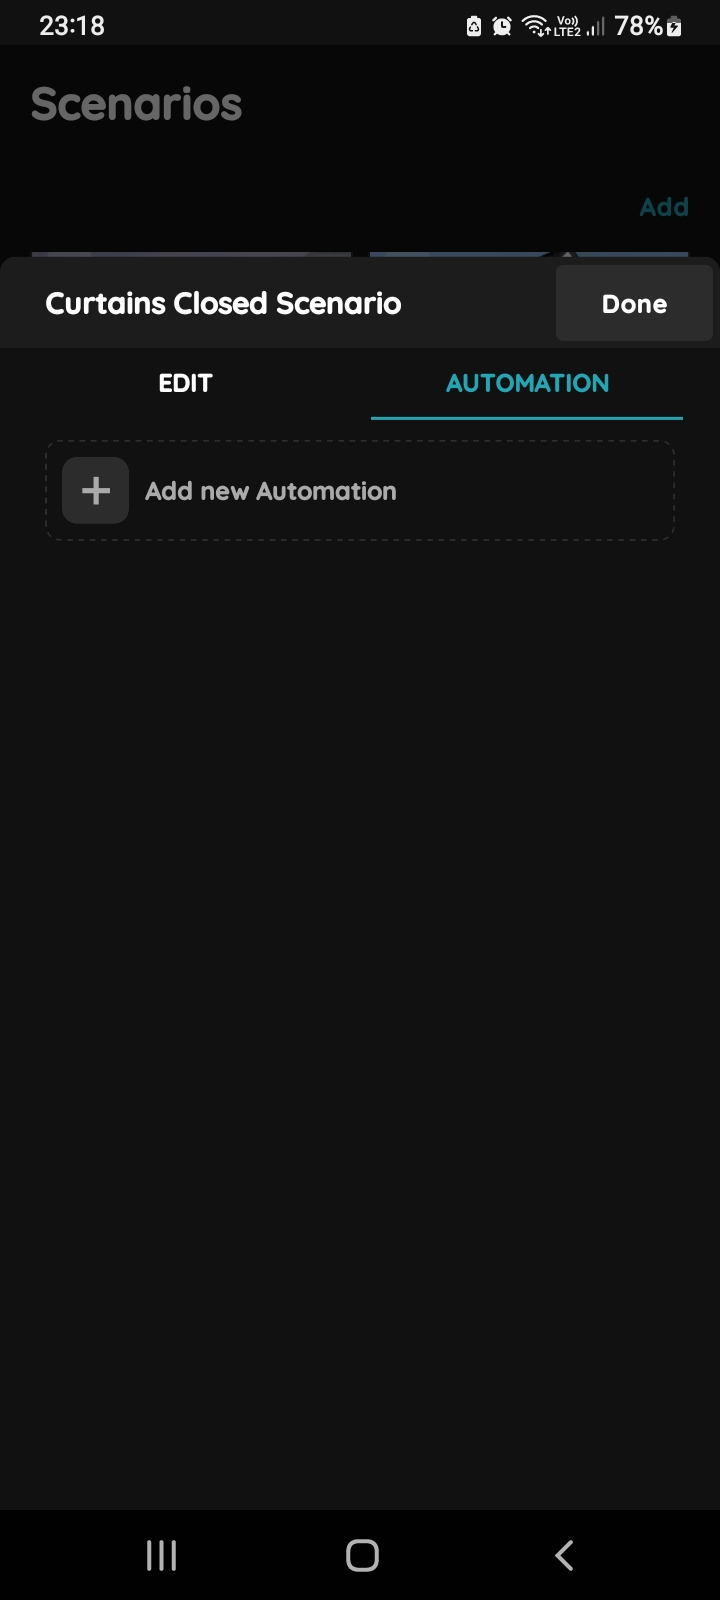
Add new Automation - Automated Scenario Curtains
Tap on the +Add new Automation.
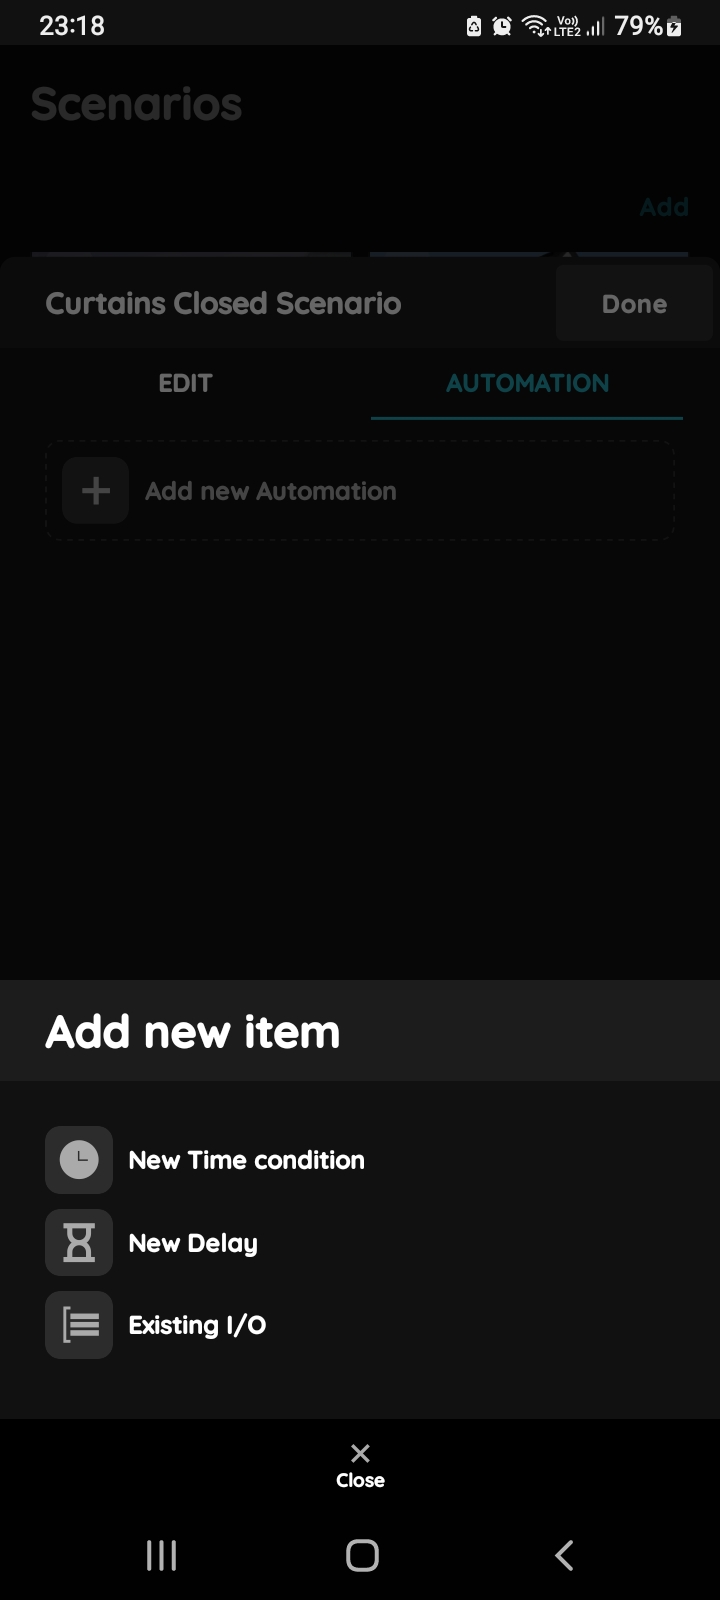
Add new item - Automated scenario Curtains
There is possibility to add:
- New Time condition,
- New Delay
- Existing I/O.
Tap on the New Time condition.
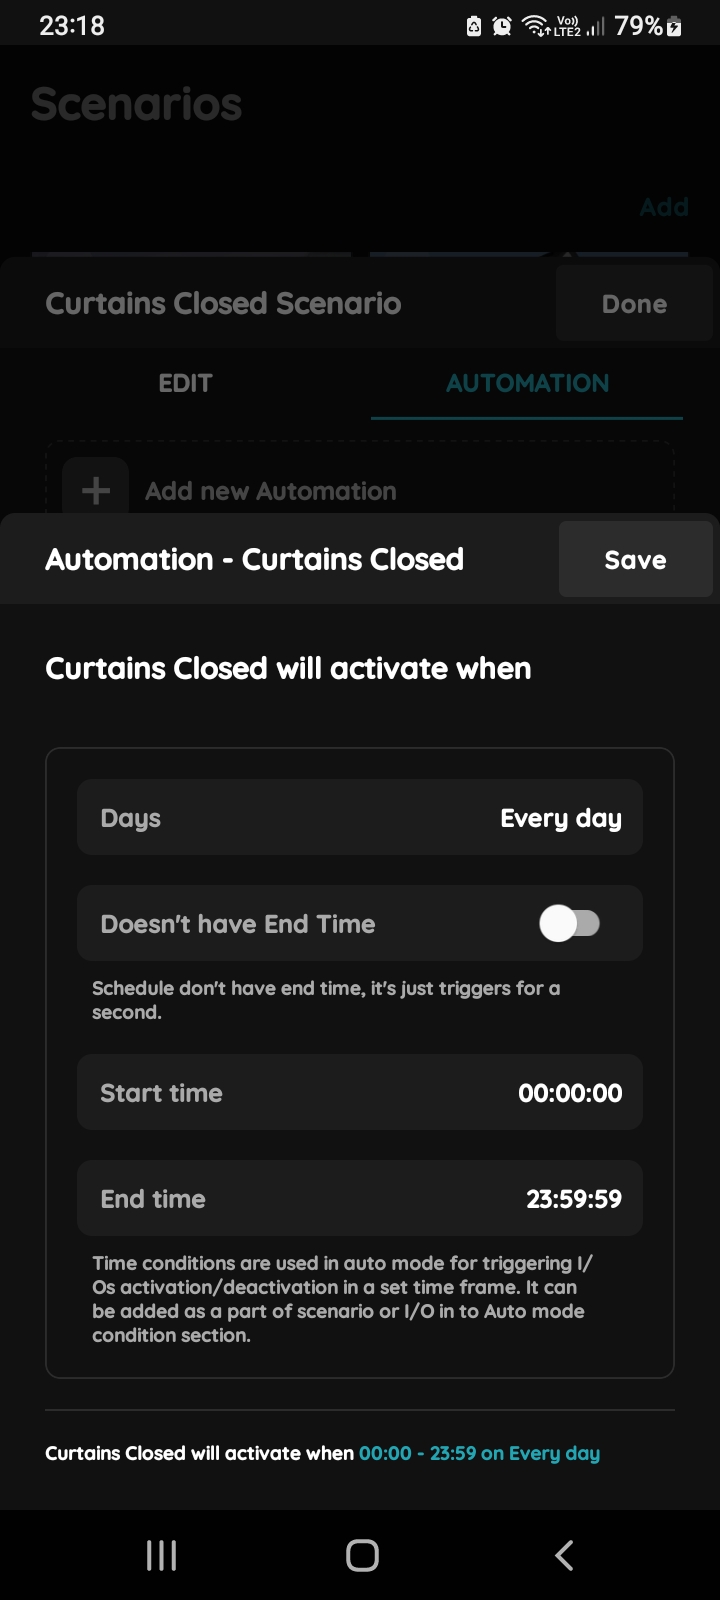
Automation Curtains
You should set Days, Start time and End time in this step.
Tap in the field of each of them to set them.
If Doesn't have End Time button is enabled it means that schedule don't have end time, it's just triggers for a second.
For more details follow next steps.
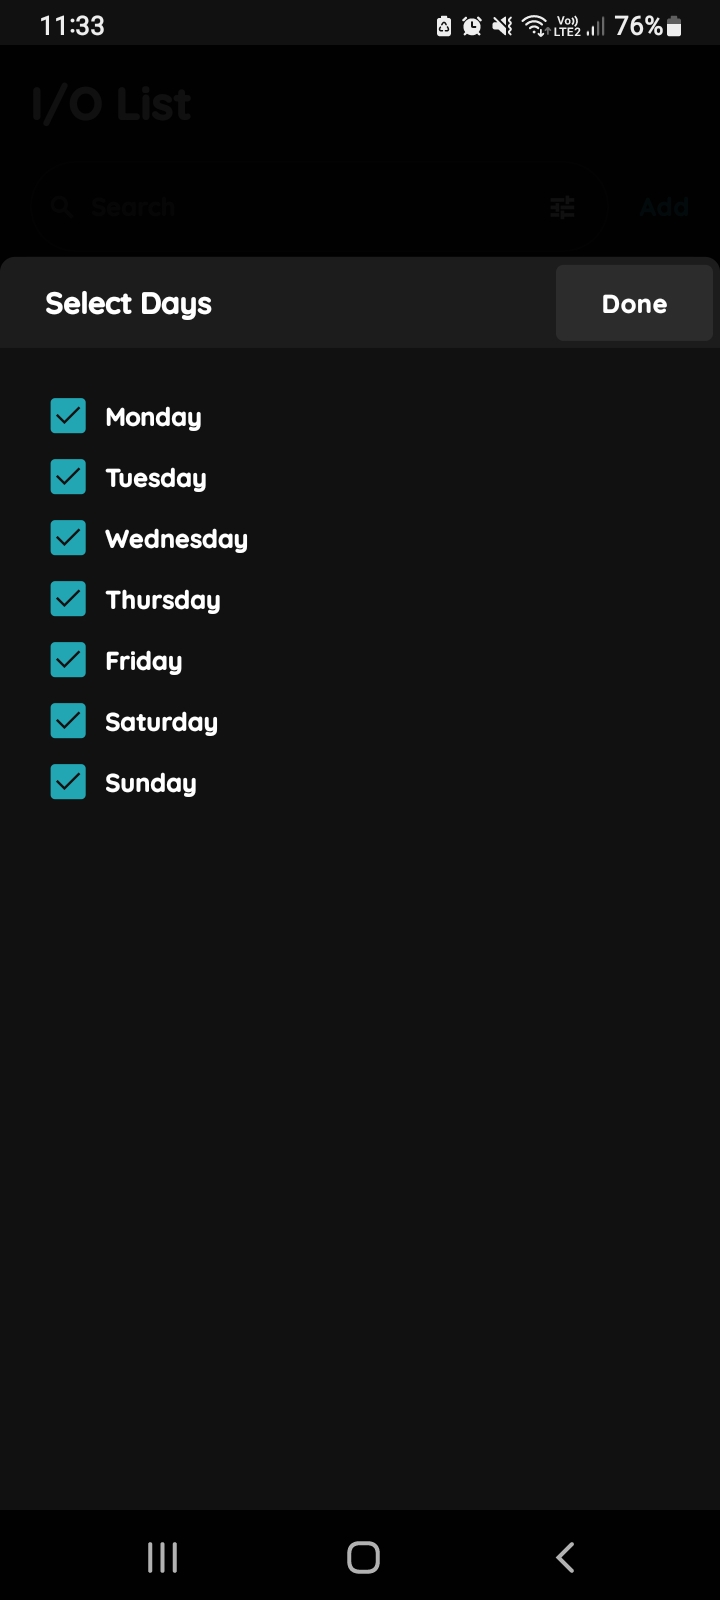
Select Days
Select Days when the I/O will be active by clicking on the check box/check boxes next to the days from the list.
In this case select all days from Monday to Sunday.
Tap button Done.
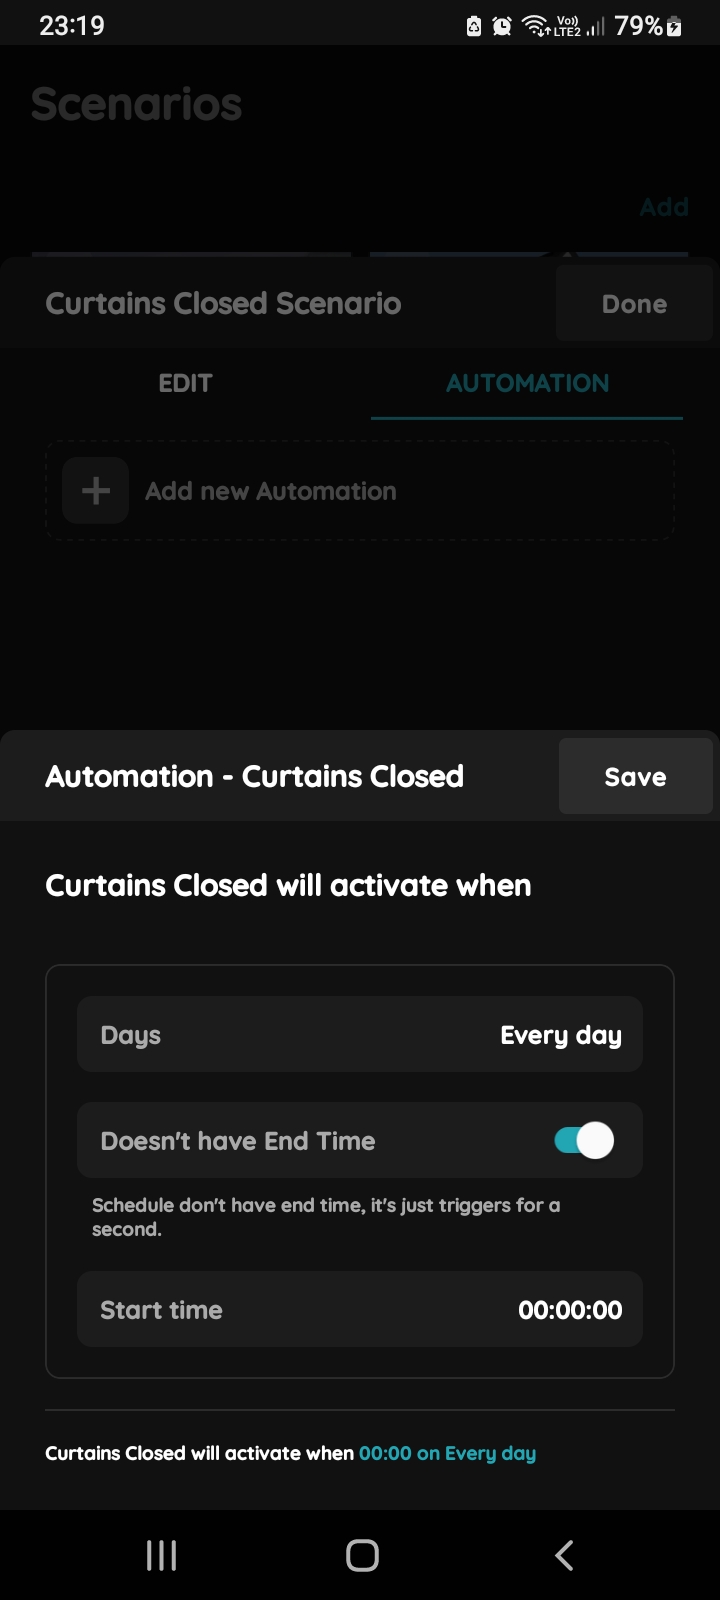
Doesn't have End Time enabled
Enable slide button Doesn't have End Time.
Tap in the field Start time to set it.
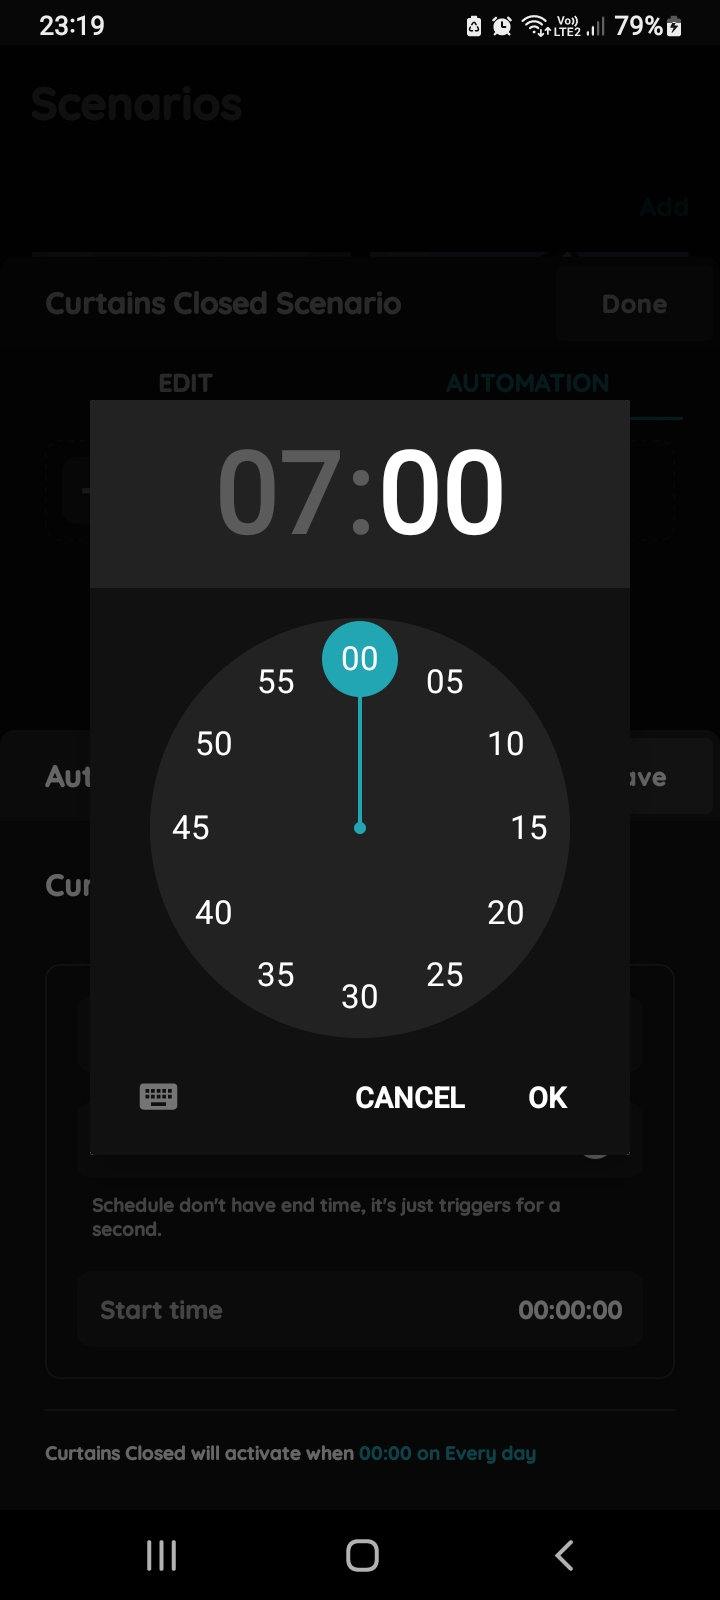
Start time - Automated Scenario - Curtains
In this step use clock or icon of the keyboard in order to set this parameter.
In this case set start time at 7 o'clock.
Tap the button OK. In case that you want to cancel it tap the button Cancel.
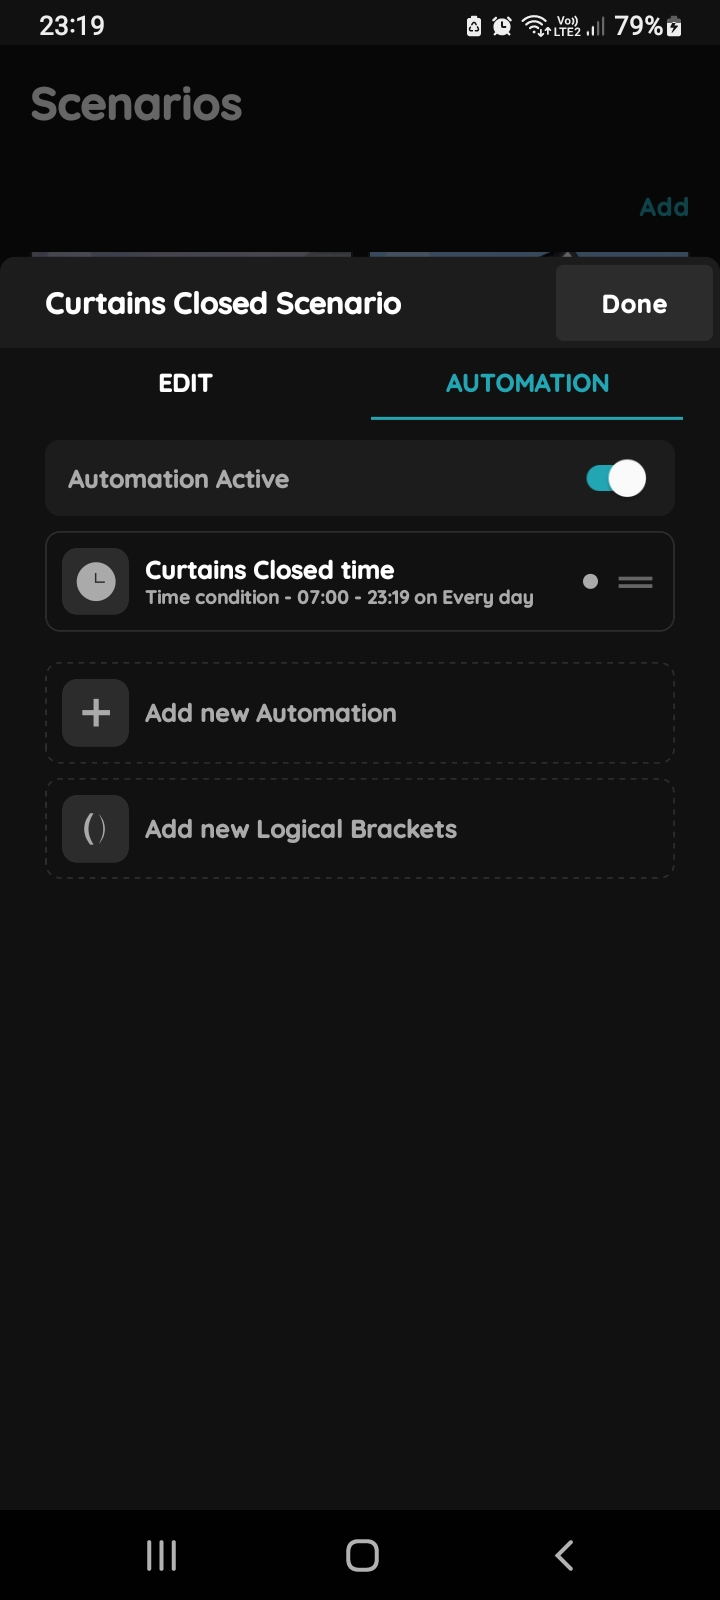
Confirm Automated Scenario settings for Curtains
To confirm settings of the Automated Scenario tap the button Done.
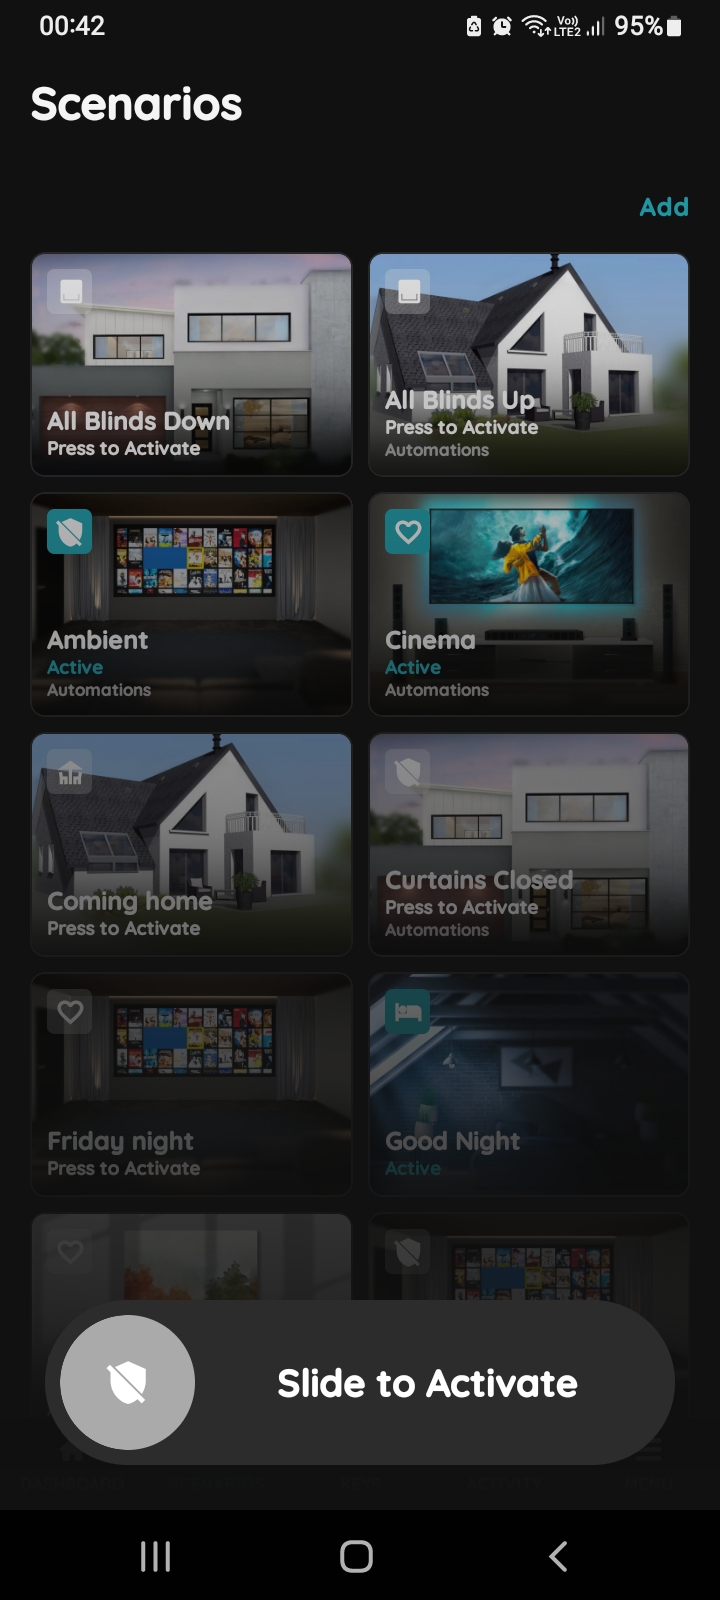
Slide to Activate - Automated Scenario Curtains
To activate the Automated Scenario Curtains Closed manually, slide from left to the right side.
The icon gets blue, and status is changed to Active.