Smart PIERRE - Passive Heating and Cooling
Description
Passive Heating and Cooling is designed for systems that transfer or remove heat through building surfaces without using a fan, such as underfloor, wall, and ceiling heating or cooling.
The system can be controlled individually for each room or zone. PIERRE compares the measured room temperature with the configured target temperature and controls the corresponding heating or cooling circuit according to demand.
Because radiant heating and cooling systems have relatively high thermal inertia, changes in operation or temperature settings may take longer to affect the room temperature.
Control
From the Dashboard of the Smart PIERRE application, users can:
-
turn the heating or cooling On / Off,
-
view the current room temperature,
-
set the desired target temperature.
Press and hold the Passive Heating/Cooling card to access additional functions:
-
Mode – Heating or Cooling operation.
-
Edit – Modify the available settings.
-
Automation – Create and manage automations.
-
Used In – View the Scenes and Automations in which the selected heating or cooling circuit is used.
Temperature Control
The selected Temperature Sensor provides the current room temperature.
PIERRE compares the measured temperature with the configured target temperature and activates or deactivates the heating or cooling demand according to the configured control parameters.
Hysteresis
Hysteresis defines how far the measured temperature must move from the target temperature before the heating or cooling demand changes state.
It prevents the system from switching repeatedly due to small temperature fluctuations around the target.
The switching thresholds for activation and deactivation can be configured separately.
For example, in heating mode:
-
the On value determines how far the room temperature must fall below the target before heating demand is activated,
-
the Off value determines the threshold at which heating demand is deactivated.
Radiant floor, wall, and ceiling systems may continue transferring heat even after the heating circuit has been switched off. Hysteresis should therefore be configured according to the thermal inertia and operating characteristics of the system.
Automation
The Passive Heating and Cooling function can be combined with sensors, schedules, and other conditions through Smart PIERRE Automations.
Temperature Sensor
The measured room temperature is used to control the heating or cooling demand according to the configured target temperature and control parameters.
Presence Sensor
A Presence Sensor can be used to adjust climate control according to actual room occupancy.
For example, a comfort target temperature can be used while the room is occupied, while an energy-saving target can be applied during longer periods of absence.
A presence sensor is more suitable than a conventional motion sensor for occupancy-based climate control, as a motion sensor may no longer detect activity when a person remains still for an extended period.
Window Contact
A Window Contact can be used to temporarily stop or modify heating or cooling demand when an open window is detected.
This prevents unnecessary heating or cooling while the window remains open.
Time-Based Control
Schedules can be used to apply different target temperatures according to the time of day or expected room usage.
For example:
-
daytime and nighttime target temperatures,
-
comfort and energy-saving periods,
-
weekday and weekend schedules.
Combining Conditions
Multiple conditions can be combined within the same climate control strategy.
For example, a schedule can define the base target temperature, a Presence Sensor can adjust it according to actual room occupancy, and a Window Contact can temporarily override normal operation while a window is open.
Automations affecting the same heating or cooling circuit should be coordinated carefully to prevent conflicting rules from issuing opposing commands.
Technical Notes
-
Install the room temperature sensor in a representative location, away from direct sunlight, strong airflow, local heat sources, cooling sources, and other conditions that could distort the measured room temperature.
-
Radiant floor, wall, and ceiling heating or cooling systems can respond slowly. Allow sufficient time after changing a setting before evaluating its effect; depending on the system, the response may take hours rather than minutes.
-
Hysteresis should be configured according to the thermal inertia and operating characteristics of the controlled system to avoid unnecessary switching.
-
Heating and cooling automations should be coordinated to prevent conflicting heating and cooling demands within the same room or zone.
-
When using window or occupancy-based automations, consider the thermal inertia of the system. The heated or cooled surface may continue transferring or absorbing heat even after the circuit has been switched off.
-
Available control and automation functions depend on the configuration of the PIERRE system and the connected sensors and equipment.
Control of the Passive heating/cooling
Controlling the Passive cooling/heating is quick and simple, easily managed directly from the Dashboard.
Follow the example of the Floor heating Living room.
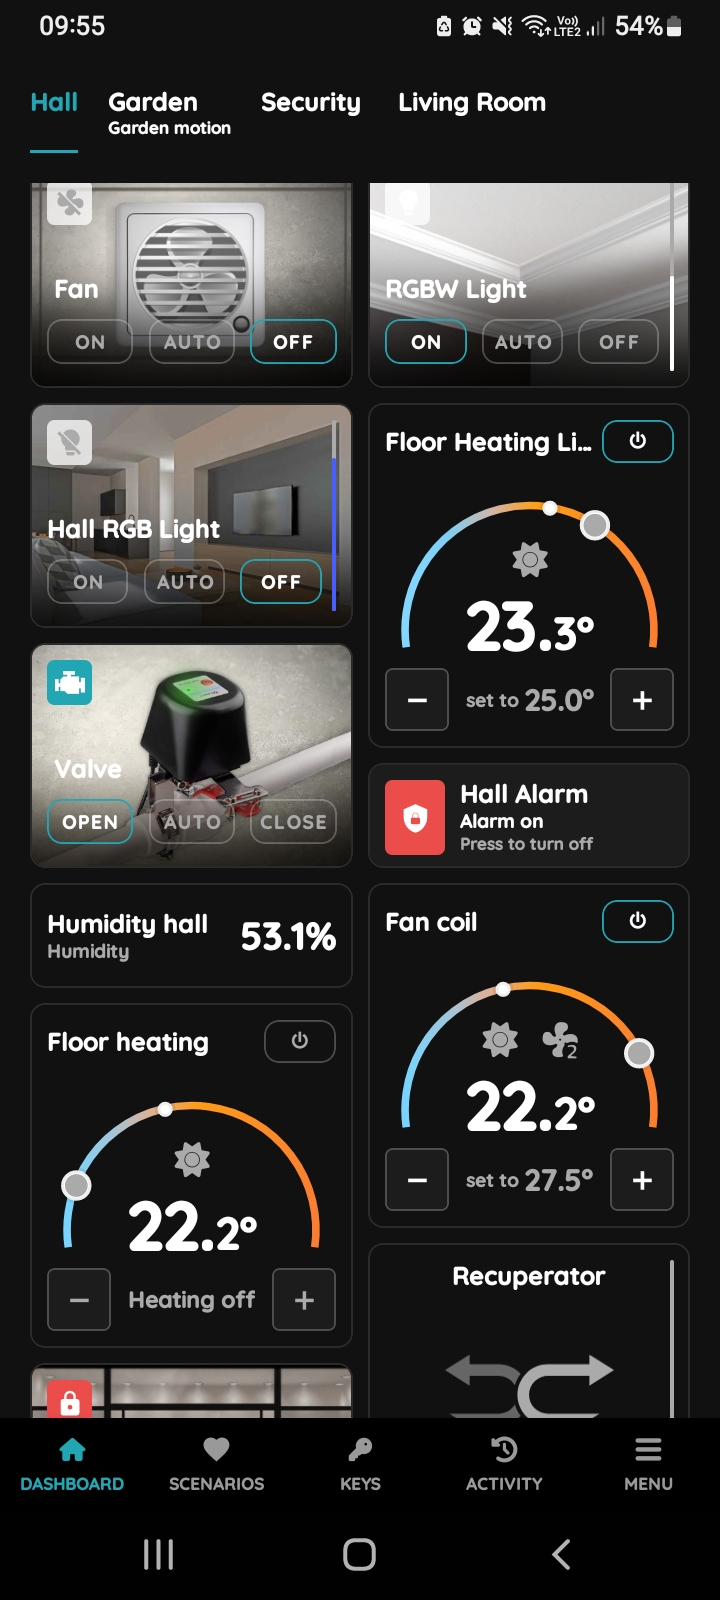
Control of temperature, heating/cooling and intensity
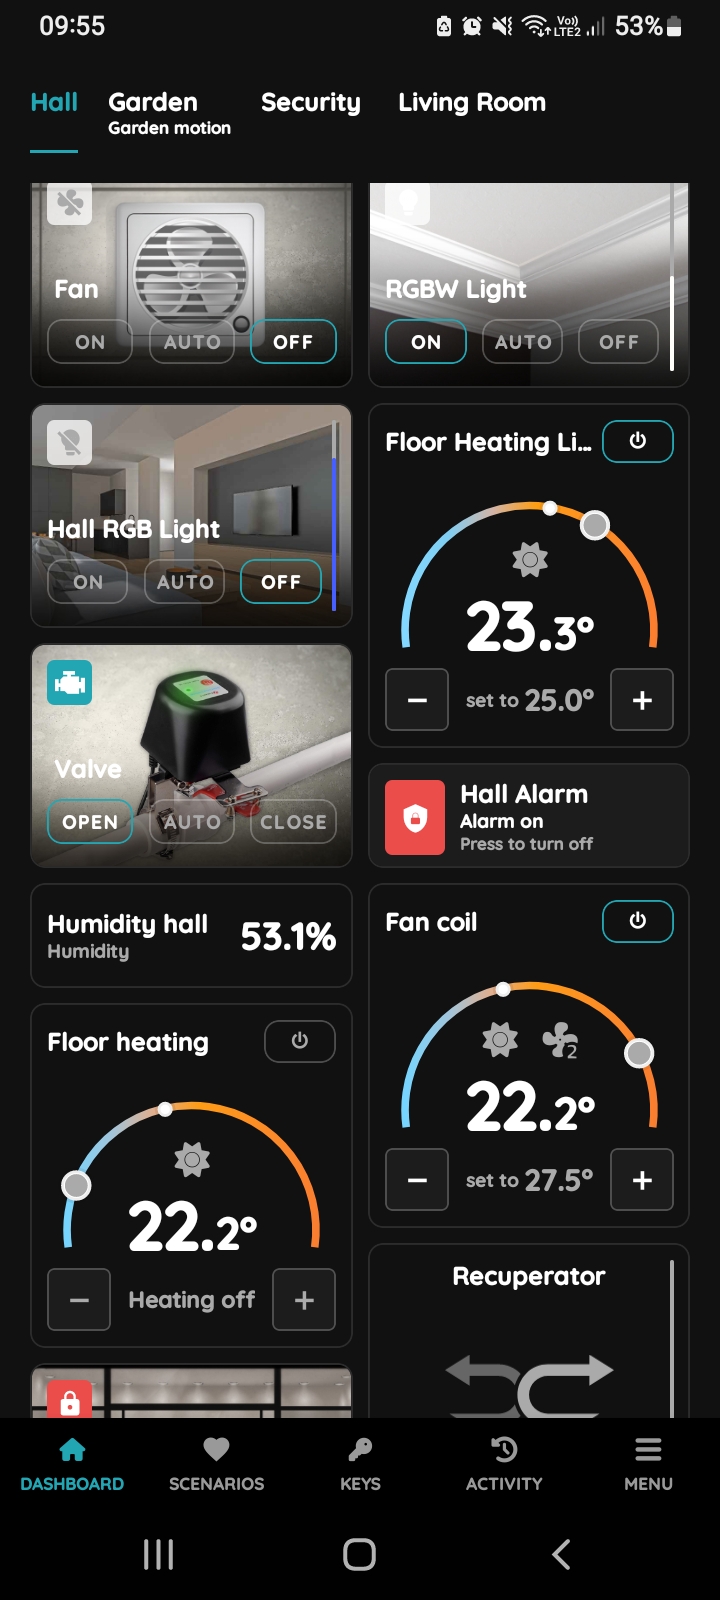
Turn the Passive heating/cooling On
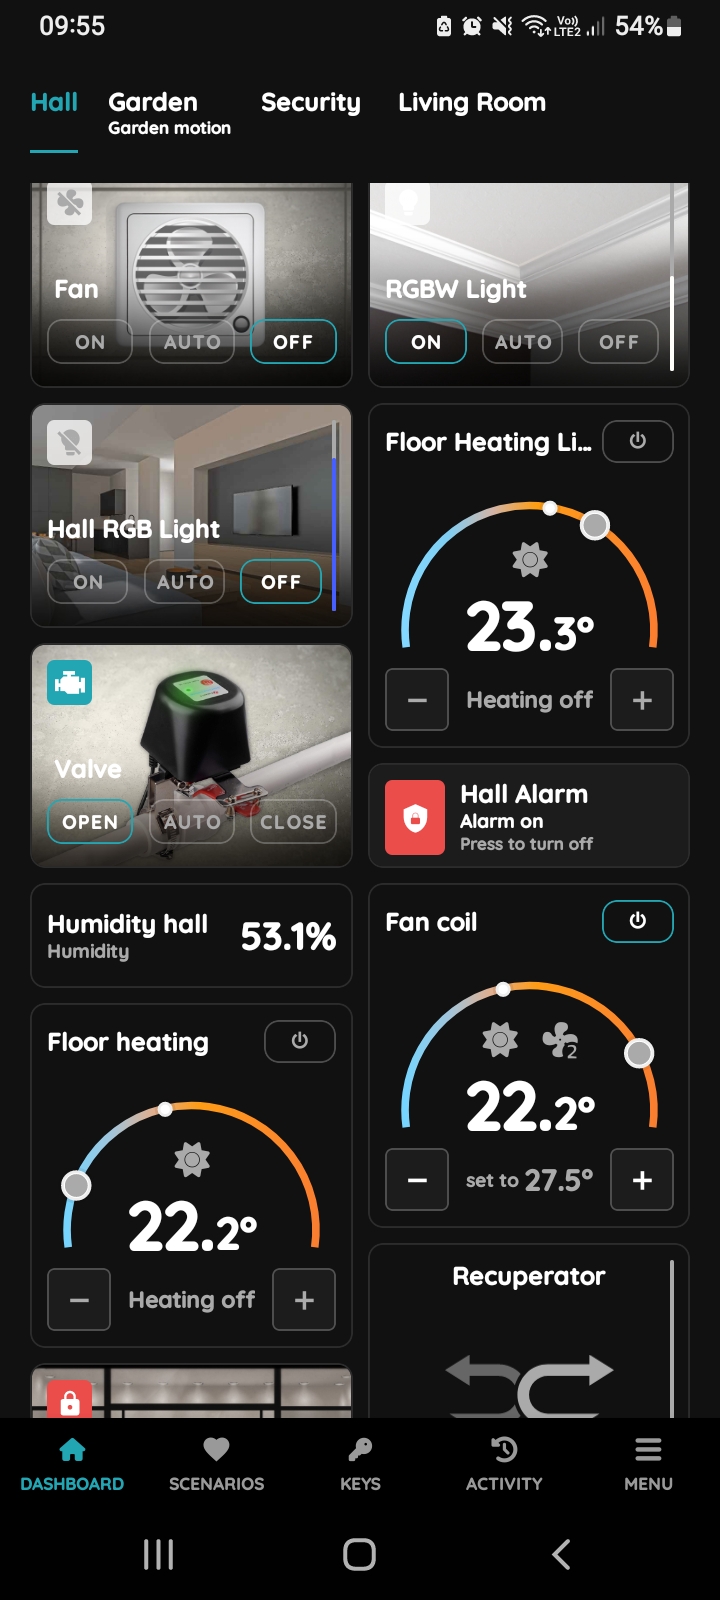
Turn the Passive heating/cooling Off
Tap the Power button again to turn Passive Heating/Cooling Off.
When the function is turned off, the target temperature controls are no longer displayed.
The current measured room temperature remains visible on the card.
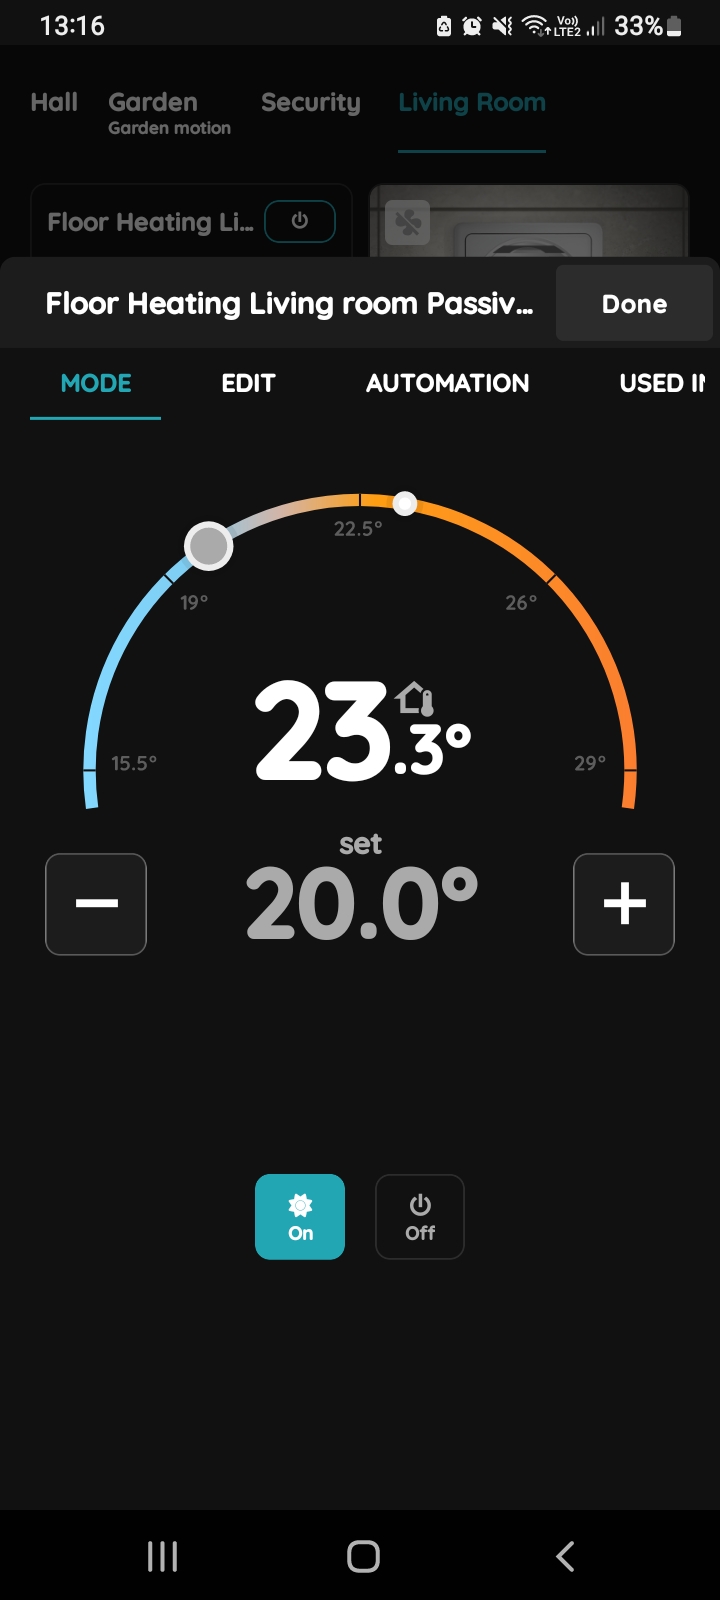
Mode - Heating On - Passive cooling/heating
Use the + / - buttons to adjust the target temperature. With each tap, the target temperature increases or decreases according to the configured Target step.
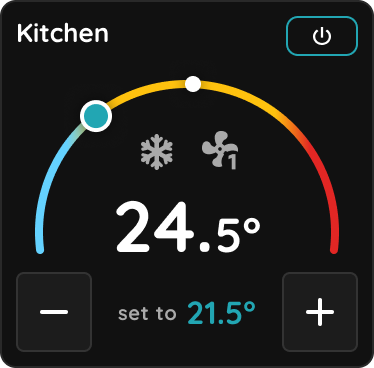
The current room temperature is displayed in larger white numbers, while the target temperature is shown in smaller grey numbers when heating or cooling is turned On.
On the temperature slider, blue represents the cooling range, while orange represents the heating range. The smaller circle indicates the current measured temperature, while the larger circle represents the target temperature. Tap and drag the larger circle along the slider to adjust the target temperature.
Tap On to activate heating or cooling. In Heating mode, a sun icon is displayed on the button. In Cooling mode, a snowflake icon is displayed. When activated, the On button turns blue.
Tap Off to deactivate heating or cooling. When selected, the Off button turns blue.
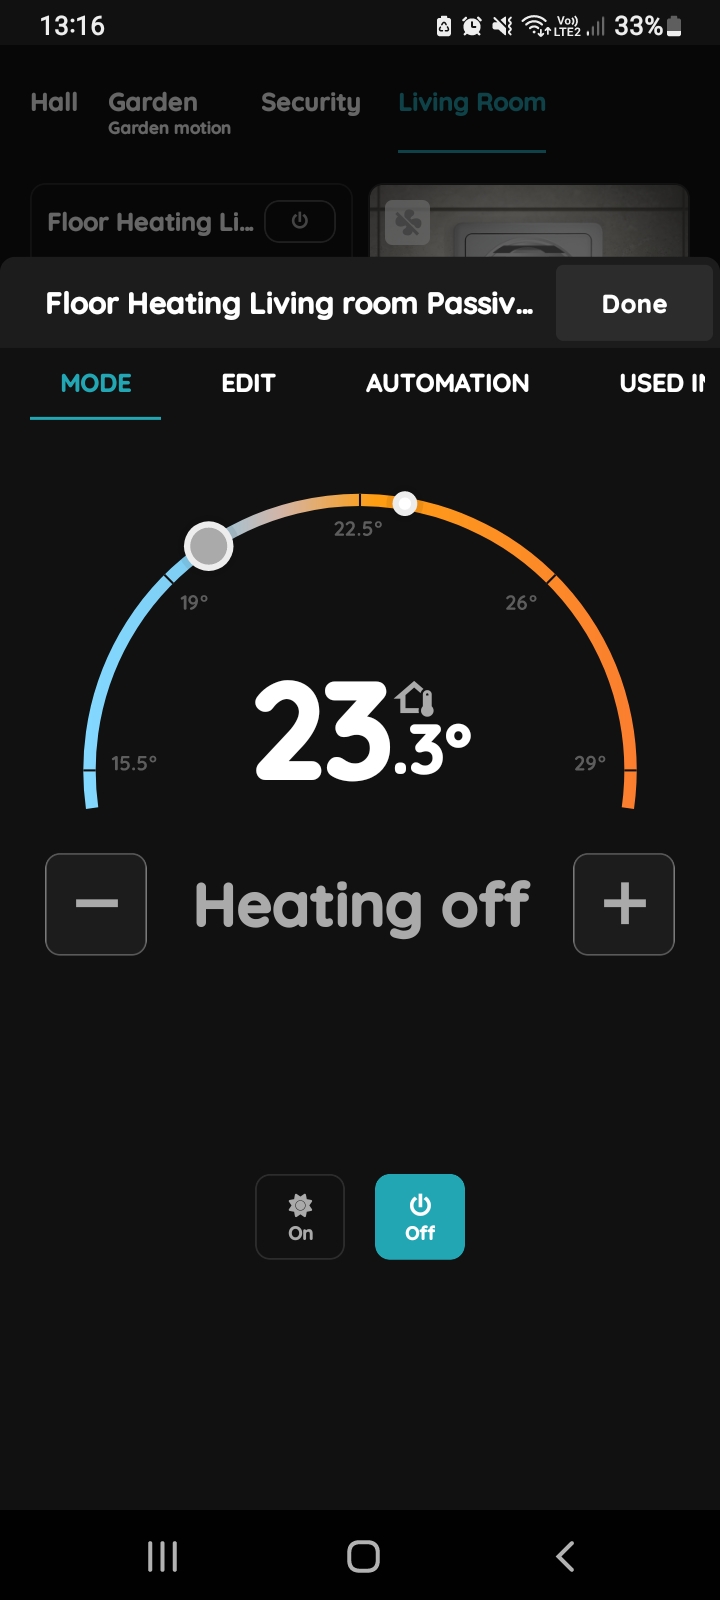
Mode - Heating Off - Passive cooling/heating
To turn Heating Off, tap the Off button.
When heating is turned Off, the target temperature can no longer be adjusted. The current room temperature remains displayed, together with the Heating Off status.
When selected, the Off button turns blue.
Tap Done to confirm.
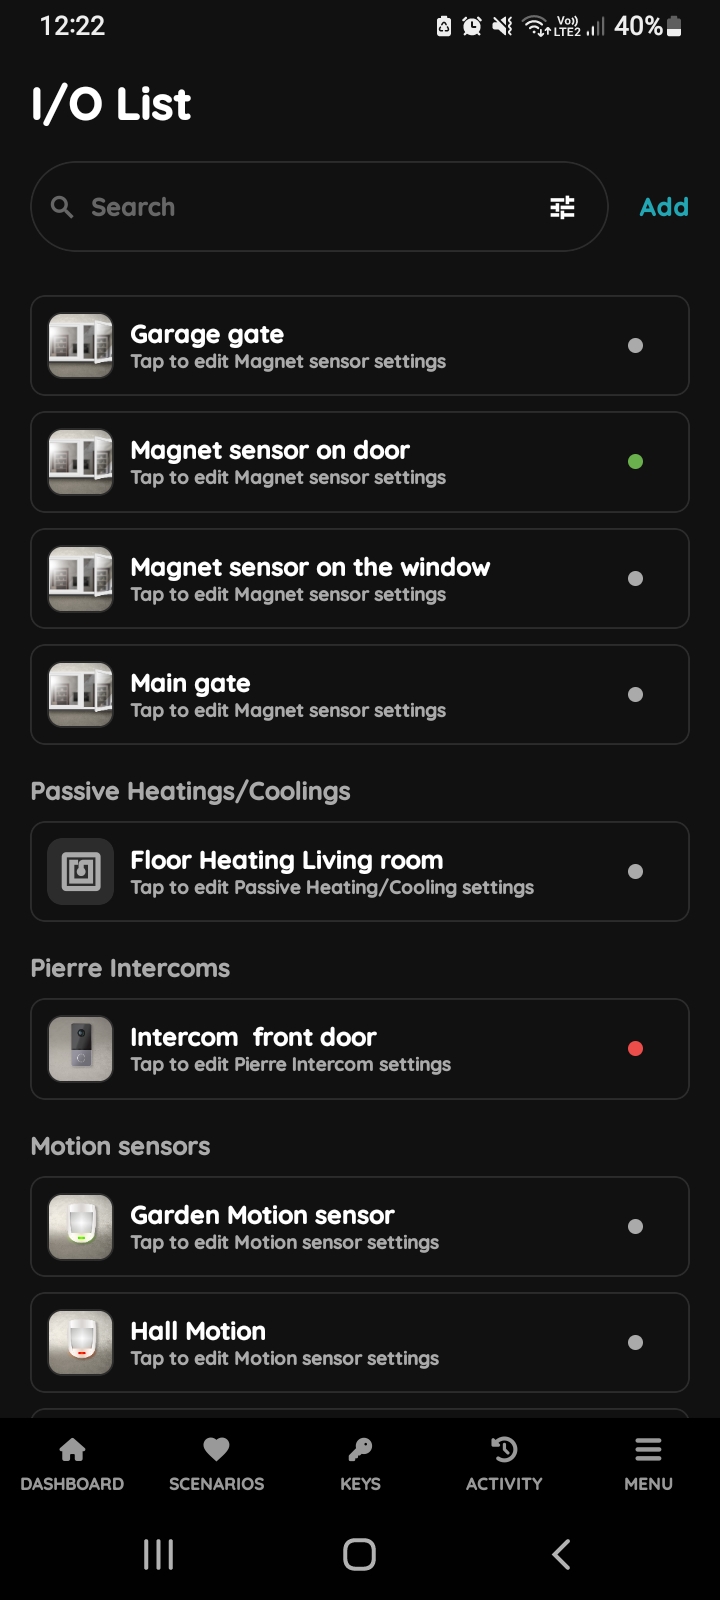
Open I/O list - Passive cooling/heating
Editing Passive Heating/Cooling is simple. Follow the steps below.
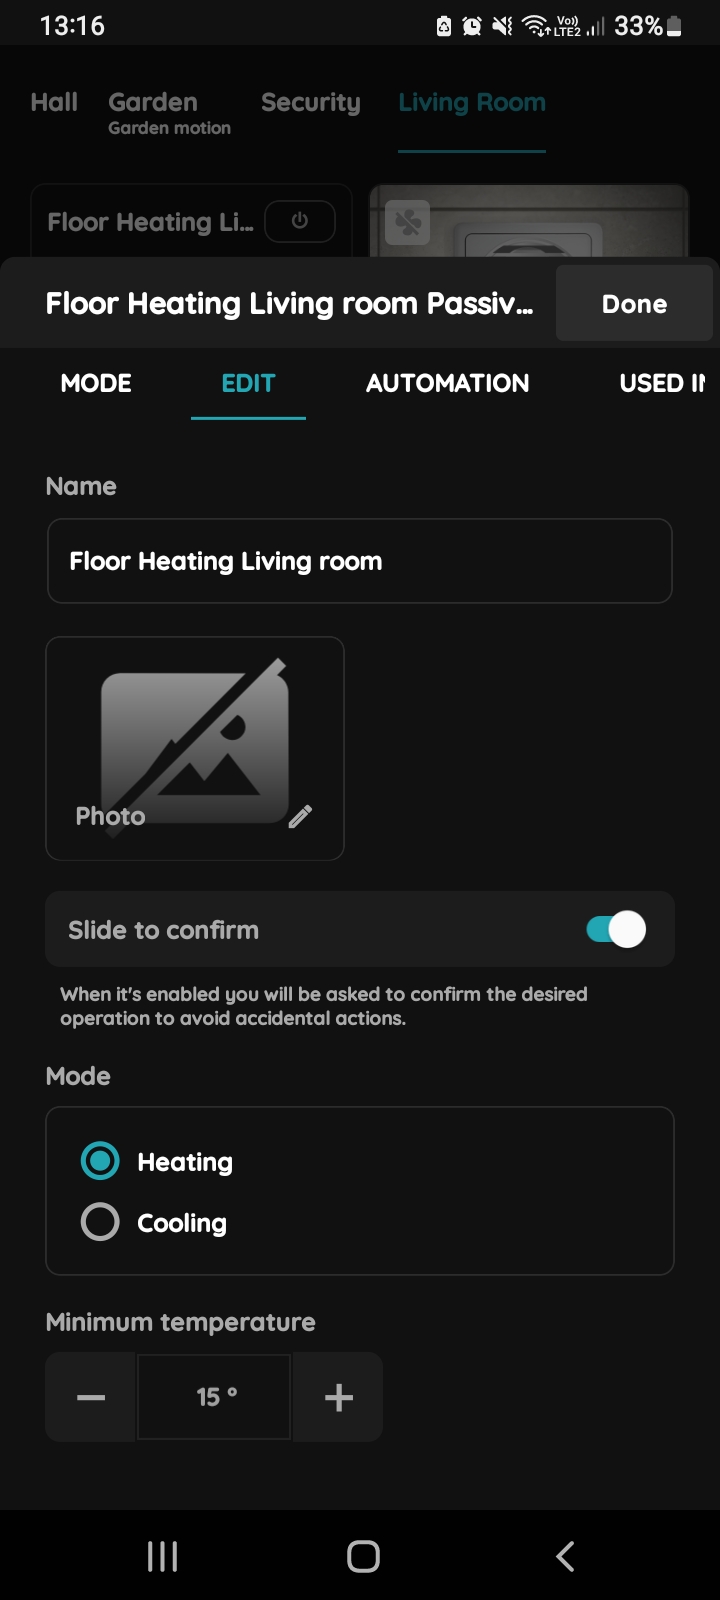
Edit Passive cooling/heating
Tap the Edit tab to modify the Passive Heating/Cooling settings.
The following settings can be edited:
Name – Edit the name of the Passive Heating/Cooling function.
Photo – Select or change the image displayed for the function.
Slide to confirm – When enabled, a confirmation gesture is required before executing the corresponding control action, helping to prevent accidental changes.
Mode – Select Heating or Cooling by tapping the corresponding option.
Minimum temperature – Set the minimum target temperature using the + / - buttons.
Maximum temperature – Set the maximum target temperature using the + / - buttons.
Target step – Define how much the target temperature increases or decreases with each adjustment.
Temperature format – Select Celsius or Fahrenheit.
Temperature sensor – Select the temperature sensor used to measure the temperature of the controlled room or zone.
Tap Submit or Done to save your changes.
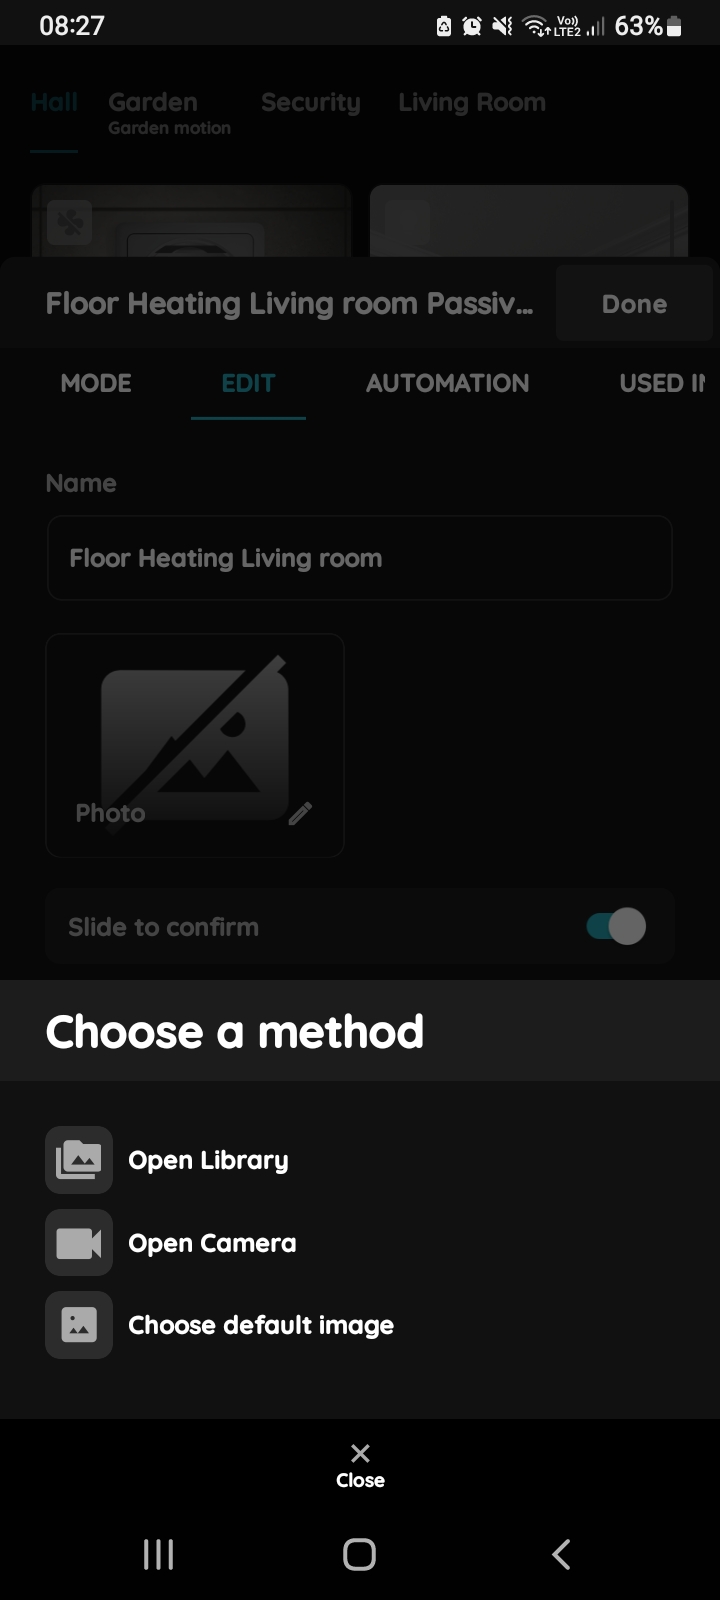
Change photo - Passive heating/cooling
Tap the Photo of the Passive Heating/Cooling function. You can choose from three options:
Open Library – Select an existing image from your phone’s photo library.
Open Camera – Take a new photo using your smartphone’s camera.
Choose default image – Select one of the predefined PIERRE images.
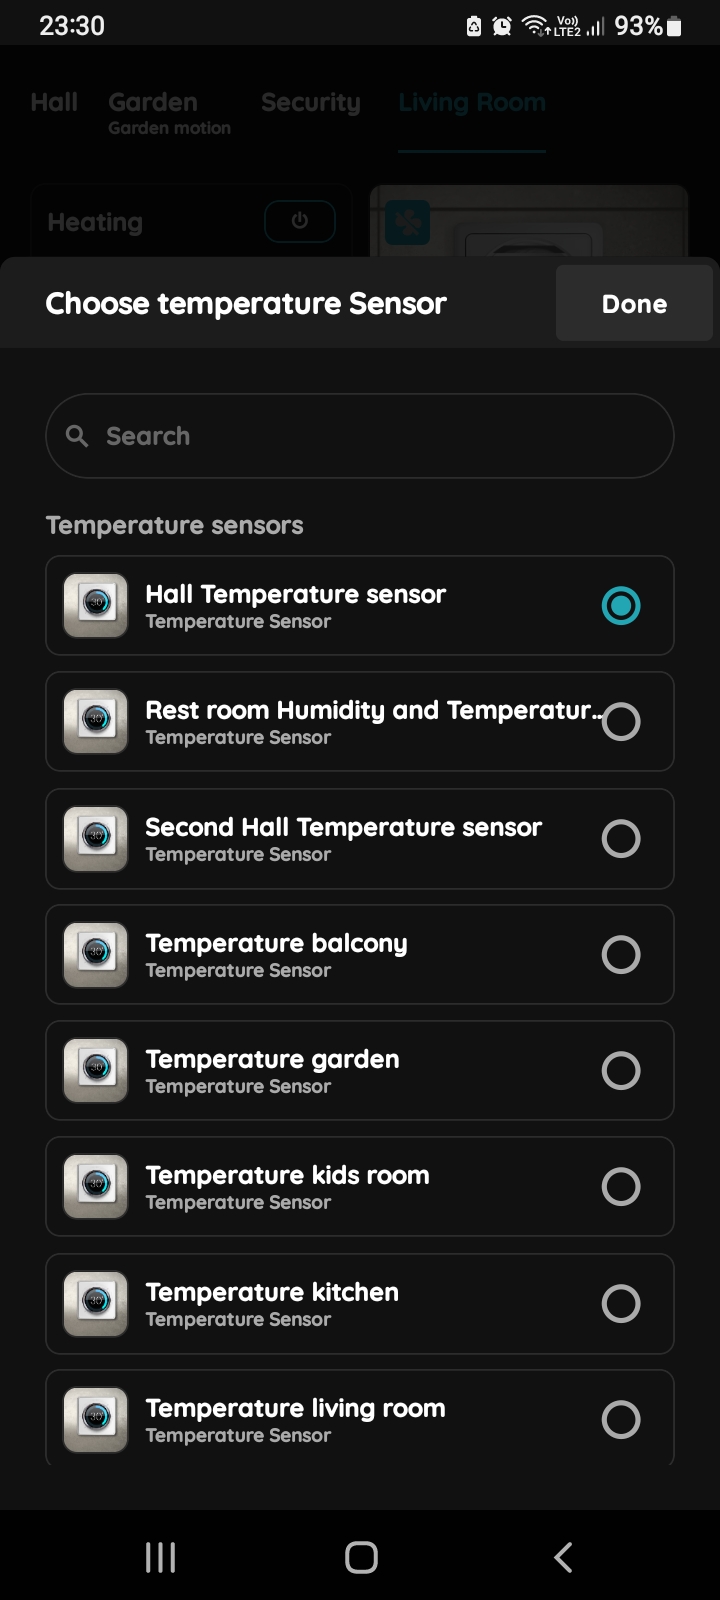
Choose Temperature sensor
Select the desired Temperature Sensor by tapping the corresponding radio button.
Tap Save or Done to confirm your selection.
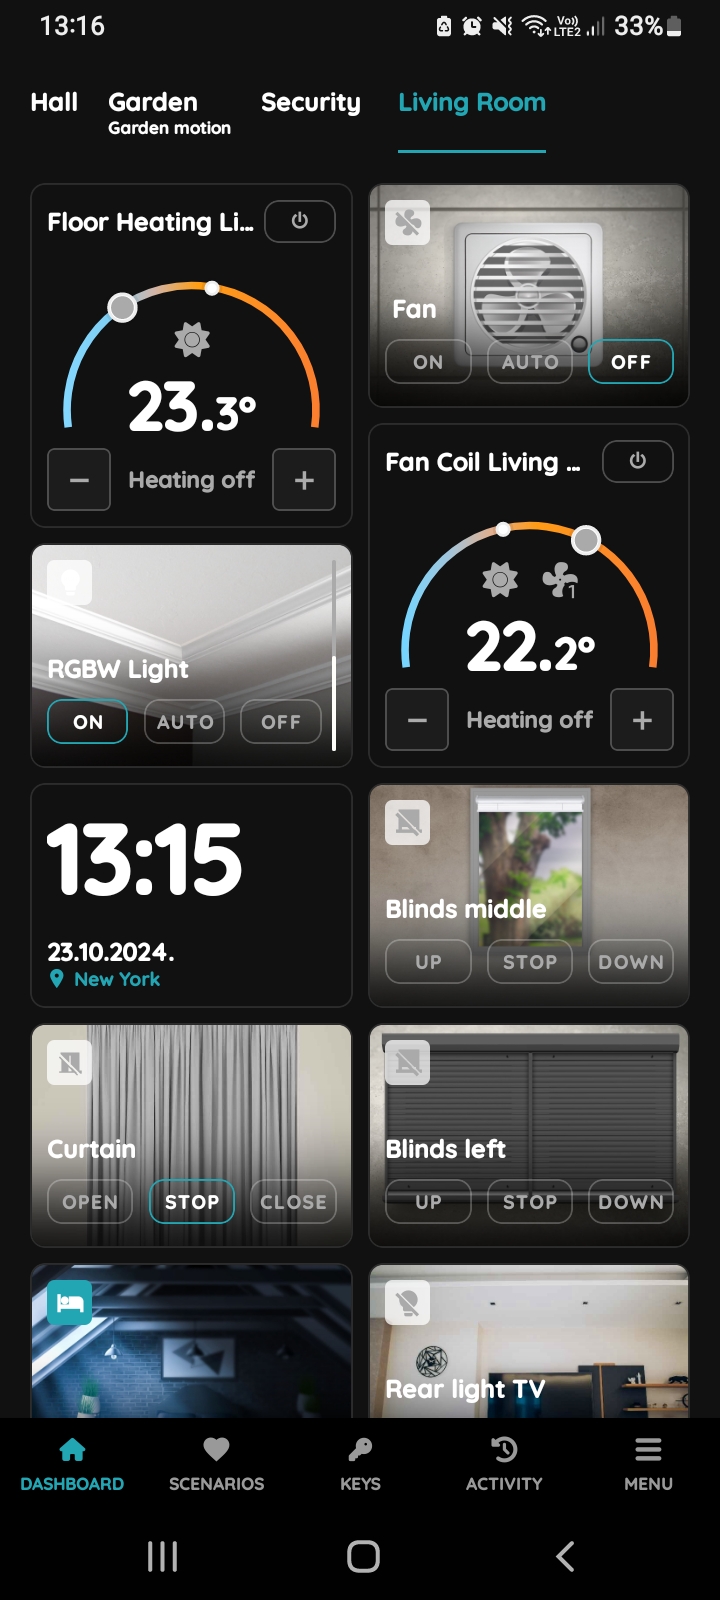
Find Passive/heating cooling on the Dashboard
If the temperature measured by the Temperature Sensor falls below the configured target temperature, the heating system can be activated automatically. For example, the corresponding floor heating Valve can open to allow warm water to flow through the heating circuit.
If a Window Contact Sensor detects that a window is open, the Valve can automatically close to prevent unnecessary heating and reduce energy consumption.
The automation can also be combined with a schedule, for example, to operate only between 6:00 AM and 10:00 PM.
By combining temperature, window status, and time-based conditions, the heating system can operate automatically according to the actual conditions in the room.
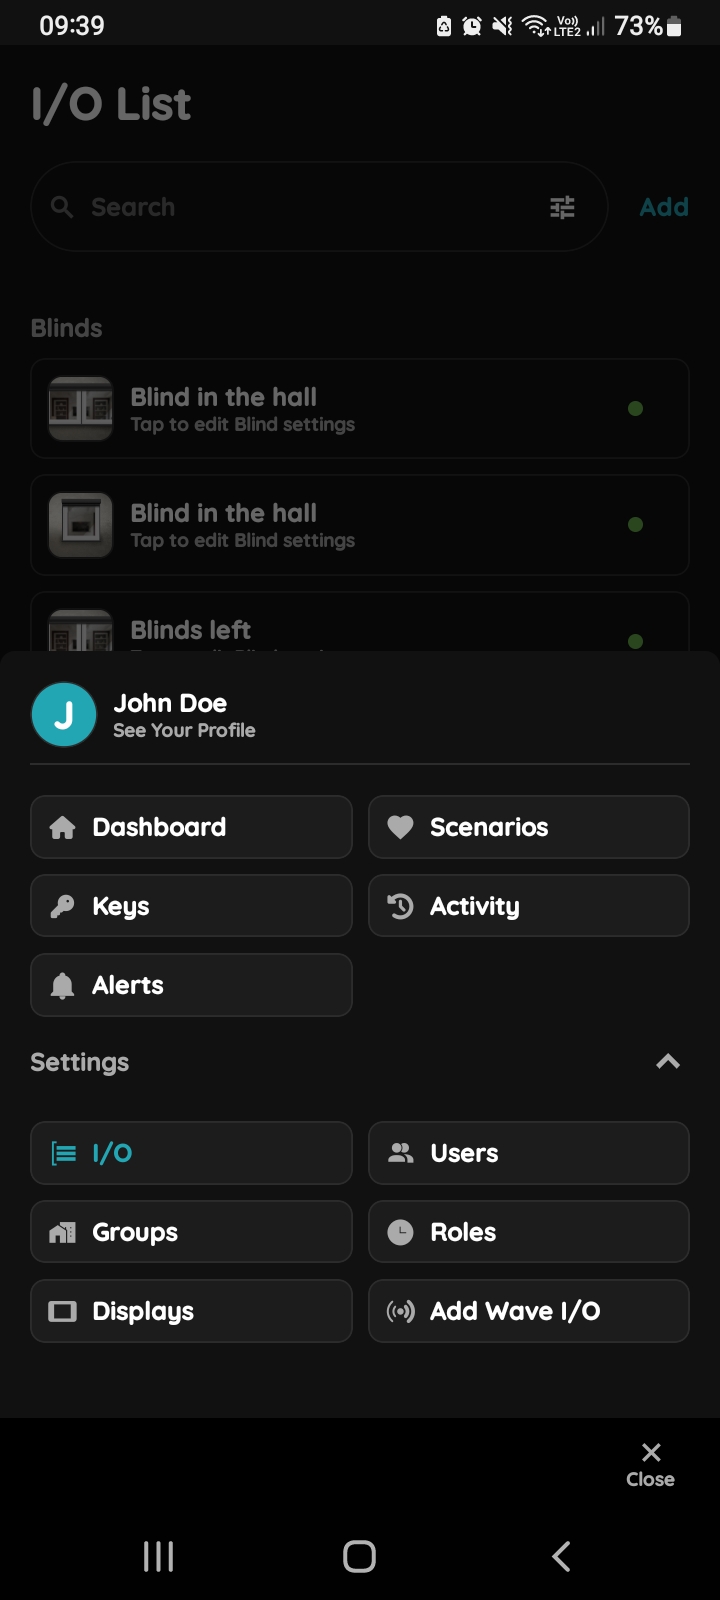
Open I/O
In the Menu, under Settings, tap I/O.
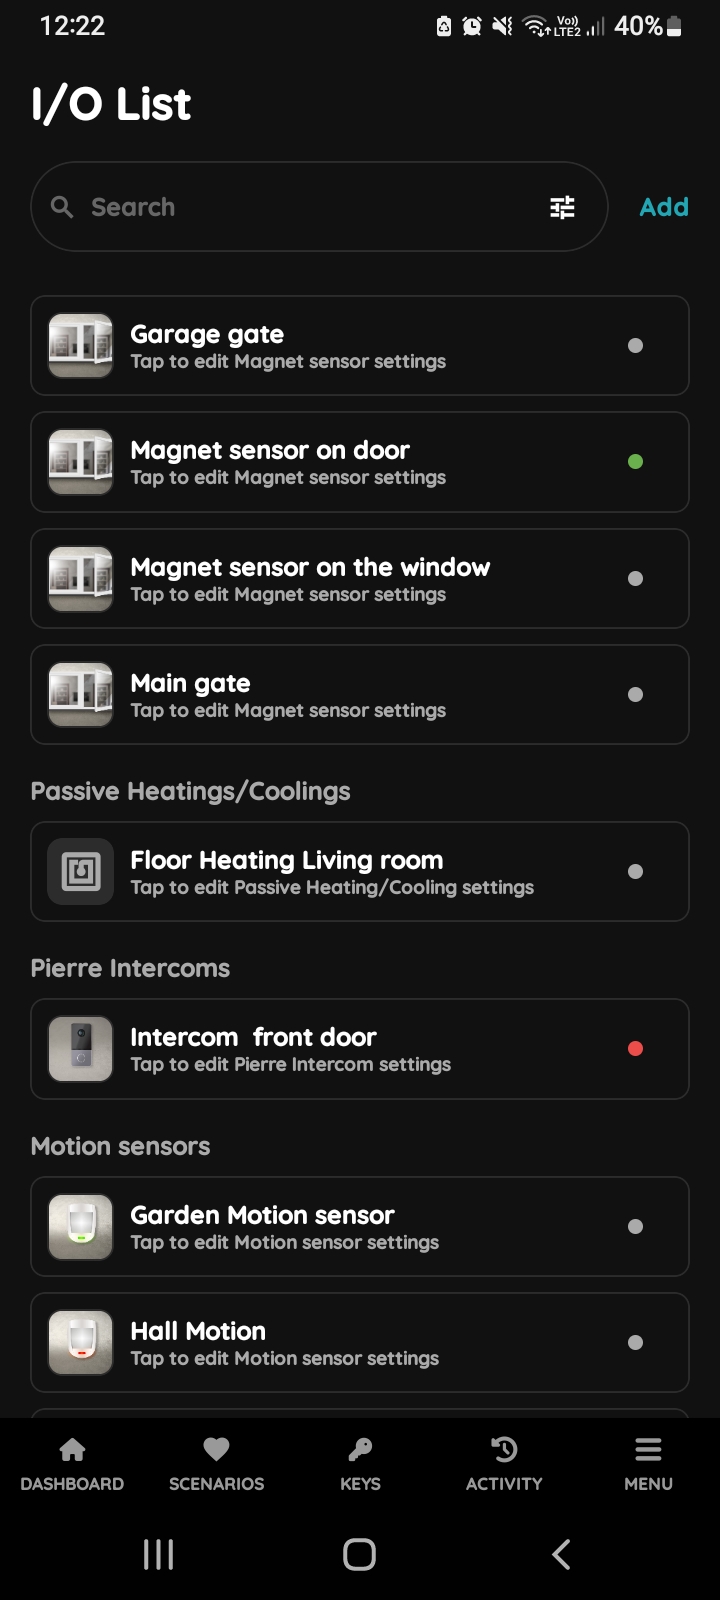
Open I/O list - Passive cooling/heating
Scroll to Passive Heating/Cooling and select the desired function from the list.
In this example, select Passive Heating/Cooling – Living Room.
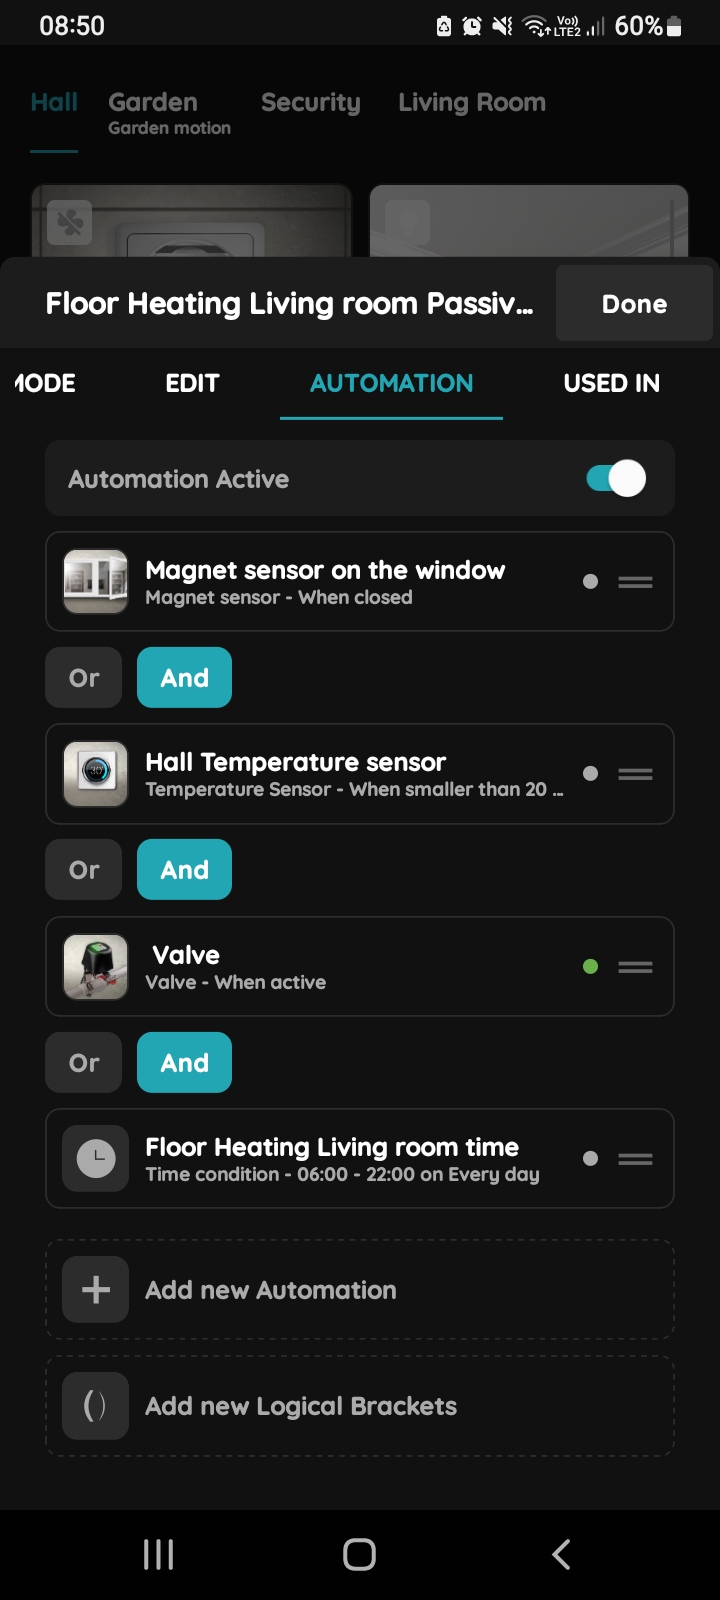
+Add new Automation - Passive cooling/heating
Tap the Automation tab, then tap + Add New Automation.
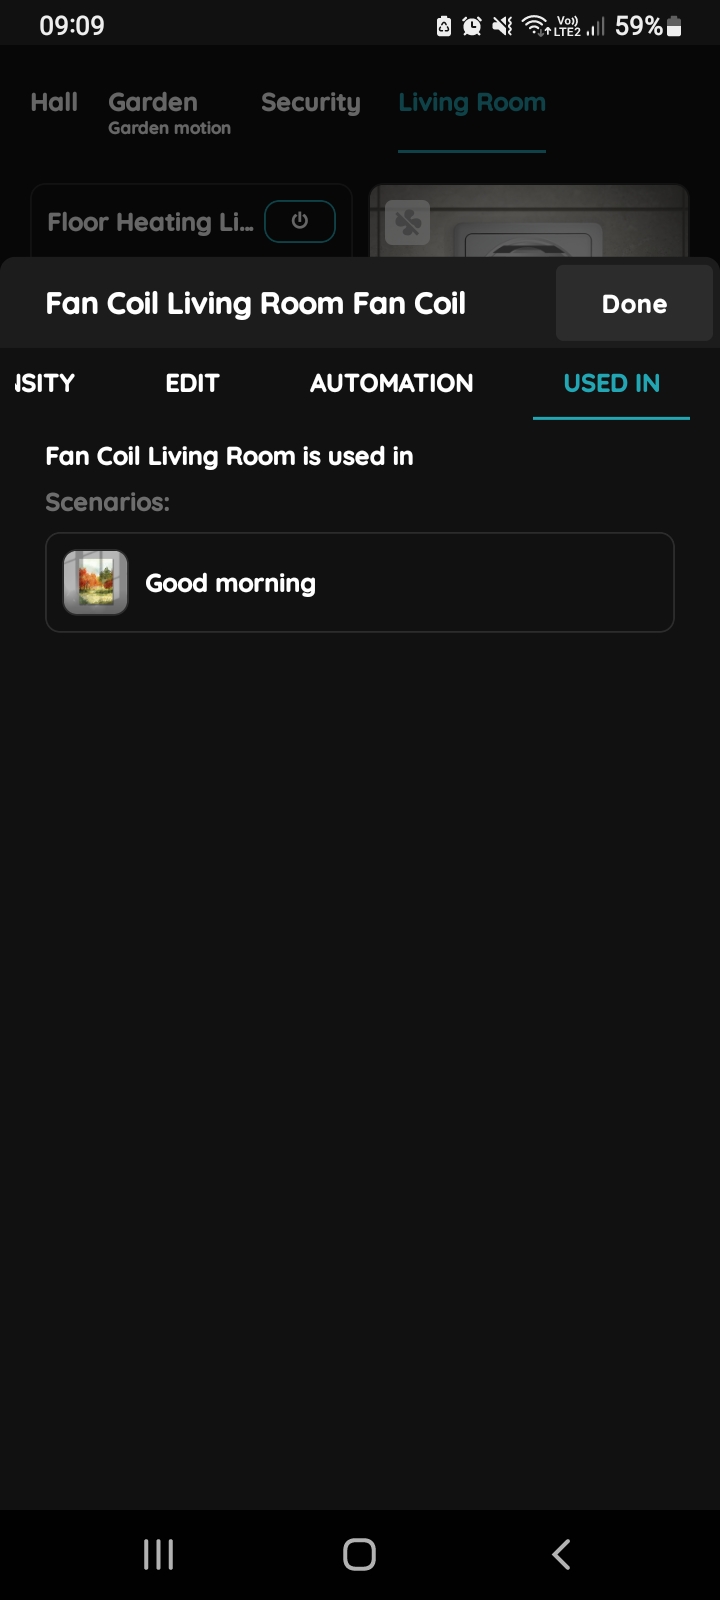
Used In - Passive cooling/heating
The Used In tab shows all Scenes and Automations in which the selected Passive Heating/Cooling function is used.
If the function is not used anywhere, the list will be empty and the following message will be displayed: “This I/O is not in use anywhere.”
This makes it easy to identify where the selected I/O is used without having to search through individual Scenes and Automations.