Smart PIERRE - Alarm
Description
Alarm – Smart PIERRE Application
Description
The Alarm function in the Smart PIERRE Application allows users to arm and disarm an Alarm configured in the PIERRE system.
Alarms can be accessed from the Dashboard and the I/O list. Sensors and other I/Os can be used in Automations to define the conditions that trigger an Alarm.
Dashboard Control
An Alarm can be armed or disarmed directly from the Dashboard.
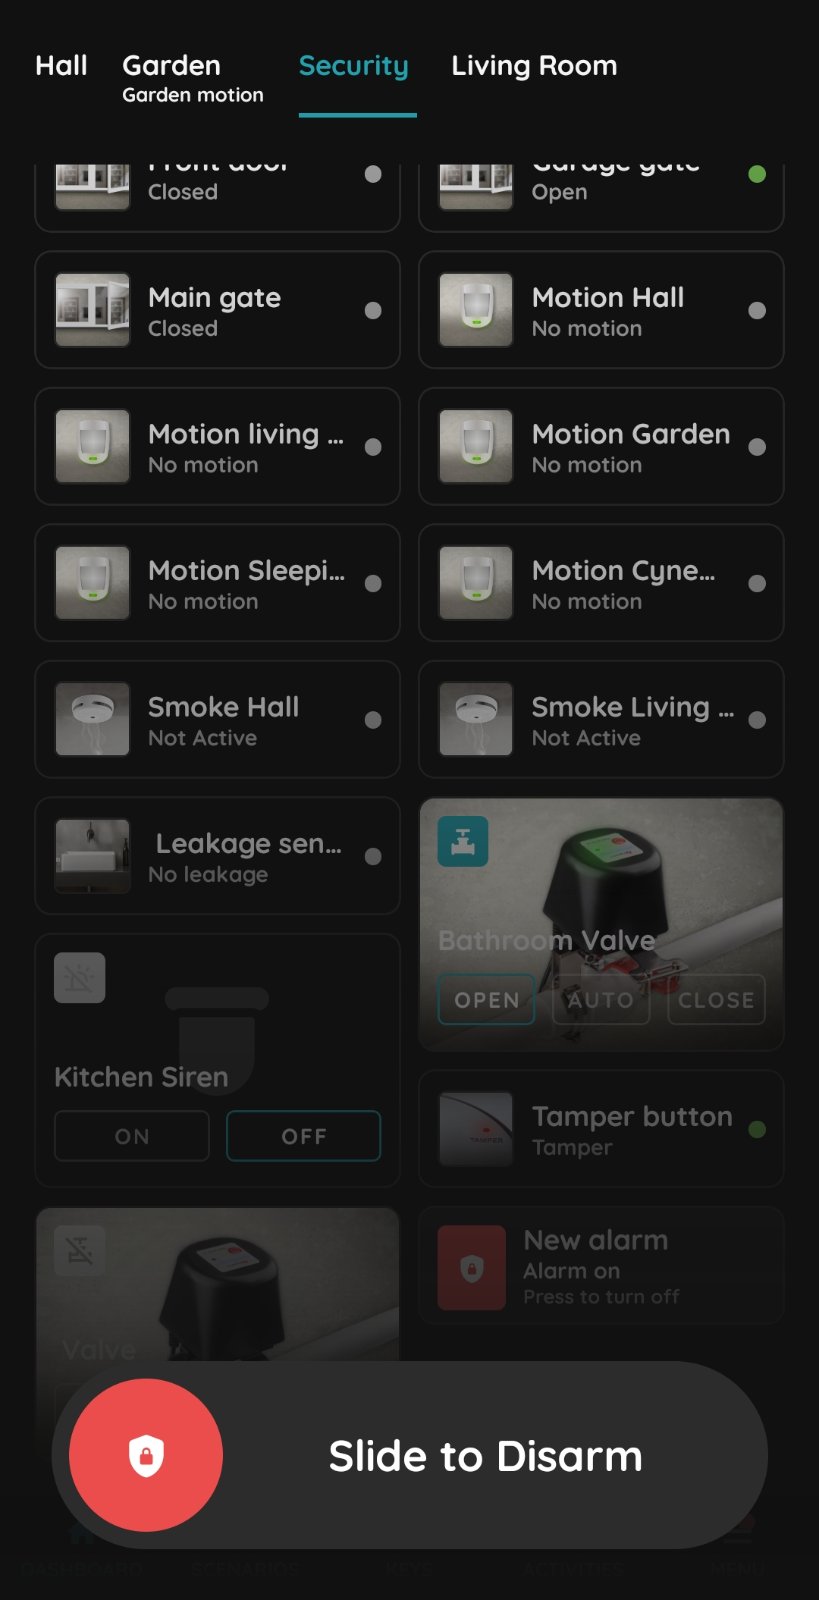
If Slide to Confirm is enabled, the user must confirm the operation by sliding before the Alarm state is changed. This helps prevent accidental activation or deactivation.
Adding and Editing an Alarm
A new Alarm can be created from:
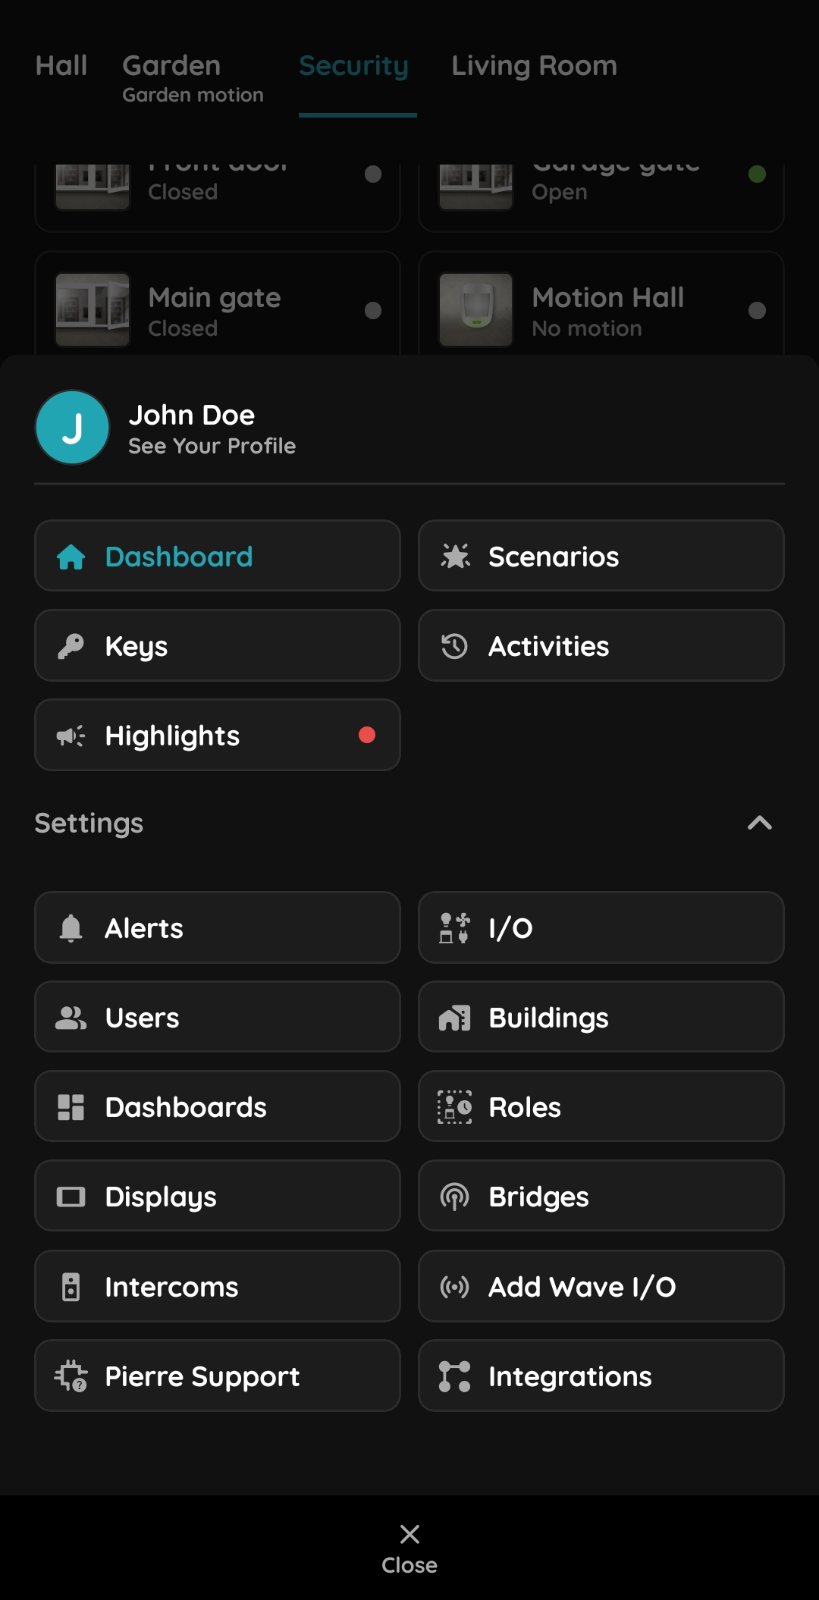
Menu → Settings → I/O → Add
Depending on the configuration, the following parameters can be set:
-
Name
-
Role
-
Group
-
Picture
-
Identifier
-
Timeout
-
Slide to Confirm
Existing Alarms can also be opened and edited from the I/O settings.
Alarm Automation
The conditions that trigger an Alarm can be configured using Automations.
From the Dashboard, press and hold the Alarm card and open Automation.
Different sensors and I/Os can be added as conditions, for example:
-
Motion or presence sensors
-
Door and window contact sensors
-
Smoke sensors
-
Leakage sensors
-
Other compatible sensors and I/Os
Multiple conditions can be combined using AND and OR logical operators. Logical Brackets can also be used to create more complex Automation logic.
When the configured conditions are met, the Alarm can become active and other configured actions can be triggered.
Alerts and Notifications
To receive a notification when an Alarm is triggered, create an Alert from:
Menu → Settings → Alerts
When creating an Alert, configure:
-
Name
-
Role
-
Message Body
-
the required notification type.
Available notification options include:
-
Show only on Activities tab – Creates an event in the Activities tab.
-
Push notification – Sends a push notification to the user's mobile device.
-
Receive a phone call – Initiates a configured notification call to the user's mobile device.
After creating the Alert, open its Automation settings and add:
Alarm → When active
as the trigger condition.
This allows the Alert to be generated when the selected Alarm becomes active.
Alarm Actions
Alarm events can also be combined with other PIERRE functions through Automations.
Depending on the installed and configured devices, an Alarm event can, for example:
-
switch on lighting,
-
activate a Siren,
-
control compatible Doors or Gates,
-
trigger other configured I/Os,
-
initiate additional Automation actions.
The exact available actions depend on the devices and functions configured in the PIERRE system.
Important Notice
The PIERRE system is a building automation and smart home control system. It is not a certified fire alarm, gas detection, intrusion alarm, life-safety, or emergency warning system and must not replace certified safety or security systems where such systems are required.
Alarm functions, Alerts, notifications, and automated actions may depend on the system configuration and the availability of the required power, network, internet, cloud services, and connected devices.
All connected safety-related devices must retain their required independent or manufacturer-provided safety functions.
Create Alarms and Alerts
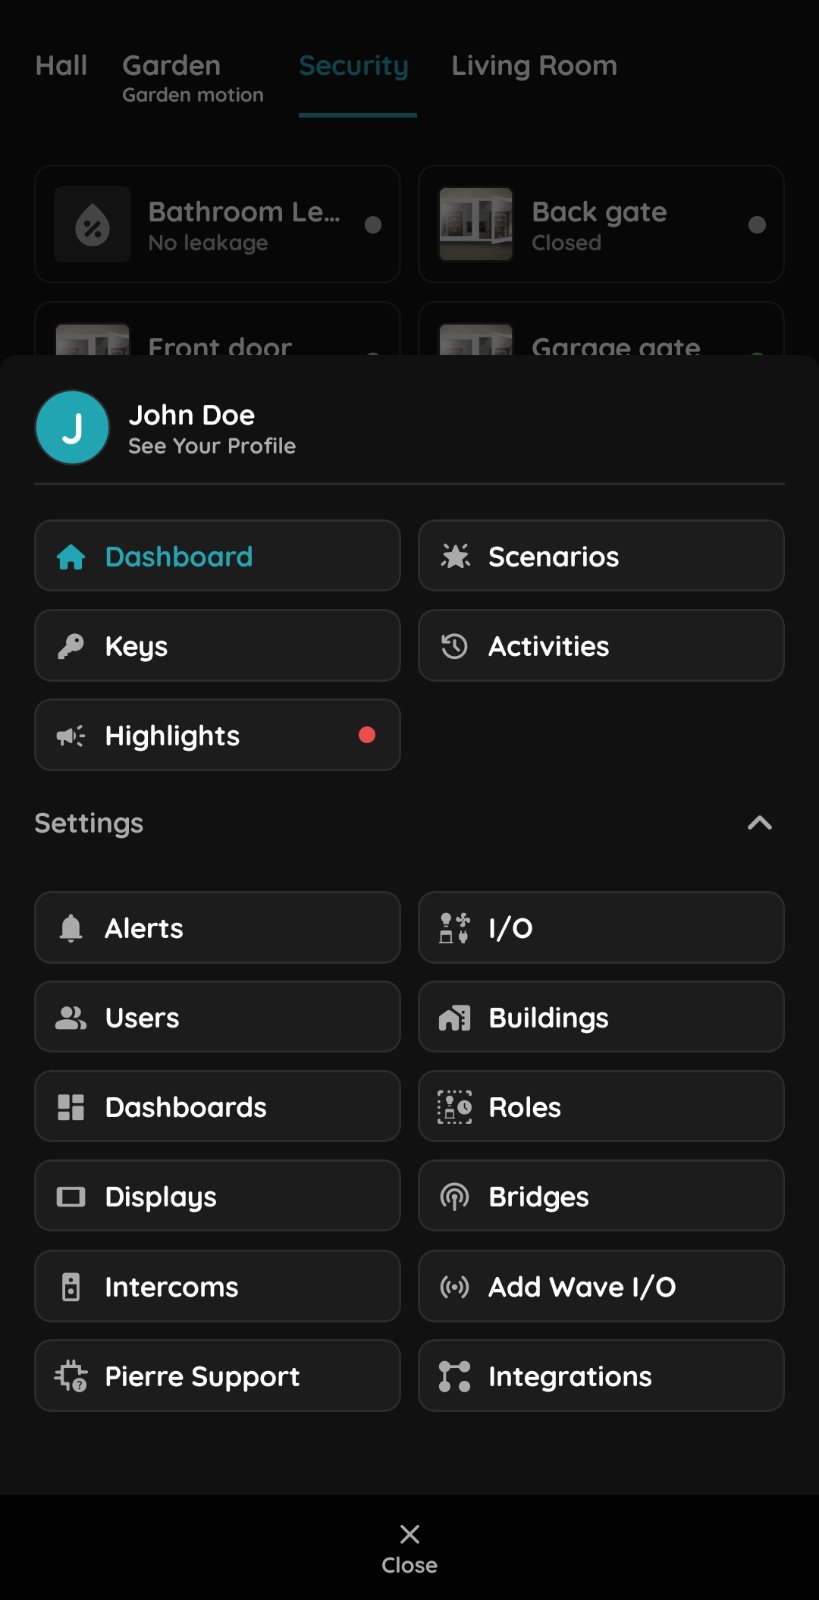
Create Alarm
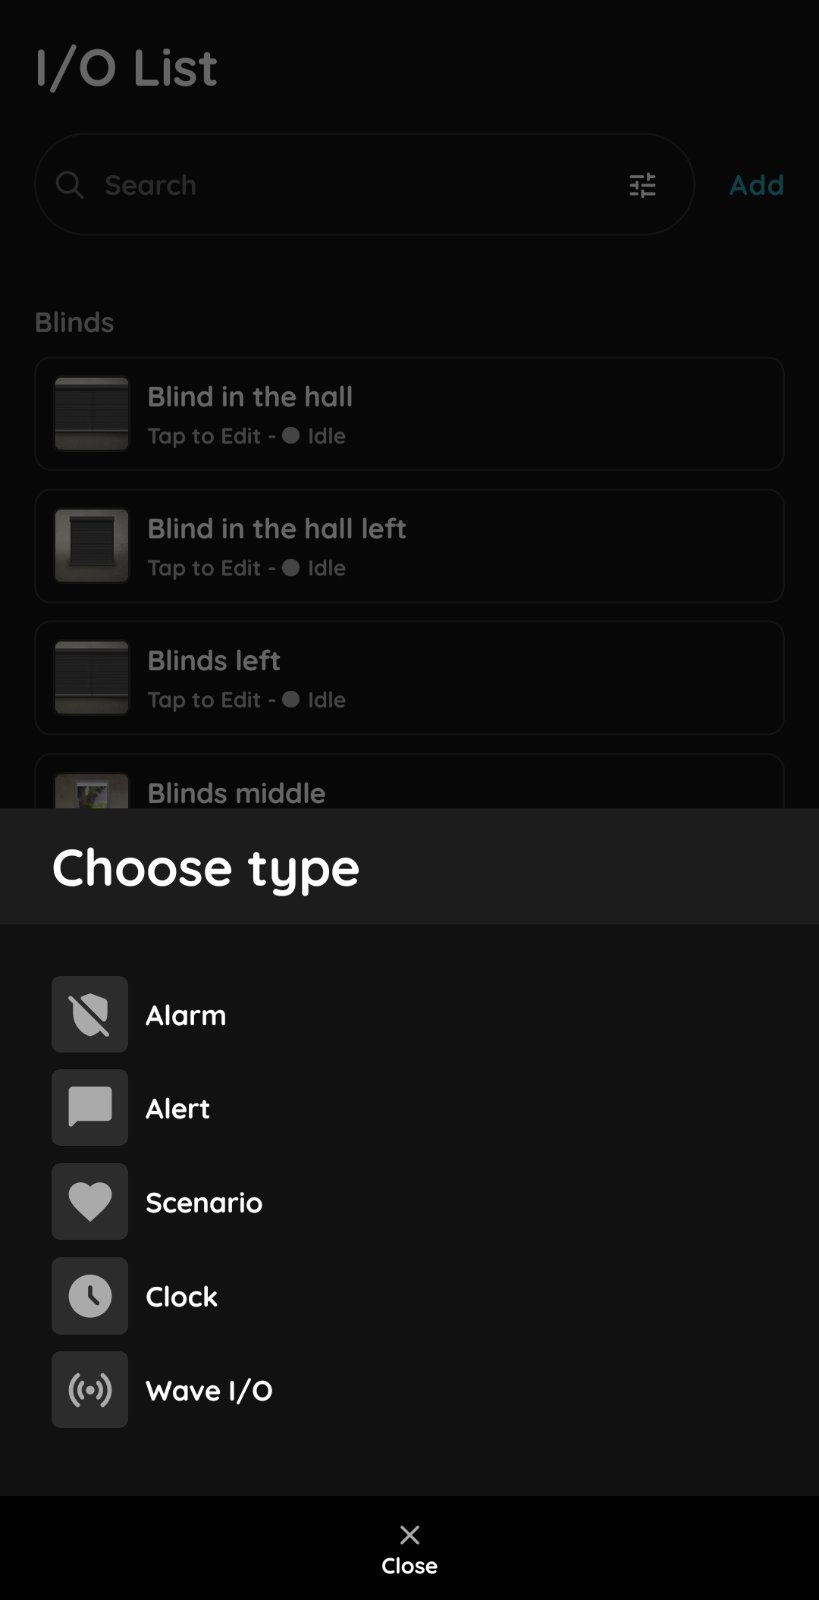
Choose type
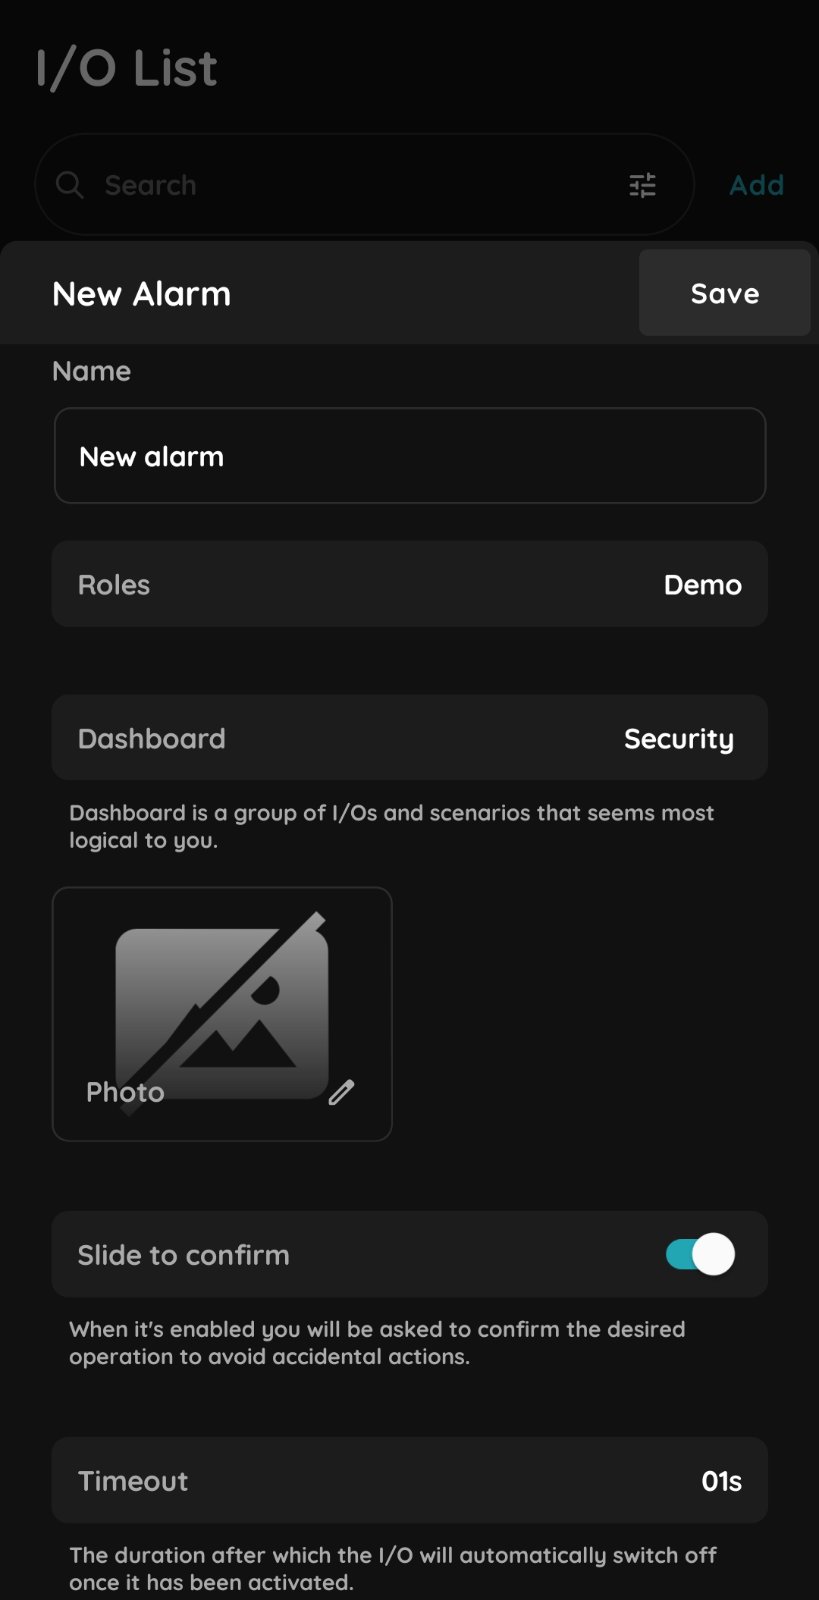
Basic settings
Set the devices that will trigger the alarm
Set the devices that will trigger the Alarm.
You can add any devices that can trigger the Alarm, including: motion sensors, contact sensors, tamper sensors, and flood, smoke, and gas sensors.
Device settings
Set up the automation
Slide to confirm
Set up the Alert
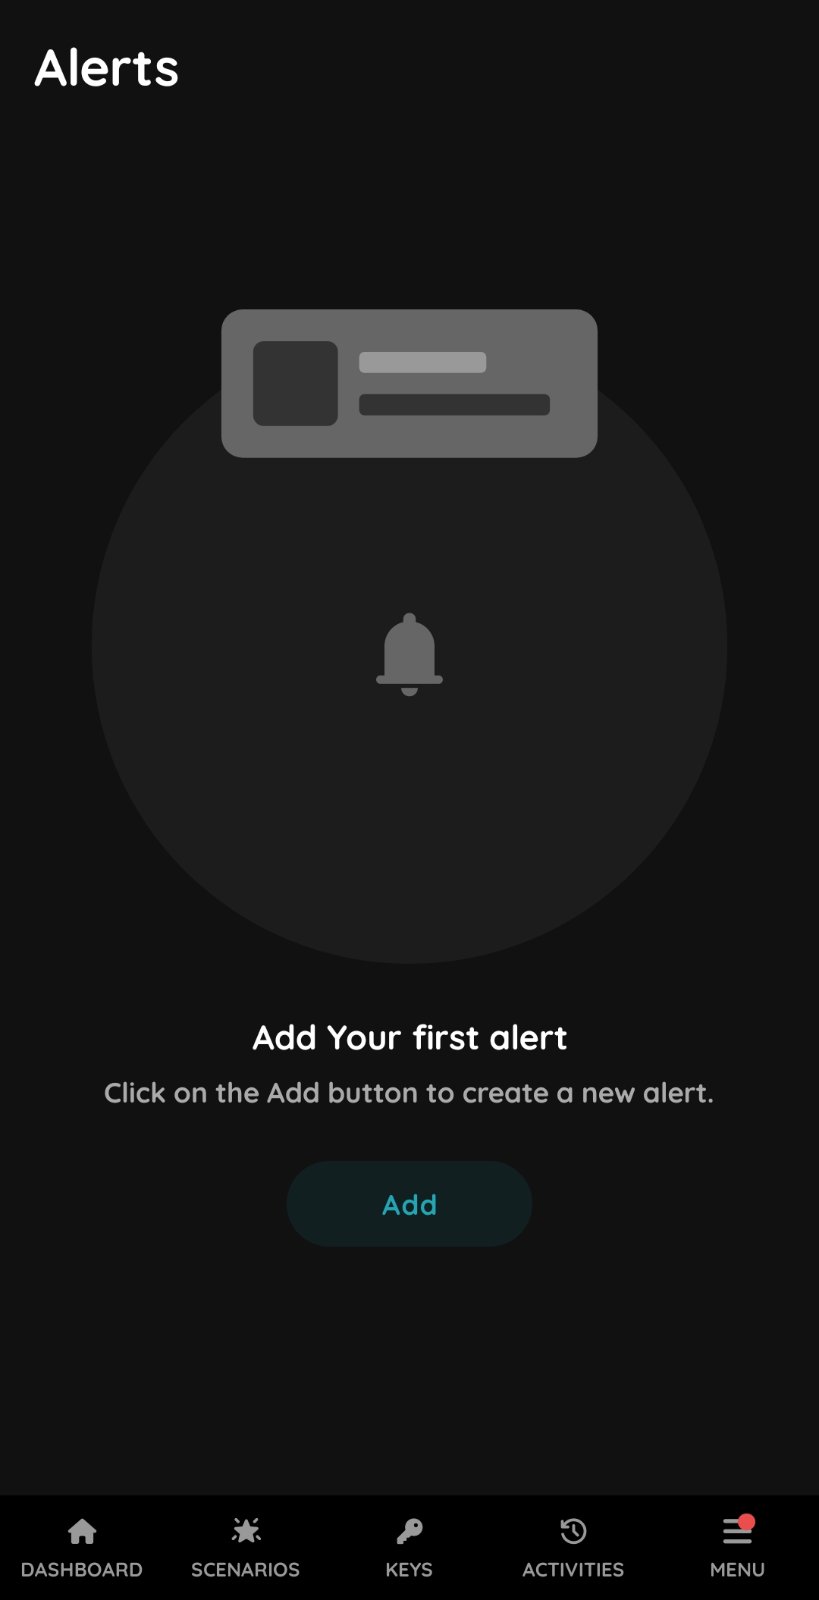
Set up the Alert
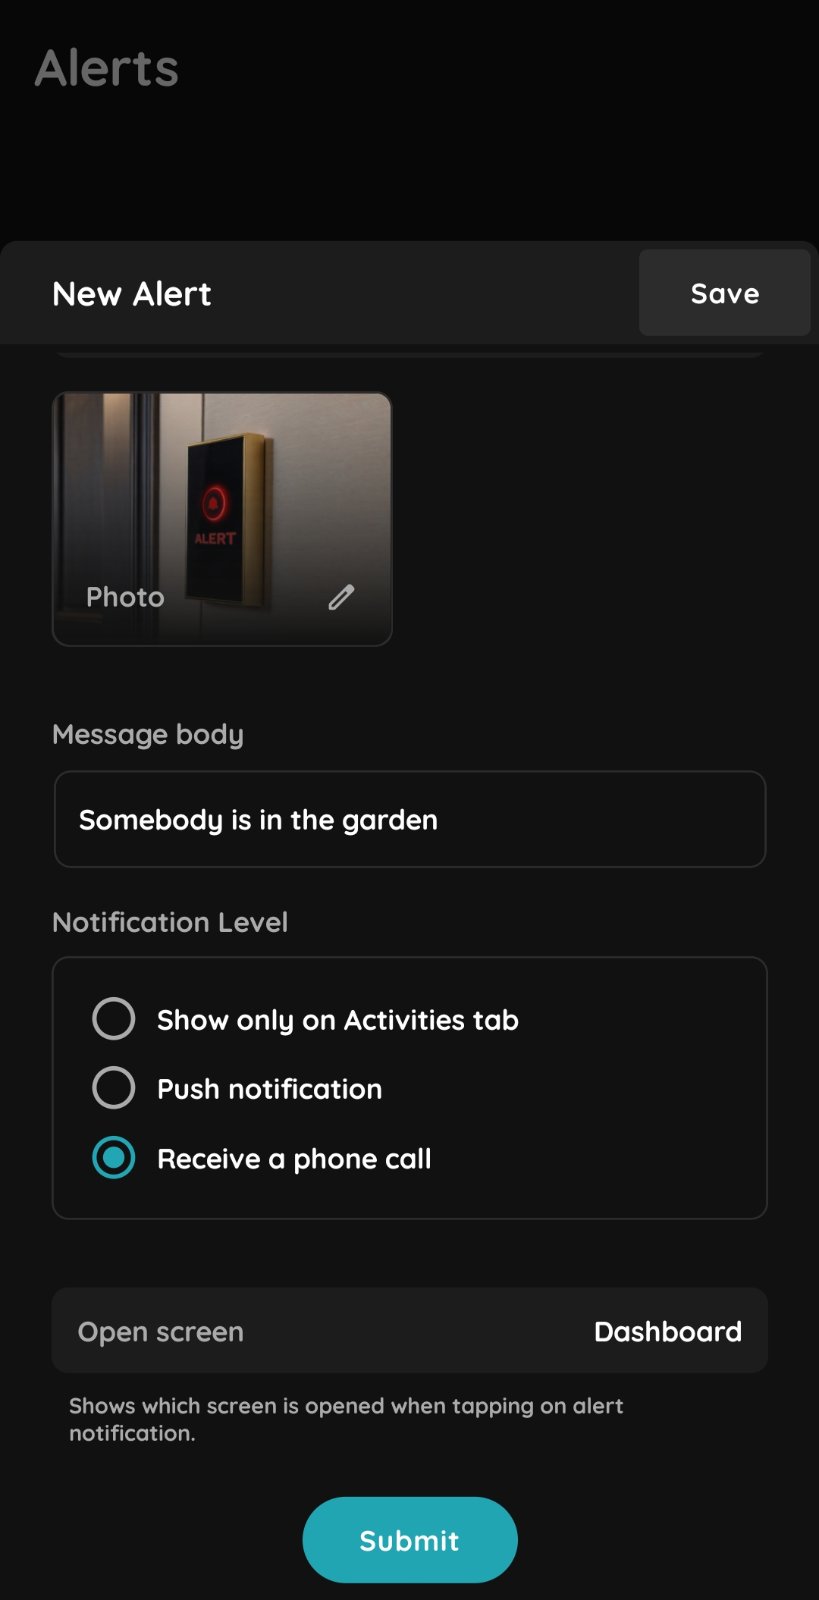
New Alert
In the Message Body field, you can define the message that will be sent when the alarm is triggered.
There are three types of notifications:
- Show only on Activities tab – Creates a record in the Activities tab.
- Push notification – Displays a yellow push notification on your mobile phone.
- Receive a phone call – Your mobile phone will ring and play the previously configured message. The call uses an internet connection, so no additional charges will be applied to your mobile subscription.
Open screen - select the screen that will open when you tap the alert notification.
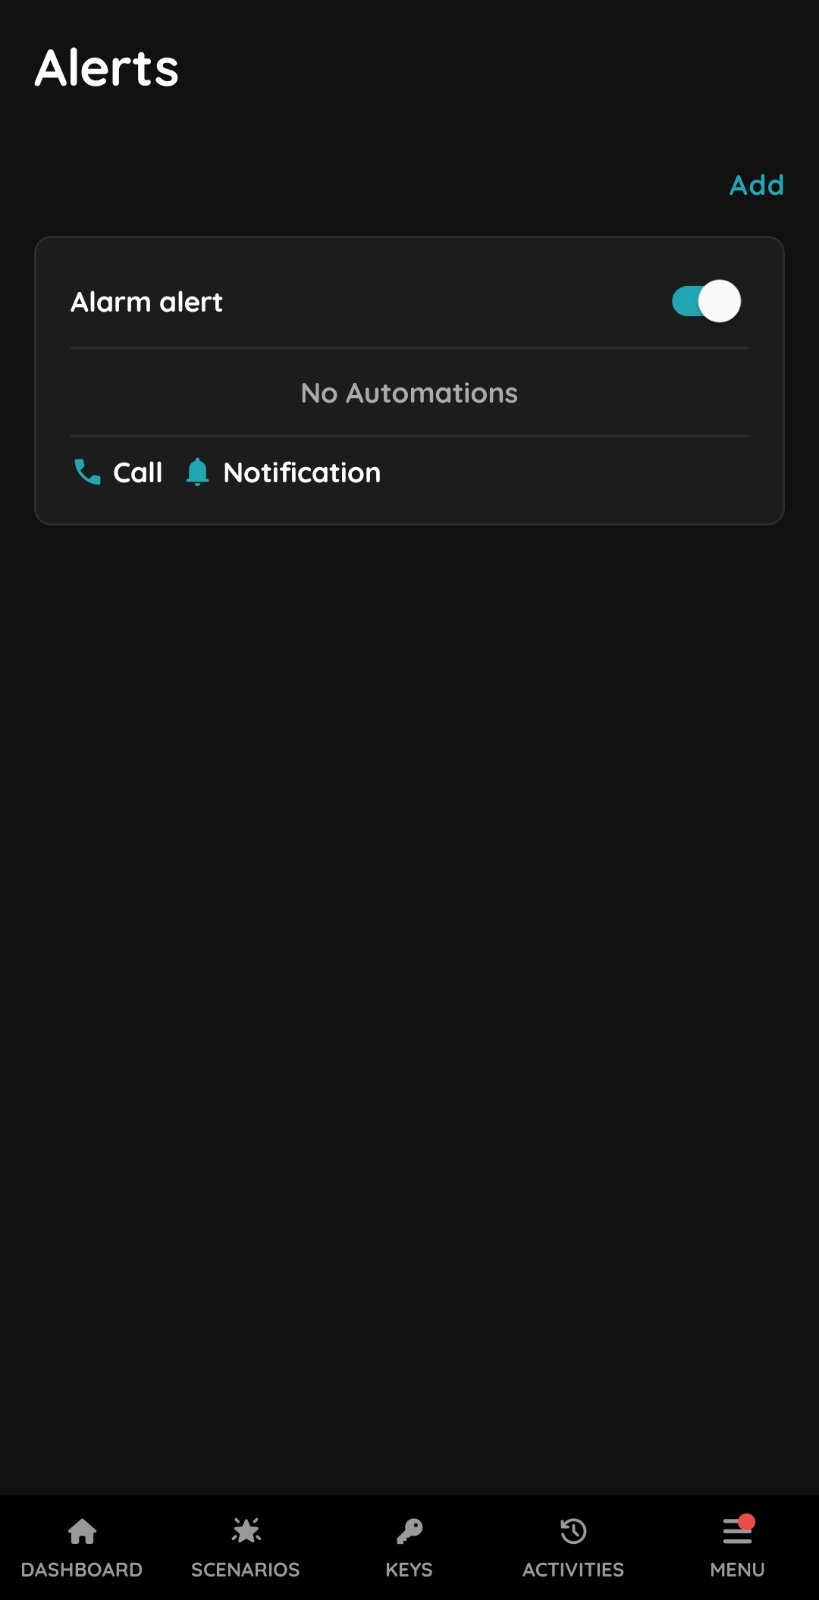
Edit Alerts automation
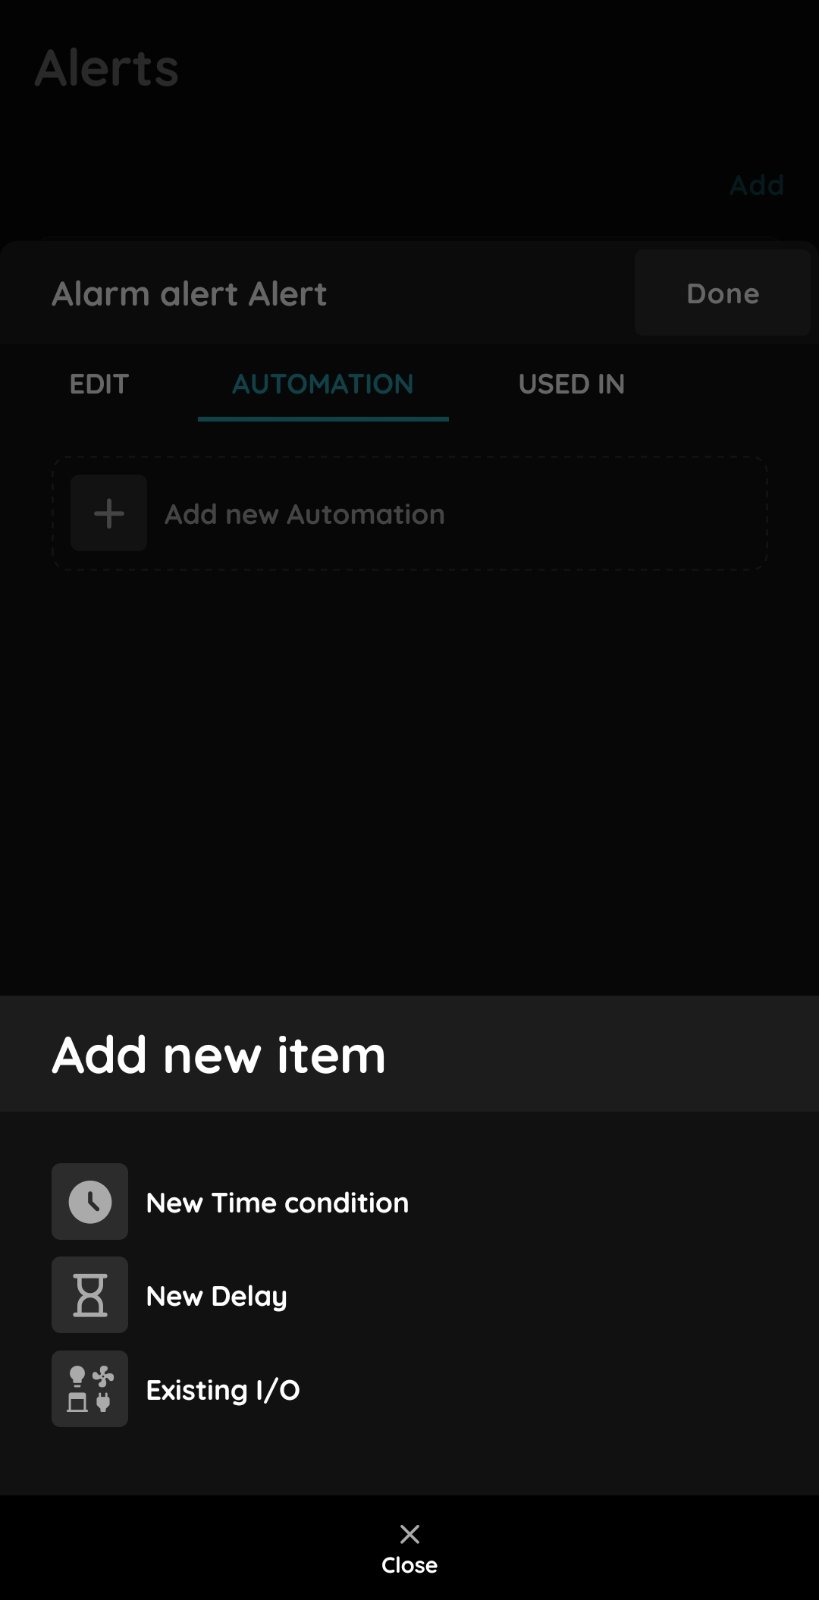
Edit Alerts automation
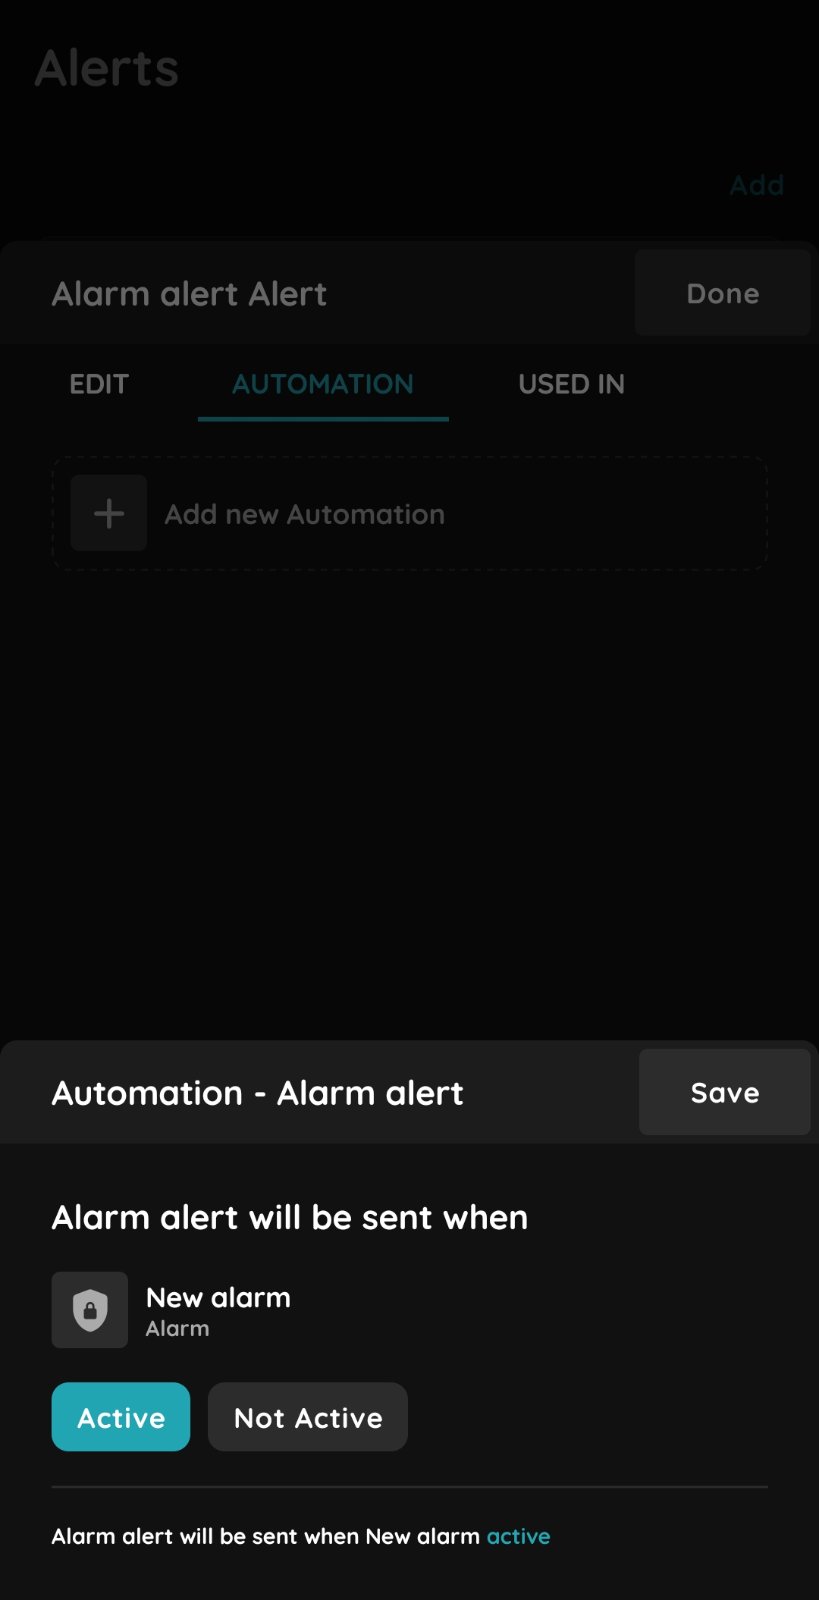
Edit Alerts automation
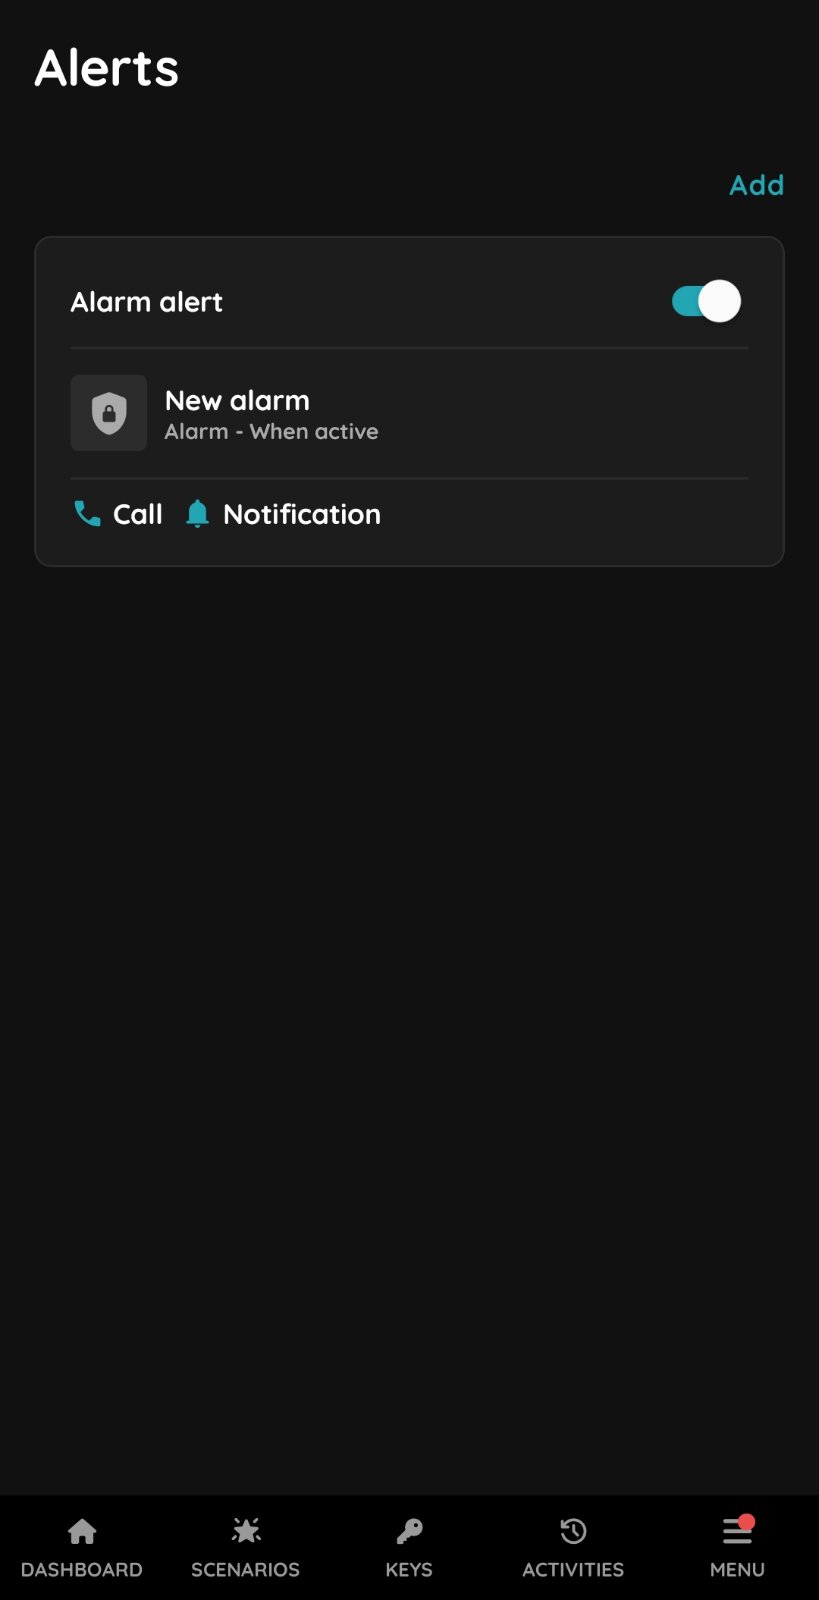
Alarm setup is finished
Control and Edit the Alarm from the Dashboard
Alarm control is quick and simple, managed directly from the Dashboard.
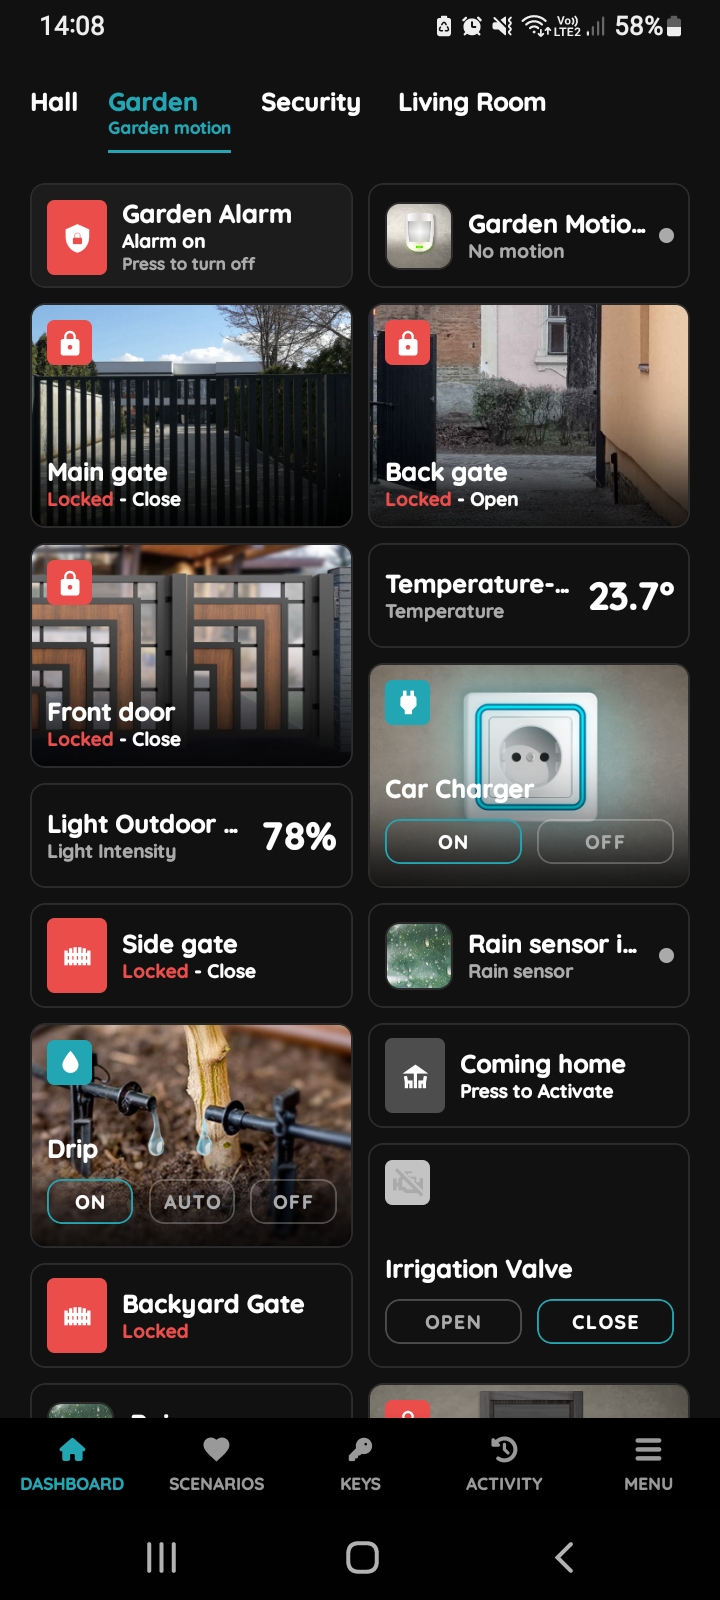
Turn On/Turn Off Alarm
There are two ways of controlling the Alarm:
- Press the card of the Alarm to turn it On.
- Press the card of the Alarm to turn it Off.
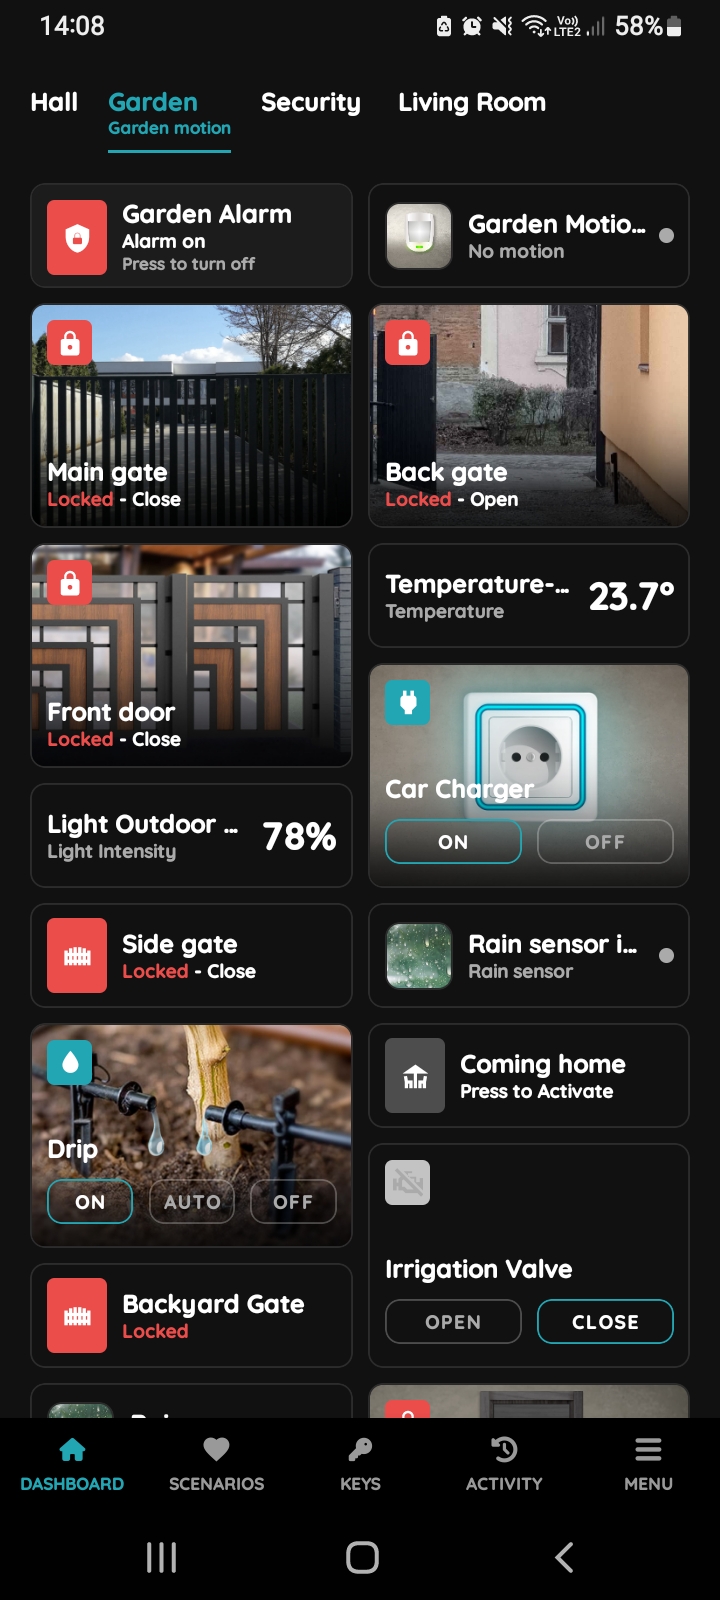
Turn On Alarm
Press the card of the Alarm to turn it On.
The icon of the Alarm turns from green to red, and it is written Alarm On, Press to turn off.
Icon of the Alarm is changed according to change of its status.
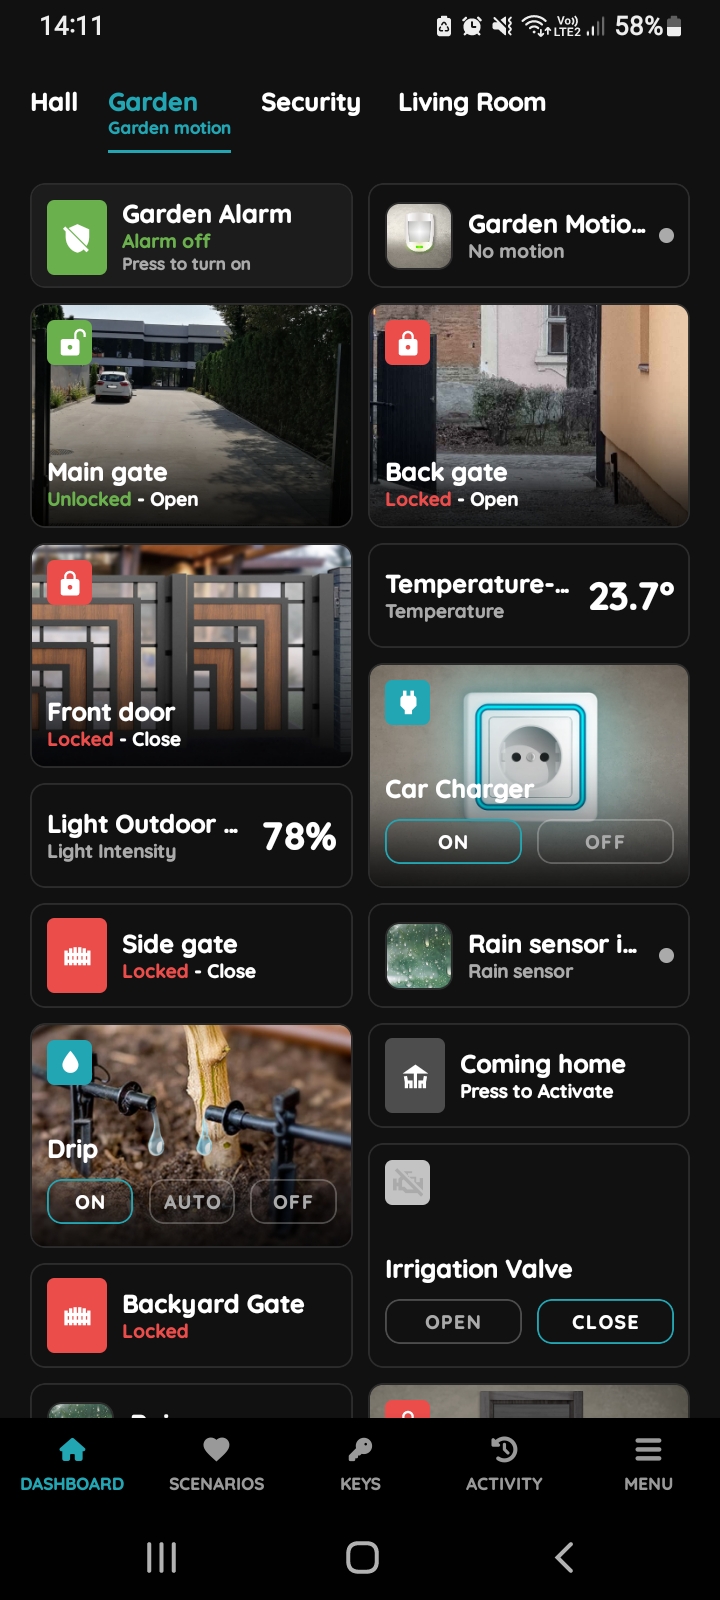
Turn Off Alarm
Press the card of the Alarm to turn it Off.
The icon of the Alarm turns from red to green, and it is written Alarm Off, Press to turn on.
Icon of the Alarm is changed according to change of its status.
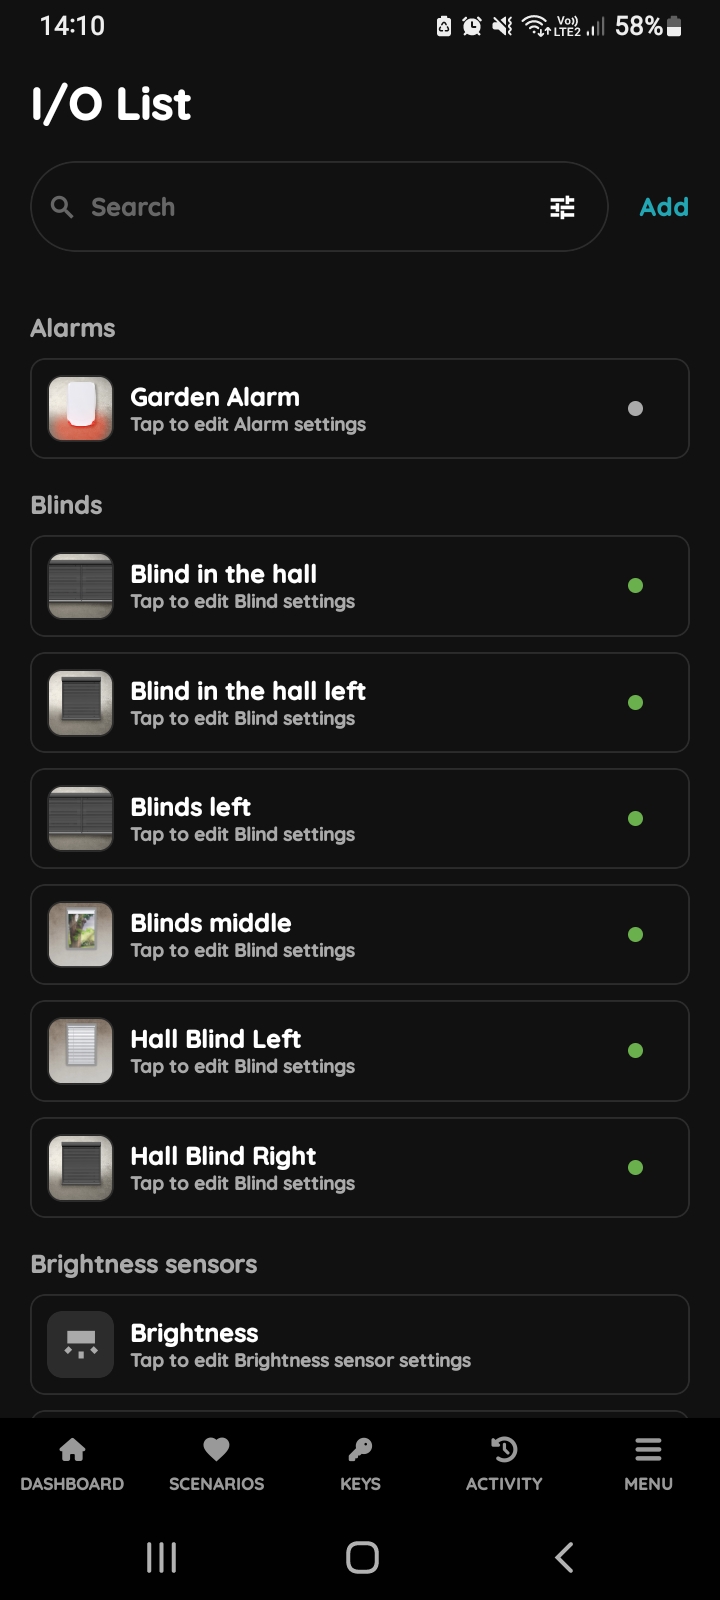
I/O list - Alarm
To edit the Alarm settings, scroll and tap on it in the I/O list.
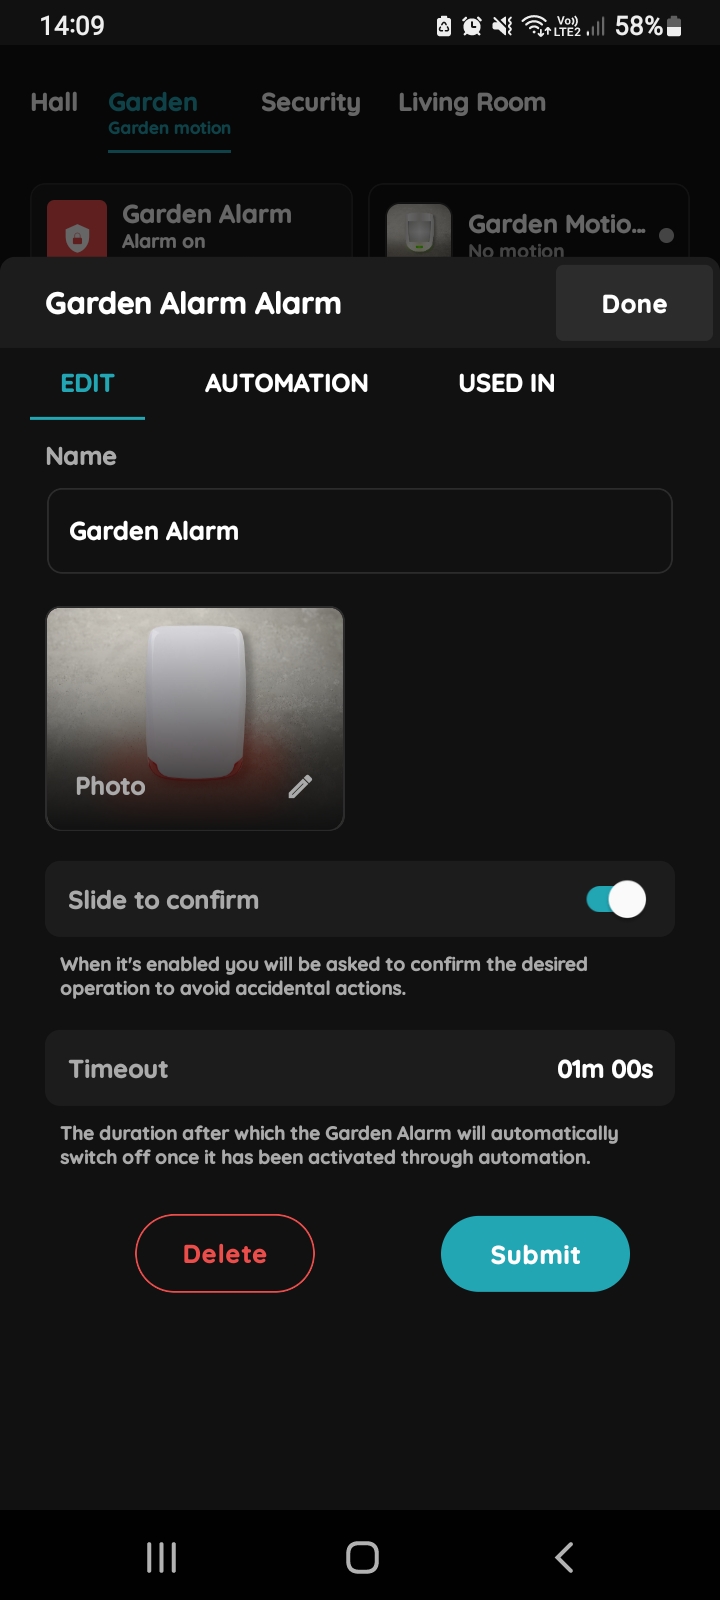
Edit Alarm
Edit the following form:
- Name – Edit the name of the Alarm.
- Photo – Choose the source for the photo.
- Slide to confirm – Enable this option to require confirmation by sliding, helping to prevent accidental activation.
- Timeout – Sets how long the Alarm stays in the triggered state. When the time expires, the Alarm returns to inactive and the associated outputs (siren, strobe) switch off. The Alarm stays enabled, so a new trigger can activate it again and send a new Alert. While the Alarm is active, further triggers do not generate additional Alerts — the Timeout therefore also acts as the minimum interval between notifications.
Set 0 to keep the Alarm active until it is reset manually. Use this for leak, gas and other technical alarms where the triggered state must be acknowledged by a person.
Typical values: 3 minutes for an outdoor siren (local noise regulations often cap this), 90 seconds to 3 minutes indoors, 5–15 minutes for notification-only alarms.
Tap Submit/Done to confirm, or tap the Delete button to remove the Alarm.
GOOD TO KNOW:
The Alarm can be edited by long-pressing the Alarm card on the Dashboard or by tapping it in the I/O list.
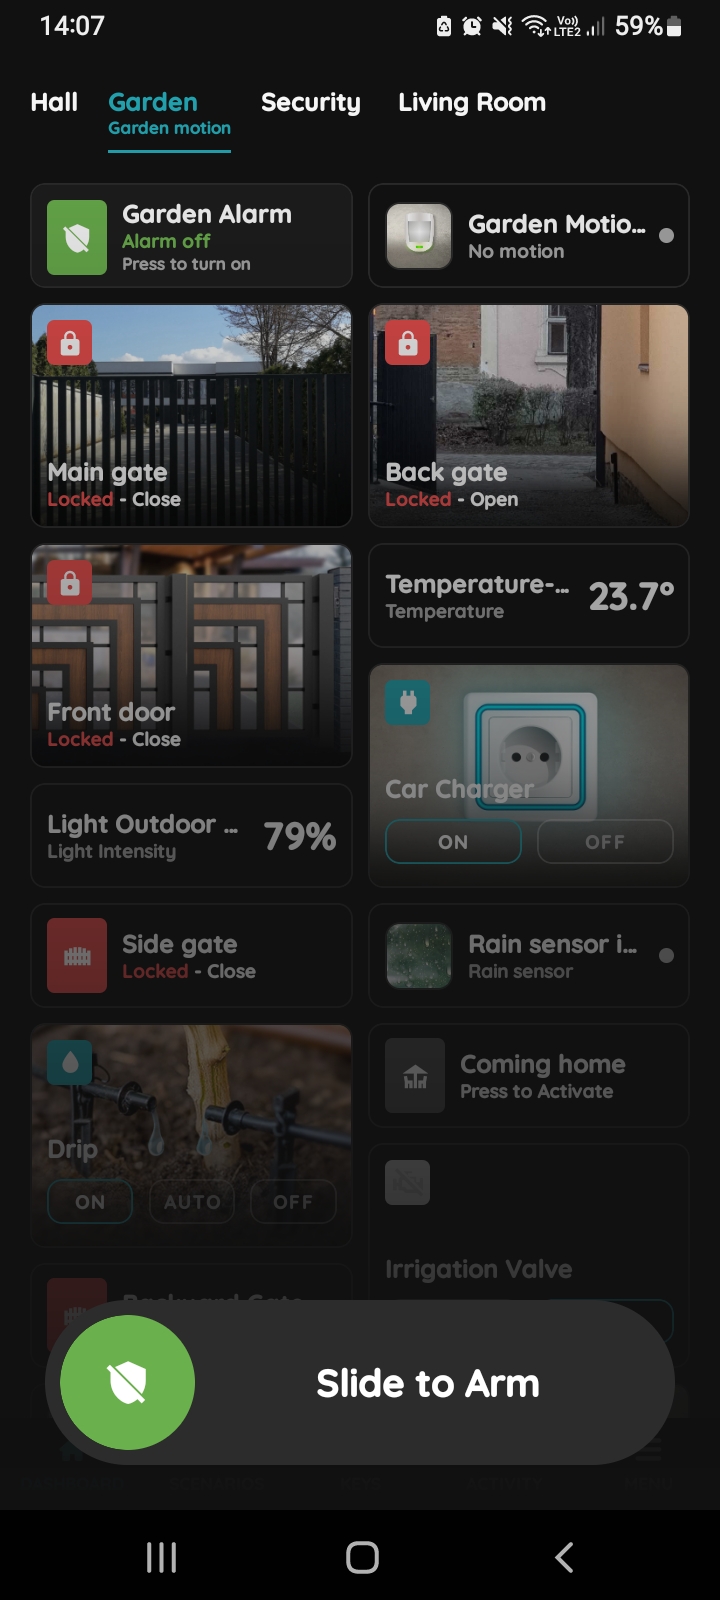
Slide to confirm - Alarm
To turn the Alarm On, slide from left to right on the Slide to Arm button.
Used In for Alarm
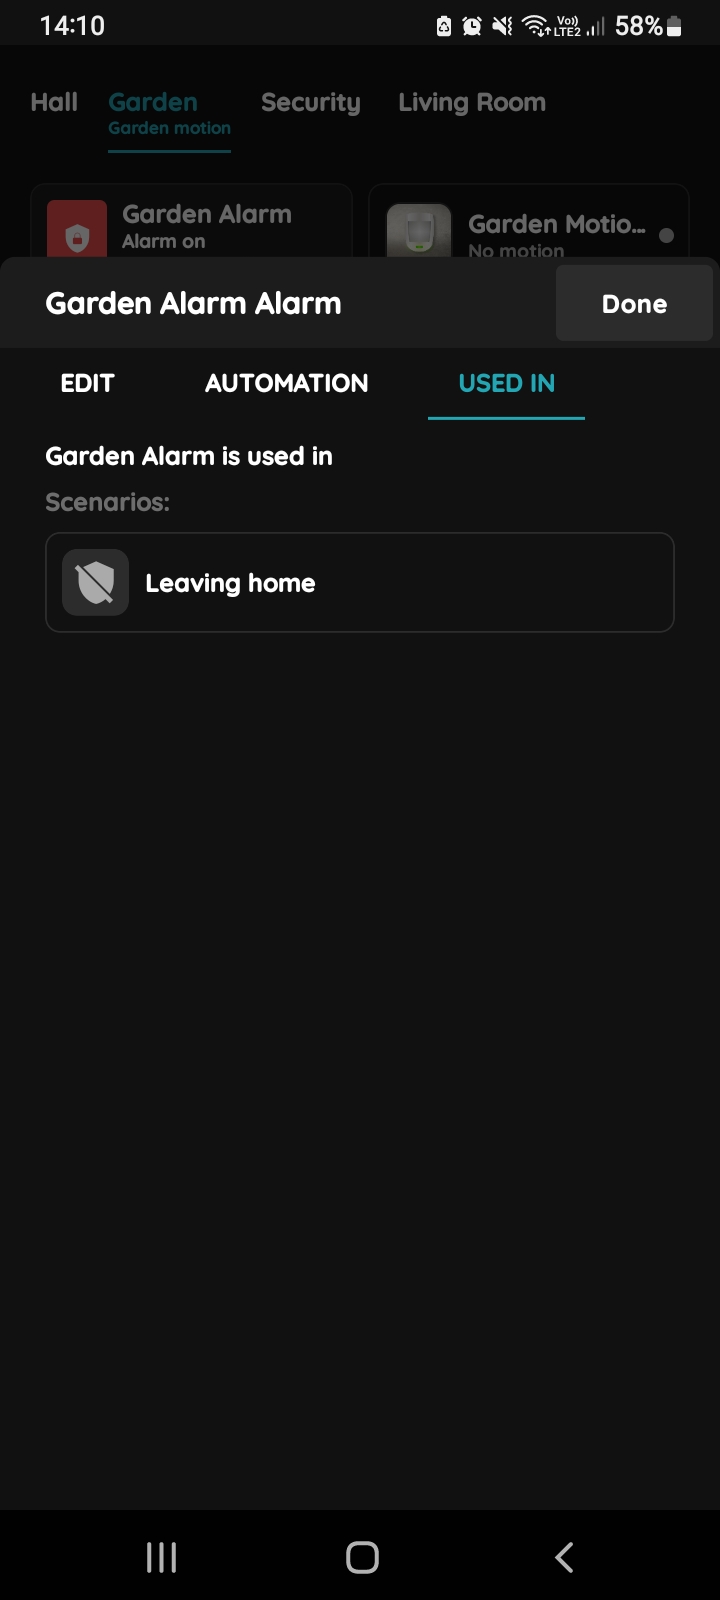
The Used In tab shows all the scenarios and automations where the Alarm is applied, making it easy to see where this I/O is used without the need to search manually. If it isn't used in any, the list will be empty, and a message will display: "This I/O is not in use anywhere." This feature is particularly useful as it consolidates all relevant information in one place.
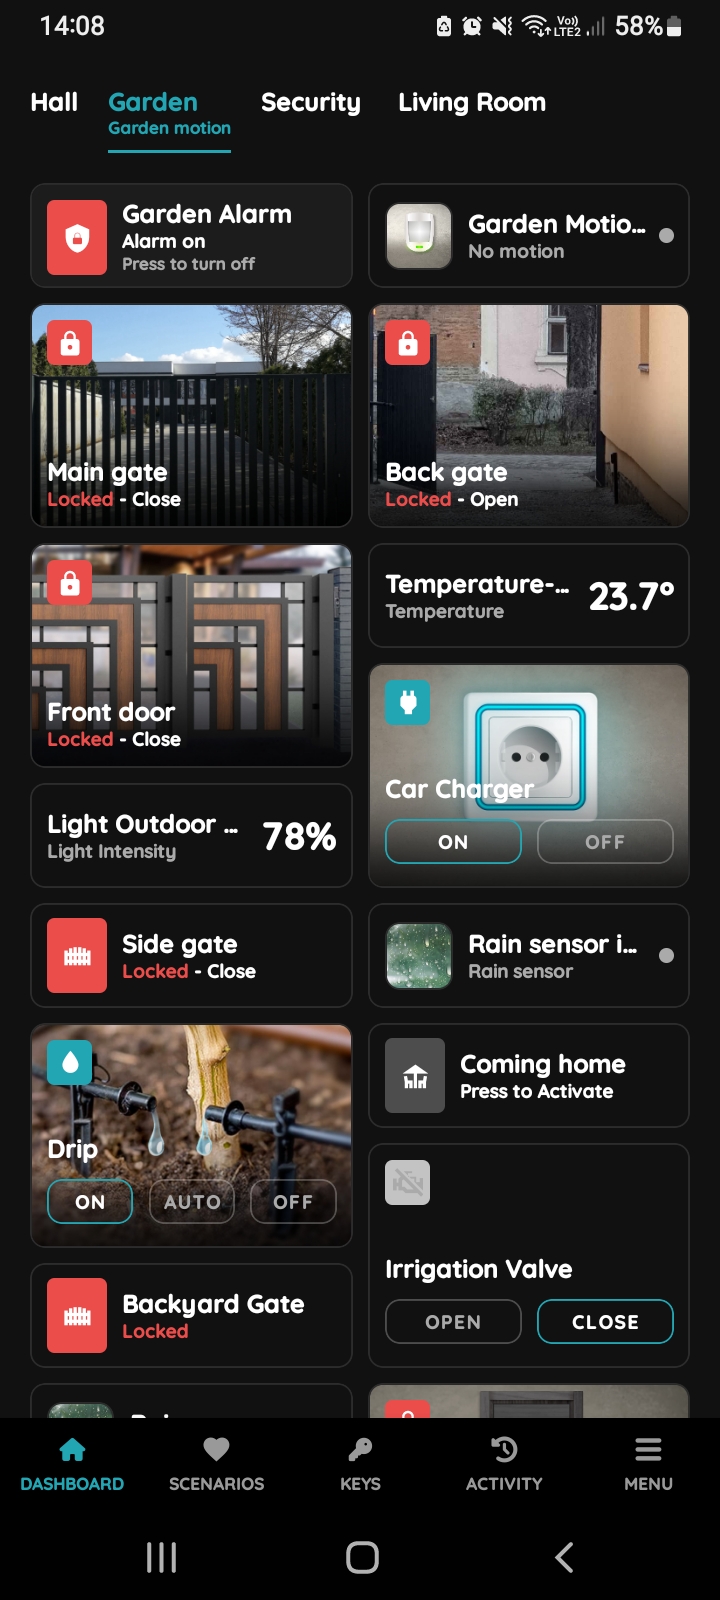
Find Alarm on the Dashboard
Automate your Alarm in the PIERRE app by setting conditions based on the Motion sensor or the window/door Magnet sensor within a specific time range. The Alarm will turn on if the Motion sensor detects movement or if the window/door is opened, and only during the defined time period. This setup enhances security by ensuring the alarm activates when either condition is met, while preventing unnecessary alerts outside of the designated hours.
Additionally, it is recommended to automate the Alarm system by including all Motion sensors and Window/door Magnet sensors.
Find the Alarm on the Dashboard or find it on the I/O list.
In both cases tap on it in order to include it in automation.
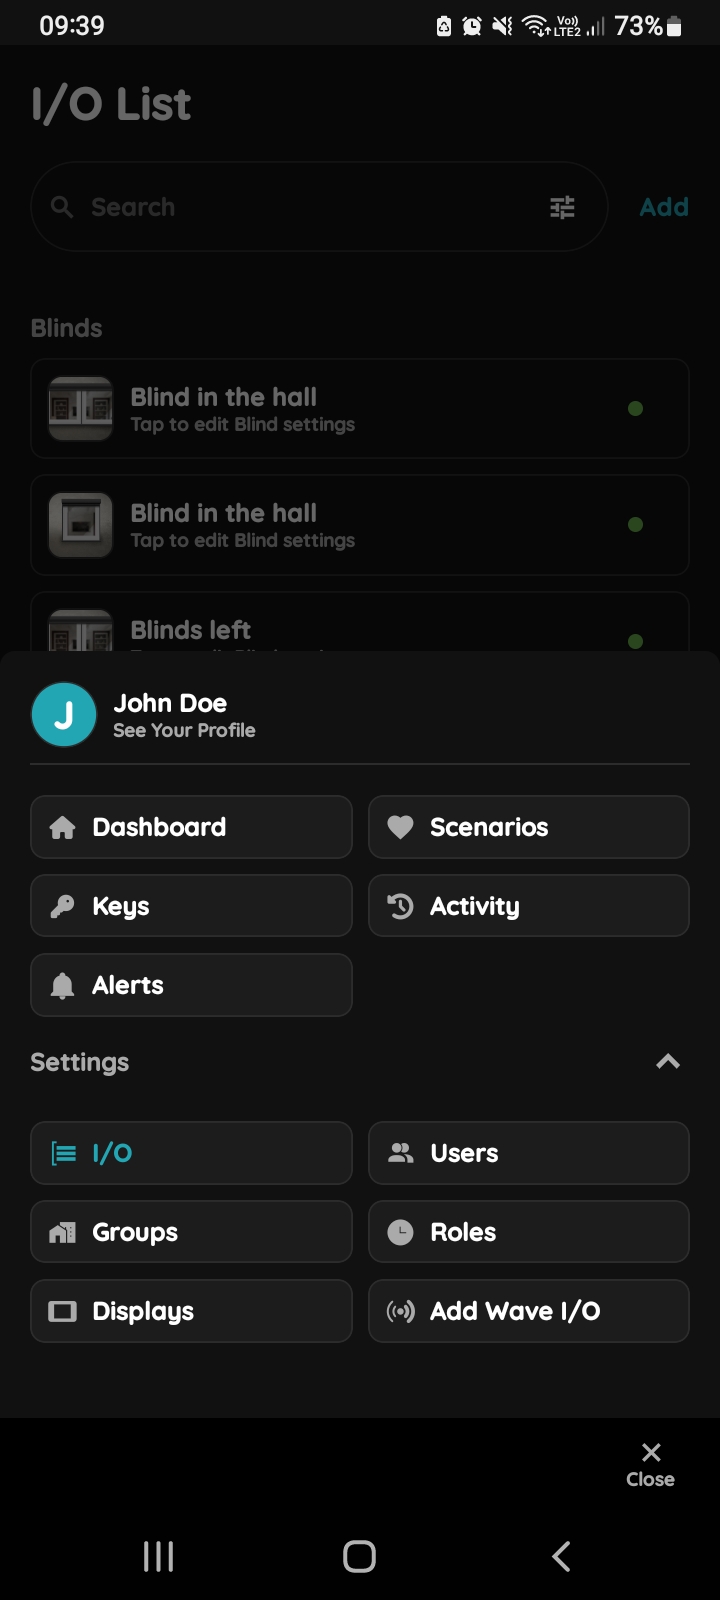
Open I/O
In the Menu, under Settings, tap on the I/O.
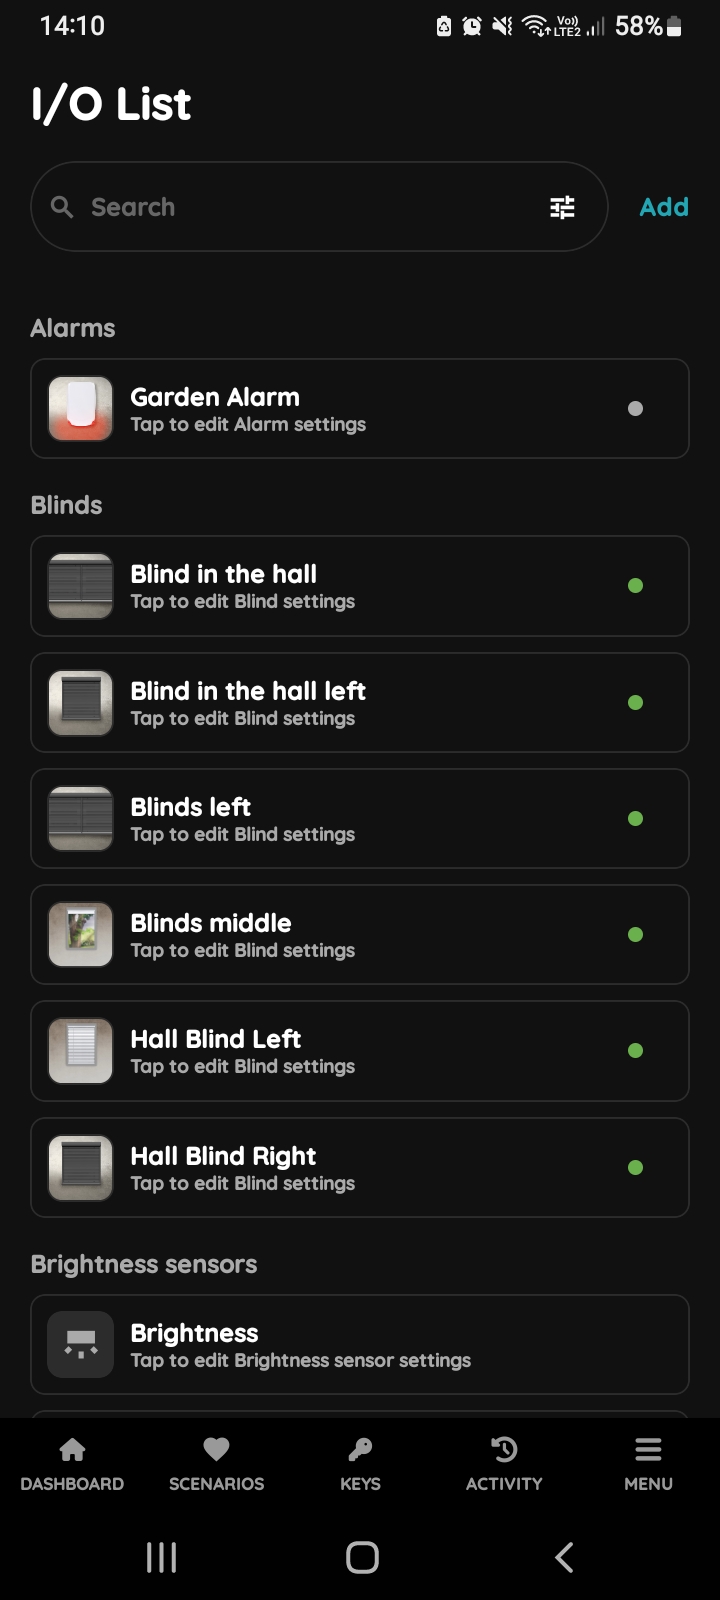
I/O list - Alarm
Open I/O list, scroll to the Alarms and tap on the card of the desired Alarm.
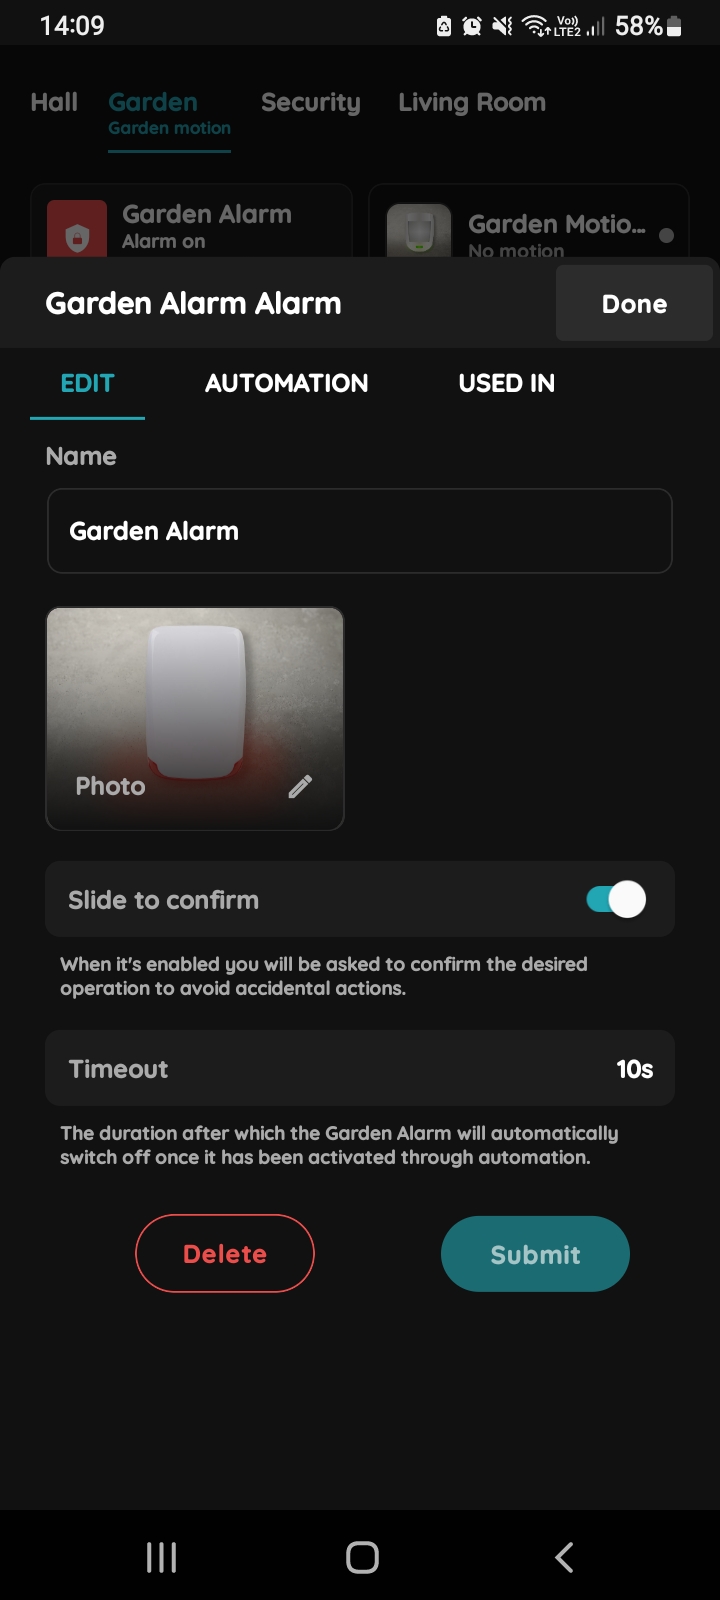
Edit, Automation, Used In - Alarm
Tap on the tab Automation.
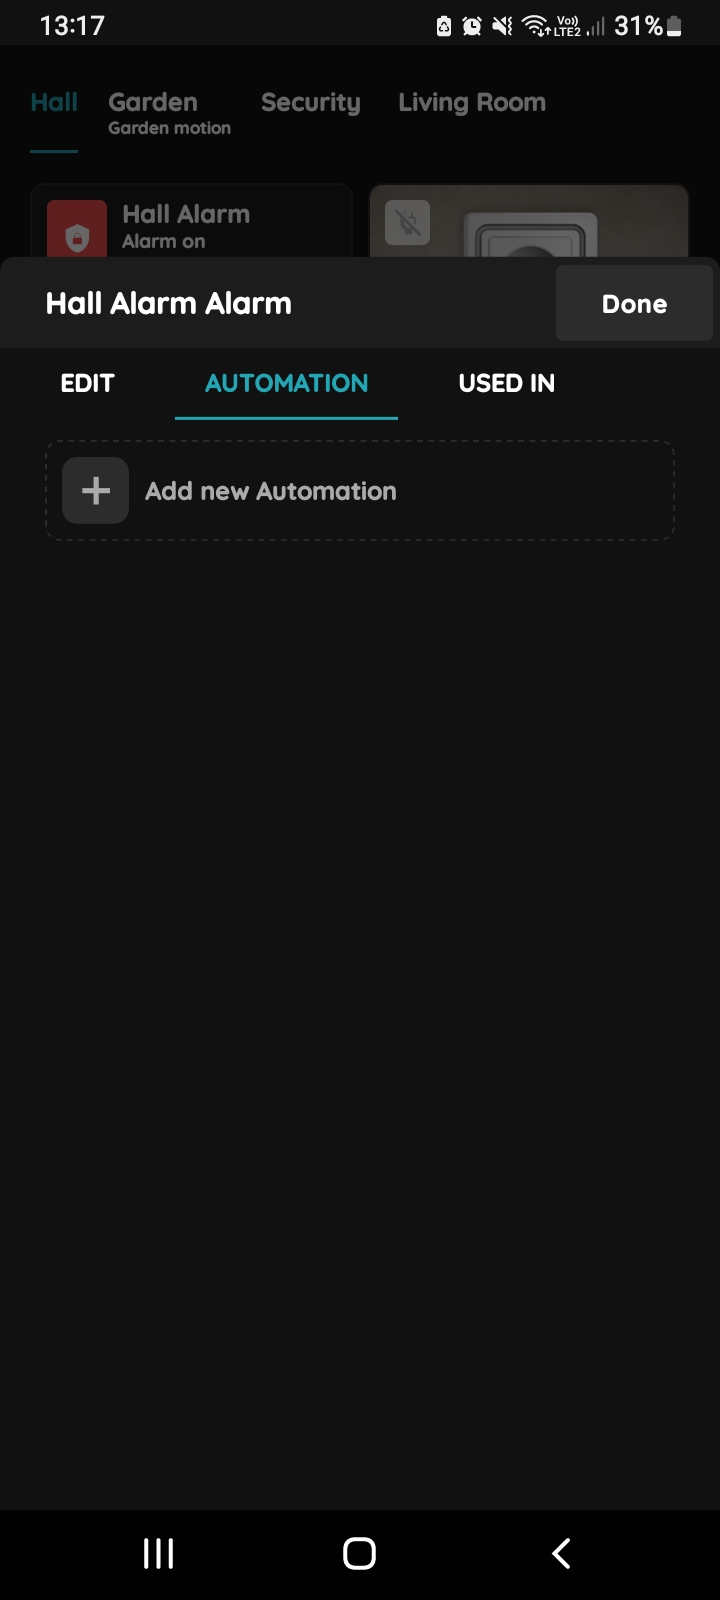
+ Add new Automation - Alarm
If you want to add new automation tap on + add new Automation.
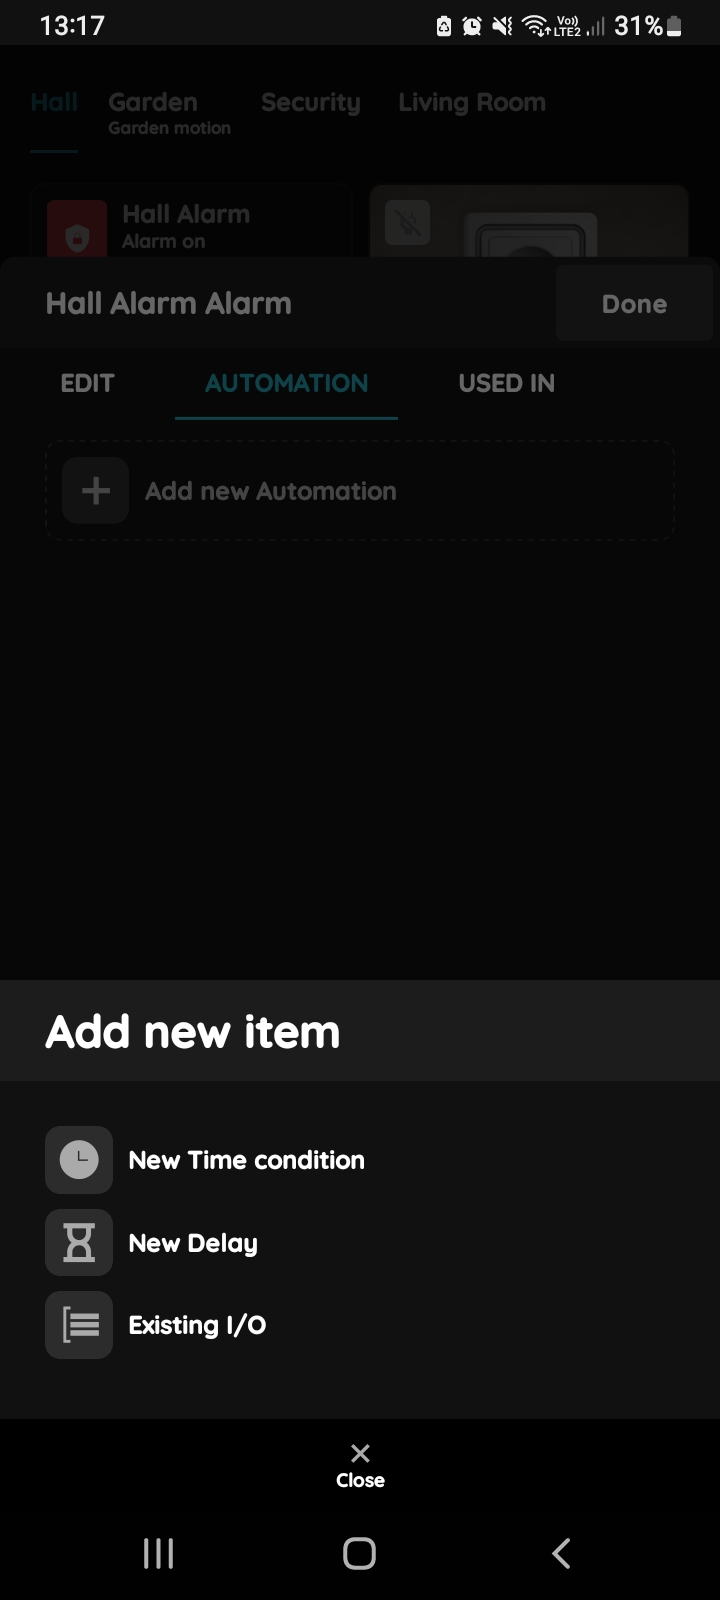
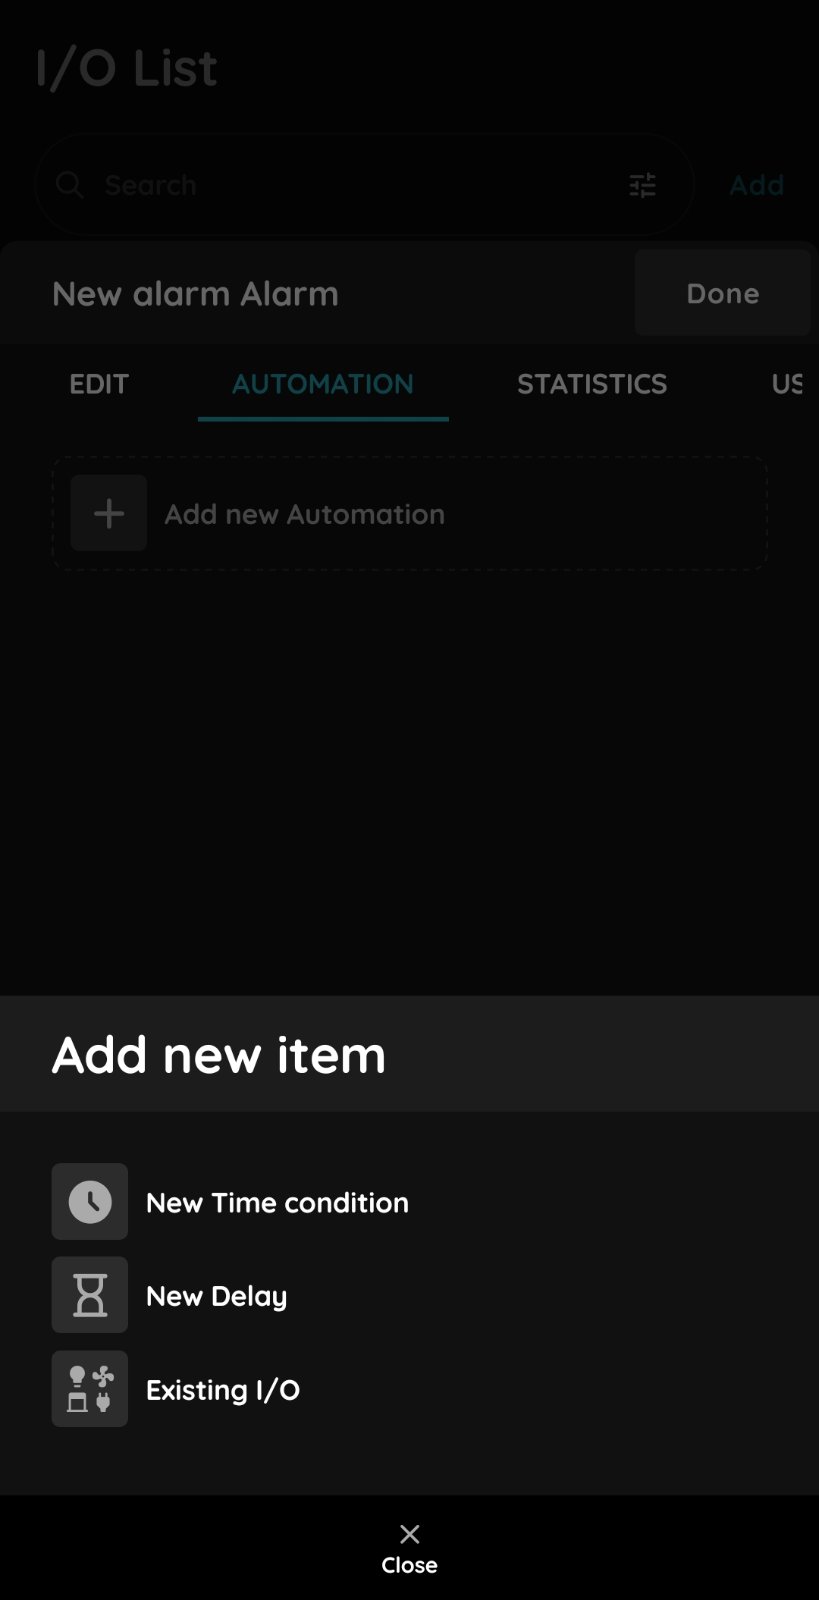
Add new item - Alarm
There is possibility to add:
- New Time condition,
- New Delay
- Existing I/O.
Tap on the Existing I/O.
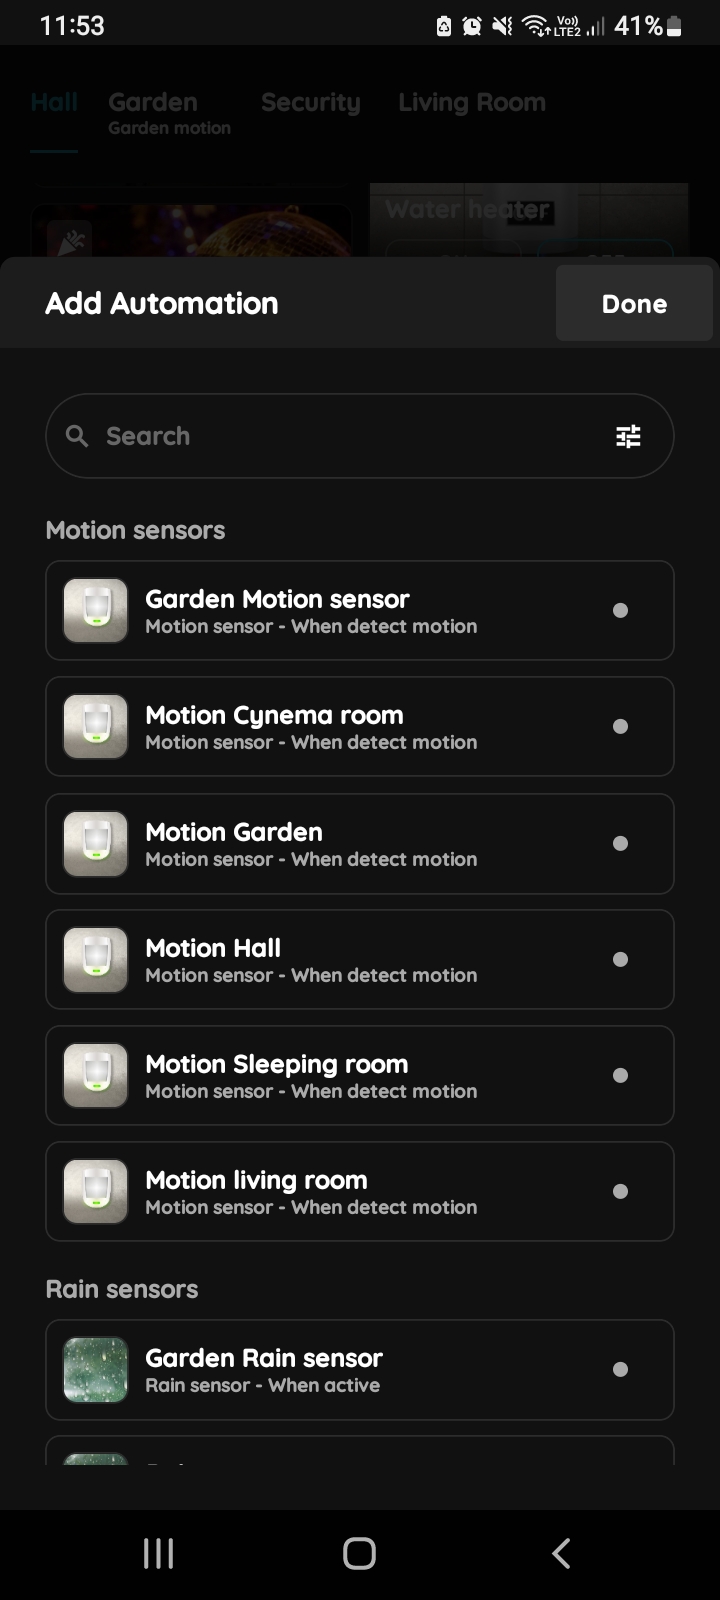
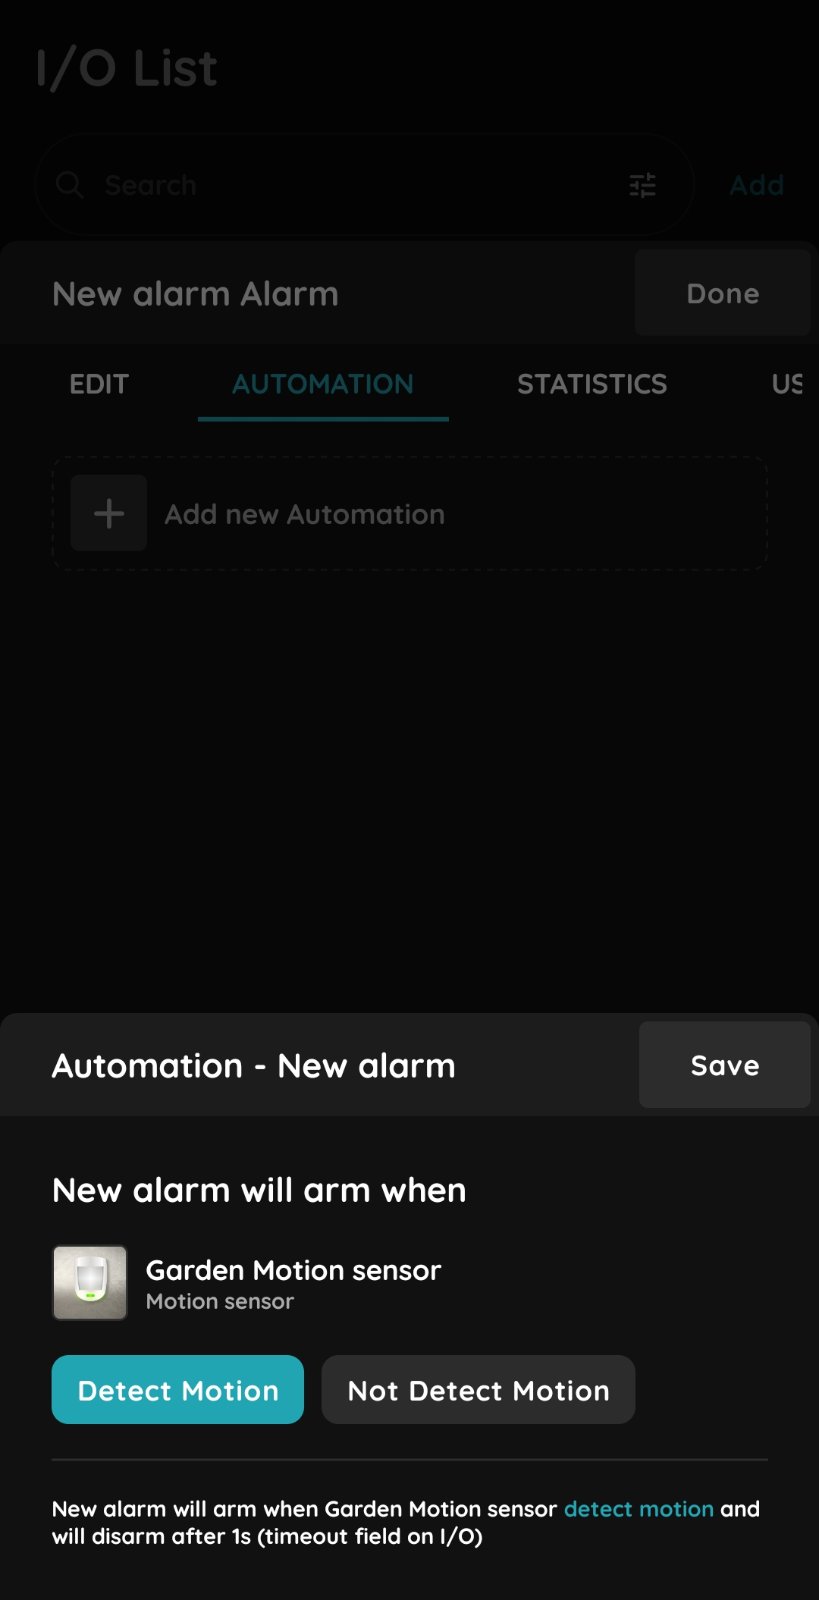
Add existing I/O - I/O list - Motion sensor
Tap on the I/O from the list that you want to add into the automation. In this case Motion Hall.
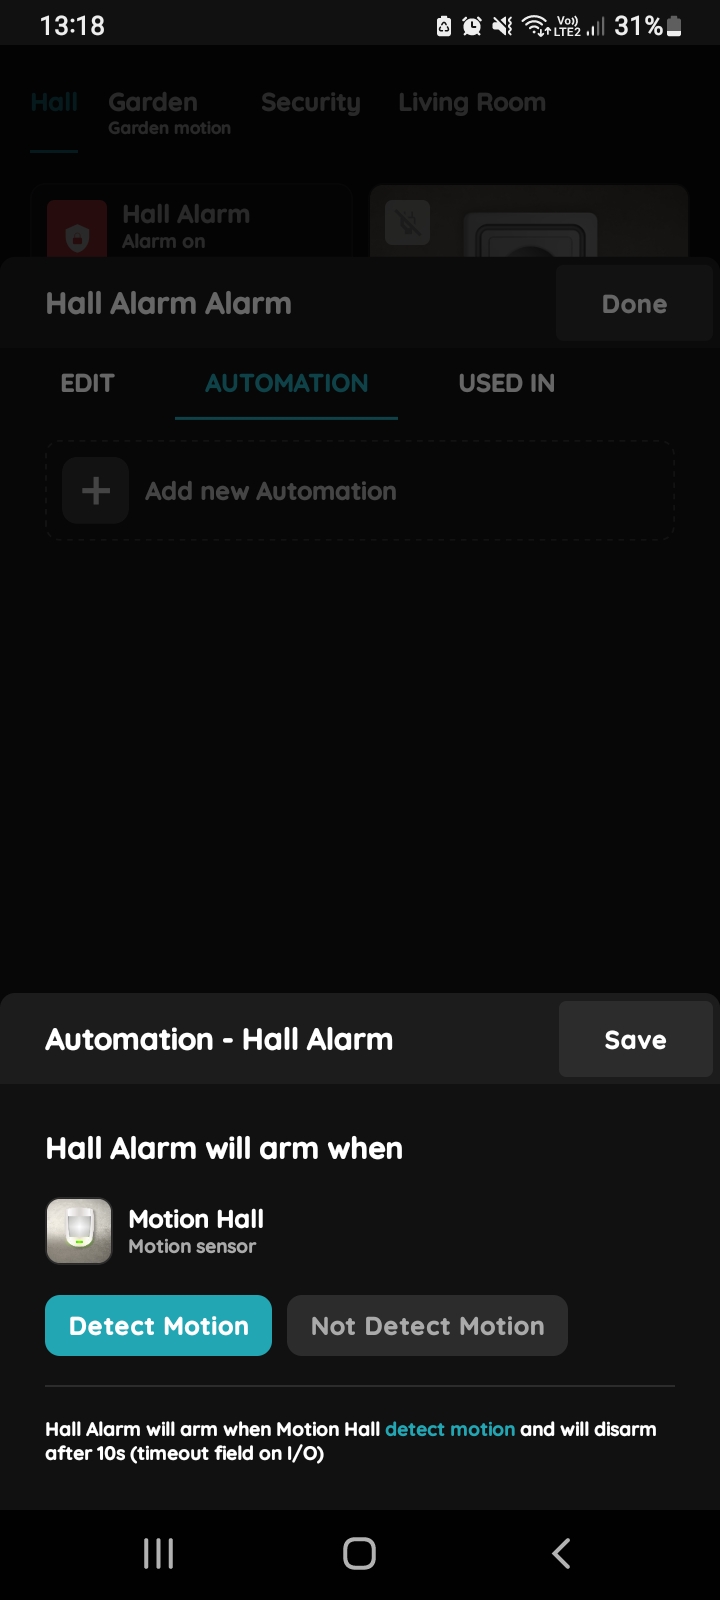
Existing I/O - Alarm - status of added I/O
Tap on the button Detect Motion.
Hall Alarm will arm, when Motion Hall sensor detects motion.
Tap Save button.
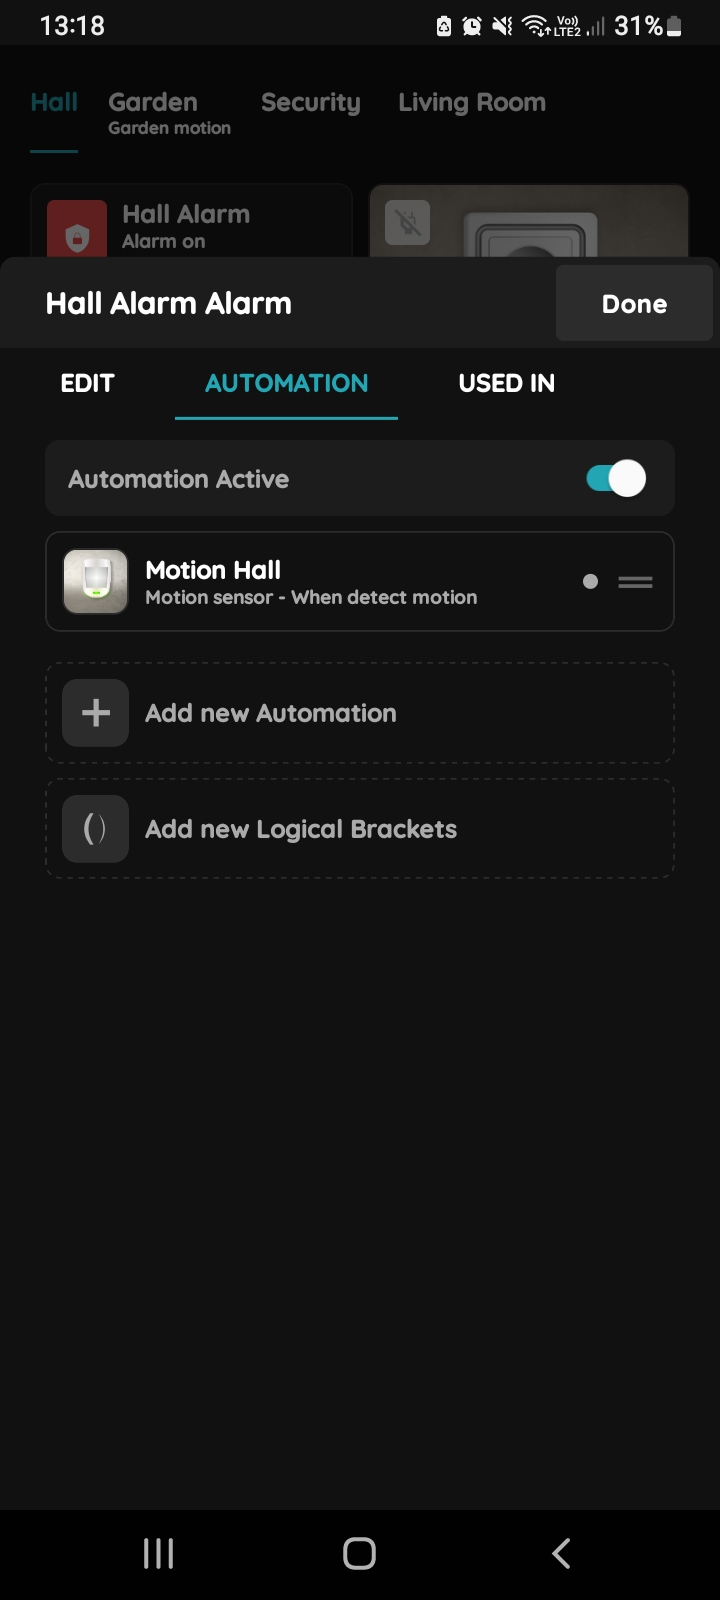
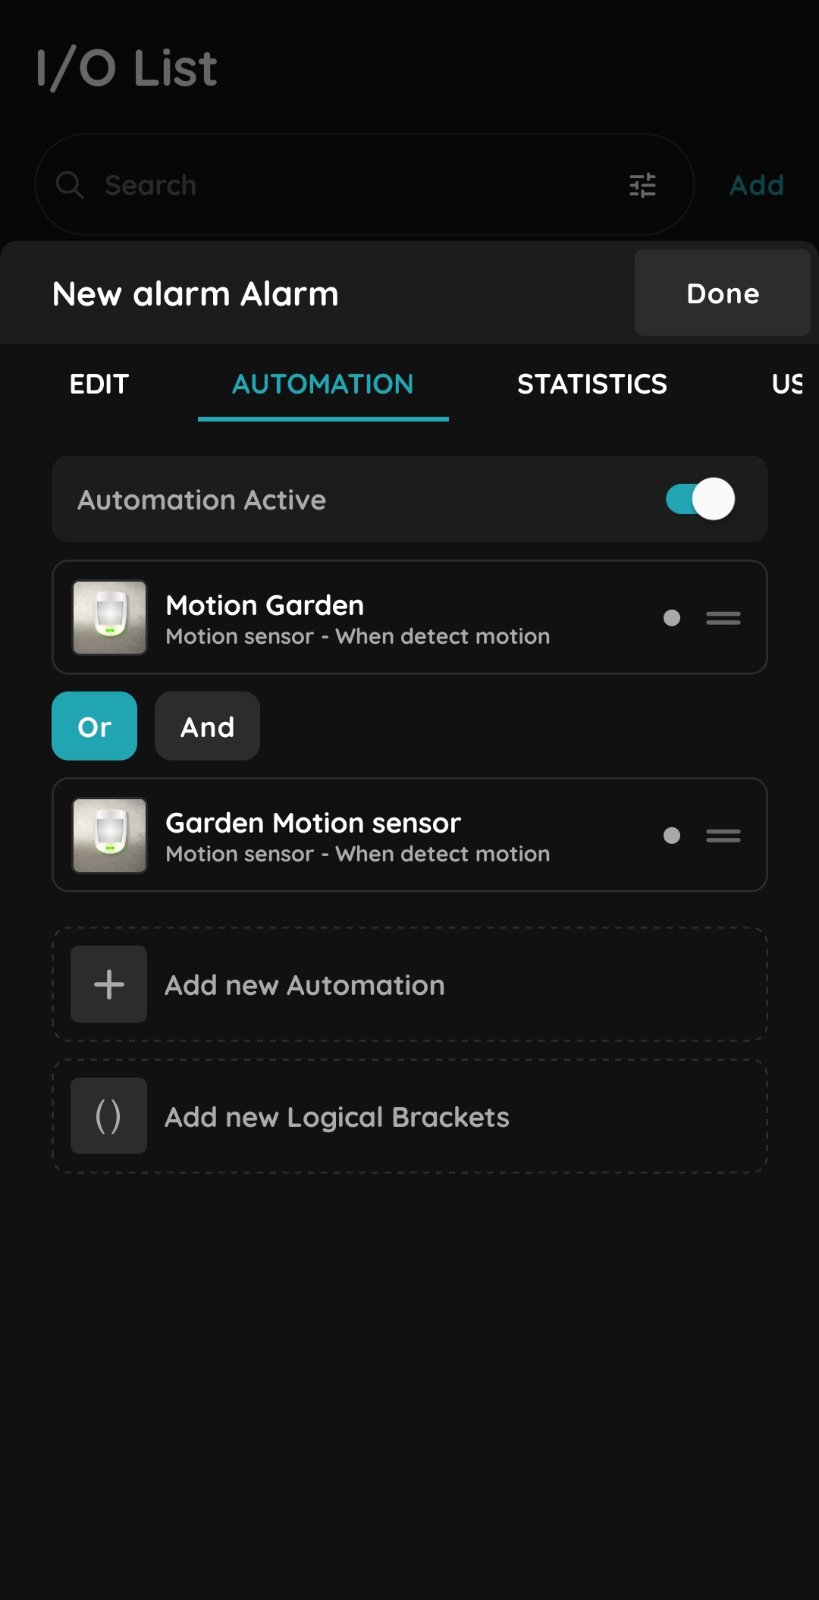
Add new Automation for the Alarm
To add new automation tap + Add new Automation.
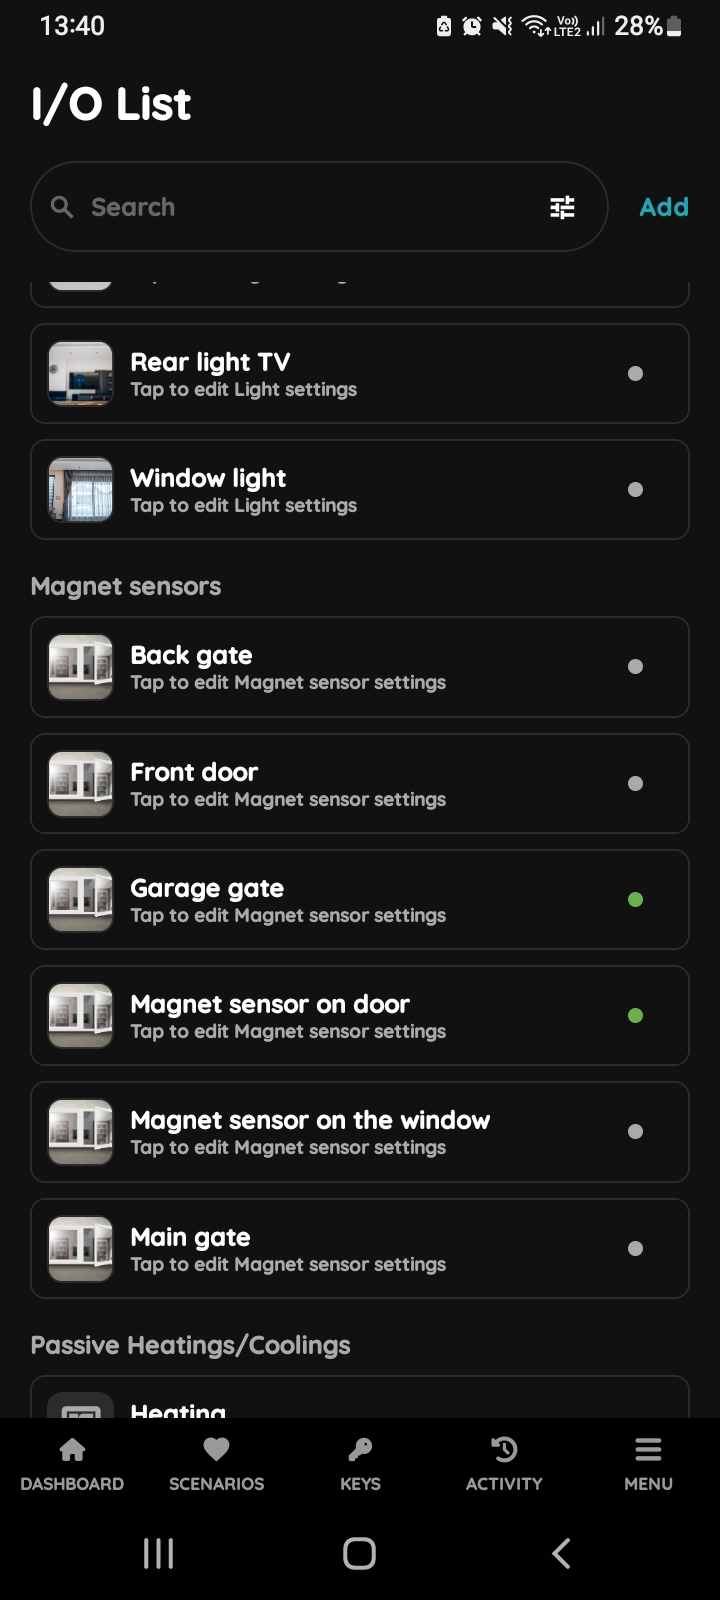
Alarm - Add existing I/O - I/O list - Motion sensor
Tap on the I/O that you would like to add to the atuomation.
In this case tap on Motion Hall sensor from the list.
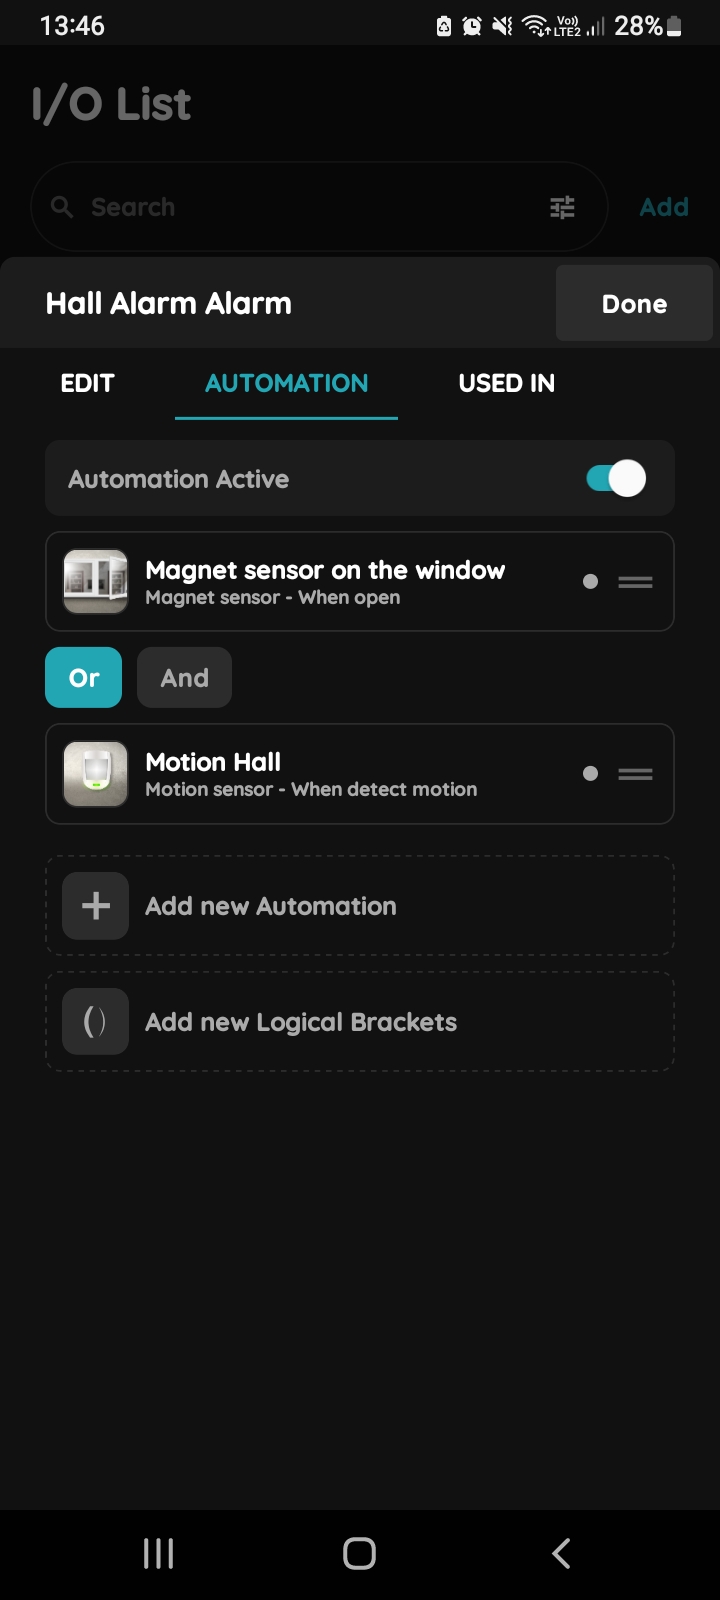
+ Add new Automation - Alarm
Tap the Or button between these two automations.
The Hall Alarm will activate when either condition is met — if the Motion Hall sensor detects movement, or if the Window Magnet sensor is in the Open status.
To add a new automation, tap +Add New Automation.