Smart PIERRE - Dimmable Lights
Description
The Dimmable Lights section of the Smart PIERRE app controls the brightness of dimmable lighting. These lights appear on the Dashboard and in the I/O list.
Dashboard Control
- On, Off and Auto directly from the Dashboard.
- The current brightness level is visible on the card.
Brightness Adjustment
A long press on the light card opens the additional settings. The Intensity tab sets the brightness level.
Status Indication
The icon and image change with the current status, so the state of the light is readable at a glance.
Automation and Scenarios
Dimmable lights can be part of automations and scenarios, so brightness levels change automatically from schedules, sensors or other system events.
Technical Notes
- A light can only be dimmed if the circuit, the driver and the light source all support dimming. If the LED specification does not state that the lamp is dimmable, assume it is not.
- A very low total load can cause flicker or a lamp that will not switch off completely. Test the actual lamps before handover.
- A scenario sets the brightness to a stored value and does not restore the previous one.
Control of the Dimmable Light
Controlling the Dimmable Light is easy and efficient, all managed directly from the Dashboard.
A slider displaying the dimming level of the Dimmable light is shown on the right side of its card.
Follow the example of the Hall door LED.
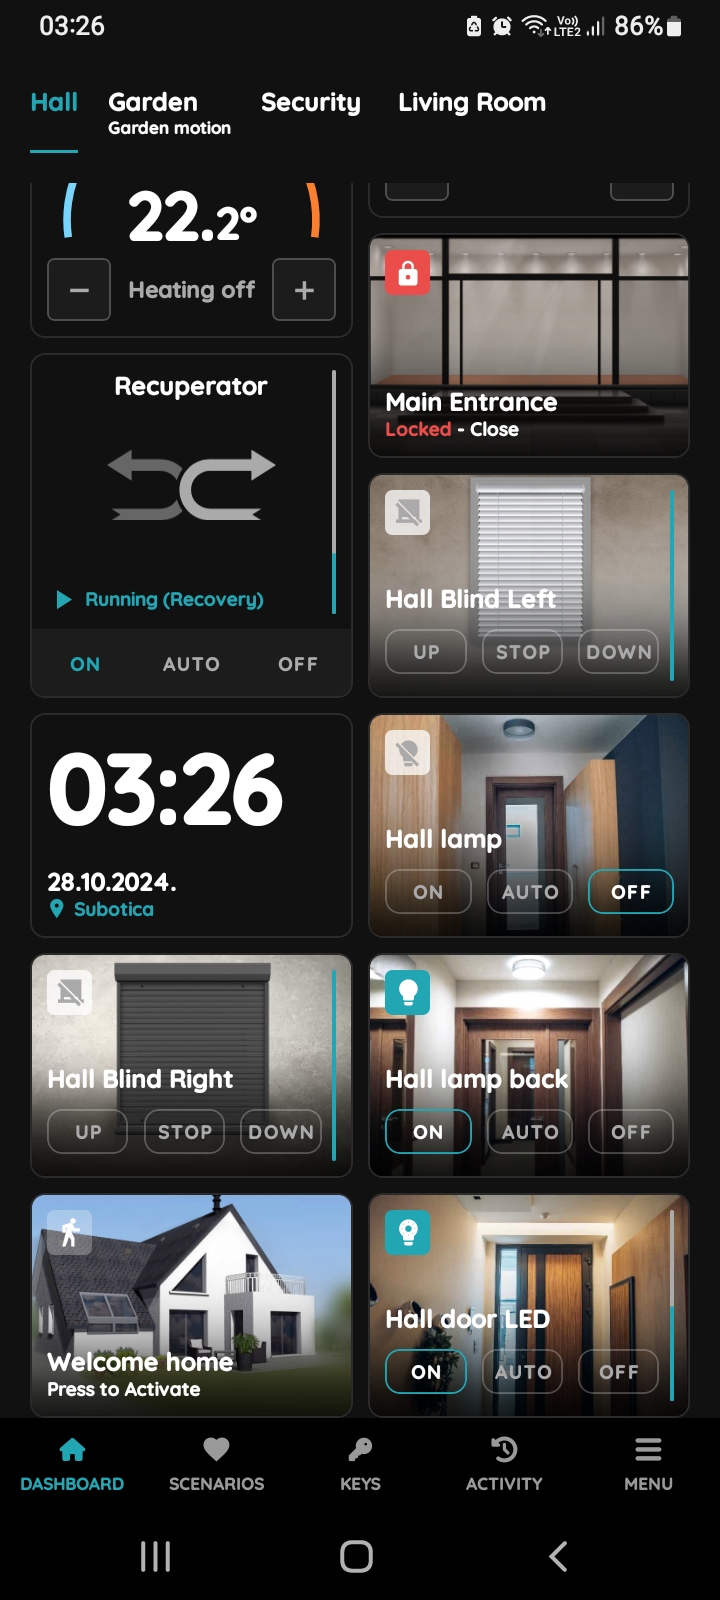
On, Off, Auto - Dimmable Light
There are three buttons for controlling the Dimmable Light:
- On - Tap this button to turn On the Dimmable Light.
- Off - Tap this button to turn Off the Dimmable Light.
- Auto - If you tap the Auto button, the automation will activate when the conditions are met.
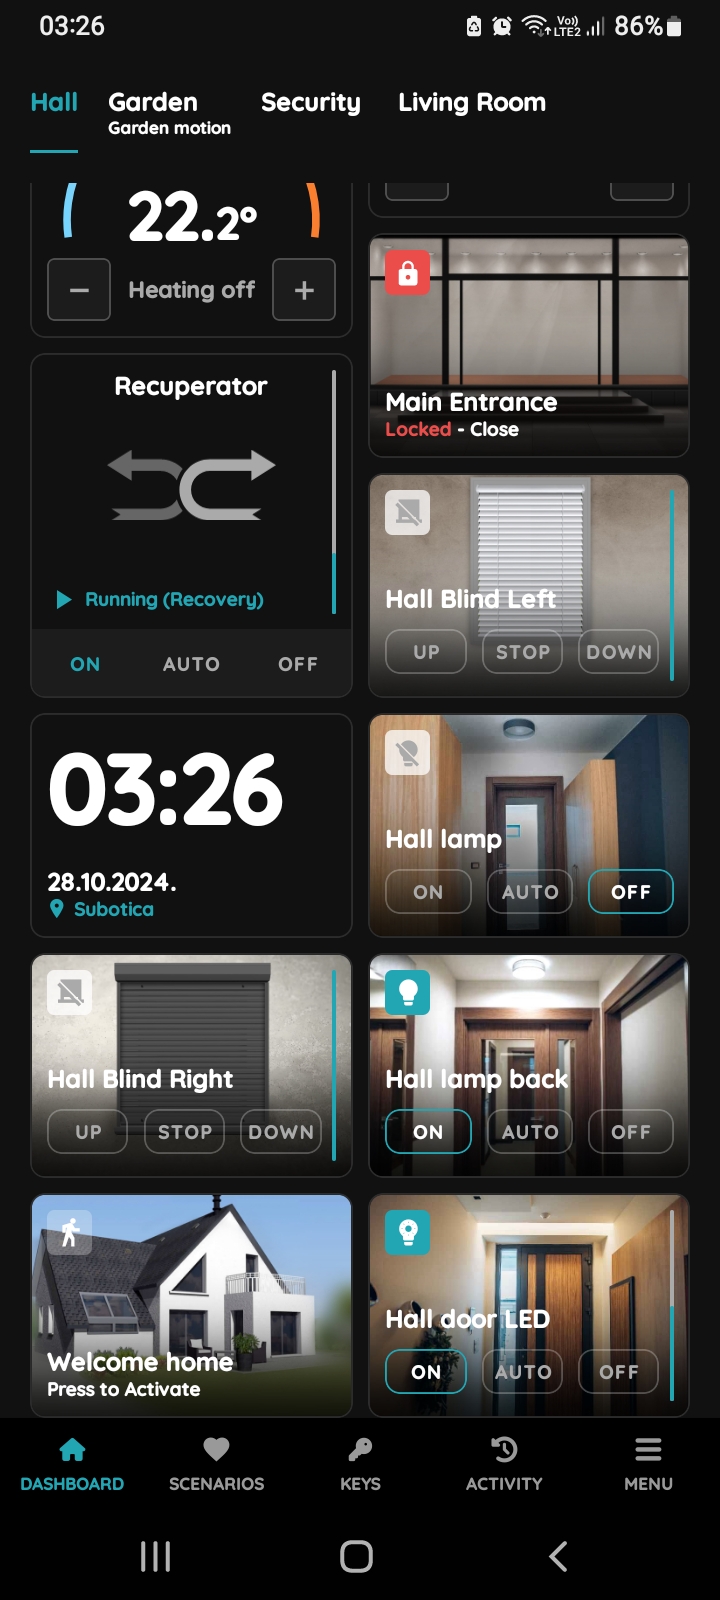
Turn the Dimmable Light On
To turn on the Dimmable Light, tap the On button.
The icon turns blue and picture of the Dimmable Light will change, indicating it has been turned On.
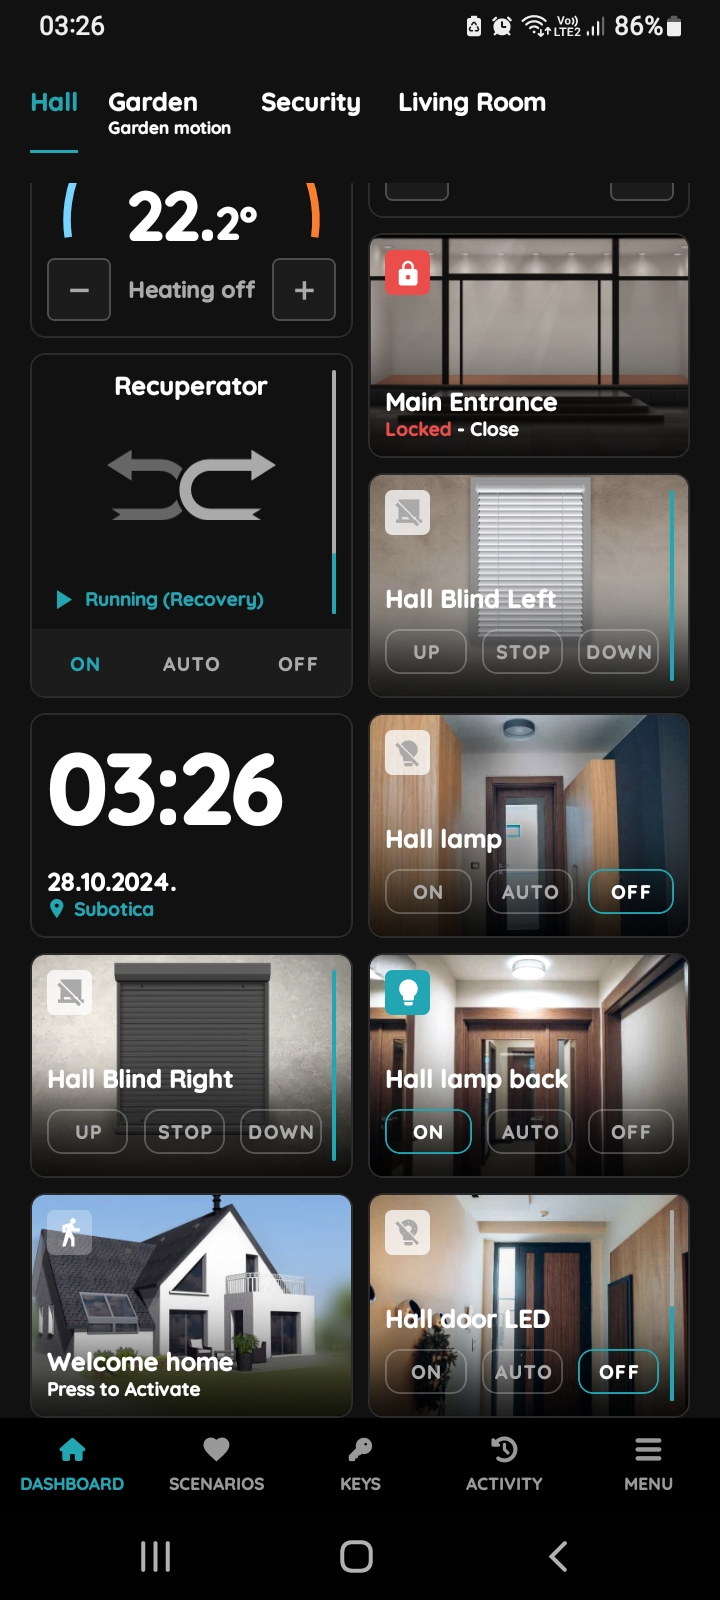
Turn the Dimmable Light Off
To turn off the Dimmable Light, tap the Off button.
The icon turns grey and picture of the Dimmable Light will change, indicating it has been turned Off.
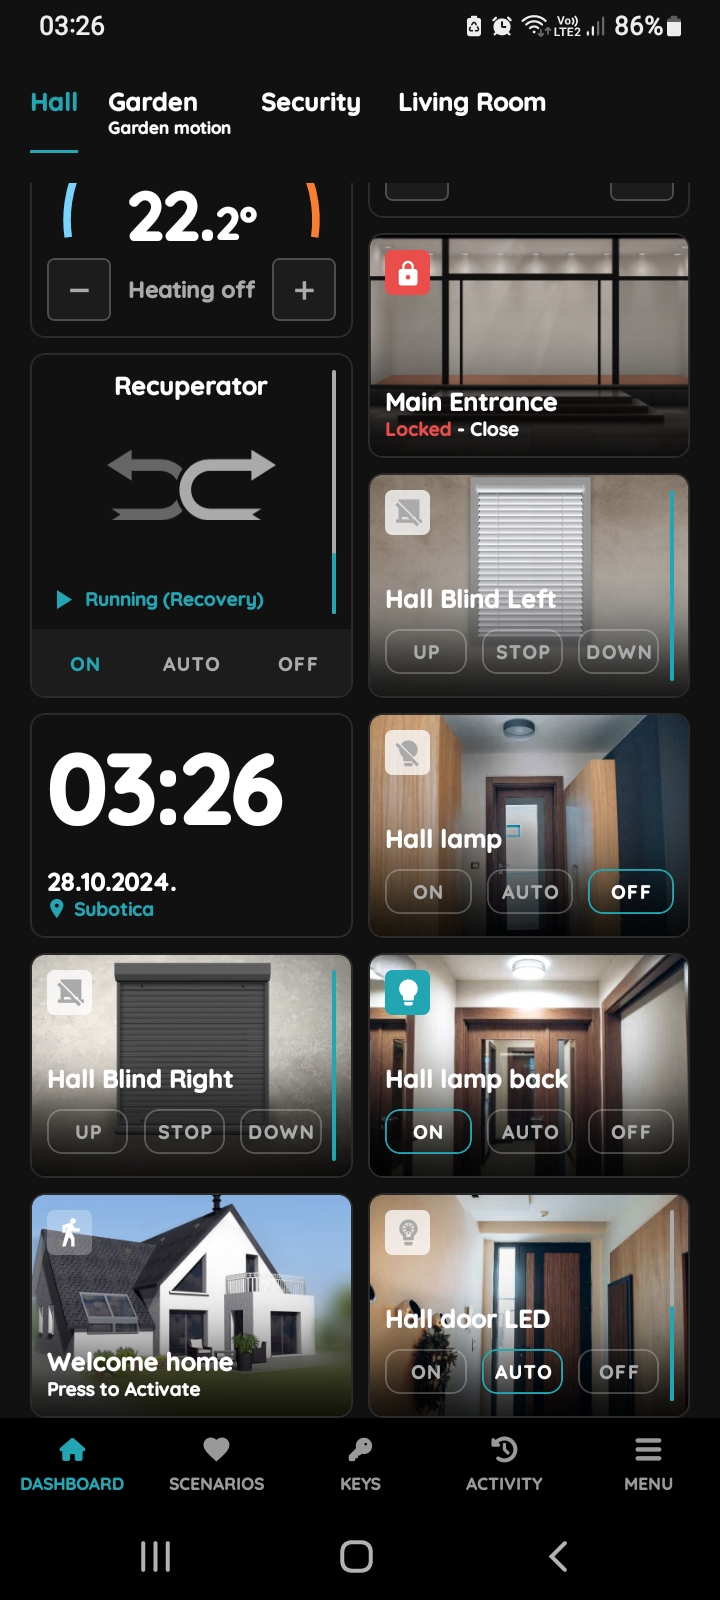
Set Dimmable Light to Auto Mode
This applies only if an automation has already been set.
Tap Auto to activate the Dimmable Light automation. It will turn On only if all conditions are met; otherwise, it will stay Off.
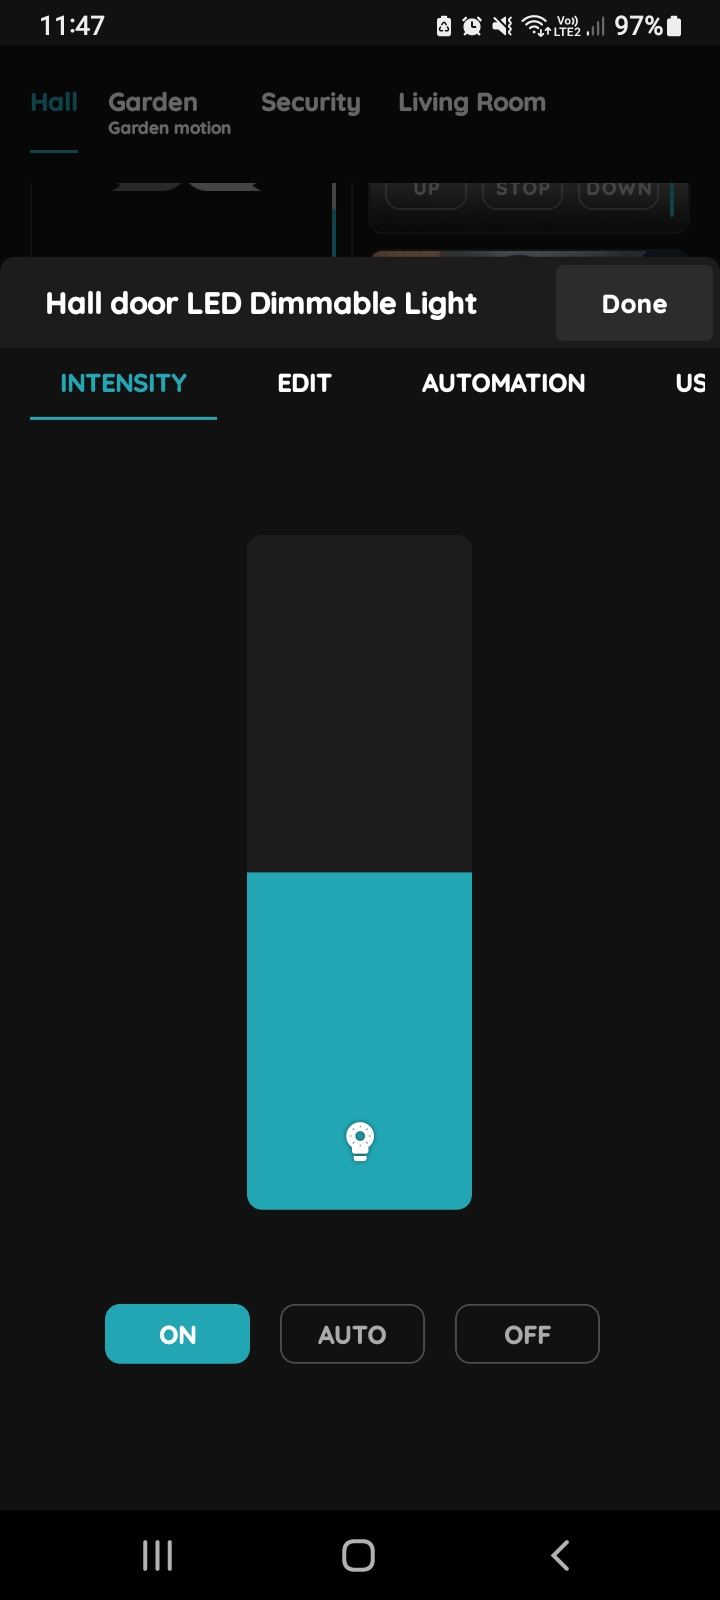
Intensity - Dimmable Light
Long-press the Dimmable Light card, then slide to set the dimming level.
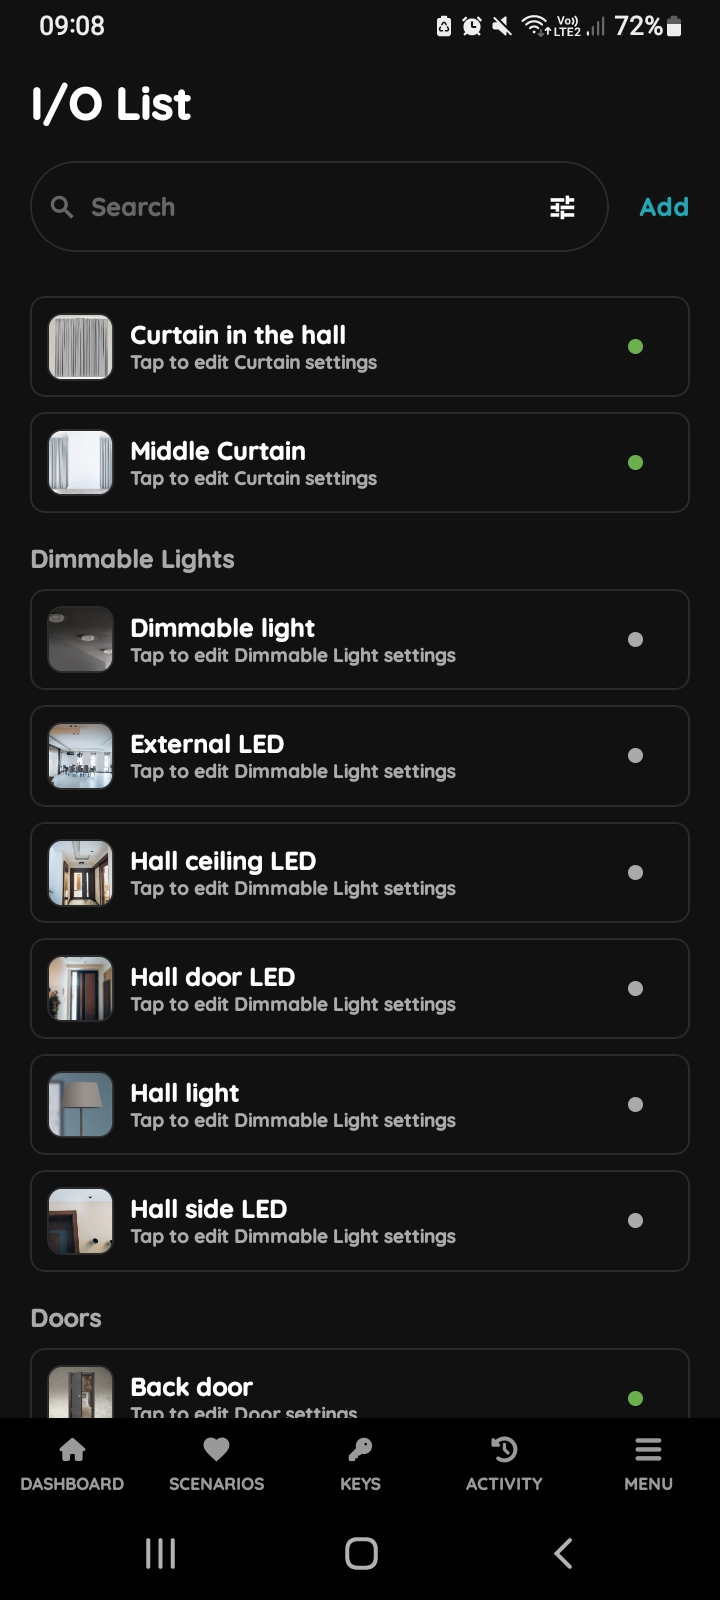
Open I/O list - Dimmable Light
To edit the Dimmable Light settings, first find it in the I/O list.
Route on displays and smartphones to open I/O list: in the Menu, under Settings, tap on the I/O.
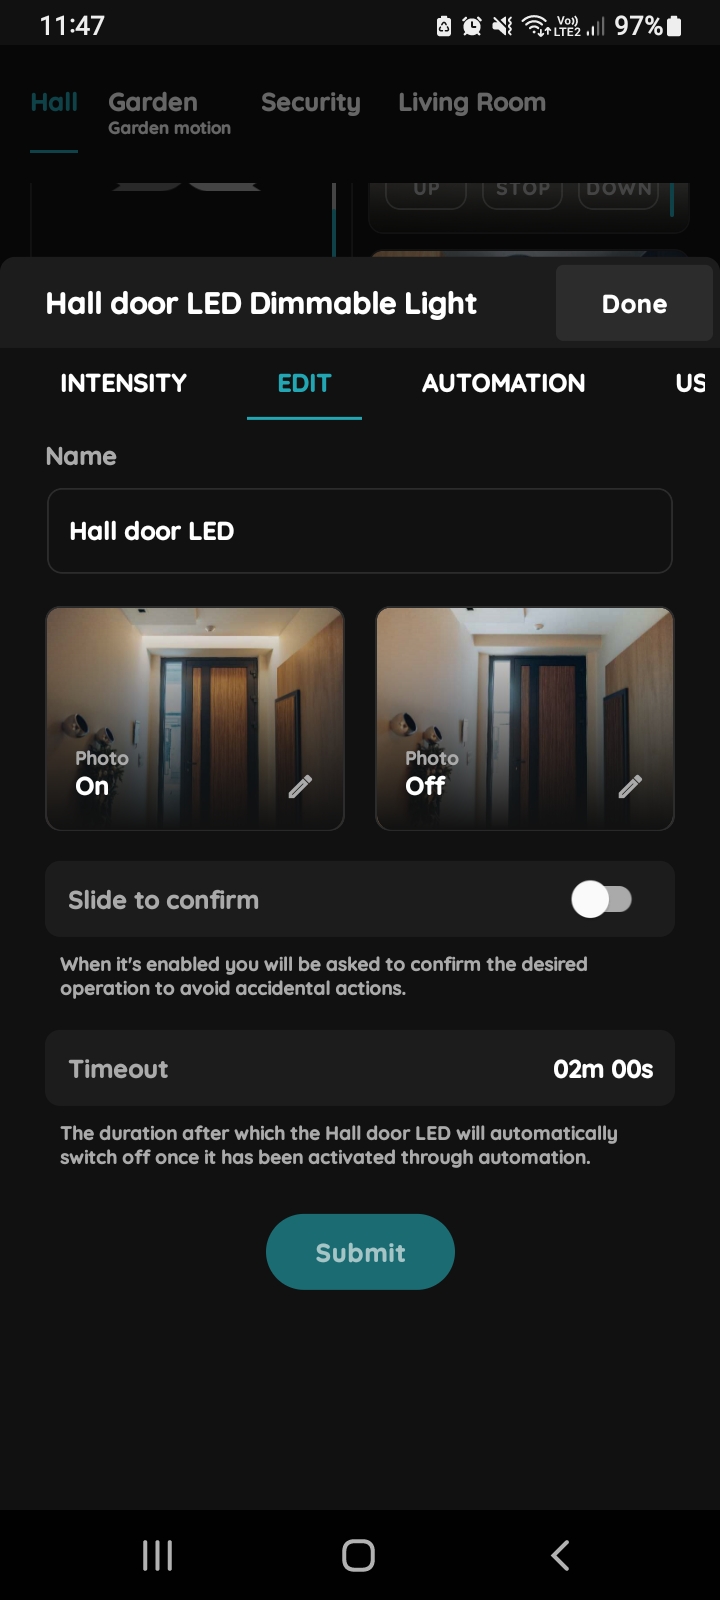
Edit Dimmable Light
Tap on the Edit tab.
Fill out the following form:
- Name - Edit the name of the Dimmable Light.
- Photo - Choose the source of the photo for both On and Off statuses.
- Slide to confirm - When turned On or Off, you'll be asked to confirm the action to avoid accidental triggers.
- Timeout - Set how long the Dimmable Light remains On in auto mode after being activated by an automation.
Tap Submit/Done to save the changes.
GOOD TO KNOW:
The Dimmable Light can be edited by long-pressing the Dimmable Light card on the Dashboard or by tapping it in the I/O list.
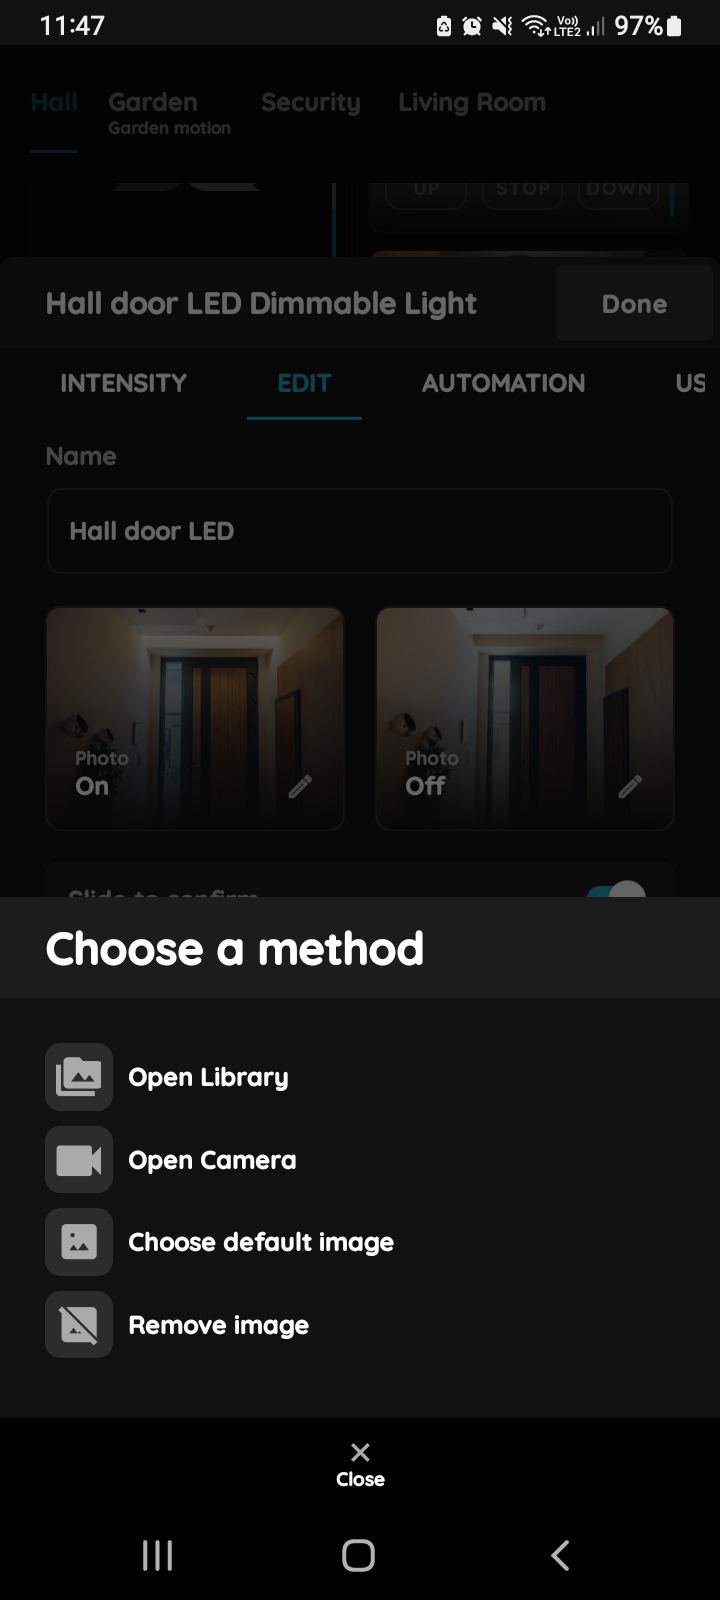
Change photo - Dimmable Light
Long-press the photo of the Dimmable Light. You have four options:
- Open Library - The phone’s Library will open. It is recommended to take pictures from the same angle for both Dimmable Light statuses to achieve a complete and consistent view.
- Open Camera - You can take a picture using your smartphone. For a complete and consistent view, it’s recommended to capture both Dimmable Light statuses from the same angle.
- Choose default image - These images are prepared in advance to provide a complete and seamless experience.
- Remove image - Removes the existing image.
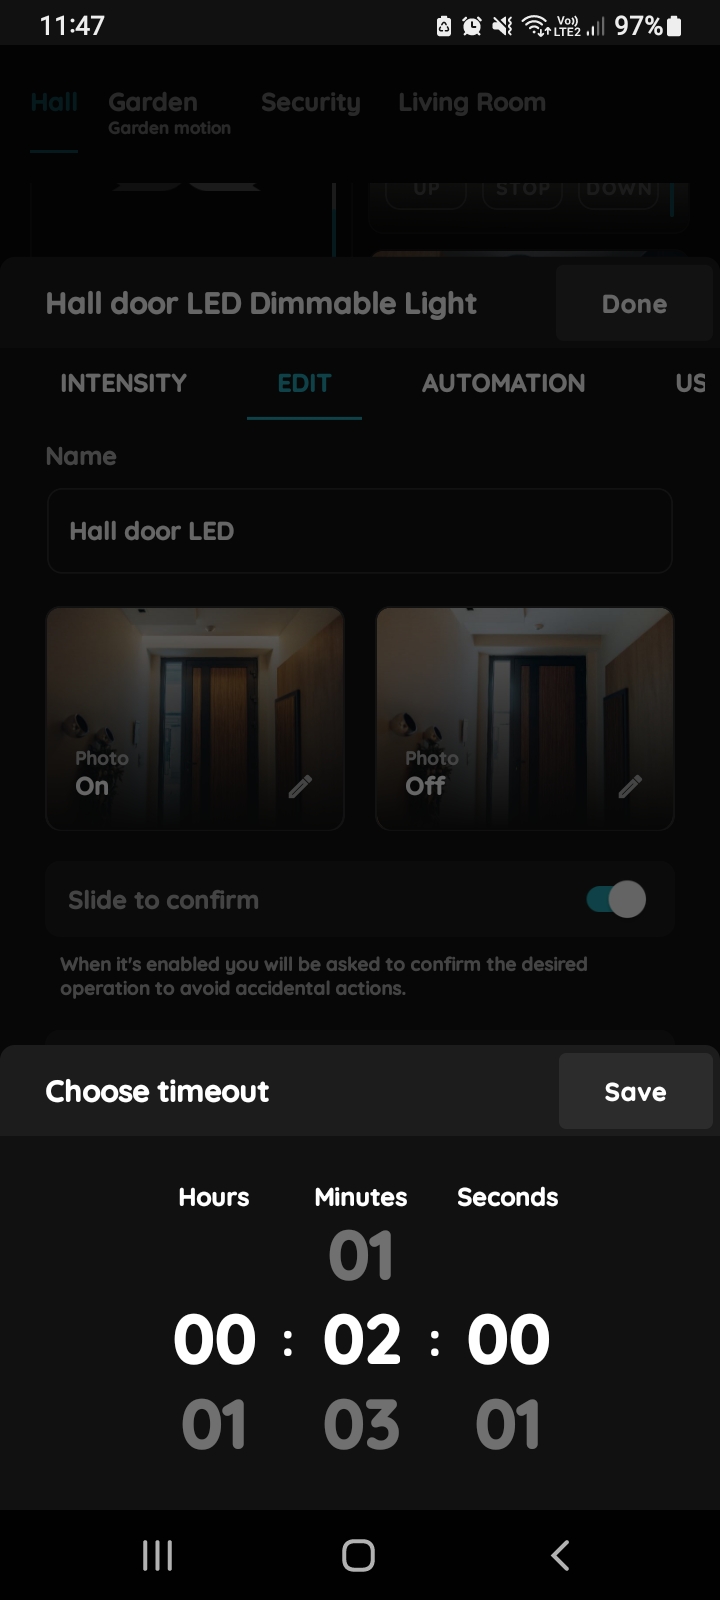
Timeout - Dimmable Light
Choose Timeout - scroll through columns for the Hours, Minutes, Seconds.
In this case, Timeout is set for 2 minutes.
Tap Save button.
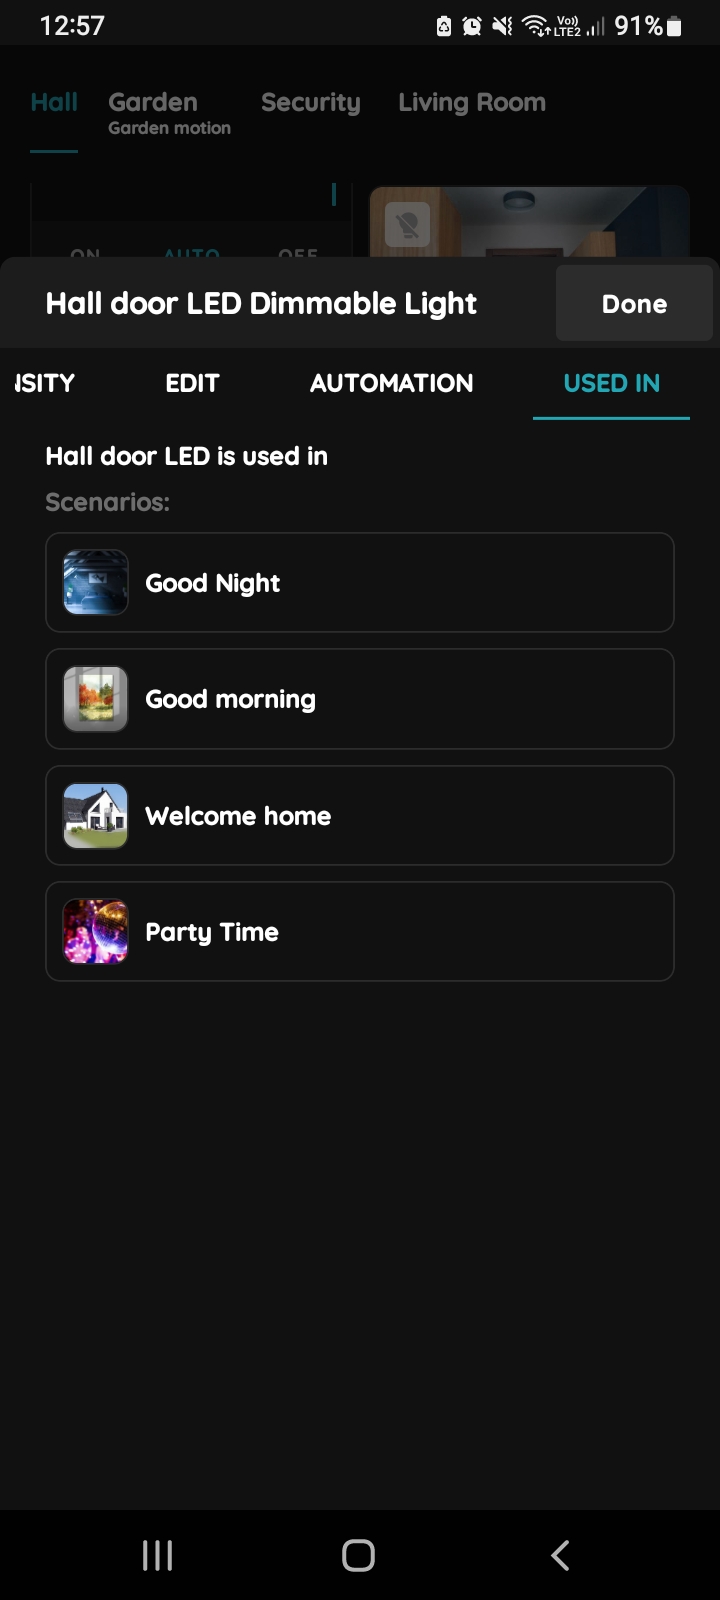
Used In - Dimmable Light
The Used In tab shows all the scenarios and automations where the Dimmable Light is applied, making it easy to see where this I/O is used without the need to search manually. If it isn't used in any, the list will be empty, and a message will display: "This I/O is not in use anywhere." This feature is particularly useful as it consolidates all relevant information in one place.
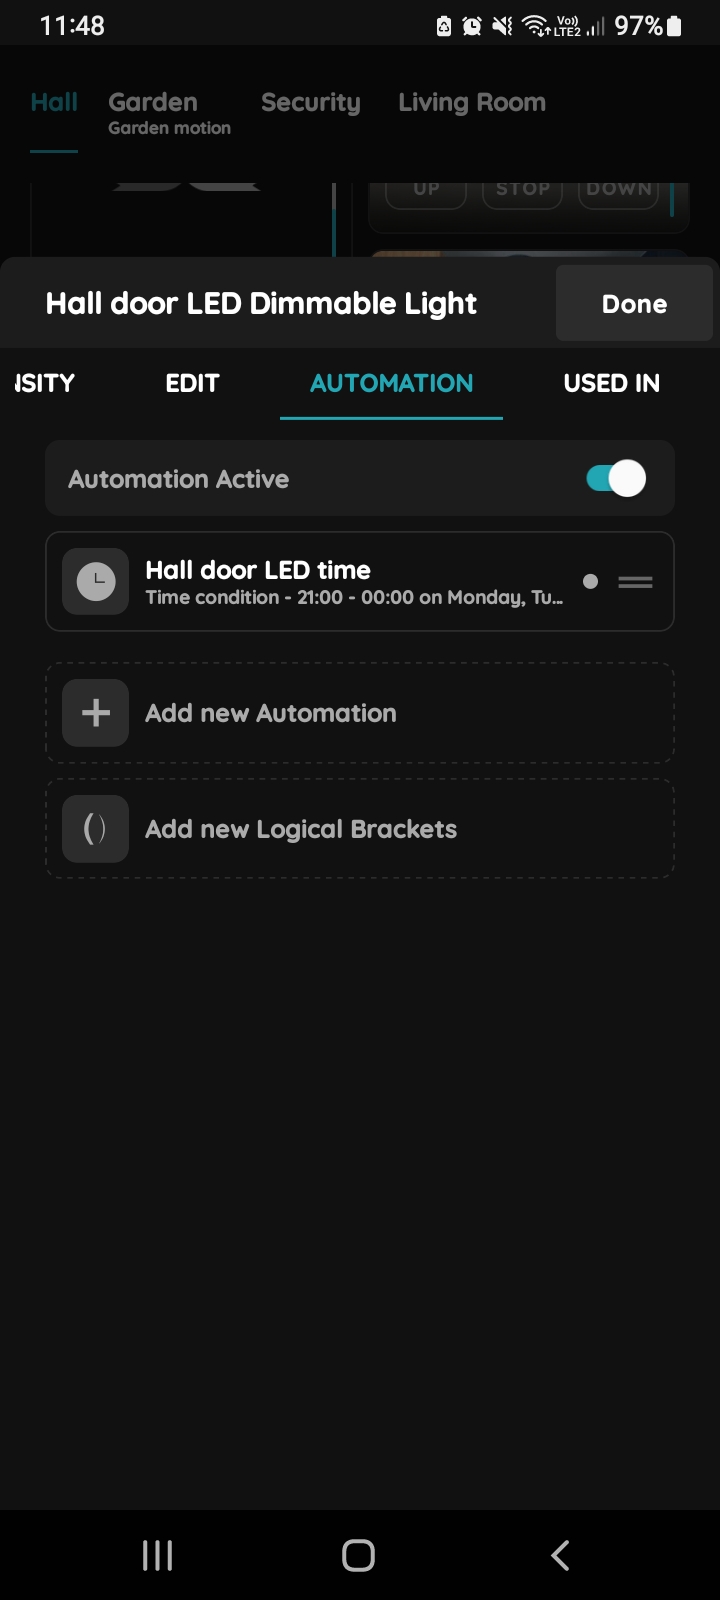
+ Add new Automation - Dimmable Light
Tap on the tab Automation and then on the +Add new Automation in order to add new automation.
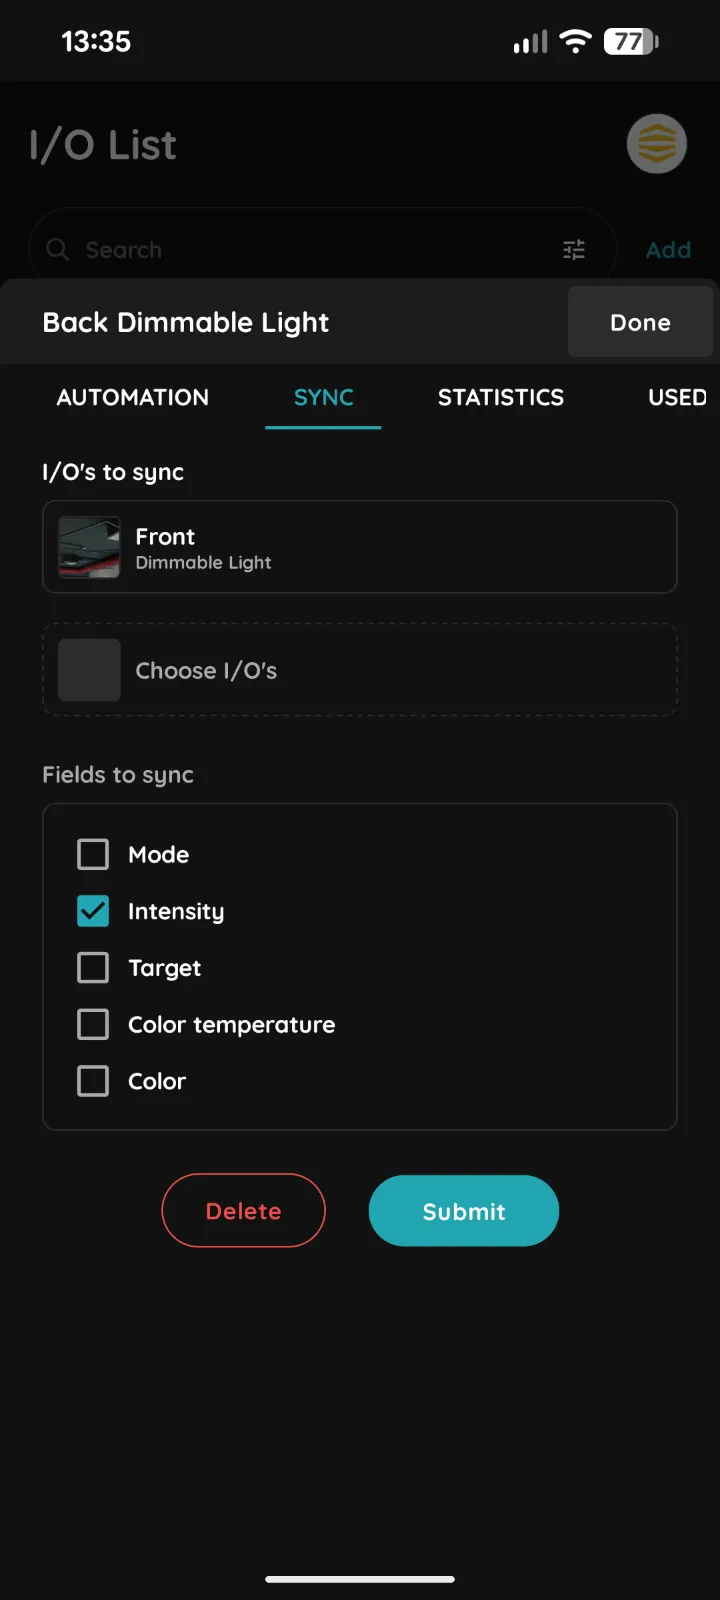
Sync - Dimmable Light
The Sync tab allows you to link multiple I/Os and create a lighting group where selected parameters stay synchronized across connected devices. Depending on the available functions of each I/O, you can choose another I/O from the same Bridge to sync with. Then, select which fields should stay synchronized. For example, if you select Intensity, changing the brightness level on one Dimmable Light will automatically apply the same brightness level to the selected synchronized light.
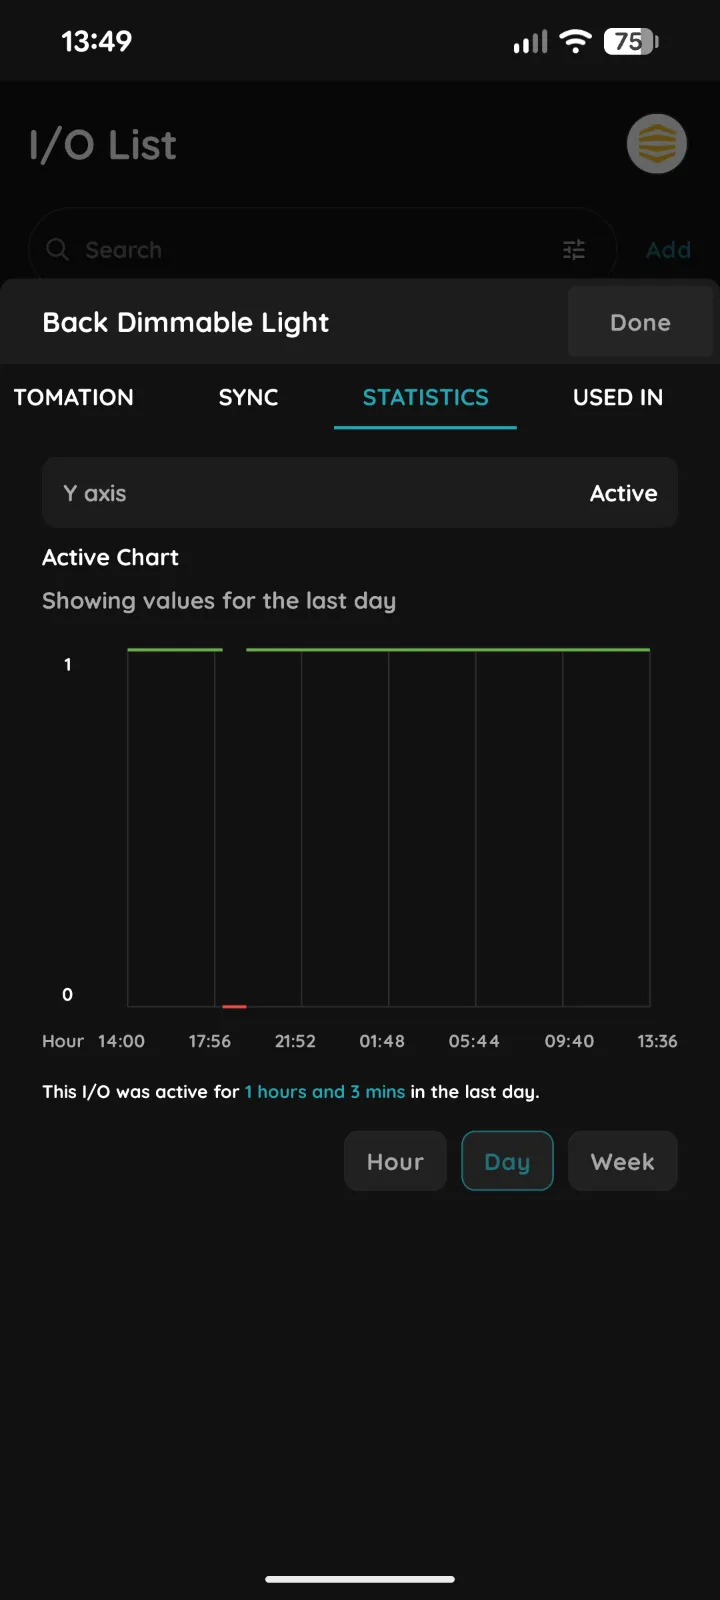
Statistics - Dimmable Light
The Statistics tab shows the activity history of the selected I/O. You can choose which value to display on the Y axis, such as Active, Intensity and Mode and view the chart for the last Hour, Day, or Week. The chart shows when the Dimmable Light was active or inactive during the selected period. Below the chart, you can see the total time the I/O was active, for example: This I/O was active for 1 hour and 3 minutes in the last day.
Used In - Dimmable Light
The Used In tab shows all the scenarios and automations where the Dimmable Light is applied, making it easy to see where this I/O is used without the need to search manually. If it isn't used in any, the list will be empty, and a message will display: "This I/O is not in use anywhere." This feature is particularly useful as it consolidates all relevant information in one place.