Smart PIERRE - Fan Coil
Description
The Smart PIERRE app gives the user control of a Fan Coil unit from the Dashboard card and from the card's settings.
1. Dashboard Control
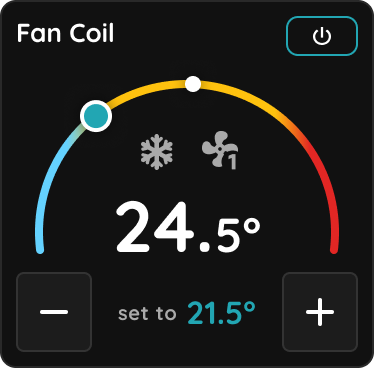
The Fan Coil card shows the measured room temperature on a gauge, the target temperature, and a fan icon with the current speed. From the card the user can:
- Turn the unit on or off with the power button. When off, the card shows "Heating off" or "Cooling off".
- Adjust the target temperature with the plus and minus buttons, in the step set by the installer.
On means "regulate to the target": the unit runs only while the room calls for heating or cooling, not permanently.
2. Fan Coil Settings
A long press on the card opens its settings with five tabs:
- Mode – the gauge with the measured and target temperature, plus and minus, and the On and Off buttons. The On icon is a sun in heating and a snowflake in cooling.
- Intensity – the fan speed. A vertical slider with one segment per speed the installer configured, and On and Off buttons for the fan.
- Edit – Name, Photo, Slide to confirm, Mode (Heating or Cooling, switched when the season changes), Minimum temperature, Maximum temperature, Temperature step, Temperature Format (°C or °F) and the Temperature Sensor used for regulation.
- Automation – the rules for the unit, see section 4.
- Used In – every scenario and automation the unit takes part in. Check it before renaming or removing the unit.
3. Hysteresis
The unit does not switch exactly at the target. Two hysteresis values, set by the installer in the PIERRE Partner app, define a band around the target: the unit starts when the room has drifted past the target by the regulation hysteresis and stops when it comes back past the target by the turn-off hysteresis. This prevents frequent switching when the measured temperature is close to the target. The values are not visible in the Smart PIERRE app; ask the installer if the room swings too much or the unit cycles too often.
4. Automation and Sensors
The Automation tab holds the rules, with an Automation Active switch. Tap Add new Automation to add a time condition, a delay or an existing I/O, for example a window contact that stops the unit while the window is open or a presence sensor that runs it only while the room is occupied. Conditions are joined with And and Or and can be grouped with logical brackets. The unit then regulates only while the rules are true.
The regulation and the rules run on the controller, so the unit keeps working without an internet connection. The step-by-step below shows a schedule rule.
Control of the Fan Coil
Controlling the Fan Coil is quick and simple, easily managed directly from the Dashboard.
Follow the example of the Fan Coil Living room.
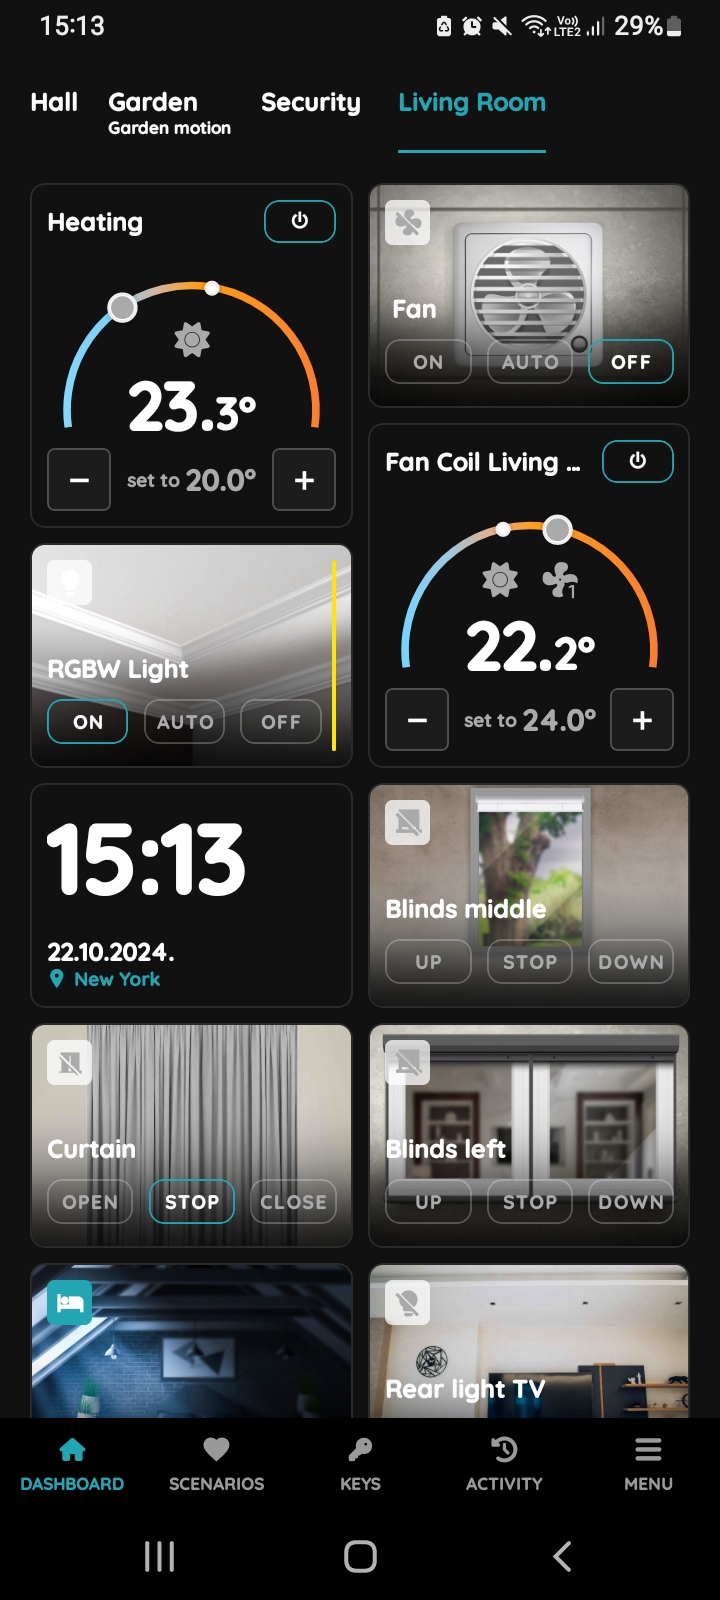
Control of temperature, heating/cooling and intensity
Use the +/- buttons to adjust the set temperature. With each tap on these buttons, the temperature increases or decreases according to the pre-set hysteresis level.
The current temperature is displayed with larger white numbers, while the set temperature is shown with smaller grey numbers (when heating/cooling is On).
The Fan Coil status is also shown: a sun icon indicates heating, a snowflake icon indicates cooling, and the Fan icon with a number beneath it displays the intensity level of the Fan Coil.
On the temperature slider, blue represents cooling levels, while orange represents heating levels. A smaller circle on the slider shows the current temperature, while the larger circle represents the set temperature.
A Power button is located in the top right corner of the Fan Coil card, allowing you to easily turn the Fan Coil On or Off.
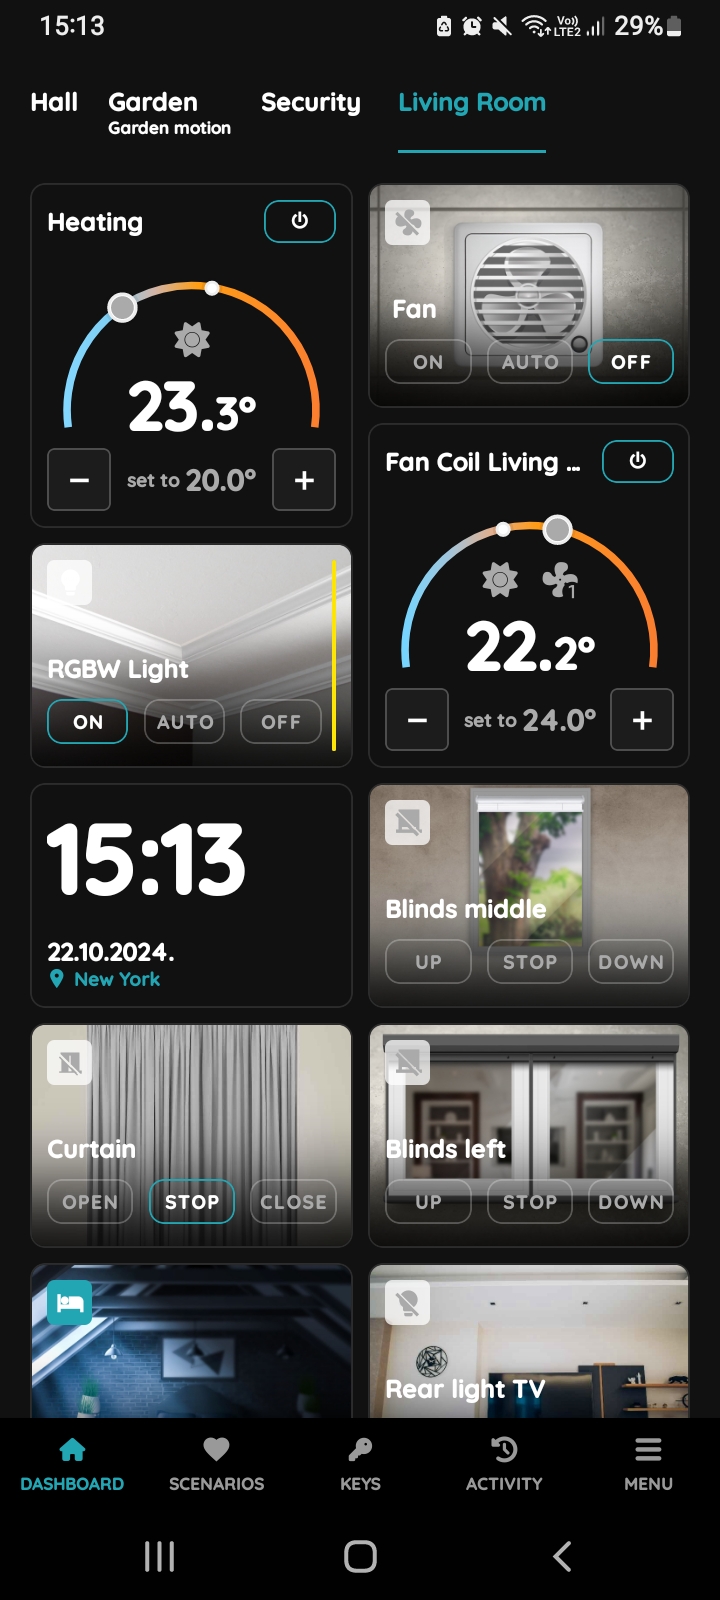
Turn the Fan Coil On
Tap the Power button to turn the Fan Coil On.
The Power button turns its border lines to blue.
Set temperature is displayed, too.
You can adjust desired temperature.
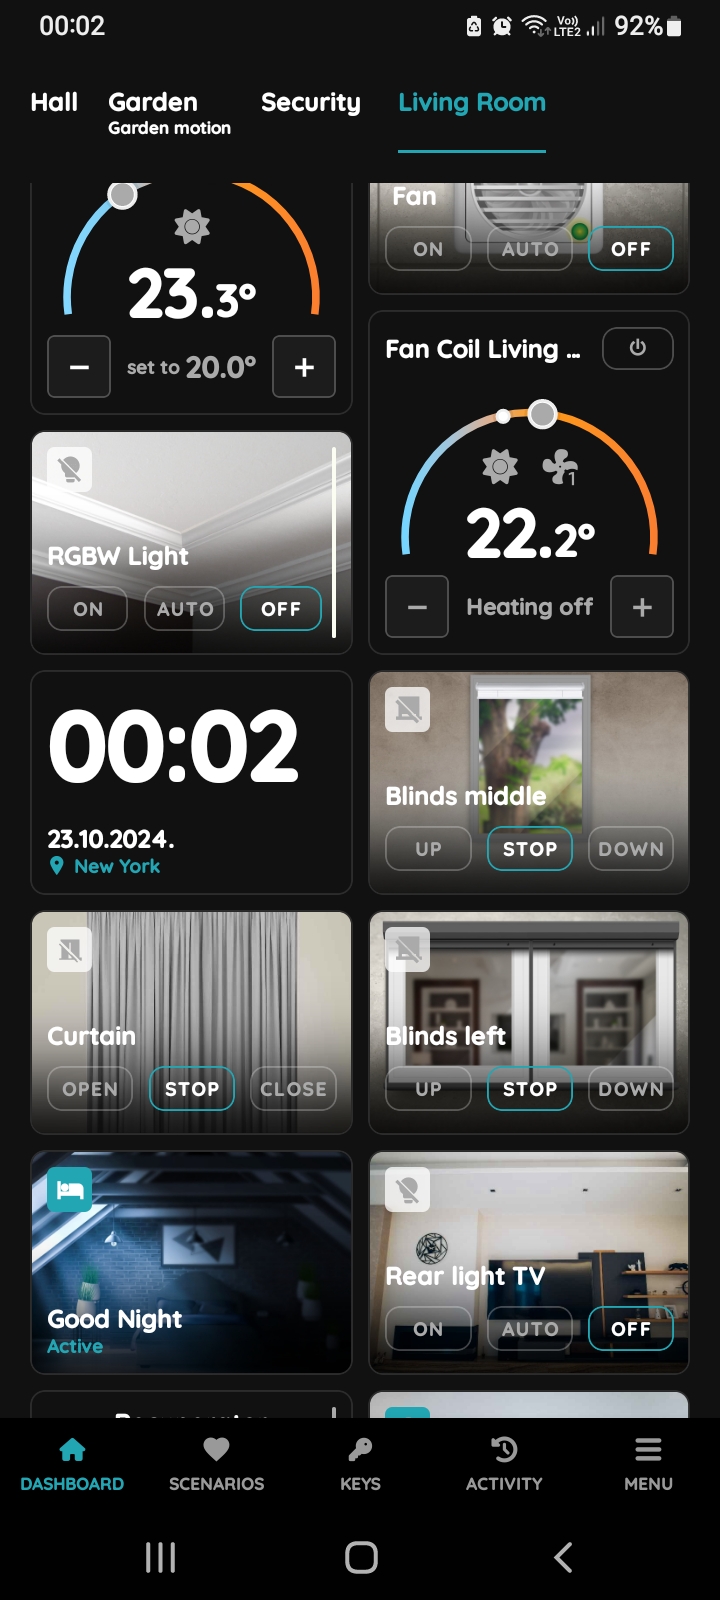
Turn the Fan Coil Off
Tap the Power button to turn the Fan Coil Off.
The Power button turns its border lines to grey.
It is shown current temperature and it is written Heating off or Cooling off.
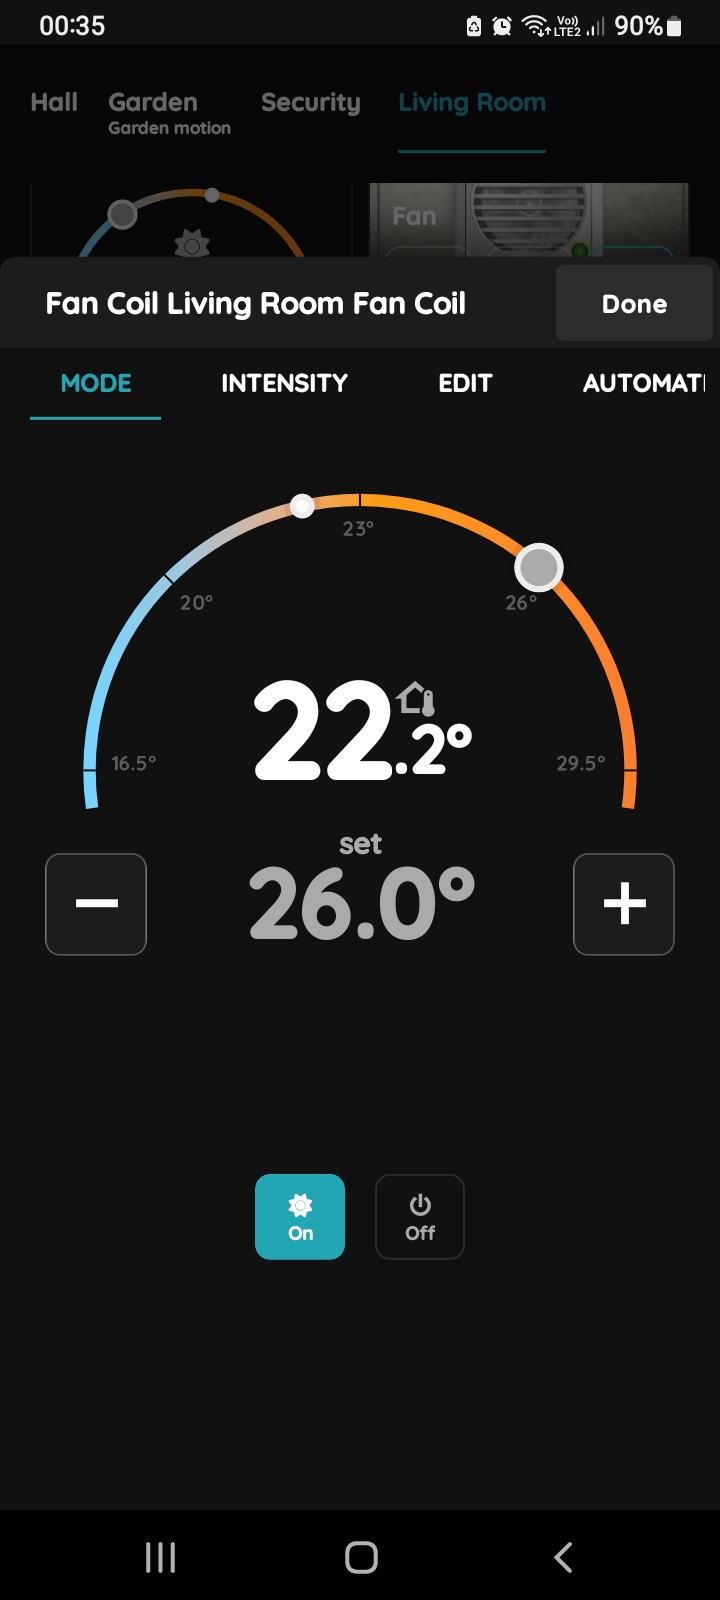
Mode - Heating On
Use the +/- buttons to adjust the set temperature. With each tap on these buttons, the temperature increases or decreases according to the pre-set hysteresis level.
The current temperature is displayed with larger white numbers, while the set temperature is shown with smaller grey numbers (when heating/cooling is turned On).
On the temperature slider, blue represents cooling levels, and orange represents heating levels. A smaller circle on the slider shows the current temperature, while the larger circle represents the set temperature. Tap the larger circle on the slider and slide it along to adjust the set temperature.
Tap the On button to activate heating or cooling. When heating is set, the sun icon is displayed on the On button. When cooling is set, the snowflake icon is shown. Once activated, the button turns blue.
Tap the Off button to deactivate heating or cooling. When activated, the Off button also turns blue.
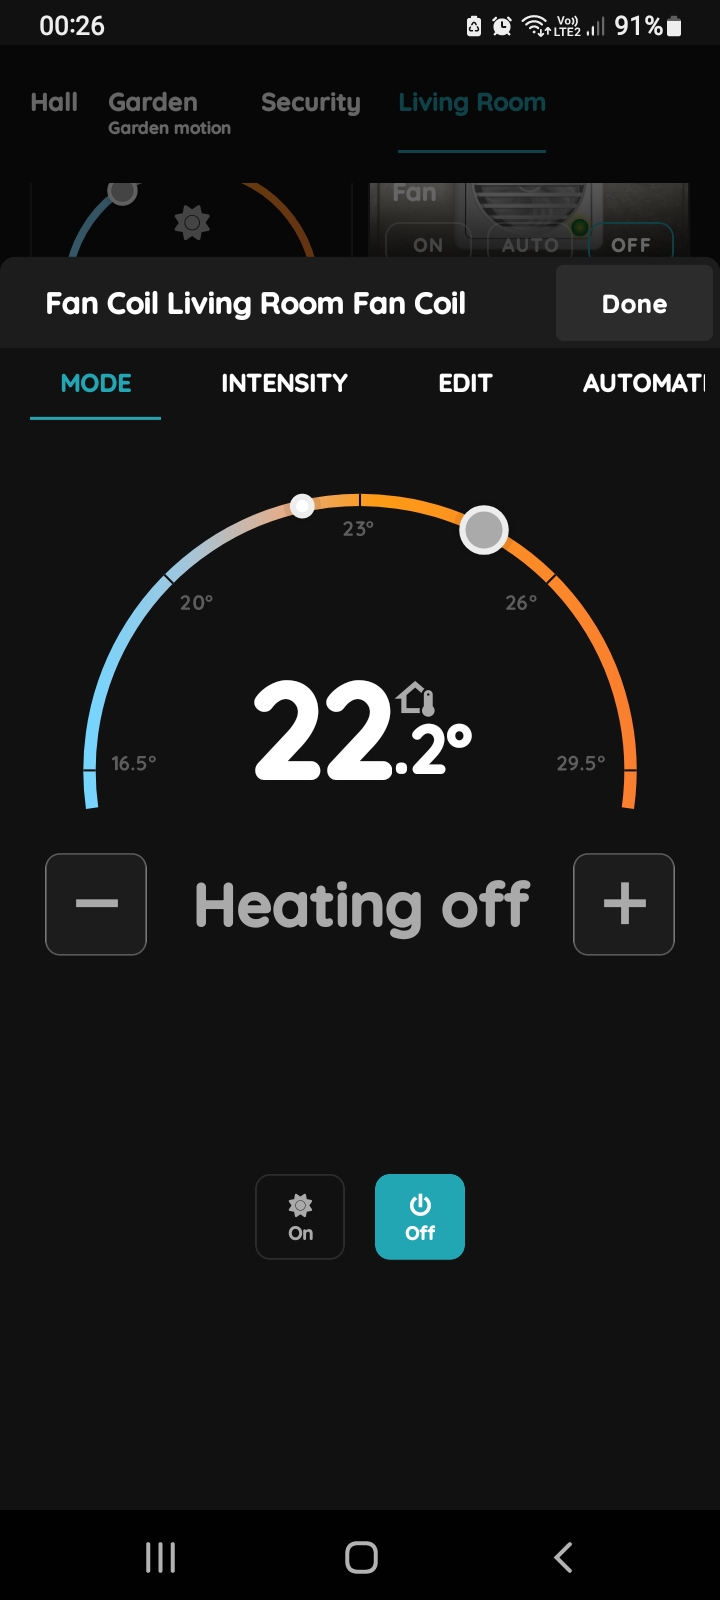
Mode - heating Off
To turn the Heating Off, tap the button Off.
You cannot set temperature now. It is displayed current temperature, and Heating off.
When heating is Off, Off button turns blue.
Tap Done to confirm.
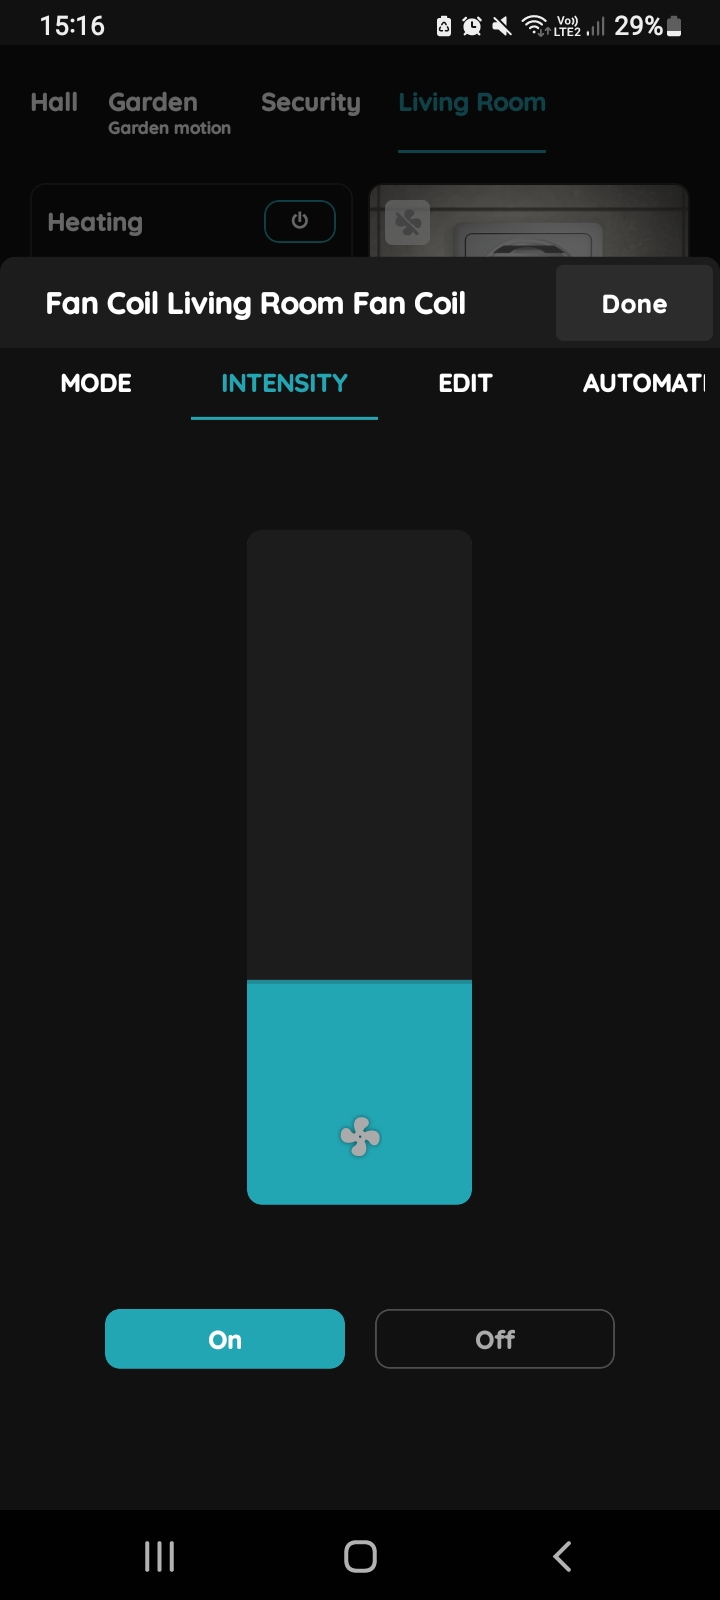
Intensity - Fan Coil
Tap on the tab Intensity.
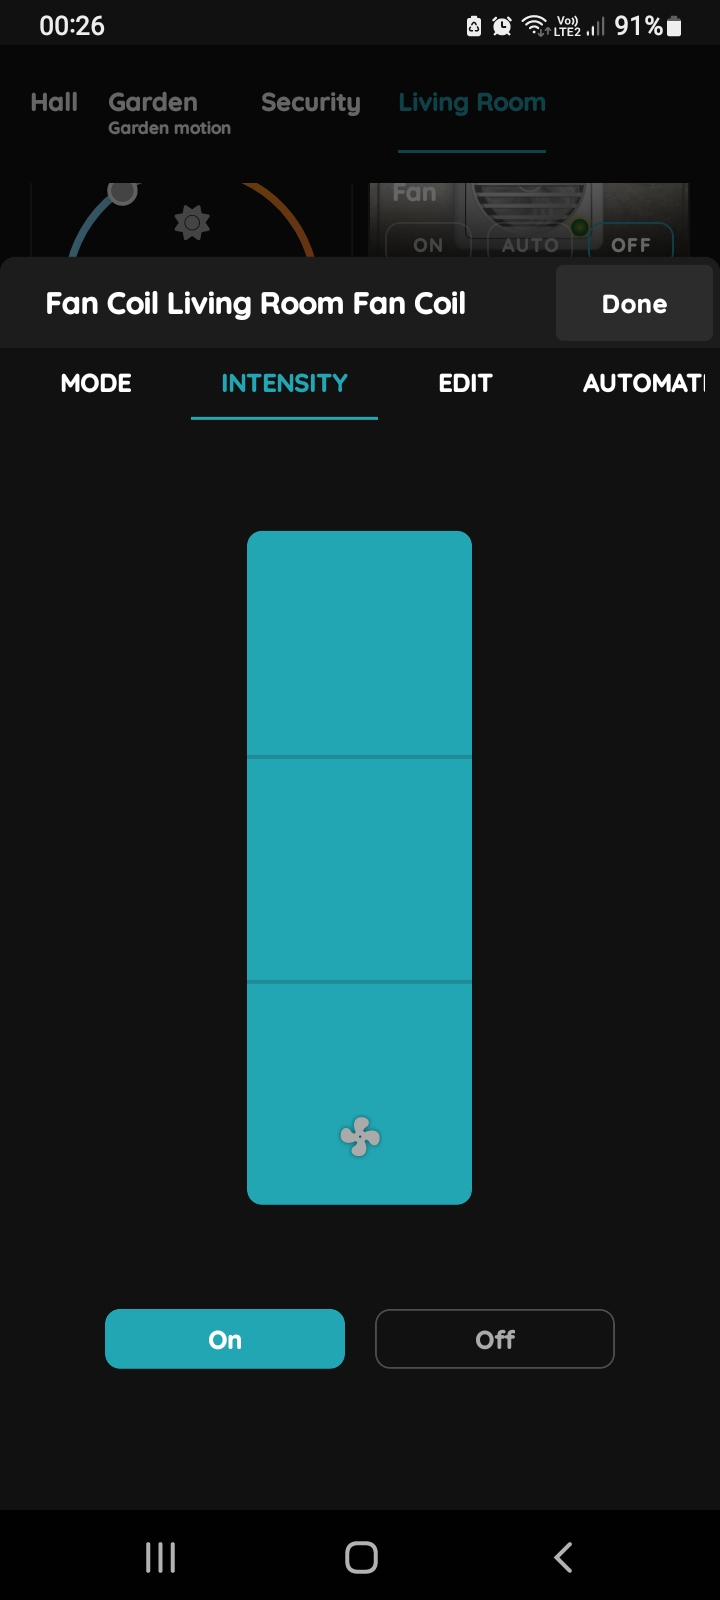
Intensity - On
Tap the On button to turn the Fan Coil On.
Once activated, the On button turns blue, and the intensity level is displayed on the slider. The Fan icon updates to reflect the On status.
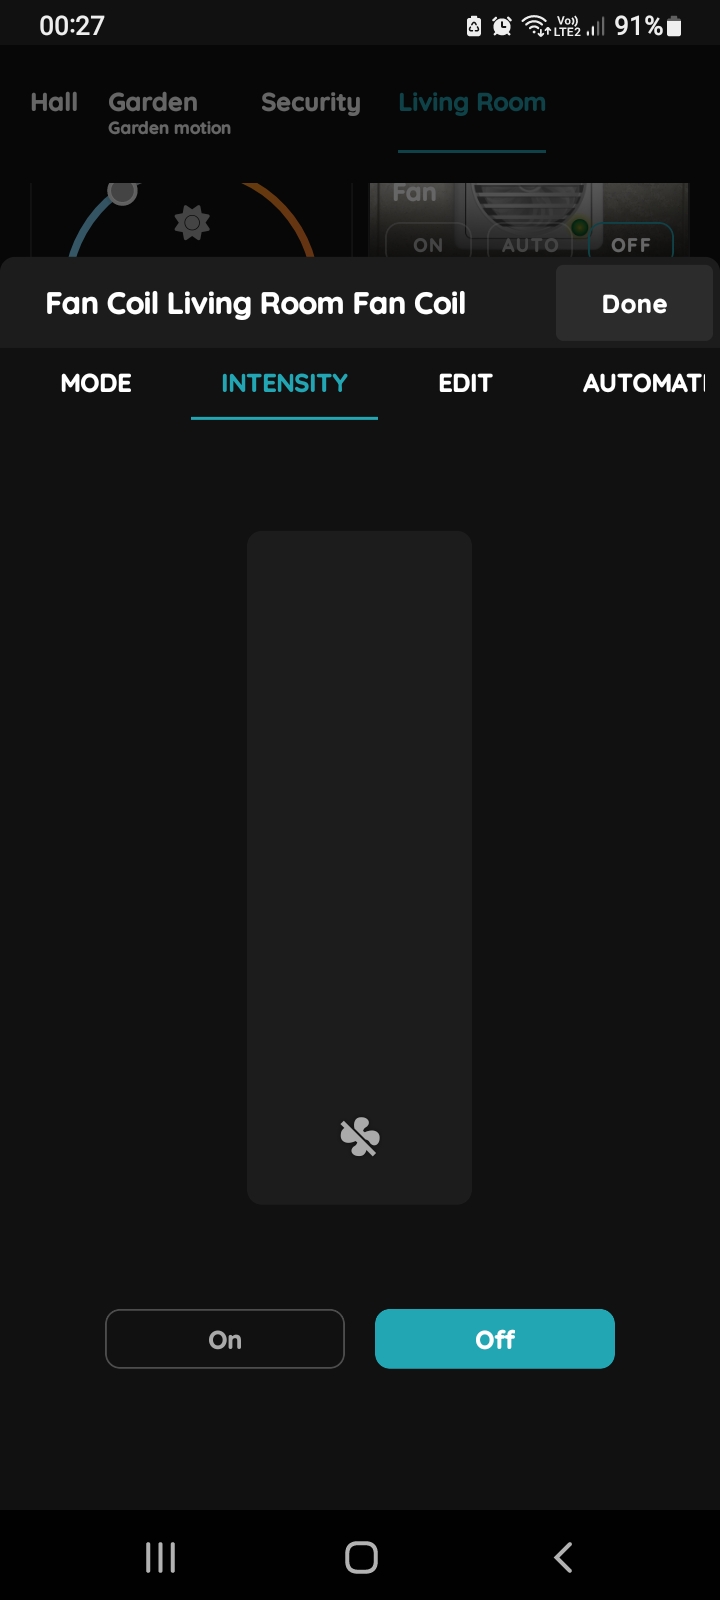
Intensity - Off
Tap the Off button to turn the Fan Coil Off.
Once turned Off, the Off button turns blue, and the intensity level is removed from the slider. The Fan icon updates to reflect the Off status, indicating the Fan Coil is turned Off.
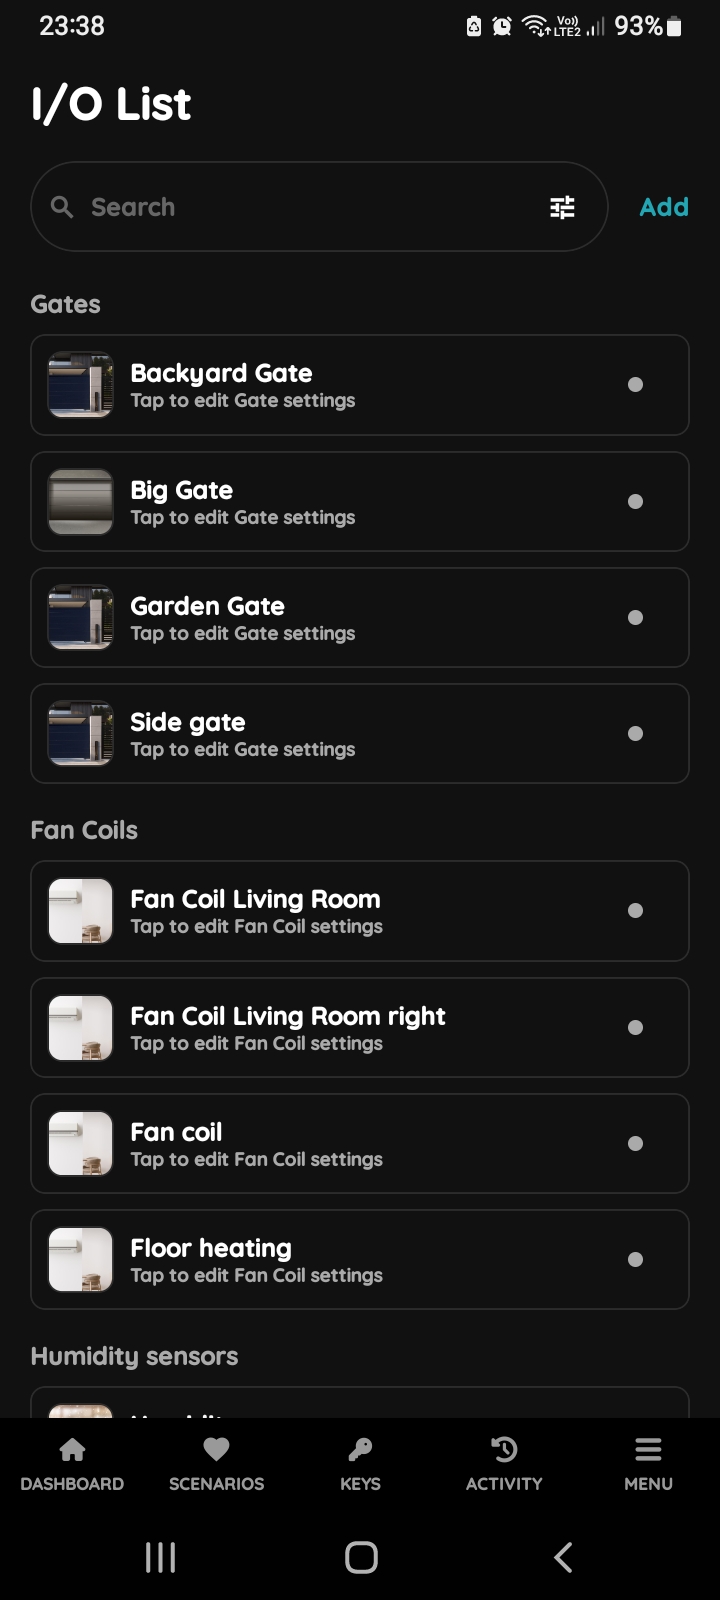
Open I/O list - Fan Coil
To edit Fan Coil follow next steps.
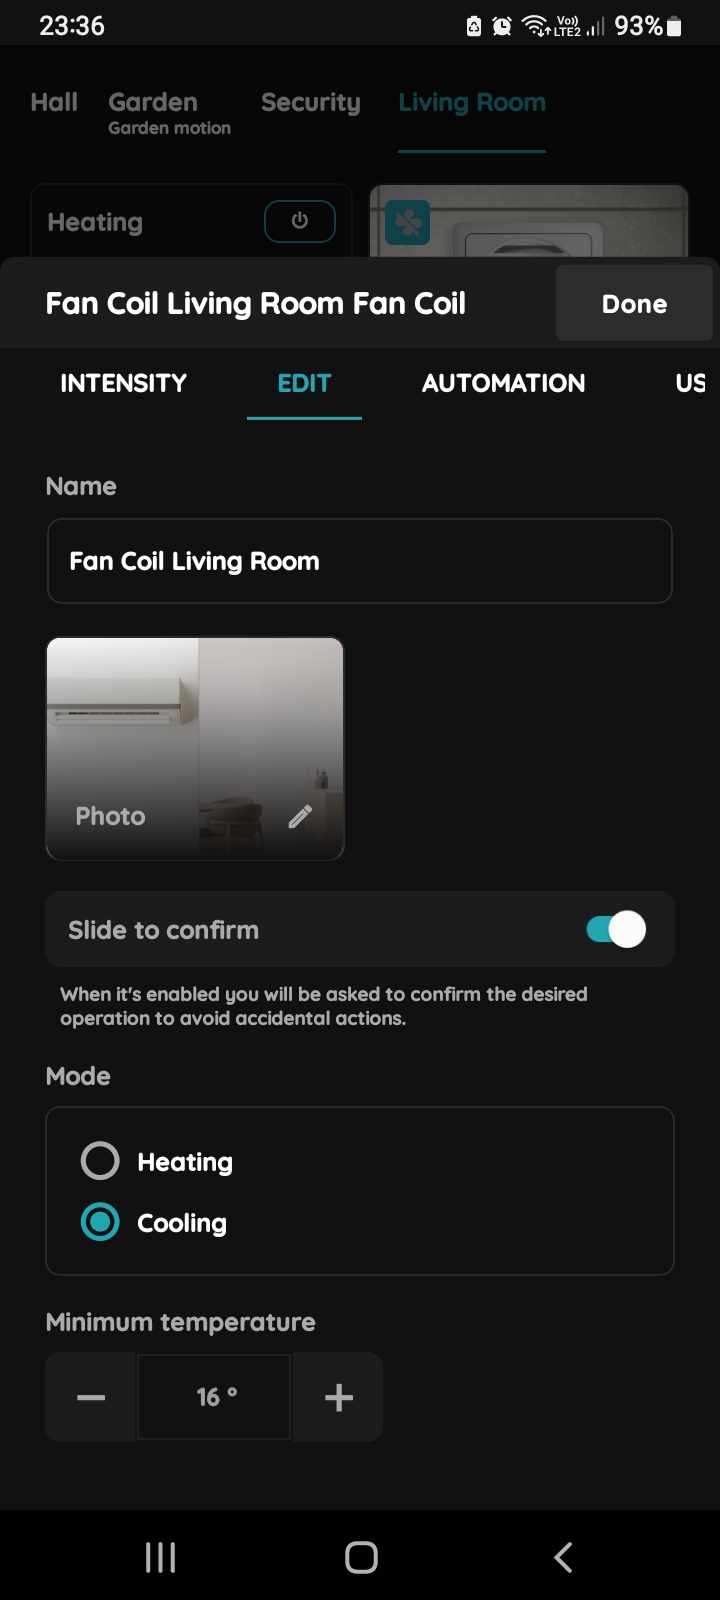
Edit Fan Coil
Tap the Edit tab and edit the form: Name, Photo, Slide to confirm, Mode (Heating or Cooling), Minimum temperature, Maximum temperature, Temperature step, Temperature Format and Temperature Sensor. Tap Submit to save.
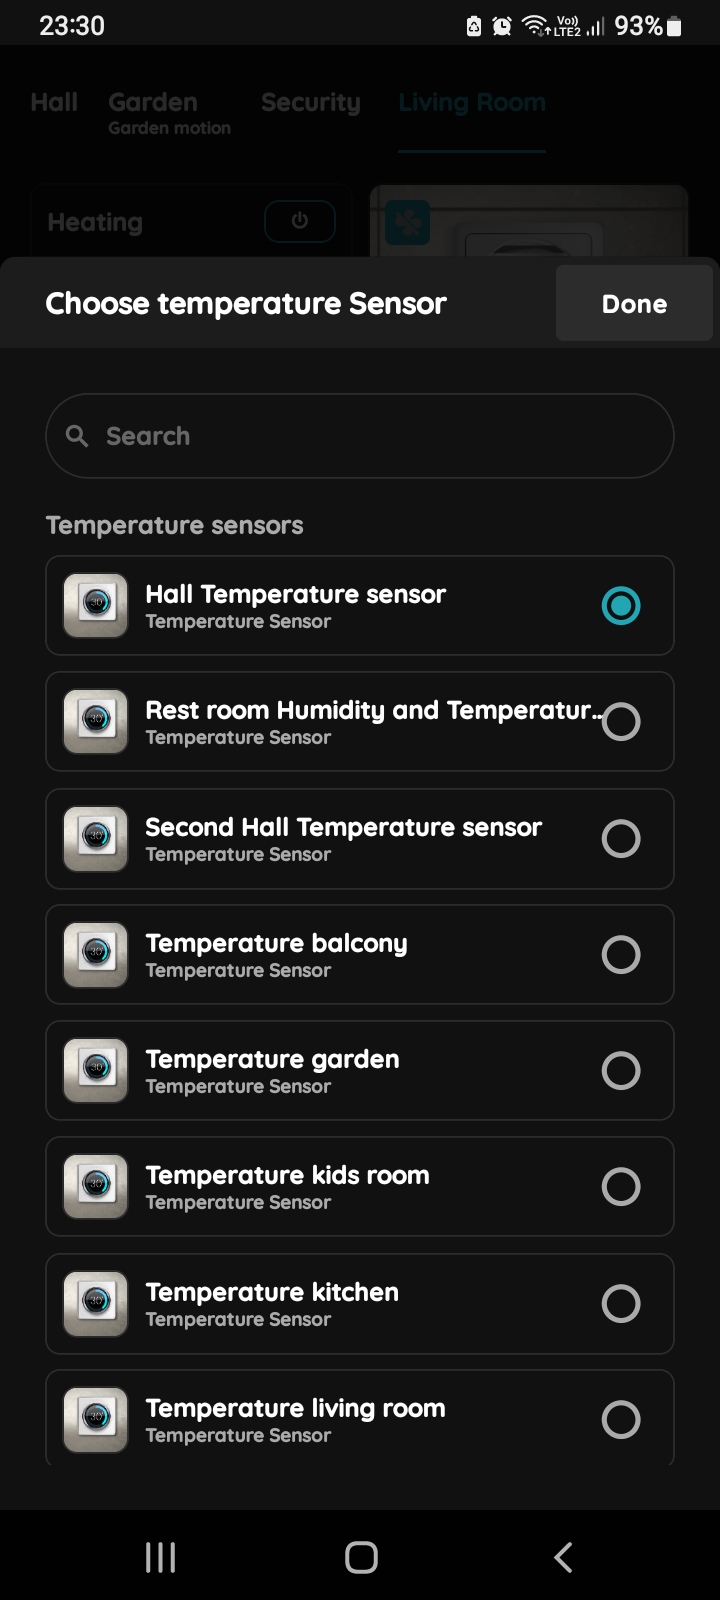
Choose Temperature sensor
Tap on the radio button next to the desired Temperature sensor from the list.
To confirm tap Save/Done.
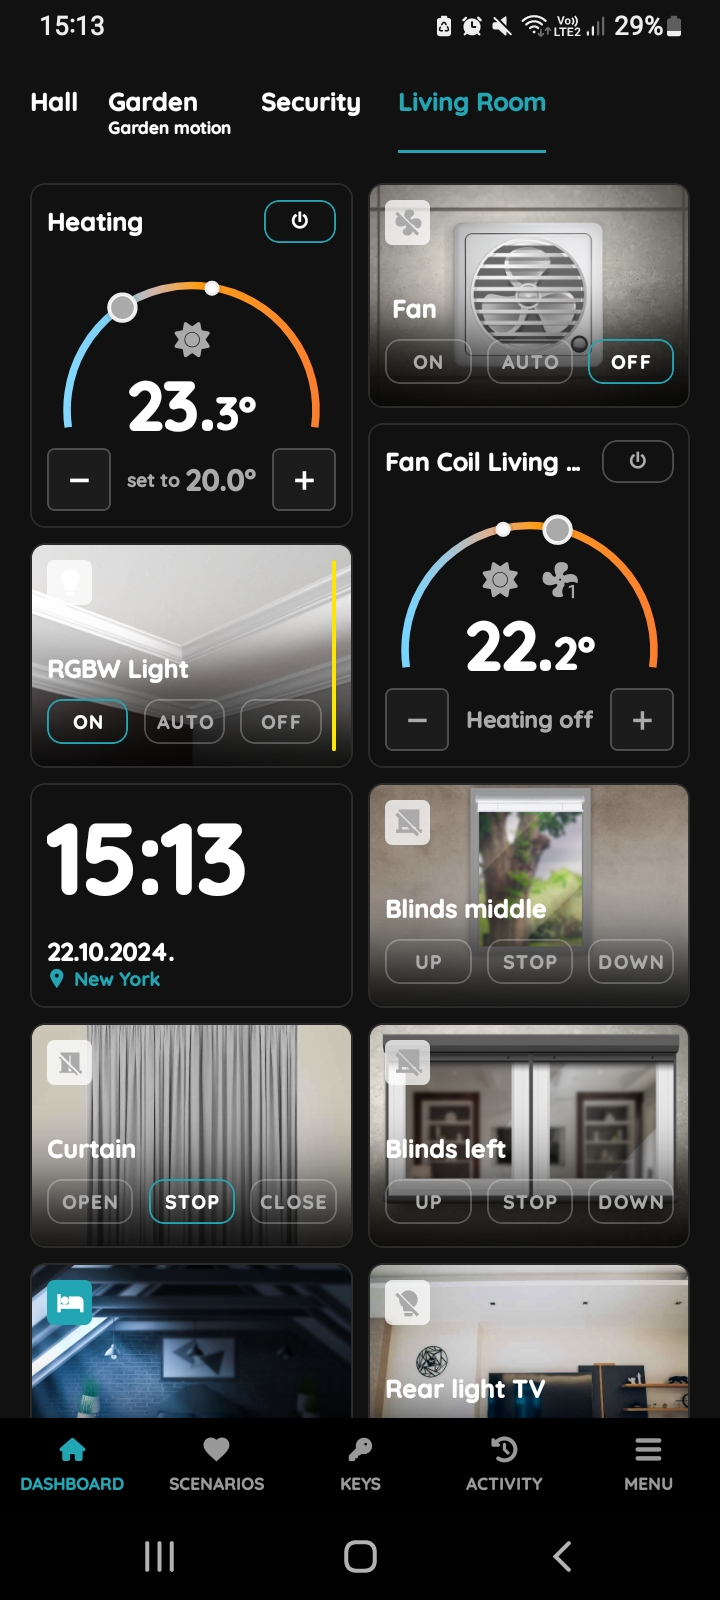
Automation
Start from the Dashboard. In this example the Fan Coil is set to run automatically every day between 09:00 and 00:00 (midnight) to keep the room at the target during the day. Open the Fan Coil settings as shown in the next steps.
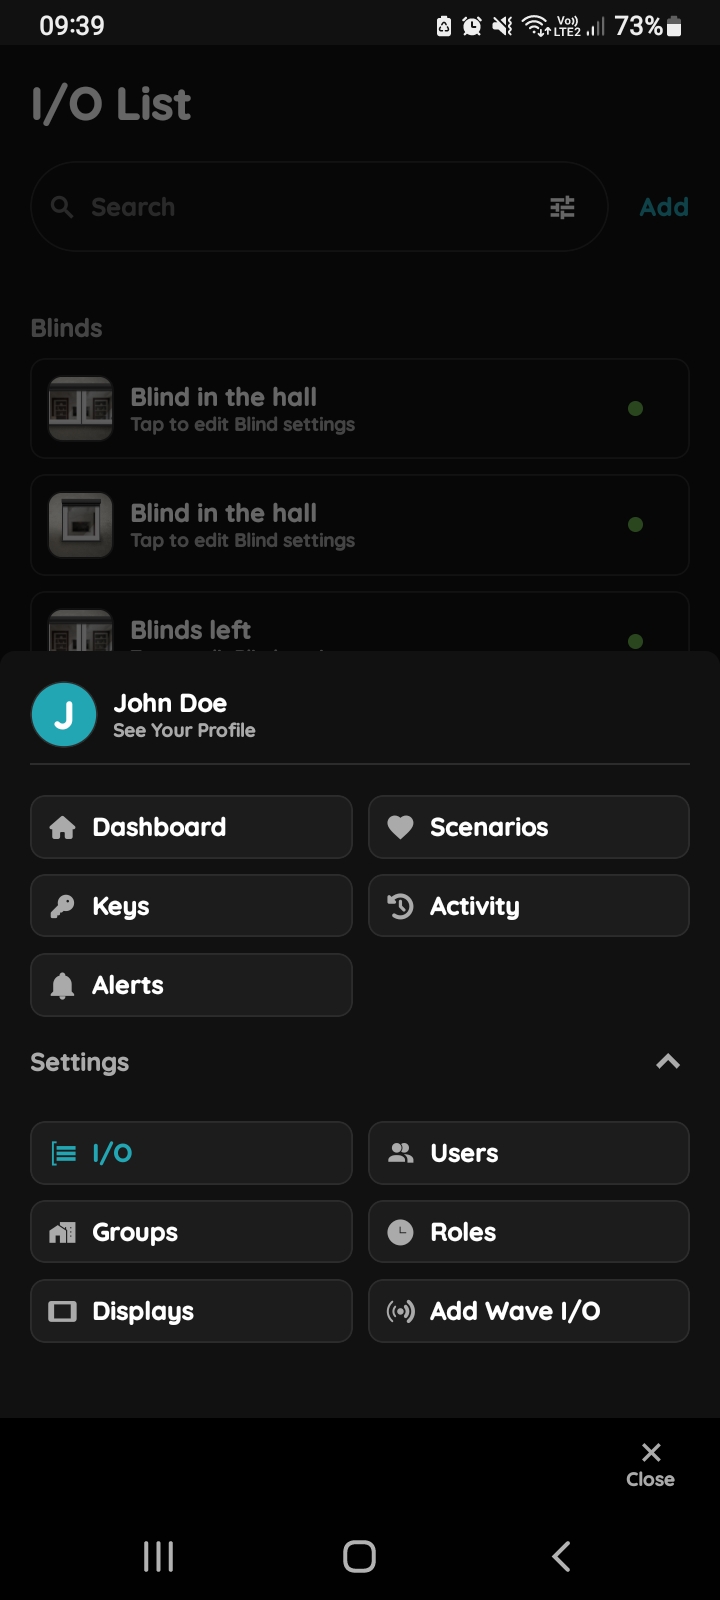
Open I/O
In the Menu, under Settings, tap on the I/O.
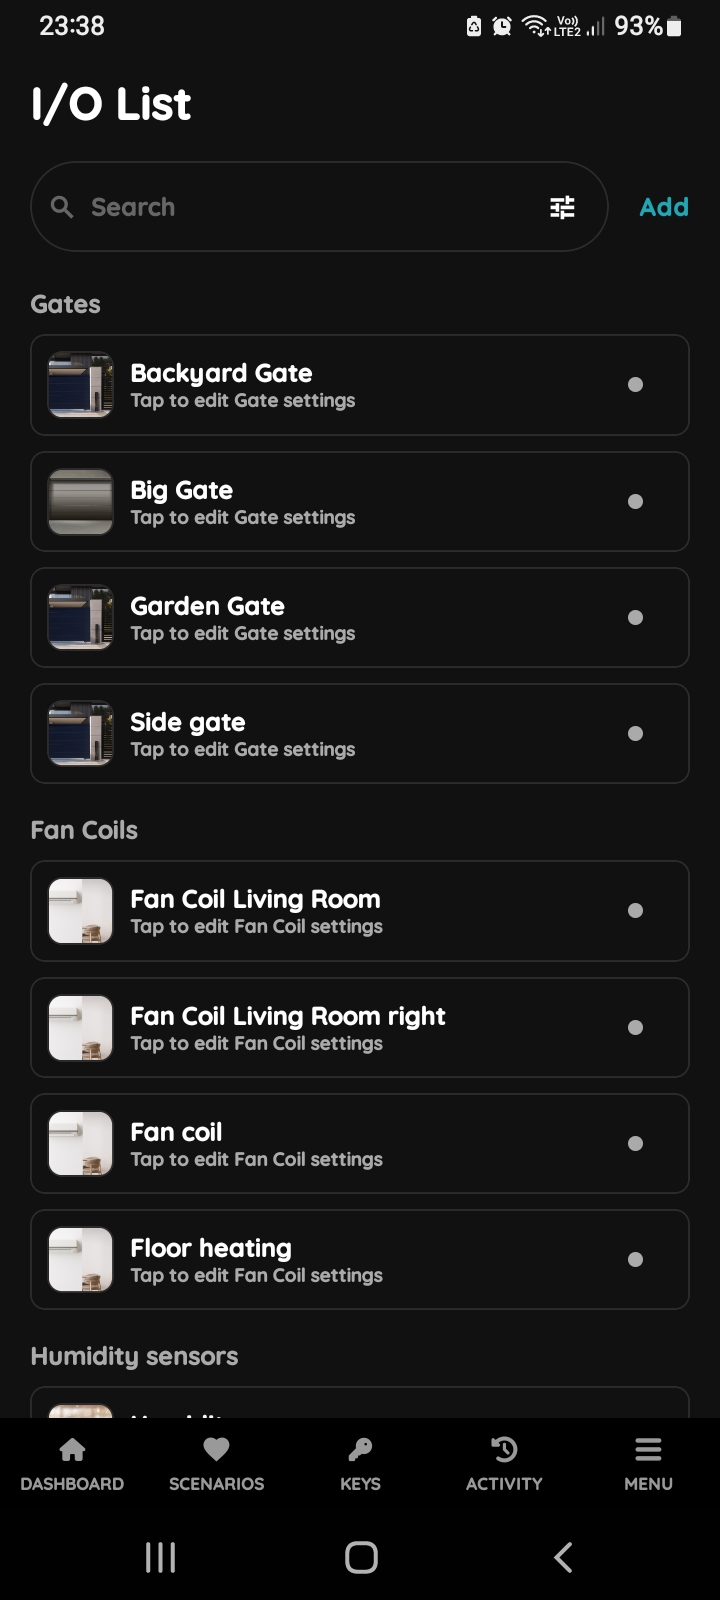
Open I/O list - Fan Coil
Open I/O list, scroll to the Fan Coils and tap on the desired Fan Coil from the list.
In this case on Fan Coil Living room.
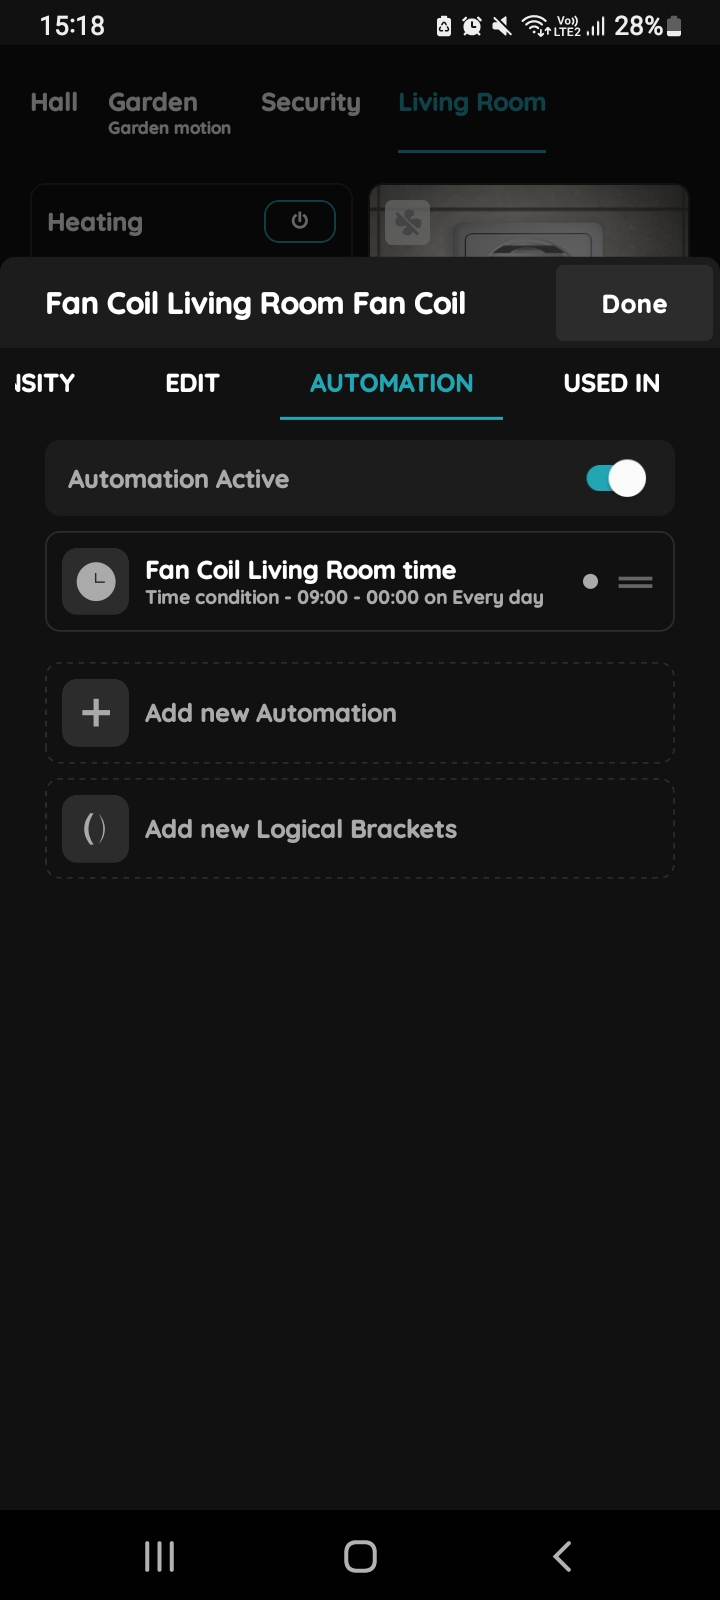
+Add new Automation - Fan Coil
Tap on the tab Automation and then on +Add new Automation.
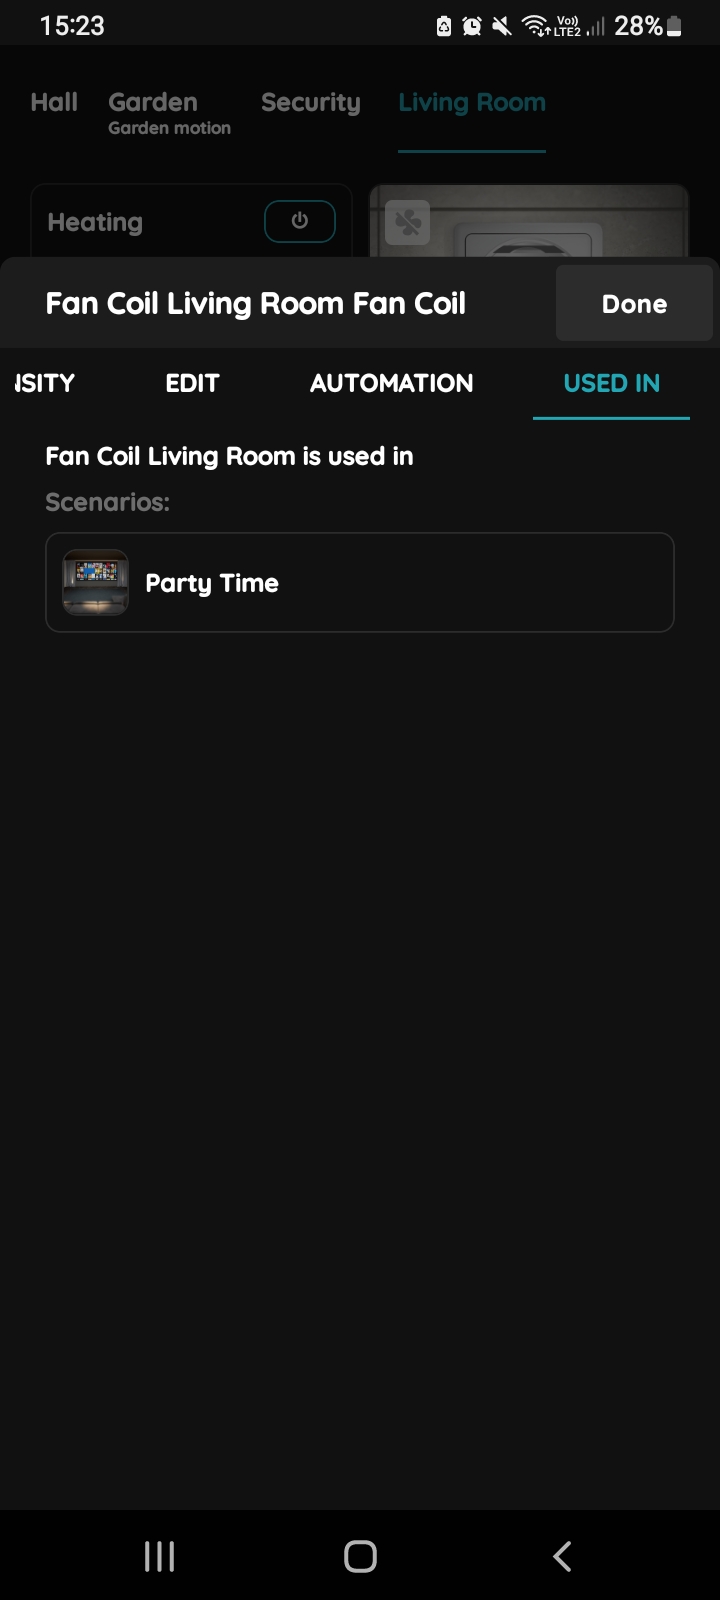
Used In - Fan Coil
The Used In tab shows all the scenarios and automations where the Fan Coil is applied, making it easy to see where this I/O is used without the need to search manually. If it isn't used in any, the list will be empty, and a message will display: "This I/O is not in use anywhere." This feature is particularly useful as it consolidates all relevant information in one place.