Smart PIERRE - IO Sync (Overview)
Description
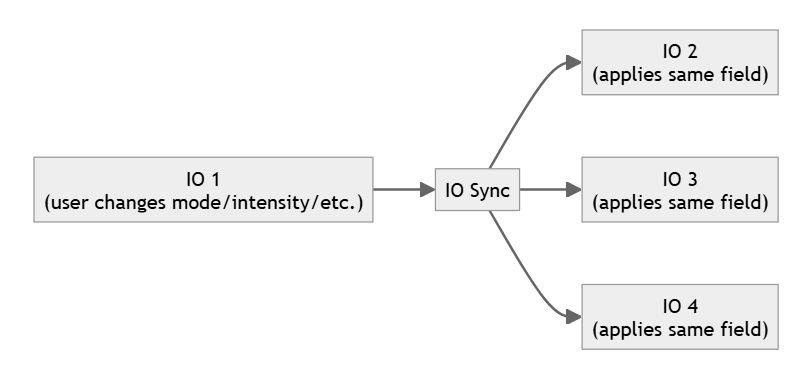
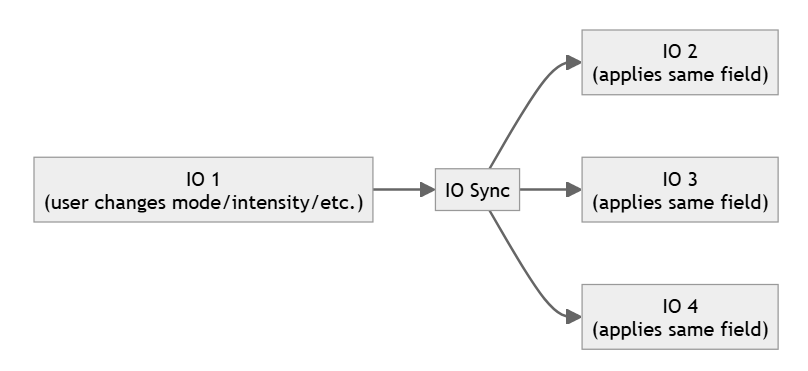
IO Sync links two or more I/Os so they stay in step. When one device changes a supported setting, the other synchronised devices follow automatically. It is used when several devices should behave as a single device.
Common Examples
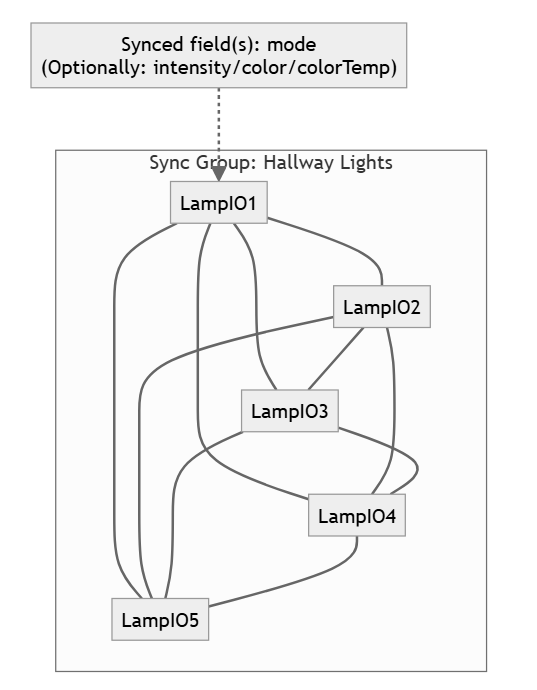
- Hallway lighting — five lights that always switch on and off together.
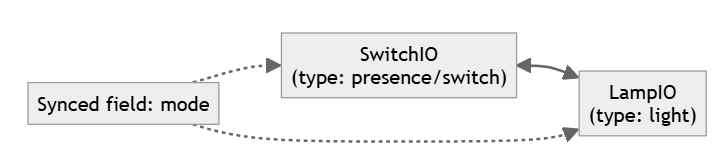
- Switch and lamp — the switch and the lamp always show the same on/off state.
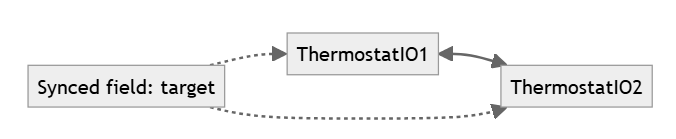
- Thermostats — several thermostats share the same target temperature.
What Can Be Synchronised
The fields available depend on the I/O type — typically mode, intensity, target, colour and colour temperature. Only the selected fields stay in step; the rest remain independent.
Technical Notes
- IO Sync works only between I/Os connected to the same bridge. Two lights in the same room may sit on different bridges, and then no configuration will link them — check this before promising synchronised behaviour.
- Synchronise only the fields that need to match. Synchronising everything removes the ability to set one device separately.
- Changes made from the Dashboard, from automations and from scenes all propagate, so a scene acting on one synchronised device affects the whole group.
What can be synced
IO Sync synchronizes user-controlled settings (“control fields”):
- mode (e.g., on/off, heat/cool)
- target (e.g., temperature / setpoint)
- intensity (e.g., brightness / dim level)
- color
- colorTemp (color temperature)
If a device doesn’t support one of these fields, IO Sync will skip that field for that device.
What cannot be synced (by design)
System state fields are not synced
Some fields represent read-only system state, not user control. For example, active is not syncable.
Window coverings are not supported
Window coverings (blinds/shades) often have complex motion states (opening/closing/stopped/calibrating), which can produce unreliable sync behavior. They are not allowed in sync groups.
Sync is local-only
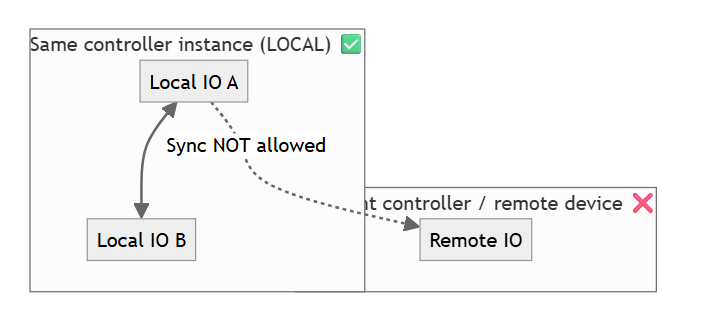
Sync works only between local devices on the same controller instance. Remote/network devices are not eligible.
Why: distributed propagation can create feedback loops and timing races that are hard to prevent reliably across network boundaries.
Automations do not trigger sync
IO Sync responds only to direct user commands, not automation-triggered changes. If an IO in a sync group has an automation (e.g., a schedule or sensor trigger) that changes its state, only that IO will change—the other IOs in the group will not sync.
Example: A sync group of 5 lights where one light has a motion-sensor automation:
- When motion is detected, only that one light turns on
- The other 4 lights remain off
- The sync group is now "out of sync"
This behavior may be used intentionally (e.g., to create exceptions within a group), but requires careful planning.
How syncing behaves
- Bidirectional: changes can originate from any device in the group
- Multi-device: groups can contain more than two devices
- Fast: local propagation is designed to be near-instant
- Deterministic conflicts: if two changes happen at nearly the same time, the system converges using last-write-wins
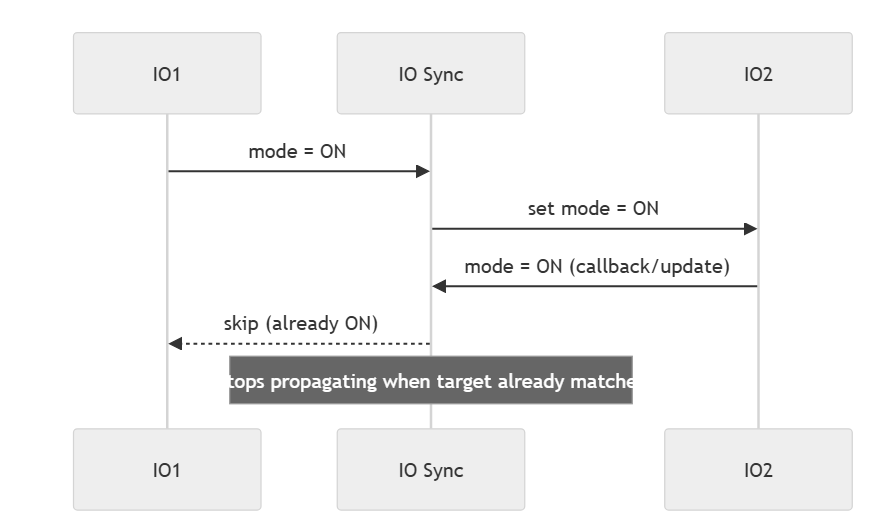
- Loop-safe: the system avoids endless back-and-forth updates
Setup model (simple rules)
Each device can belong to one sync group (multi-sync is not supported). A sync configuration defines:
- the other devices in the group
- the fields to keep synchronized
If one device is unavailable, the system continues syncing the remaining available devices.
Mermaid Diagrams
Supported I/O Types
- Lights
- Dimmable Lights
- Fans
- Electric Outlets
- RGBCW Lights
- RGB Lights
- RGBW Lights
- Valves
- Water Heater
Blinds, curtains and shaders are not offered in the Sync tab.
Supported Synchronisation Fields
All five fields — Mode, Intensity, Target, Colour Temperature and Colour — are always offered. Select only the fields that the devices in the group support; a field that a device does not have is simply ignored for that device. One or more fields can be selected, depending on the behaviour required.
System Requirements
IO Sync only works between I/Os connected to the same bridge. Supported bridges:
- PIERRE Controller
- PIERRE Display
- PIERRE Gateway
I/Os connected to different bridges cannot be synchronised with IO Sync, even when they are in the same room.
Configuration
The Sync tab is available to Partner accounts only. End users do not see it.
- Sign in to the Smart PIERRE application with a Partner account.
- Press and hold the card of one of the I/Os to open its settings.
- Open the Sync tab.
- Under I/Os to sync, choose the other I/Os.
- Under Fields to sync, tick the fields that must stay equal.
- Save. The other I/Os are linked back automatically, so the group is complete without opening each one.
To change a group, open the Sync tab of any member, adjust the I/Os or fields and save again. To dissolve a group, open the Sync tab of any member and press Delete. This clears the sync setting on every member.
Operation and Timing
- The synchronisation runs inside the bridge, so it keeps working without an internet connection. Creating, changing or deleting a group needs the cloud.
- Rapid repeated changes are grouped together. The first change is applied immediately; further changes within about a second are collected and applied once, so the group can lag the last command by up to a second.
Rules
- The group does not align the devices when it is created. They become equal at the first change after saving.
- If a member is unreachable when a change happens, the other members still follow. The member that was unreachable is not brought up to date afterwards.
Technical Notes
- Check the bridge assignment before promising synchronised behaviour. Two lights in the same room may sit on different bridges, and no configuration will link them. Re-pair the device to the right bridge first.
- For on/off switches tick Mode only. For dimmers tick Mode and Intensity.
Step-by-Step Example: Three Hallway Lights
A hallway has three Wave light switches, Hallway 1, Hallway 2 and Hallway 3, all paired to the same PIERRE Display. The customer wants any switch to control all three lights.
- Check the bridge. In the PIERRE Partner application open the display and confirm that all three switches are listed under it. If one is paired to a different display or gateway, re-pair it first; otherwise it cannot join the group.
- In the Smart PIERRE application, signed in as Partner, press and hold the Hallway 1 card.
- Open the Sync tab.
- Tap I/Os to sync and tick Hallway 2 and Hallway 3. Confirm.
- Under Fields to sync tick Mode only. Leave Intensity, Target, Colour Temperature and Colour unticked, because these are on/off switches.
- Save.
- Test. Press the wall switch of Hallway 2. Hallway 1 and Hallway 3 switch on within about a second, and the three cards in the app show the same state. Switch Hallway 3 off from the app. All three go off.
- Open Hallway 2 or Hallway 3 and check the Sync tab. Each already lists the other two, which confirms the group.
Variant: Two Dimmable Lights
Two dimmable lights must always show the same brightness. Follow the same steps, but tick both Mode and Intensity. Setting one light to 50 % then sets the other to 50 % as well. If the customer wants to dim one light on its own occasionally, tick Mode only.
Removing the Group
Open the Sync tab of any of the three lights and press Delete. All three lights return to independent operation.
1) High-level: one device change propagates to the group
2) Example: 5 hallway lights synced on mode
3) Example: switch + lamp (different device types)
4) Example: thermostats synced on target
5) Local-only rule (what’s allowed vs not allowed)
6) Loop-safe behavior (conceptual)
This shows why sync doesn’t “bounce” forever: once everyone already has the value, propagation stops.
Setting up IO Sync in the Smart PIERRE app
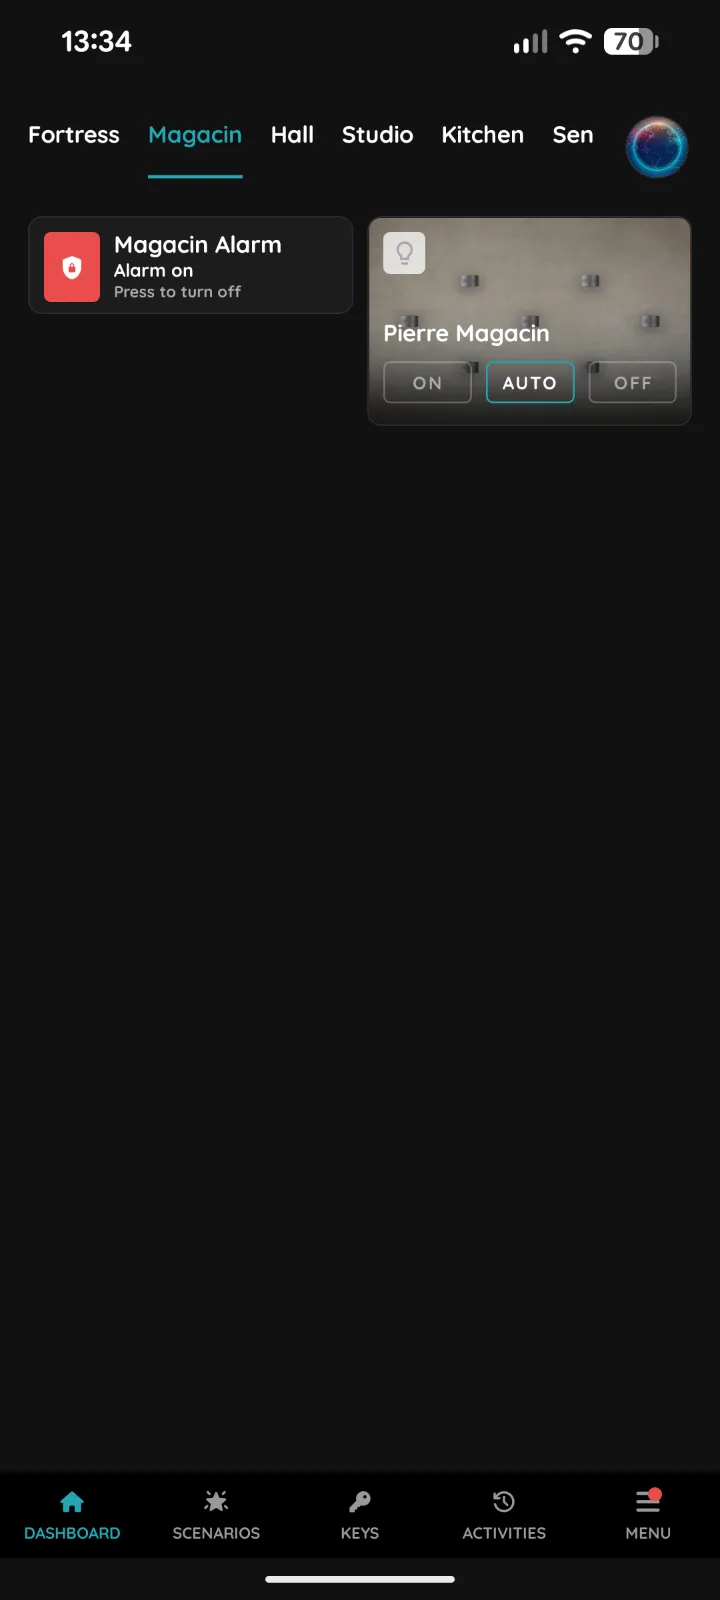
Open the device you want to sync
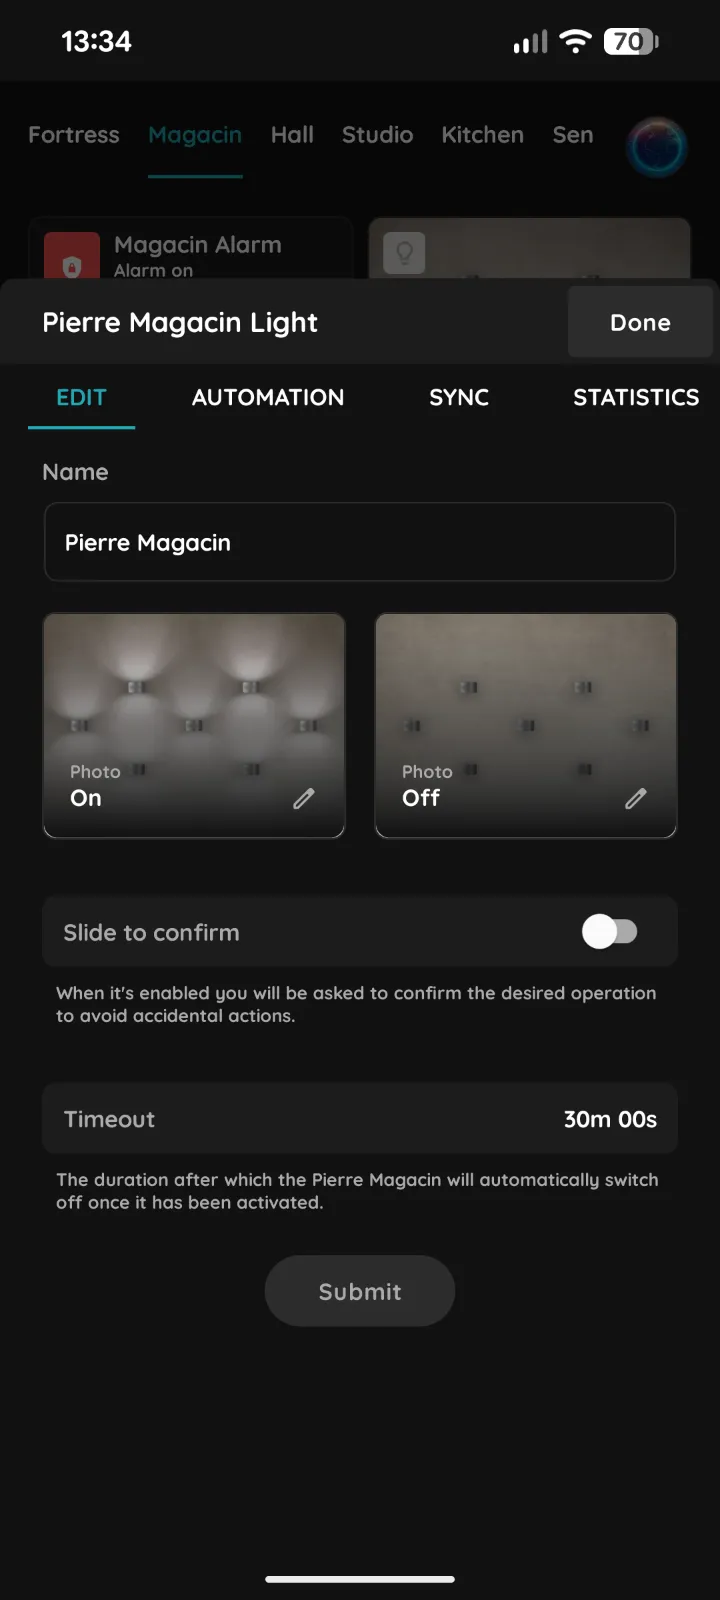
On the Dashboard, pick the room tab and tap the card of the device that will lead the group.
Here it is the Pierre Magacin light on the Magacin dashboard, showing the usual ON / AUTO / OFF controls.
Open the SYNC tab
The device sheet opens on EDIT. IO Sync has its own tab, next to AUTOMATION and STATISTICS.
Tap SYNC.
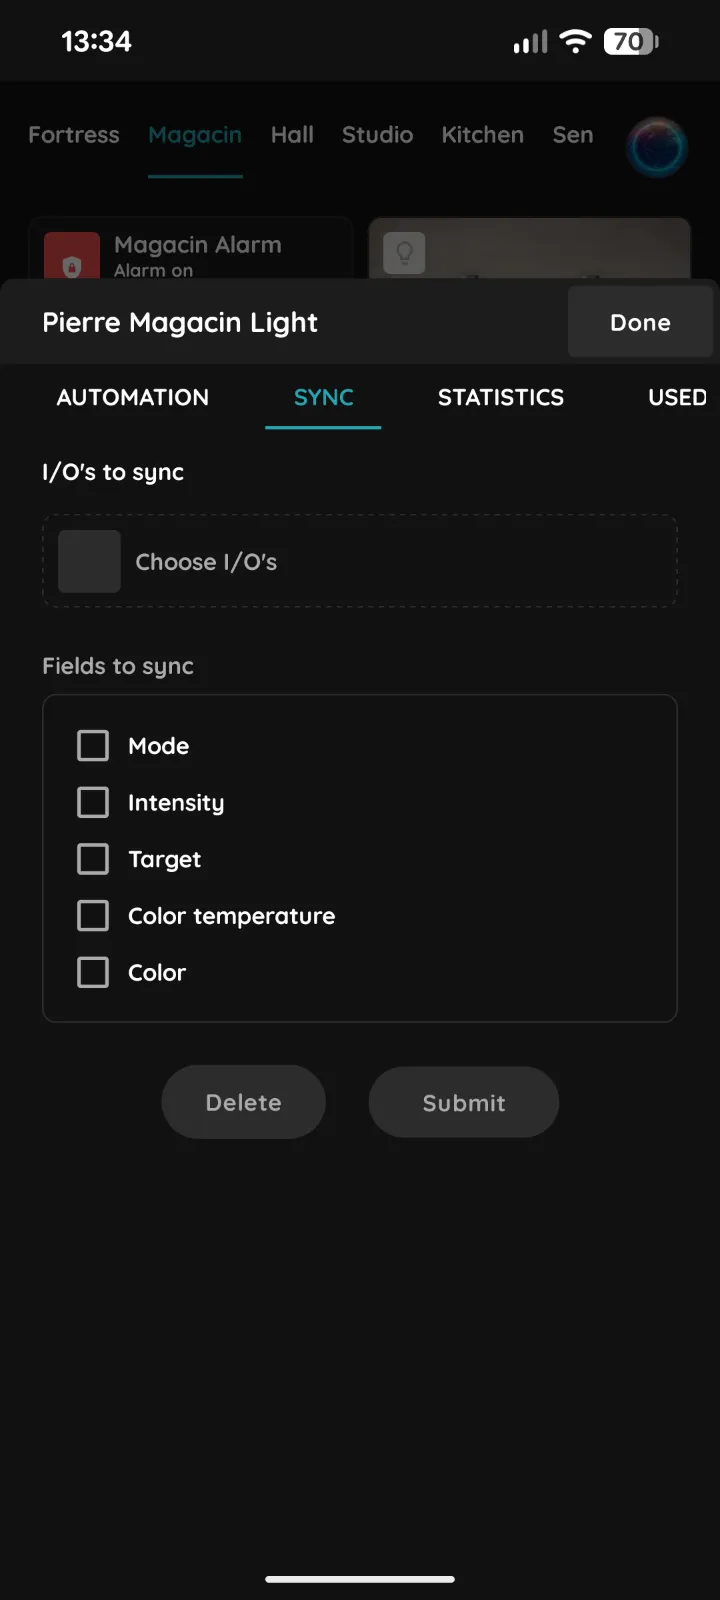
Read the two halves of the Sync tab
The tab has two parts:
- I/O's to sync - which devices follow this one.
- Fields to sync - which settings travel: Mode, Intensity, Target, Color temperature, Color.
Only fields a device actually supports have any effect on it.
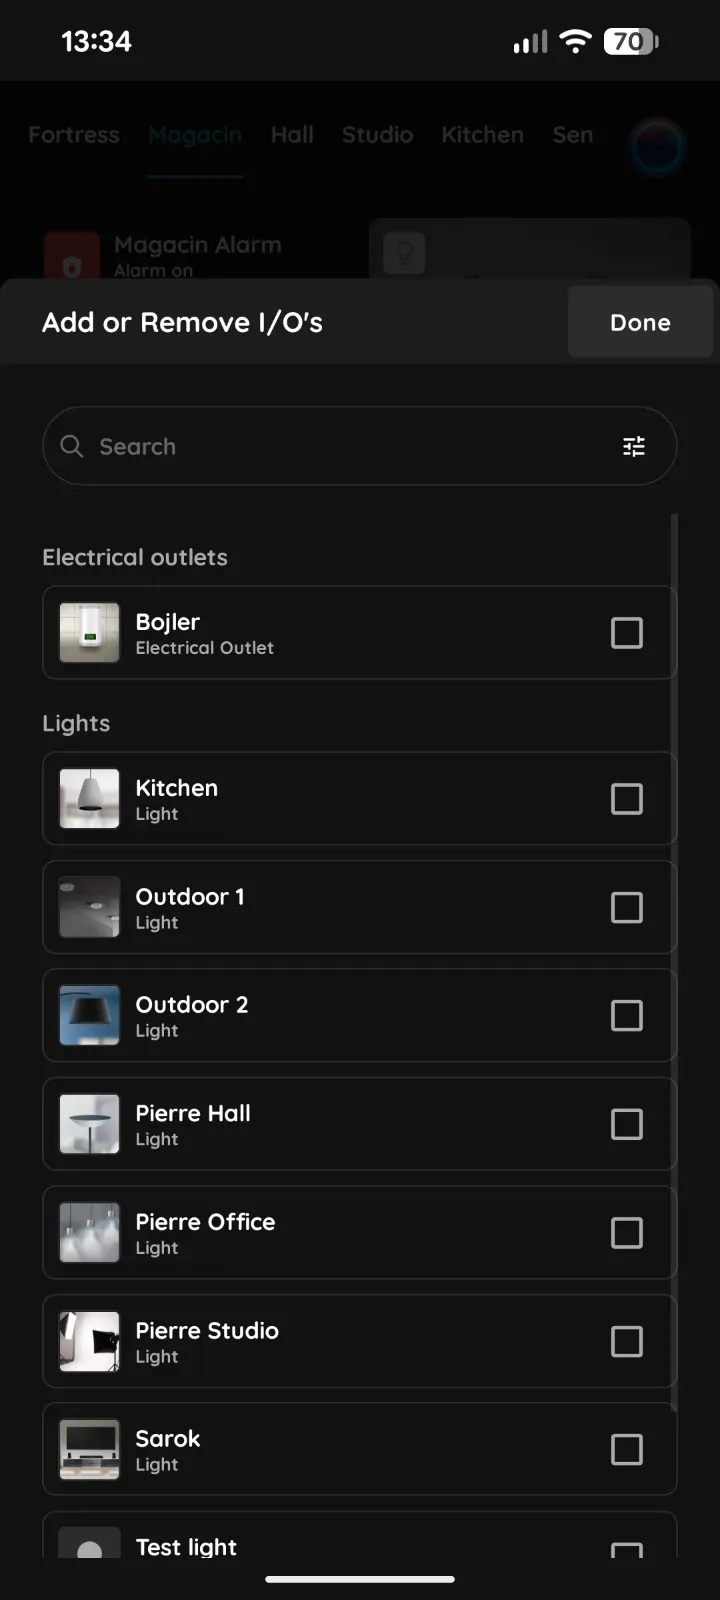
Choose the I/O's to sync
Tap Choose I/O's. The Add or Remove I/O's picker lists the available I/Os grouped by type - Electrical outlets, Lights and so on - with a Search field at the top.
Only local devices on the same controller are listed, because sync does not cross controllers.
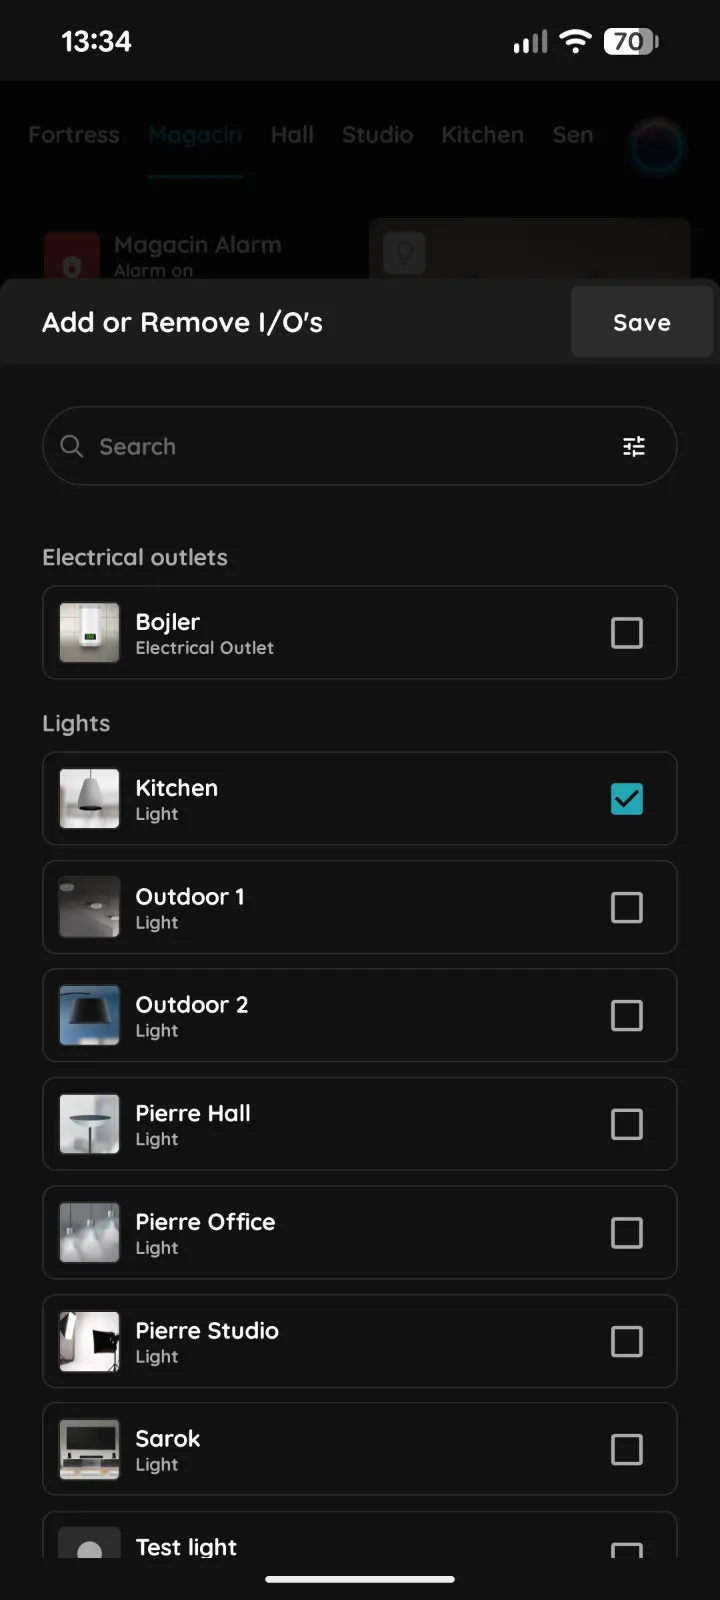
Tick the devices and save
Tick every device that should stay in step with the first one. In this example Kitchen light is selected.
As soon as something is ticked the button in the corner changes from Done to Save. Tap Save.
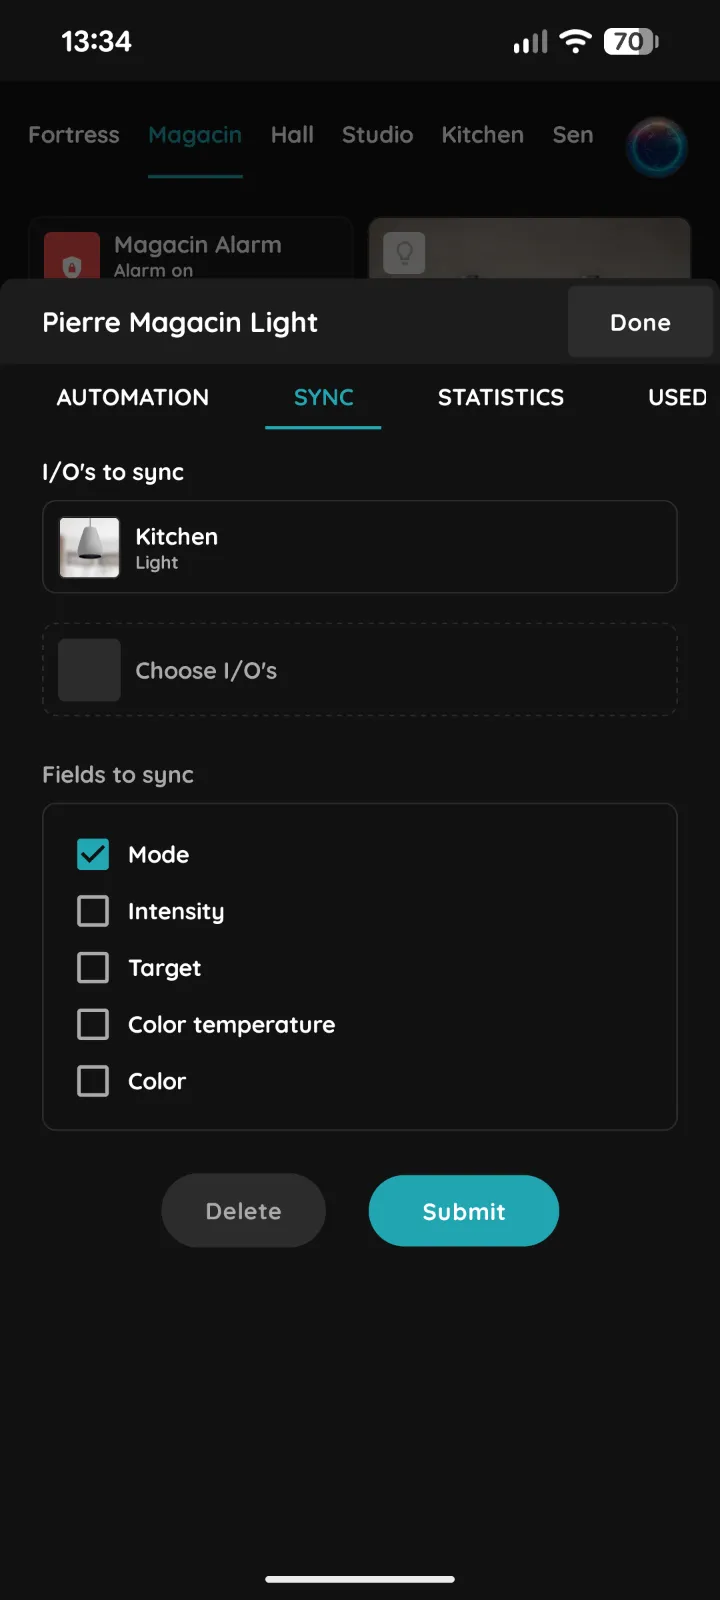
Pick the fields and submit
The chosen device now appears under I/O's to sync, and Choose I/O's stays below it so you can add more.
Tick the fields that should be kept in step - here Mode - and tap Submit, which turns teal once the group is valid.
Sync works both ways from now on: changing any member by hand moves the others. Delete removes the sync group again.
Availability
IO Sync is currently available only to partners due to the behavioral limitations described above (particularly around automations). This ensures proper setup and user expectations.