Smart PIERRE - Motion Sensor
Description
The Motion sensor section of the Smart PIERRE app shows movement detection. Sensors are listed on the Dashboard and in the I/O list in the Menu. Wired motion sensors on a controller and PIERRE Wave motion sensors paired to a display or gateway appear the same way.
Status
- Green dot and the text "Motion detected" – the sensor currently reports movement.
- Grey dot and "No motion" – no movement, or the hold time has run out.
- The card cannot be switched; a motion sensor is an input and only reports.
Settings
A long press on the sensor card, or a tap on it in the I/O list, opens its settings:
- Edit – name, role, group, pin, photo and Timeout. Role, group and pin are only shown to users who may manage I/Os.
- Used In – every automation, alert and alarm the sensor takes part in. Check it before renaming or removing the sensor.
- Wave Health – on a PIERRE Wave motion sensor only: battery level and link quality. The app sends a low-battery notification when the battery runs down.
A motion sensor has no Automation tab of its own. It is used as the trigger inside the automation of another I/O.
Timeout
Timeout is the hold time: how long the sensor keeps reporting "Motion detected" after the last movement, set in hours, minutes and seconds. Every new movement restarts it. A short value, a few seconds, gives a precise picture of the room; a longer value, a minute or more, stops lights and alerts from flickering when someone pauses. This is separate from the Timeout of a light, which decides how long the light stays on after the sensor has cleared.
Automation
Rules are added on the I/O that should react, not on the sensor:
- Lighting – on the light, Automation tab, Add new Automation, Existing I/O, pick the sensor and choose Detects motion. Set the light's own Timeout for the time it stays on after the room is clear, and set the light to Auto. The step-by-step below walks through it.
- Alerts – an alert with the sensor as condition, combined with a time condition using And, sends a push notification when movement is detected in an area that should be empty.
- Alarm – the sensor as a condition of an Alarm I/O, active only while the alarm is armed.
- Combined with a brightness sensor – Detects motion And brightness smaller than a chosen value, so lighting only comes on when it is dark.
Rules run on the controller or gateway, so they keep working without an internet connection.
Technical Notes
- A motion sensor reports movement and then times out. Where people stay still, a presence sensor is the correct device; it keeps reporting while someone is in the room.
- Set the hold time long enough that a room is genuinely empty before a rule acts on it.
- Where lighting is switched off by a motion rule, tell the user; a light that goes off while they sit still looks like a fault.
- If the sensor shows "Motion detected" permanently or never, the Signal setting in the PIERRE Partner app does not match the sensor's contact type. See the Partner Motion Sensor lesson.
- Wave motion sensors run on a battery and sleep between reports; they are not repeaters and do not extend the wireless network.
Use of the Motion sensor
Motion sensor has two statuses.
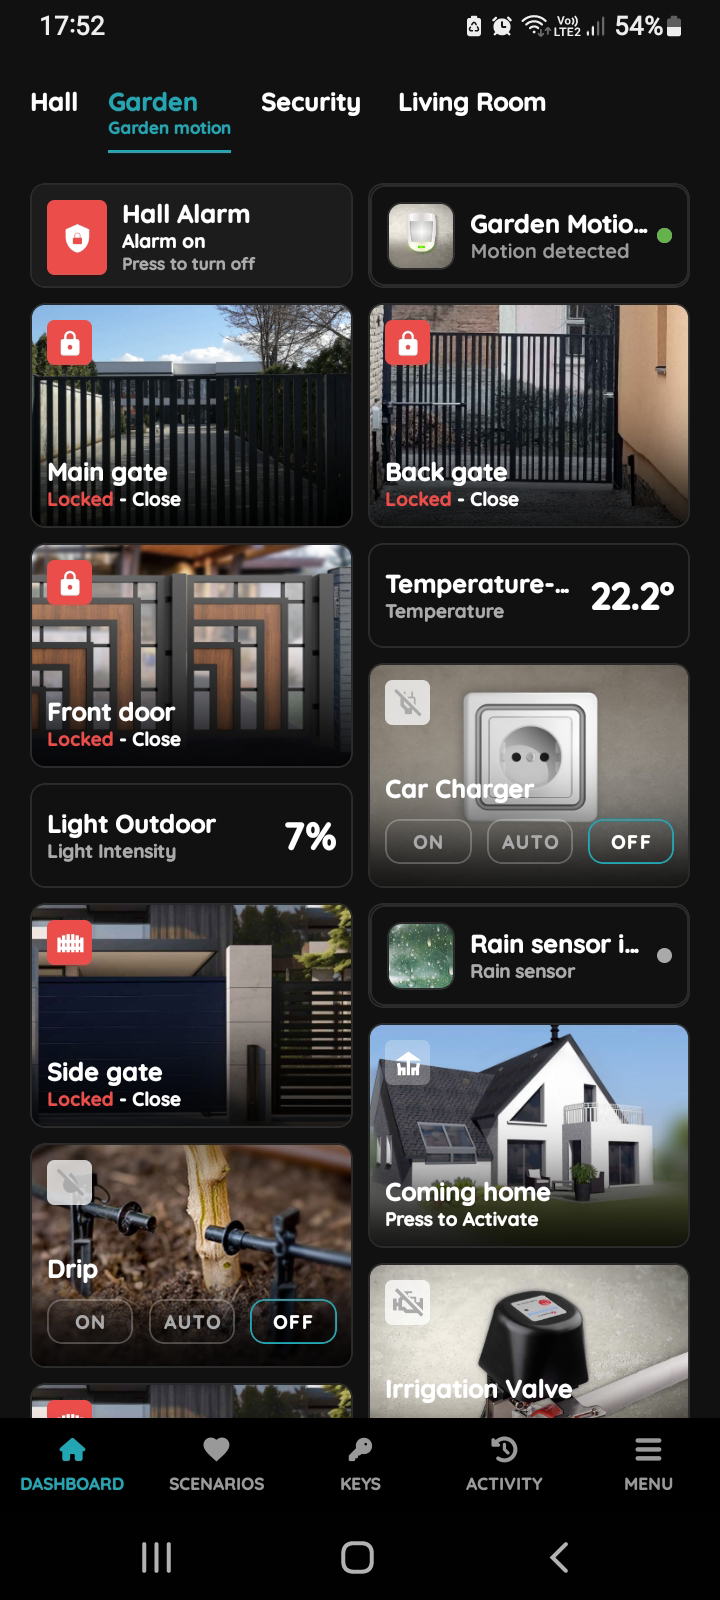
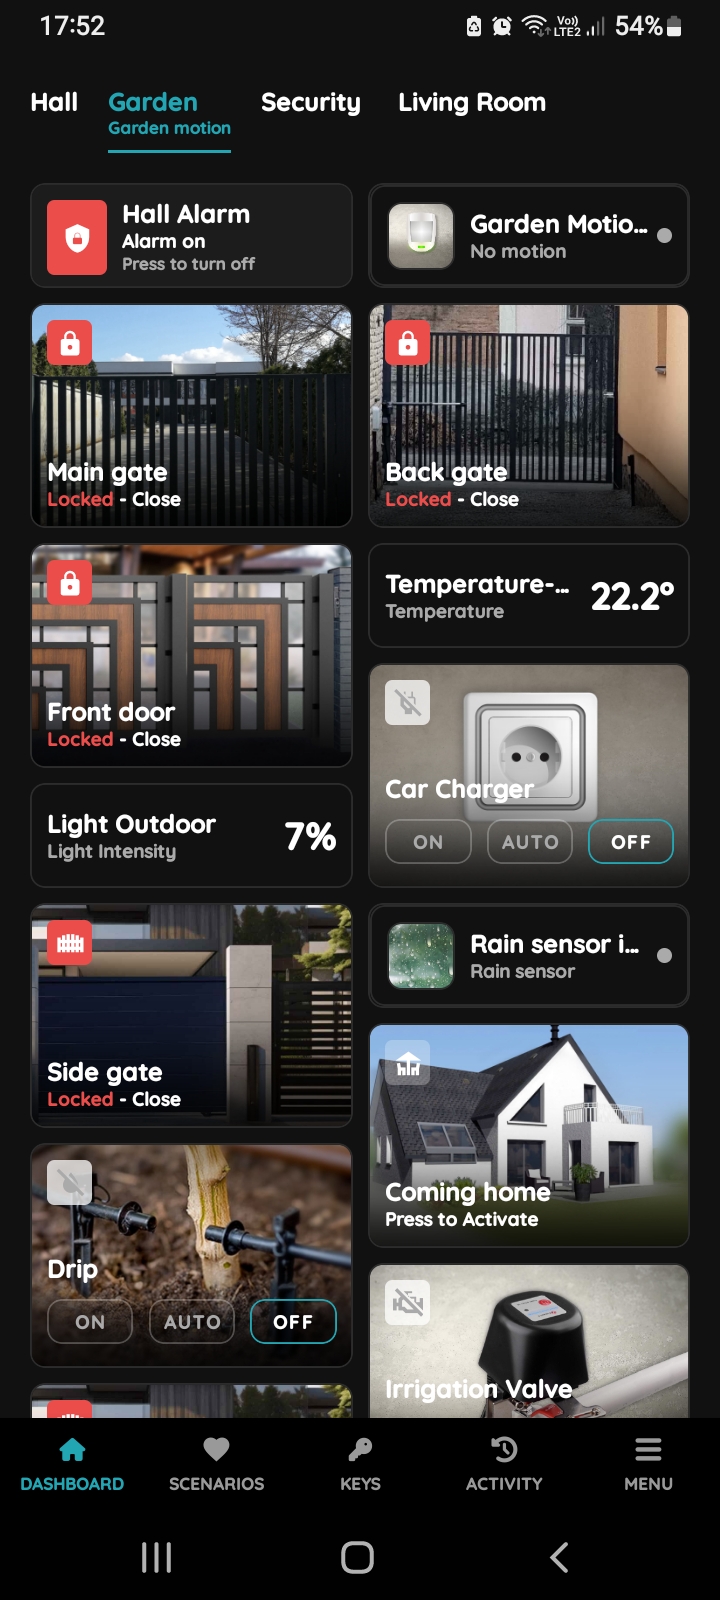
Motion is detected
When motion is detected, green dot as an indicator of this status is visible next to the Motion sensor.
In this case Garden Motion sensor has got green dot.
Motion is not detected
When motion is not detected, grey dot as an indicator of this status is visible next to the Motion sensor.
In this case Garden Motion sensor has grey dot.
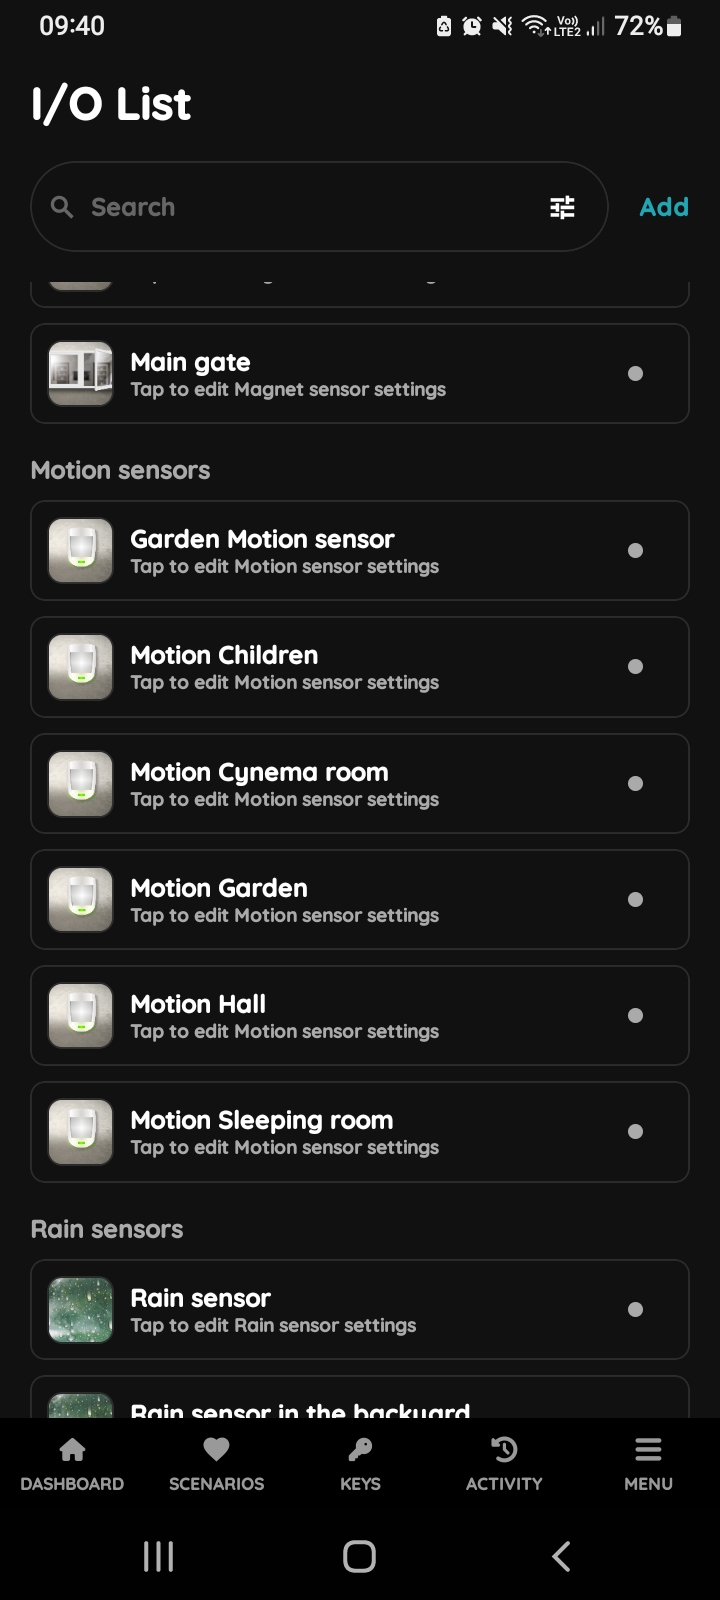
I/O List - Motion sensor
To edit the Motion sensor settings, follow next steps.
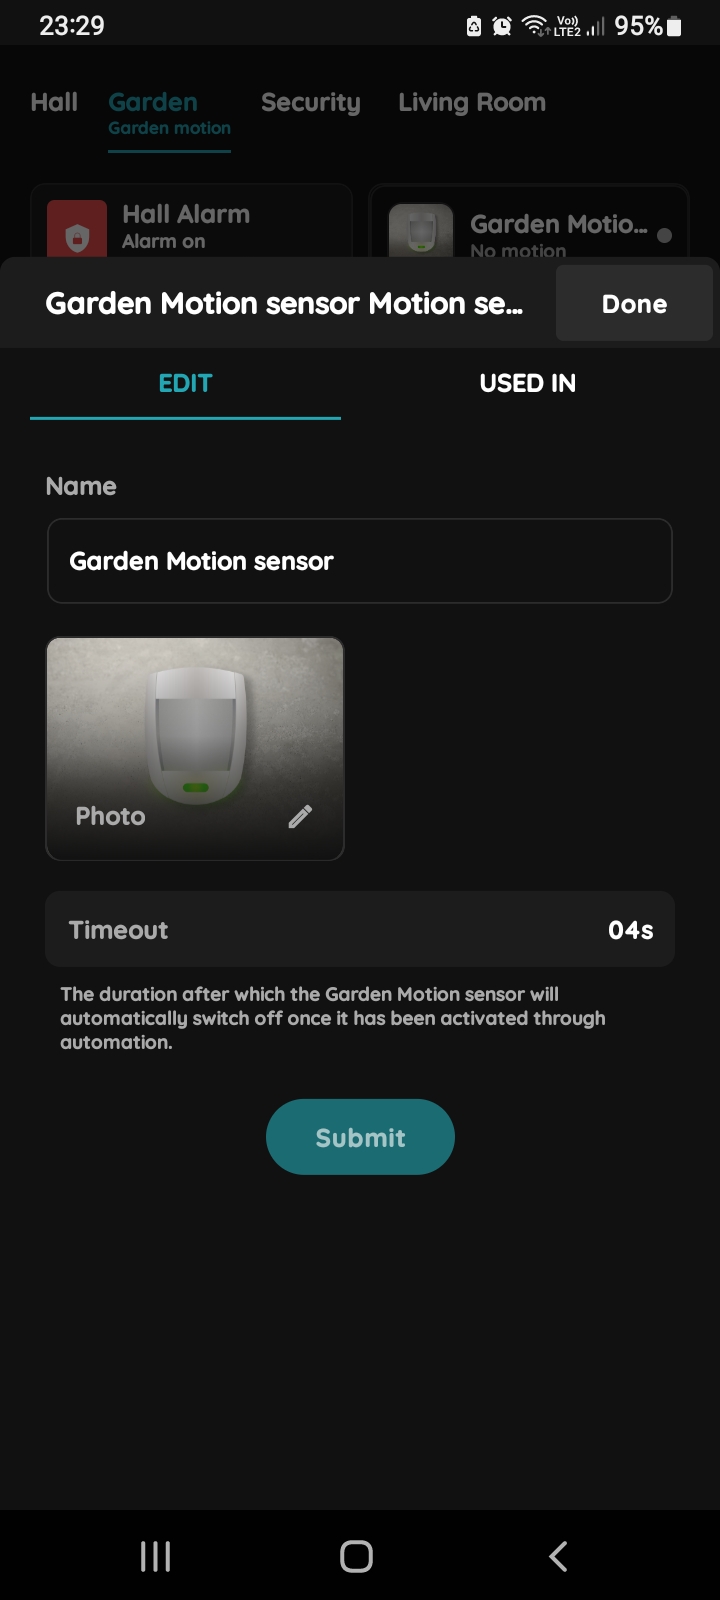
Edit Motion sensor
In order to edit Motion sensor you should edit following form:
- Name - Edit the Motion sensor's name.
- Role - Select the role from the list.
- Group - Choose a group from the list. This represents a logical grouping of I/O and scenarios.
- Pin - Select the Pin from the list. (The Pin is the physical location on the Controller where the I/O device is connected.)
- Photo - Choose a photo for the Motion sensor.
- Identifier - This field represents the I/O identifier in the electrical project.
- Advanced - Select the type of signal that activates or triggers the Motion sensor.
- Timeout - Set the duration for how long the Motion sensor will remain active in auto mode.
When you want to confirm your choice click on button Save or Submit button Delete in order to delete it.
Follow next steps.
GOOD TO KNOW:
Motion sensor can be edited by long-press the Motions sensor card on the Dashboard or tapping it in the I/O list.
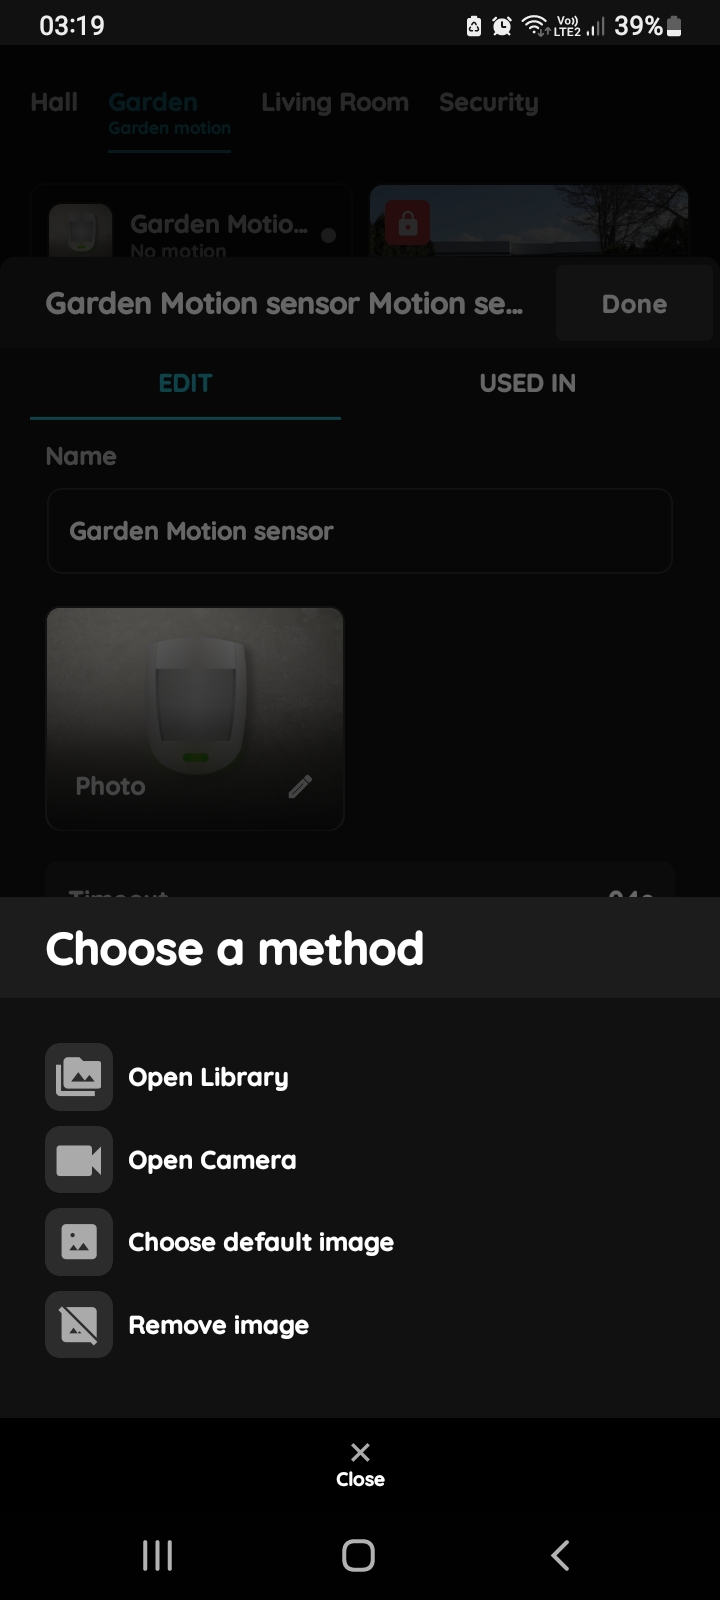
Change picture - Motion sensor
Tap the picture of the Motion sensor.
You have four options:
Open Library - The phone’s Library will open.
Open Camera - You can take a picture using your smartphone.
Choose default image - These images are prepared in advance in order to provide a complete and seamless experience.
Remove image - Removes existing image.
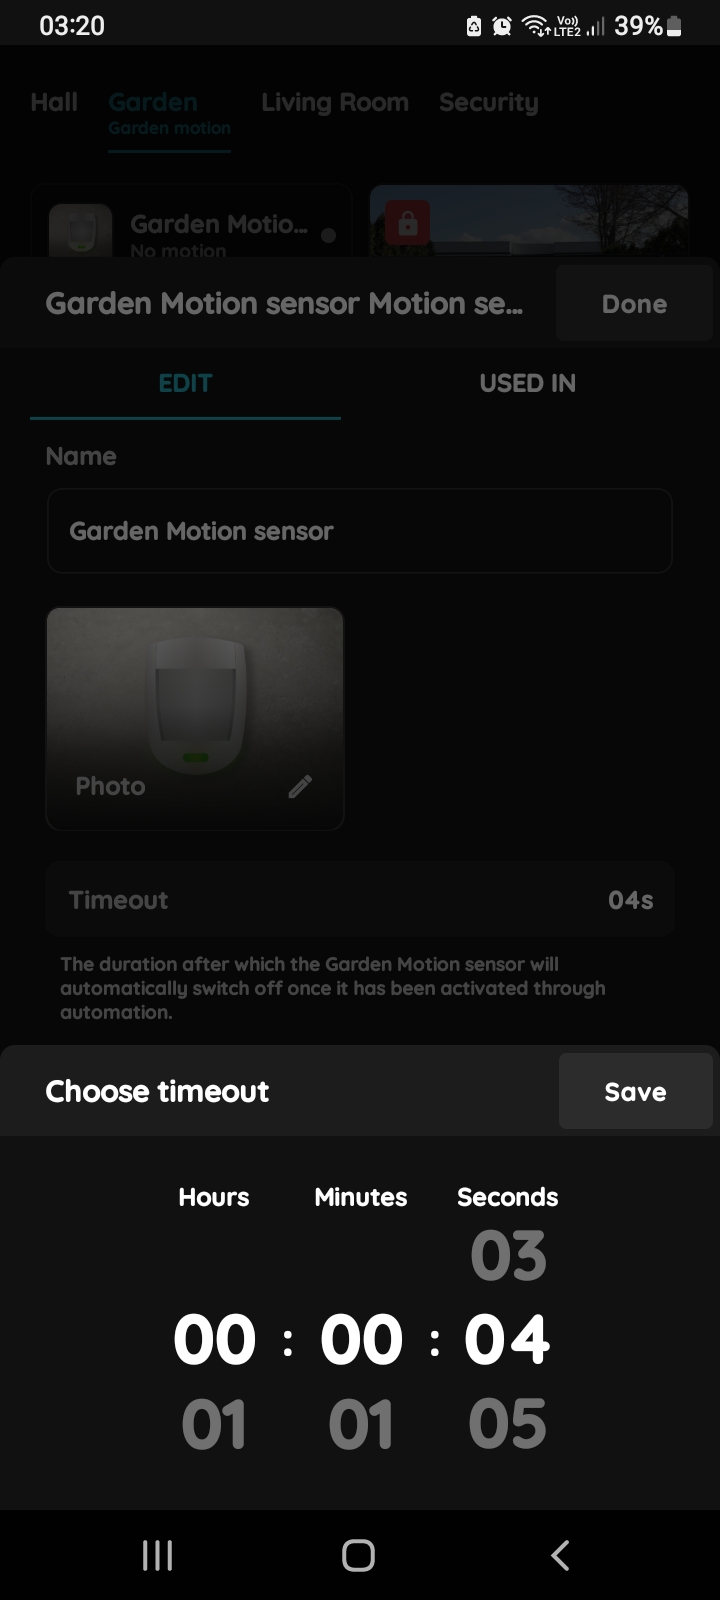
Timeout - Motion sensor
Choose Timeout - scroll through columns for the Hours, Minutes, Seconds.
Tap Save button.
In this case, Motion sensor has set Timeout on 4 seconds.
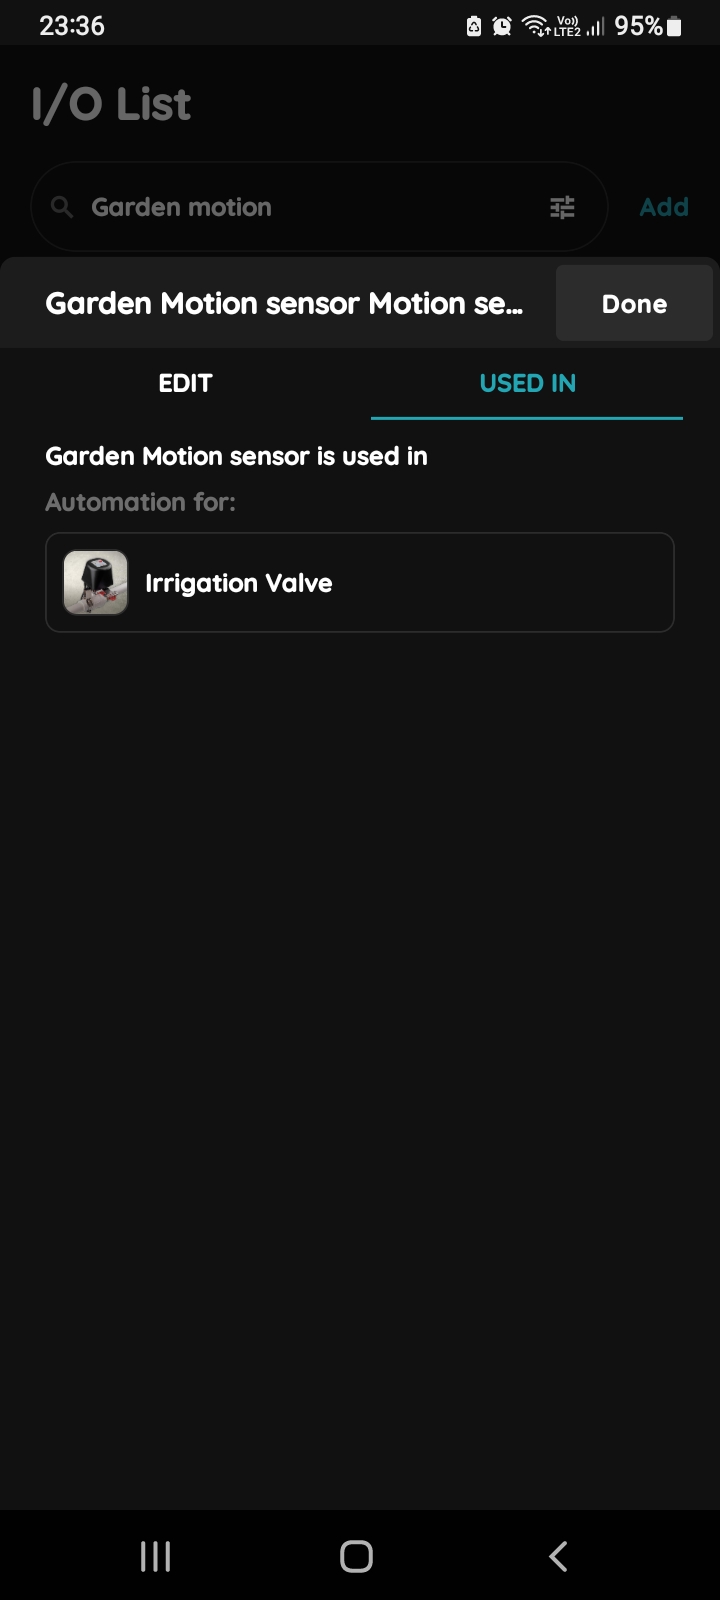
Used In - Motion sensor
The Used In tab shows all the scenarios and automations where the Motion sensor is applied. If it isn't used in any, the list will be empty, and a message will display: "This I/O is not in use anywhere." This feature is particularly useful as it consolidates all relevant information in one place.
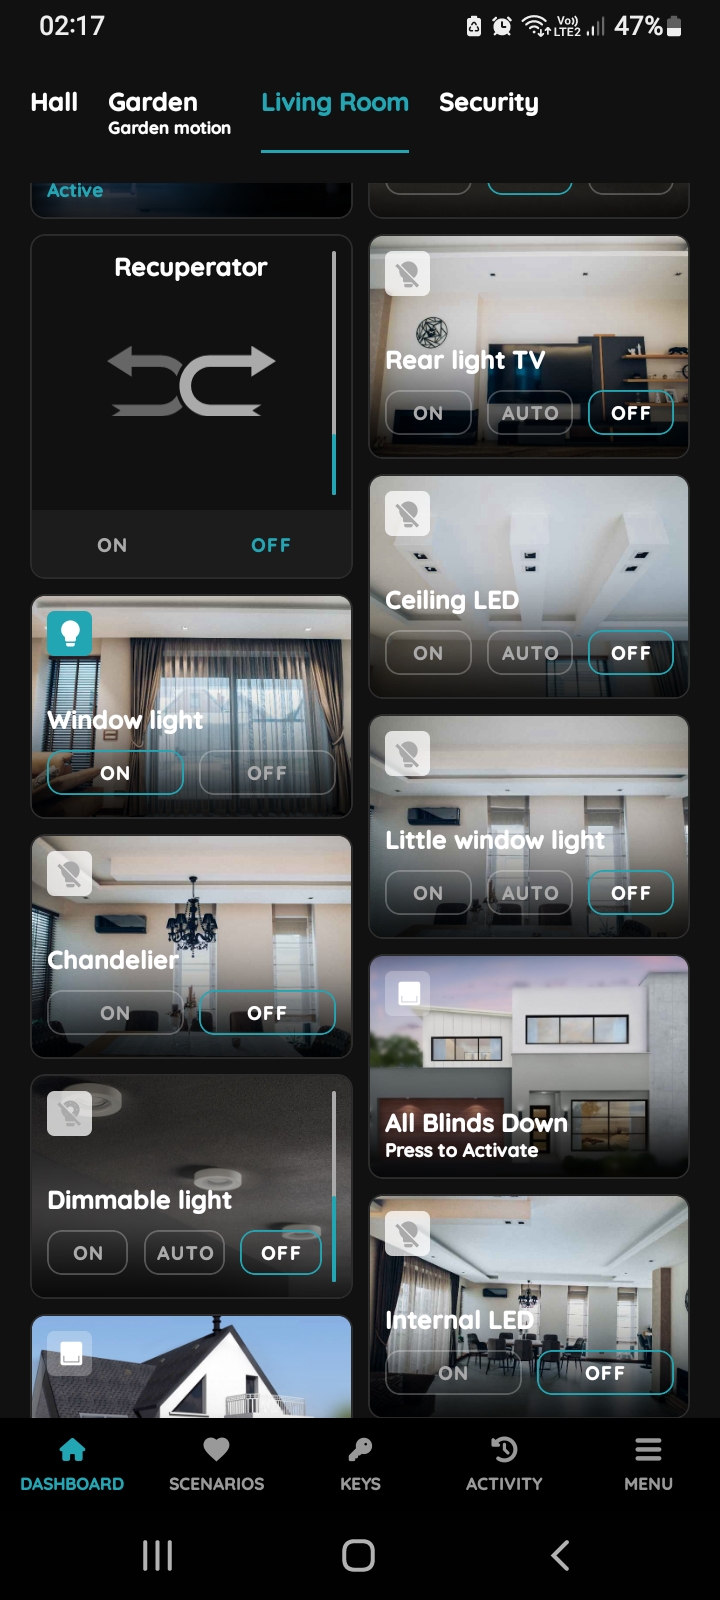
Find Light on the Dashboard
When the Motion Sensor detects movement, the Light in the selected area automatically turns On. This automation is particularly useful in spaces like hallways or entryways, ensuring illumination only when someone is present. After a set period of inactivity (e.g., 2 minutes), the Light will turn Off automatically, saving energy. This setup provides efficient lighting control and enhances convenience by responding to real-time occupancy.
You can find Light on the Dashboard or on the I/O list.
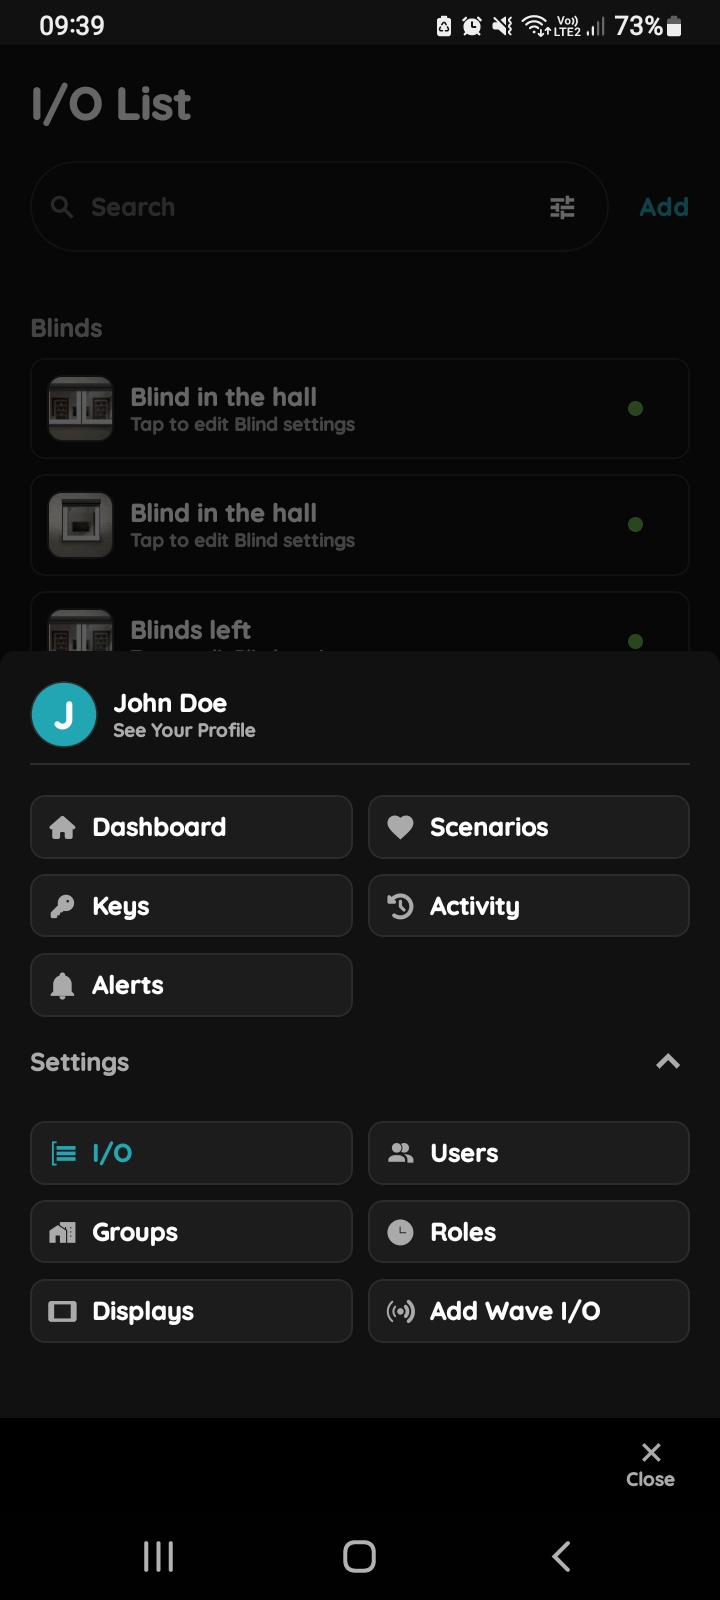
Open I/O
In the Menu, under Settings, tap on the I/O.
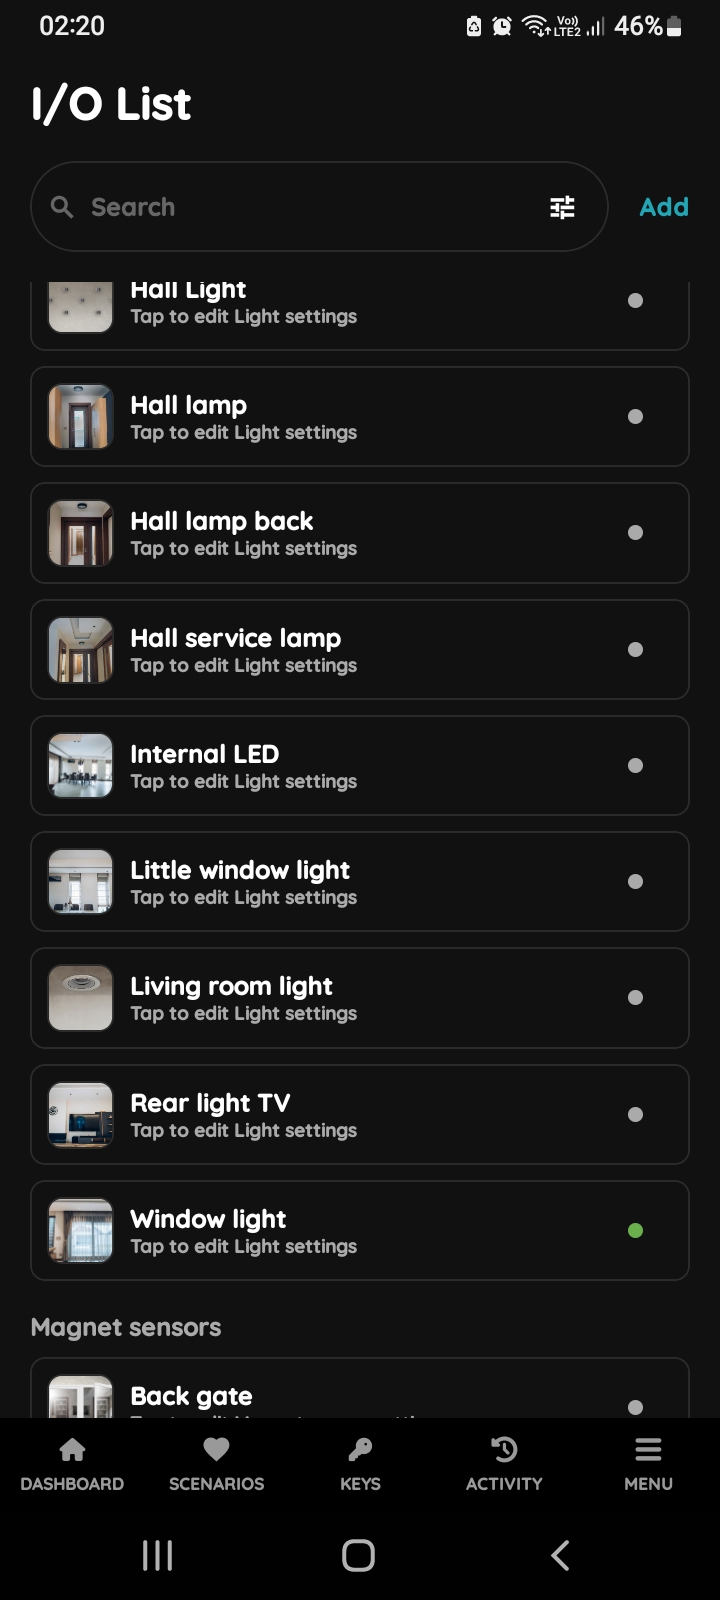
Find Light on the I/O list
Another way to find desired I/O is to open the I/O list, scroll through it to the Lights in this case and tap on the desired Light, in this case on Window Light.
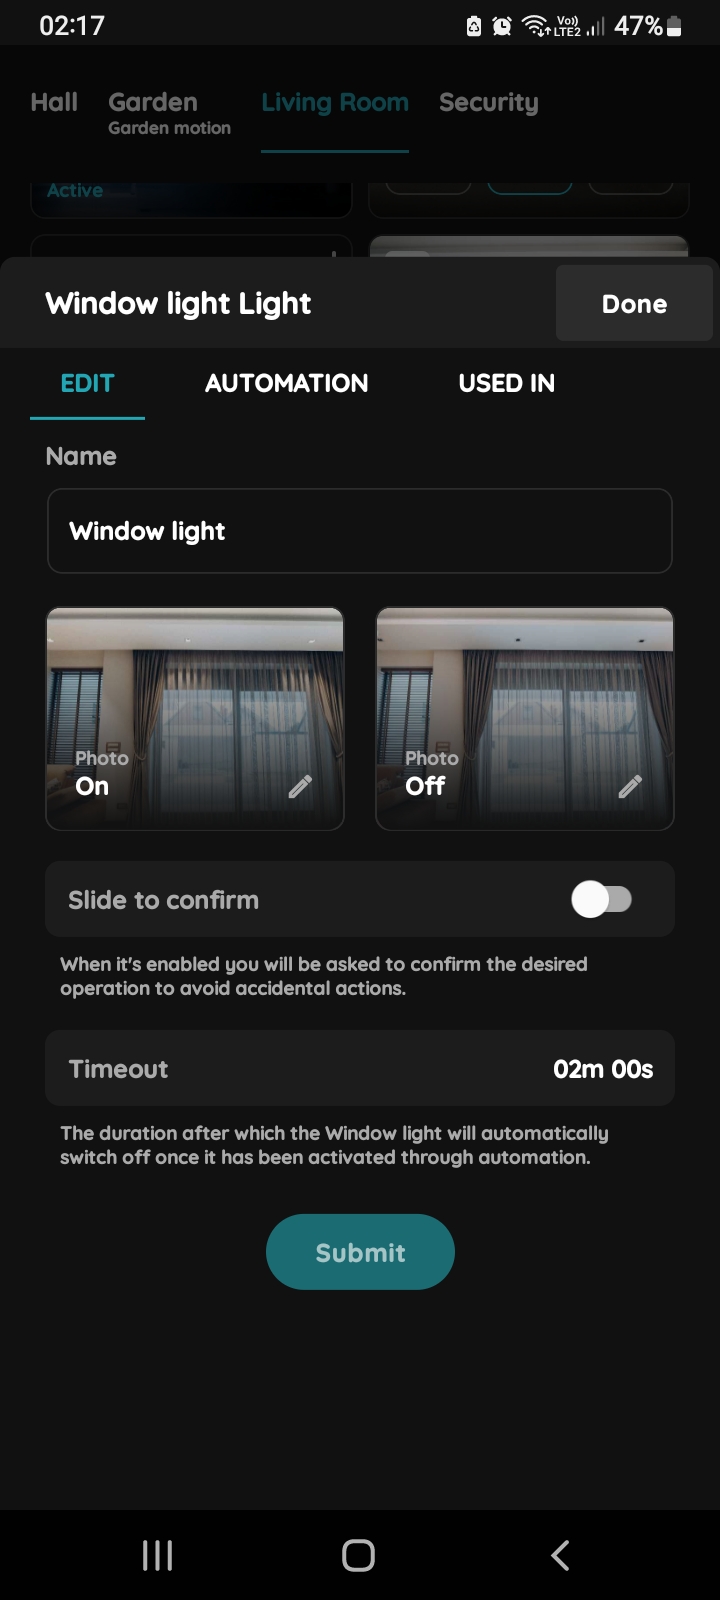
Edit, Automation, Used In - Light
Tap on the tab Automation.
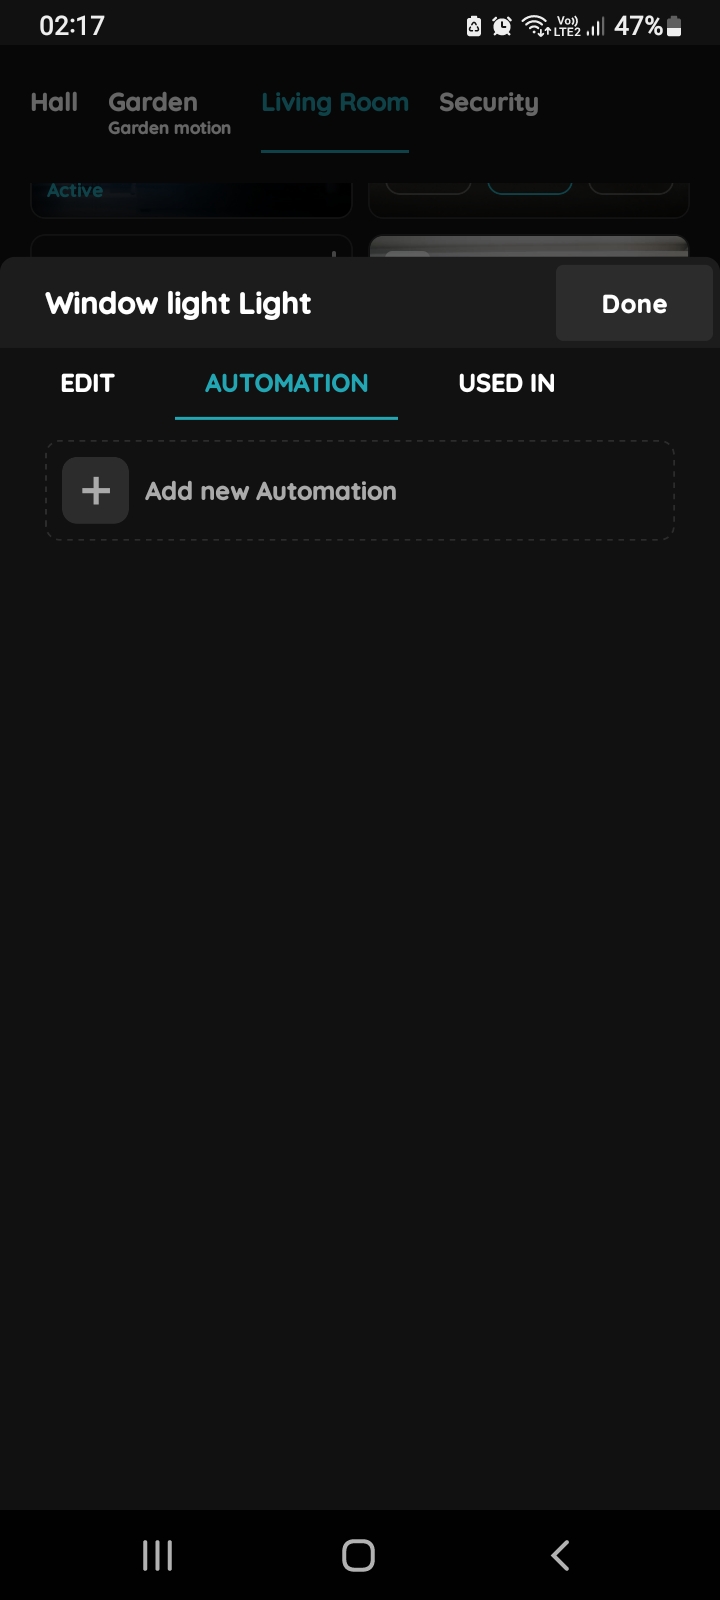
Add new Automation - Light and Motion sensor
Tap the +Add new Automation.
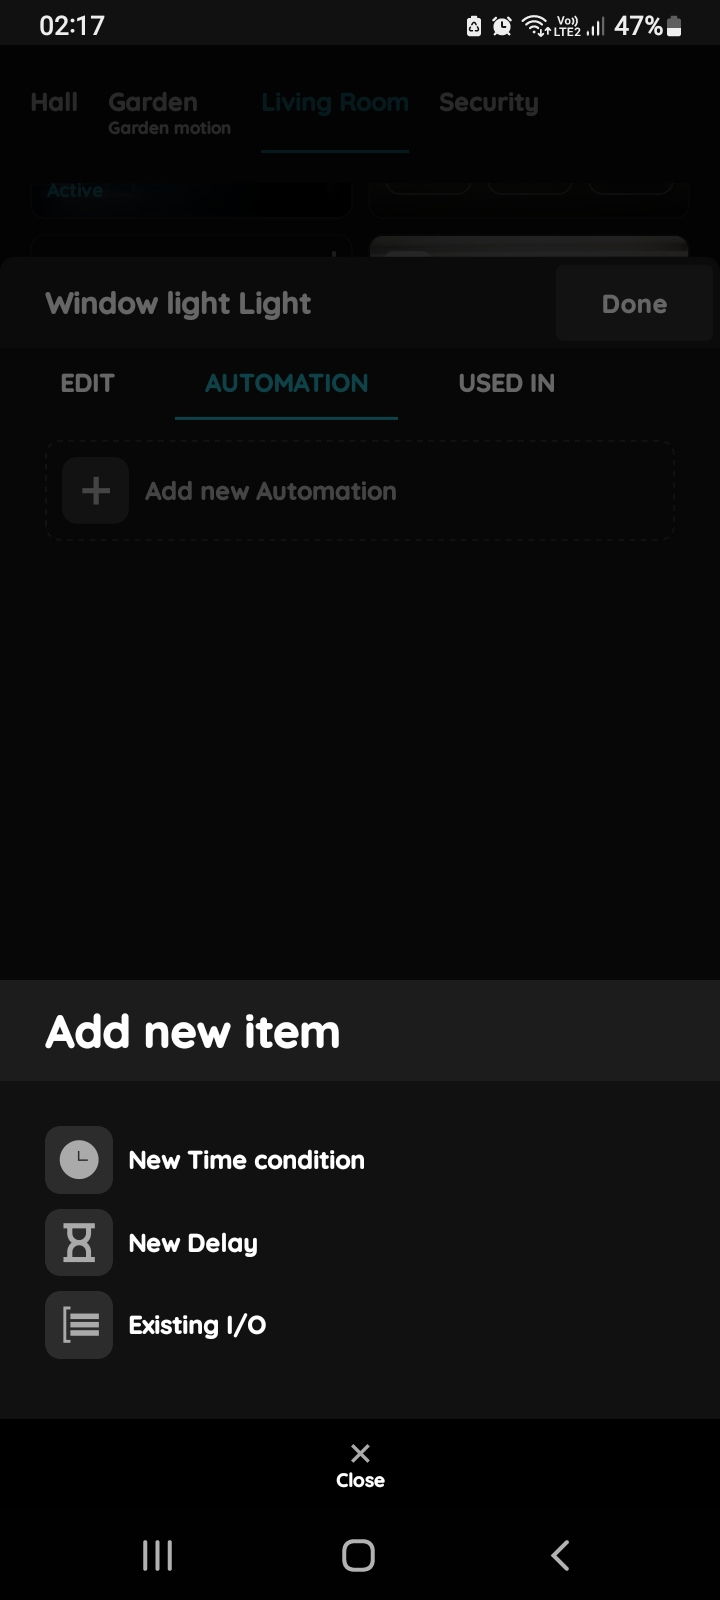
Add new item for the Light
There is possibility to add:
- New Time condition,
- New Delay,
- Existing I/O.
Tap on the Existing I/O from the list.
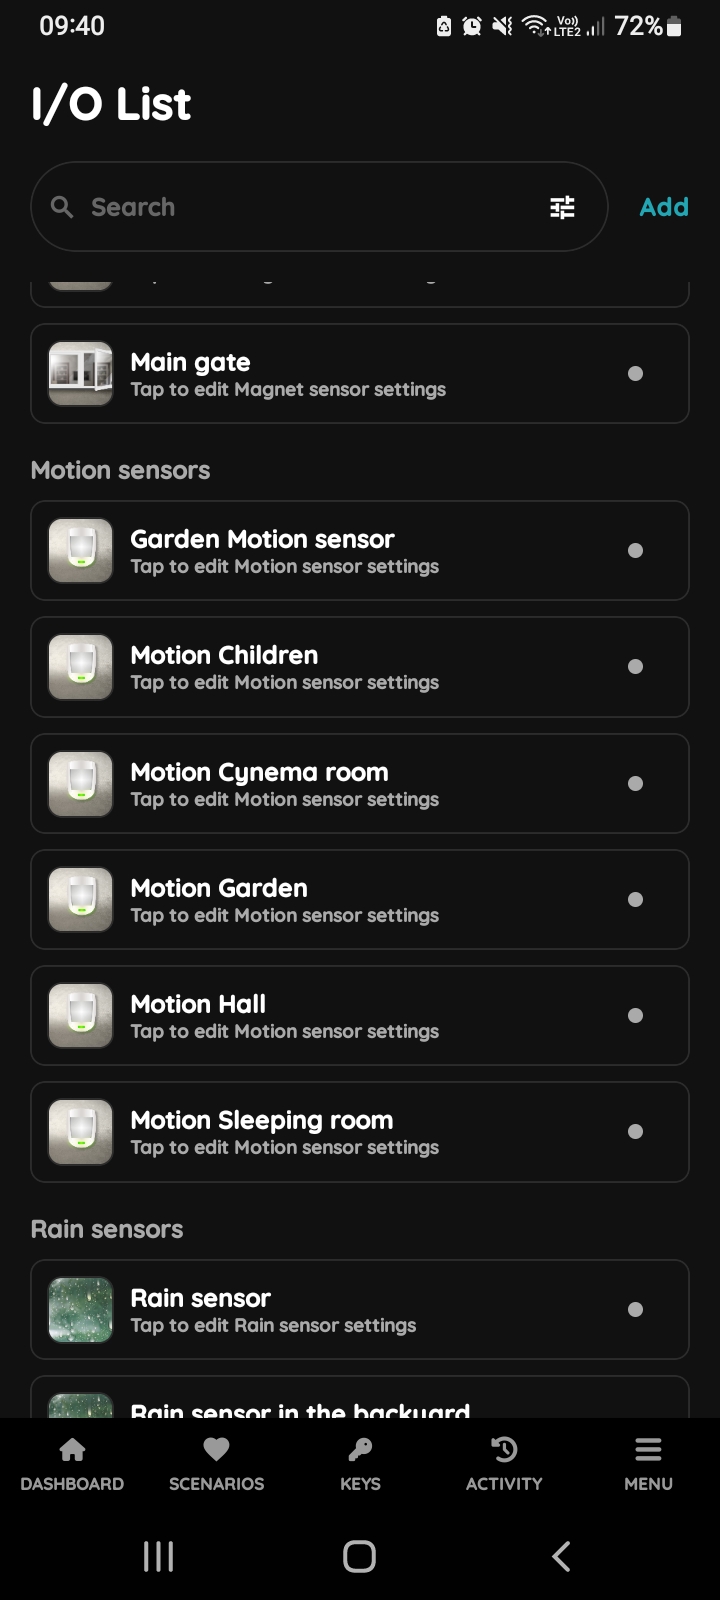
I/O List - Motion sensor
Open I/O list, scroll to the Motion sensors and tap on the card od the desired Motion sensor from the list.
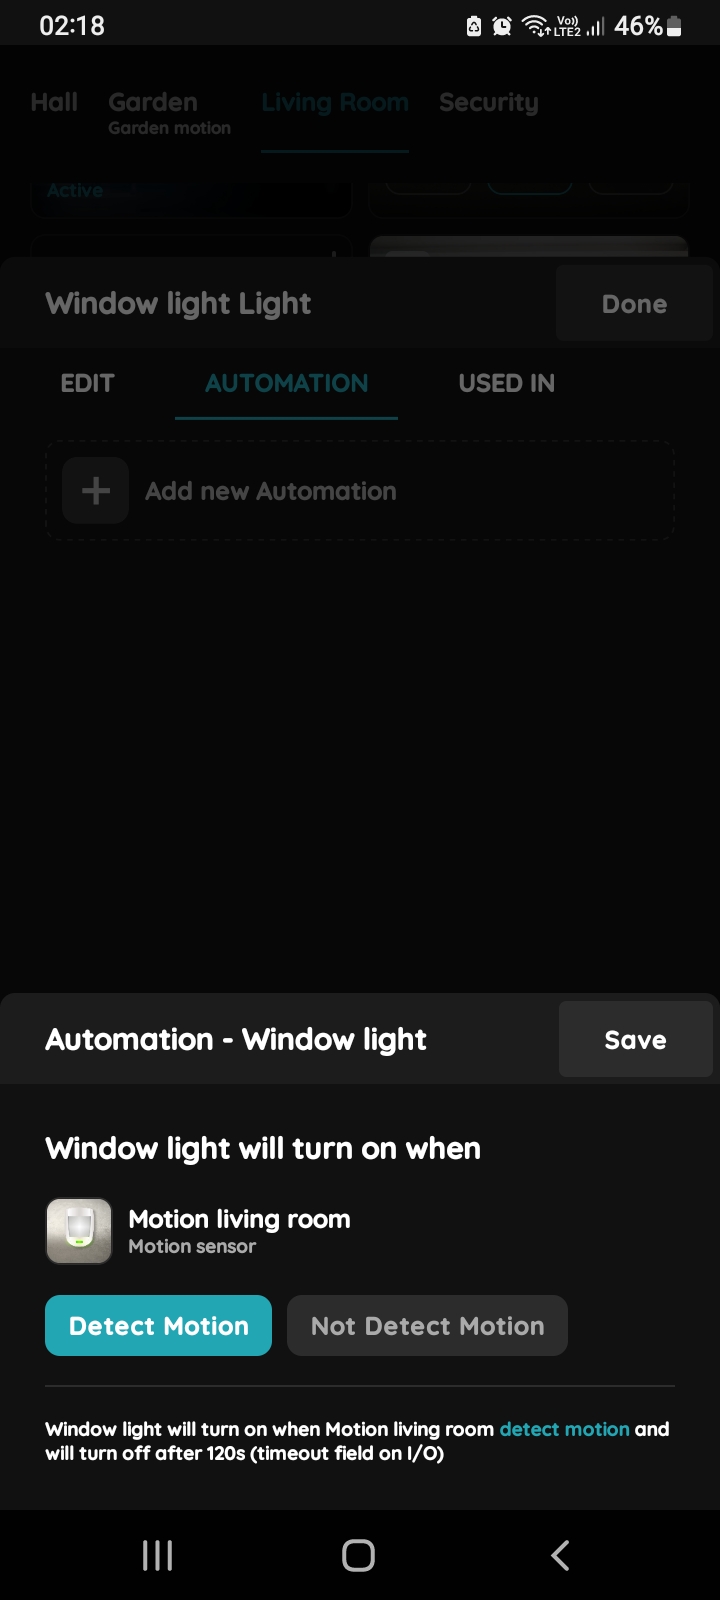
Automation - Light and Motion sensor
Window Light will turn On when Motion sensor in Living room detects motion and it will be turned On in auto mode for 120 s (timeout field on I/O).
Tap Detect Motion.
Tap Save.
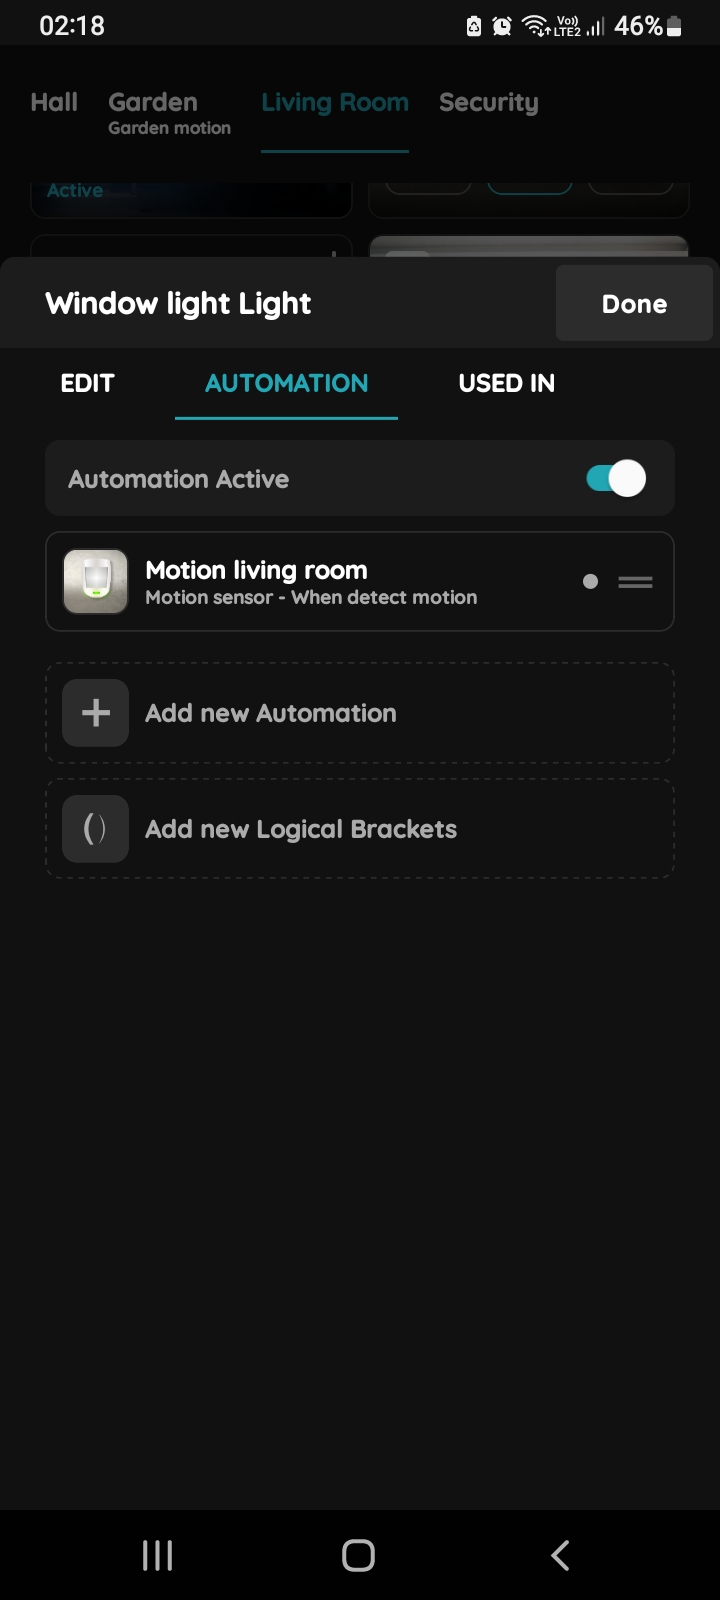
Confirm automation for Light and Motion sensor
Confirm automation - tap button Done.