Smart PIERRE - Rain Sensor
Description
The Rain Sensor in the Smart PIERRE application shows whether rain is currently detected by the system.
The Rain Sensor can be accessed from the Dashboard or from the Menu, allowing users to quickly check its current status.
Status
The current Rain Sensor status is indicated by a colored dot:
-
Green dot – rain is detected.
-
Grey dot – no rain is detected.
Settings
Press and hold the Rain Sensor to access additional options:
-
Edit – change the Name and Picture of the Rain Sensor.
-
Used In – view the Automations in which the Rain Sensor is currently used.
Automation
The Rain Sensor can be used in Automations to trigger actions when rain is detected.
For example:
-
stop or pause irrigation when rain is detected,
-
retract a compatible awning,
-
close a compatible pergola roof,
-
close compatible motorized roof windows,
-
send a notification.
Technical Notes
-
Some rain sensors may remain in the rain-detected state for a period after rainfall stops while the sensor dries.
-
This behavior should be considered when creating Automations, particularly when controlling irrigation.
-
The Rain Sensor status displayed in the Smart PIERRE application represents the state received by the PIERRE system from the connected sensor.
Use of the Rain sensor
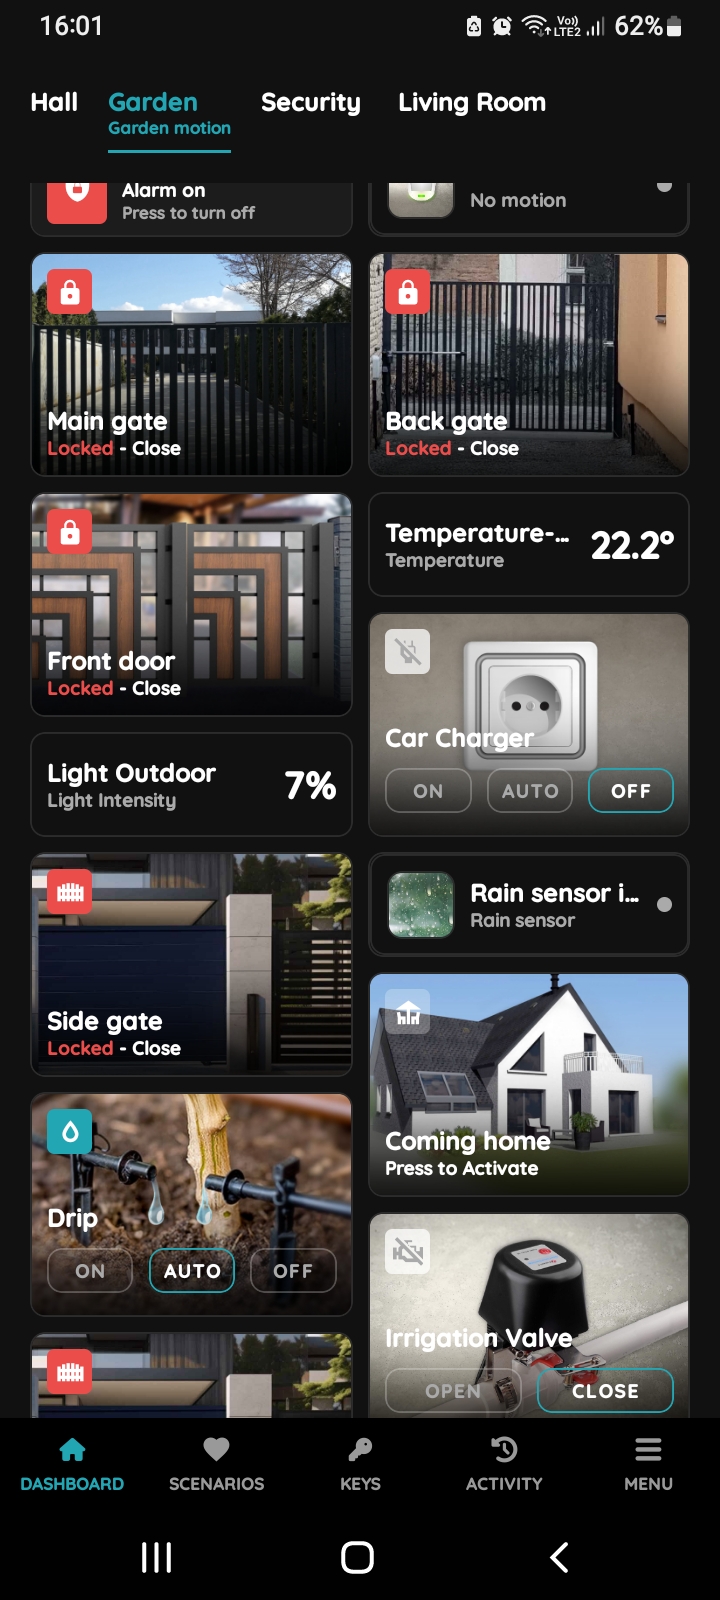
Rain sensor has got two status indicators.
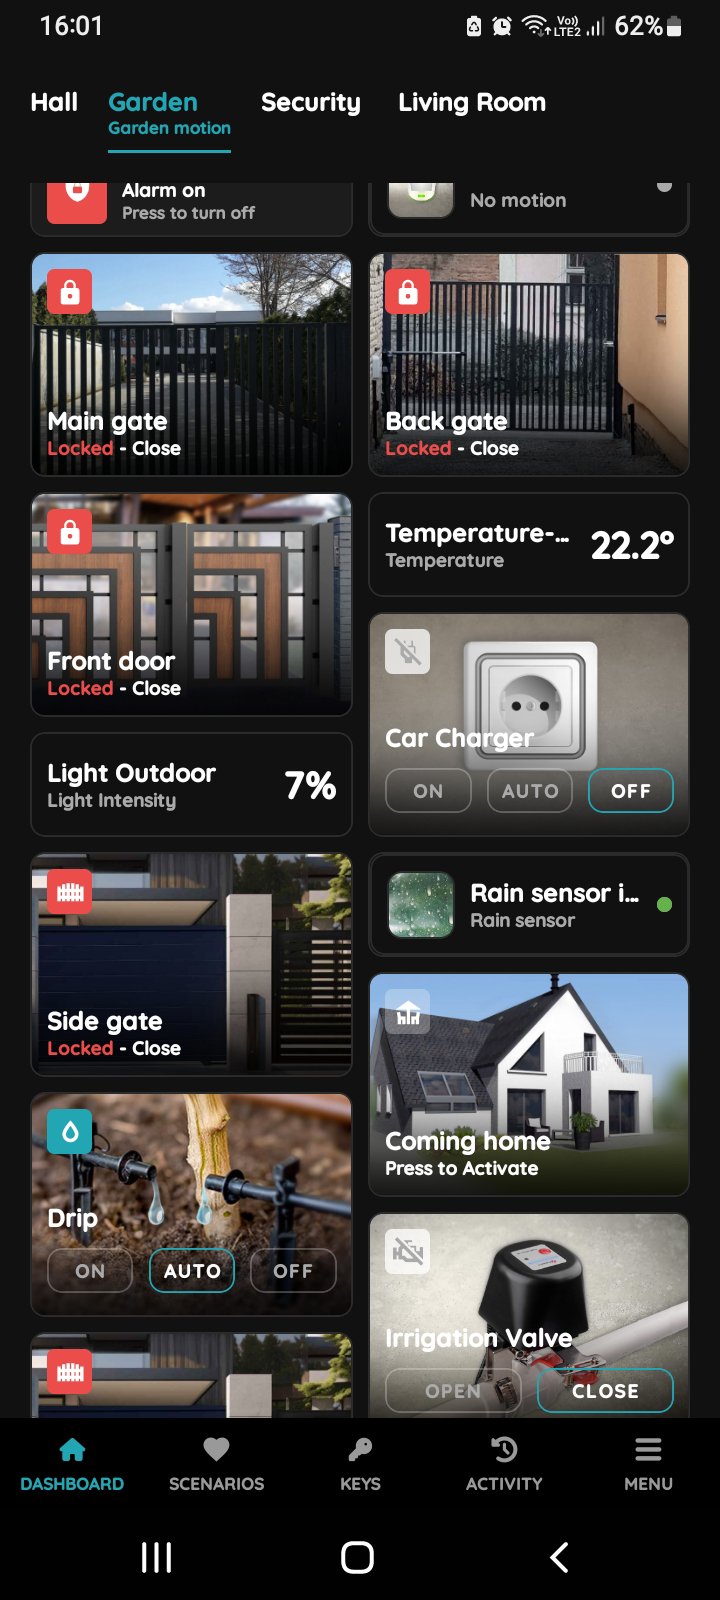
Rain sensor - active
When rain is detected, a green dot is visible next to the Rain sensor, indicating that the Rain sensor is Active.
In this case, the Rain sensor in the backyard has a green dot.
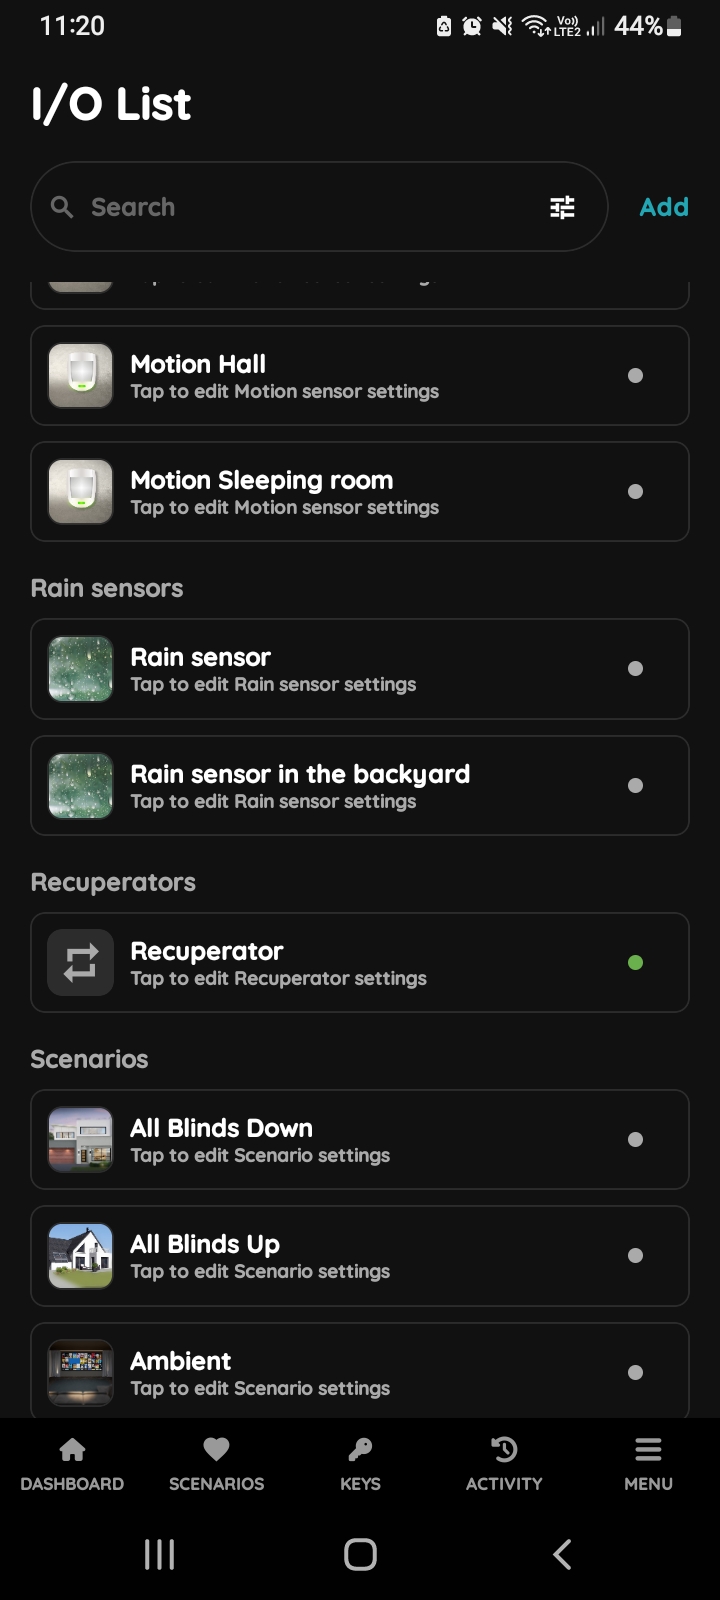
Rain sensor - inactive
When rain is not detected, a grey dot is visible next to the Rain sensor, indicating that the Rain sensor is not Active.
In this case, the Rain sensor in the backyard has a grey dot.
Open I/O list
To edit the Rain sensor settings, follow the next steps.
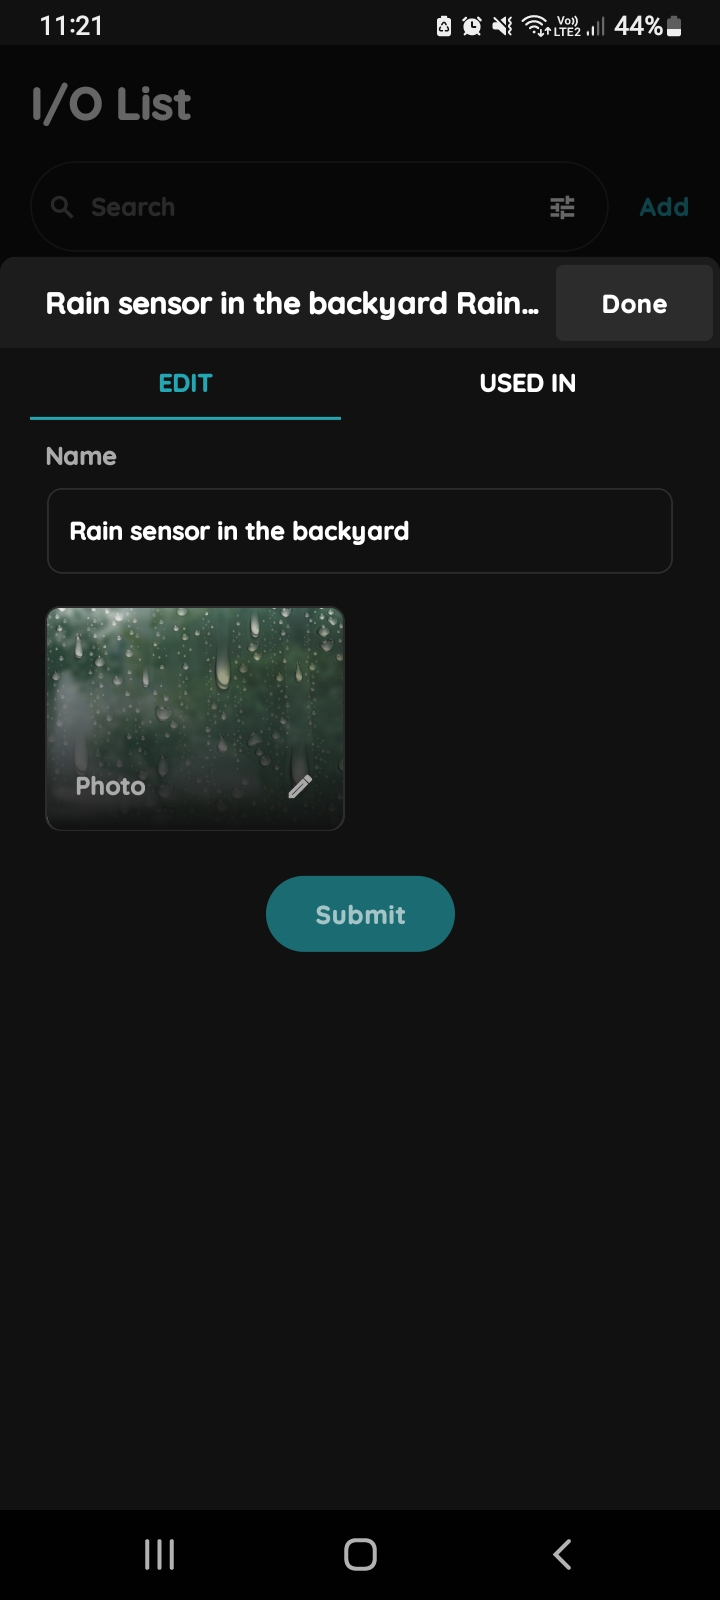
Edit Rain sensor
Edit the following fields:
- Name - Edit the name of the Rain sensor.
- Photo - Choose the source of the photo.
Tap Submit/Done.
GOOD TO KNOW:
The Rain sensor can also be edited by long-pressing the Rain sensor card on the Dashboard or by tapping it in the I/O list.
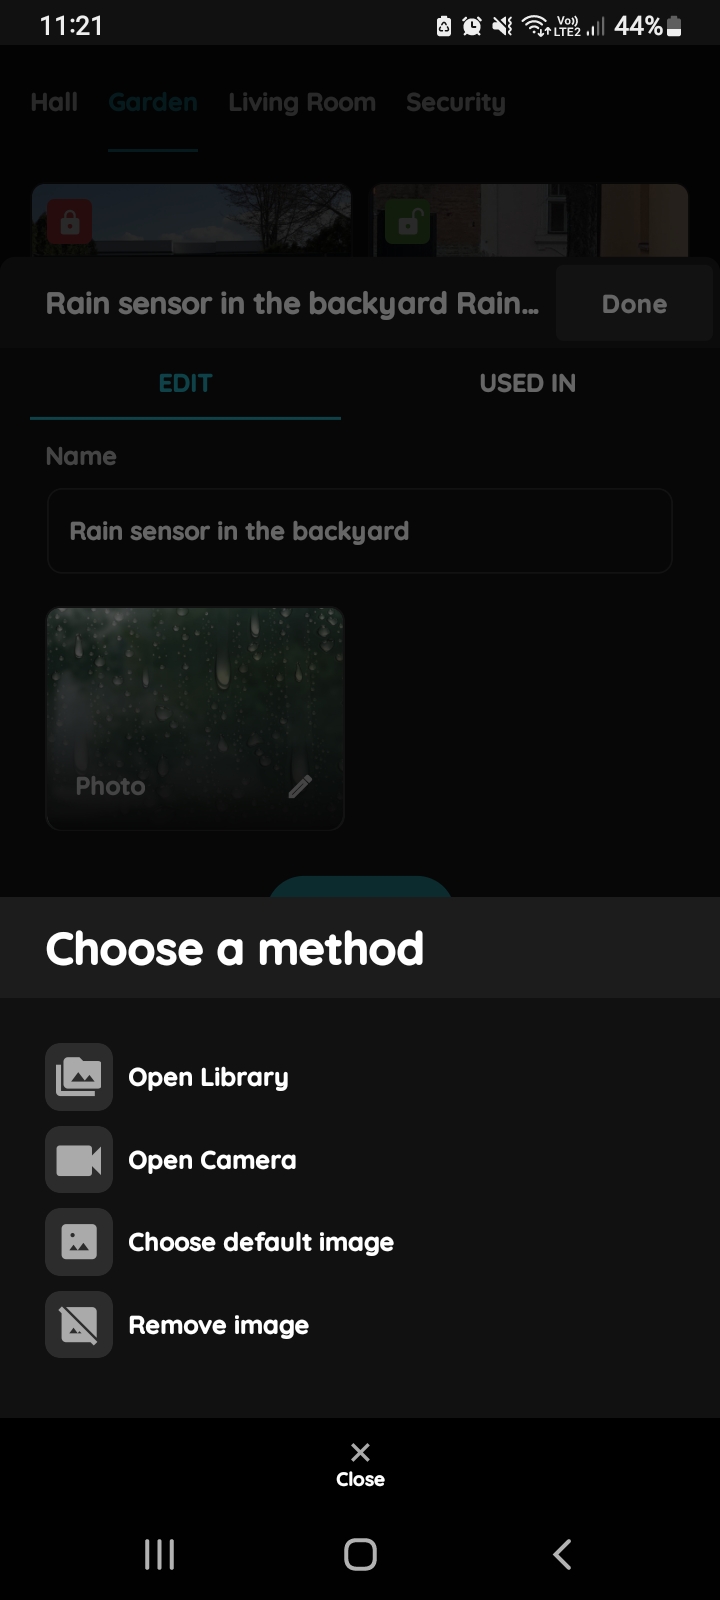
Change photo - Rain sensor
You have four options:
- Open Library - Select a photo from your phone's Library.
- Open Camera - Take a picture using your smartphone.
- Choose default image - Choose one of the predefined images.
- Remove image - Remove the existing image.
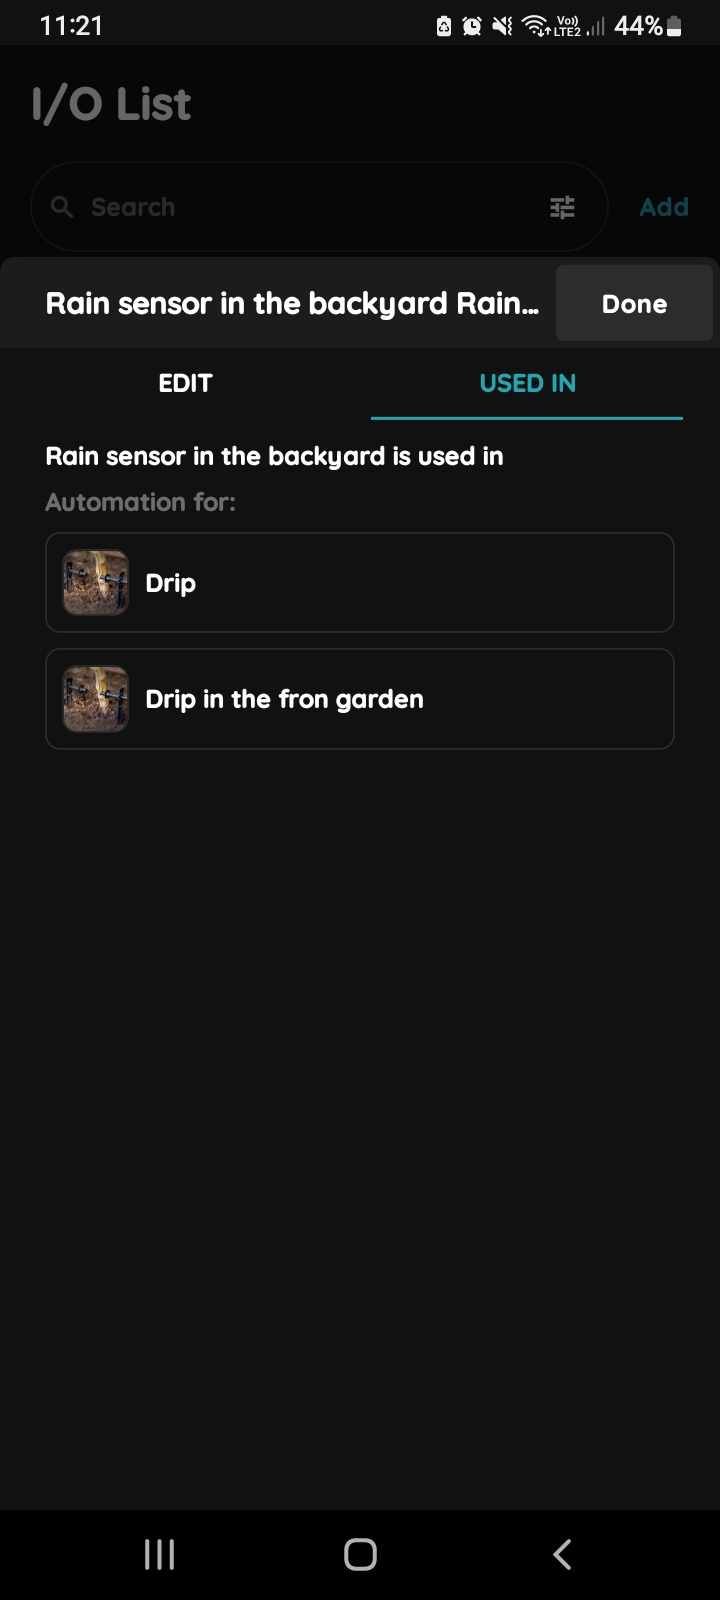
Used in - Rain sensor
The Used In tab shows all the Scenes and Automations where the Rain sensor is used.
If it is not used anywhere, the list will be empty and the following message will be displayed: “This I/O is not in use anywhere.”
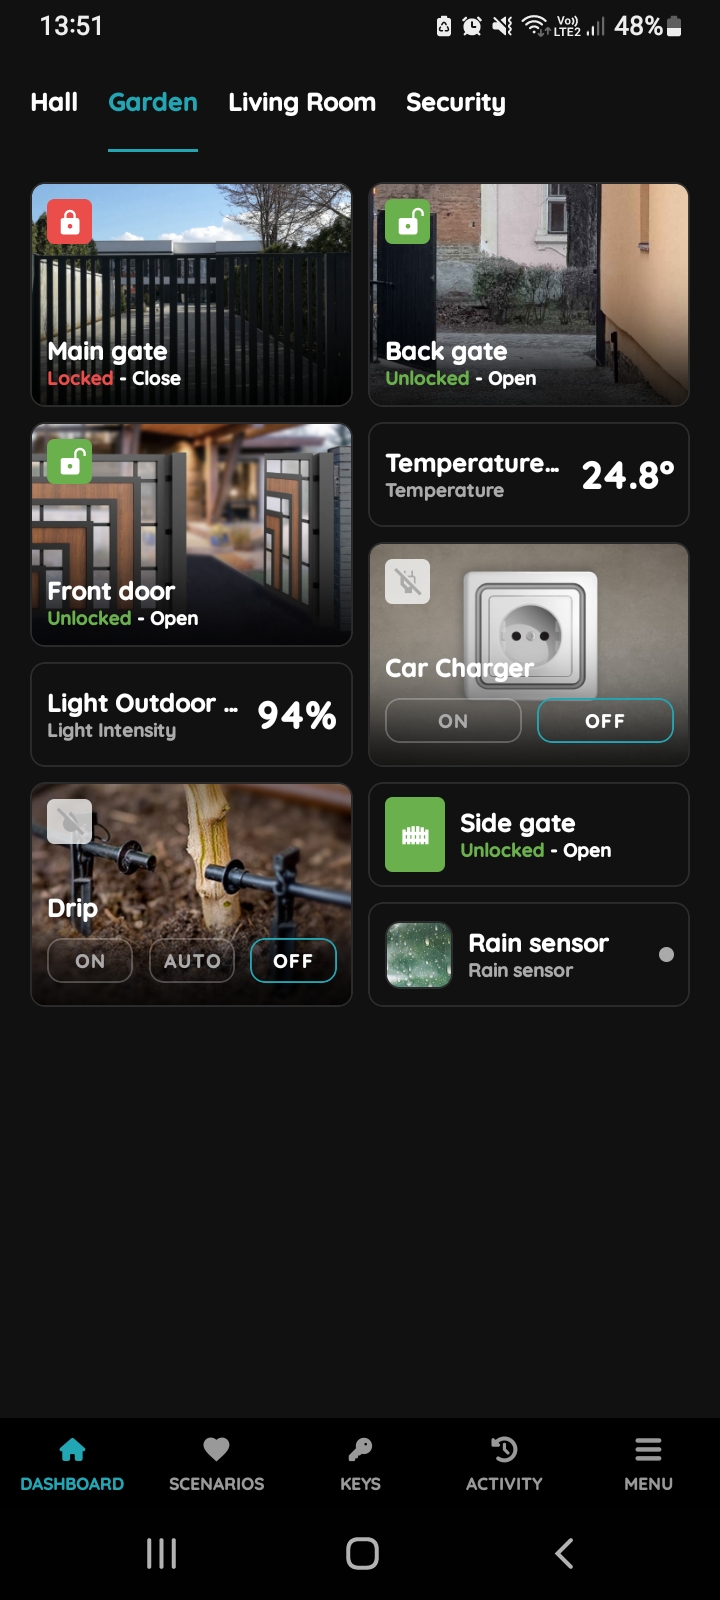
Find the Irrigation on the Dashboard
Automate your irrigation system in the Smart PIERRE app by setting conditions based on the Rain sensor and time. This allows irrigation to operate only during the configured period and when rain is not detected.
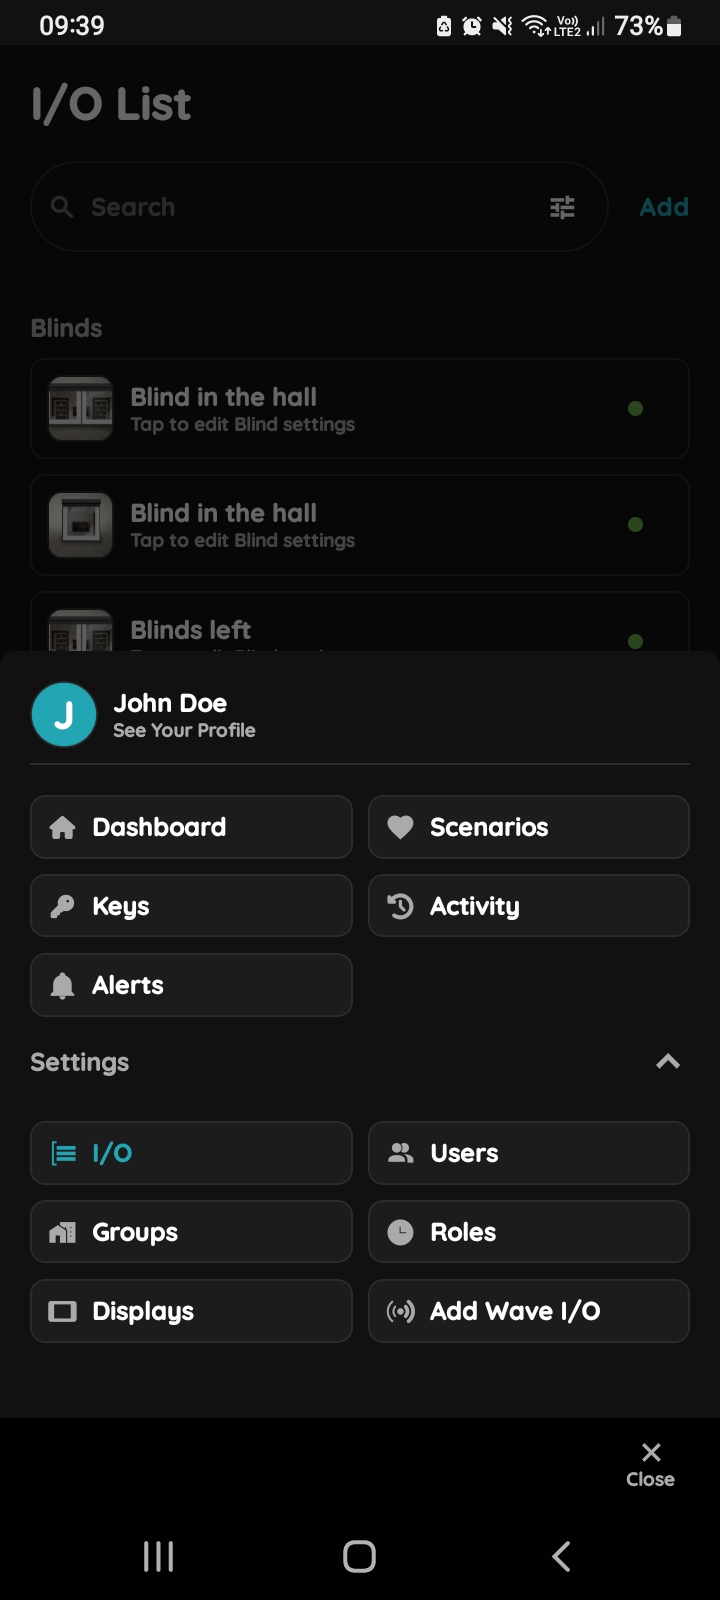
Open I/O
In the Menu, under Settings, tap on the I/O.
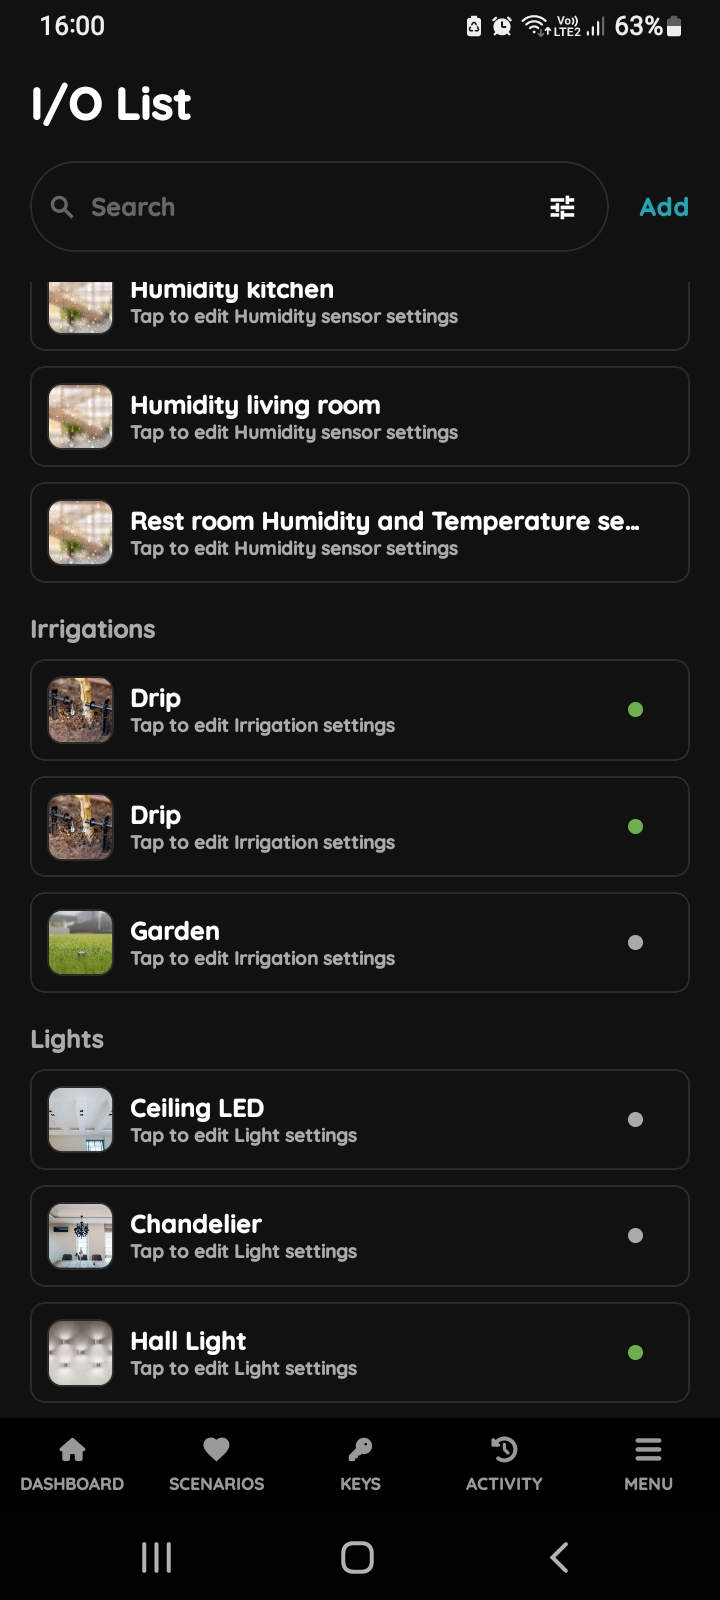
I/O list - Irrigation
Open the I/O list, scroll to Irrigation, and tap the appropriate Irrigation card. In this example, select Drip.
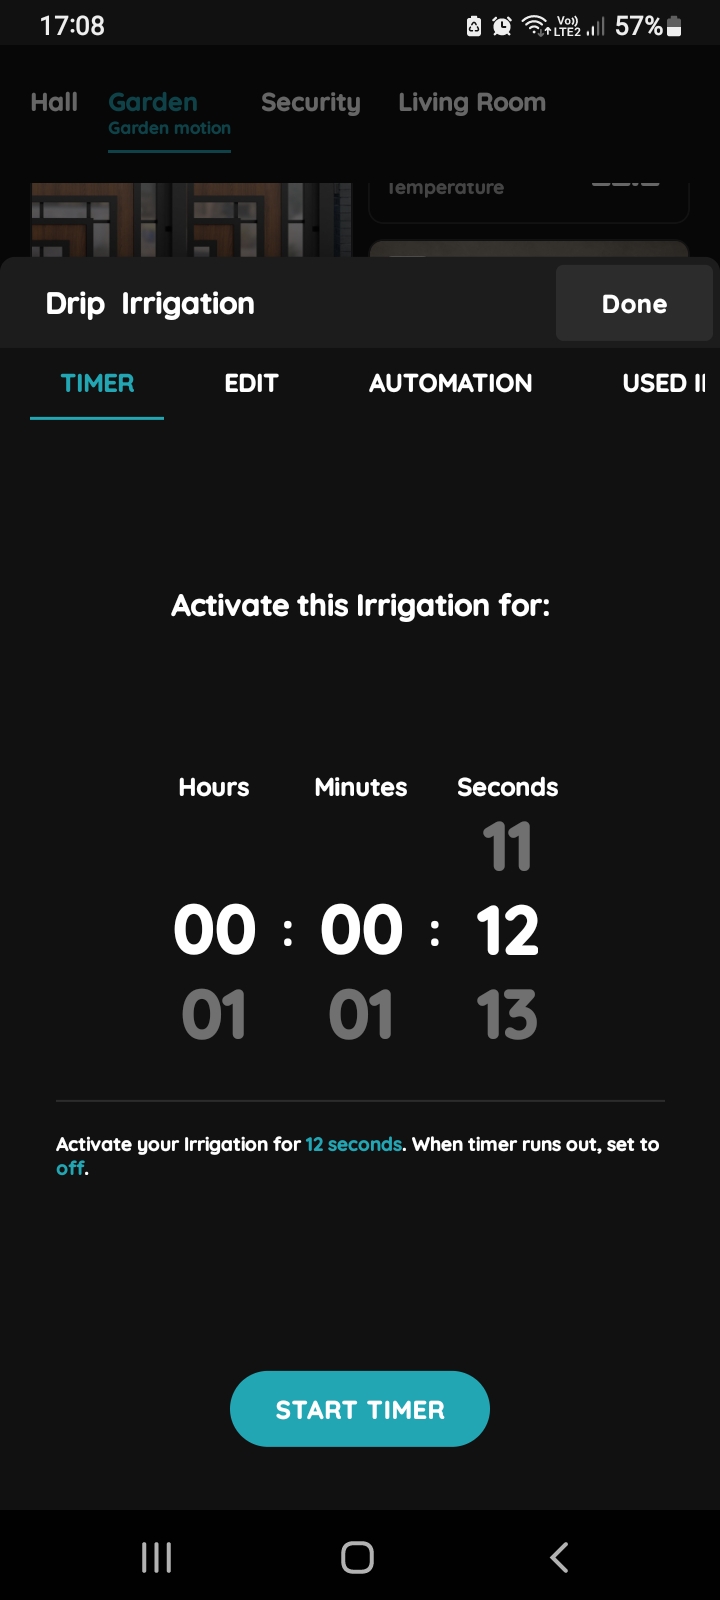
Timer, Edit, Automation, Used In - Irrigation
Tap the Automation tab.
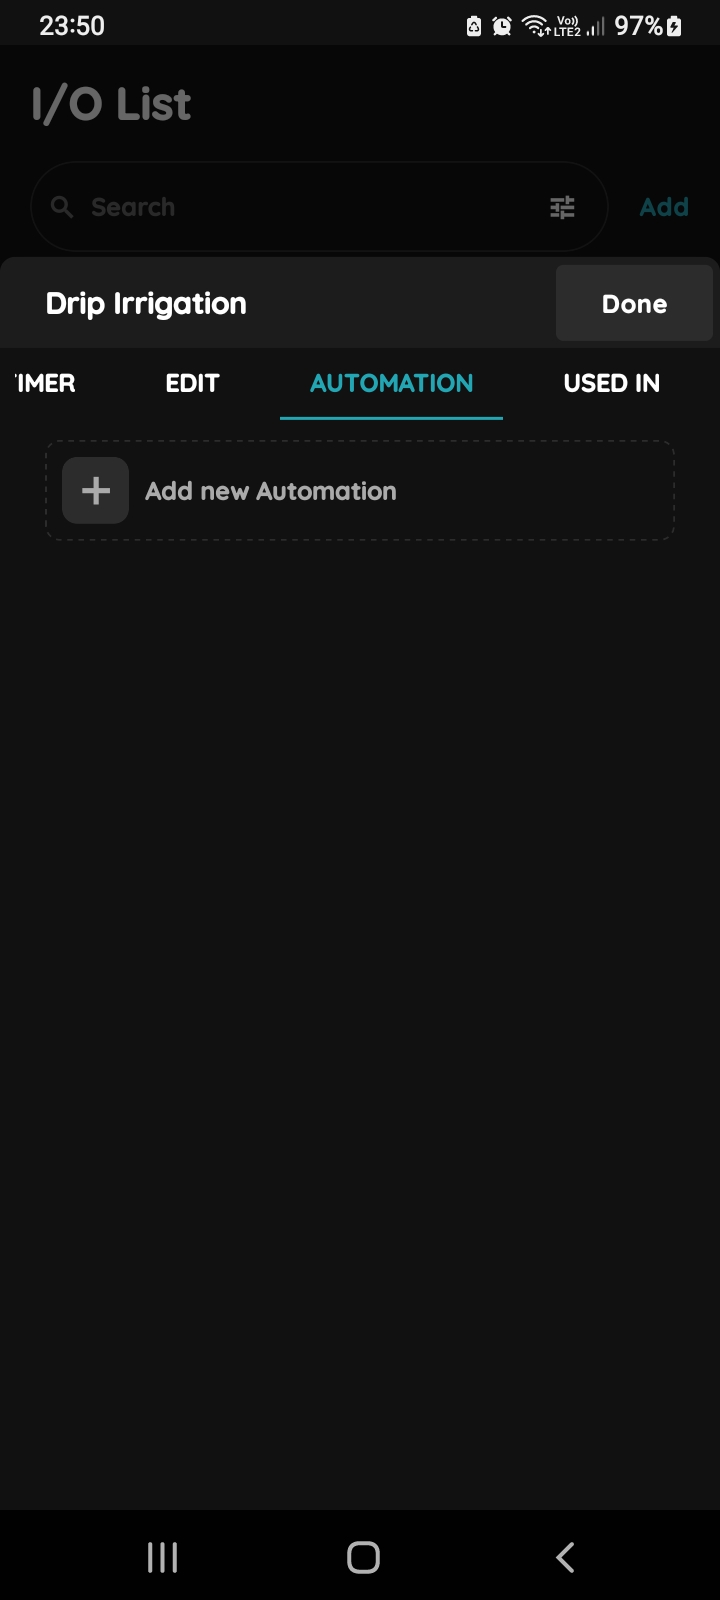
Add new Automation - Irrigation and Rain sensor
Tap + Add Automation to add an Automation for the Irrigation.
In this example, we will create an Automation that allows the Irrigation to be active every day from 12:00 to 15:00, when the Rain sensor is inactive.
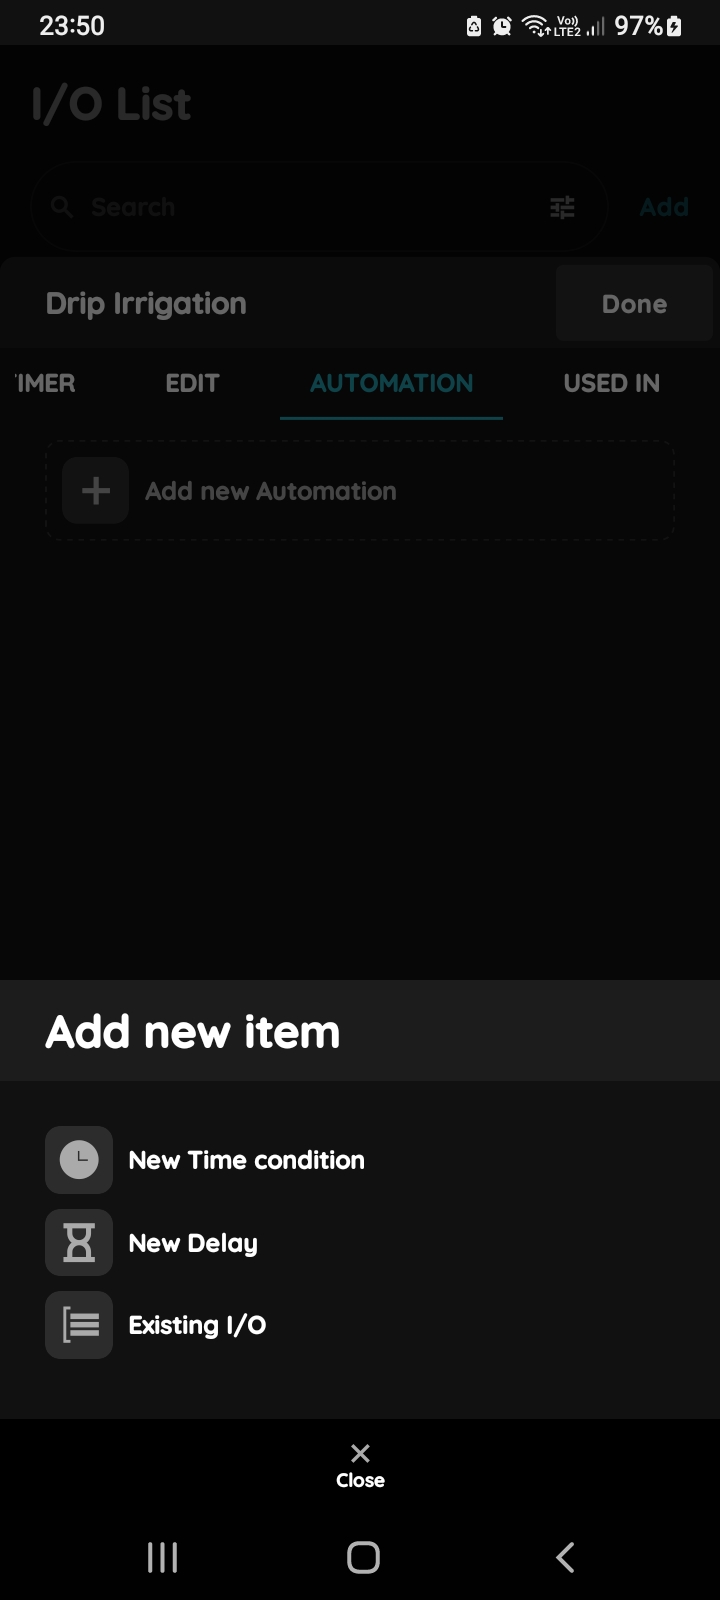
Add new item for the Irrigation - New Time condition
You can add:
- New Time condition
- New Delay
- Existing I/O
Tap New Time condition.
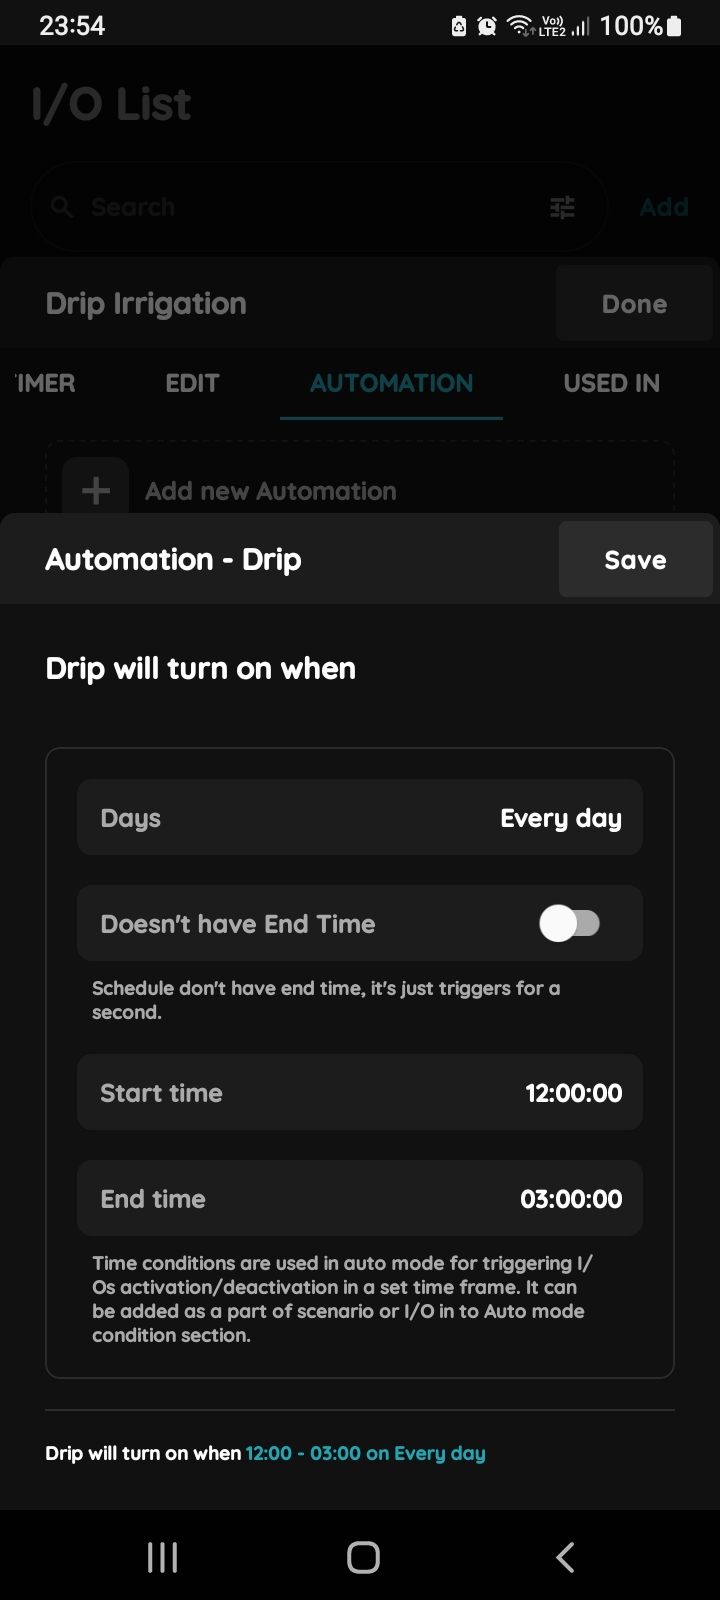
New Time Condition - Irrigation
In this step, set the Days, Start time, and End time.
Tap each field to configure it.
For more details, follow the next steps.
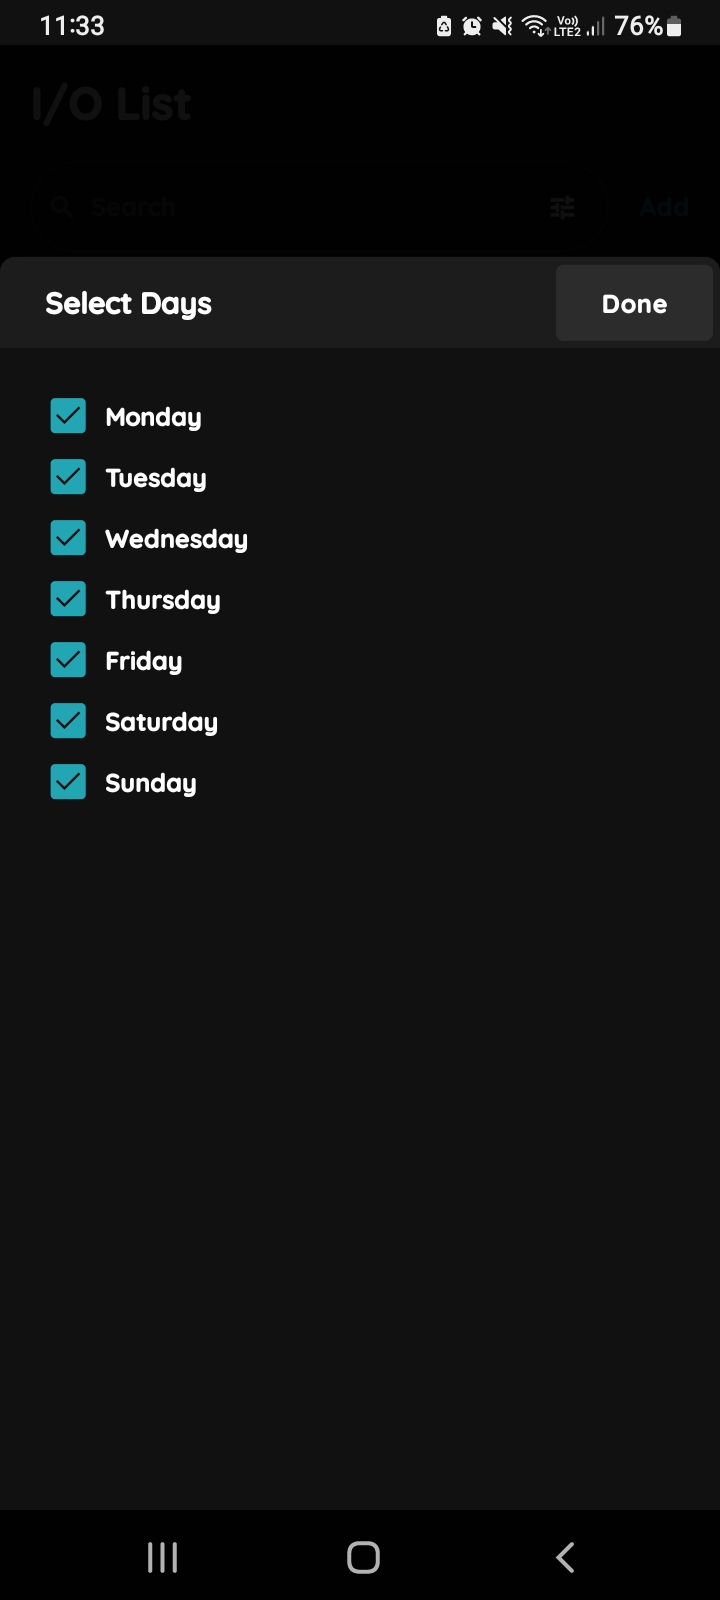
Select Days
Select the Days when the I/O will be active by tapping the checkbox next to each required day.
In this example, select all days from Monday to Sunday.
Tap Done.
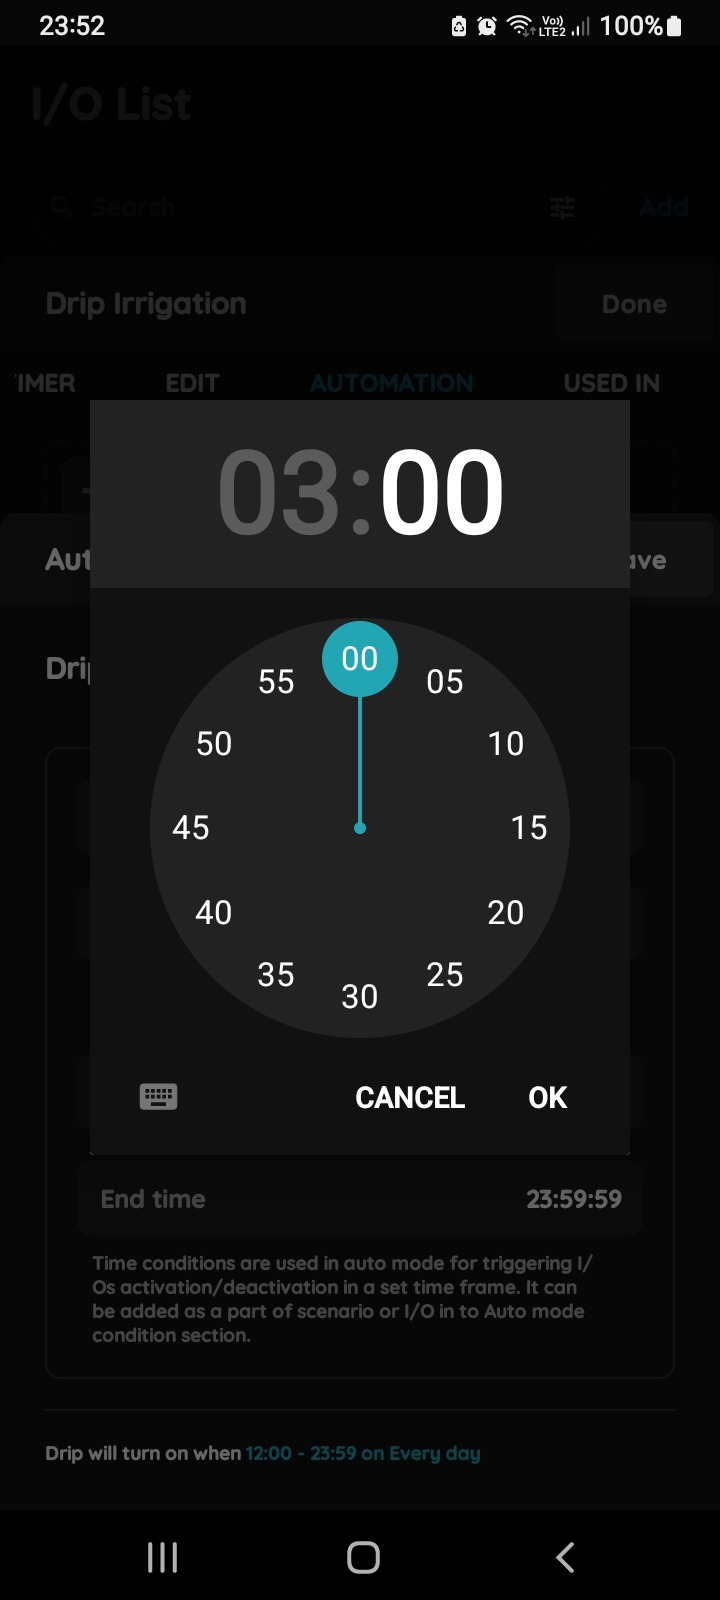
Start time and End time
Tap the Start time and End time fields to set the required times using the clock or keyboard.
Tap OK to confirm. To cancel, tap Cancel.
(Time conditions can be used to define when an I/O or Automation is active within a specified time period.)
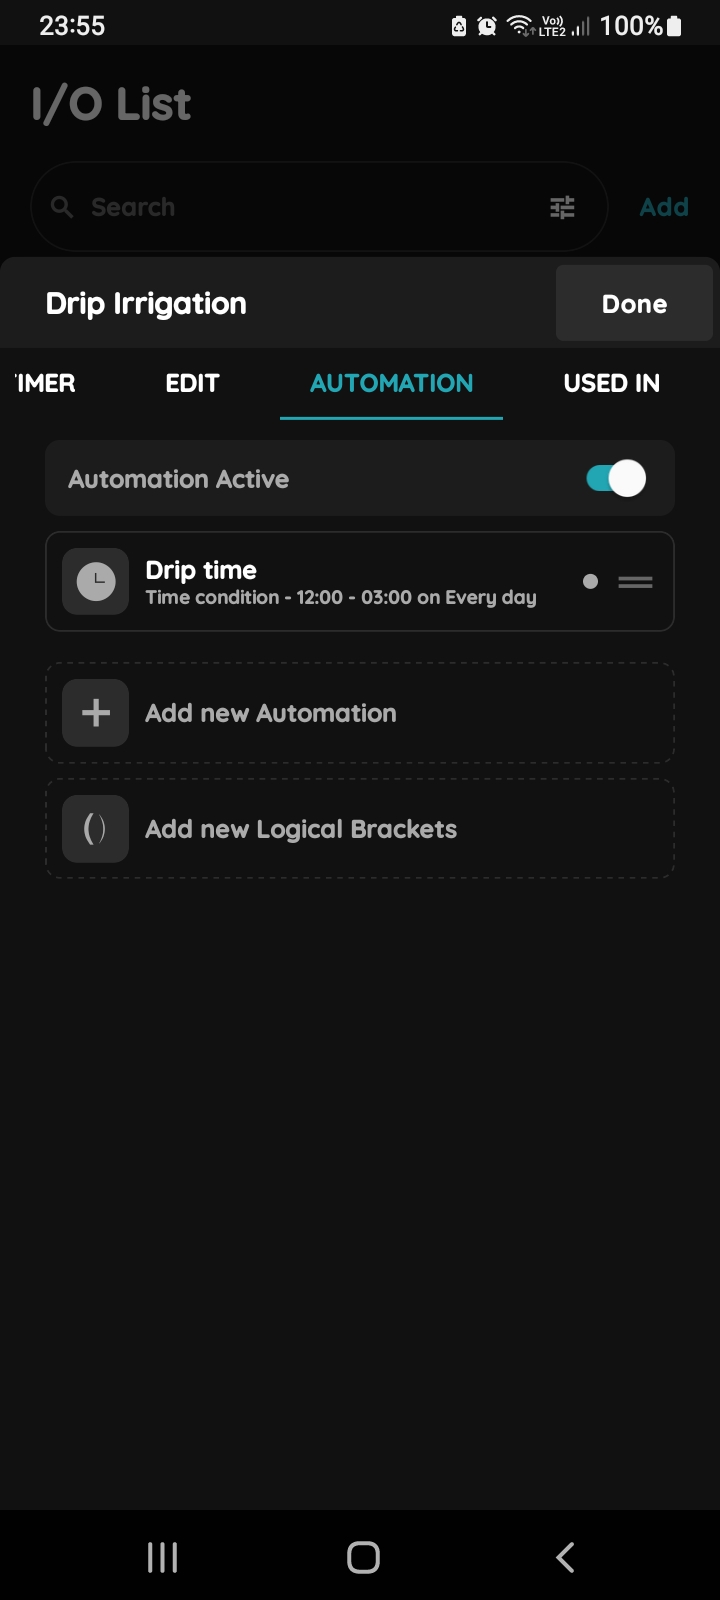
Add new Automation for the Irrigation
To add the Rain sensor to this Automation, tap + Add new Automation.
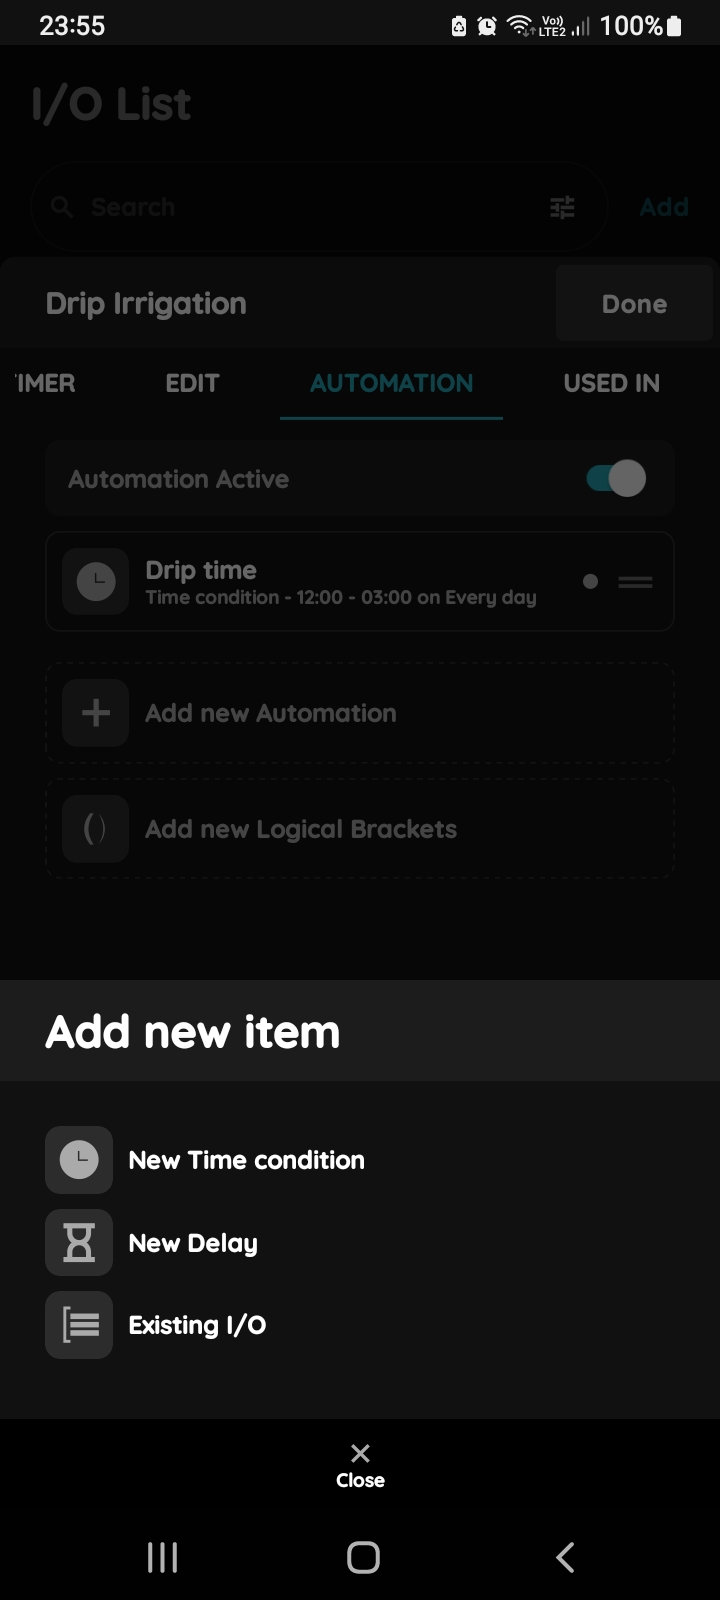
Add new item for the Irrigation
In this step, add a new item.
Tap Existing I/O.
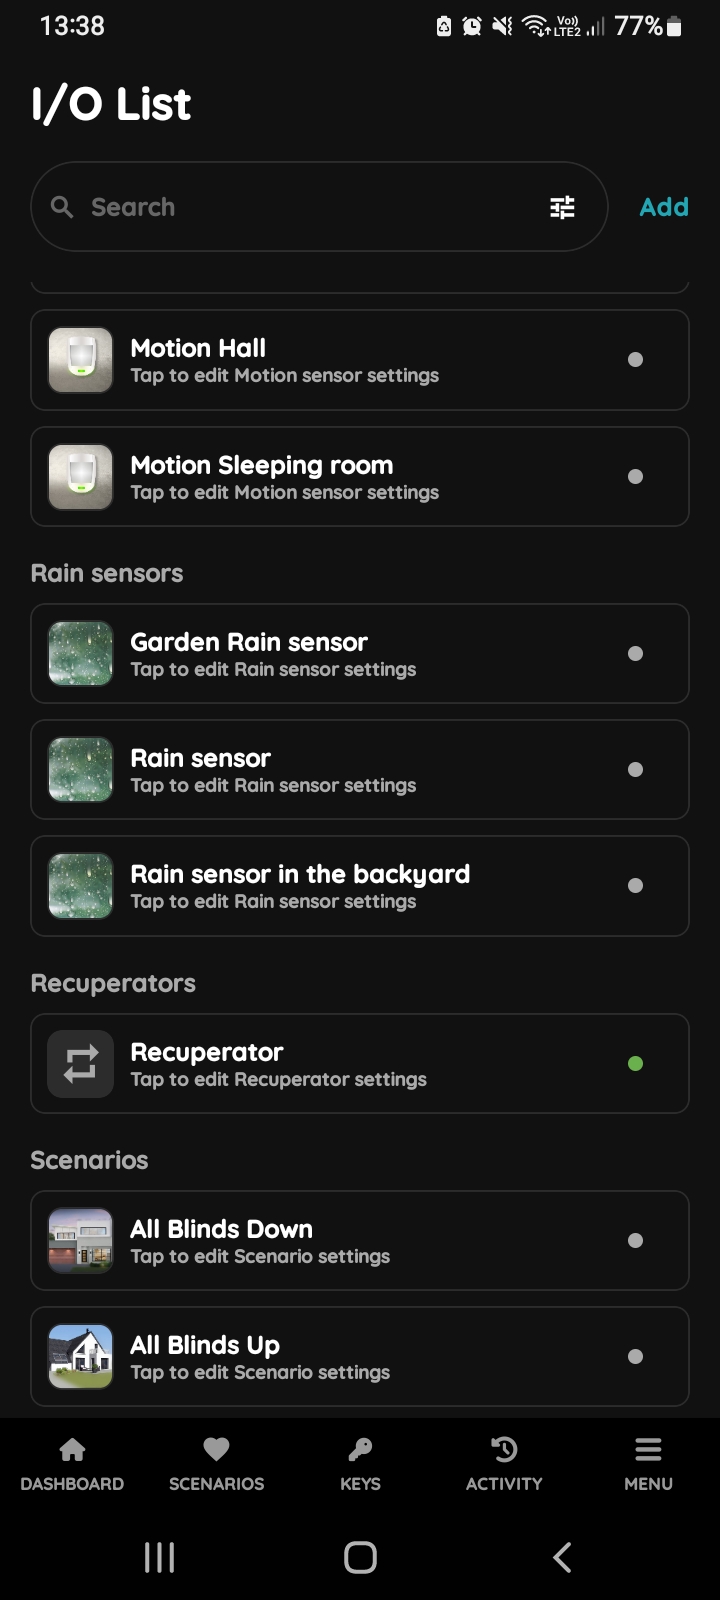
Existing I/O - Rain sensor
Scroll through the I/O list and find the desired I/O.
Tap the Rain sensor to add it to this Automation.
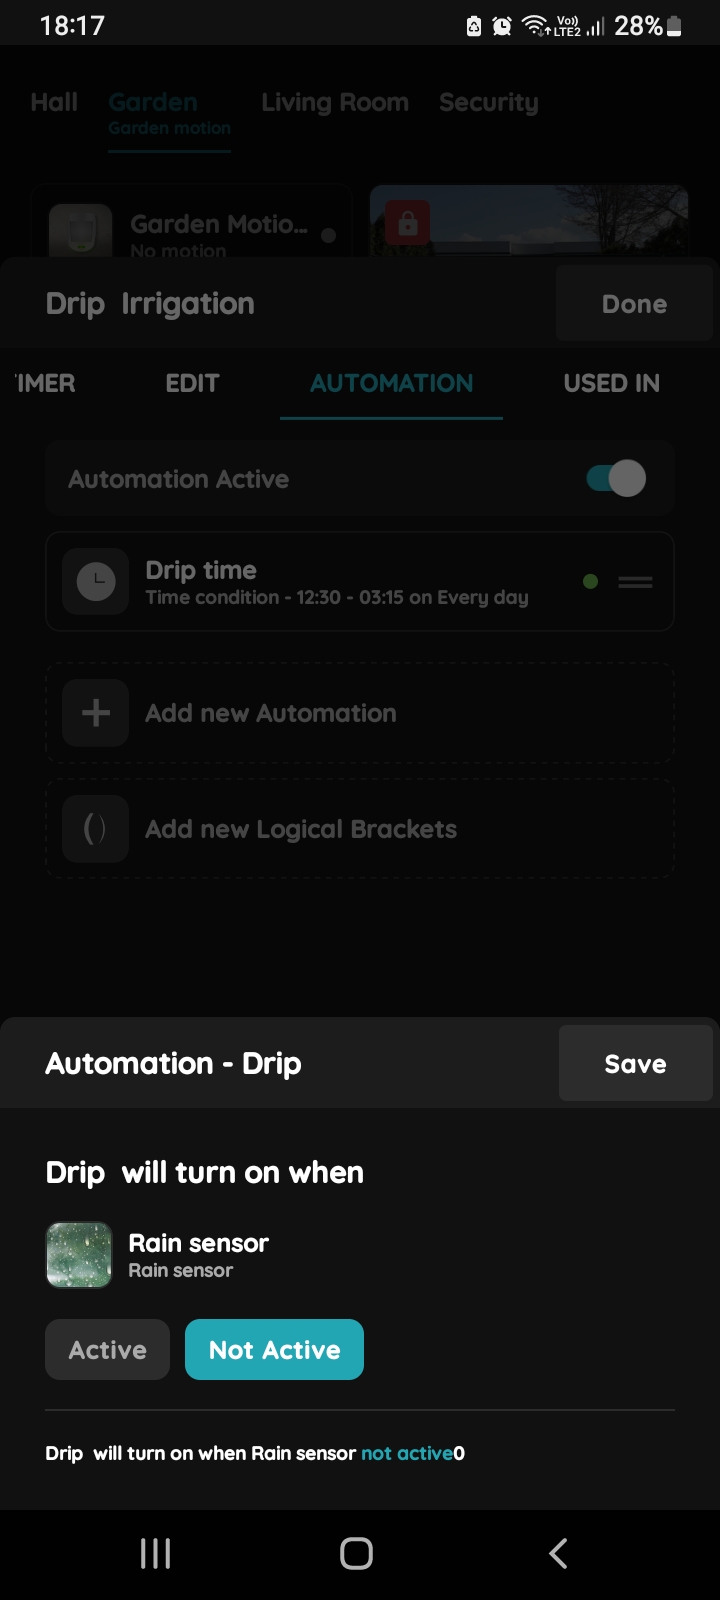
Existing I/O - Rain sensor - status
The Irrigation will be turned On when the Rain sensor is not active.
Tap Not active.
Tap Save.
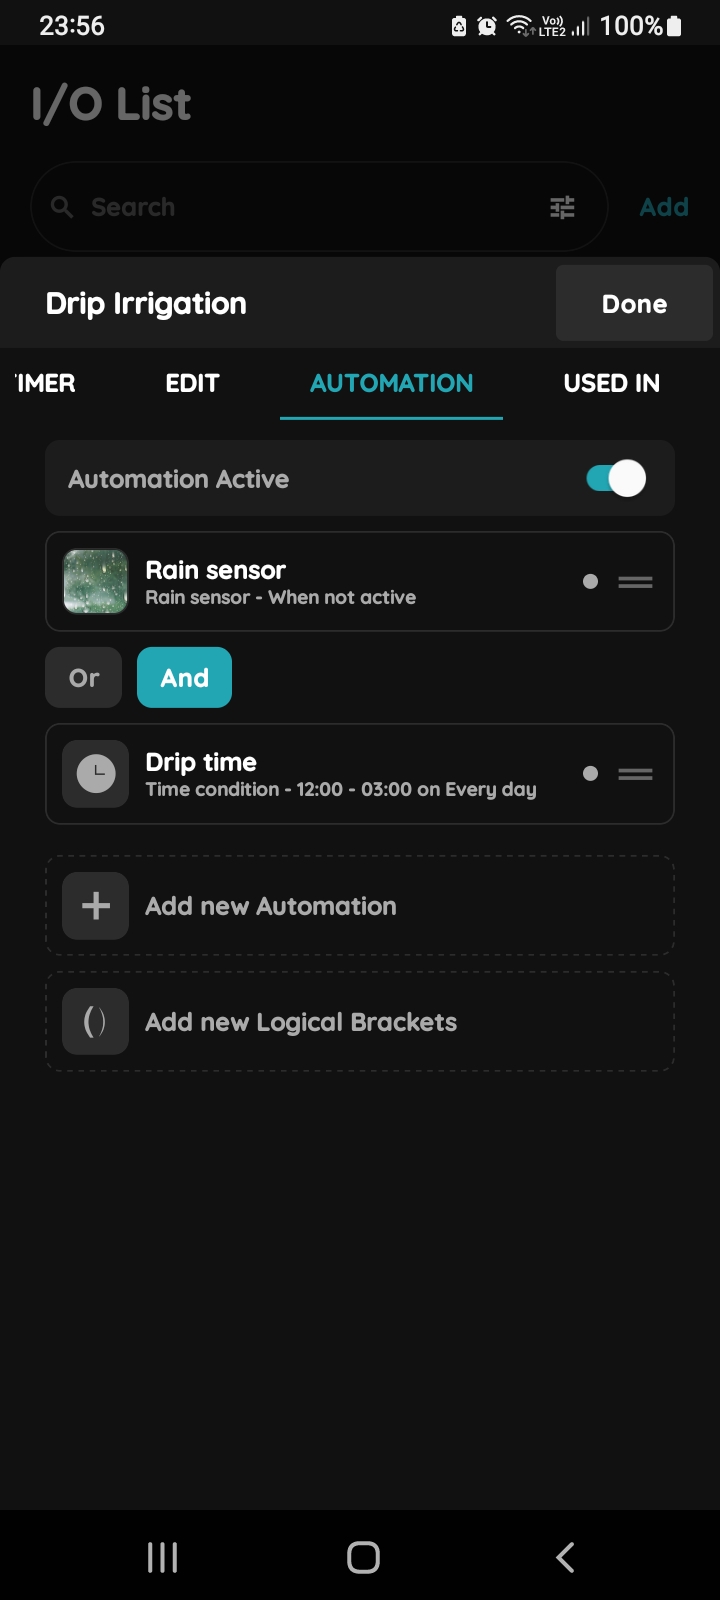
And
Tap the And button.
You can use drag and drop to change the order of the conditions in the list.
In this example, And means that both conditions must be met for the Automation to be active.
Tap Done.