

Smart PIERRE - Safety Detectors
Description
The Safety Detector I/O type monitors safety-related sensors connected to the system. It works with compatible 12 VDC detectors that provide a dry contact or relay contact output.
Supported Devices
- Smoke detectors.
- Heat detectors.
- Gas detectors.
- LPG detectors.
- CO detectors.
- Fire alarm outputs.
- Other safety-related detectors with dry-contact outputs.
Status Monitoring
The current detector status is shown on the Dashboard and in the I/O list. Typical states:
- Active
- Inactive
- Alarm
Which states appear depends on the detector type and its configuration.
Configuration
Press and hold the detector card to open the configuration page:
- Name
- Image
- Used In — lists every scene and automation that uses this detector.
Automation
Automations run when the configured detector state is reached. Examples:
- Activate sirens.
- Send notifications.
- Switch on lighting.
- Shut down equipment.
- Close gas valves.
- Trigger emergency procedures.
Important Notice
The PIERRE system is a building automation and smart home control system. It is not a certified fire alarm, gas detection, intrusion alarm, security alarm, life-safety or emergency warning system. It can monitor sensors, generate events and send notifications, but it must not be considered a replacement for a certified safety or security system where one is required by local regulations, insurance requirements or project specifications.
Notifications, alarms and automated actions are provided for convenience only and may depend on external factors, including internet connectivity, power availability, mobile network availability, cloud service availability, network infrastructure integrity and mobile device settings.
PIERRE shall not be liable for any personal injury, loss of life, property damage, financial loss, or other direct or indirect damages resulting from the failure, malfunction, interruption, improper installation, configuration, maintenance or operation of the system or any connected devices.
Use of the Smoke detector
Smoke detector has got two status indicators.
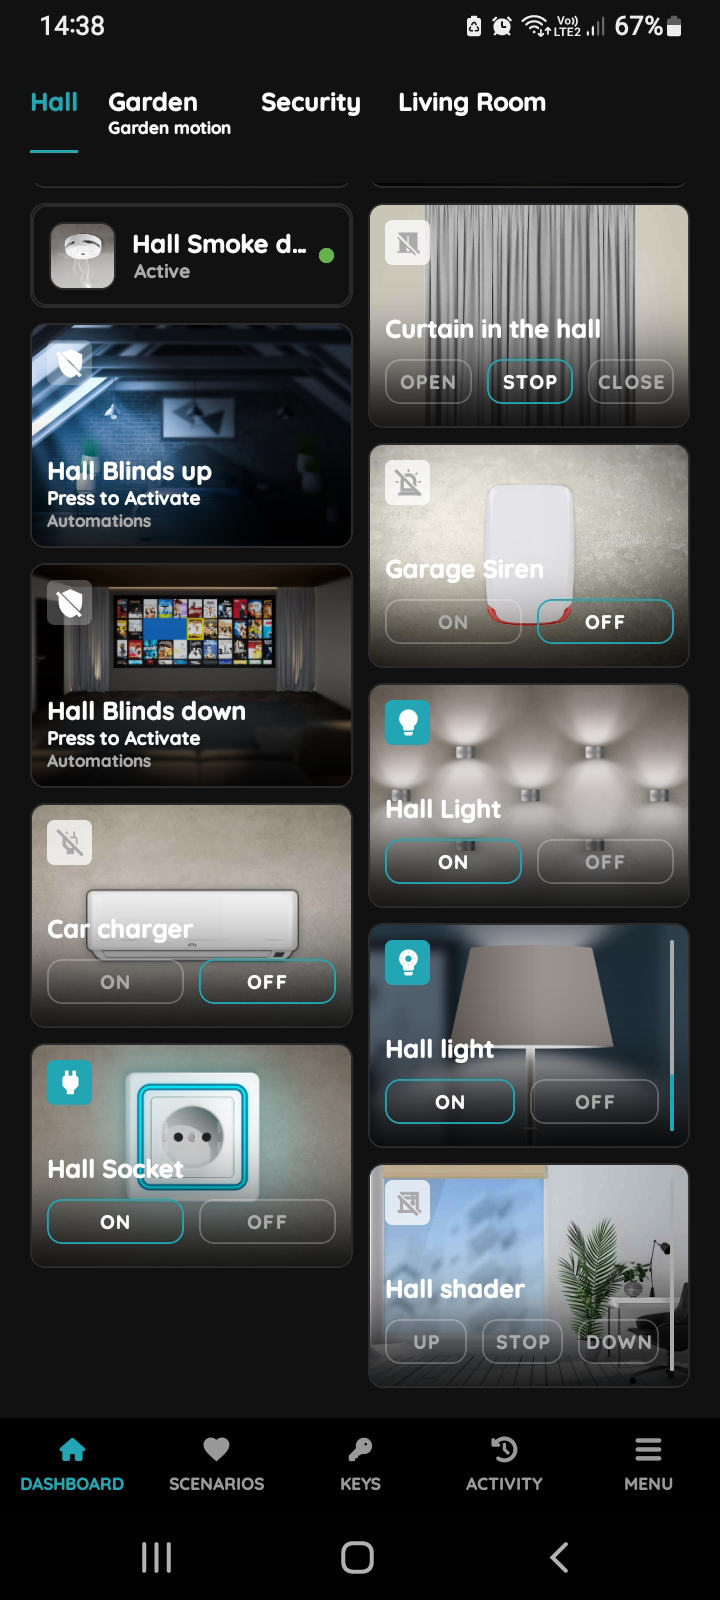
Smoke detector - Active
When smoke is detected, green dot as an indicator of this status is visible next to the Smoke detector, because Smoke detector is Active.
In this case Hall Smoke detector has green dot.
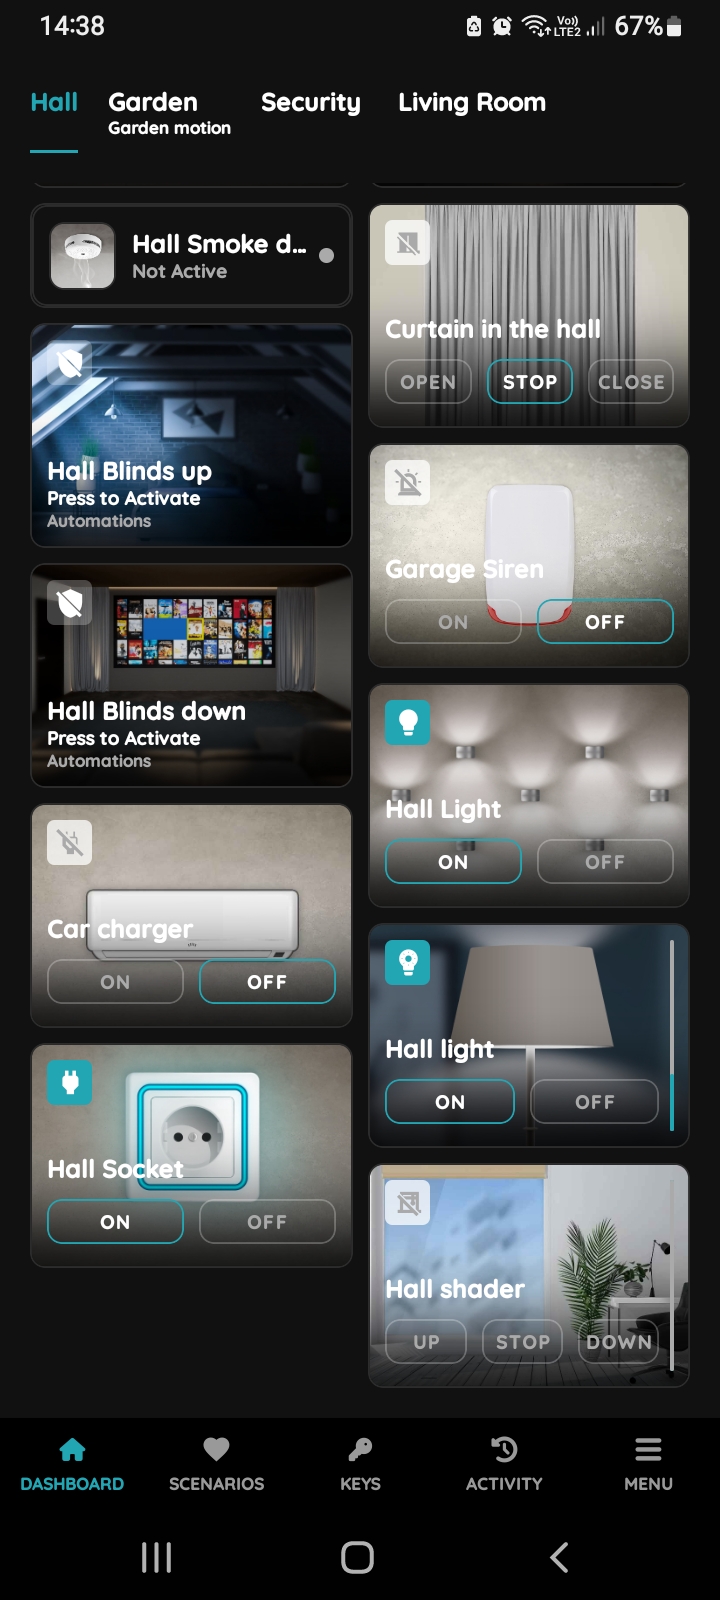
Smoke detector - Not Active
When smoke is not detected, grey dot as an indicator of this status is visible next to the Smoke detector, because Smoke detector is Not Active.
In this case Hall Smoke detector has grey dot.
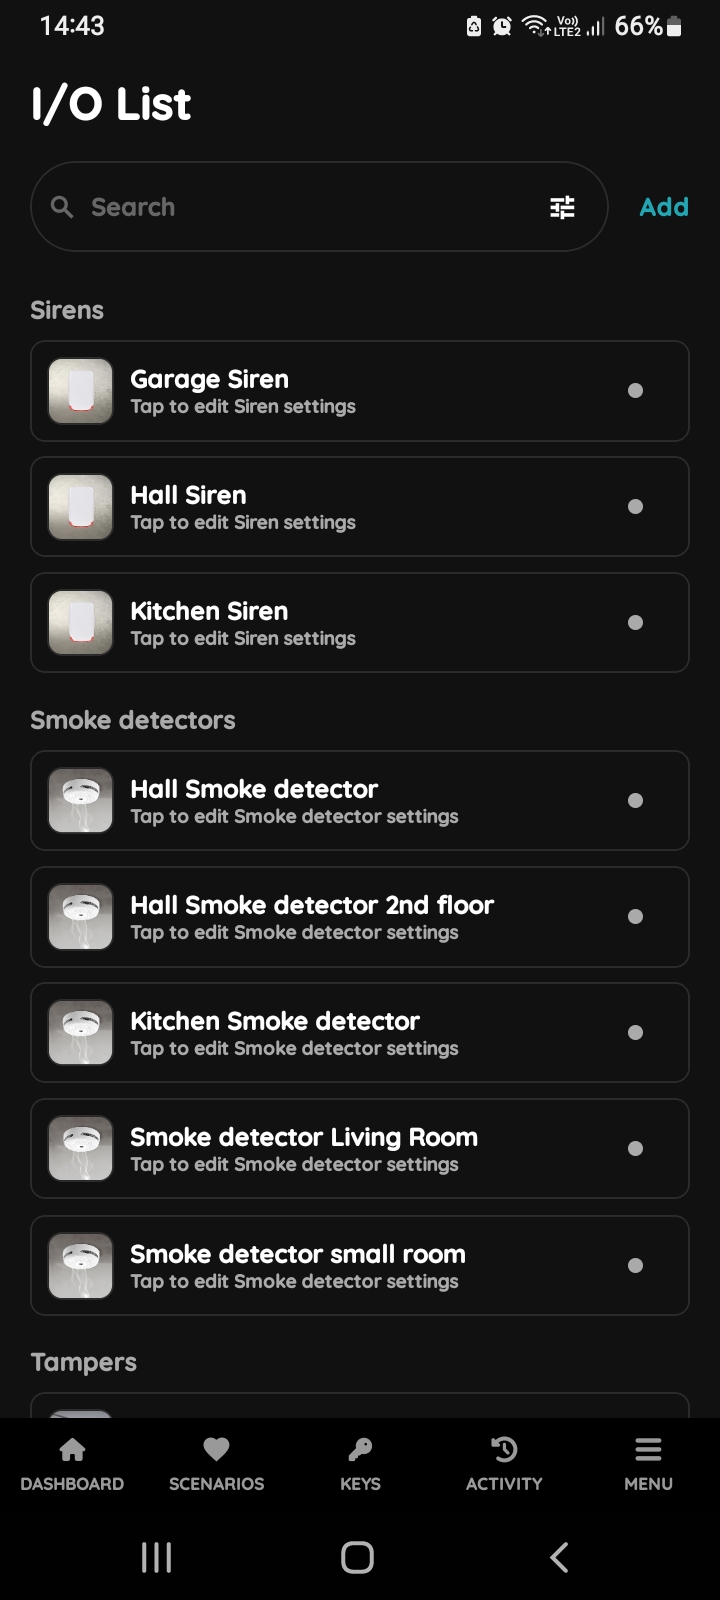
I/O list - Smoke detector
To edit the Smoke detector settings, follow next steps.
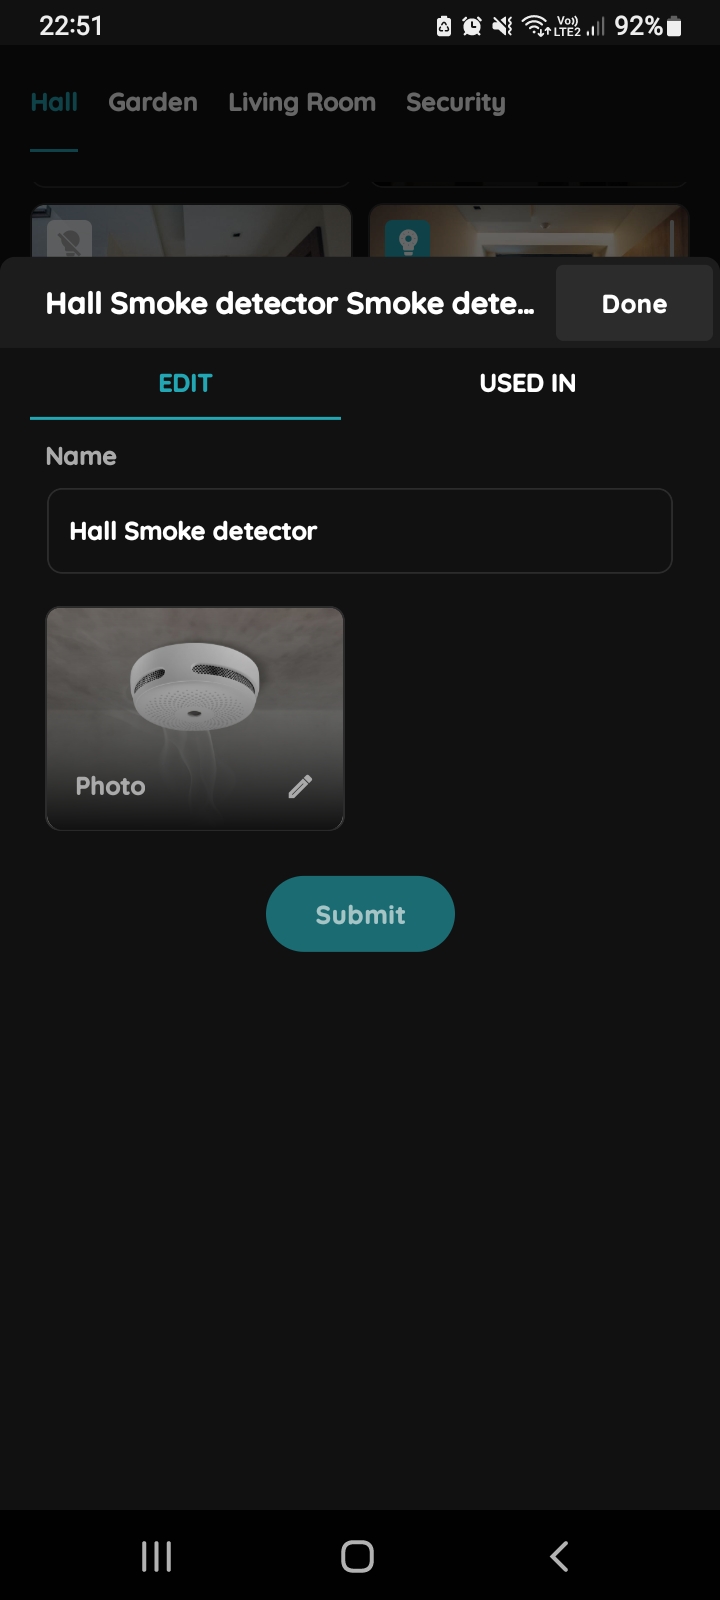
Edit Smoke detector
Edit following form:
- Name - Edit name of the Smoke detector
- Photo - Choose the source of the photo.
Tap Submit/Done.
GOOD TO KNOW:
Smoke detector can be edited by long-press the Smoke detector card on the Dashboard or tapping it in the I/O list.
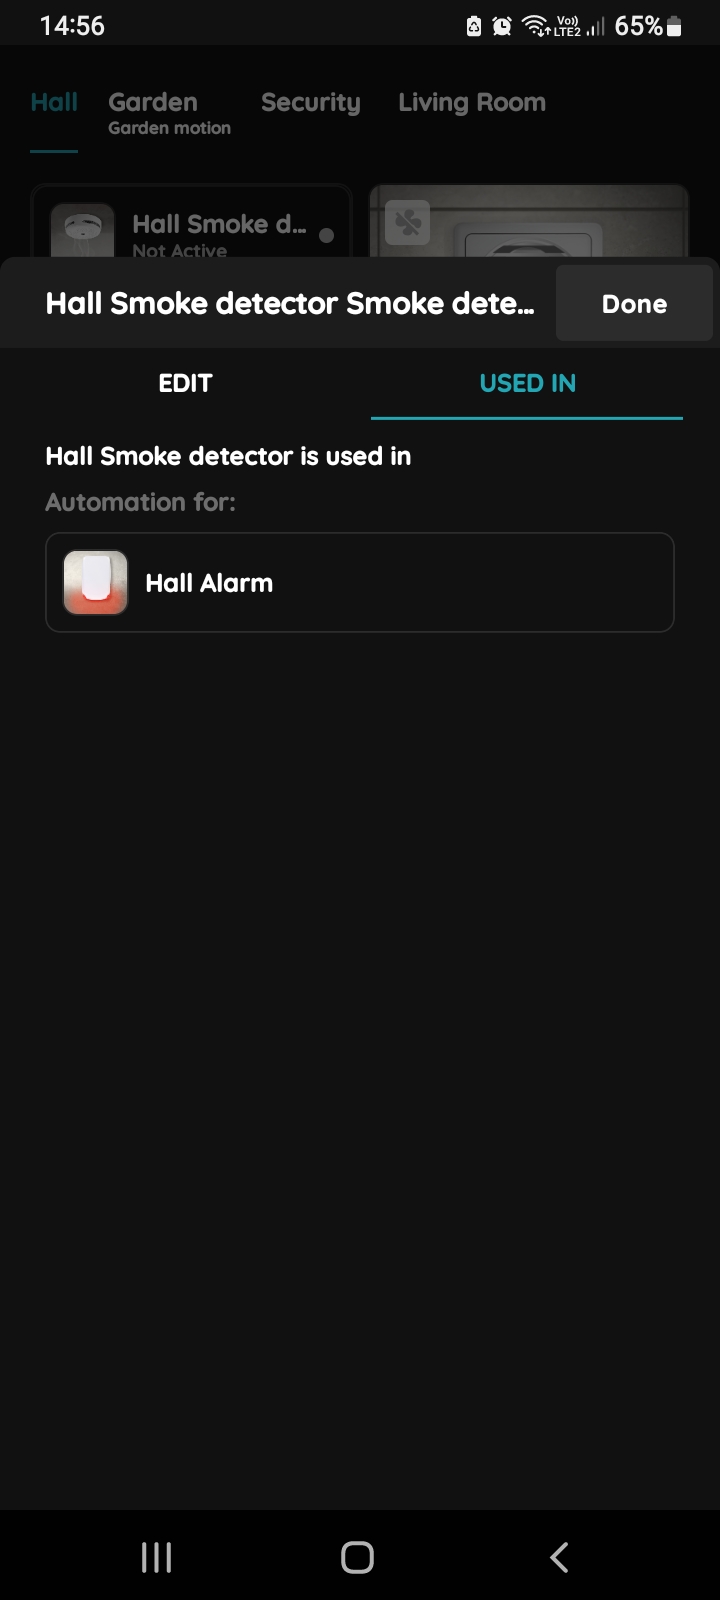
Used In - Smoke detector
The Used In tab shows all the scenarios and automations where the Smoke detector is applied. If it isn't used in any, the list will be empty, and a message will display: "This I/O is not in use anywhere." This feature is particularly useful as it consolidates all relevant information in one place.
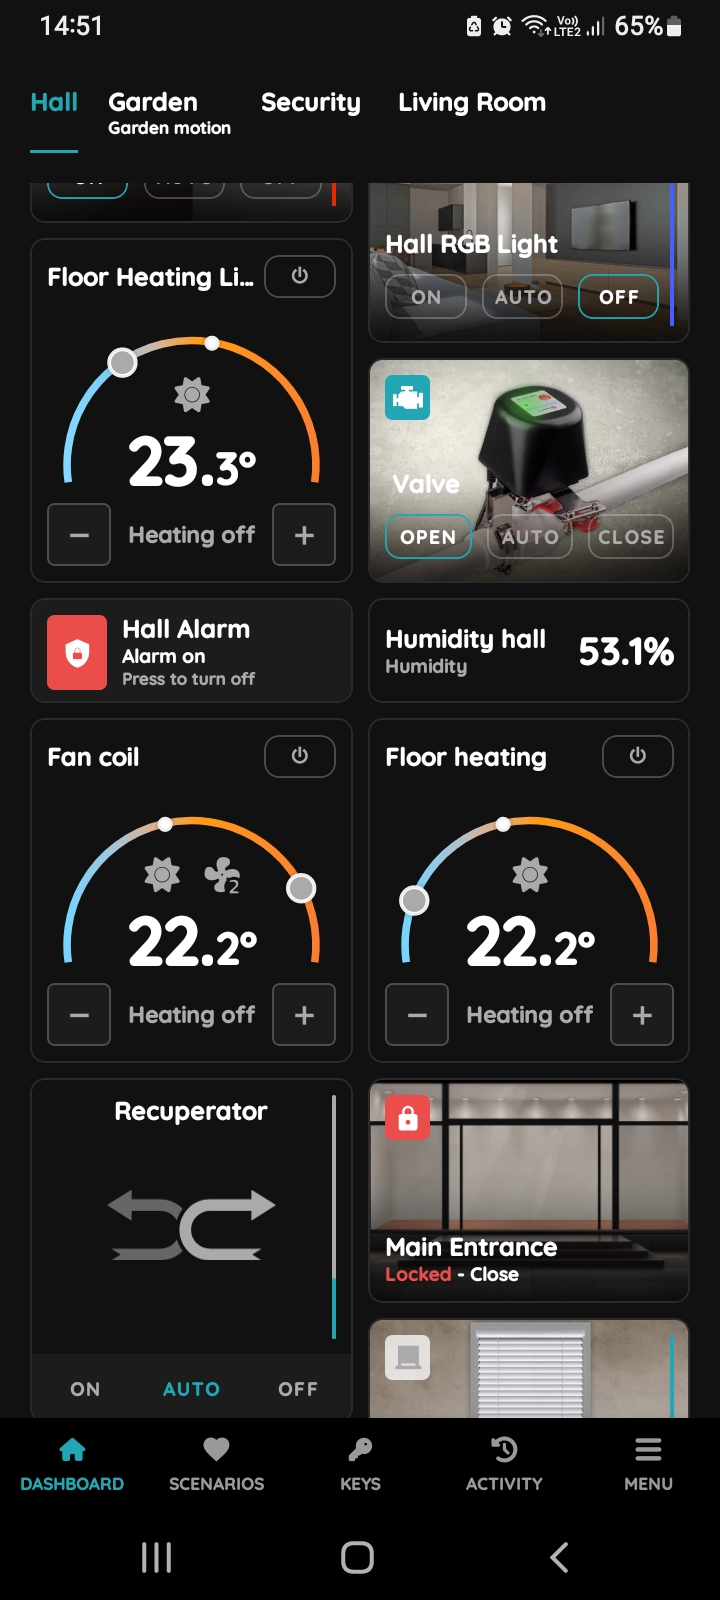
Find the Alarm on the Dashboard
When smoke is detected by the Smoke Detector, the Alarm will arm immediately to ensure safety. The automation triggers the Alarm to emit a loud sound, notifying you of potential danger.
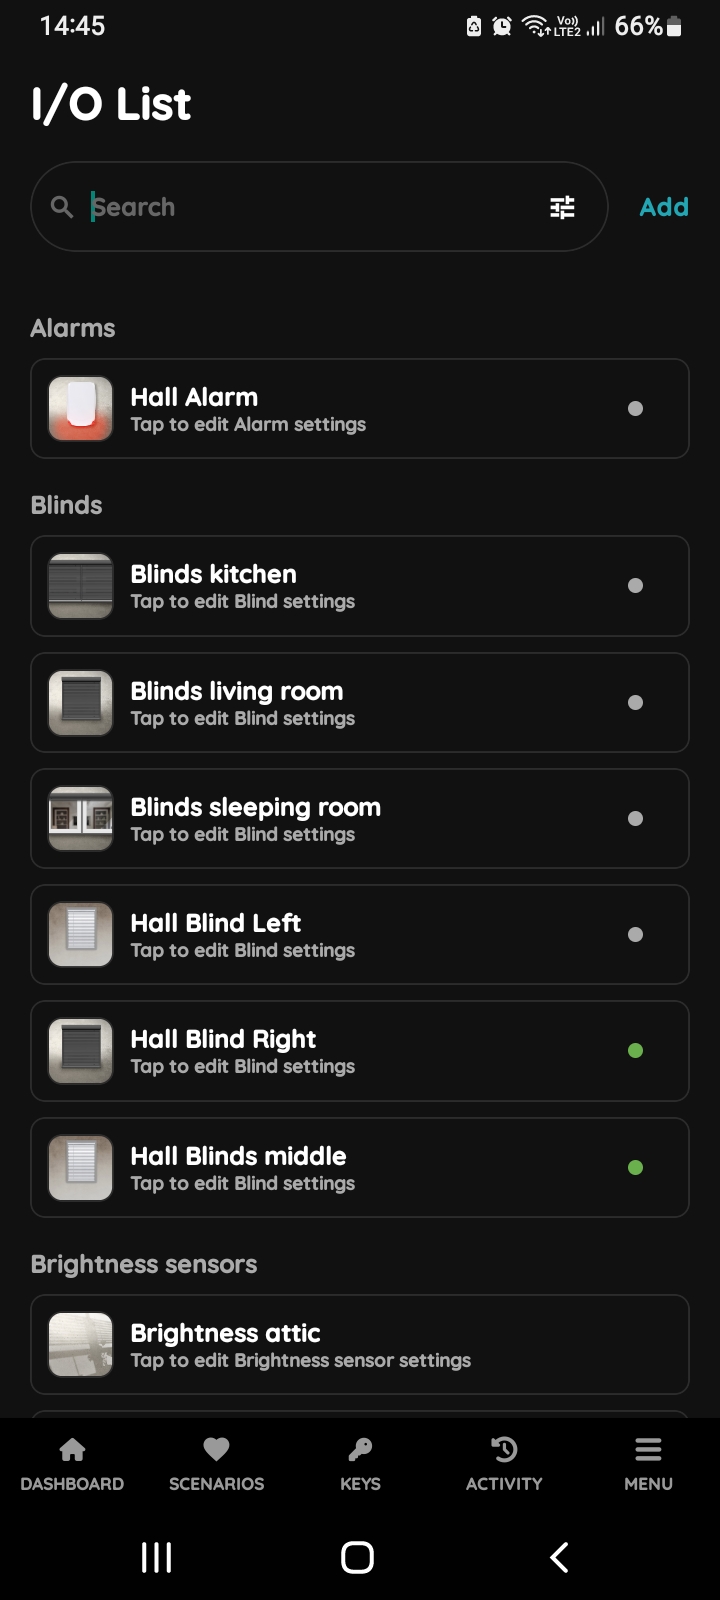
I/O list - Hall Alarm
Open I/O list, scroll to the Alarms and tap on the card of the desired Alarm.
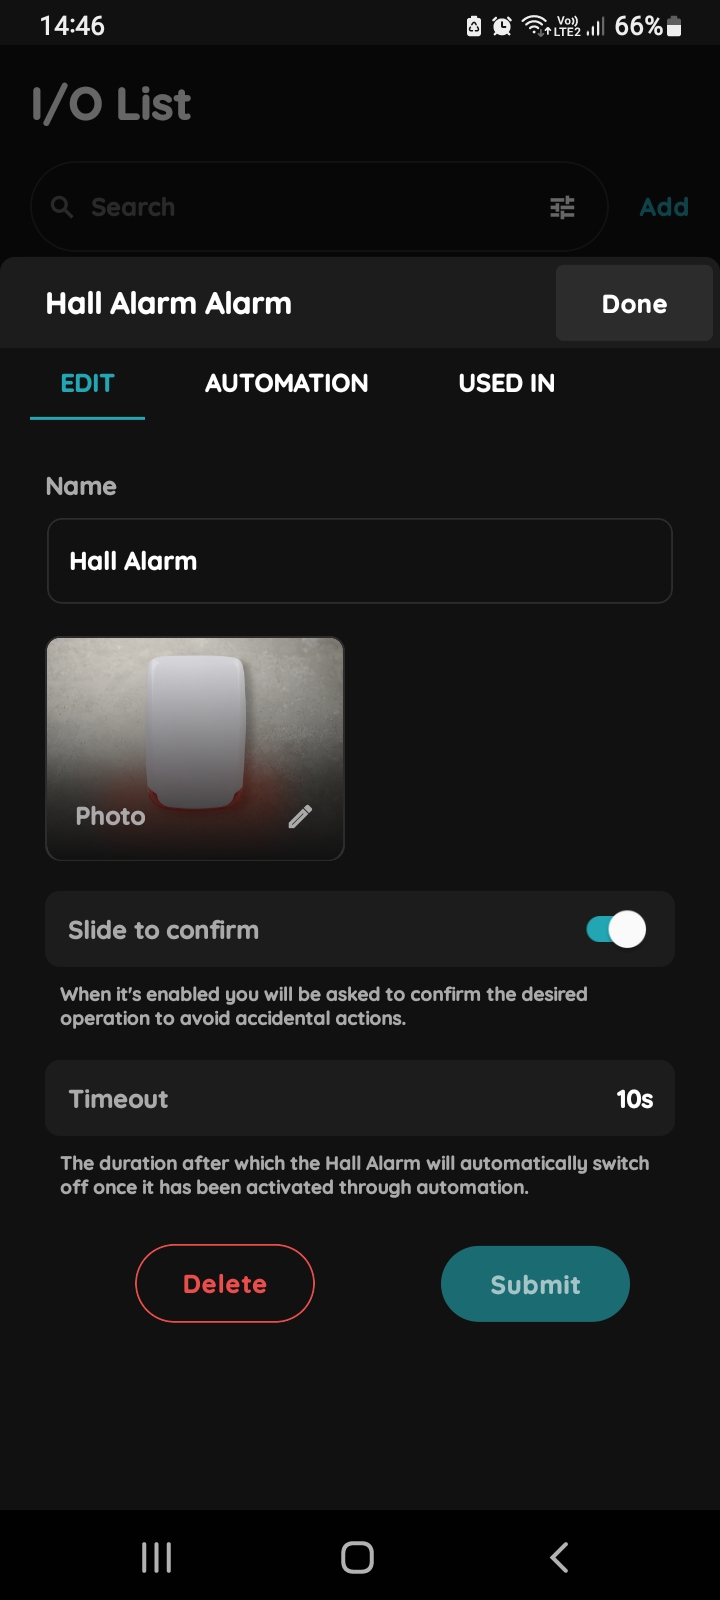
Edit, Automation, Used In - Hall Alarm
Tap on the tab Automation.
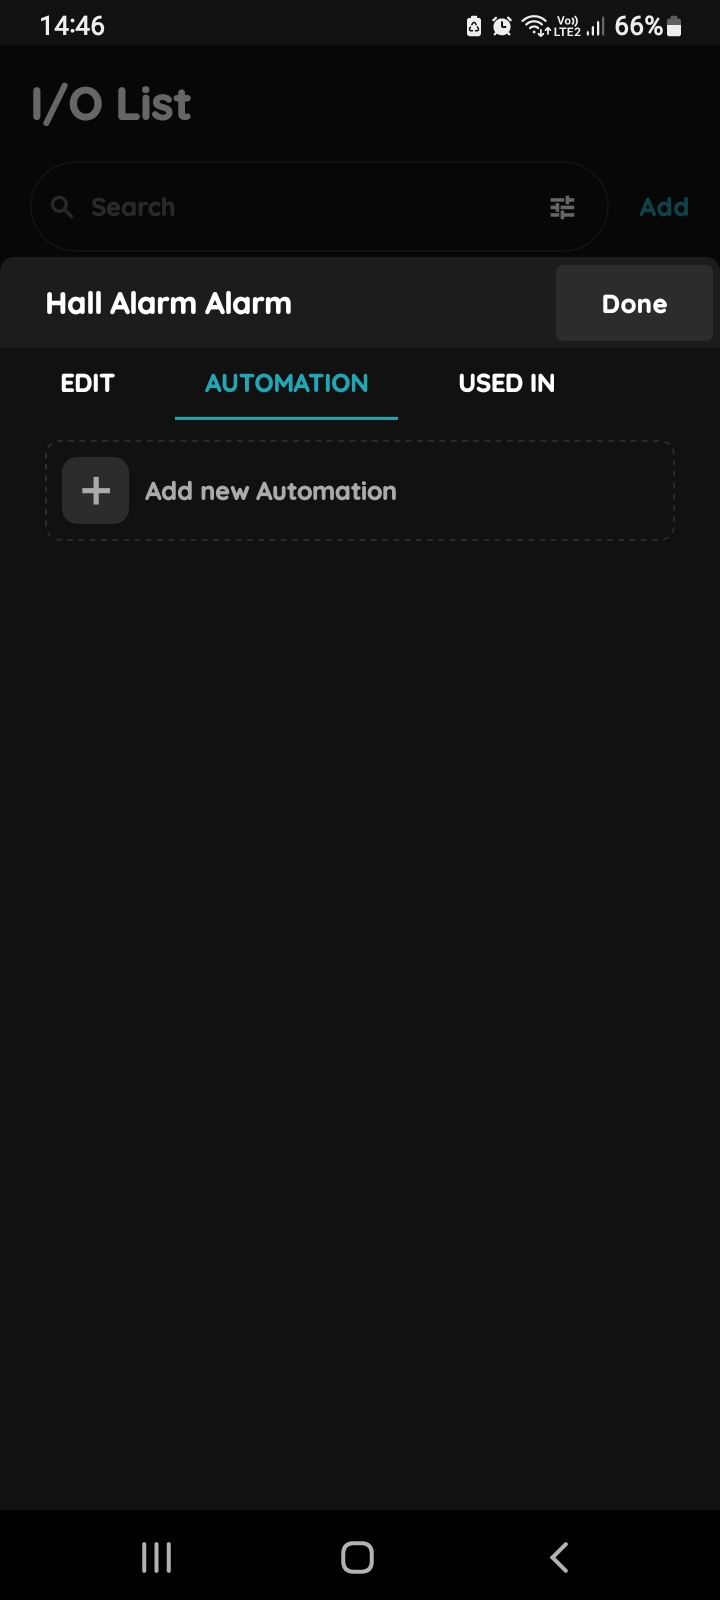
+ Add new Automation - Hall Alarm
If you want to add new automation tap + Add new Automation.
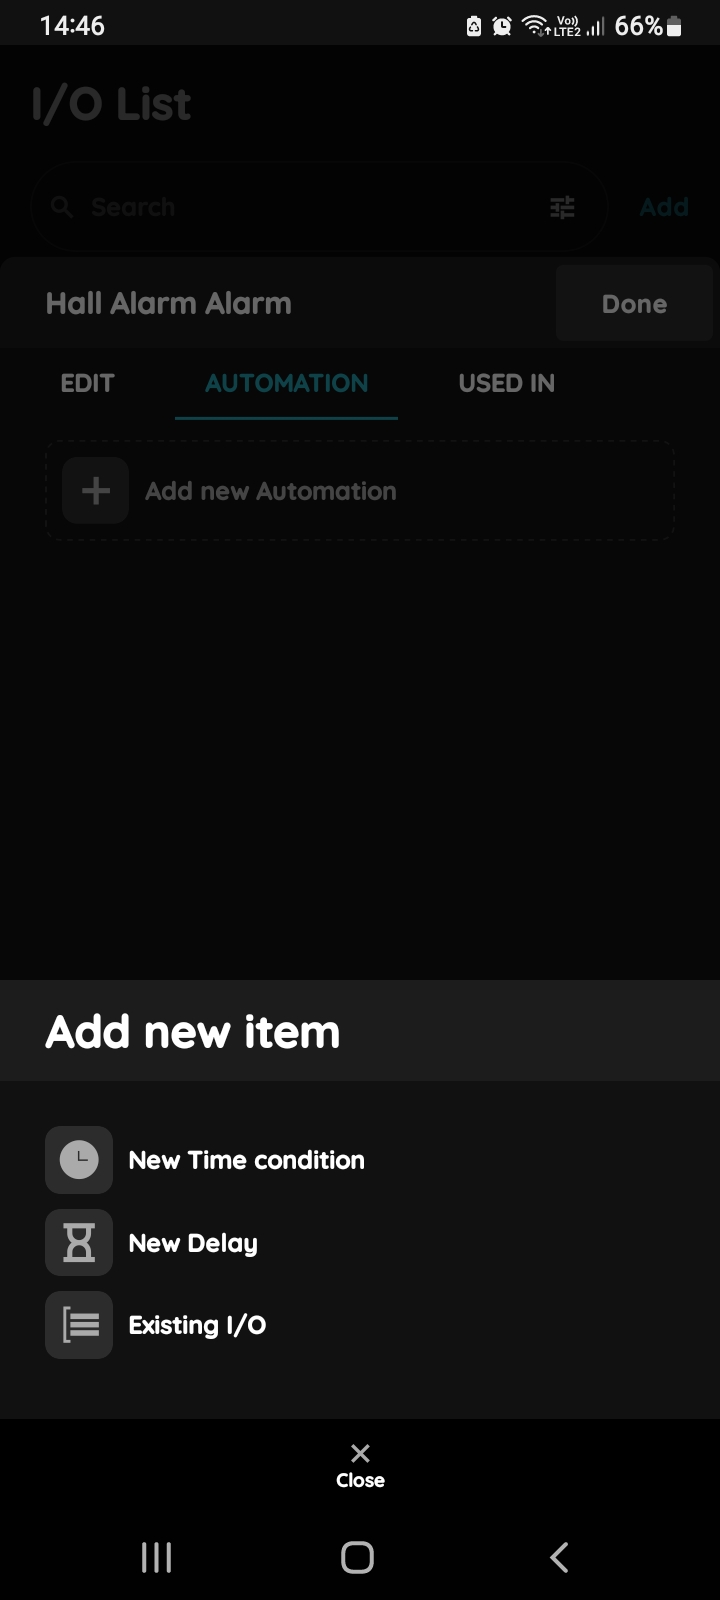
Add new item - Hall Alarm
There is possibility to add:
- New Time condition,
- New Delay,
- Existing I/O.
Tap on the Existing I/O.
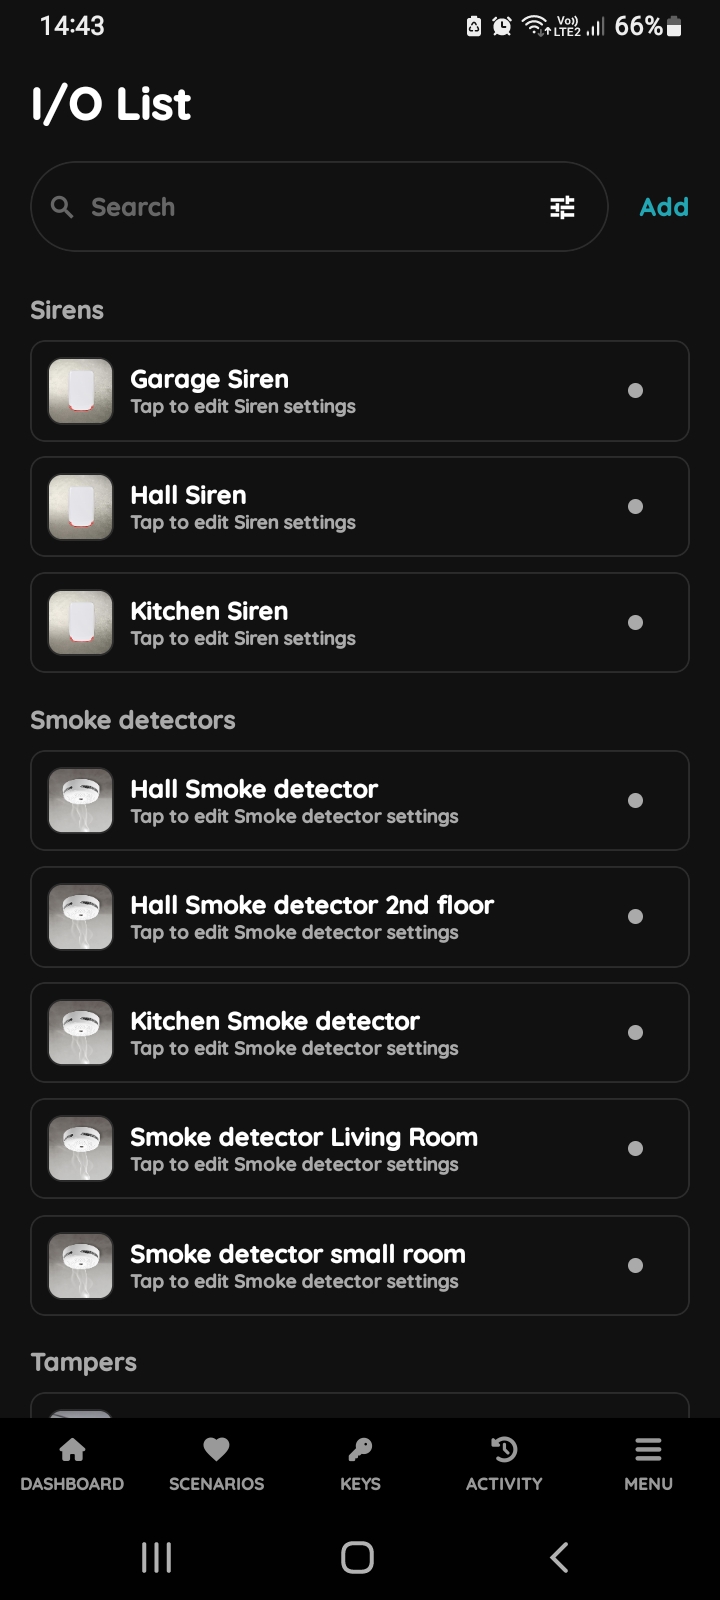
I/O list - Smoke detector
Open I/O list, scroll to the group of Smoke detectors and and tap on the desired Smoke detector.
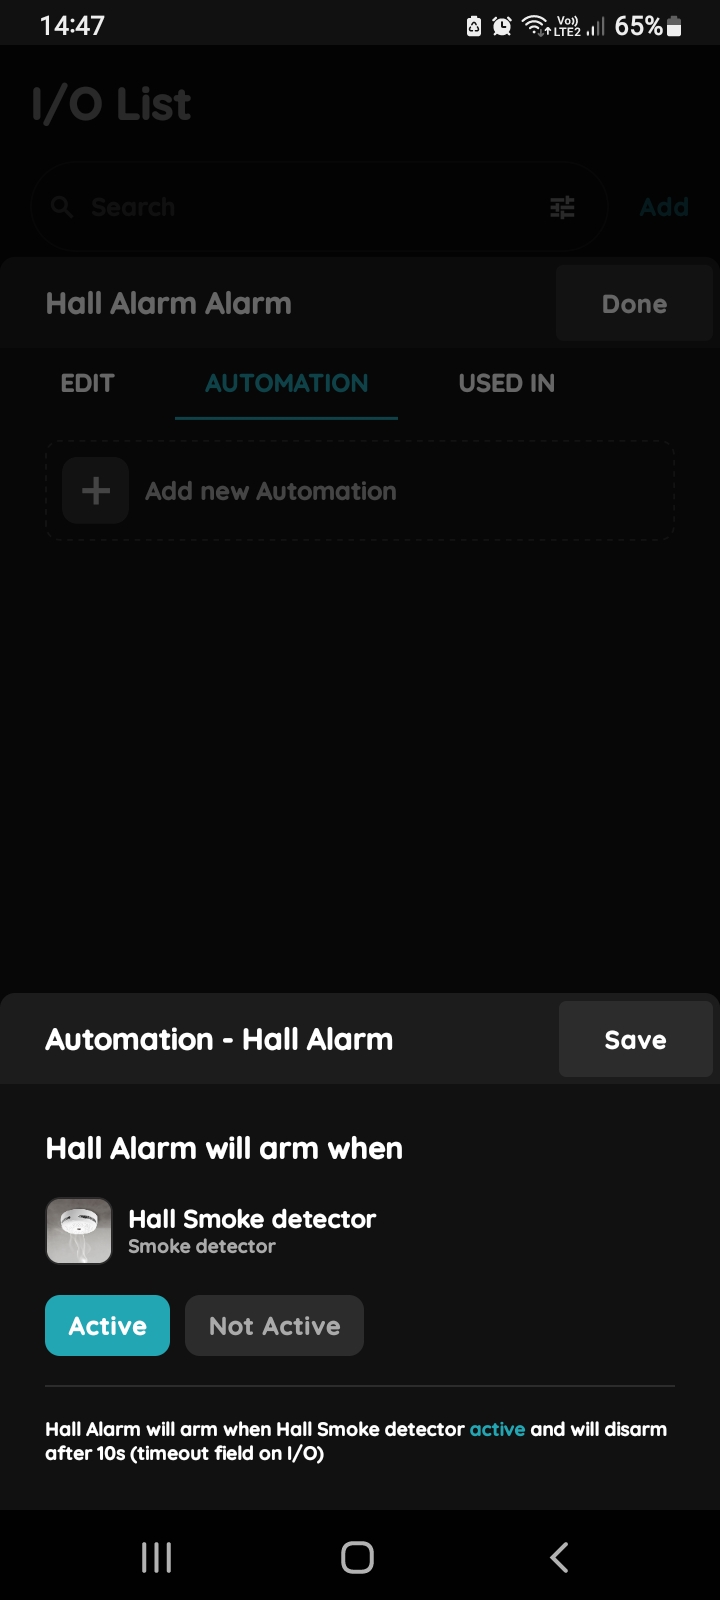
Automation - Alarm
Alarm will arm when Smoke detector is Active.
Tap button Active.
Tap button Save.
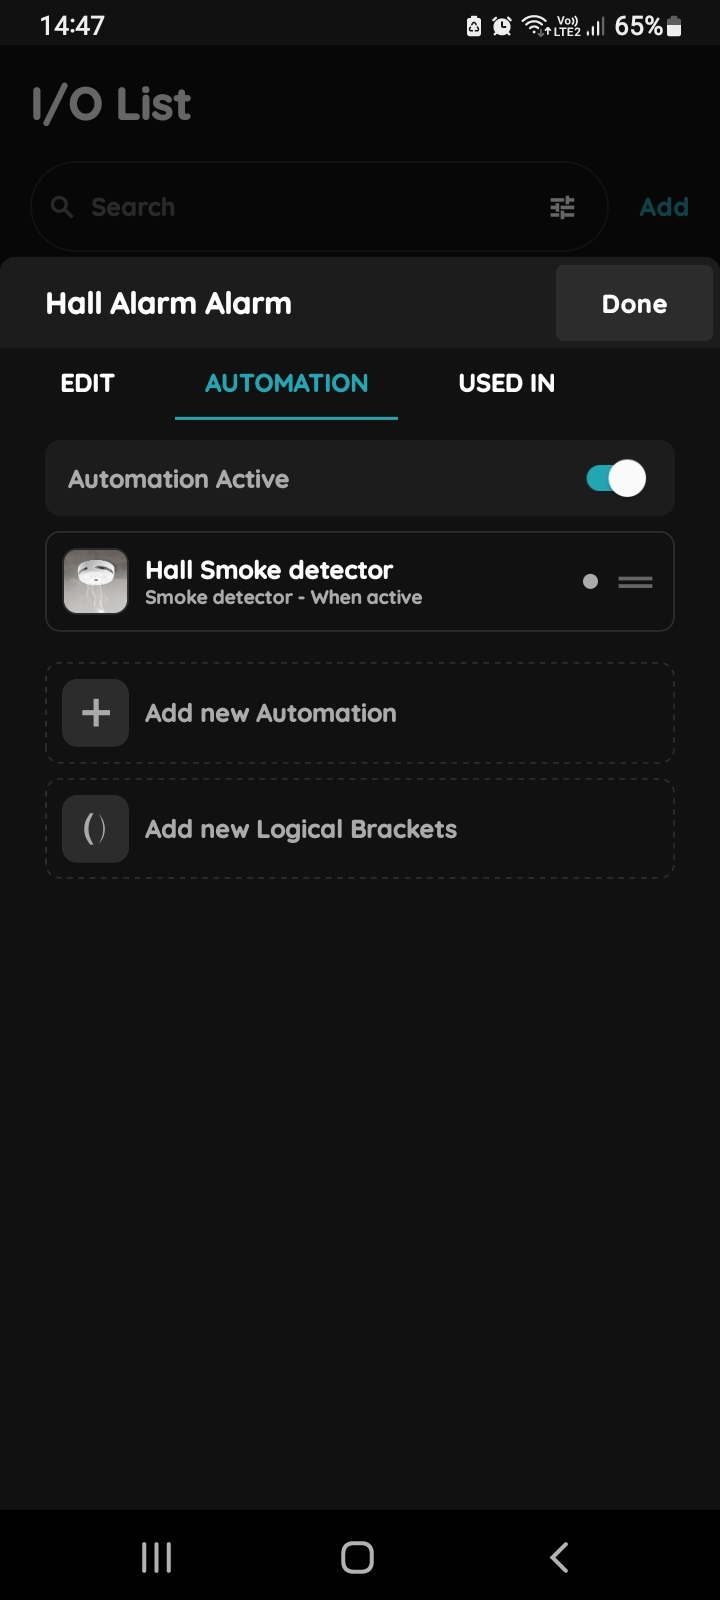
Confirm automation - Alarm based on Smoke detector
To confirm settings of the automation tap button Done.
Get notification or alert when sensors are active
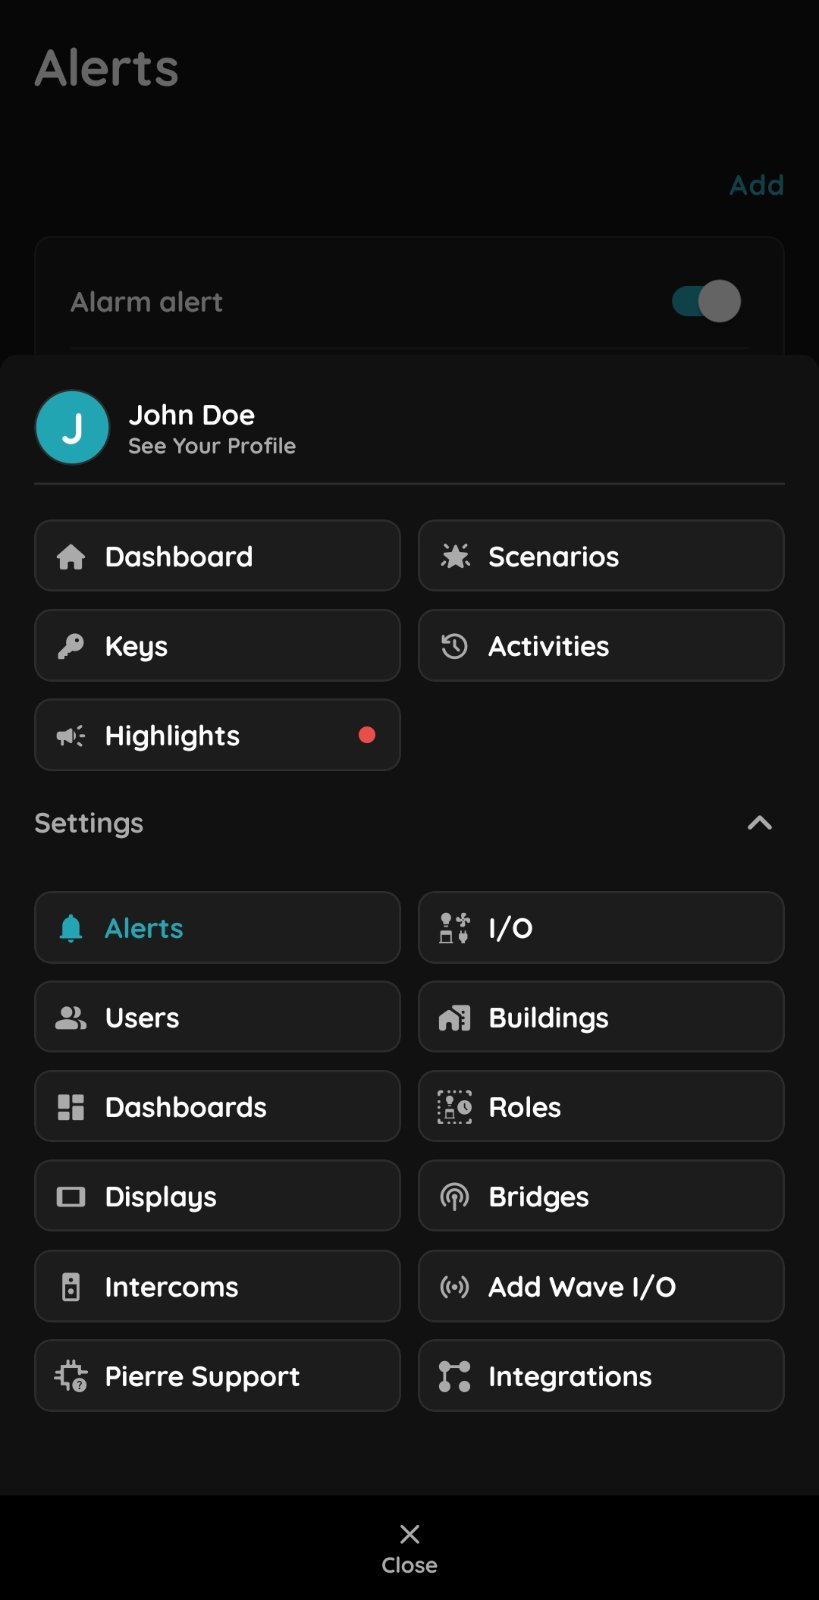
Open Alerts
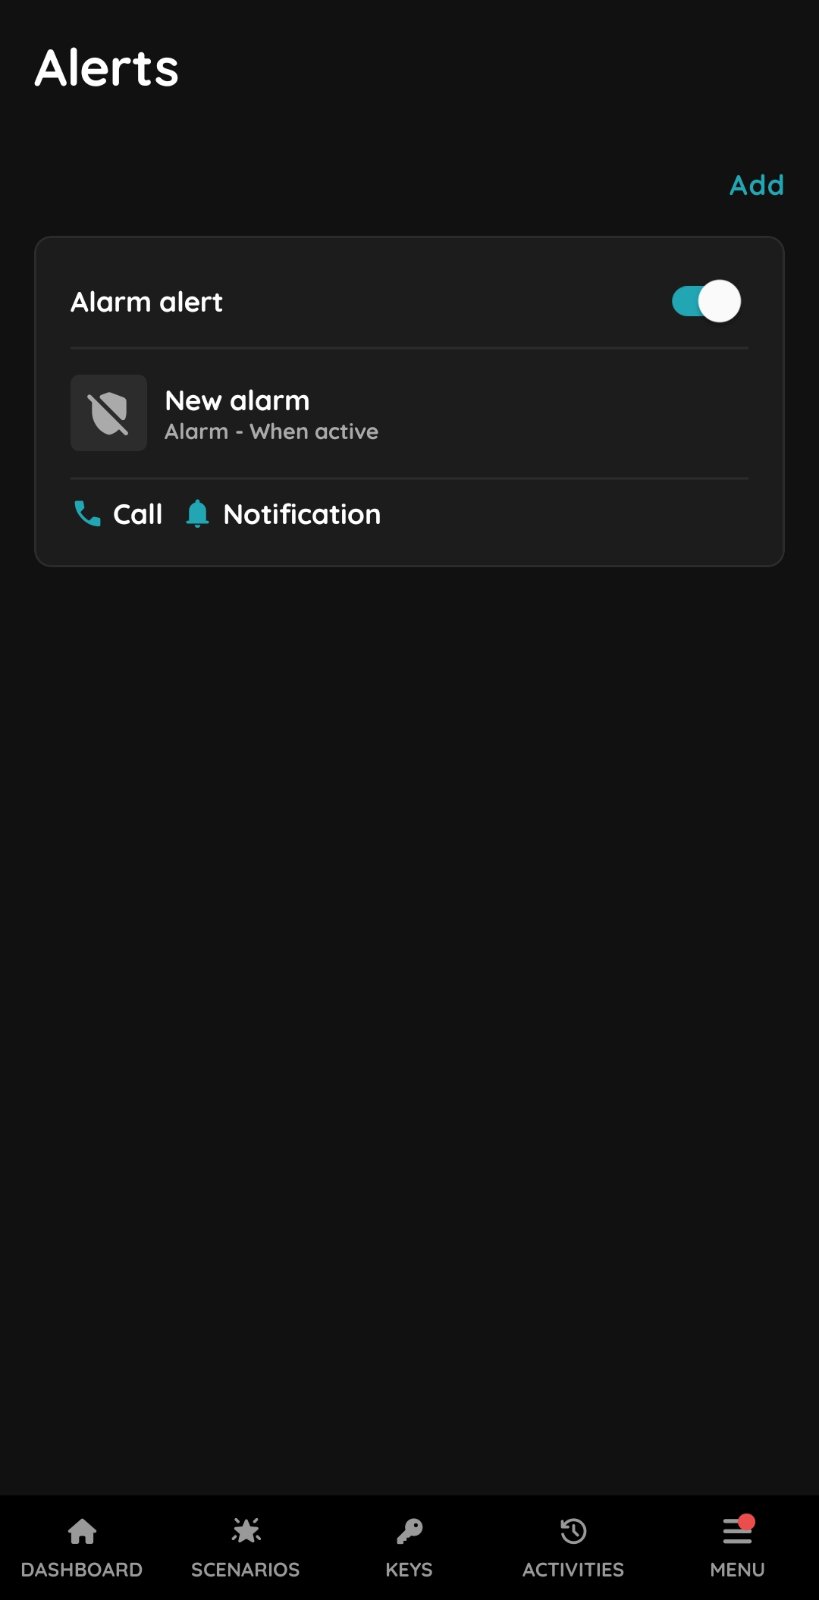
Add new Alert
You can have multiple notifications for various cases, such as security-related events, informational messages, or specific events that should only be recorded in the Activity Log.
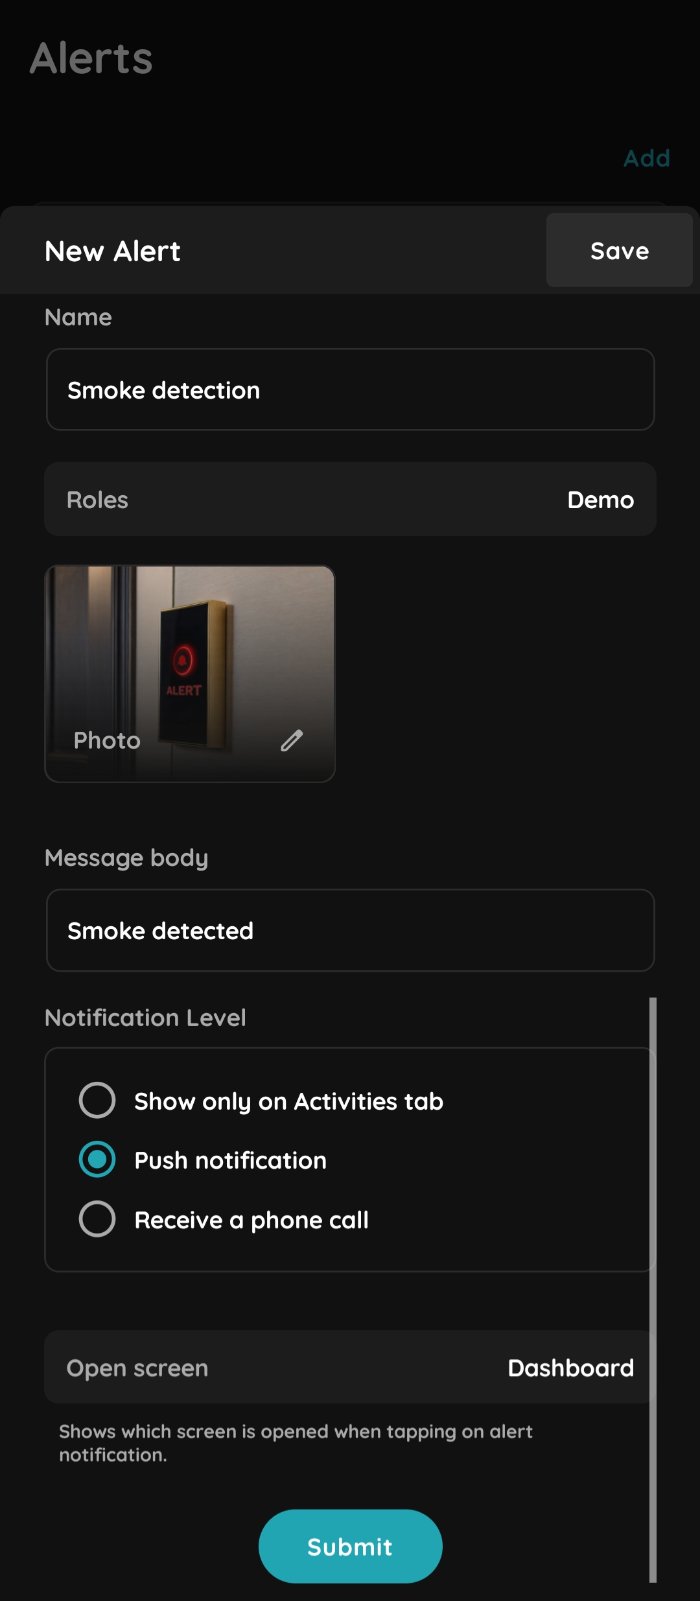
New Alert
Fill the following form:
- Name - Enter the name of the Alert.
- Role - Select the Role from the list.
- Photo - Choose a photo to represent the Alert.
- Message body - Enter the message that will be displayed when the Alert is triggered.
Notification Level (tap radio button next to desired notification level):
- Display only in the Activity tab - This alert will appear in the list of all activities that have occurred over time on the Activity tab.
- Push notification - A push notification is a message sent directly to your device, alerting you instantly without needing to open the app.
- Receive a phone call - A phone call will be made as an alert.
Open screen - Specifies which screen opens when tapping on the alert notification.
Tap Submit/Save.
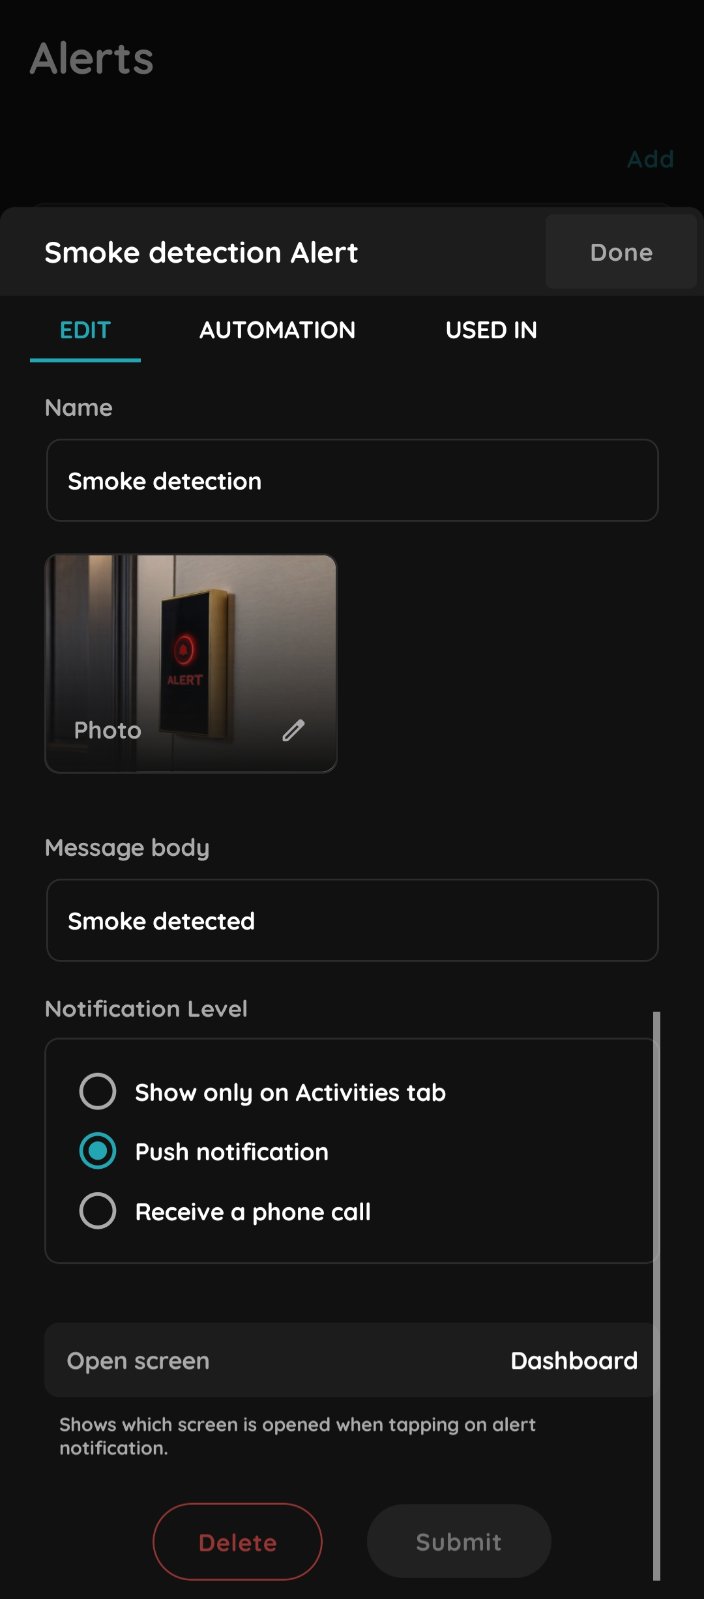
Edit alert
Add or modify automations.
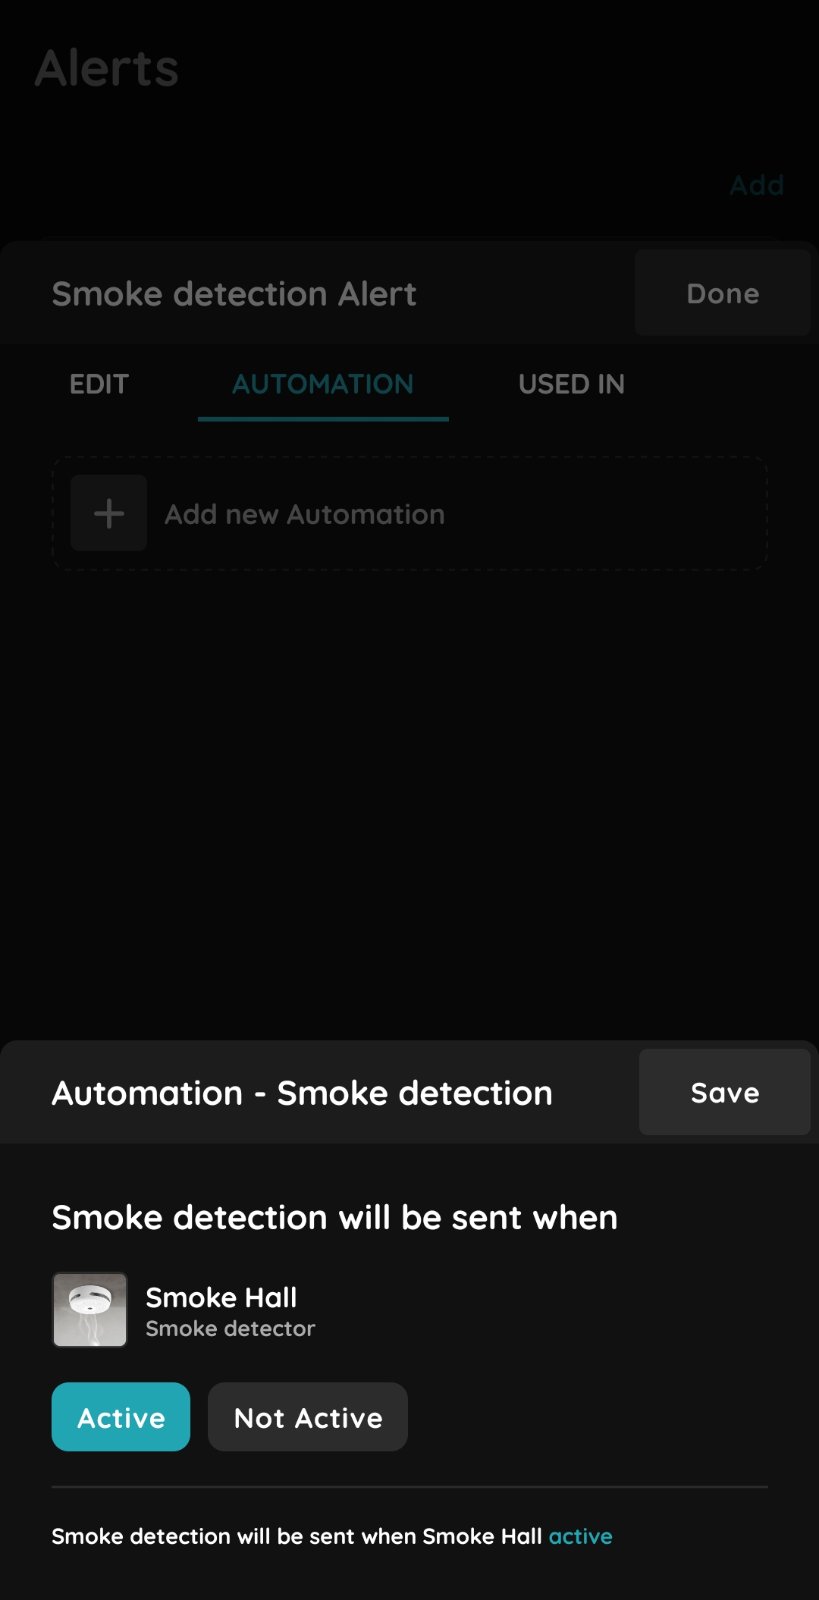
Add new Automation to Alert
List of Automations where Alert is included is shown.
When these conditions are met, it will trigger the Alert.
If you want to add new Automation tap +Add new Automation.
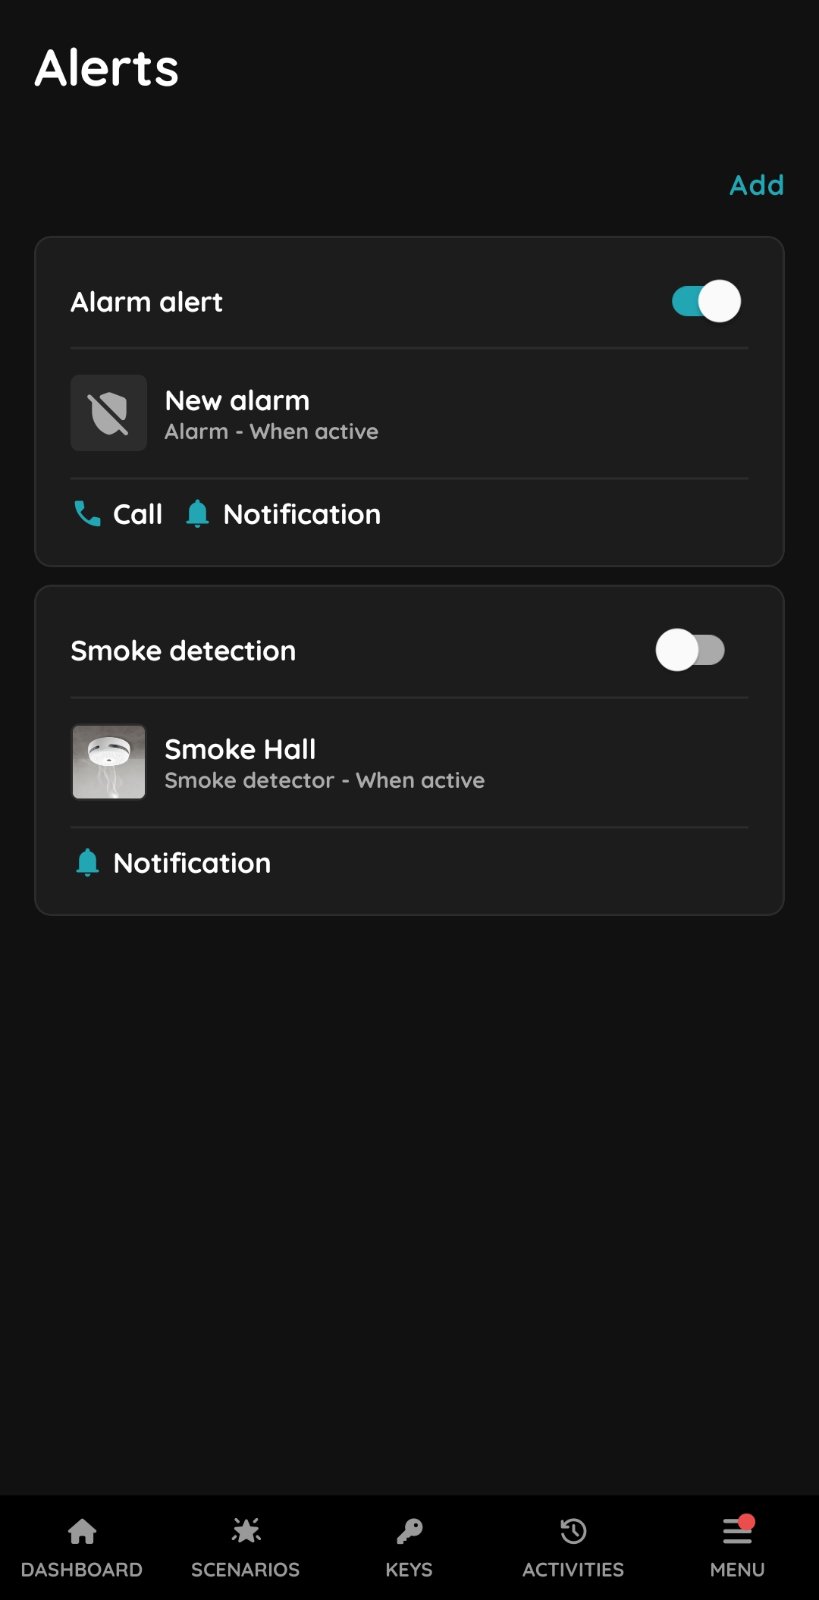
Enable or Disable the notification
In order to enable Alert use slide button next to it.
Under each Alert is shown which Notification Level is included.
Thanks for your feedback!
Related pages

Smart PIERRE - Alarm
Alarm – Smart PIERRE Application Description The Alarm function in the Smart PIERRE Application allows users to arm and disarm an Alarm configured in the PIERRE system. Alarms can…
Smart PIERRE - Blind control
The Blinds feature in the Smart PIERRE app allows users to manage and customize their blinds. Blinds are displayed on the Dashboard and in the I/O list from the Menu. Key benefits…

Smart PIERRE - Brightness Sensor
The PIERRE system supports integration of BH1750 digital ambient light / illuminance sensors through the controller's I²C interface. The sensor measures ambient light levels and…
Smart PIERRE - Clock
The Clock is a dashboard element that displays the current time within the PIERRE application. Key Features Adding a Clock A Clock can be added from the I/O list in the Settings…
Smart PIERRE - Curtains
The Curtains I/O type allows users to control and monitor motorized curtains within the PIERRE system. Curtains are available on the Dashboard and in the I/O List of the Smart…

Smart PIERRE - Dimmable Lights
The Dimmable Lights section of the Smart PIERRE app controls the brightness of dimmable lighting. These lights appear on the Dashboard and in the I/O list. Dashboard Control On…