Smart PIERRE - Shaders
Description
The Shaders I/O type allows motorized venetian blinds to be controlled and their current status to be displayed within the PIERRE system.
Configured Shaders are available on the Dashboard and in the I/O List of the Smart PIERRE application. The system allows users to raise, lower, and stop the blinds, adjust their position, and control the angle of the lamellas.
Control
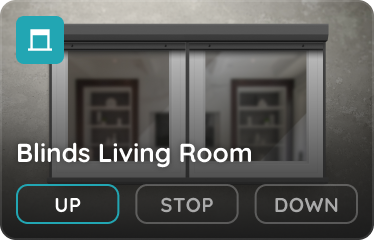
Shaders can be controlled directly from the Dashboard using the following functions:
-
Up – Raises the Shader.
-
Stop – Stops the movement.
-
Down – Lowers the Shader.
The Shader icon and image change according to the current state of the device.
Intensity
Press and hold the Shader card to access the Intensity tab, where more detailed control options are available:
-
Up – Raises the Shader.
-
Stop – Stops the movement.
-
Down – Lowers the Shader.
-
Position Slider – Sets the desired position of the Shader.
-
Lamella Open – Opens the lamellas.
-
Lamella Middle – Moves the lamellas to the middle position.
-
Lamella Close – Closes the lamellas.
The Intensity function allows the desired position of the Shader to be set precisely, while its current position can also be monitored in the application.
The lamella controls allow the angle of the slats to be adjusted, making it possible to control the amount of incoming light and the level of privacy.
Configuration
Press and hold the Shader card to open the configuration page.
The following parameters can be configured:
-
Name – Enter a name for the Shader.
-
Open Position Photo – Select an image for the open position.
-
Closed Position Photo – Select an image for the closed position.
-
Slide to Confirm – Defines whether manual control requires additional confirmation.
-
Lifting Time – Raising time.
-
Release Time – Lowering time.
-
Collapse Time – Lamella movement time.
Lifting Time
The Lifting Time value defines, in seconds, the time required for the Shader to move from the fully lowered position to the fully raised position.
Release Time
The Release Time value defines, in seconds, the time required for the Shader to move from the fully raised position to the fully lowered position.
Collapse Time
The Collapse Time value defines, in seconds, the time required for the lamellas to move between the fully open and fully closed positions.
Accurate configuration of the Lifting Time, Release Time, and Collapse Time values is required for the PIERRE system to correctly determine and control the position of the Shader and the angle of the lamellas.
During configuration, it is recommended to measure the actual full raising, lowering, and lamella movement times of the Shader and enter these values into the system.
Used In
The Used In tab displays all Scenes and Automations in which the selected Shader is used.
This provides a quick overview of where the Shader is used within the PIERRE system.
Automation Integration
Shaders can be controlled as part of Scenes and Automations, allowing their operation to be linked to schedules, sensor states, or other system conditions.
Examples include:
-
Automatically raising Shaders in the morning.
-
Automatically lowering Shaders at a specified time.
-
Controlling Shaders based on measured brightness levels.
-
Adjusting the lamella position according to sunlight conditions.
-
Integrating Shaders into Away, Movie, or Good Night scenes.
Automations are executed automatically when the configured conditions are met. Scenes can also be activated manually from the Dashboard.
Technical Notes
-
The Shaders I/O type is designed for motorized venetian blinds with adjustable lamellas.
-
It supports raising and lowering, position control, and lamella angle control.
-
Accurate calibration of the movement times is required for correct position and lamella control.
-
Shaders can be combined with sensors, schedules, scenes, and automation rules.
-
When selecting a blind motor, make sure that its control method is compatible with the PIERRE system.
-
For conventional direct control, a motor with L1, L2, N, and PE connections can be used, where L1 and L2 are used to control the two movement directions.
-
The motor must always be connected and the appropriate outputs selected according to the motor manufacturer's documentation and the PIERRE system wiring diagram.
Control of the Shader
Shader control is quick and simple, managed directly from the Dashboard.
Follow the example of Hall Shader.
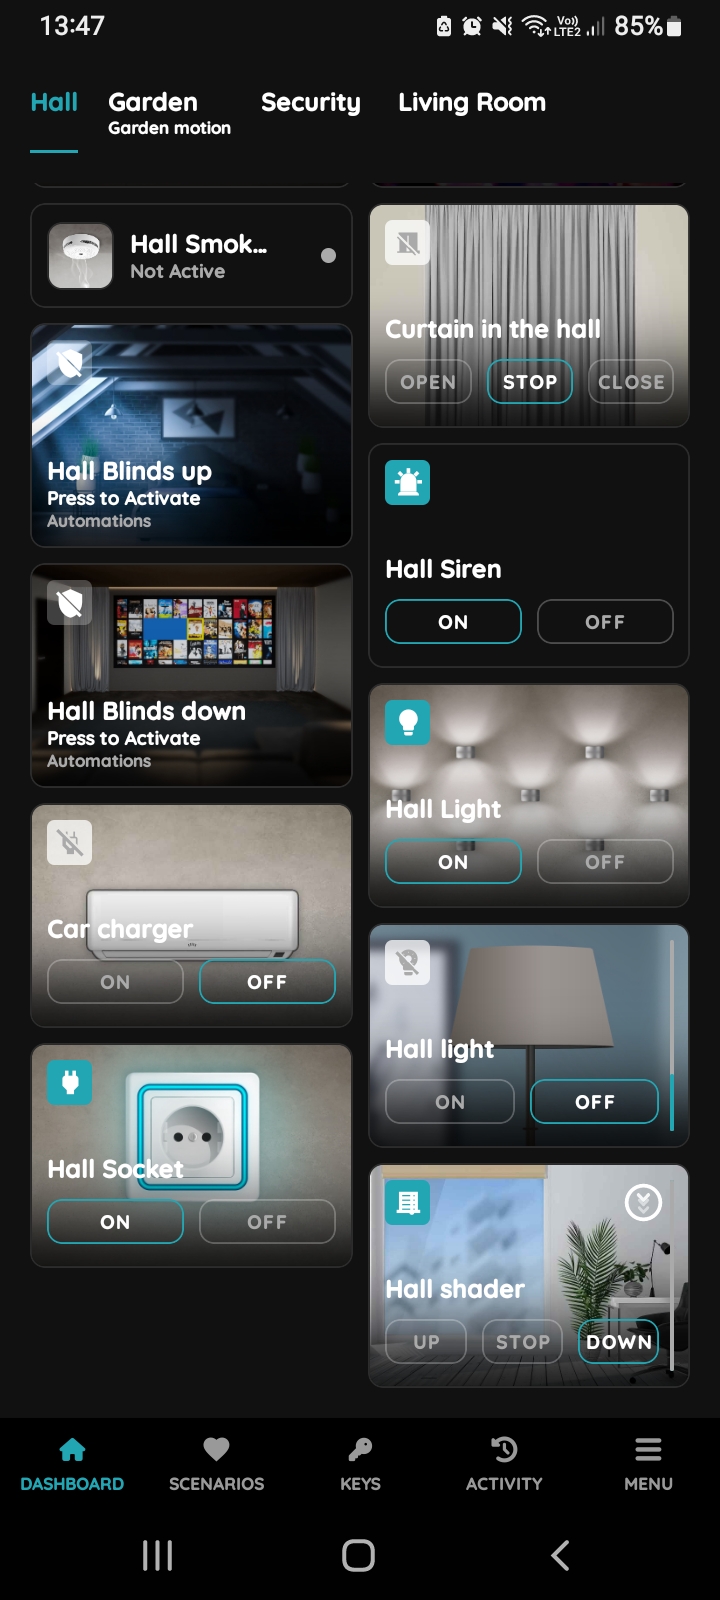
Up, Stop, Down - Shader
There are three buttons for the control of the Shader:
- Up - Tap this button to move the Shader up.
- Stop - Tap this button to stop the Shader.
- Down - Tap this button to move the Shader down.
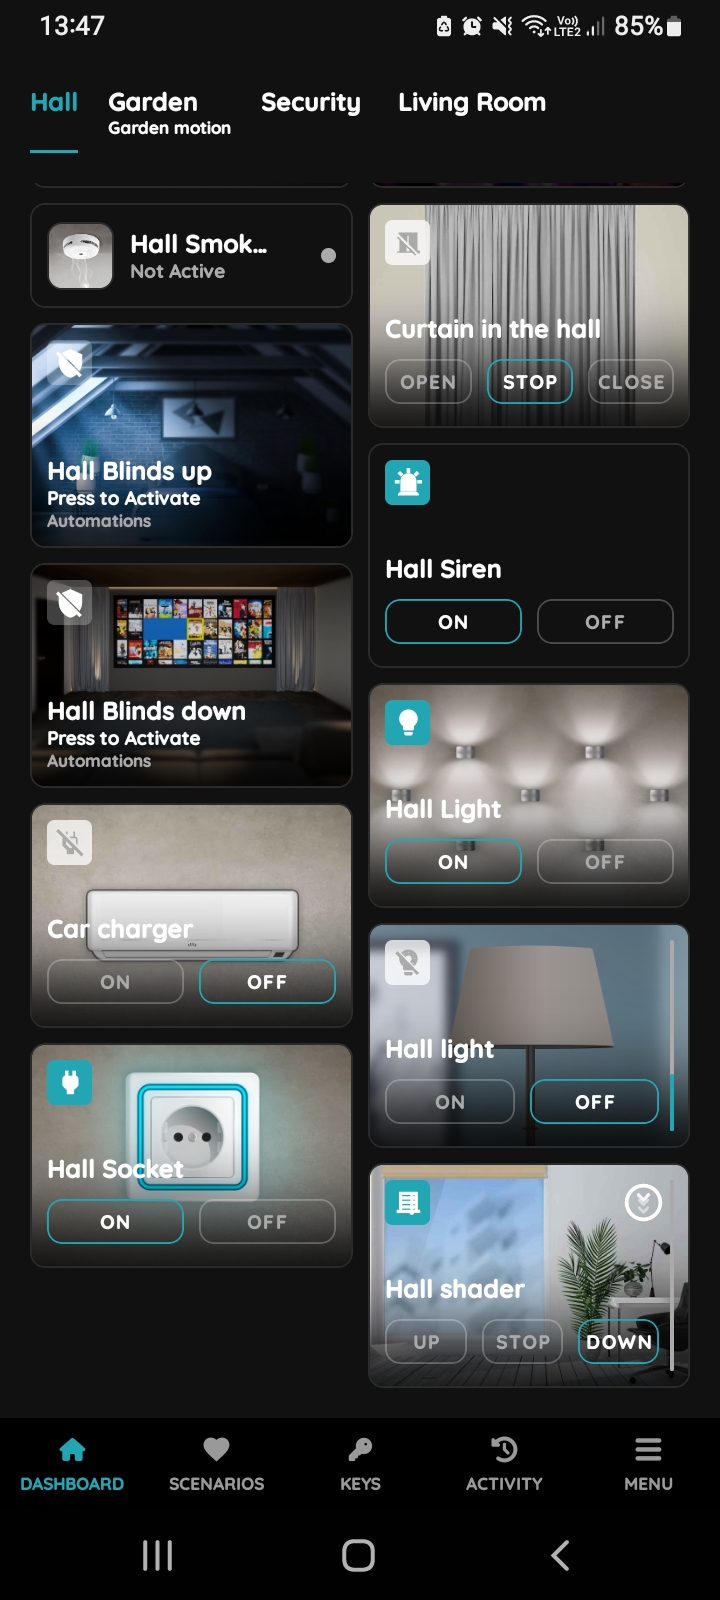
Shader - Down
In order to Shader gos down tap the button Down.
Picture of the Shader and icon will be changed according to the status Down.
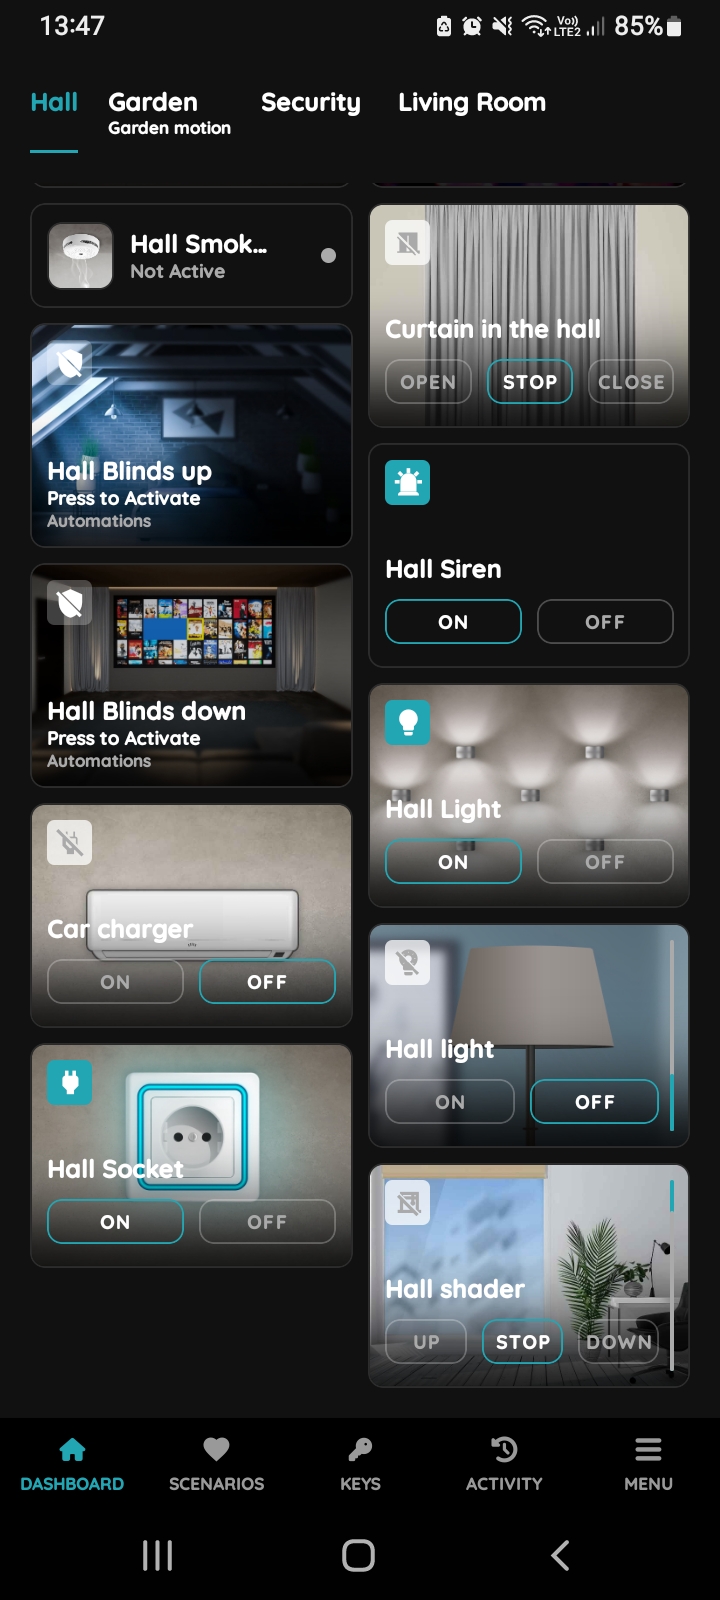
Shader - Stop
In order to stop Shader tap the button Stop, the icon and the picture of the Shader will be changed.
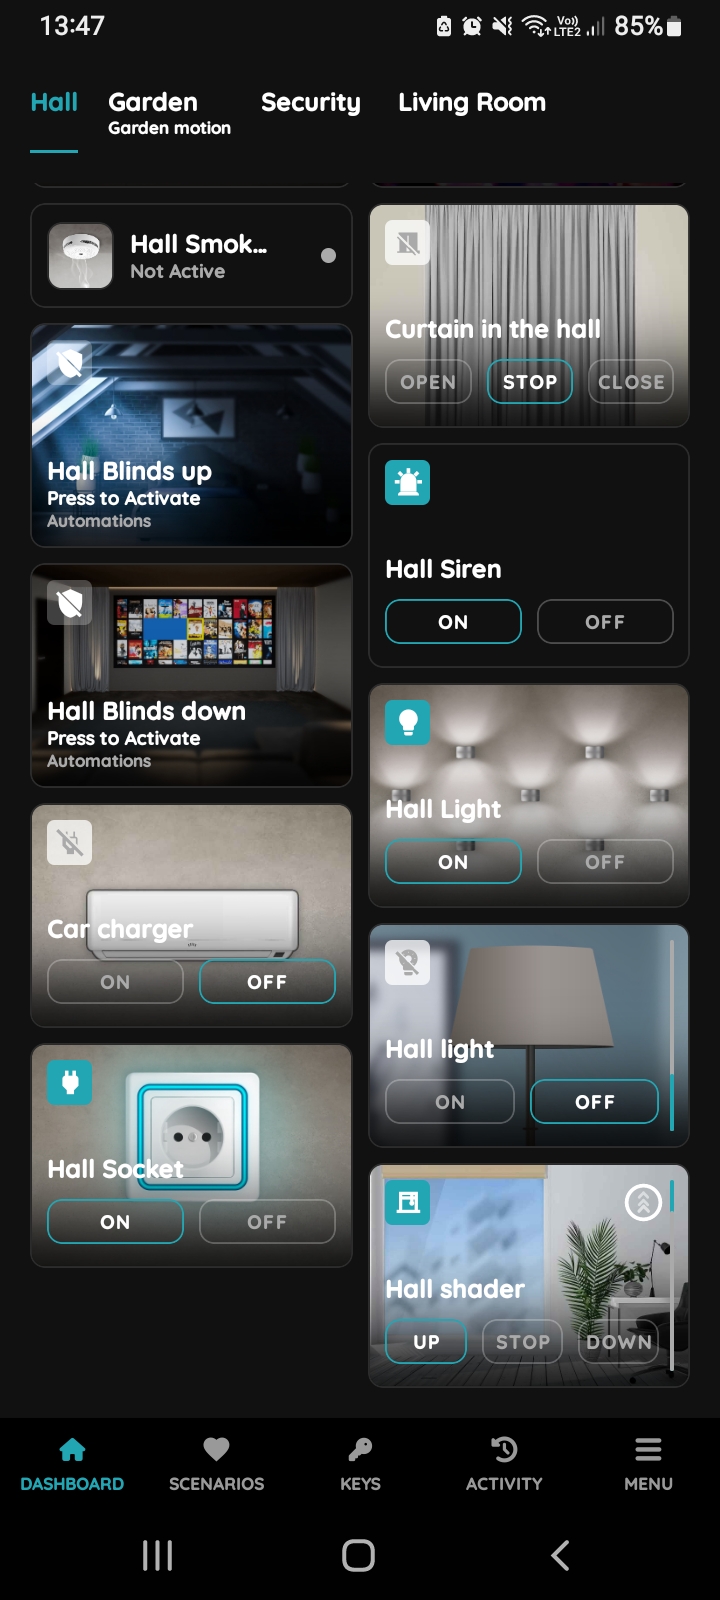
Shader - Up
In order to Shader goes up tap the button Up.
The icon of the Shaders turns blue and picture of the Shader will be changed according to the status Up.
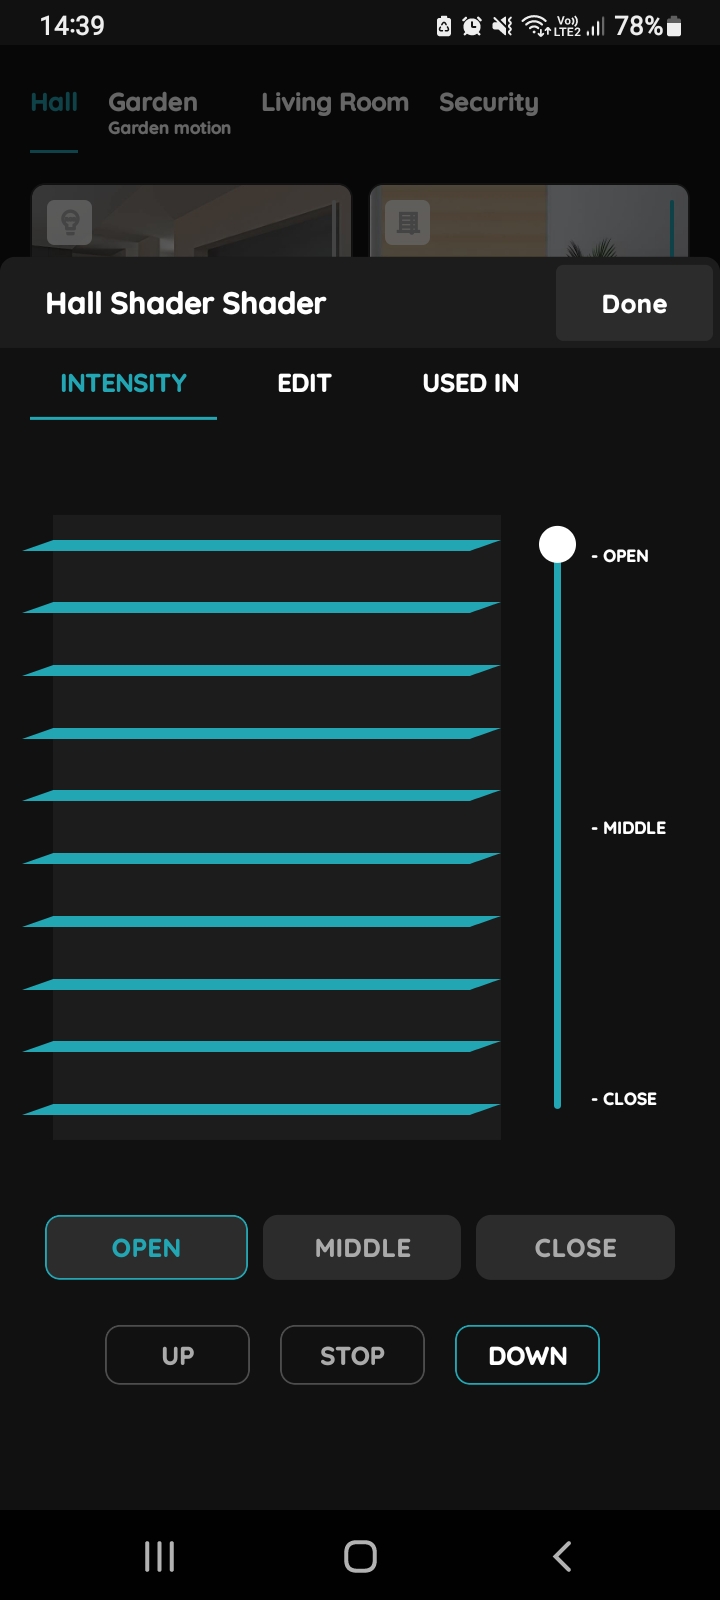
Intensity - Shader
Long press the card of the Shader on the Dashboard.
Tap Intensity is already selected.
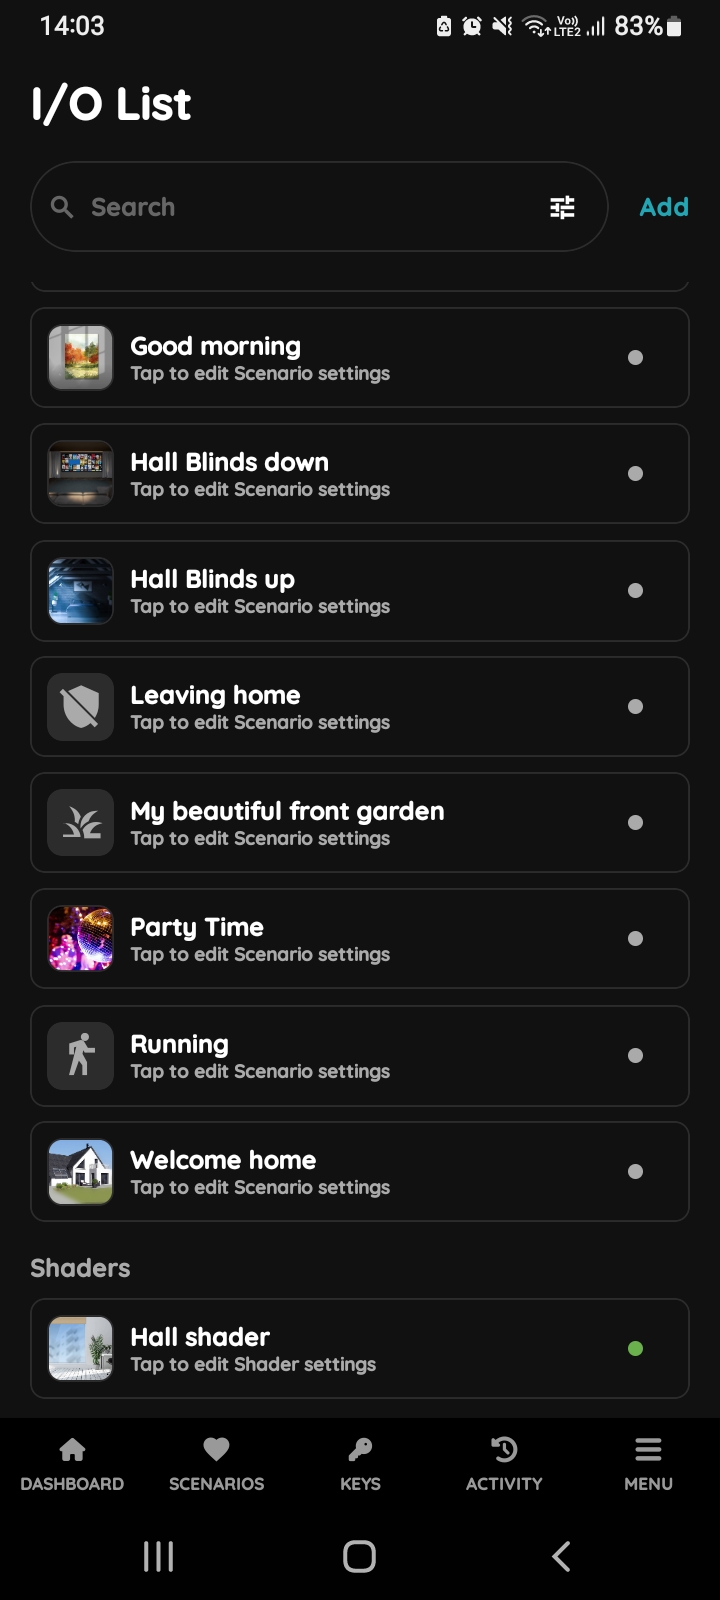
Edit Shader - I/O list Menu
To edit the Shader's settings, scroll and tap on it in the I/O list.
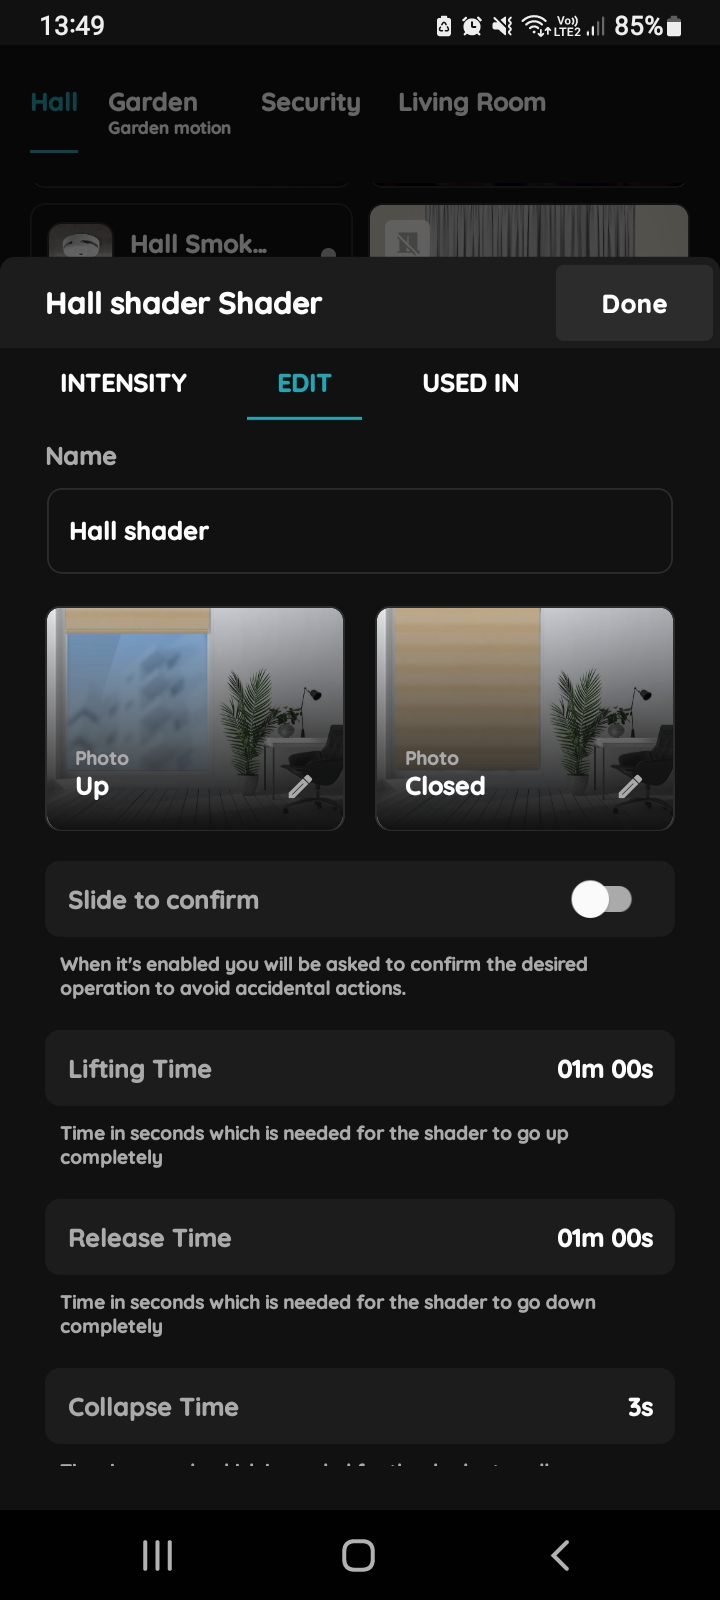
Edit Shader
Edit the following form:
- Name - Edit the name of the Shader.
- Photo - Choose photos for both the open and closed statuses of the Shader.
- Slide to confirm - Enable this option to require confirmation before performing actions, preventing accidental operations.
Calibration - Used to accurately determine the position of the Shader, either as a percentage or with a slider. Measurements are required to enter the appropriate times for lifting, lowering, and collapsing.
- Lifting time - Measure the time in seconds for the Shader to fully raise, and enter this value.
- Release time - Measure the time in seconds for the Shader to fully lower, and input this value.
- Collapse time - Measure the time for the Shader to collapse or for each lamella to open, and enter this time in seconds.
Tap Submit and Done to save the settings, or if you want to delete the Shader, tap the Delete button.
Follow the next steps for more details.
GOOD TO KNOW:
Shader can be edited by long-press the Shader's card on the Dashboard or tapping them in the I/O list.
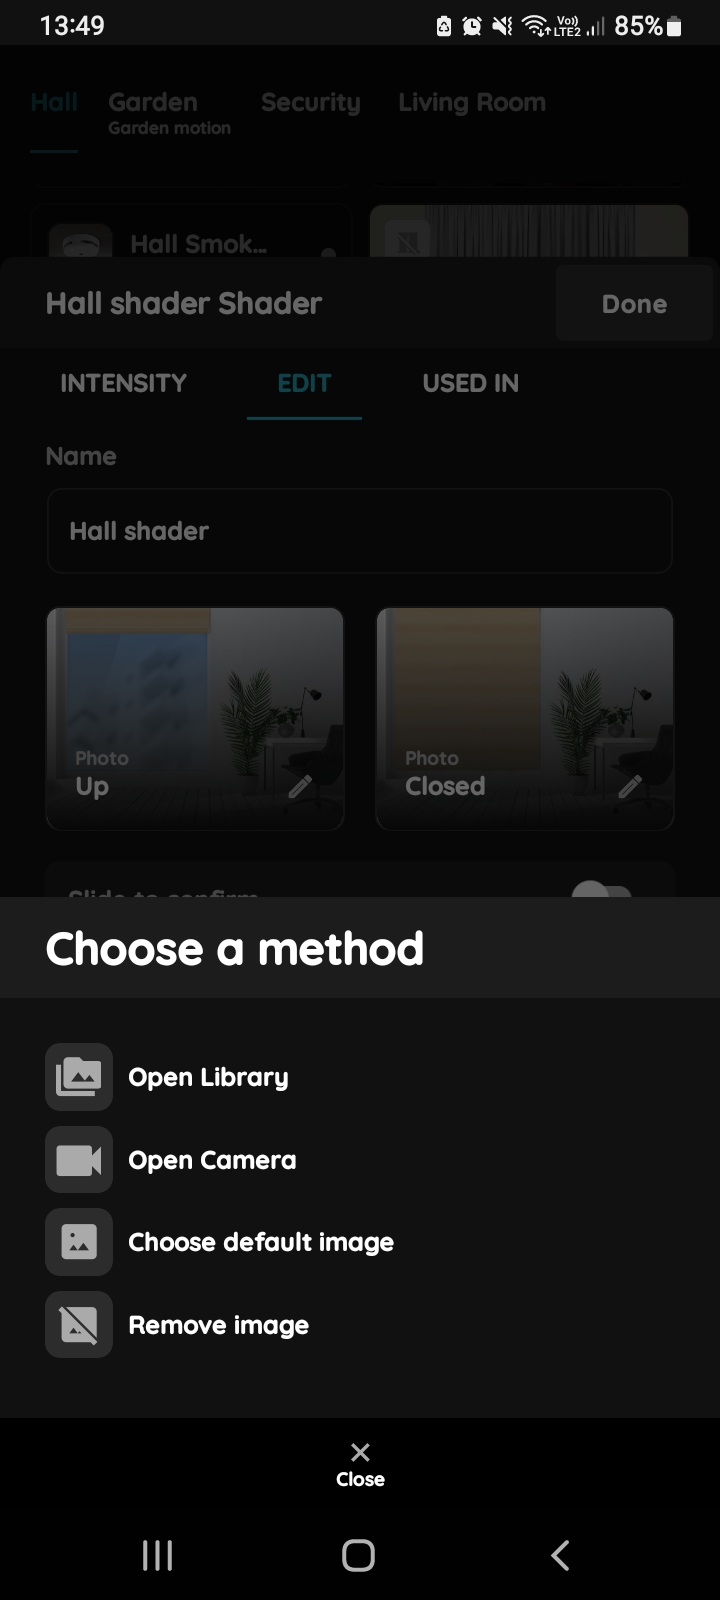
Change photo - Shader
Long press the picture of the Shader. You have four options:
- Open Library - The phone's Library will open. It is recommended to take pictures from the same angle for all Shader statuses to achieve a consistent and complete view.
- Open Camera - You can take a picture using your smartphone. For a consistent and complete view, it’s recommended to capture all Shader statuses from the same angle.
- Choose default image - These images are pre-prepared to provide a seamless and complete experience.
- Remove image - Removes the current image.
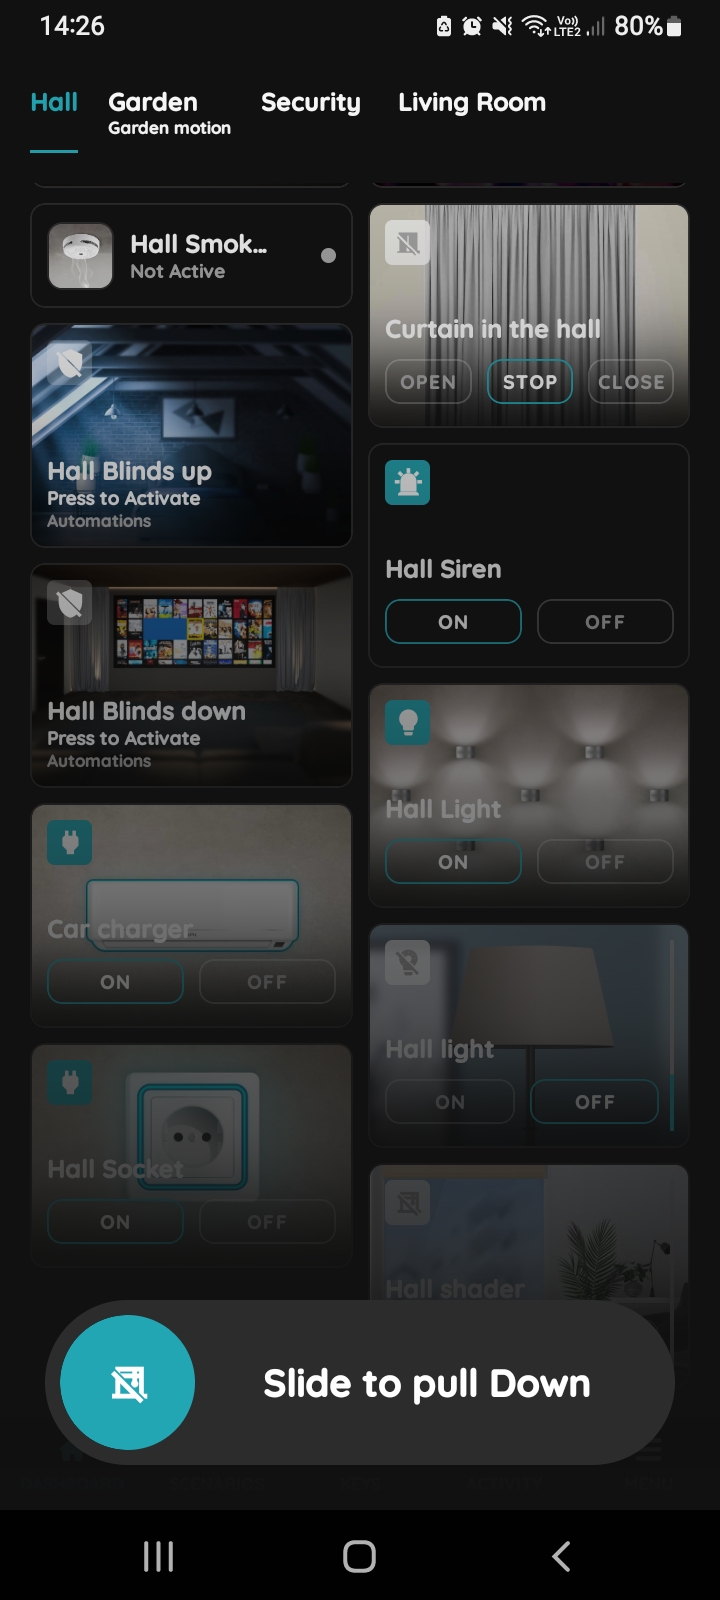
Slide to confirm - Shader
The Slide to confirm feature adds an extra layer of security, preventing accidental actions.
It asks you to confirm your choice once more.
Here's an example of how the Slide to confirm feature is applied:
If you want the Shader to move down, tap the Slide to pull Down button and slide from left to right.
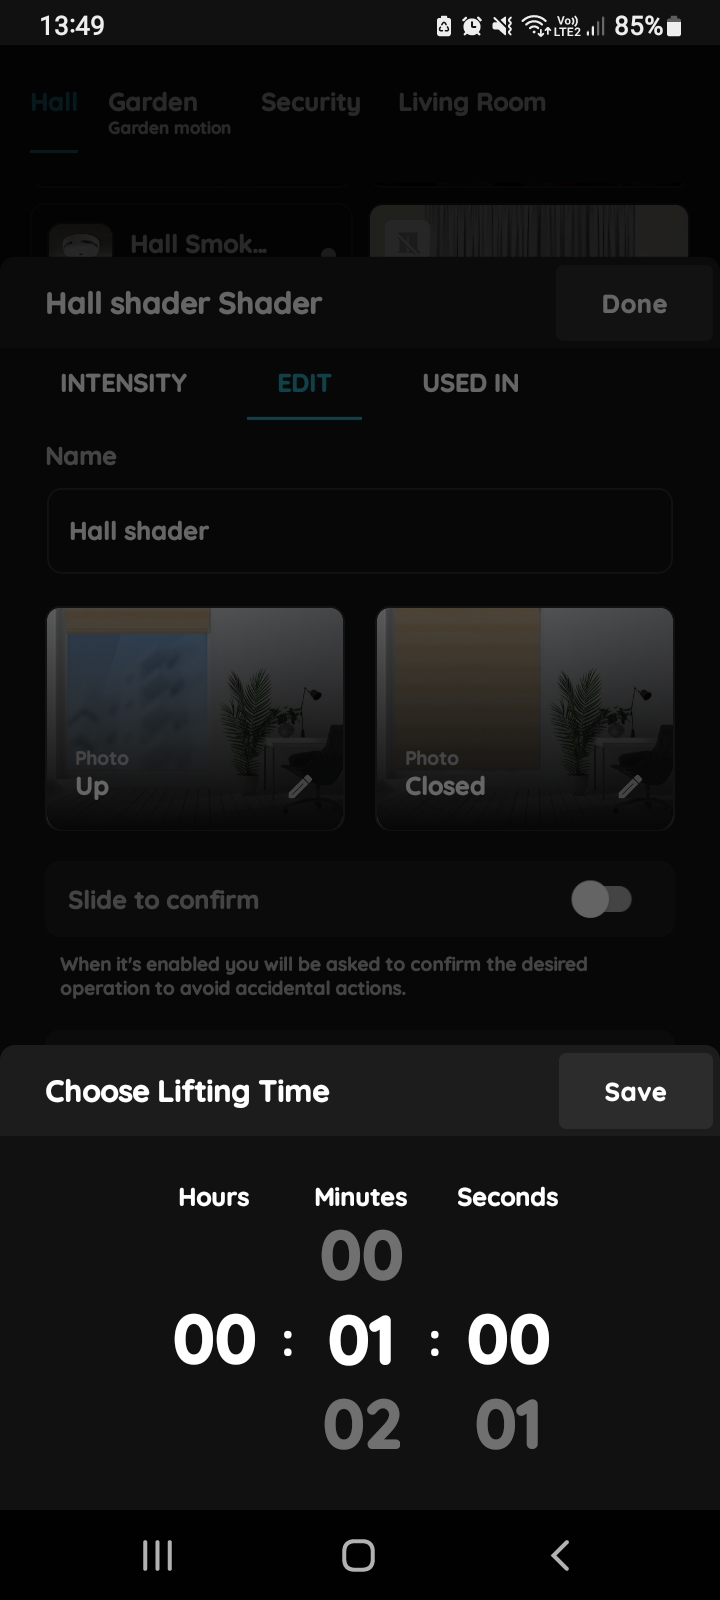
Choose Lifting Time - Shader
Lifting time – Measure how long it takes for the Shader to fully raise, then enter this time in seconds.
You have three columns: hours, minutes, and seconds to set the lifting time for the Shader.
Scroll through each column to adjust the lifting time, and tap the Save button.
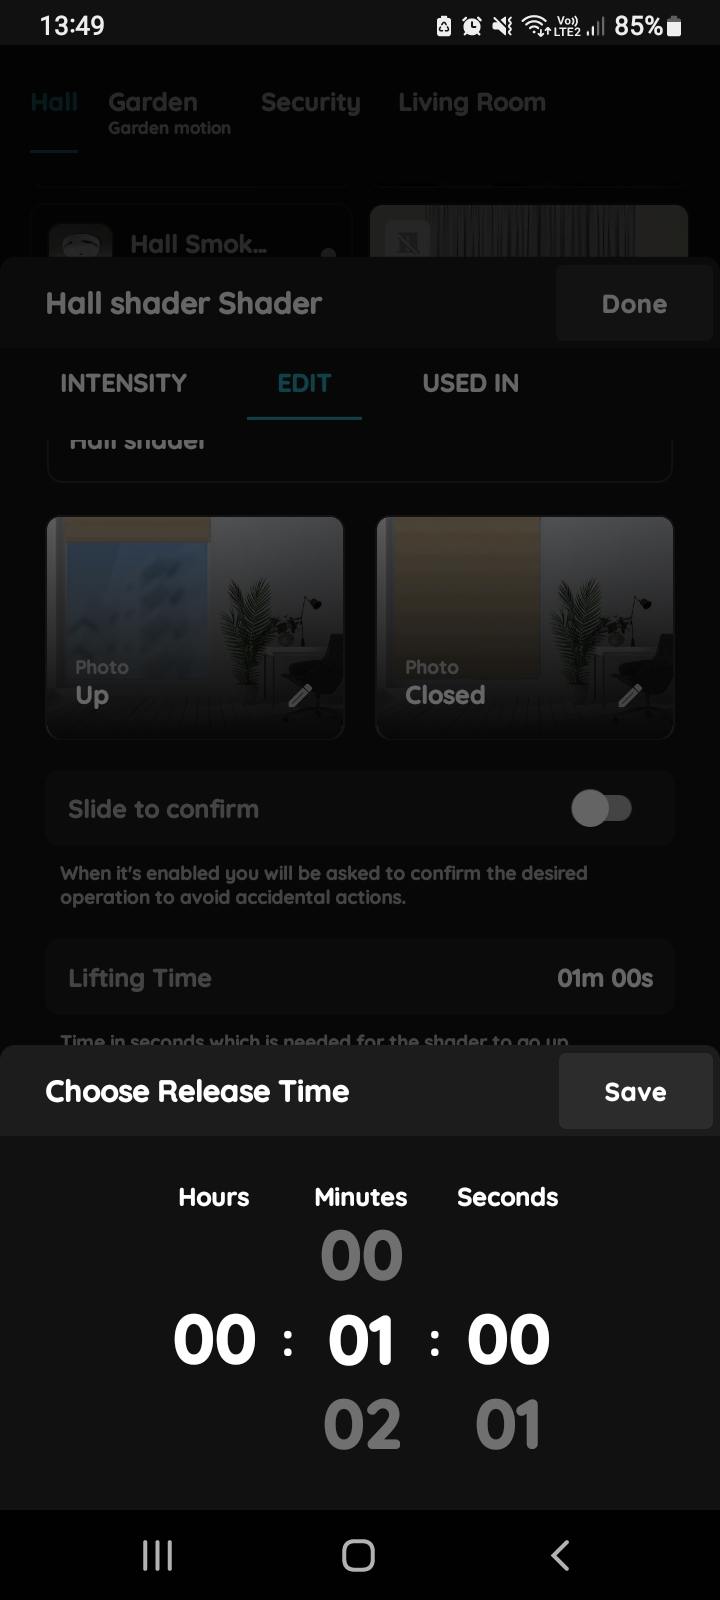
Release Time - Shader
Release time – Measure how long it takes for the Shader to fully lower, then enter the time in seconds.
Tap the Release Time field to set it.
You have three columns: hours, minutes, and seconds to set the time.
Scroll through each column to adjust the release time, then tap the Save button.
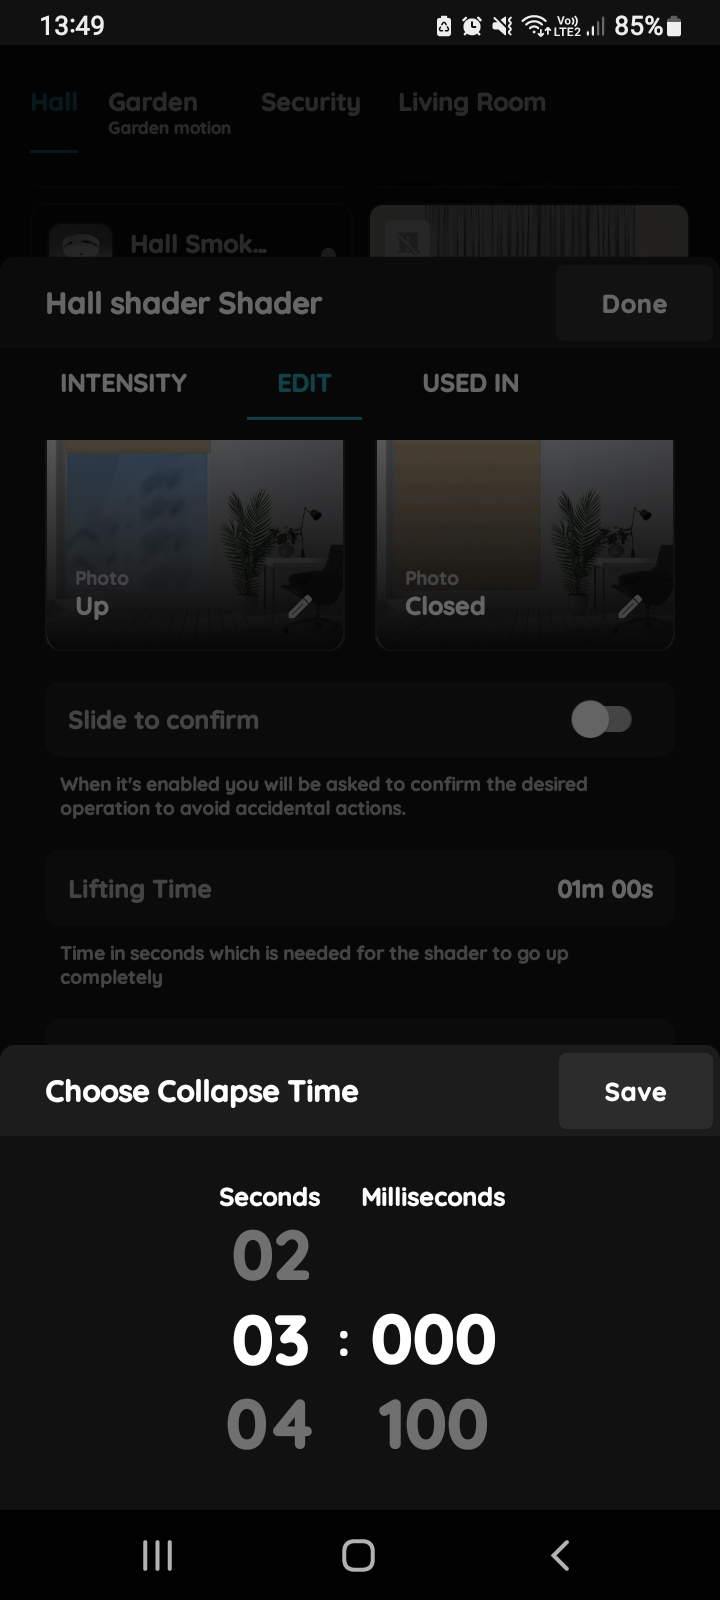
Choose Collapse Time - Shader
Collapse time – Measure the time it takes for the Shader to collapse or for each lamella to open, and enter the time.
In this step, select the Collapse Time by tapping the Collapse Time field.
You have two columns - seconds and milliseconds.
Scroll through each column to set the collapse time, then tap the Save button.
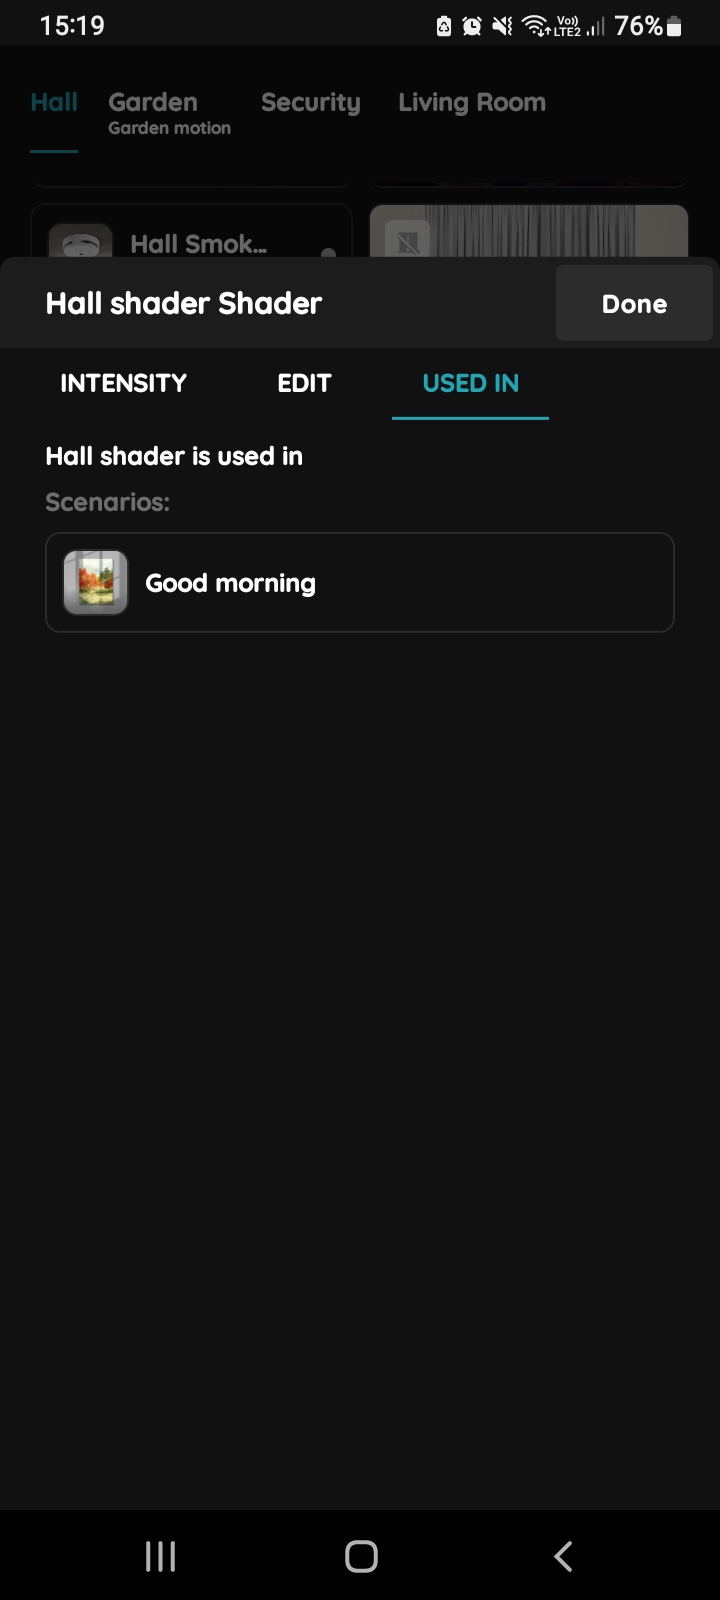
Used In - Shader
The Used In tab shows all the scenarios and automations where the Shader is applied, making it easy to see where this I/O is used without the need to search manually. If it isn't used in any, the list will be empty, and a message will display: "This I/O is not in use anywhere." This feature consolidates all relevant information in one place.