Smart PIERRE - Valves
Description
The Valves section in the Smart PIERRE application allows users to monitor and control connected valves directly from the Dashboard. It provides a simple and intuitive interface for managing water flow, heating, cooling, and other valve-controlled systems within the property.
Dashboard Control
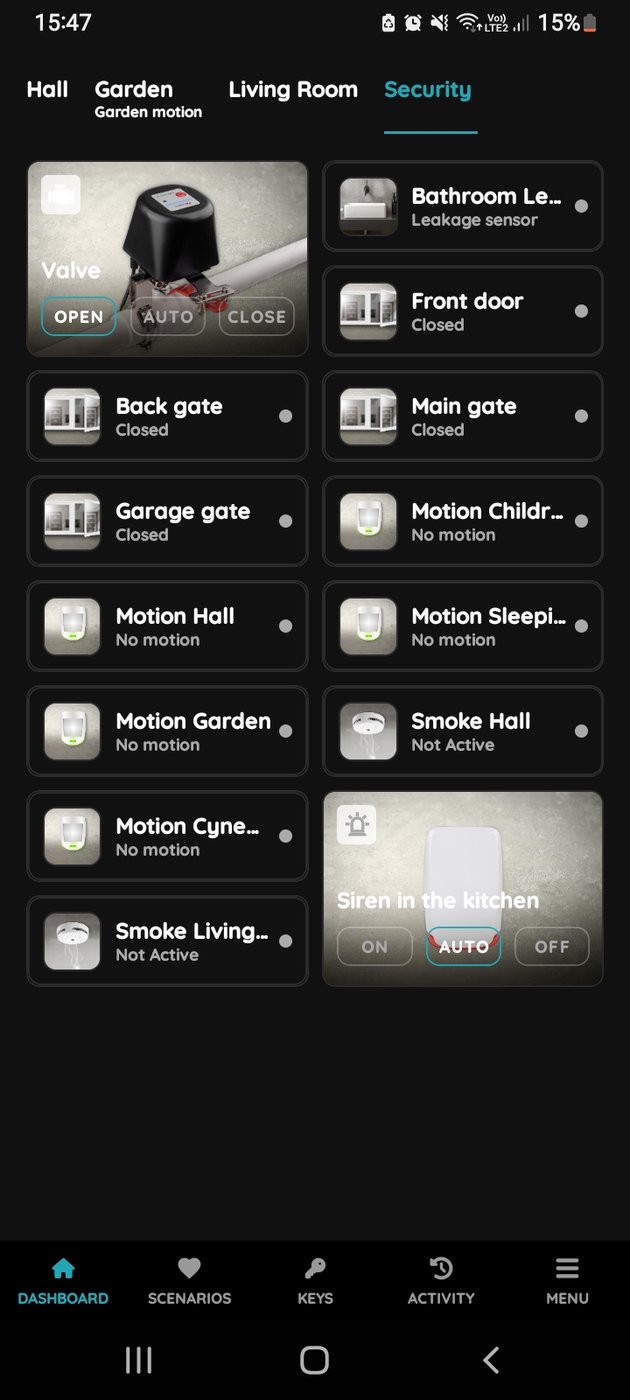
Valves can be opened or closed directly from the Dashboard with a single tap, providing quick access to essential functions and immediate control when required.
Valve Configuration
Users can customize valve settings to simplify identification and management:
-
Name – Assign a descriptive name to the valve.
-
Image – Select an image or icon representing the valve.
-
Room Assignment – Associate the valve with a specific room or area.
-
Additional Settings – Modify other configuration parameters as required.
Visual Status Indication
Each valve is displayed with an icon and image that clearly indicate its current state. Users can instantly verify whether a valve is currently open or closed without accessing additional menus.
Automation
Valves can be fully integrated into automations, schedules, and scenarios. Common use cases include:
-
Opening or closing valves based on schedules.
-
Controlling heating or cooling circuits according to room temperature.
-
Responding to sensor inputs such as temperature, humidity, or water leak detection.
-
Coordinating valve operation with other PIERRE devices and system events.
The Valves section provides centralized management, real-time status monitoring, and seamless integration with the automation capabilities of the PIERRE ecosystem.
Important Notice
PIERRE valve controls, automations, schedules, and notifications are provided for convenience and building management purposes only. The system is not a certified flood prevention, leak detection, water protection, emergency shut-off, or life-safety system.
Valve operation may be affected by power outages, network interruptions, communication failures, hardware malfunctions, improper installation, mechanical valve defects, plumbing issues, or configuration errors. Users are responsible for ensuring that all valves, sensors, plumbing components, and related equipment are properly installed, tested, and maintained.
Automated valve control functions should not be relied upon as the sole means of preventing water damage, flooding, freezing, overheating, equipment damage, or other property-related incidents. Regular inspection, testing, and maintenance of all connected equipment are strongly recommended.
PIERRE, its manufacturers, distributors, and partners shall not be liable for any direct, indirect, incidental, consequential, or property damages resulting from the failure, delay, malfunction, or improper operation of valves, sensors, automations, notifications, or related system components.
Control of the Valve
Valve control is quick and simple, managed directly from the Dashboard.
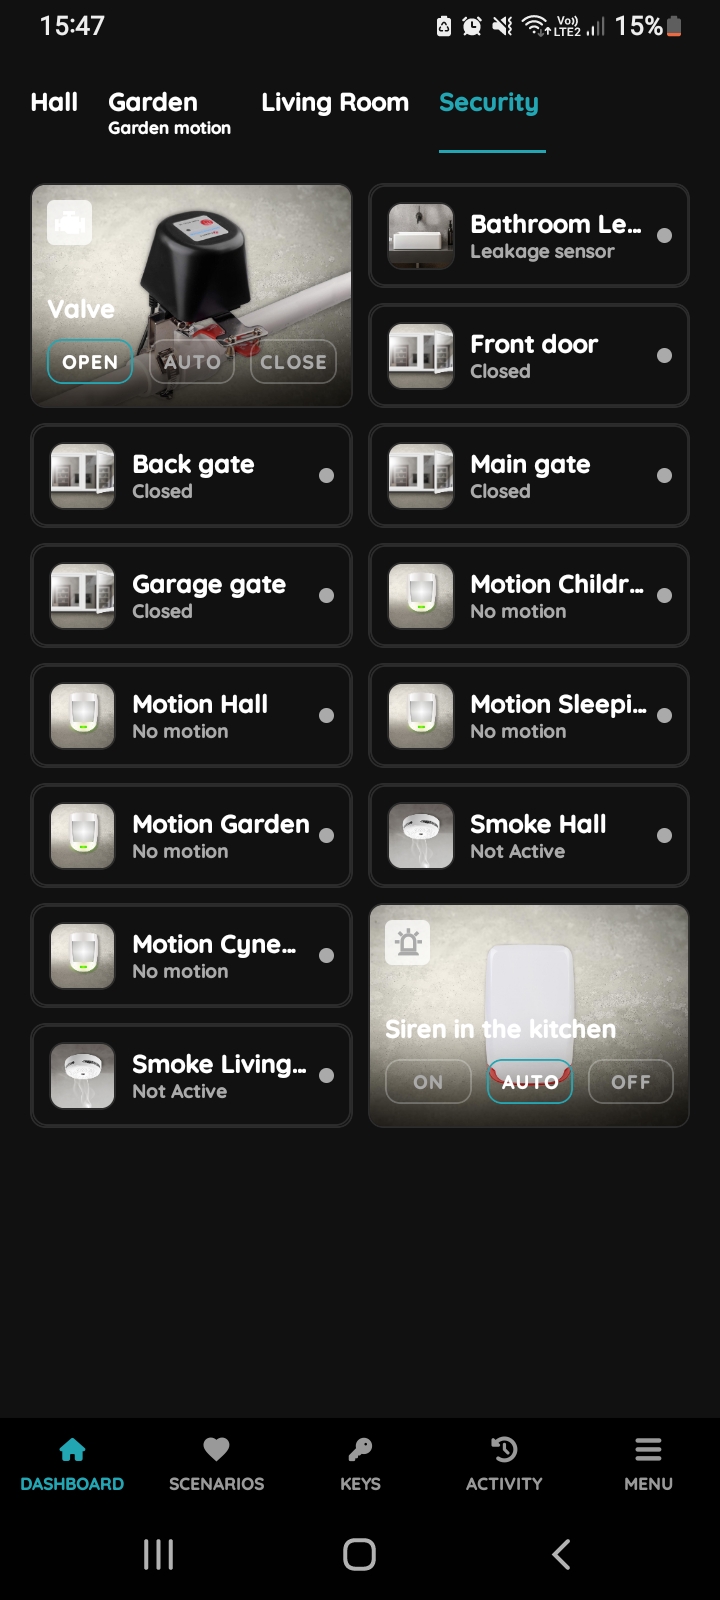
On, Off, Auto buttons - Valve
There are three buttons for controlling the Valve:
- Open - Tap on this button to open the Valve.
- Close - Tap on this button to close the Valve.
- Auto - If you tap the Auto button, the automation will activate when the conditions are met.
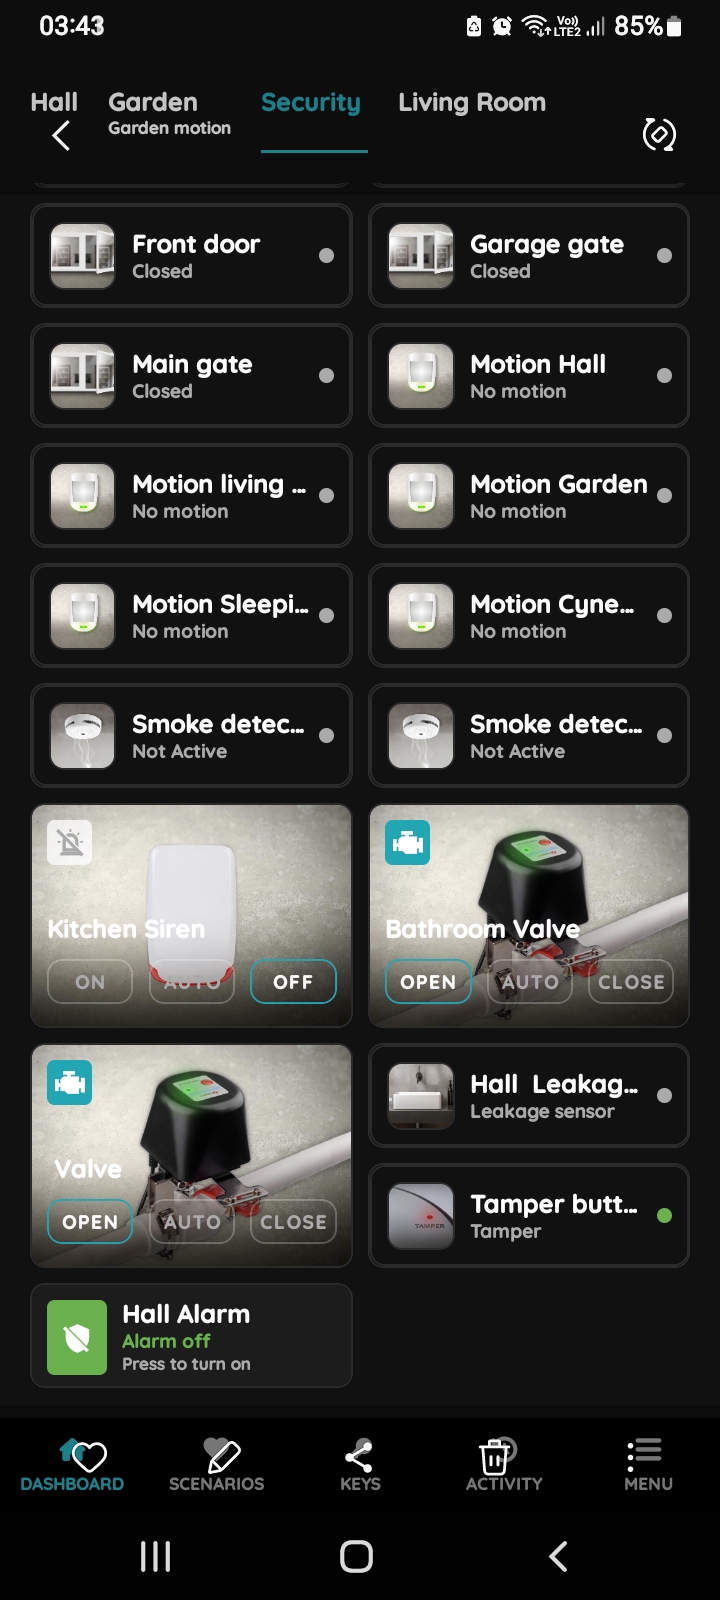
Open Valve
To open Valve, tap the button Open.
The icon of the Valve turns blue, and the picture changes according to the Open status.
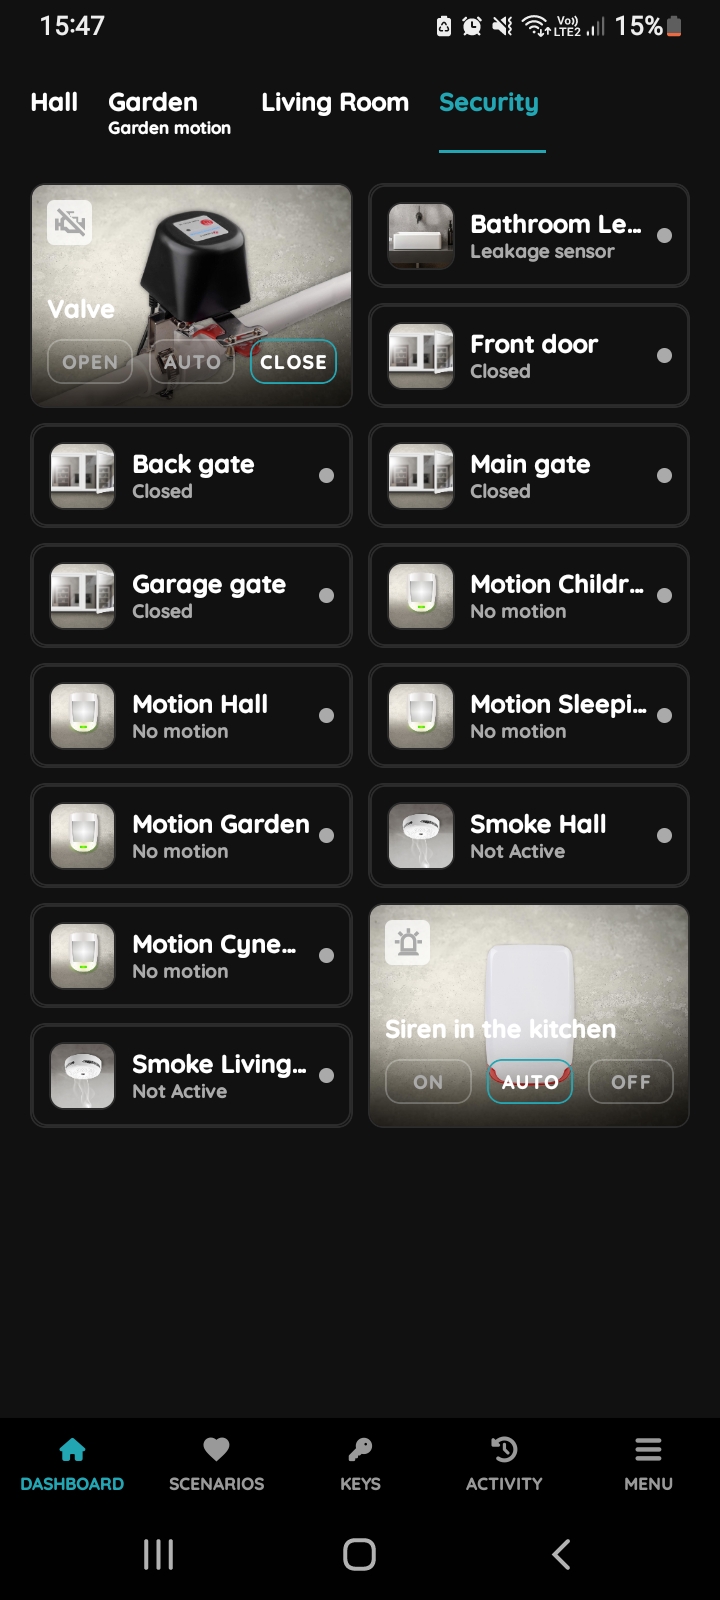
Close Valve
To close the Valve, tap on the Close button.
The icon of the Valve turns grey, and the picture changes according to the Close status.
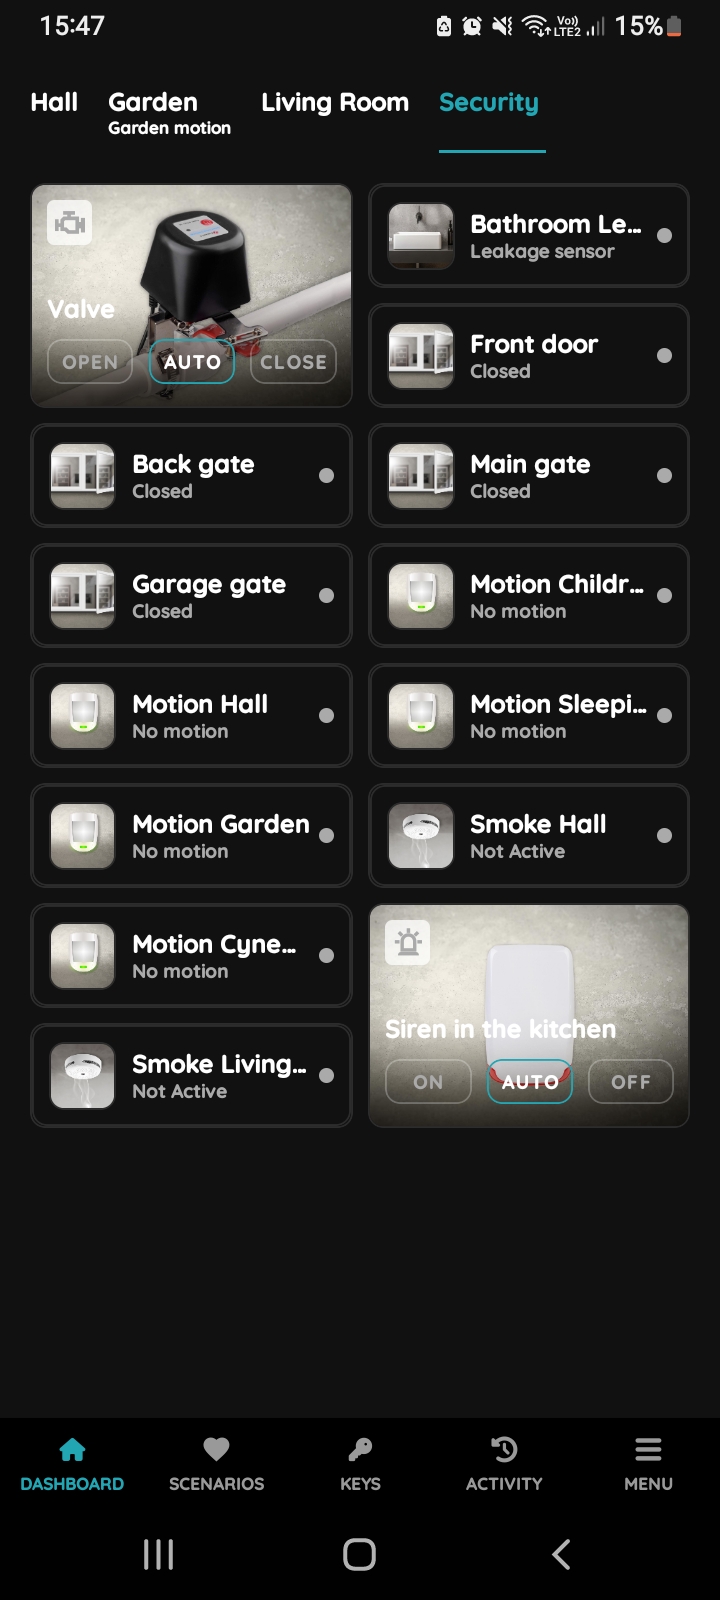
Set Valve to auto mode
If you click on the Auto button, you will activate the previously created automation for the Valve, provided that all conditions from the automation are fulfilled. The icon of the Valve turns blue, and the picture of the Valve changes to reflect the Open status.
If you click on the Auto button when some of the conditions from the automation are not fulfilled, the Valve will not be activated. The icon of the Valve turns grey, and the picture of the Valve is set to the Off status. All conditions must be fulfilled for the automation to activate.
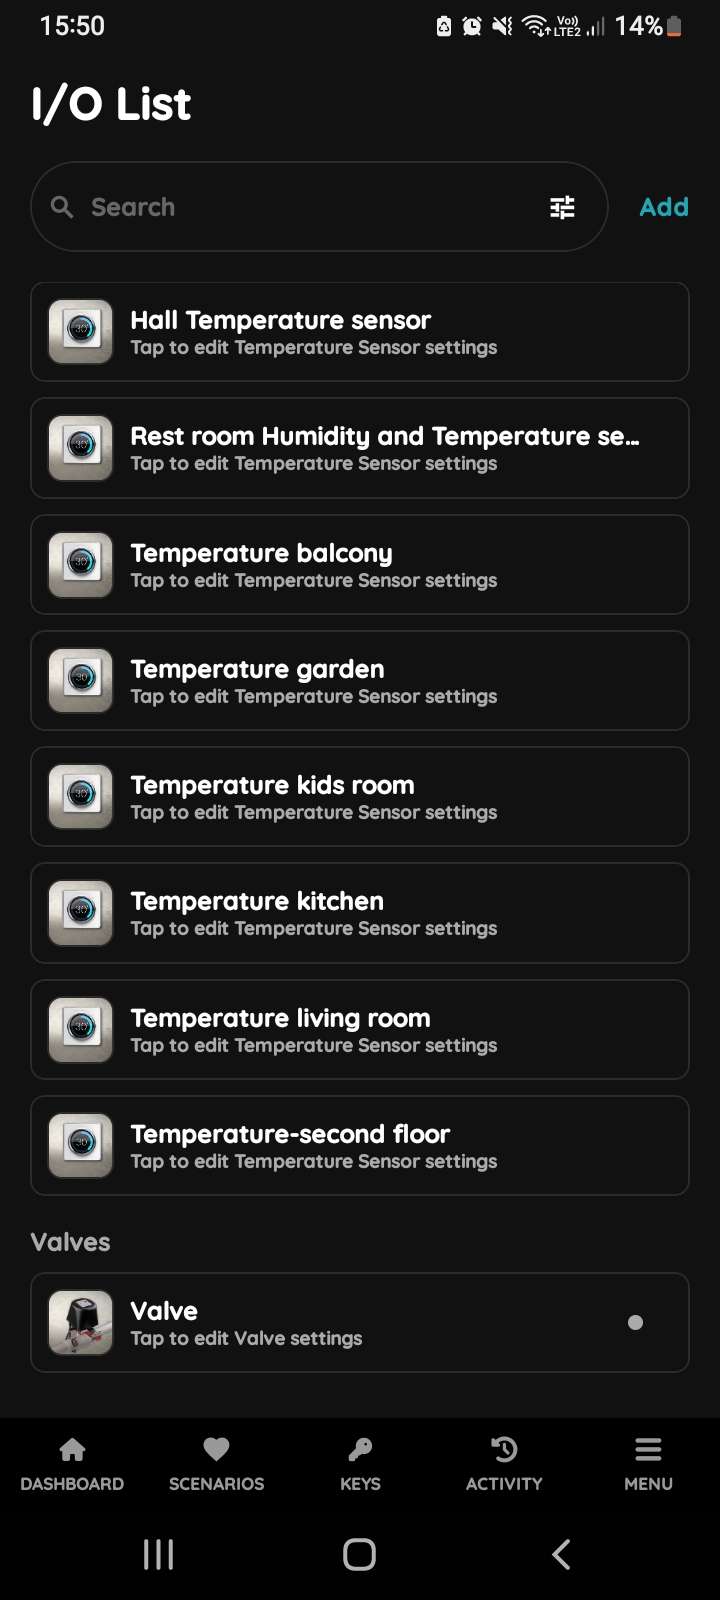
Open I/O List - Valve
To edit the Valve settings, scroll and tap on it in the I/O list.
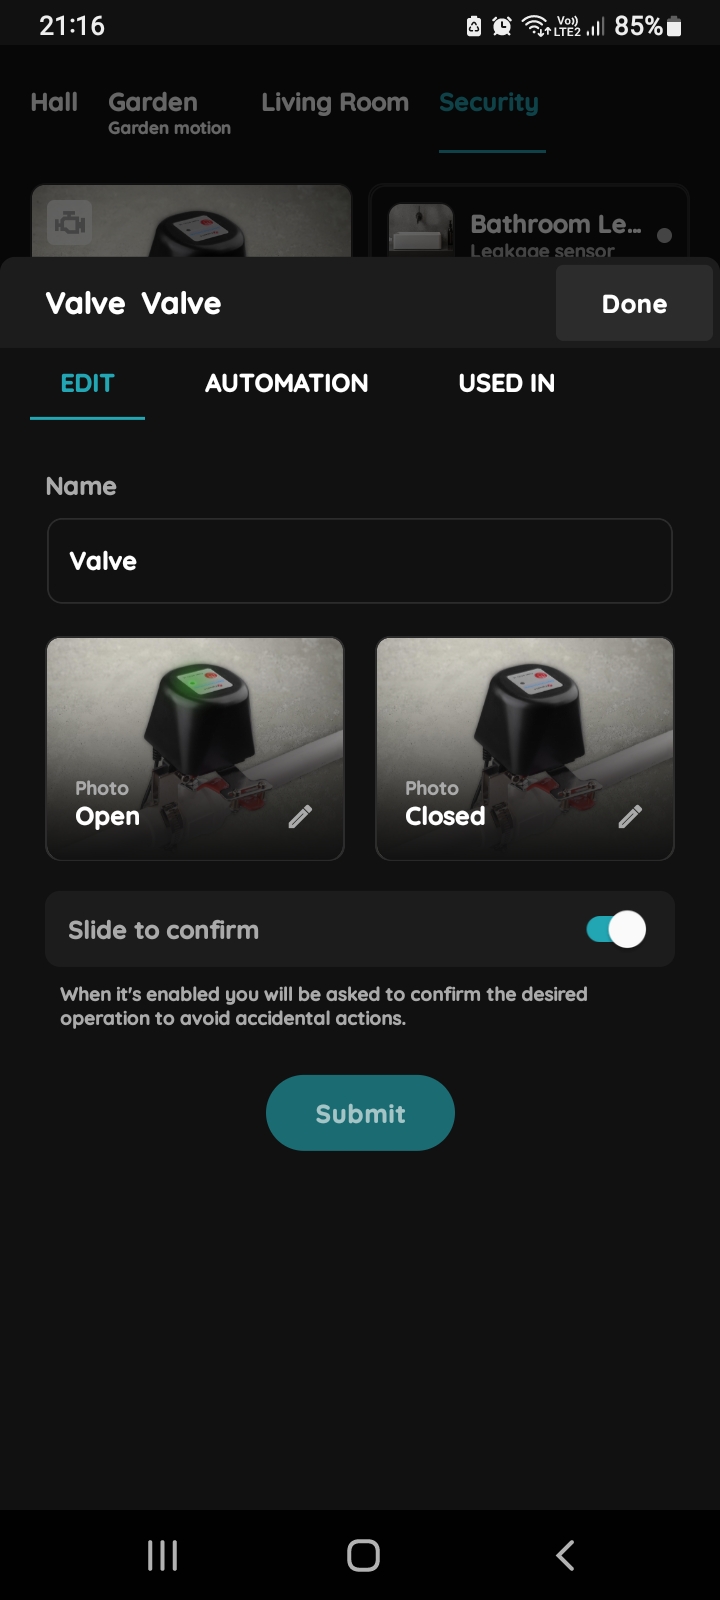
Edit Valve
Edit following form:
- Name - Edit name of the Irrigation.
- Photo - (status Open, Closed) - Choose the source of the photo.
- Slide to confirm - When it is enabled you will be asked to confirm the desired operation to avoid accidental actions.
Tap Submit/Done.
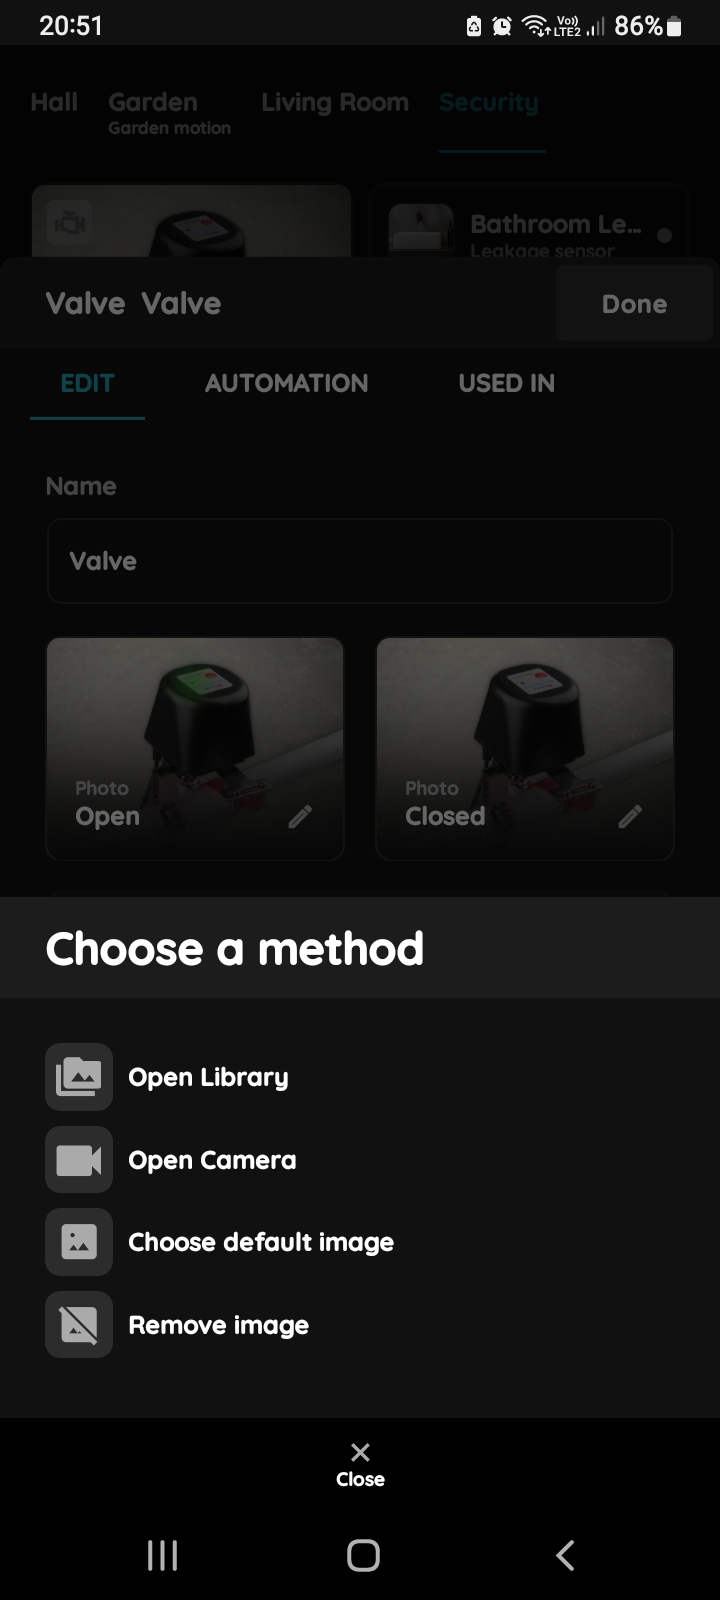
Change a photo - Valve
You have four options:
- Open Library - The phone’s Library will open. It is recommended to take pictures from the same angle for both valve statuses to achieve a complete and consistent view.
- Open Camera - You can take a picture using your smartphone. For a complete and consistent view, it’s recommended to capture both valve statuses from the same angle.
- Choose default image - These images are prepared in advance to provide a complete and seamless experience.
- Remove image - Removes the existing image.
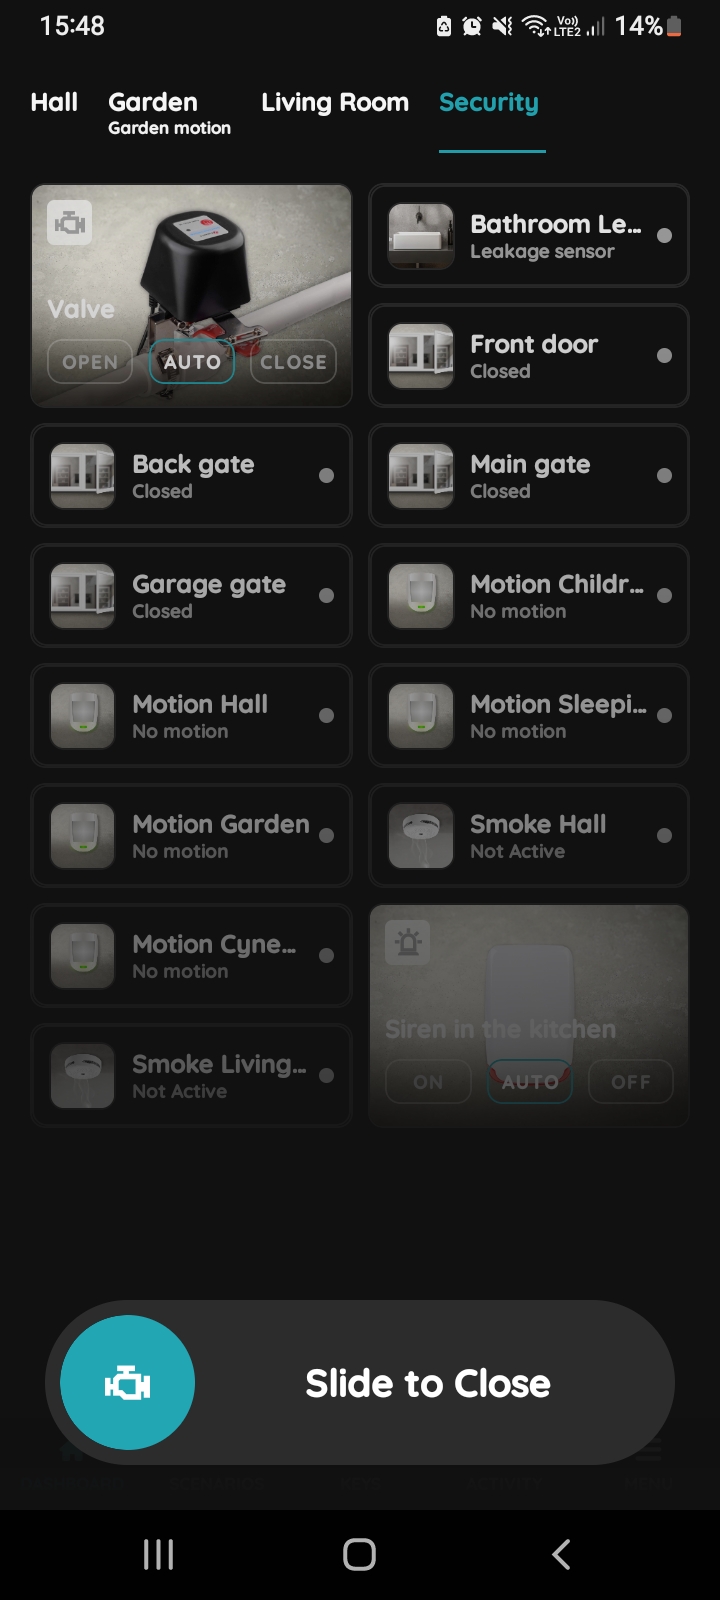
Slide to confirm - Valve
The Slide to confirm feature adds an extra layer of security, preventing accidental actions.
It asks you to confirm your choice once more.
Here's an example of how the Slide to confirm feature is applied:
If you want to close the Valve, tap on the Close button and Slide to Close from left to right.
Used In for Valve
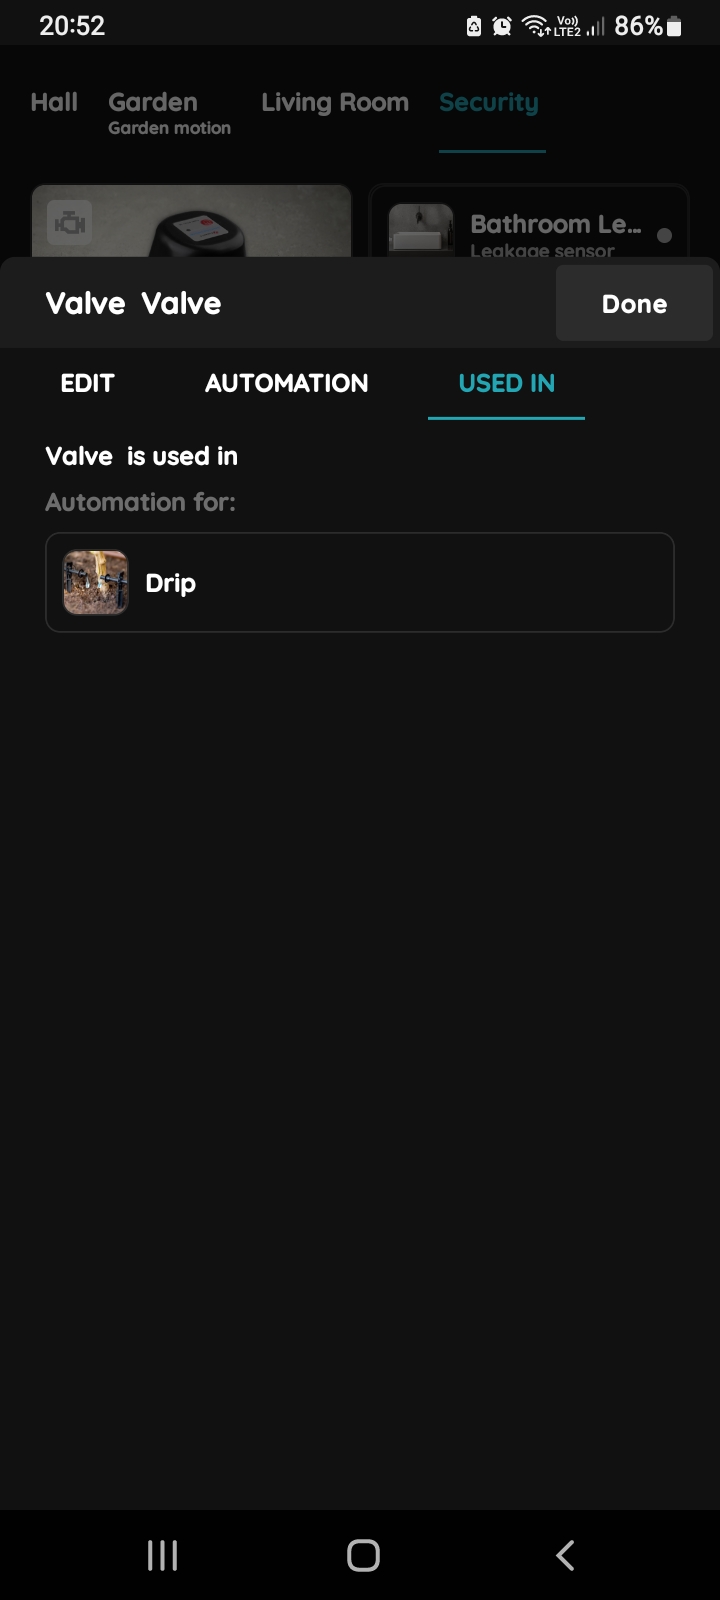
The Used In tab shows all the scenarios and automations where the Valve is applied, making it easy to see where this I/O is used without the need to search manually. If it isn't used in any, the list will be empty, and a message will display: "This I/O is not in use anywhere." This feature is particularly useful as it consolidates all relevant information in one place.
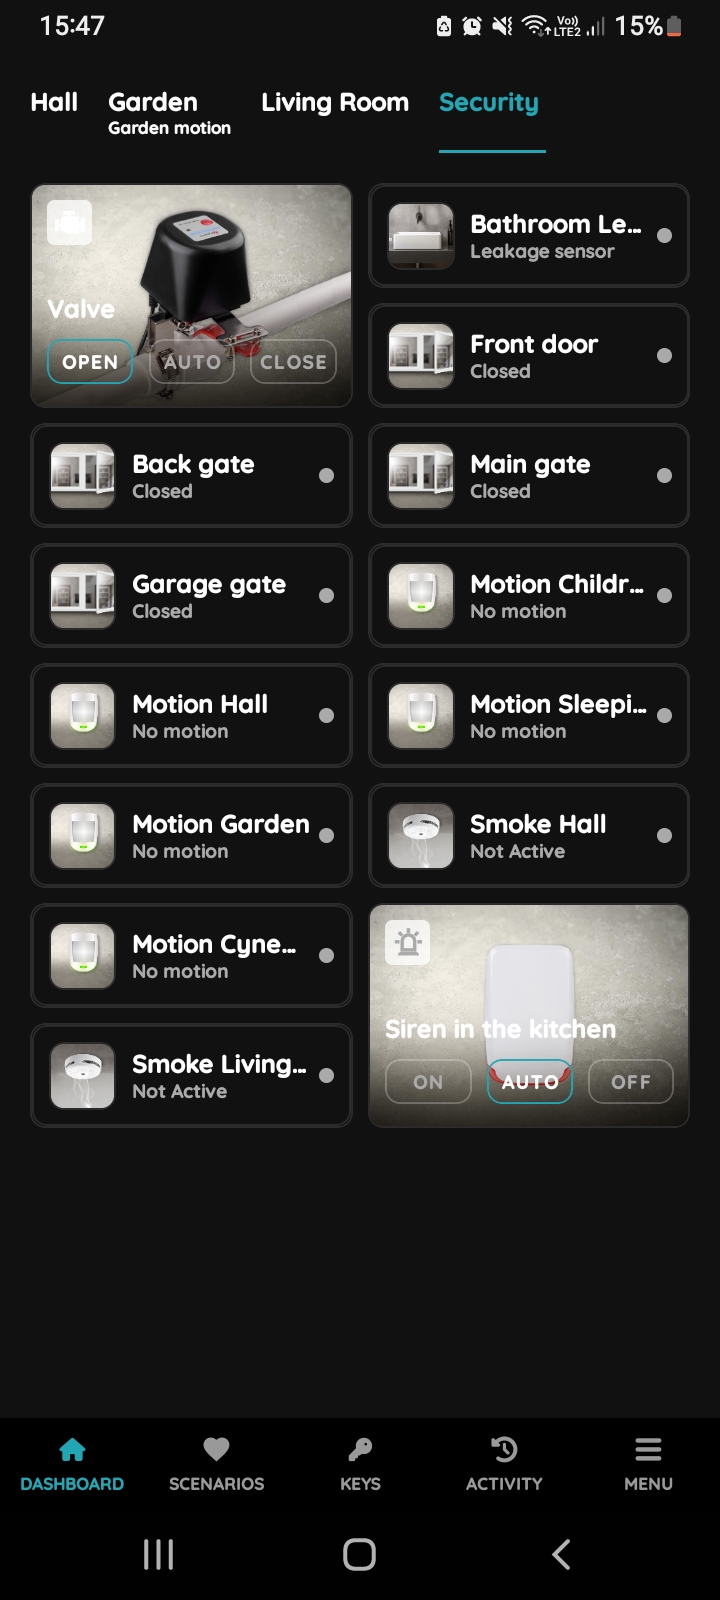
Find the Valve on the Dashboard
The Valve can be automated in the PIERRE app by linking it to a heating or cooling system or a leakage sensor. For example, the valve can automatically open or close depending on whether the heating or cooling system is running, optimizing energy efficiency. Alternatively, the valve can be set to close immediately if the leakage sensor detects water, preventing potential flooding and water damage. This ensures that the valve operates intelligently based on real-time conditions, whether for climate control or safety.
You can open Valve from the Dashboard or from the I/O list.
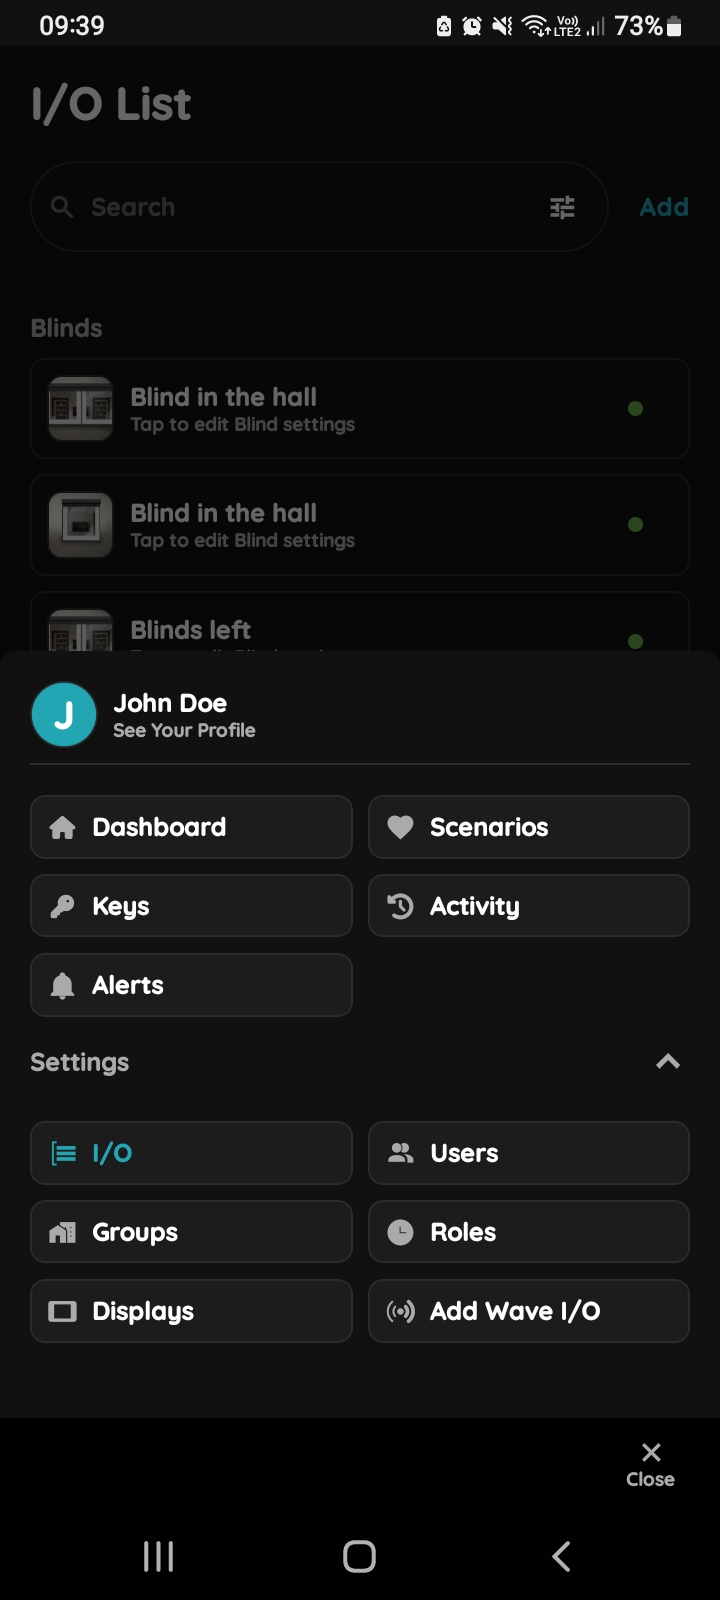
Open I/O
In the Menu, under Settings, tap on the I/O.
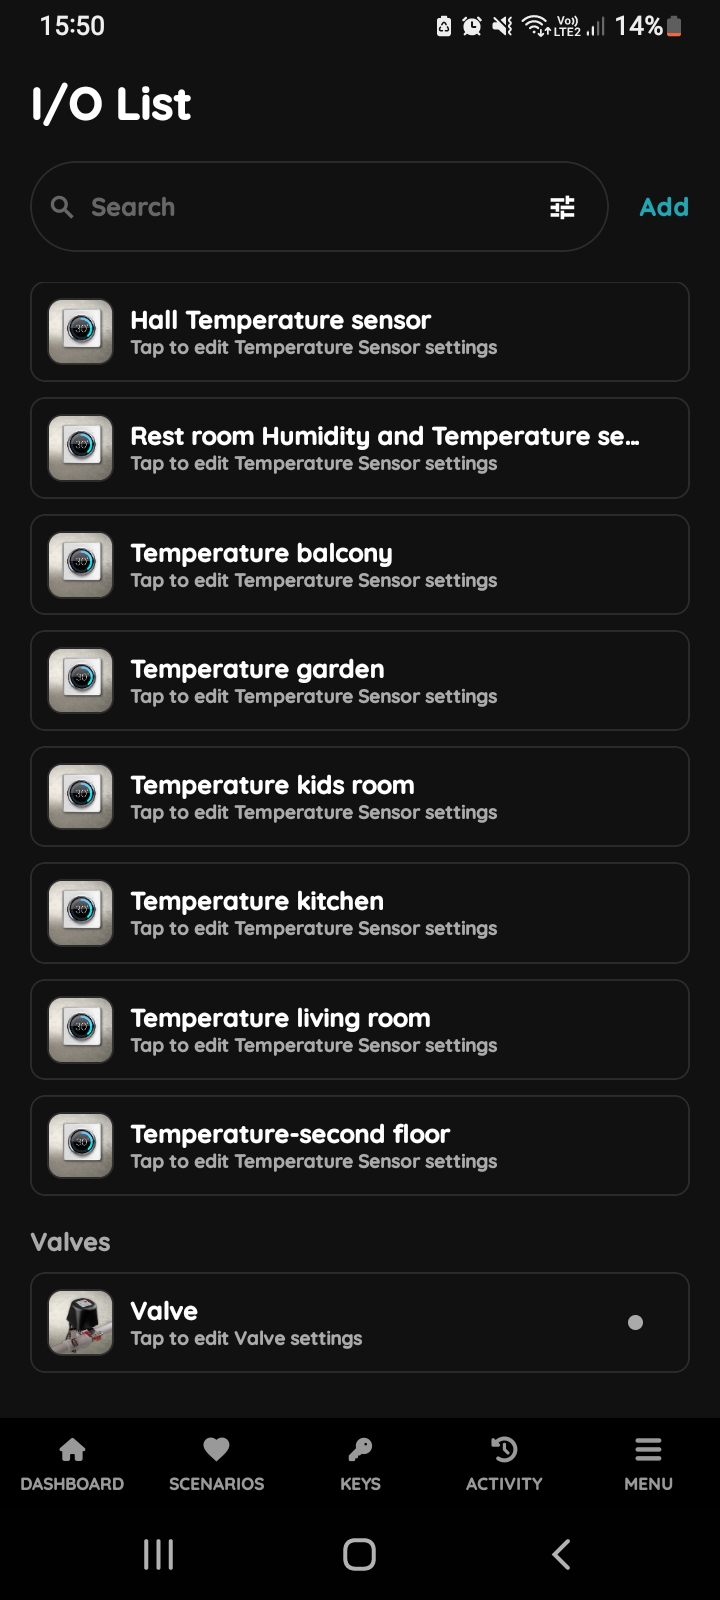
Open I/O list - Valve
Scroll to the Valves and long press the picture of the valve that you want to open.
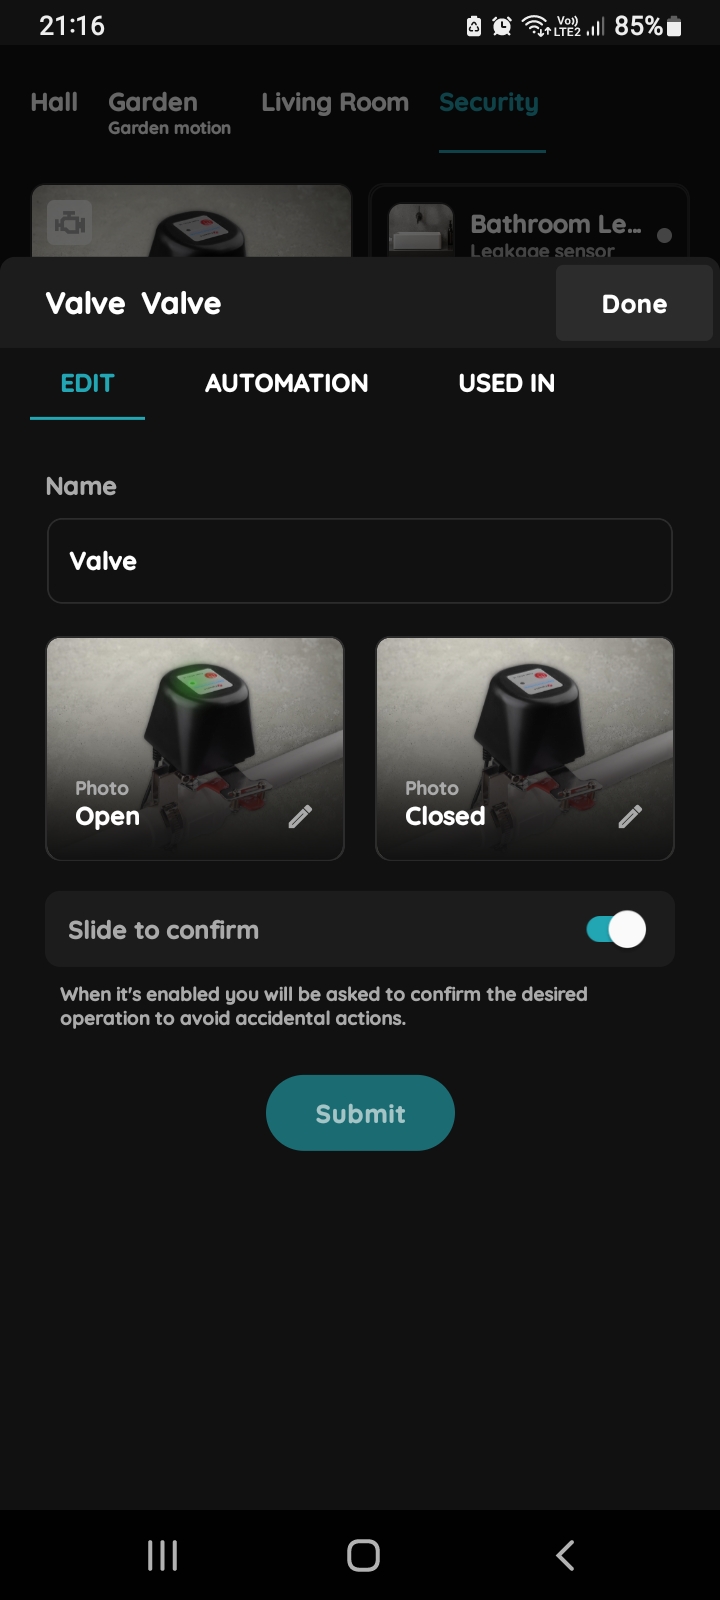
Edit, Atuomation, Used In - Valve
Tap on the tab Automation.
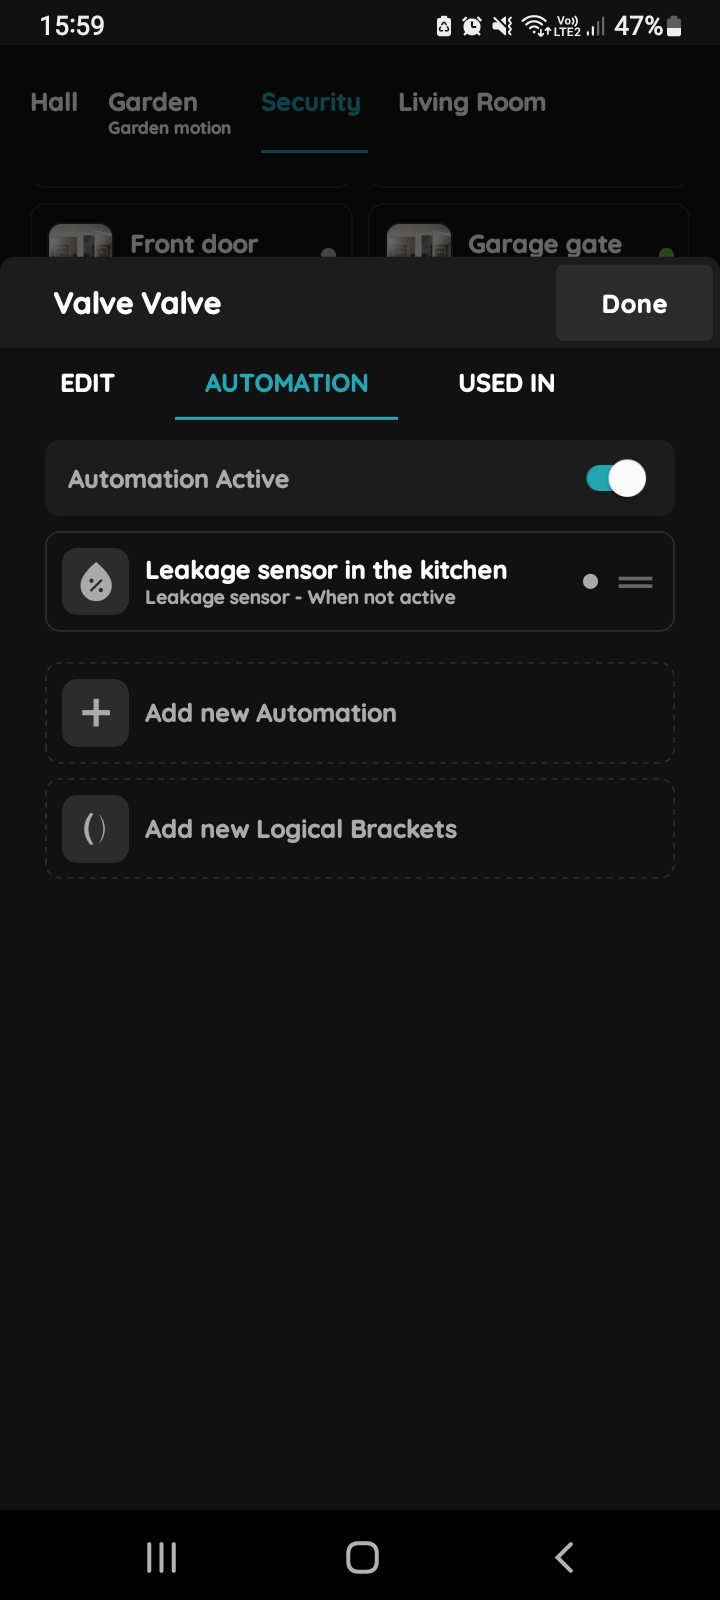
+ add new Automation - Valve
The list of automations that include the Valve is displayed.
Tap + Add new Automation to create a new automation.
A common use case is to control the Valve based on one or more leakage sensors. The valve operates normally when the leakage sensors are inactive. If multiple leakage sensors are used, add them to the automation using the OR logical operator.
With this configuration, the Valve will stop operating if any one of the leakage sensors becomes active.