Smart PIERRE - User management
Description
The Users section allows administrators and authorized users to manage access to the PIERRE system. From this section, users can invite new members, manage permissions, review activity logs, and control access credentials such as RFID cards and license plates.
Invite Users
New users can be added to the system using the Invite button. Once invited and registered, users can access the application and interact with devices, automations, and other functions according to their assigned permissions.
Search and User List
The user management interface includes:
-
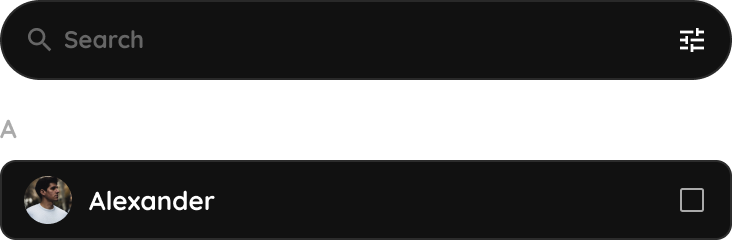
Search Function – Quickly locate users by name or keyword.
-
Alphabetical Sorting – Users are automatically displayed in alphabetical order for easier navigation and management.
User Profile Management
Selecting a user opens their profile, where administrators can:
-
Edit user information.
-
Update profile details.
-
Review assigned permissions.
-
Manage access credentials.
Activity Logs
Each user profile contains an activity log that provides visibility into actions performed within the system. This can help administrators review system usage and monitor user interactions.
Access Credentials
Users can be assigned and managed through various access credentials, including:
-
RFID cards
-
License plates
-
Access codes
-
Other supported authentication tokens
These credentials can be used throughout the PIERRE ecosystem for access control and automation purposes.
Permissions and Access Control
Administrators can define what each user is allowed to access and control. Permissions can be assigned to:
-
Individual devices and I/Os
-
Rooms and zones
-
Access control points
-
Buildings or properties
-
Specific system functions
This allows precise control over user privileges while maintaining system security and operational flexibility.
Centralized User Management
The Users section provides a centralized platform for managing system access, permissions, credentials, and activity monitoring, helping ensure secure and organized operation of the PIERRE system.
Open Users' Menu
Users's Menu can be opened in a few following steps.
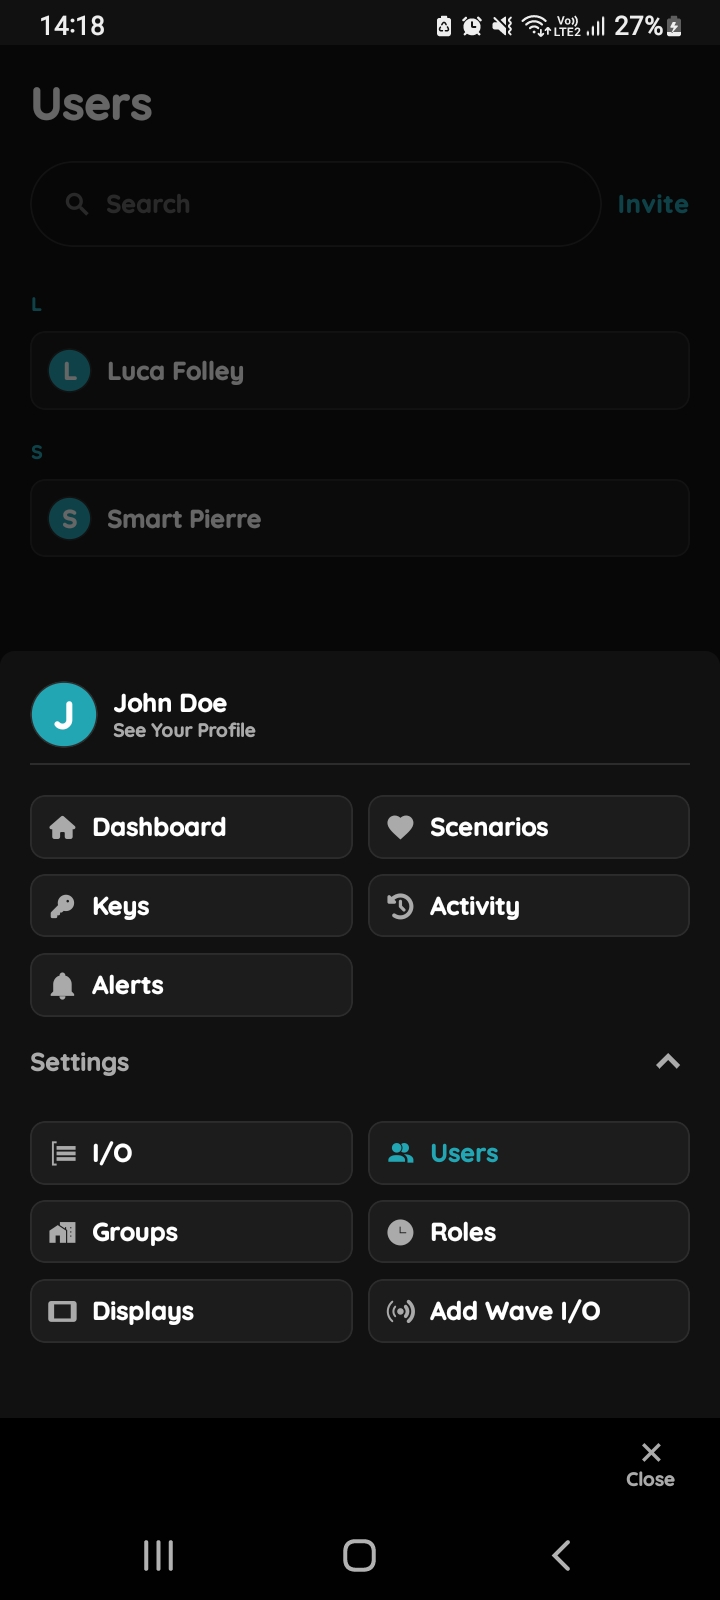
Open Users list
Tap on the Users under the Settings.
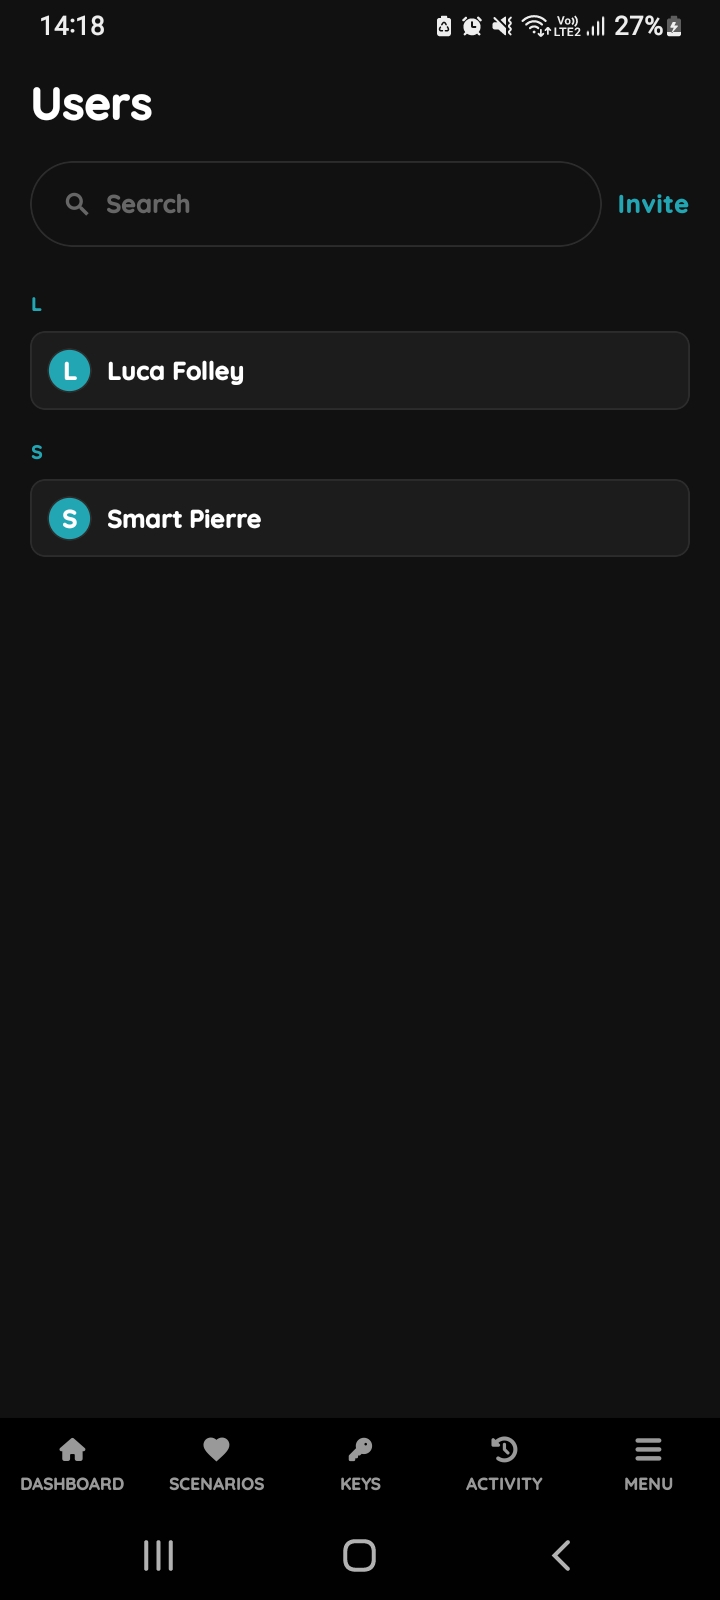
Users list
List of the Users is shown. Select the User from the list (tap on the name).
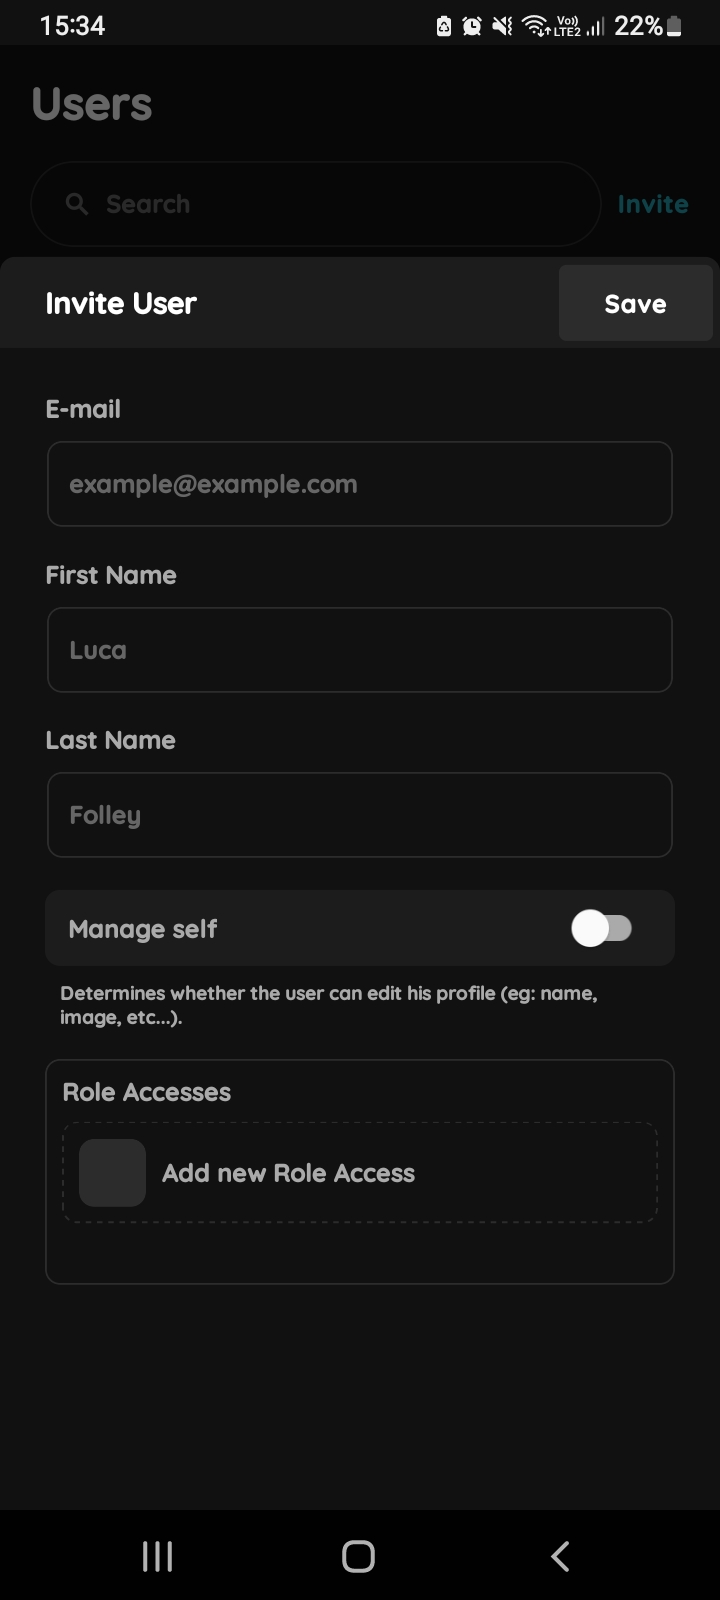
Invite User
In the top right corner, there is a button - Invite. Fill the following form:
- E-mail - Enter the user's email address.
- First Name - Provide the user's First Name.
- Last Name - Provide the user's Last Name.
- Manage Self Button - Enable this option to allow the user to edit their profile details (e.g., name, image).
- Role Access - Add new role access to define the user's permissions within the system.
After completing these steps, the user’s profile will be set up with the specified access and customization options.
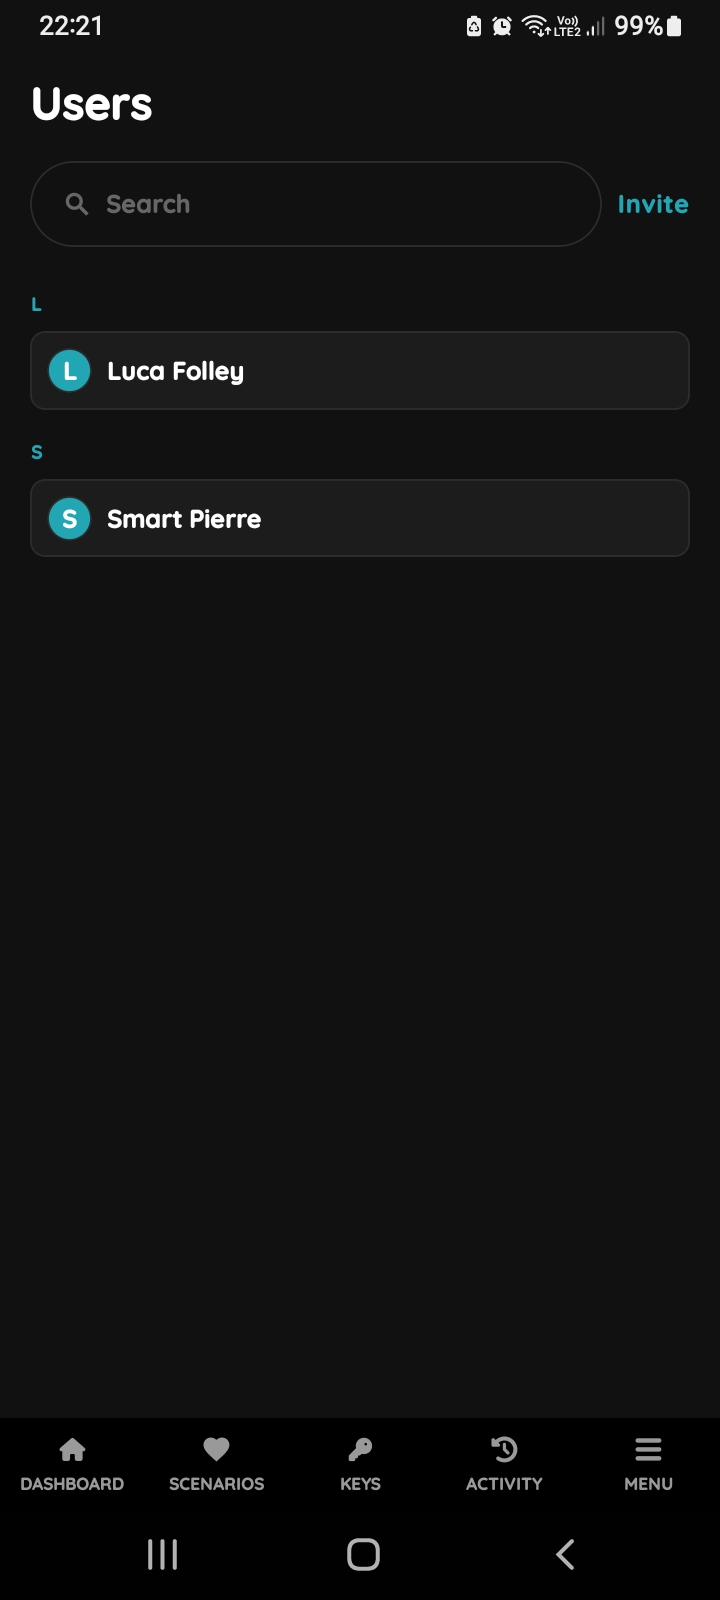
Search User
The Search functionality allows for quick and precise User identification by entering relevant keywords, streamlining the process of finding and managing user profiles.
Tap in the Search field and search list of Users by name and surname of the User.
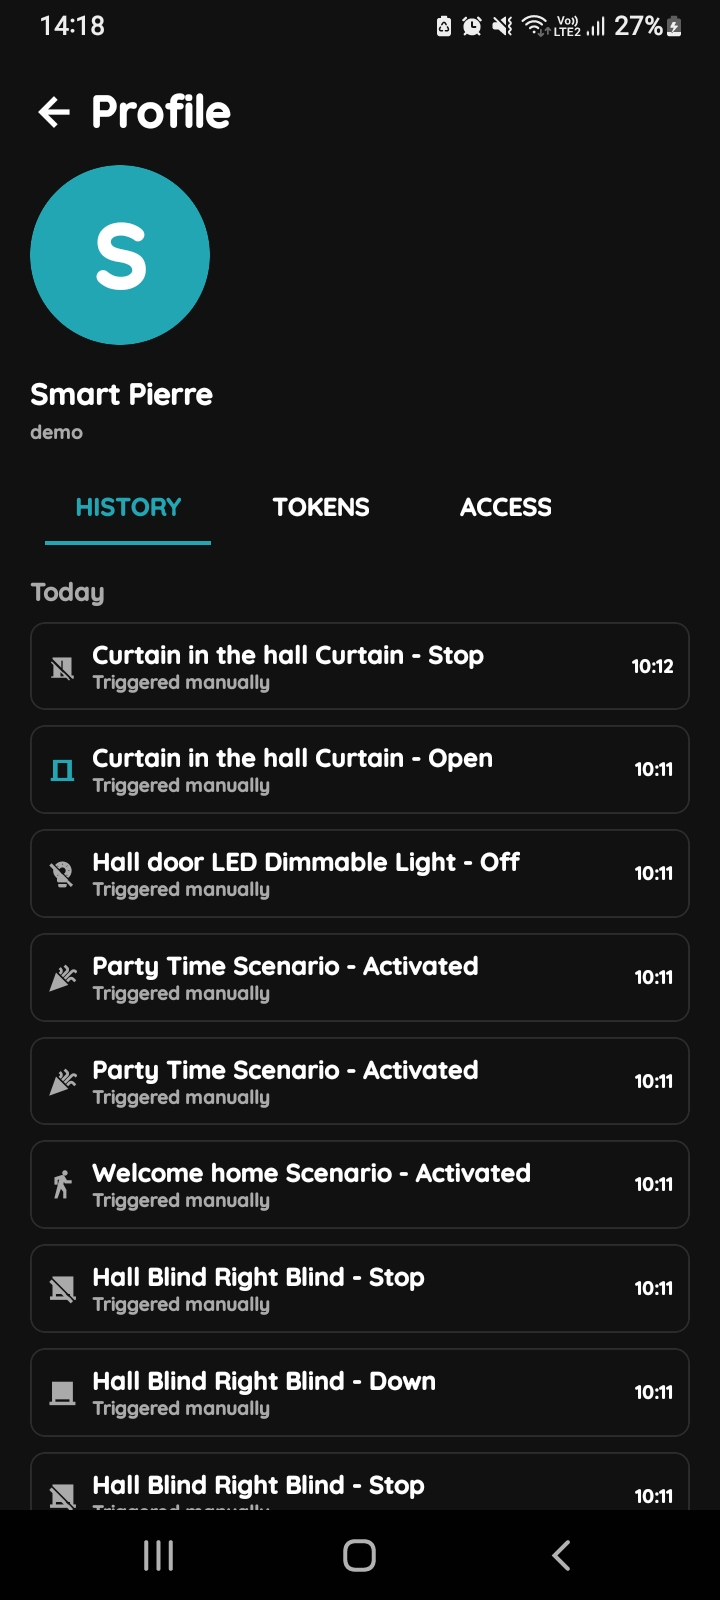
Open Profile, History, Tokens, Access
- History is displayed - It shows a list of all the I/Os that are activated during time by this User.
- Tokens are used to add a new token (New RFID card, New Licence Plate, New PIN).
- Access - Here are displayed details about the Role of the selected User. Also here can be added new role to the selected User.
To change the User's picture, tap on the current picture. To add Tokens, tap on the Tokens tab. To set the User's access permissions, tap on the Access tab.
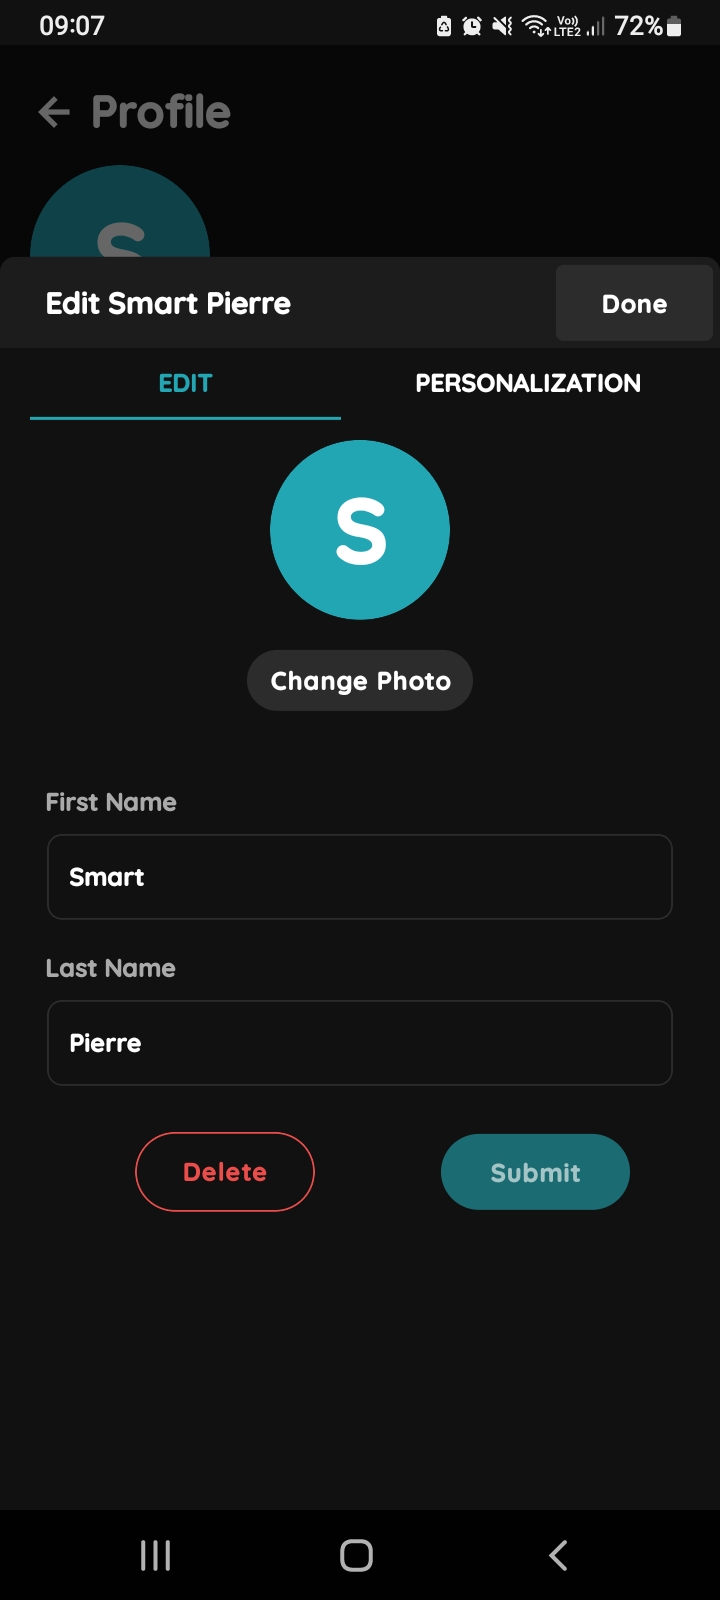
User's profile - edit personal information
Tab Edit is selected, so you can edit following form:
- Fist Name - Tap in the field and edit User's Name.
- Last Name - Tap in the field and edit User's Last Name.
For more details follow next step.
To confirm your changes tap Submit/Done or if you want to delete User tap button Delete.
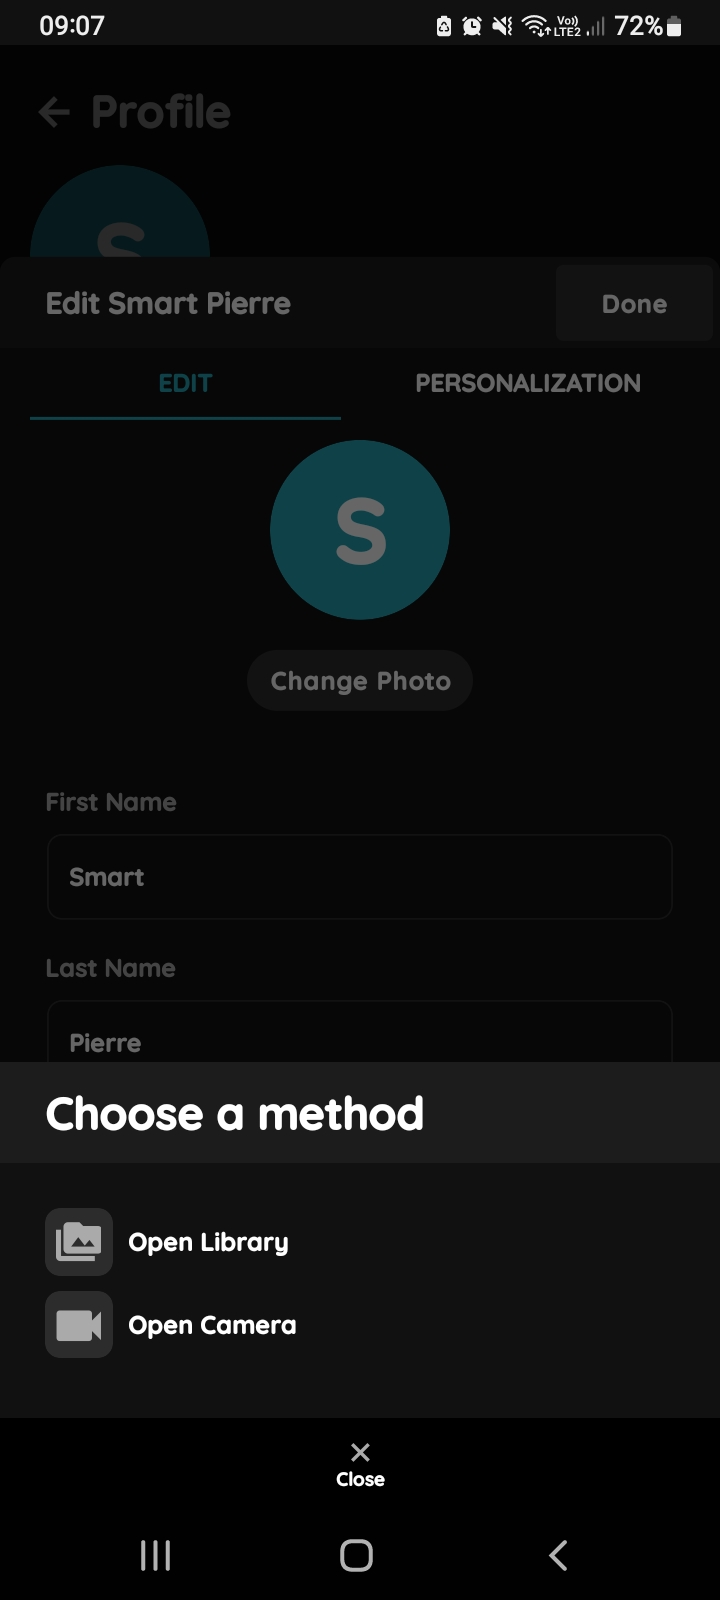
Change photo of the User
You have two source of the photo:
- Open Library - The phone’s Library will open.
- Open Camera - You can take a picture using your smartphone.
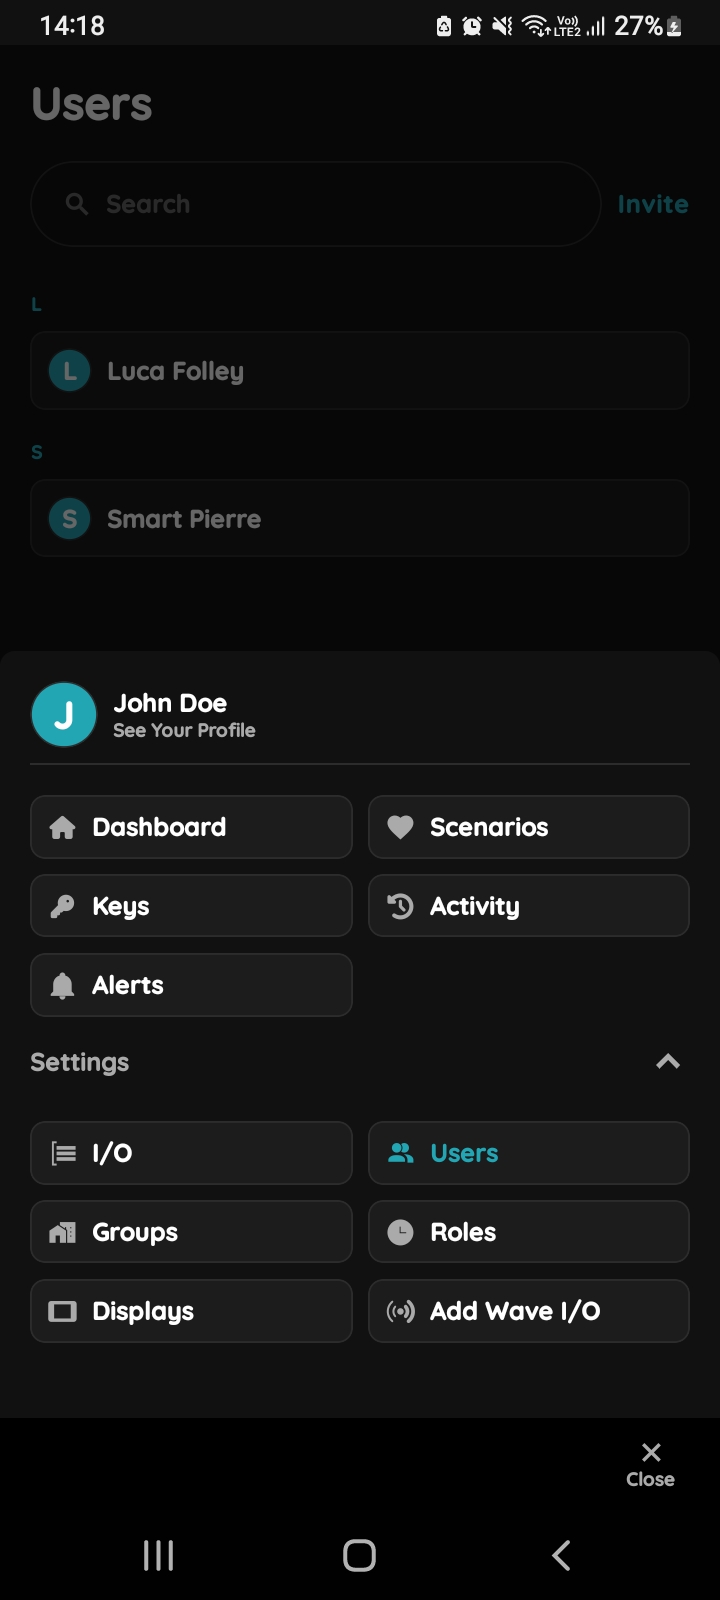
Open Users list
You can add PIN to other User. First step is to open Menu list.
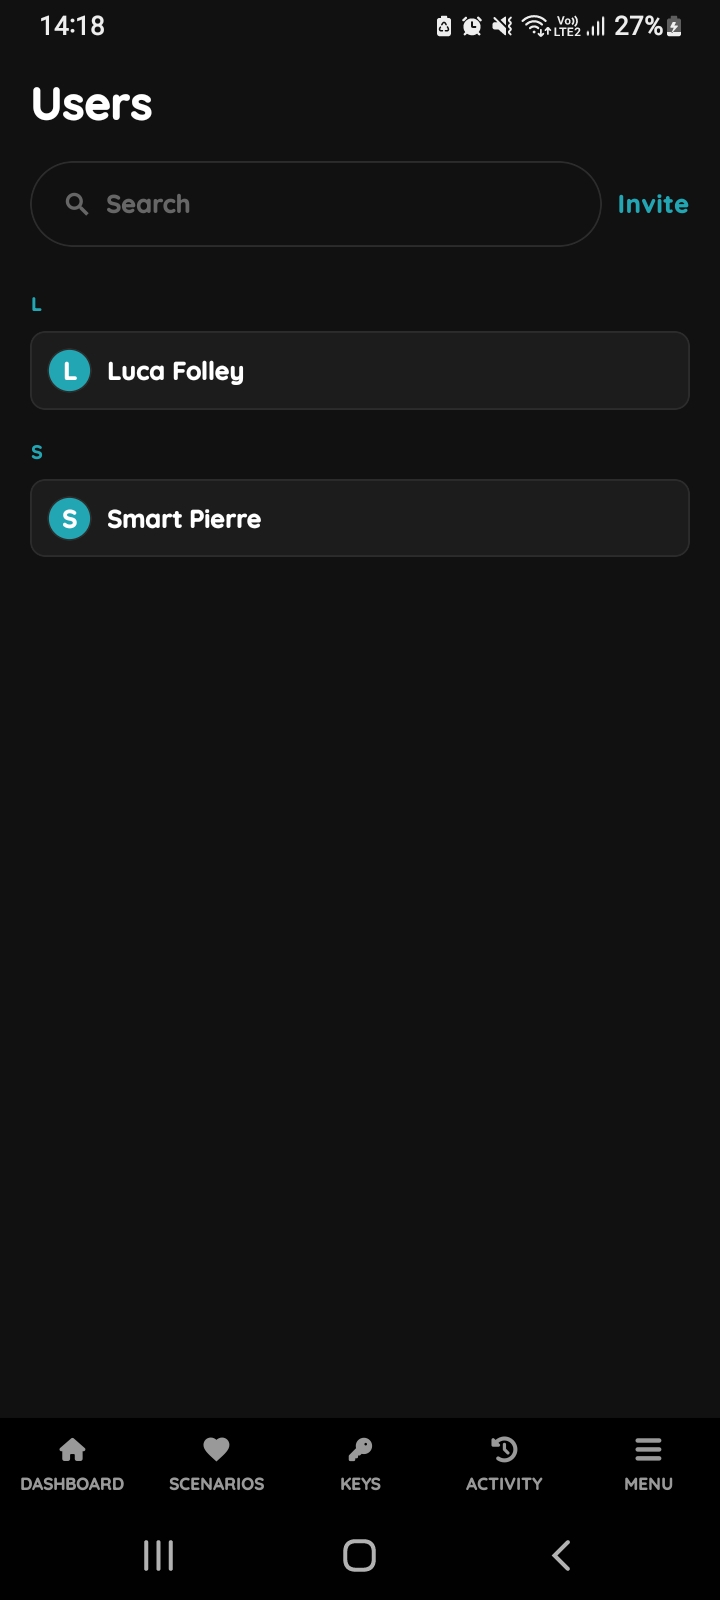
Users list
List of the Users is shown. Select the User from the list (tap on the name).
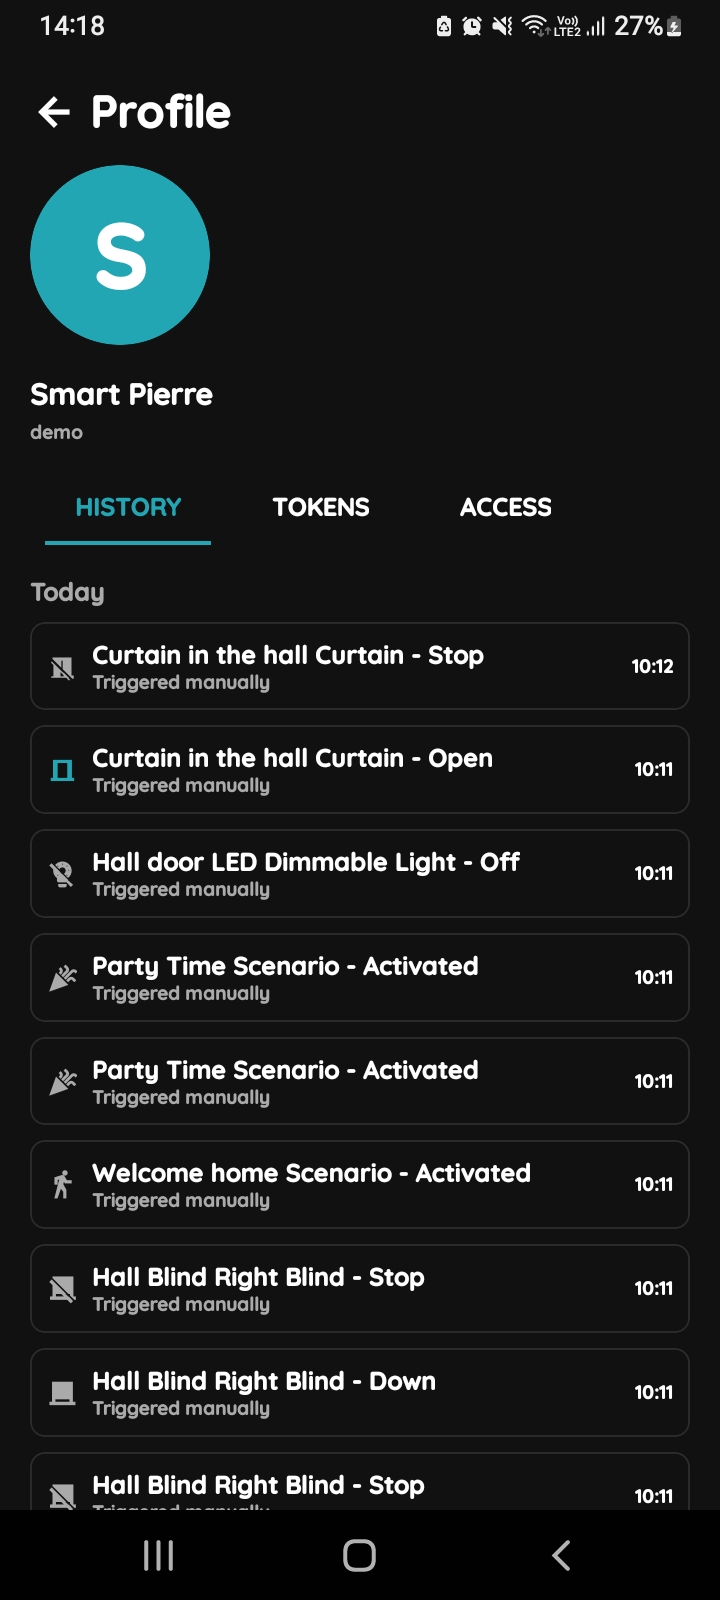
Open Profile, History, Tokens, Access
- History is displayed - It shows a list of all the I/Os that are activated during time by this User.
- Tokens are used to add a new token (New RFID card, New Licence Plate, New PIN).
- Access - Here are displayed details about the Role of the selected User. Also here can be added new role to the selected User.
To change the User's picture, tap on the current picture. To add Tokens, tap on the Tokens tab. To set the User's access permissions, tap on the Access tab.
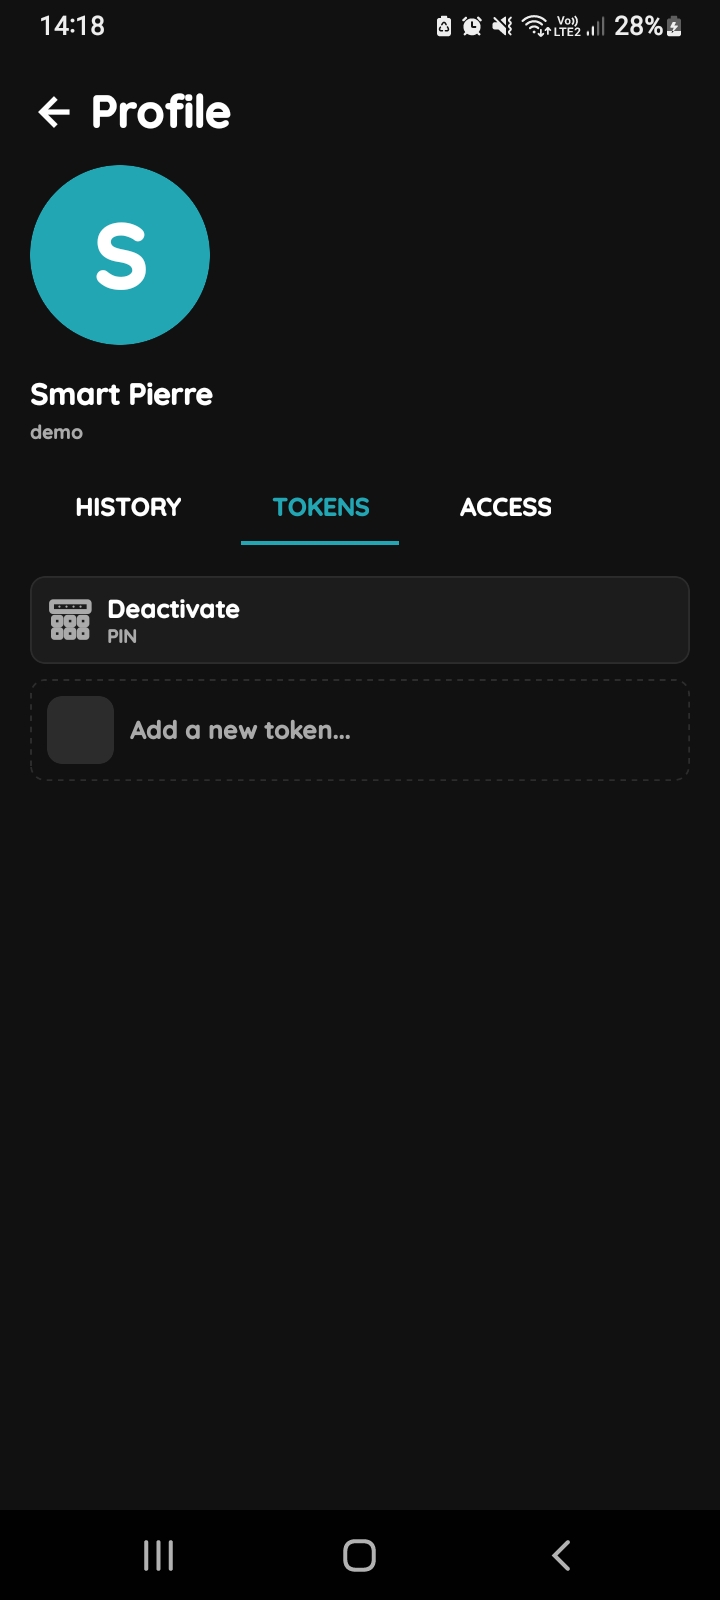
Add Tokens
Tap on the Tokens tab and tap on the Add a new token.
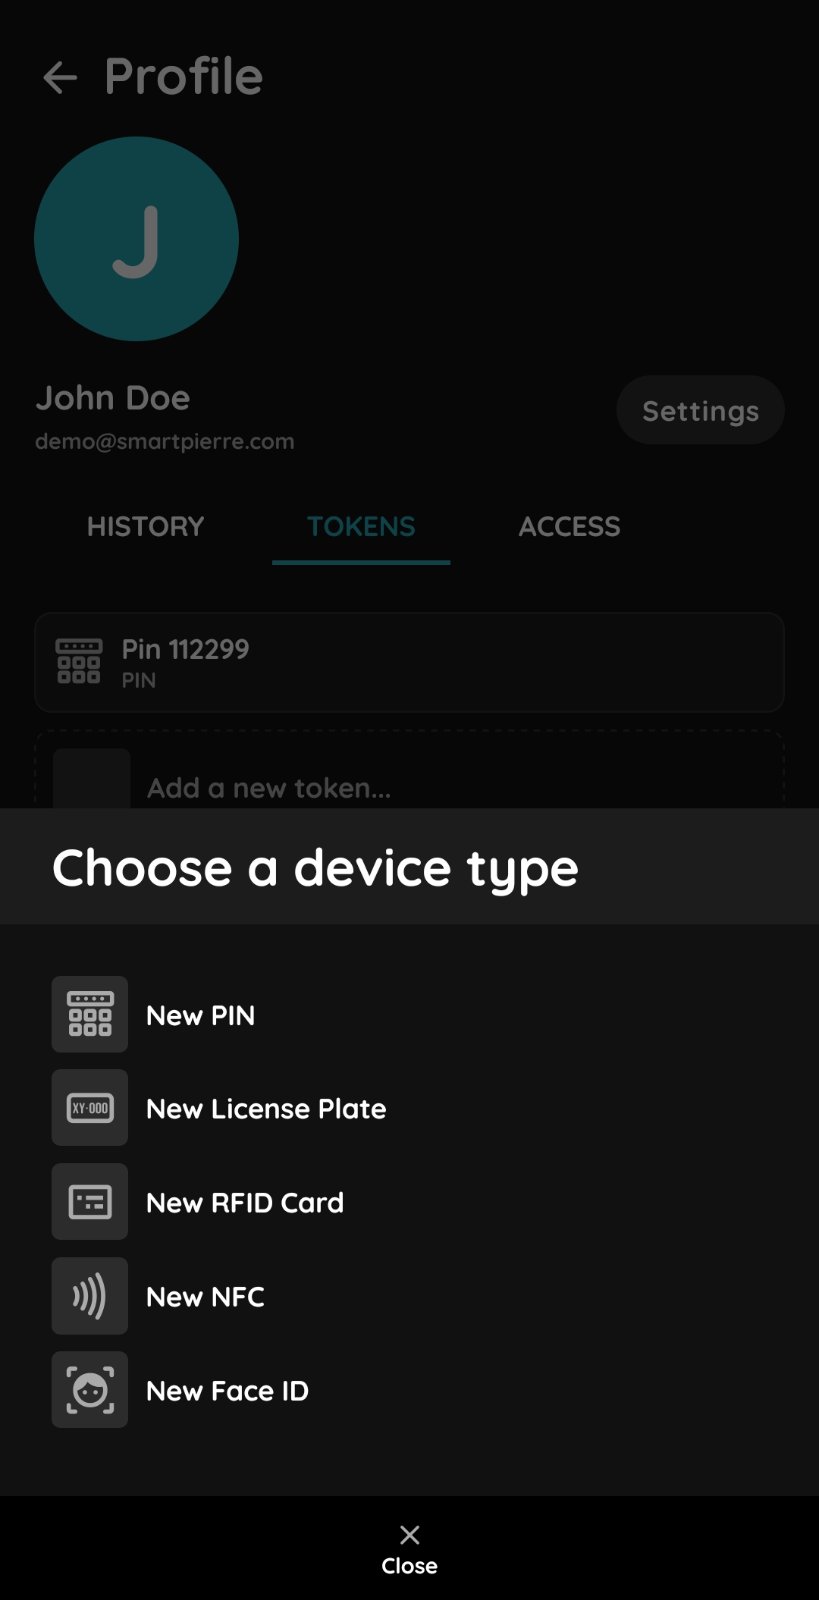
Choose a device type - PIN
Choose a device type - Tap on a New PIN.
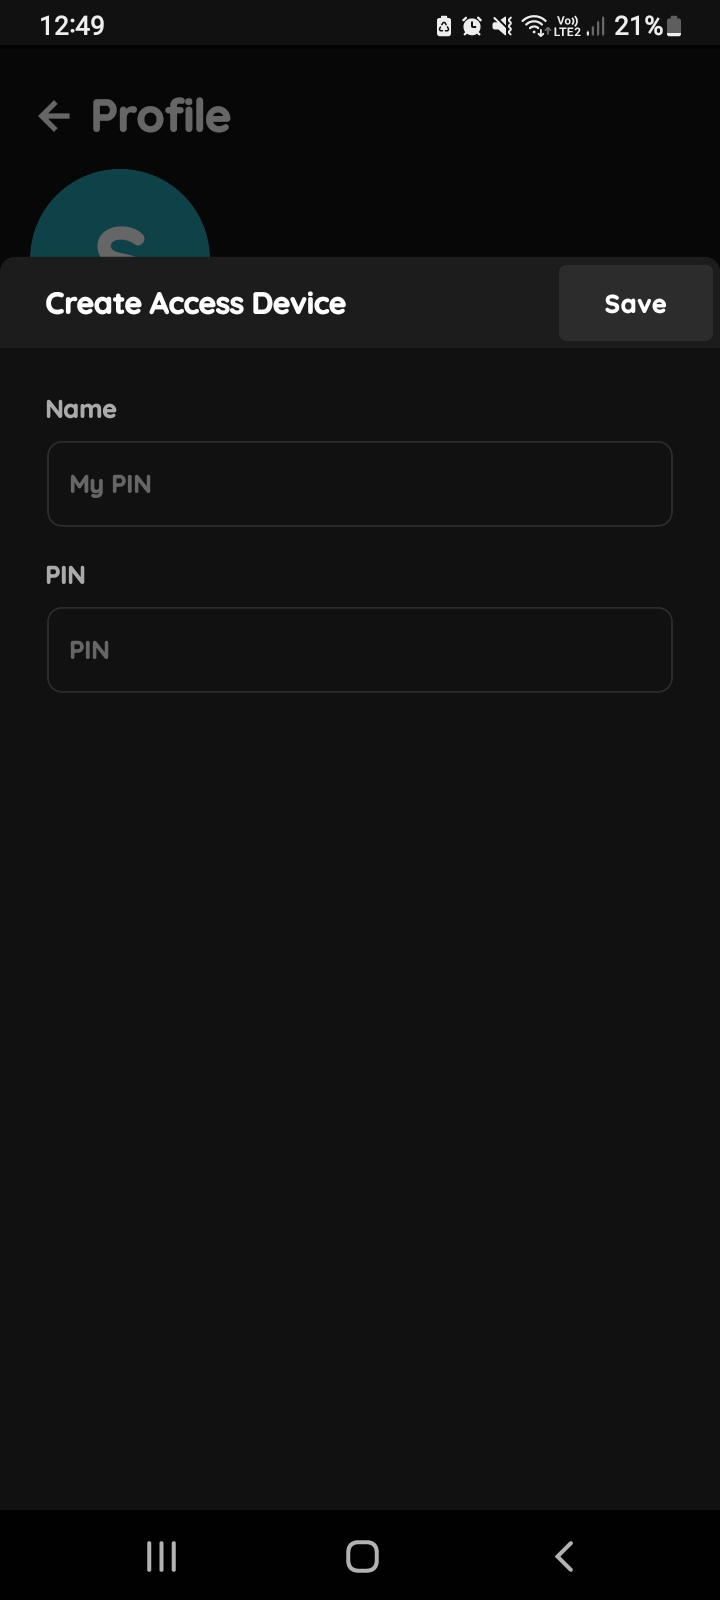
Create Access Device - PIN
Fill the form:
Name - Write name of the PIN.
PIN - Write the number of your PIN in this field.
Tap on button Save.
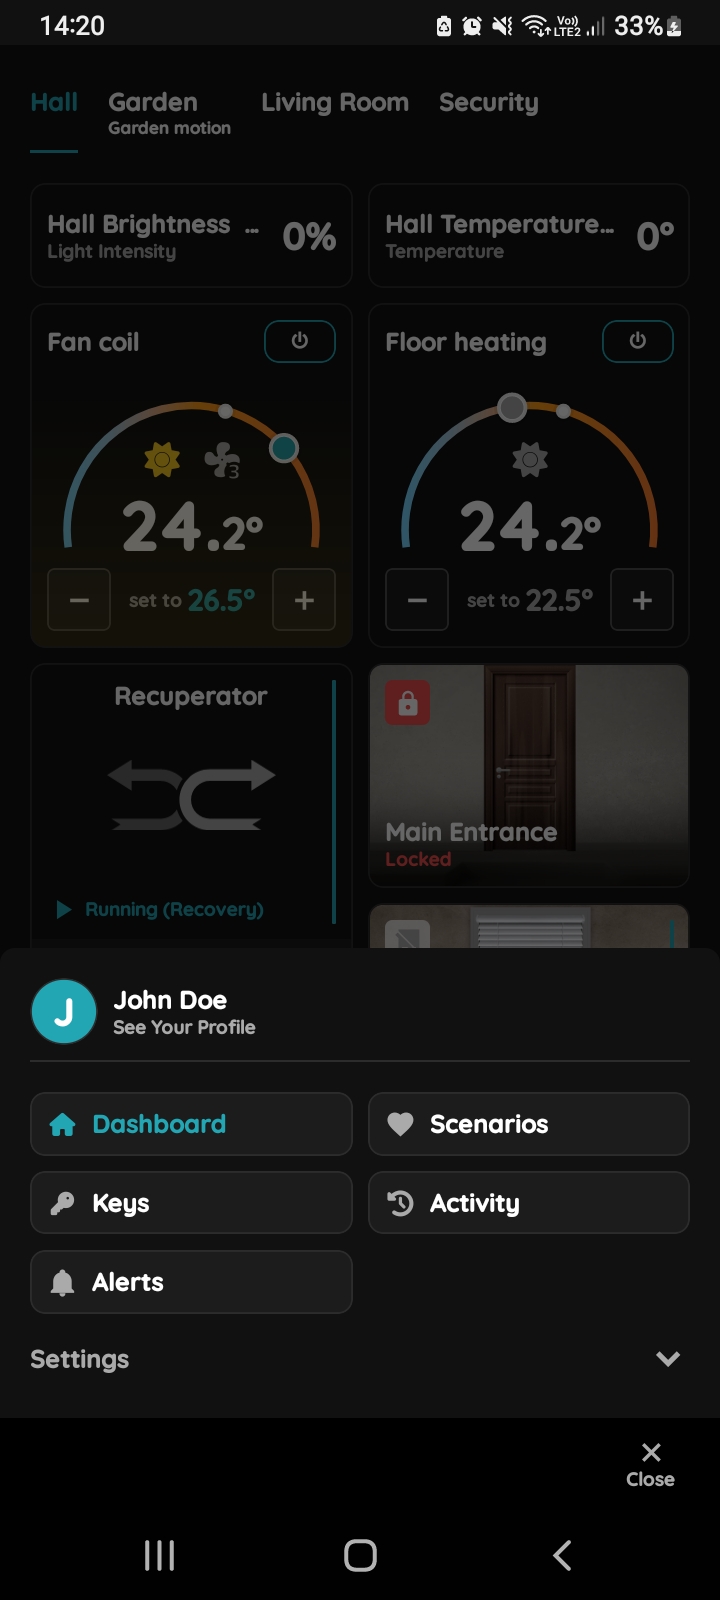
Open Your Users' Profile
You can add your PIN from Your User's Profile.
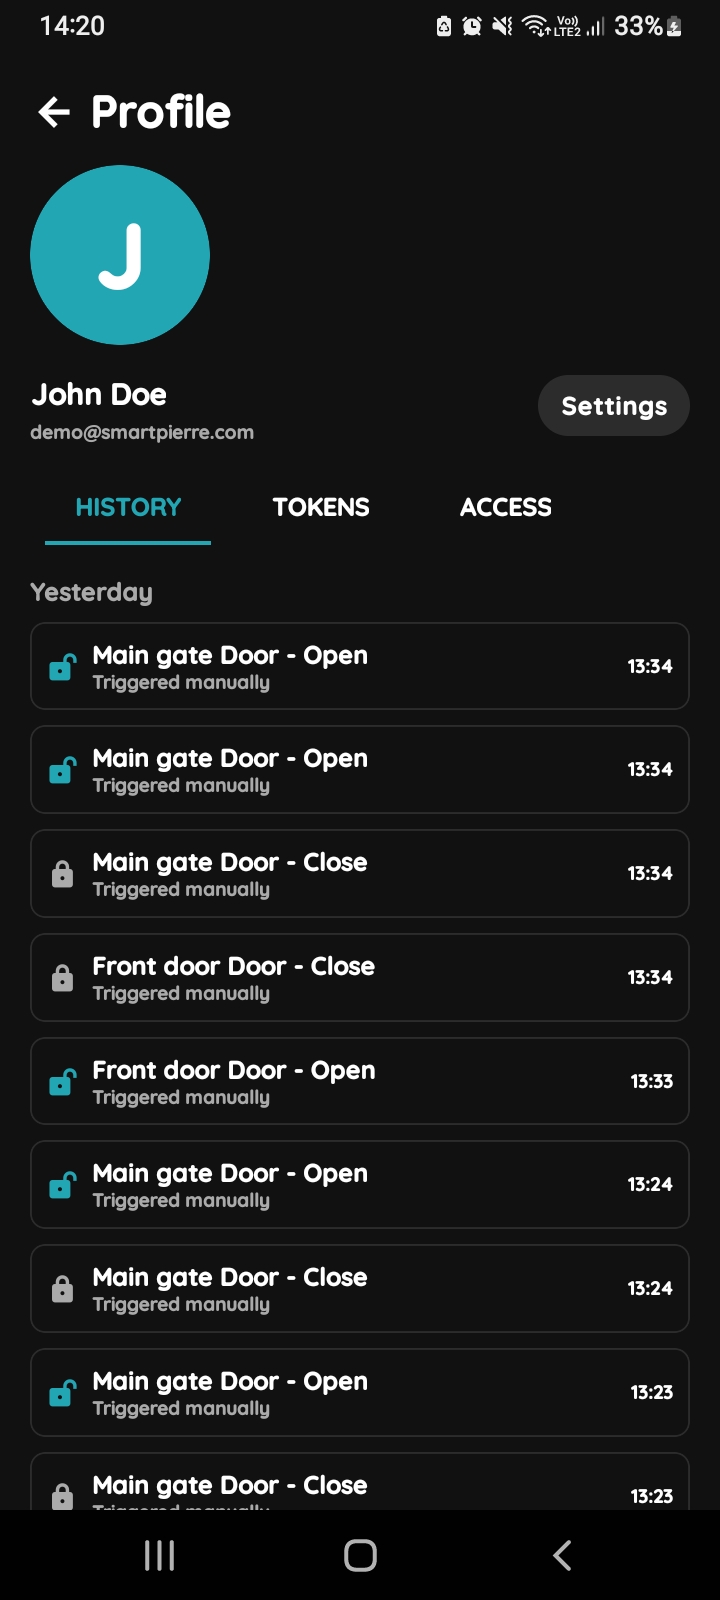
Open Your Profile, History, Tokens, Access
History is displayed for your profile. This is a list of all the I/Os that you triggered during time.
Tabs Tokens and Access are available here, too. is displayed for your profile. This is a list of all the I/Os that you triggered during time.
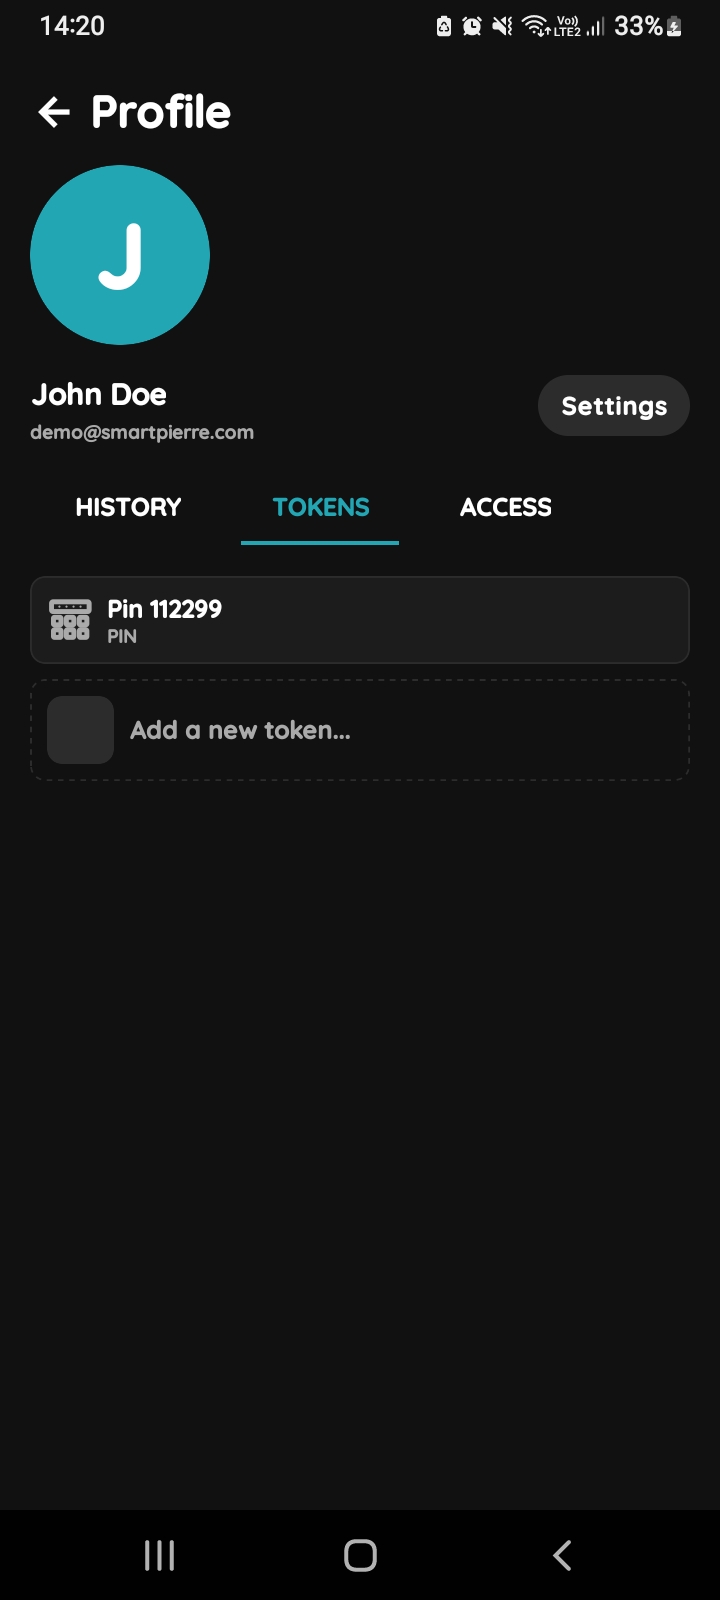
Add Tokens - Your Profile
Tap on the Tap on the Tokens tab and tap on the Add a new token.
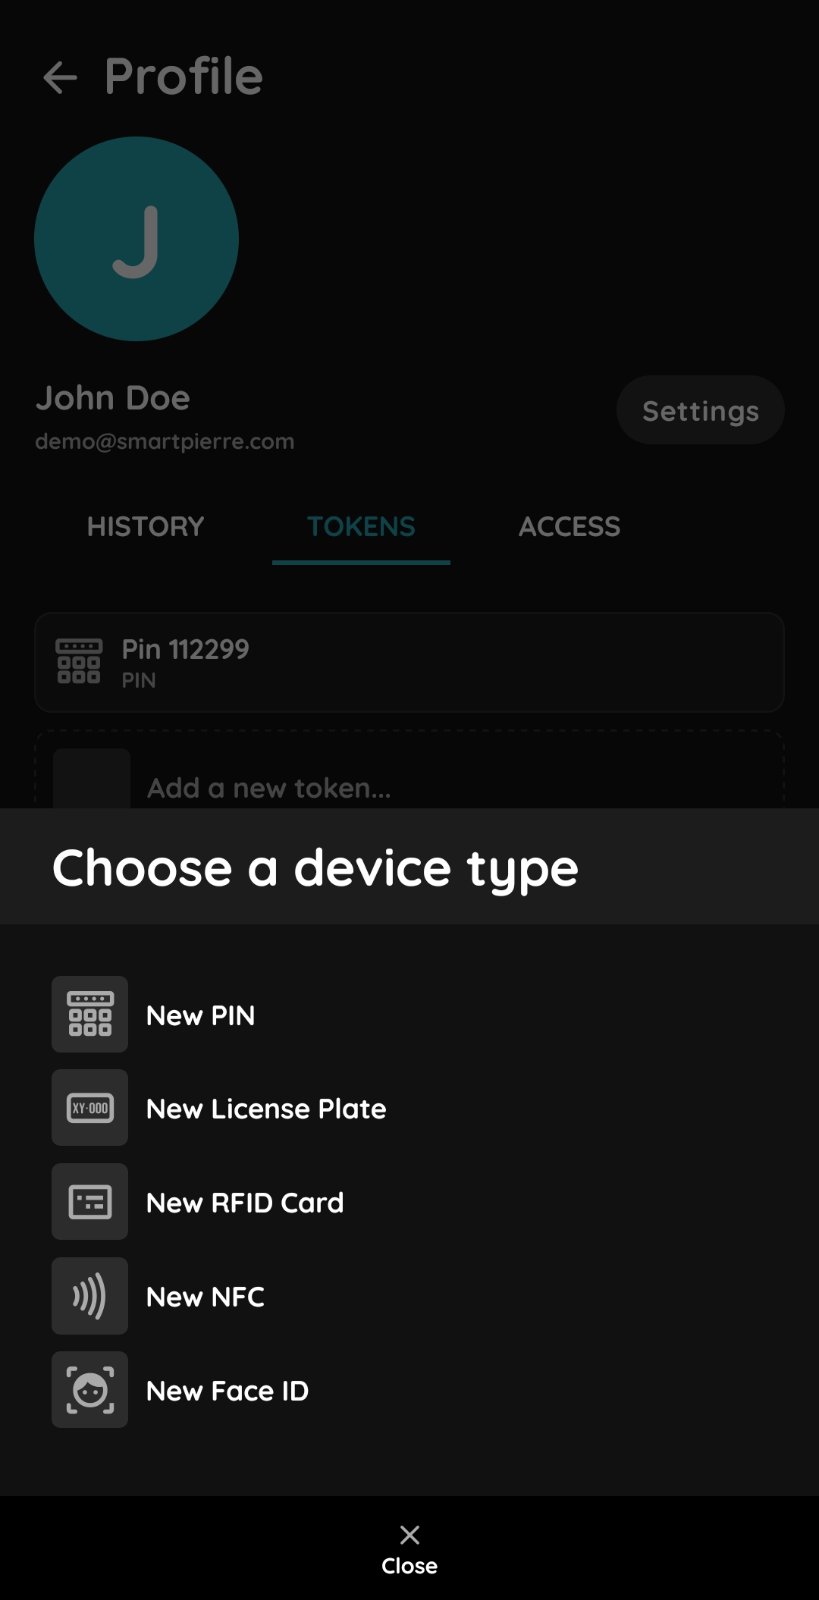
Choose a device type
Choose a device type - Tap on a New PIN.
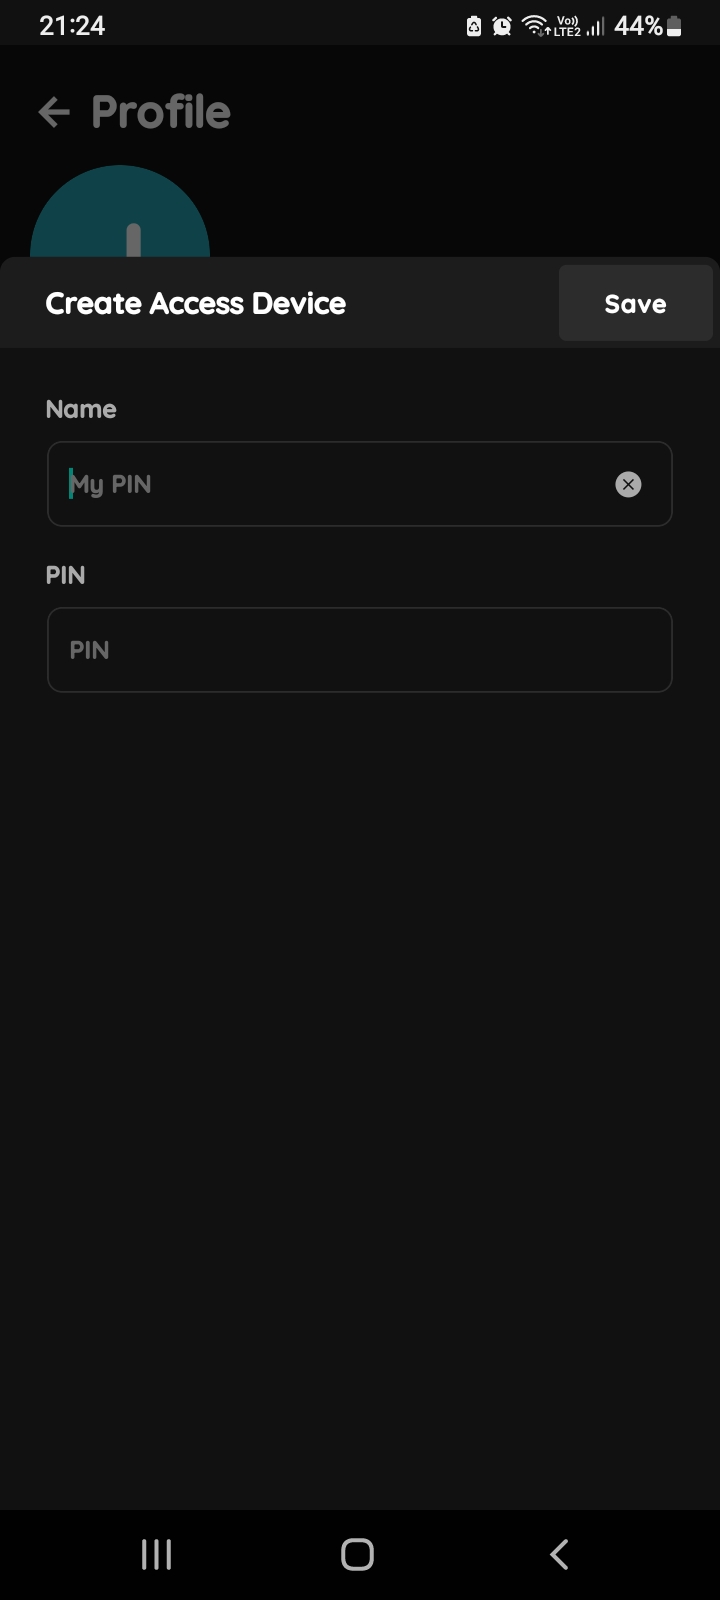
Create Access Device - RFID PIN - Your Profile
Fill the form:
- Name - Write name of the PIN.
- PIN - Write the number of your PIN in this field.
Tap on button Save.
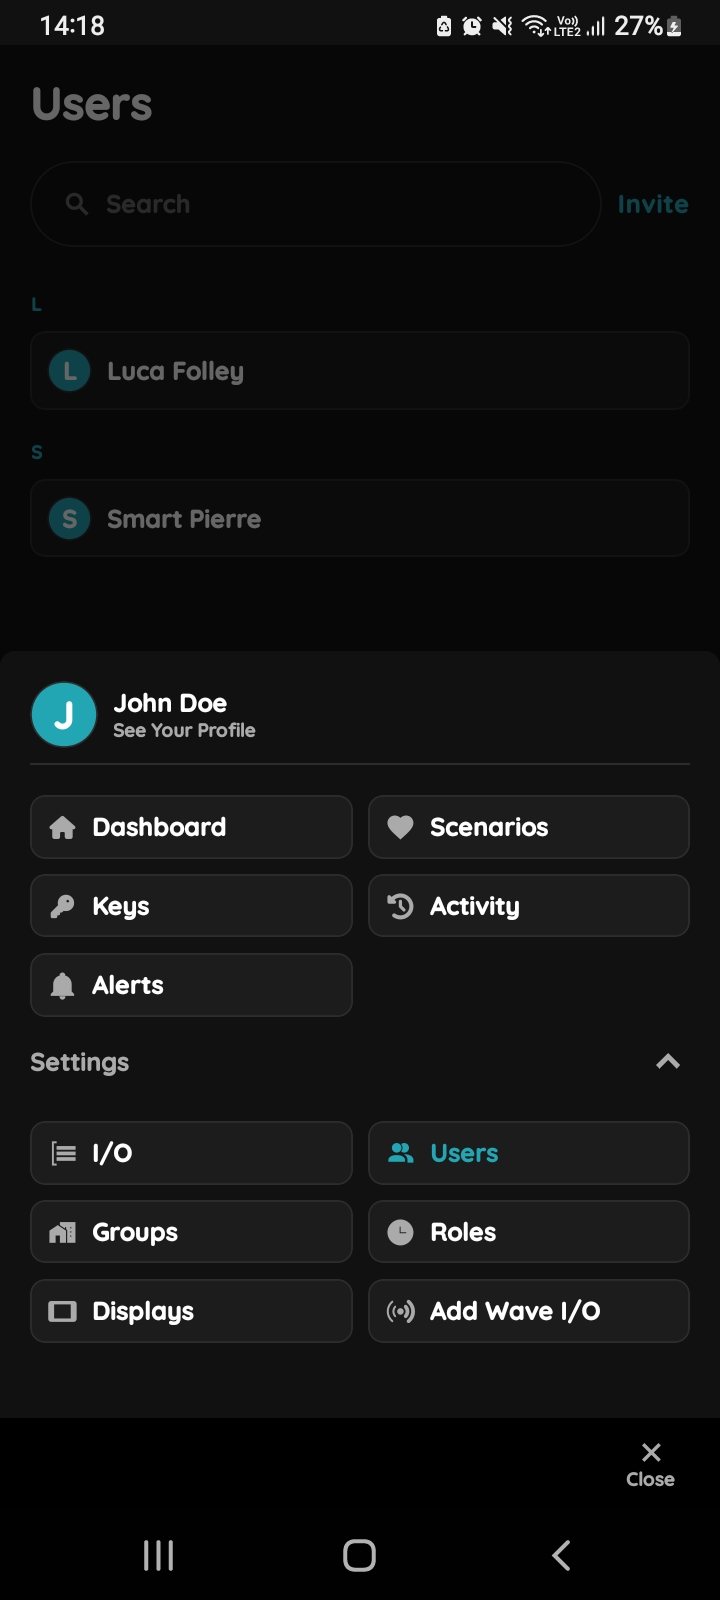
Open Users list
You can add New Licence Plate Access for the other User. First step is to open Menu list.
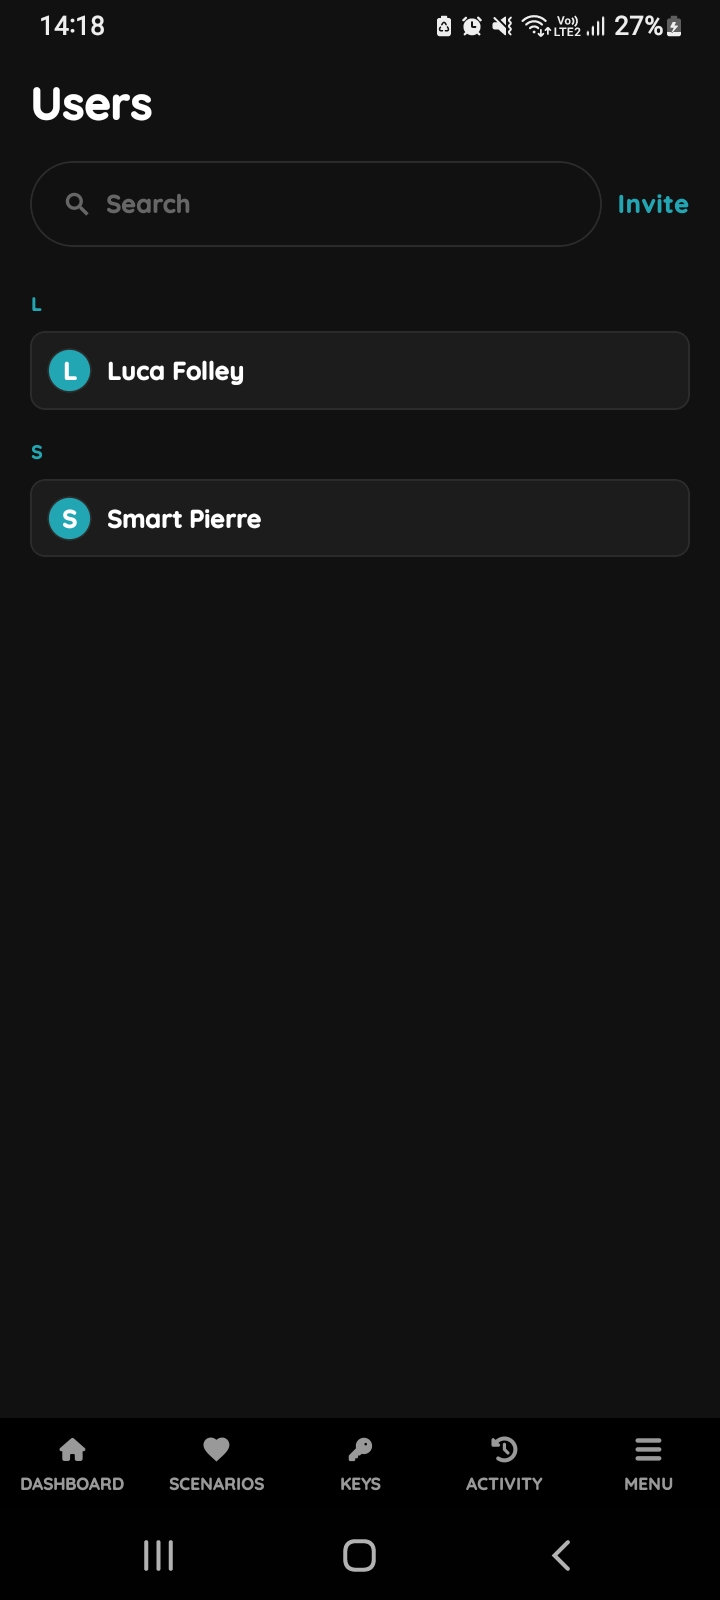
Users list
List of the Users is shown. Select the User from the list (tap on the name).
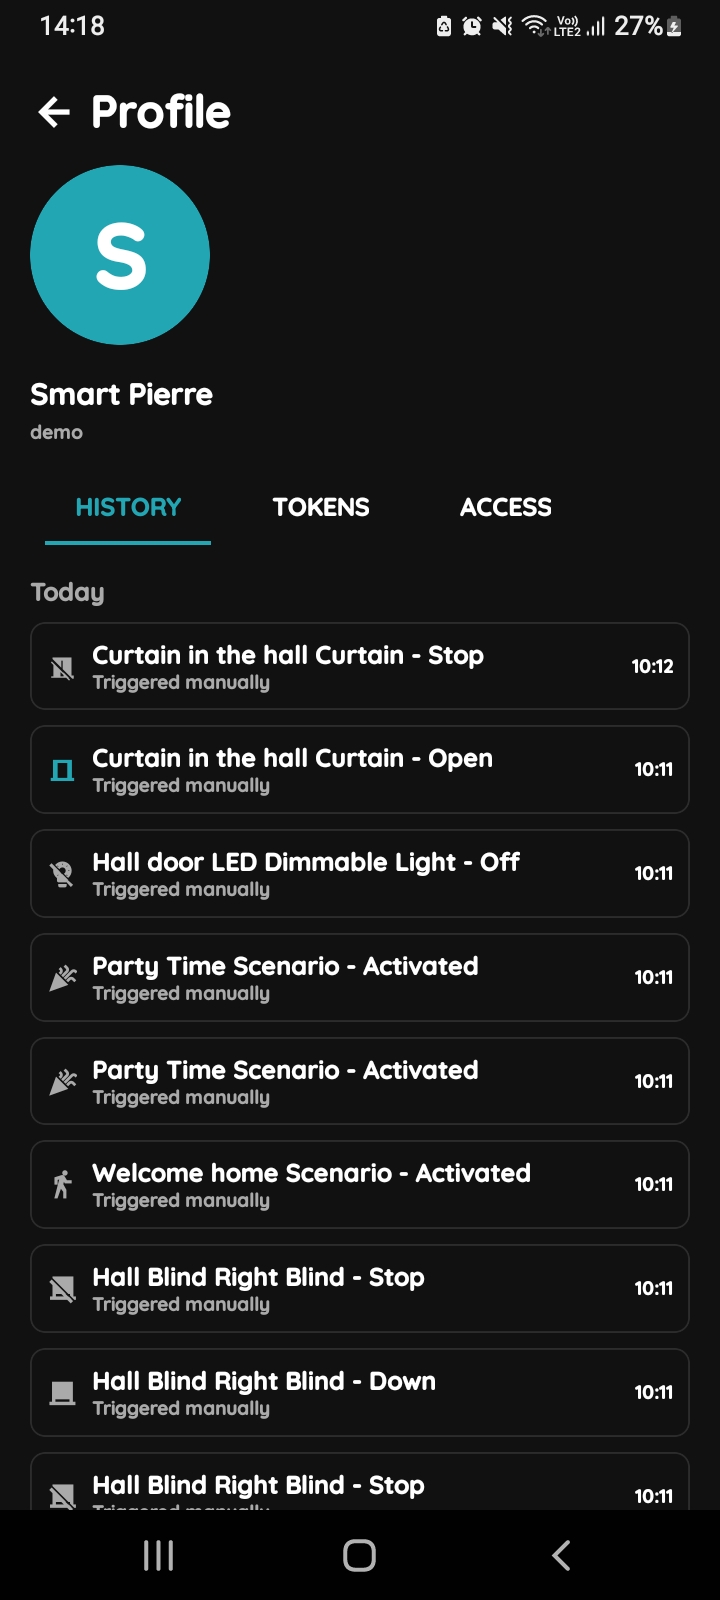
Open Profile, History, Tokens, Access
- History is displayed - It shows a list of all the I/Os that are activated during time by this User.
- Tokens are used to add a new token (New RFID card, New Licence Plate, New PIN).
- Access - Here are displayed details about the Role of the selected User. Also here can be added new role to the selected User.
To change the User's picture, tap on the current picture. To add Tokens, tap on the Tokens tab. To set the User's access permissions, tap on the Access tab.
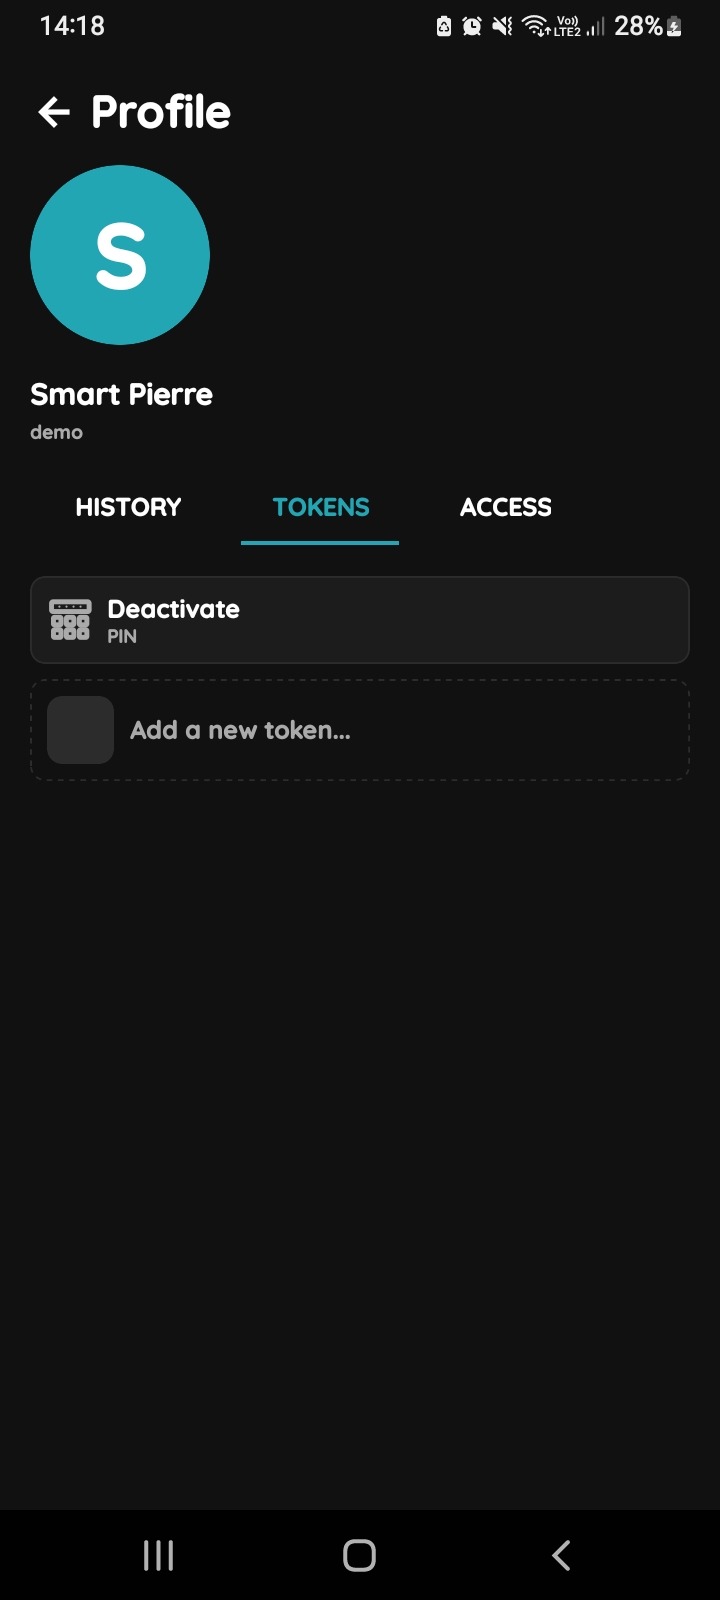
Add Tokens
Tap on the Tokens tab and tap on the Add a new token.
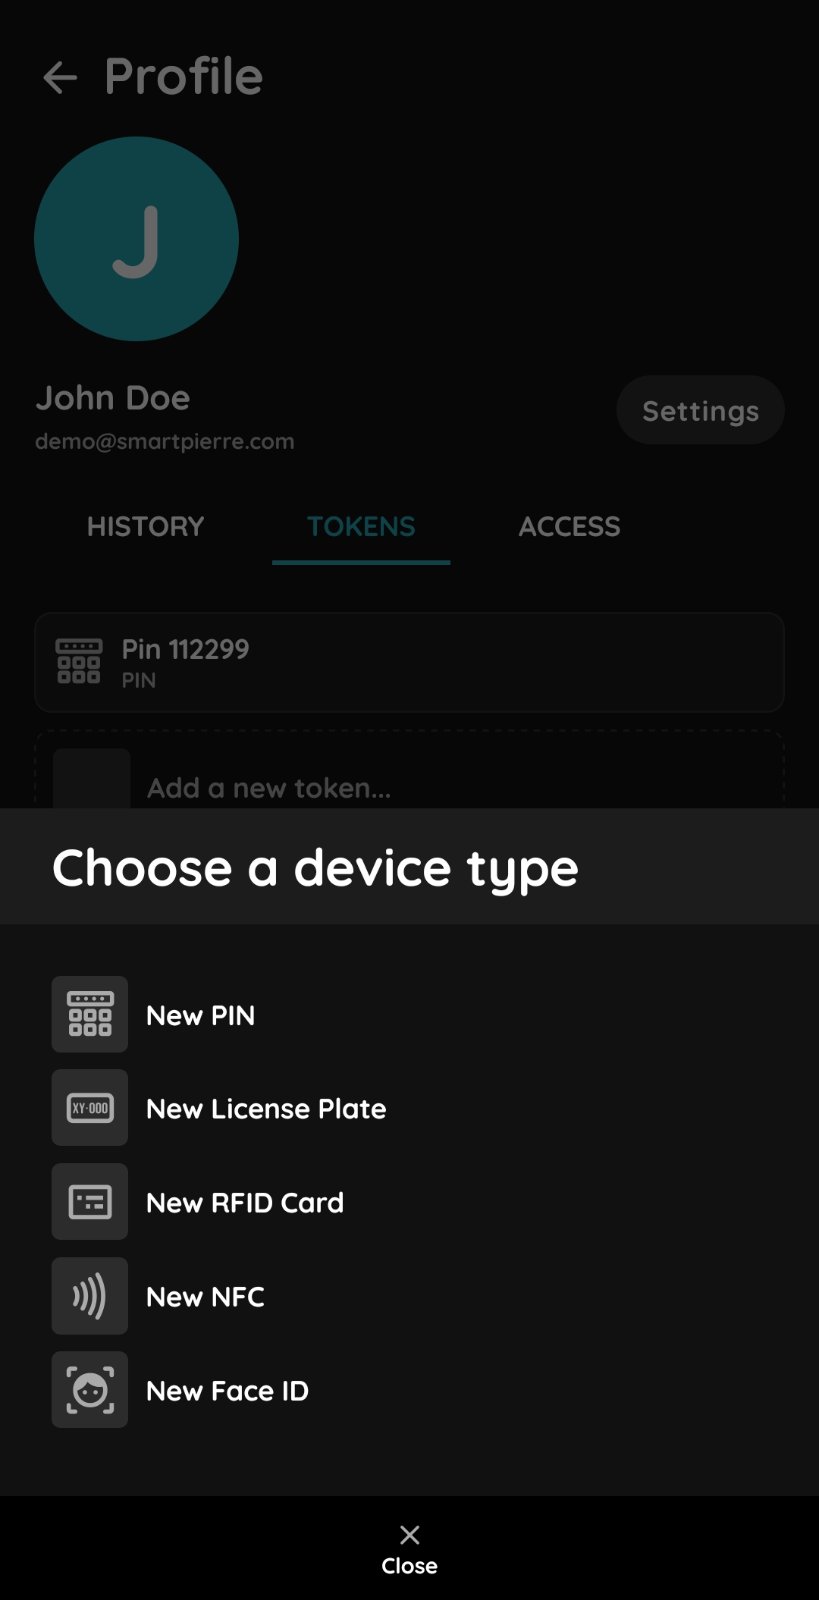
Choose a device - New Licence Plate
Choose a device type - Tap on a New Licence Plate.
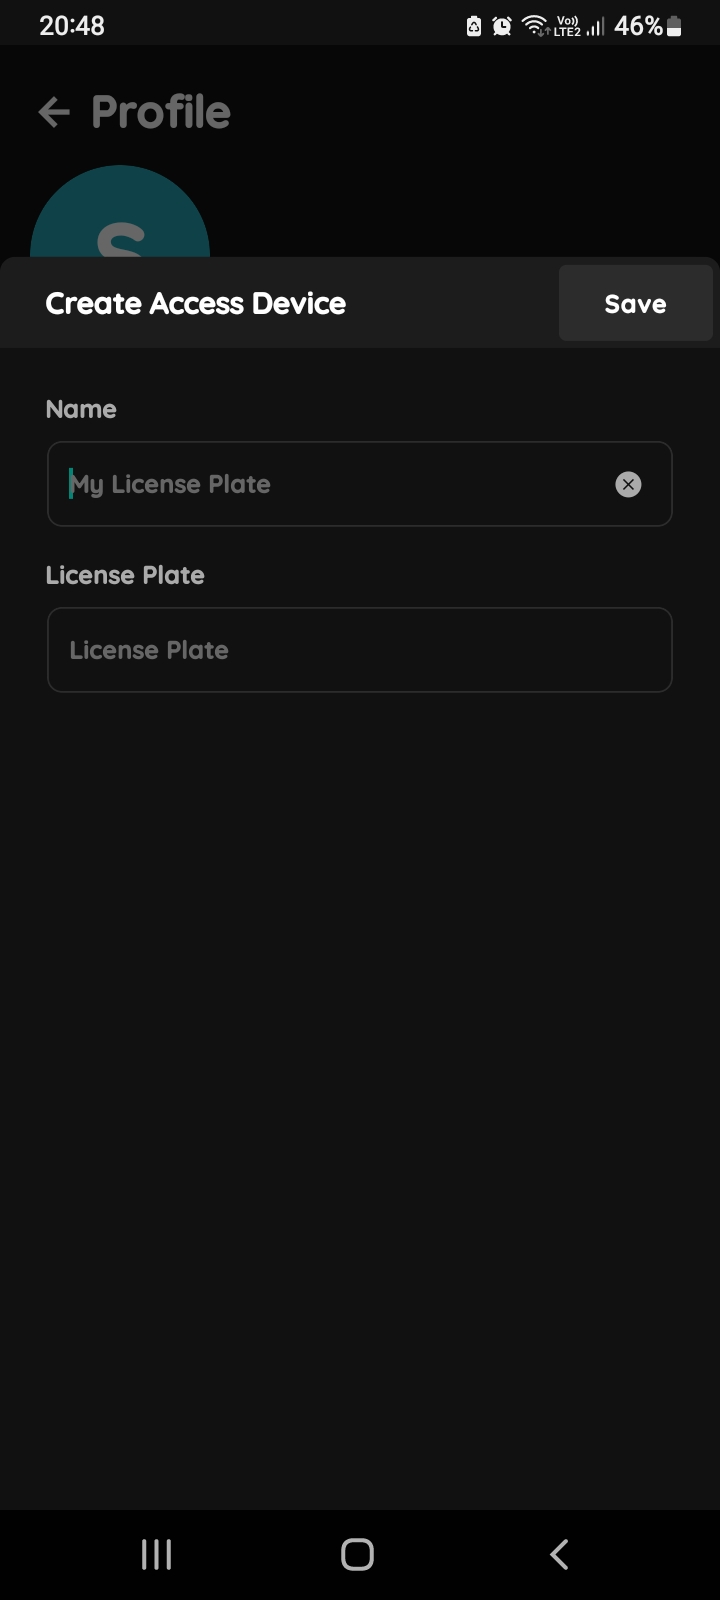
Create Access Device - New Licence Plate
Fill the form:
- Name - Write name of the Licence plate.
- Licence plate - Write the number of the licence plate.
Tap button Save.
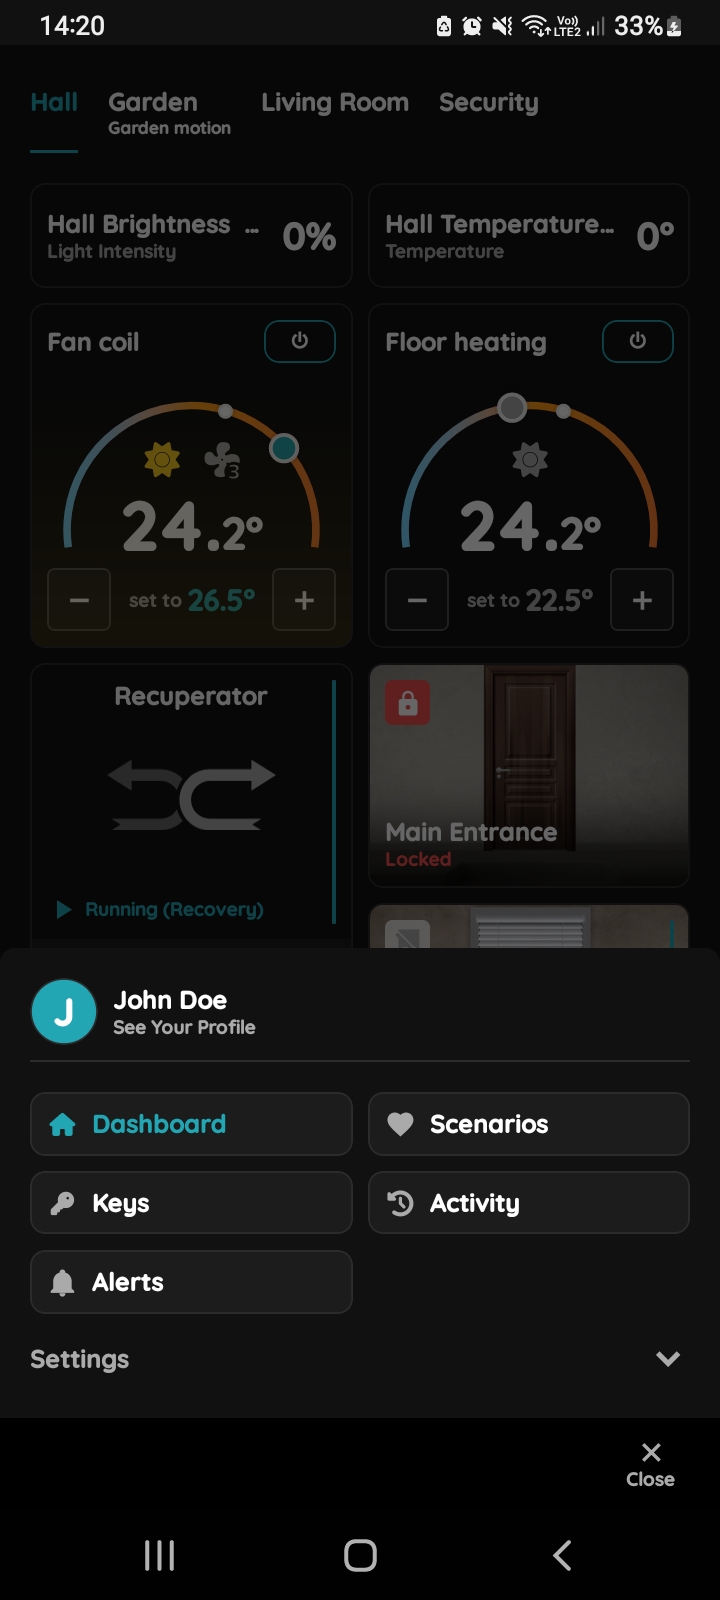
Open Your Users' Profile
You can add access to your New Licence plate from Your User's Profile.
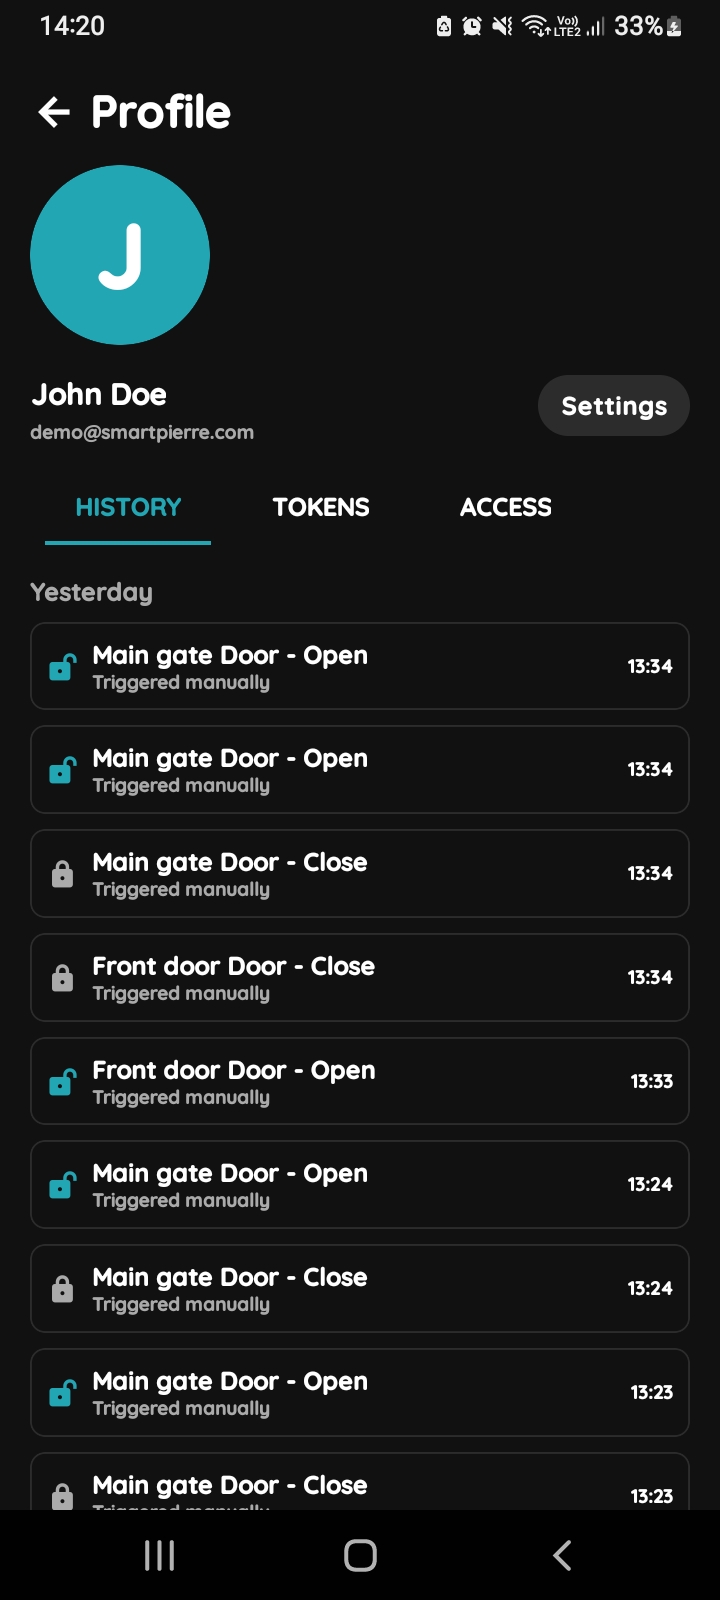
Open Your Profile, History, Tokens, Access
History is displayed for your profile. This is a list of all the I/Os that you triggered during time.
Tabs Tokens and Access are available here, too. is displayed for your profile. This is a list of all the I/Os that you triggered during time.
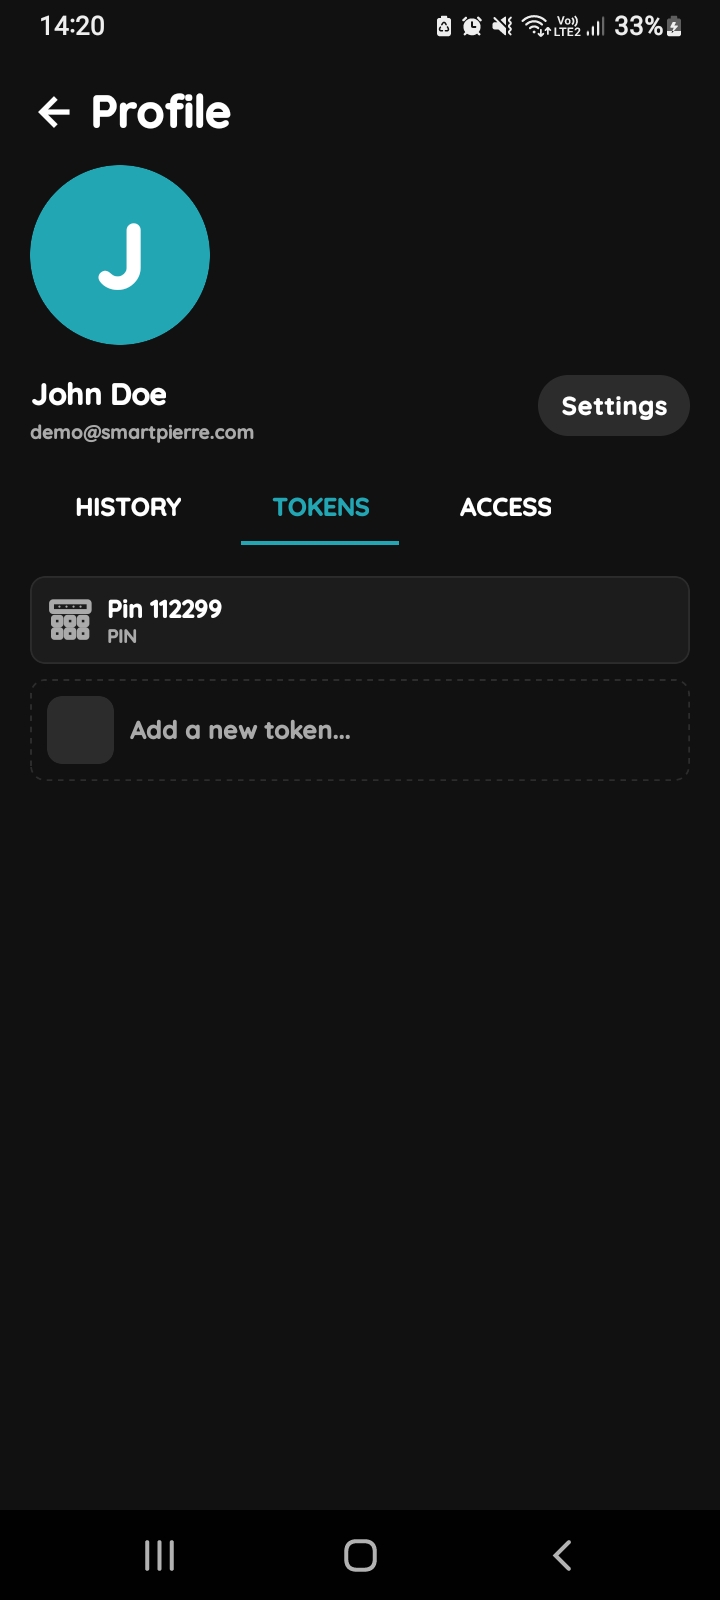
Add Tokens - Your Profile
Tap on the Tap on the Tokens tab and tap on the Add a new token.
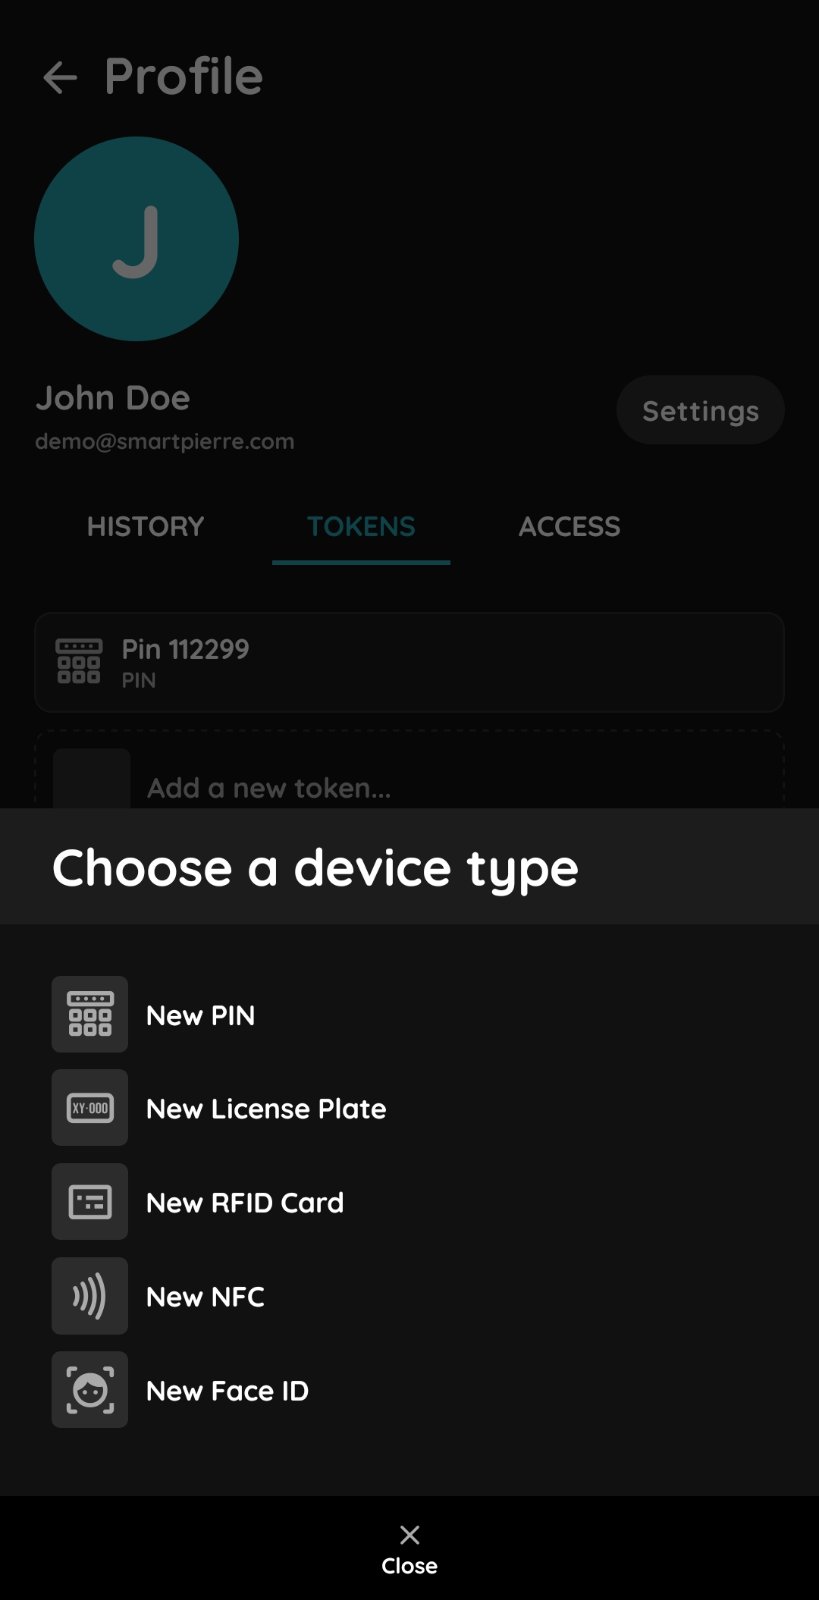
Choose a device type
Choose a device type that you would like to add - Tap on a New Licence Plate/RFID card/Licence plate.
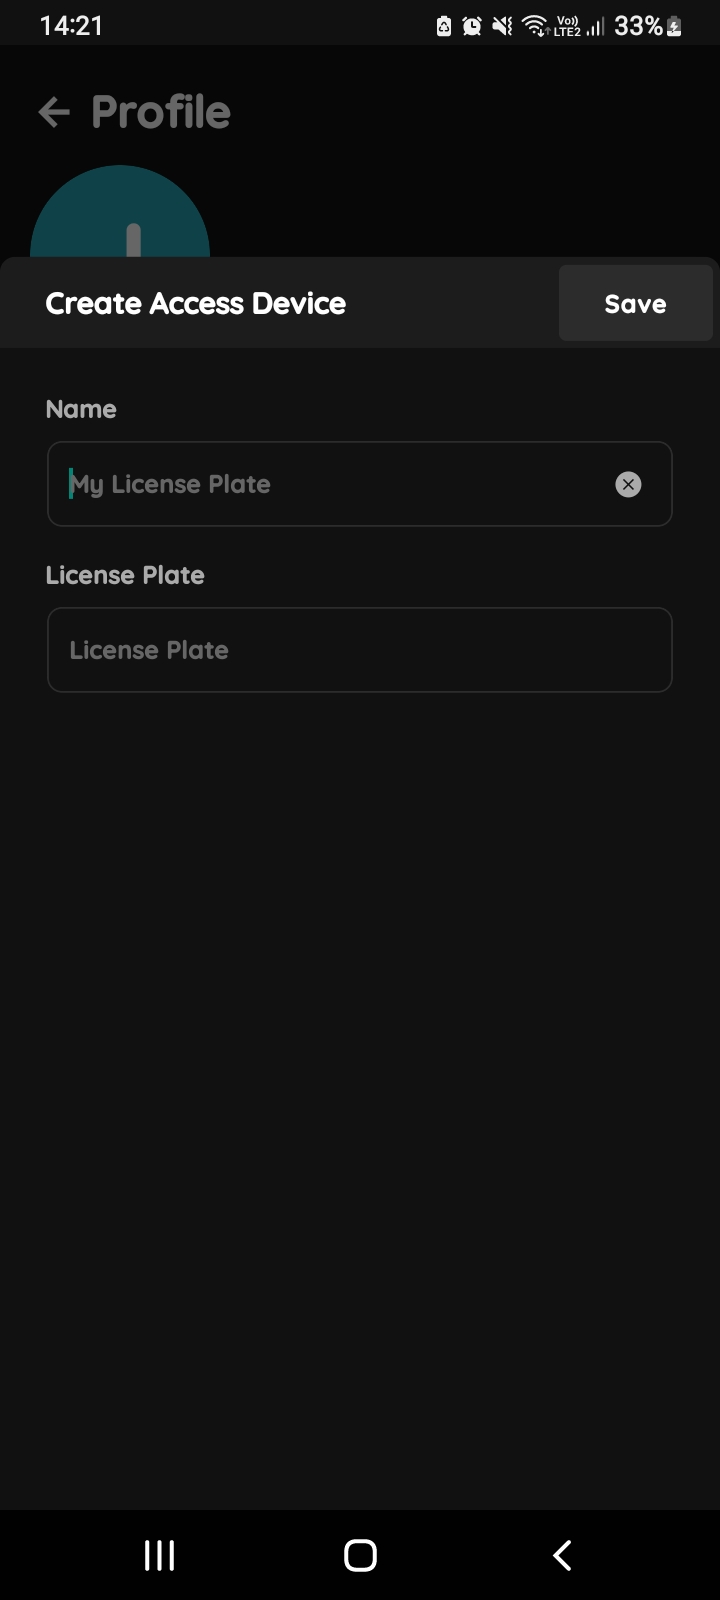
Create Access Device - Your Profile - Licence Plate
Fill the form:
- Name - Write name of the Licence Plate.
- Licence Plate field - Write the number of the Licence Plate.
Tap button Save.
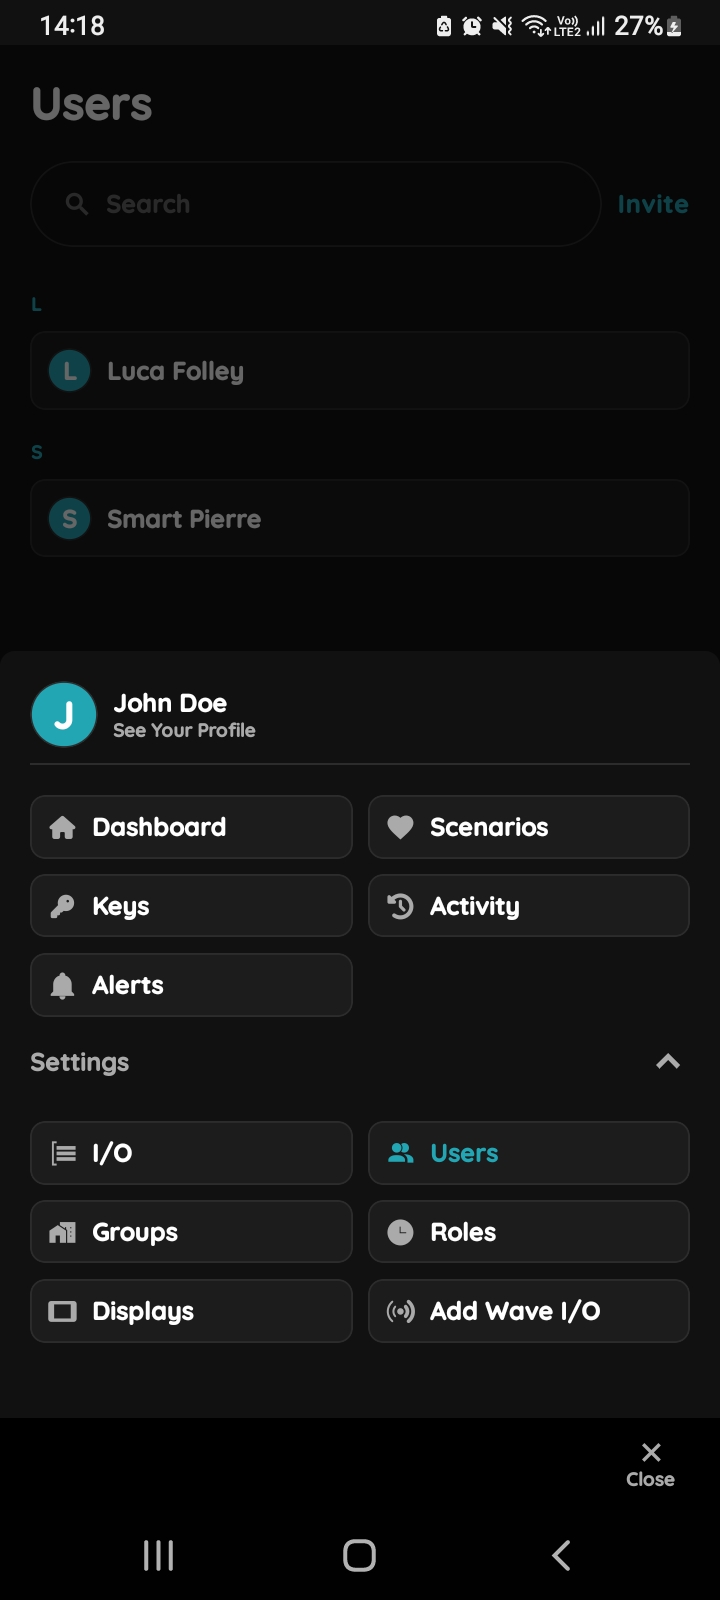
Open Users list
You can add RFID card to other User. First step is to open Menu list.
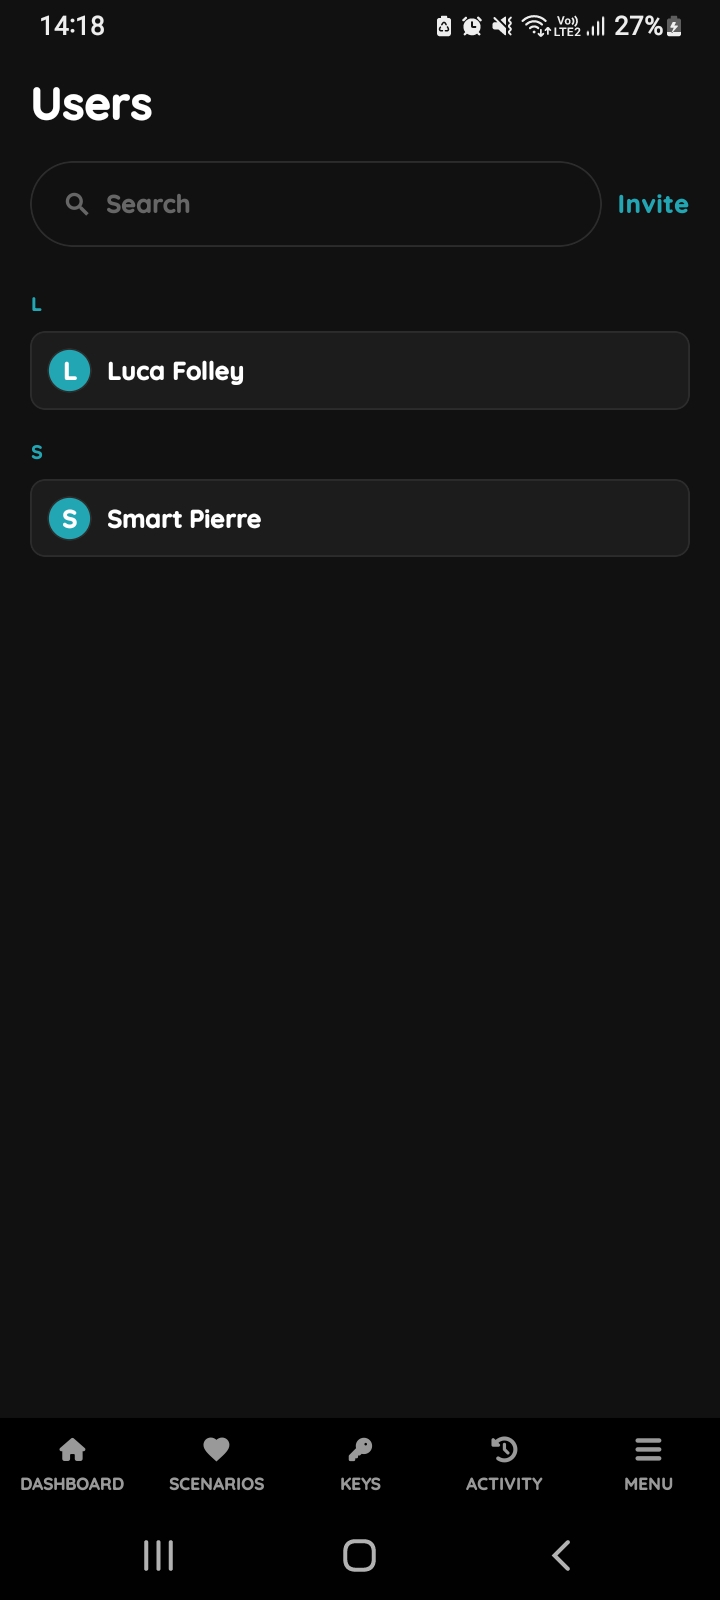
Users list
List of the Users is shown. Select the User from the list (tap on the name).
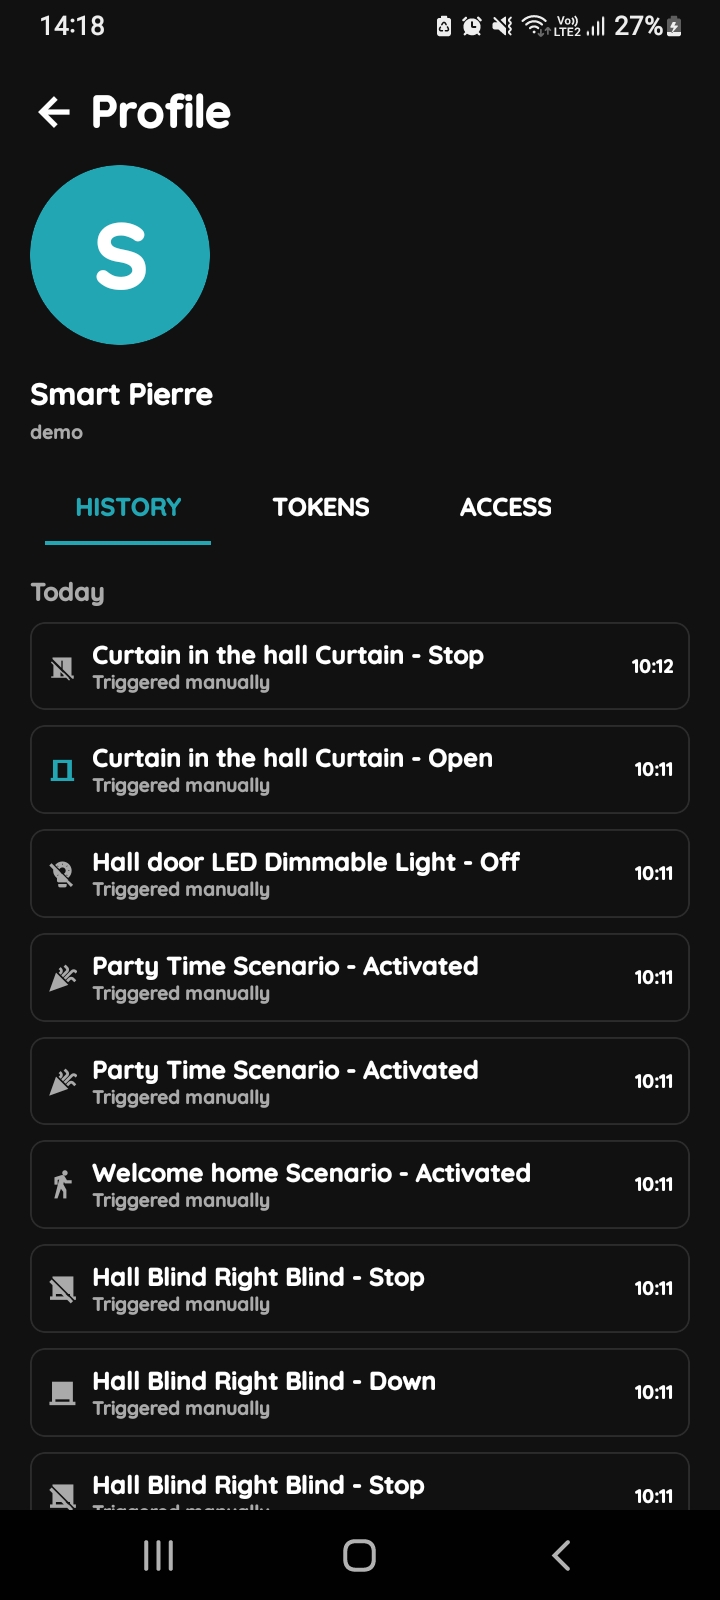
Open Profile, History, Tokens, Access
- History is displayed - It shows a list of all the I/Os that are activated during time by this User.
- Tokens are used to add a new token (New RFID card, New Licence Plate, New PIN).
- Access - Here are displayed details about the Role of the selected User. Also here can be added new role to the selected User.
To change the User's picture, tap on the current picture. To add Tokens, tap on the Tokens tab. To set the User's access permissions, tap on the Access tab.
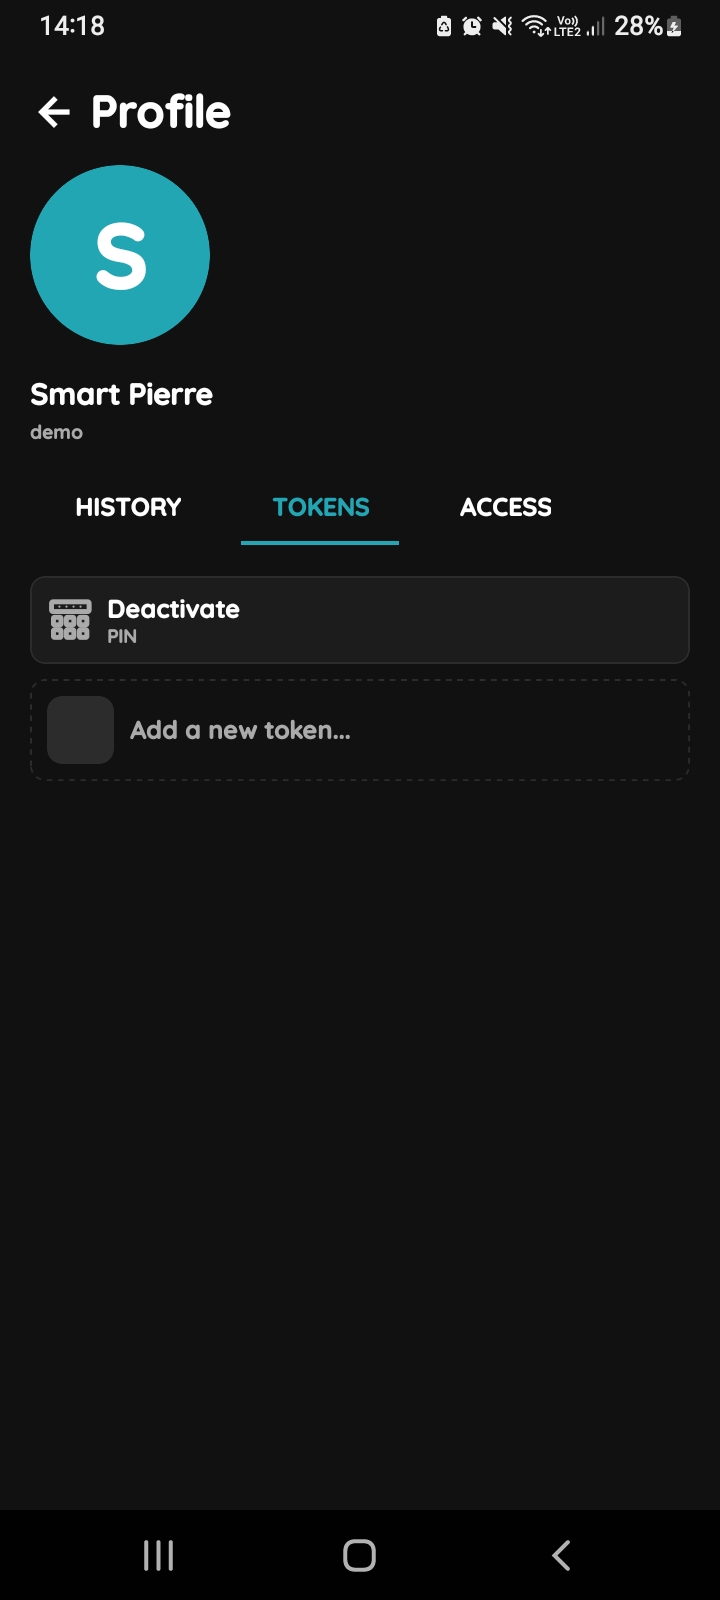
Add Tokens
Tap on the Tokens tab and tap on the Add a new token.
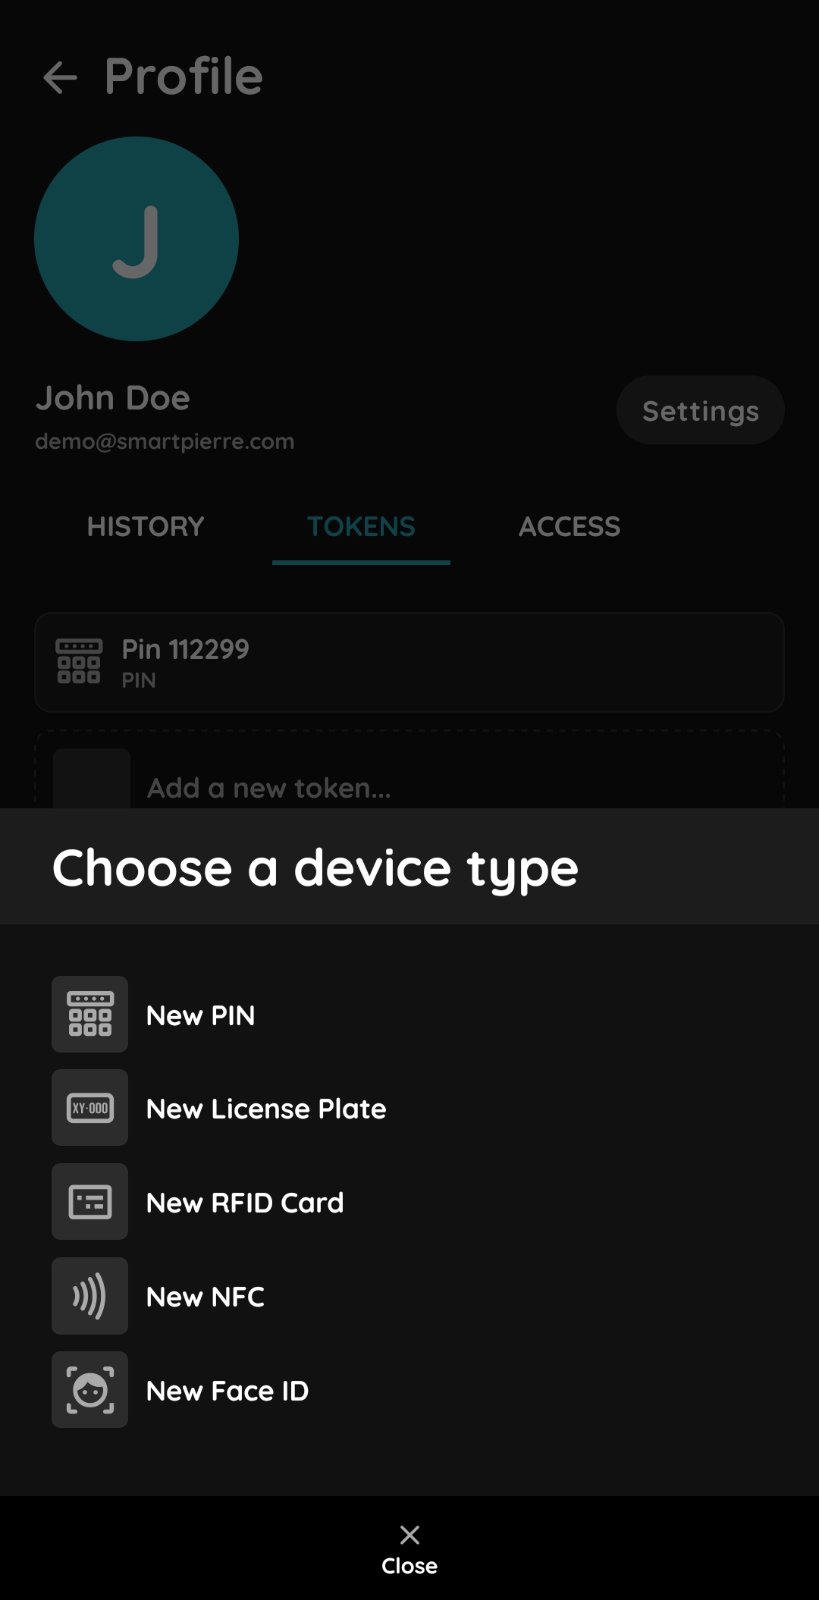
Choose a device type - RFID card
Tap on the New RFID card from the list.
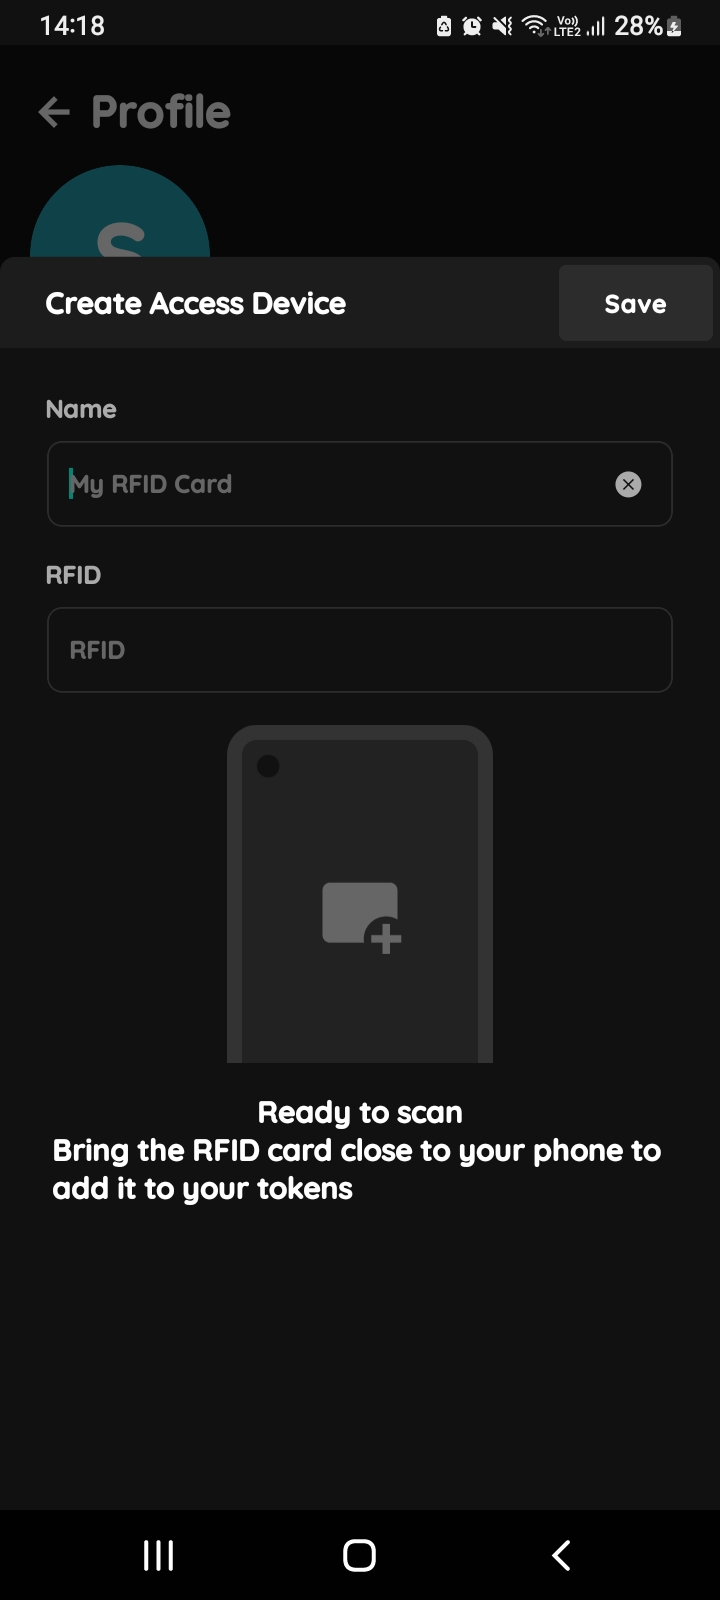
Create Access Device-RFID Card
Fill the form:
- Name - Write name of the RFID card.
- RFID field will be filled when you bring the RFID card close to your phone in order to add it to your tokens.
Tap button Save.
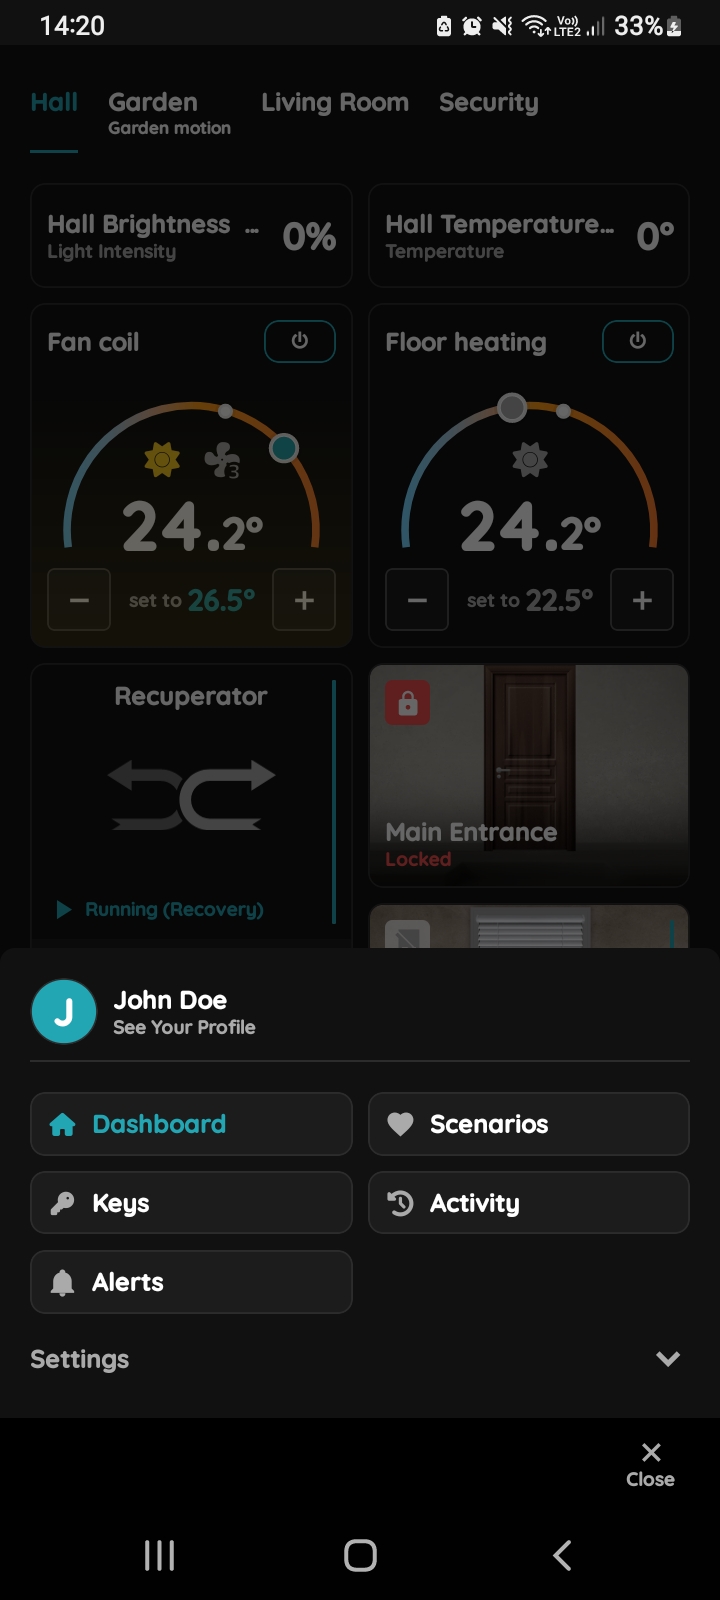
Open Your Users' Profile
You can add your RFID card from Your User's Profile.
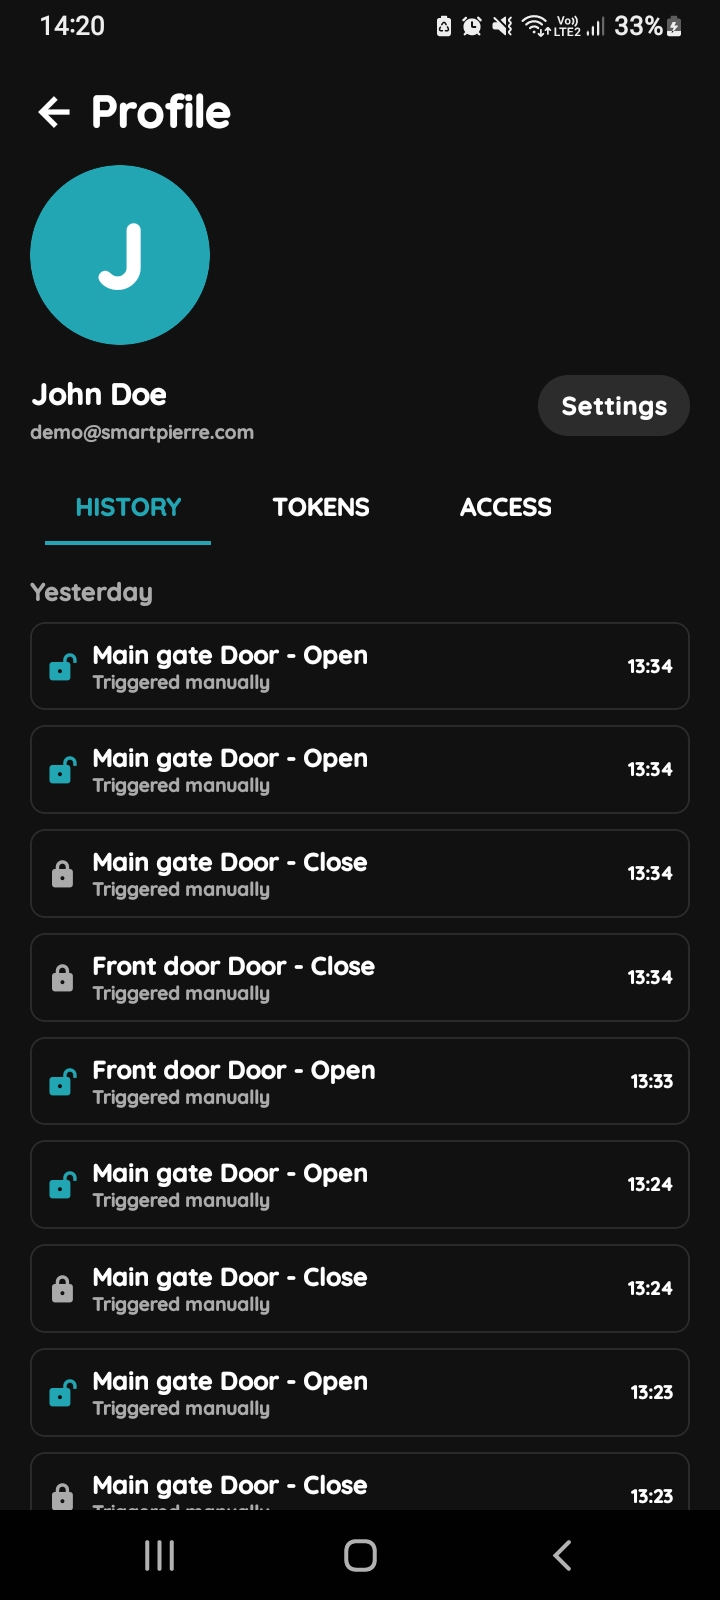
Open Your Profile, History, Tokens, Access
History is displayed for your profile. This is a list of all the I/Os that you triggered during time.
Tabs Tokens and Access are available here, too. is displayed for your profile. This is a list of all the I/Os that you triggered during time.
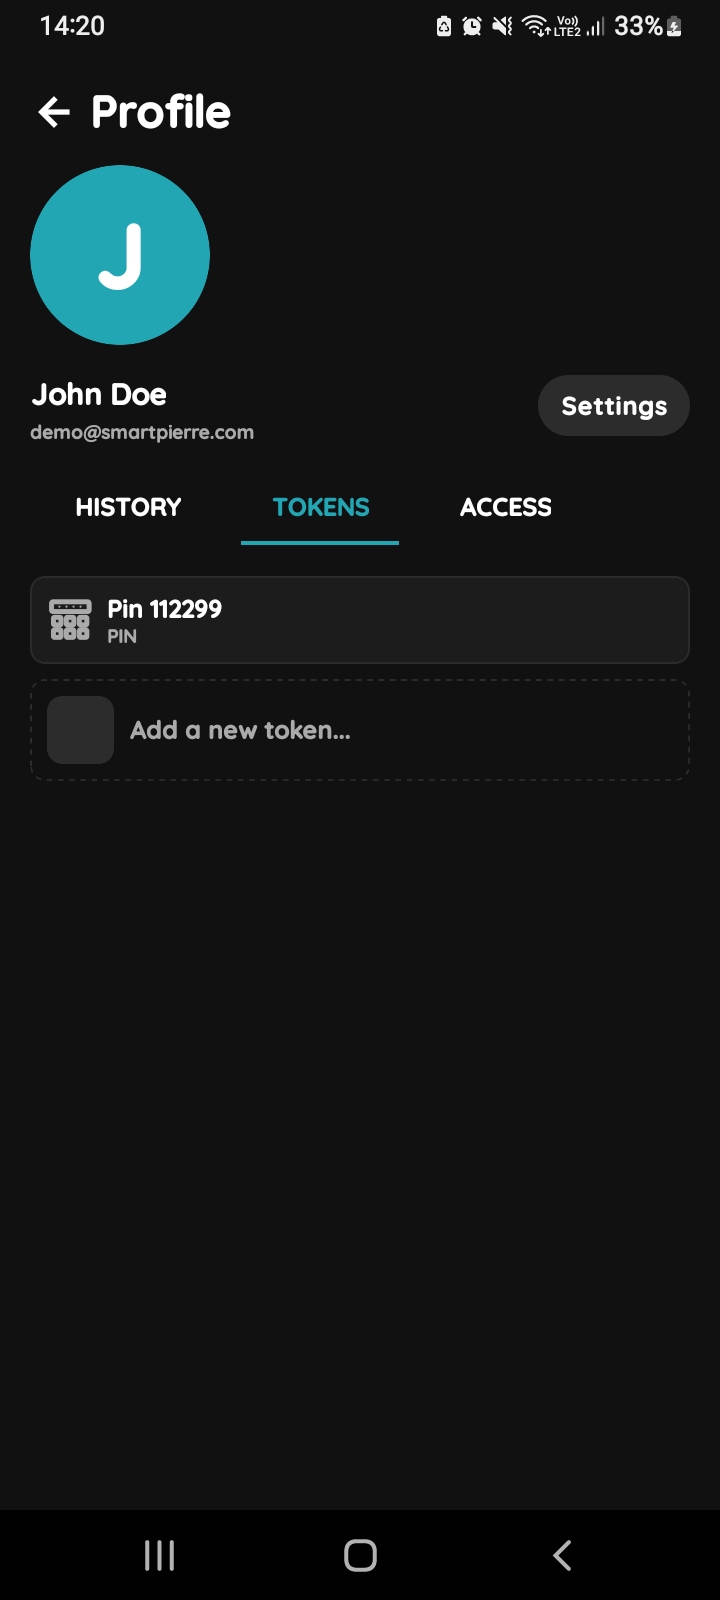
Add Tokens - Your Profile
Tap on the Tap on the Tokens tab and tap on the Add a new token.
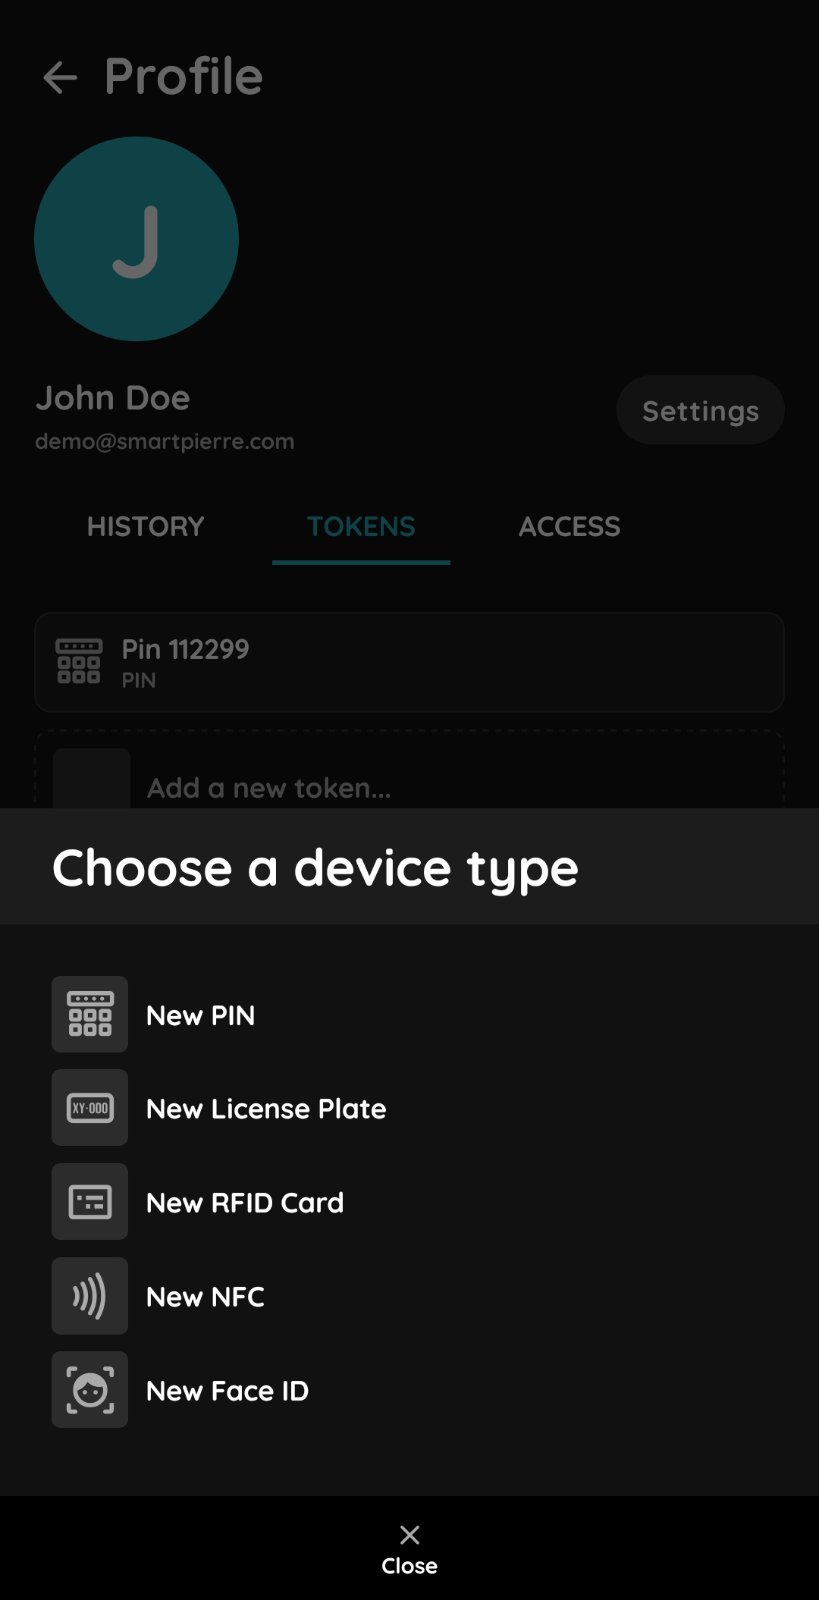
Choose a device type
Choose a device type that you would like to add - Tap on a RFID card.
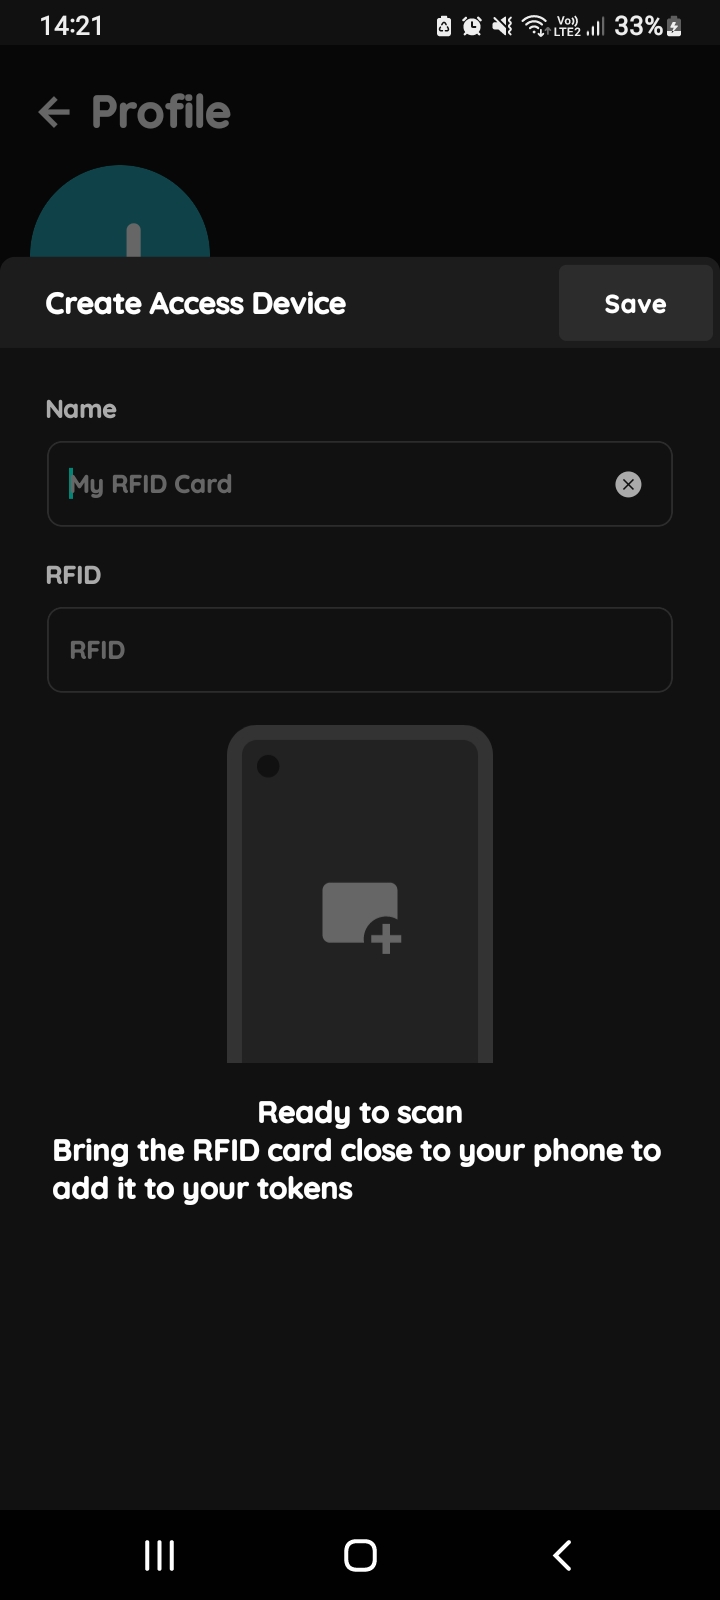
Create Access Device - Your Profile - RFID card
Fill the following form:
- Name - Write name of the RFID card.
- RFID field will be filled when you bring the RFID card close to your phone in order to add it to your tokens.
Tap button Save.
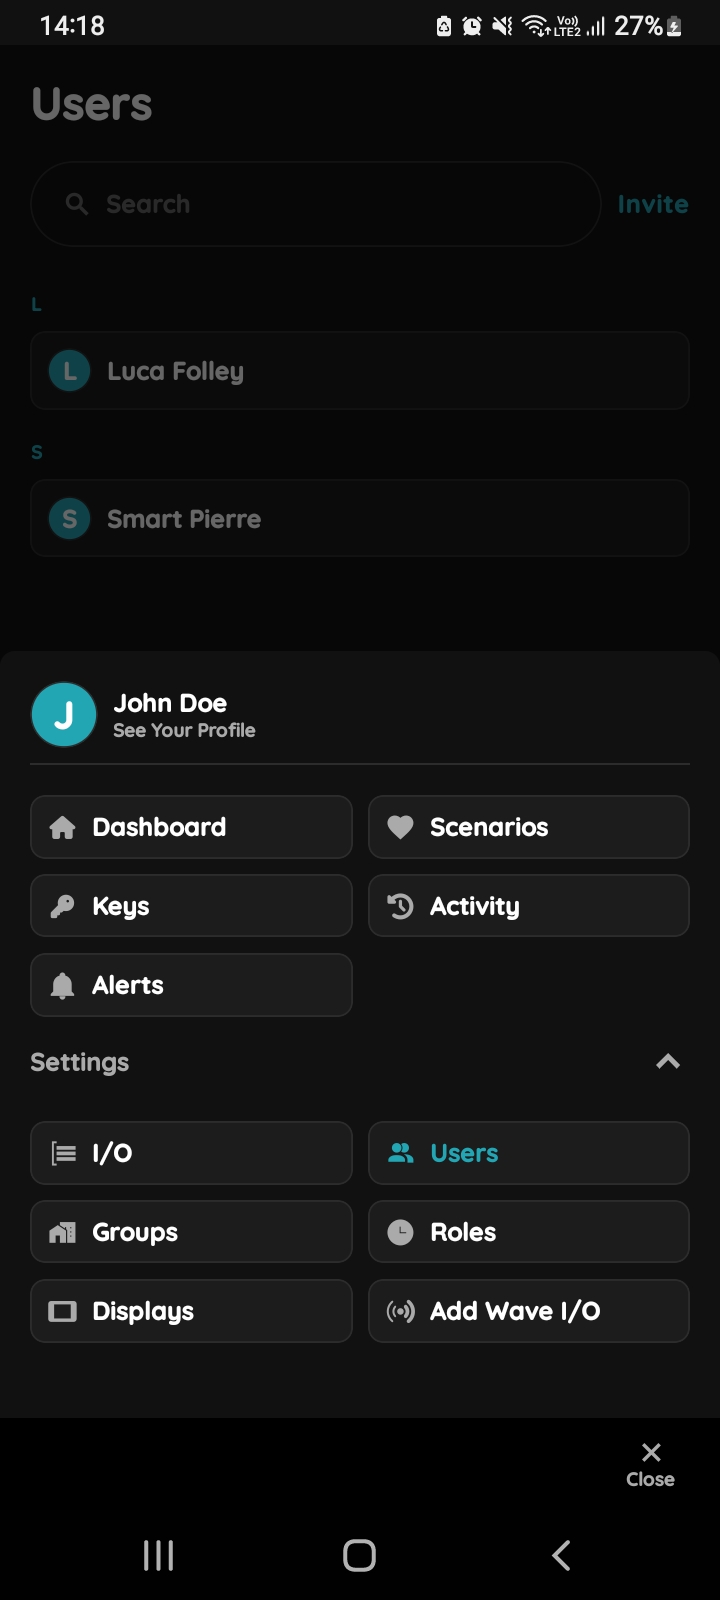
Open Users list
In order to regulate access for the Users, select the Menu.
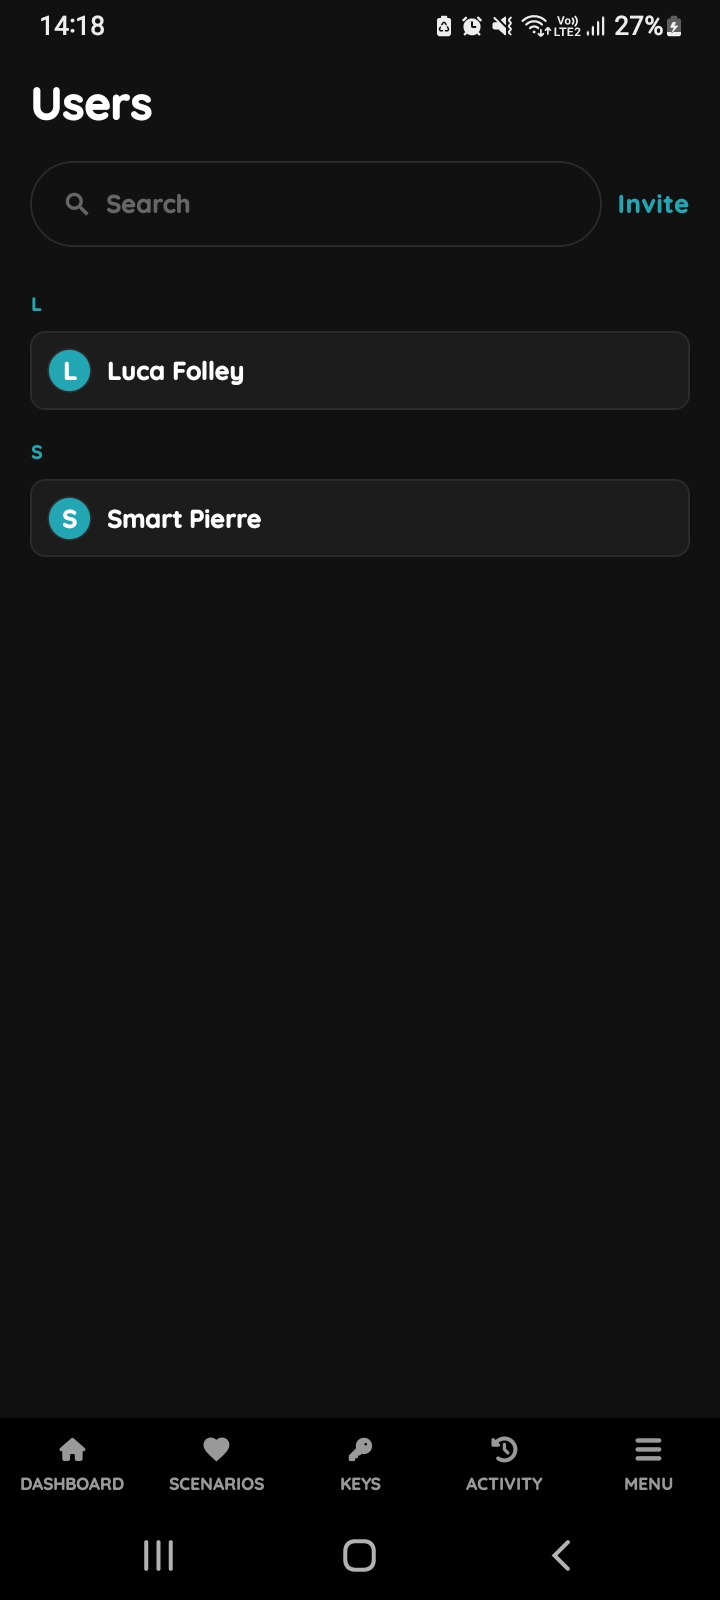
Users list
List of the Users is shown. Select the User from the list (tap on the name).
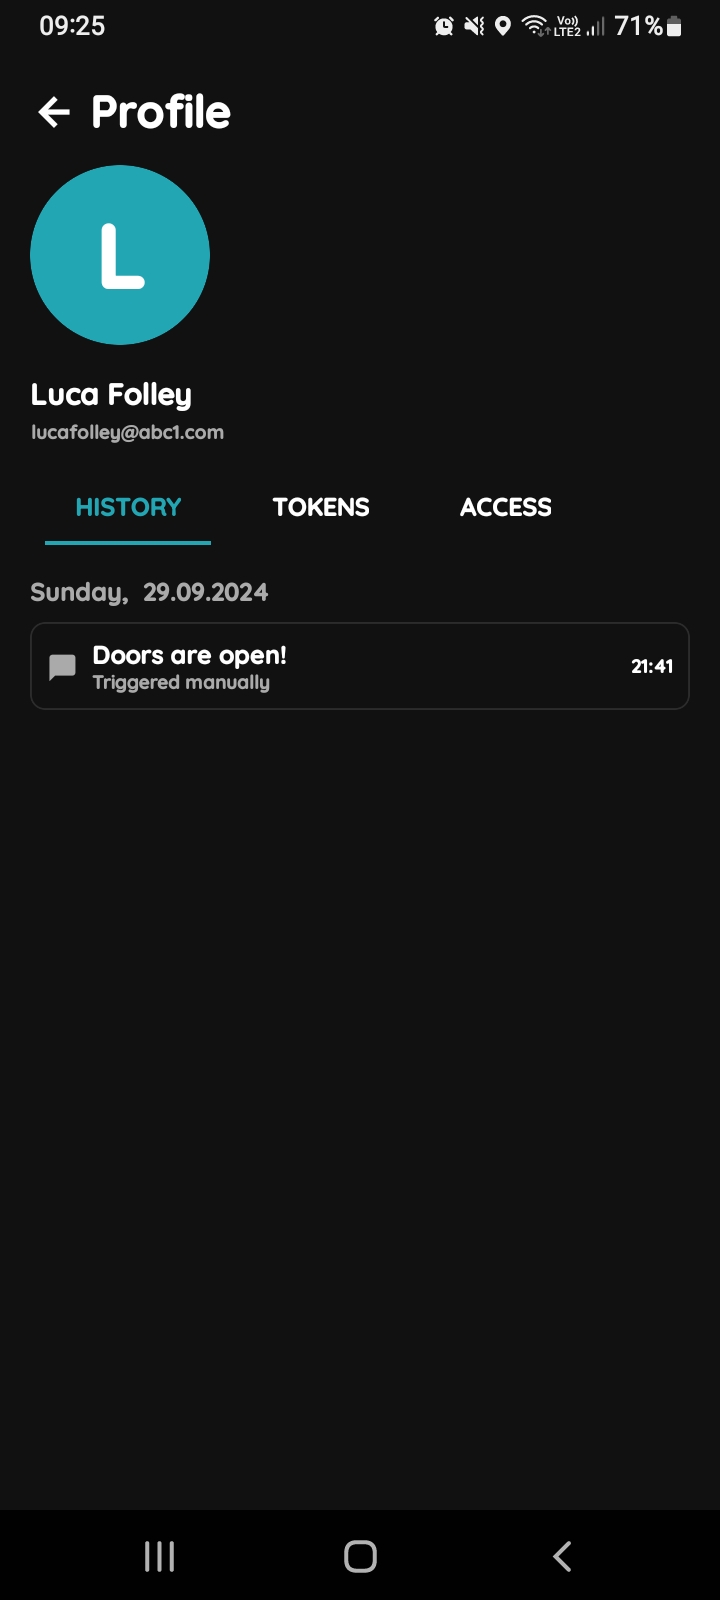
Profile of the User
Three tabs are shown:
- History - A record of all I/Os triggered by the User over time.
- Tokens - A list of all Tokens associated with the User.
- Access - A list of the User's role-based access permissions.
Tap on the Access tab.
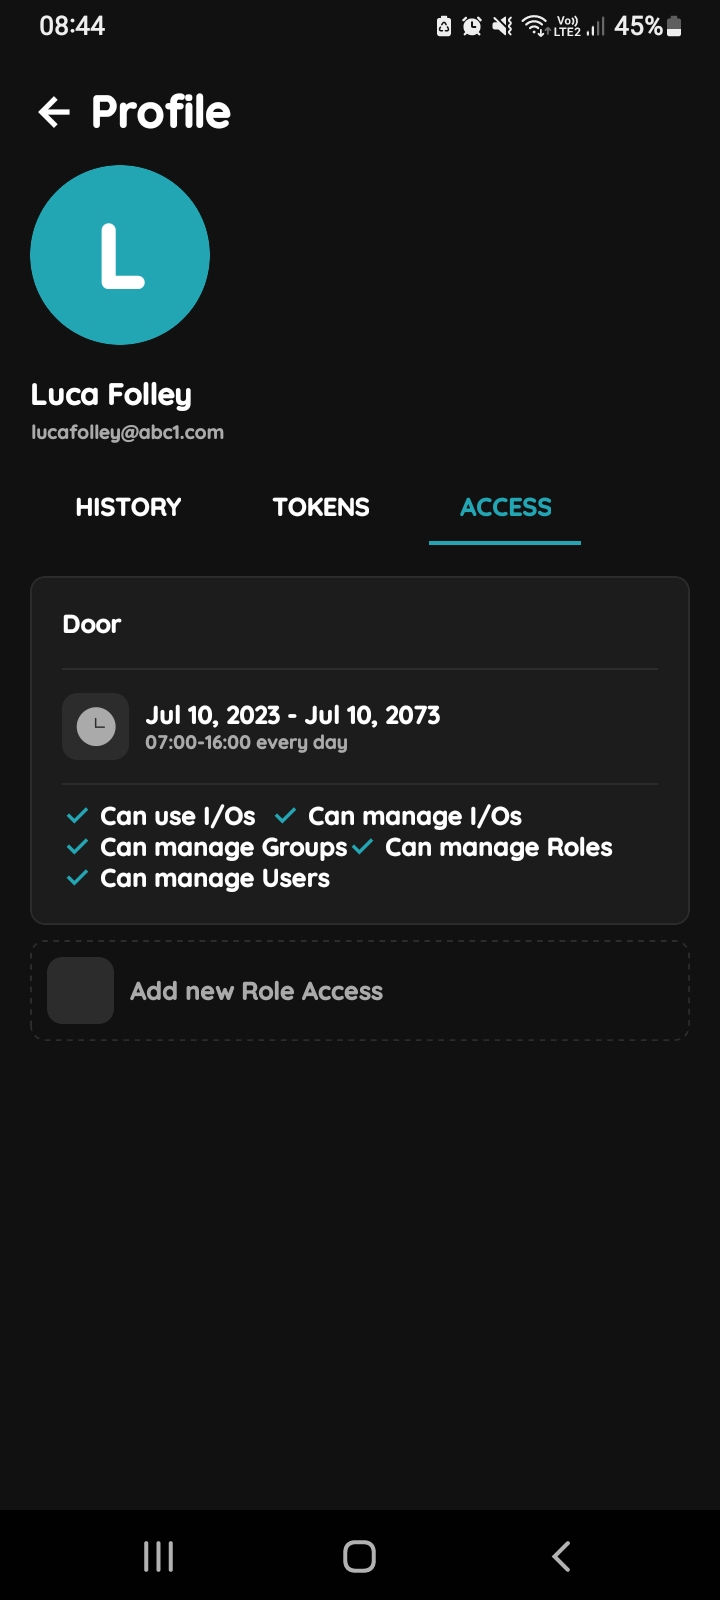
Role Access
Here is displayed list of Roles that is added to User with permissions. Also, there is ability to Add new Role Access.
When you tap on the Role from the list you can edit access of the Role.
In this example, Luca Folley has role with name Door.
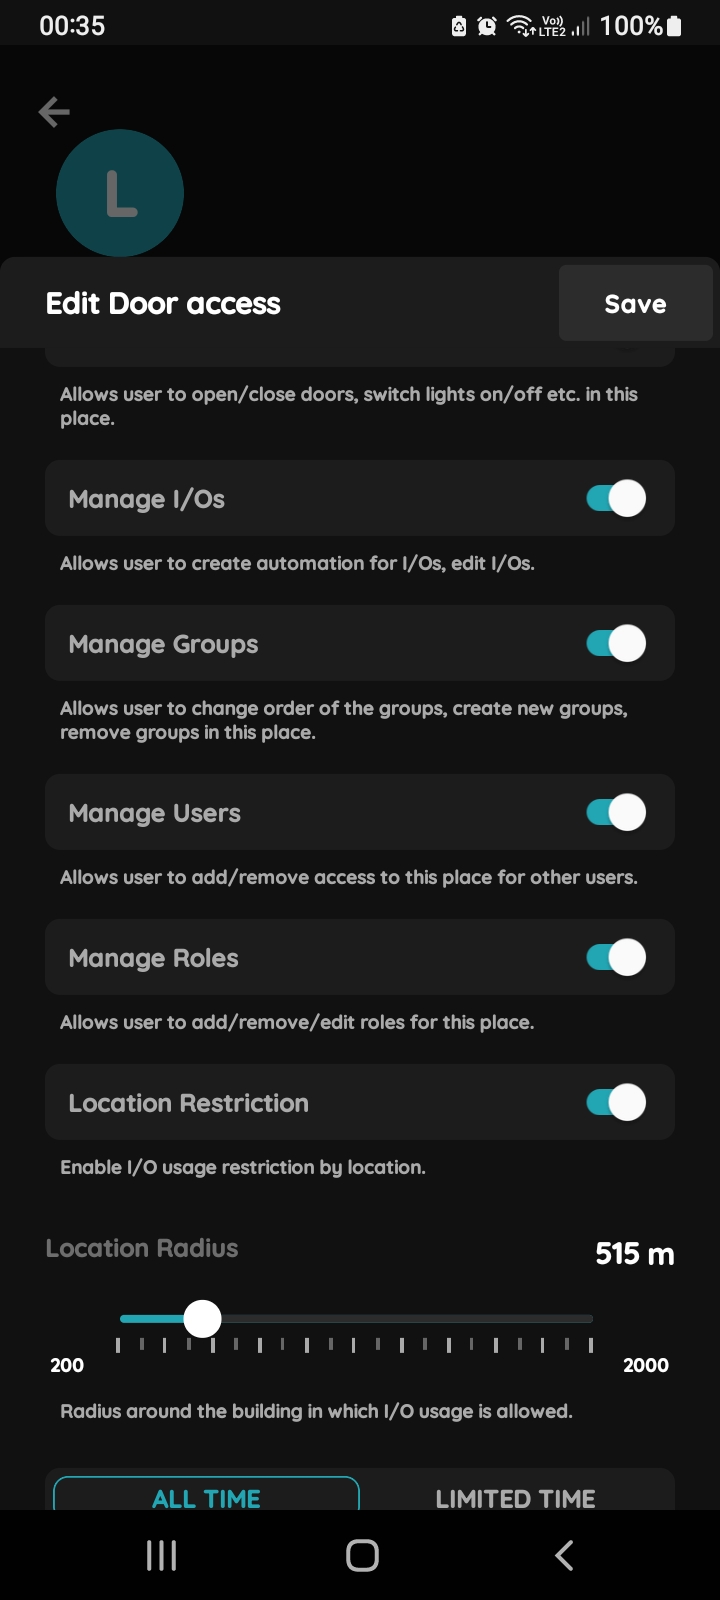
Edit permissions
Tap on he desired Role and edit following form:
Use I/Os - Allows user to open/close doors, switch lights on/off etc. in this place.
Manage I/Os - Allows user to create automation for I/Os, edit I/Os.
Manage Groups - Allows user to change order of the groups, crate new groups, remove groups in this place.
Manage Users - Allows user to add/remove access tot his place for other users.
Manage Roles - Allows user to add/remove/edit roles for this place.
Location Restriction - Enable I/O usage restriction by location.
You can set radius around the building in which I/O usage is allowed.
In this case Location Radius for the User is set to 515 m.
(Use slider button to activate any of this functionalities.)
ALL TIME - Permissions are valid all the time.
LIMITED TIME - It means that the user does not have access every day of the week and all day.
Start date - The date when given permission start to be valid.
End date - The date when given permissions stop to be valid.
Days - Days during which given permissions are valid.
When 0-24 is enabled (slider should be moved to the right) permissions are valid
0-24.
When 0-24 period is not enabled, you should set Start time and End time.
Timezone - Choose timezone region from the list.
To confirm your choices tap on a button Save or if you would like to delete it tap on Delete.
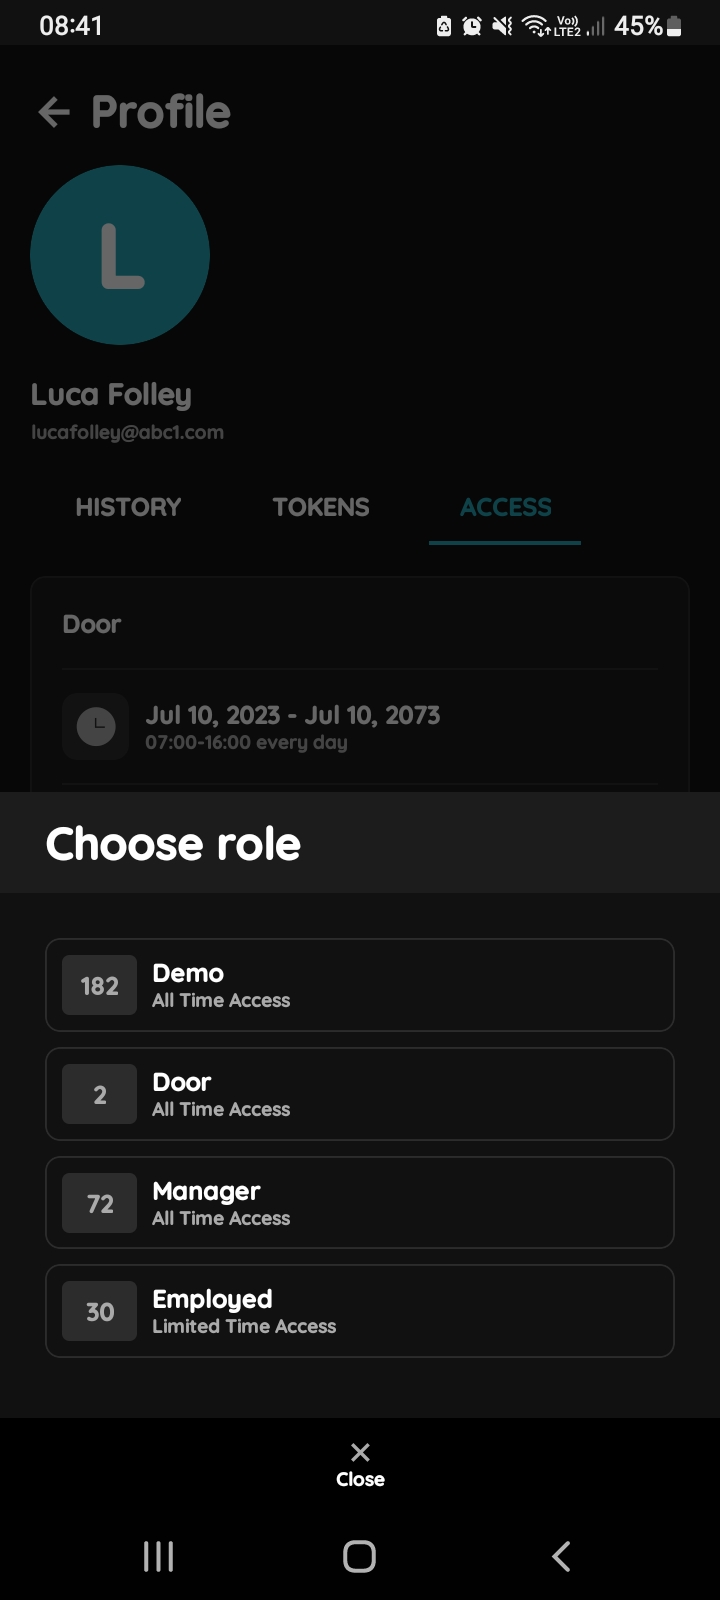
Add new Role Access
Click on the Add new Role Access and tap on the Role from the list that you would like to add to the User.
Tap on the Role Employed from the list.
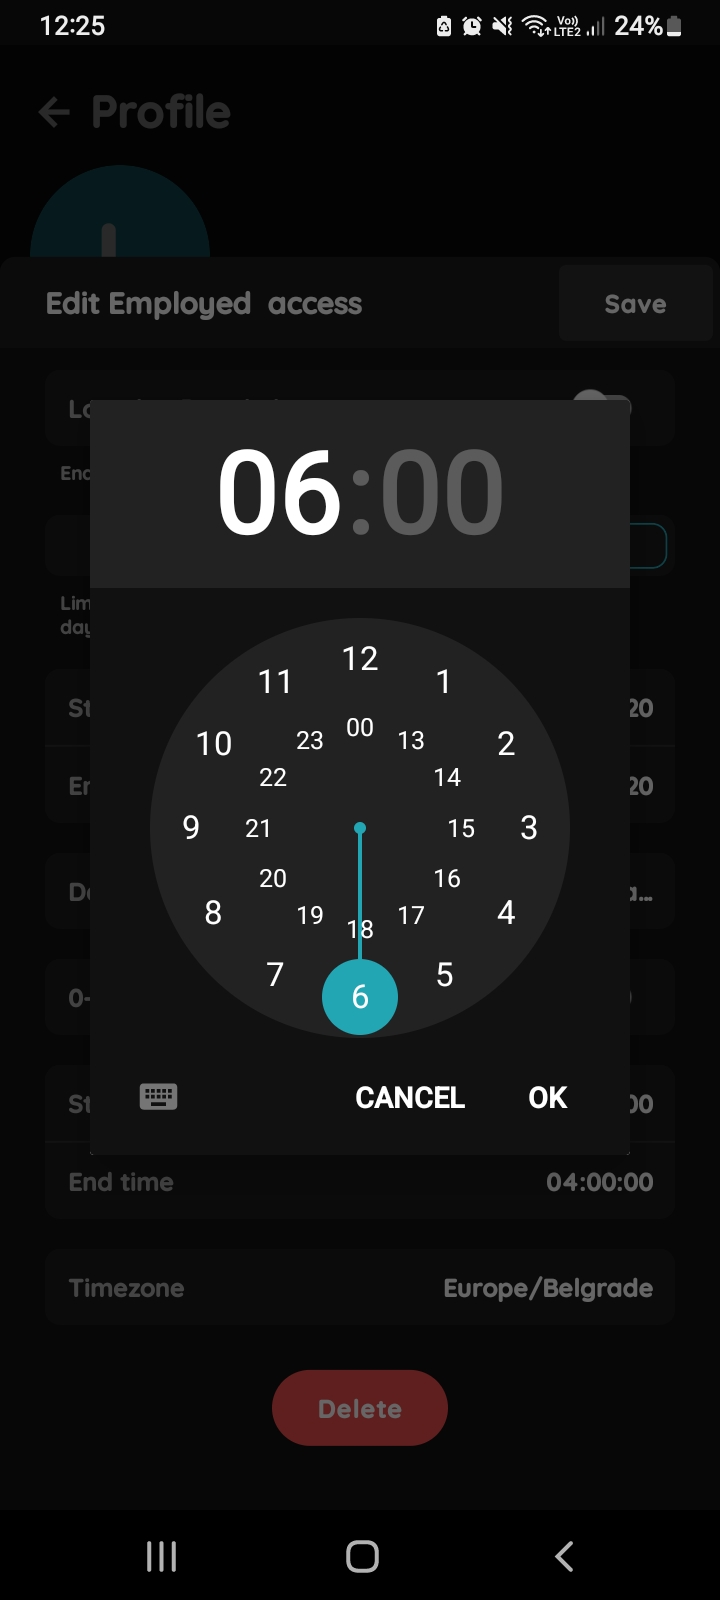
Set Start and End time
Set Start and End time, tap in each of these fields.
Star time is 6 AM and End time is 4 AM.
To confirm time click on OK.
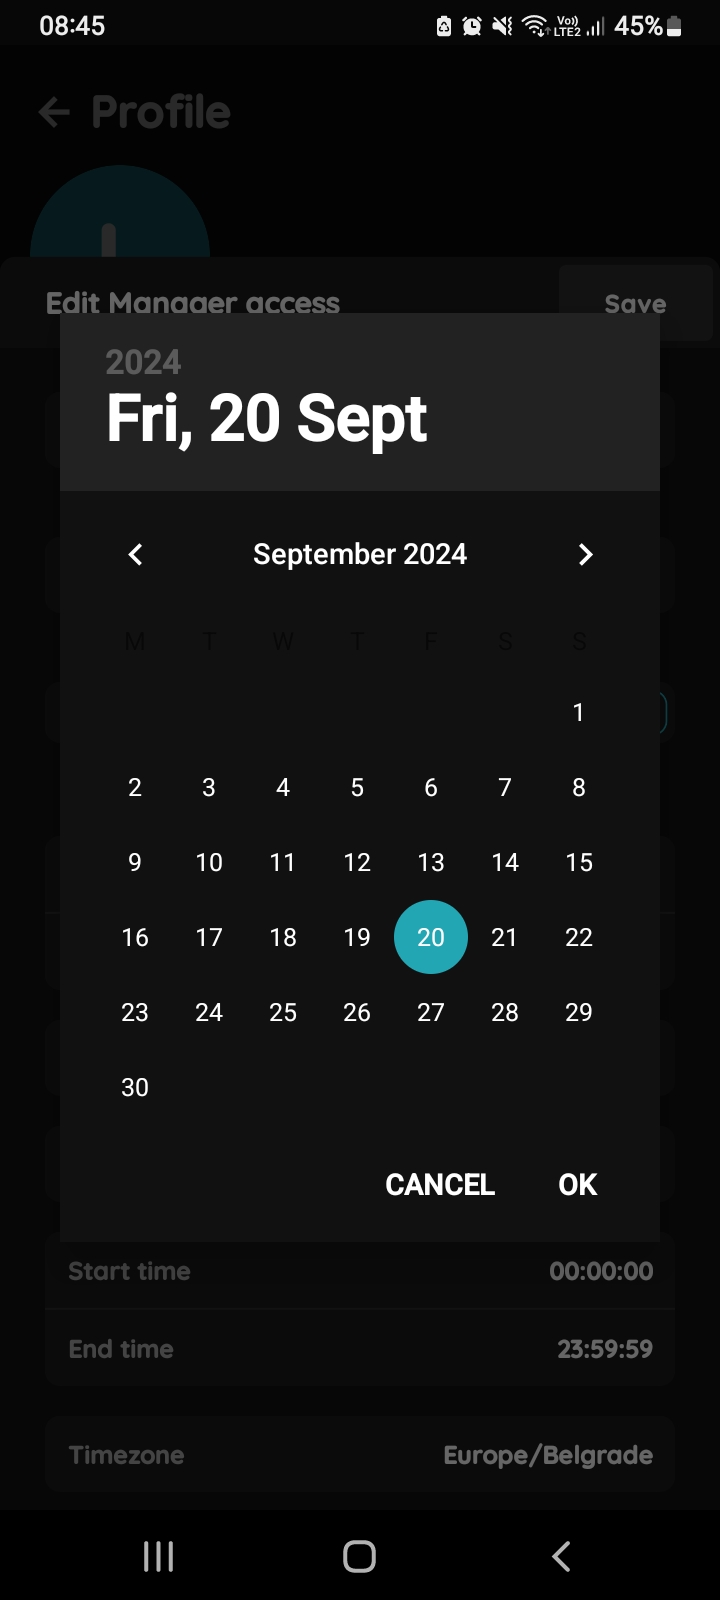
Limited time - Start and End date
In case that your access permissions are valid during limited time, you should set Start date and End date by click in these fields, and set them on the Calendar.
Start date, in this case is 20th September 2024 and End date is 30th December 2024.
When you want to confirm your choice tap on OK.
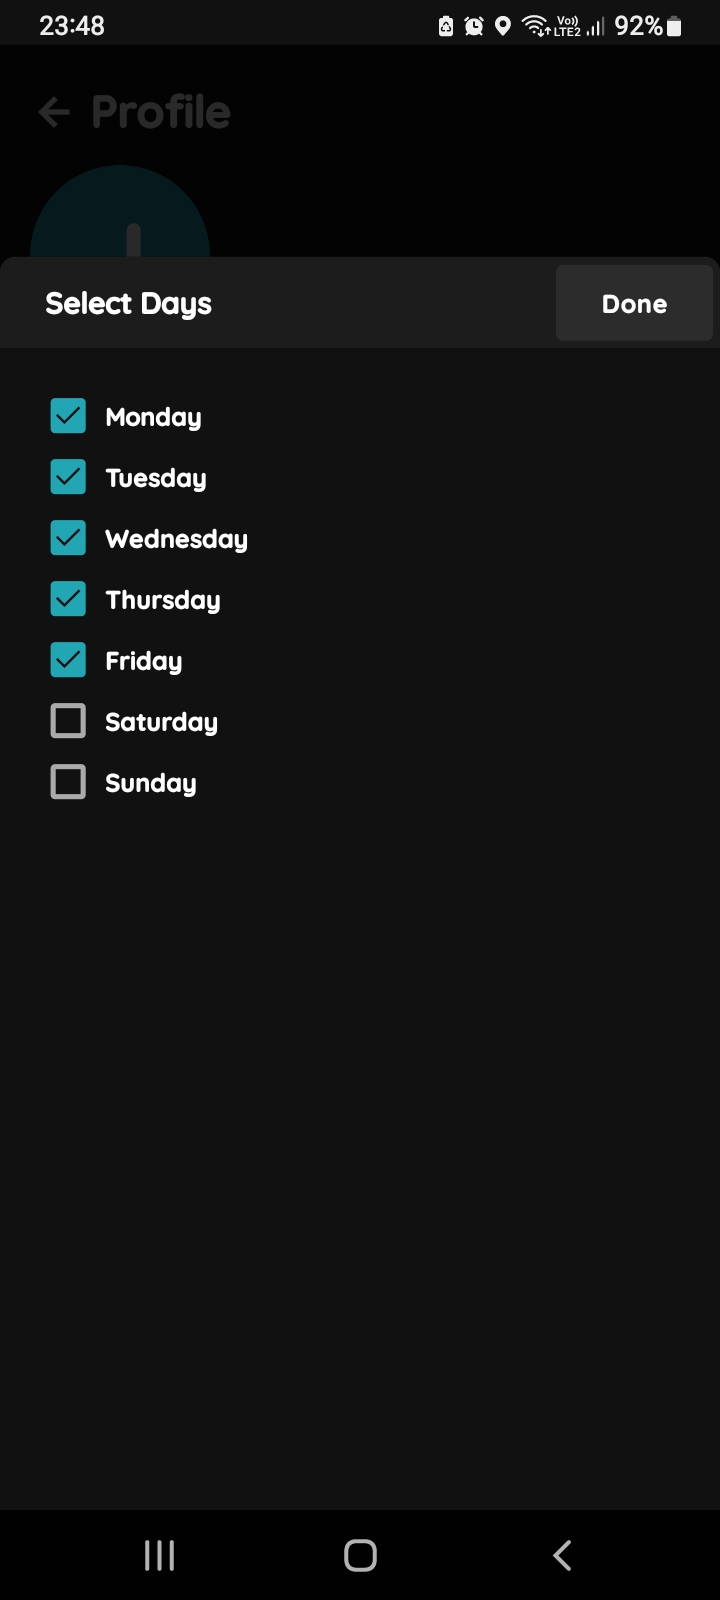
Days
Choose Days when the given permissions will be valid by clicking on the check box/boxes next to the day/days and tap button Done.
In this case permissions are valid on days from Monday to Friday.
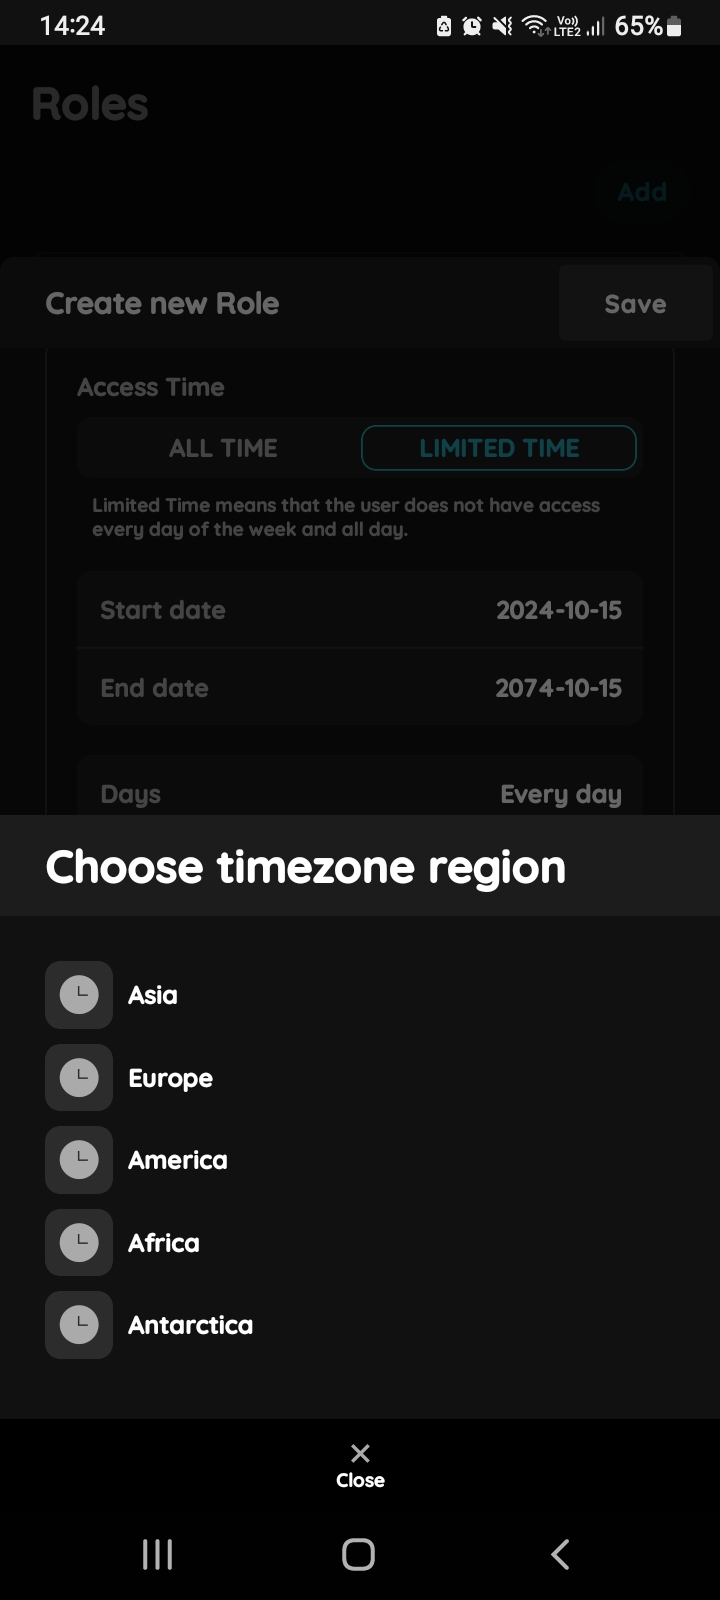
Timezone region
Choose Timezone region from the list.
(Tap on the desired zone.)
In this case tap on Europe.
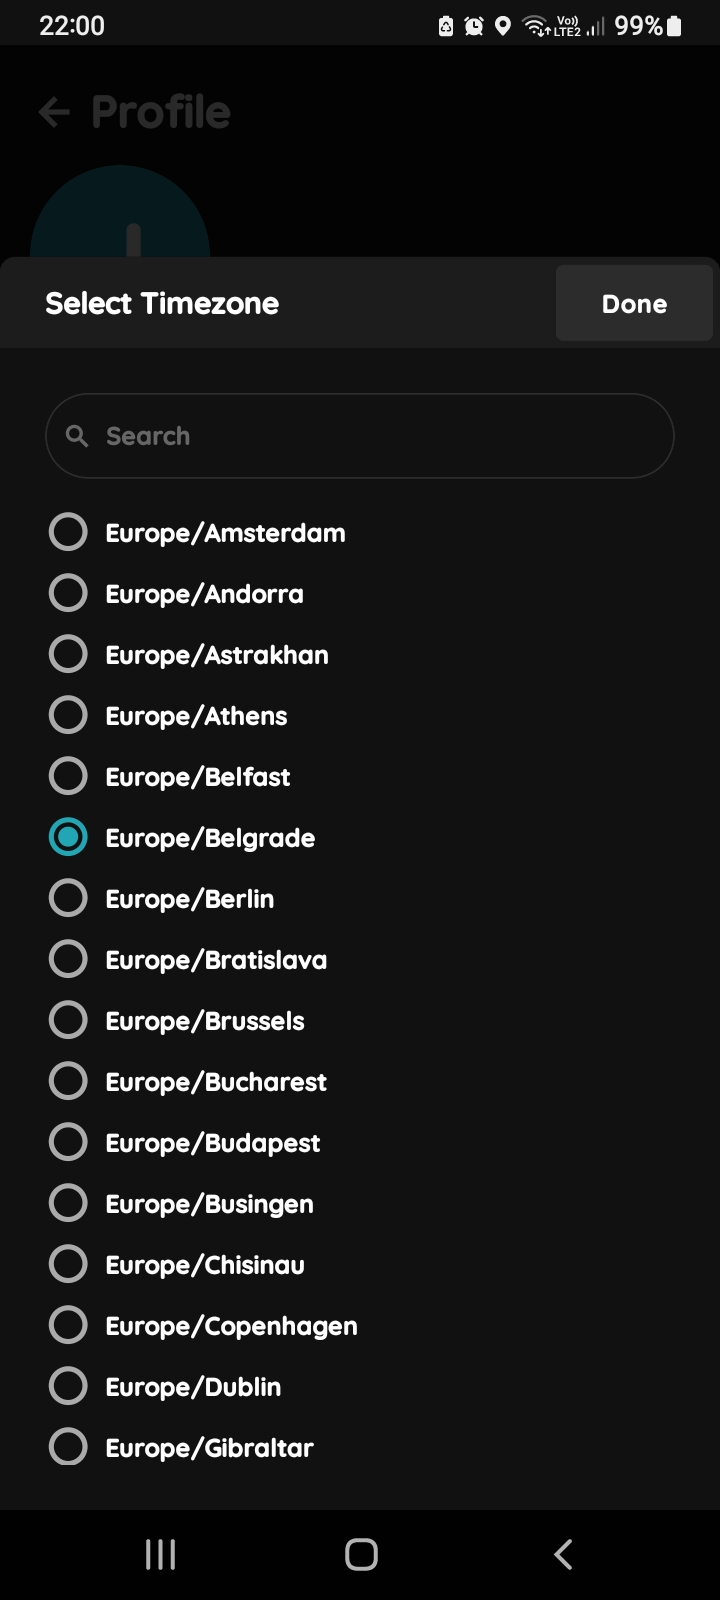
Select Timezone
Select Timezone (click on the radio button next to it) and confirm it by clicking on button Done.
In this case, Europe/Belgrade Timezone is selected.
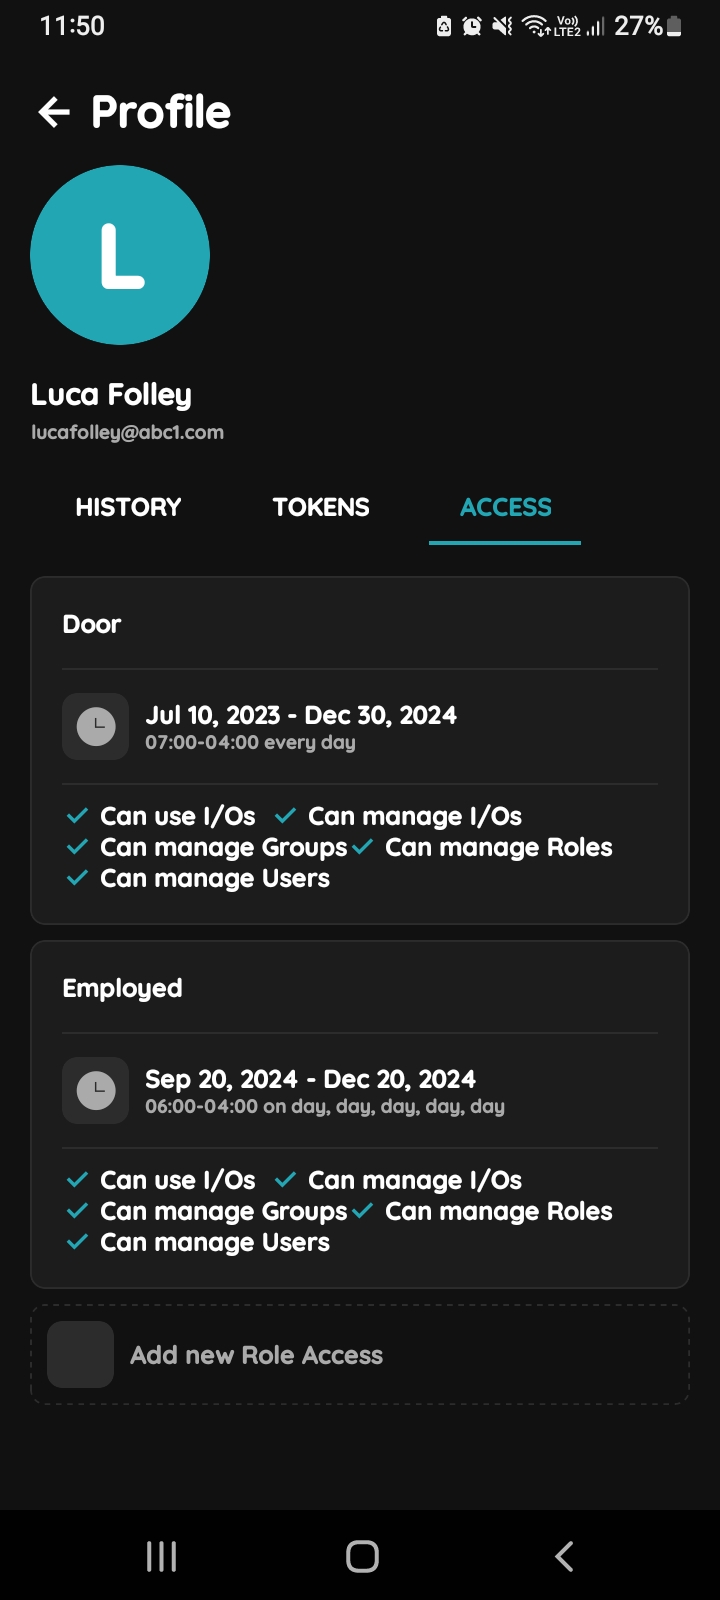
User gets new Role permission
In this case, new Role permission is added to the User.
User Luca Follye got role Employed, wit access permissions from September 20th 2024 to December 20th 2024, from 6 AM to 4 PM, from Monday to Friday. Here is shown list of permissions: Can use I/Os, Can manage I/Os, Can manage Groups, Can manage Roles, Can manage Users.