Smart PIERRE - Keys
Description
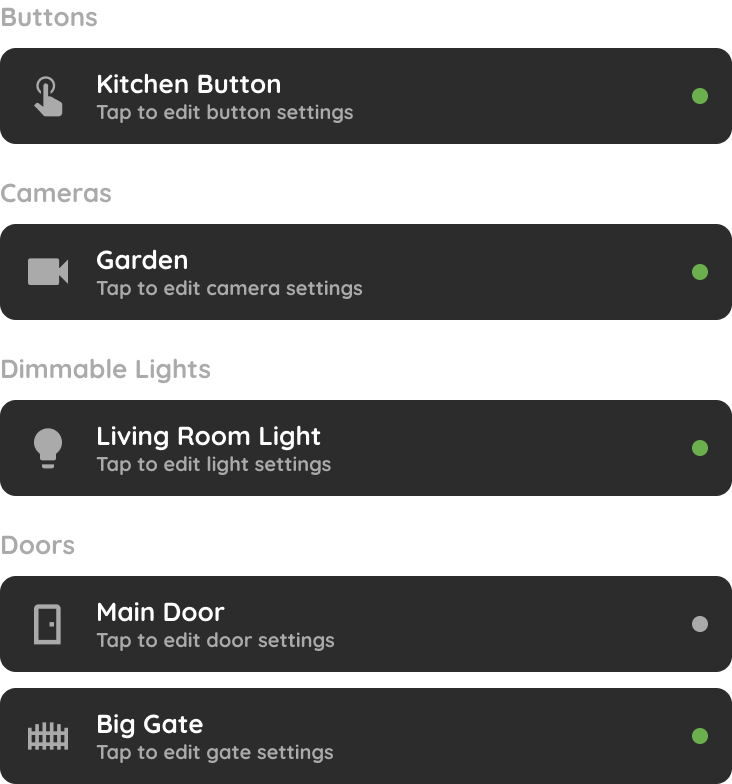
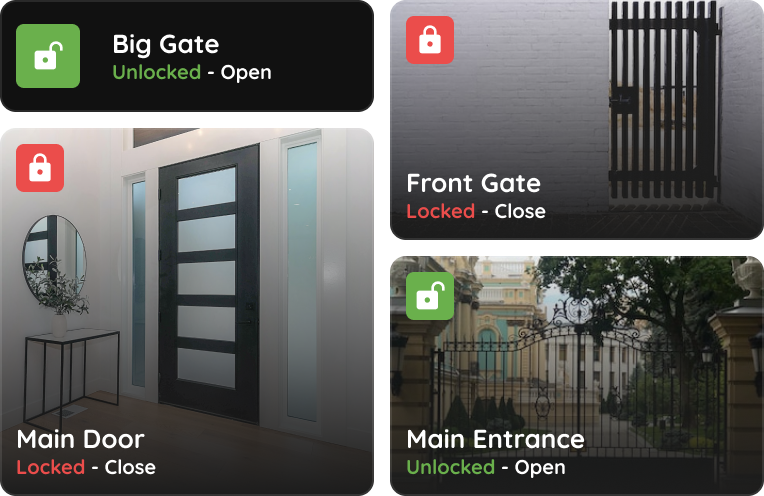
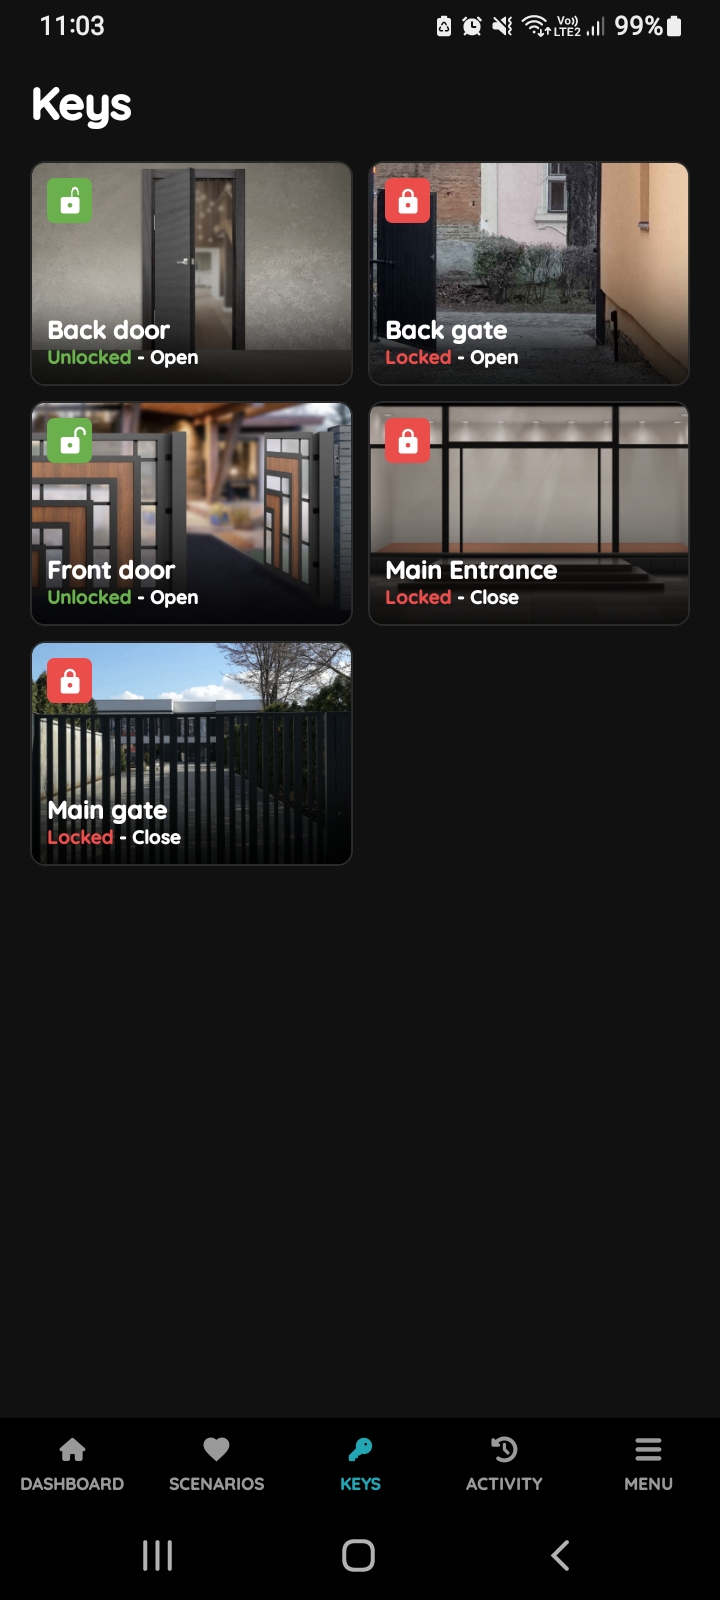
The Keys section of the Smart PIERRE app lists every door and gate in the property and shows the state of each one.
Real-Time Status
Each entry point shows whether it is locked or unlocked, and whether it is open or closed. The two are separate: a door can be unlocked and still closed.
Settings
A long press on a door or gate opens its settings, where the name and the security options can be changed.
Slide to Confirm
When enabled, unlocking requires a confirmation swipe rather than a single tap. This prevents a door being unlocked by accident.
Automation
Doors and gates can be locked or unlocked automatically from triggers such as the time of day, a motion sensor, or another event in the system.
Technical Notes
- Enable Slide to Confirm on every door that leads outside.
- The open/closed state requires a contact sensor on the door or gate. Without it, only the locked state is real — the rest is what was commanded.
- Review which users hold access to which doors at handover.
- Keep a mechanical key available for a power or network failure.
Control of the Doors
Doors control is quick and simple, managed directly from the Keys menu.
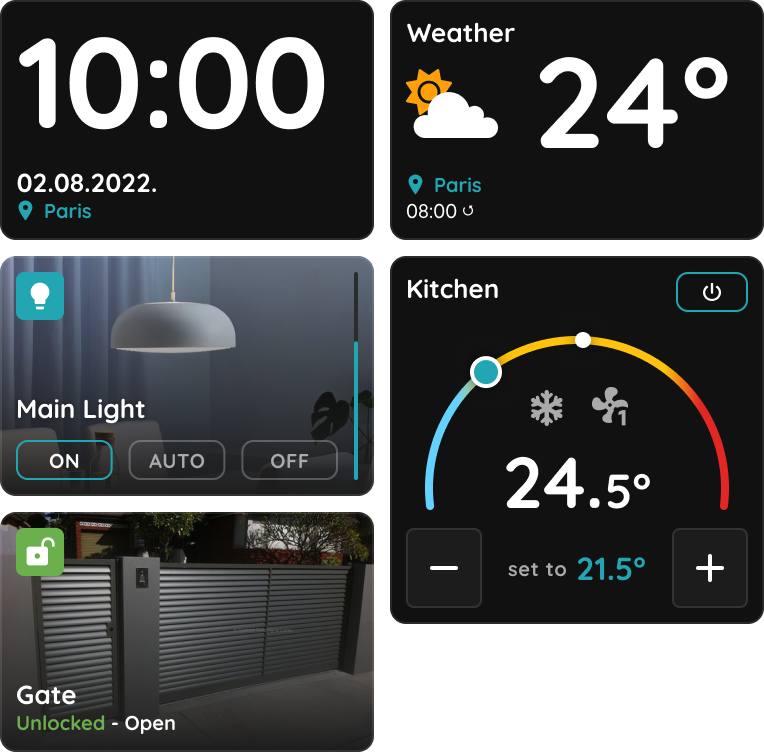
You can also control them from the Dashboard.
Follow the example of the Front door.
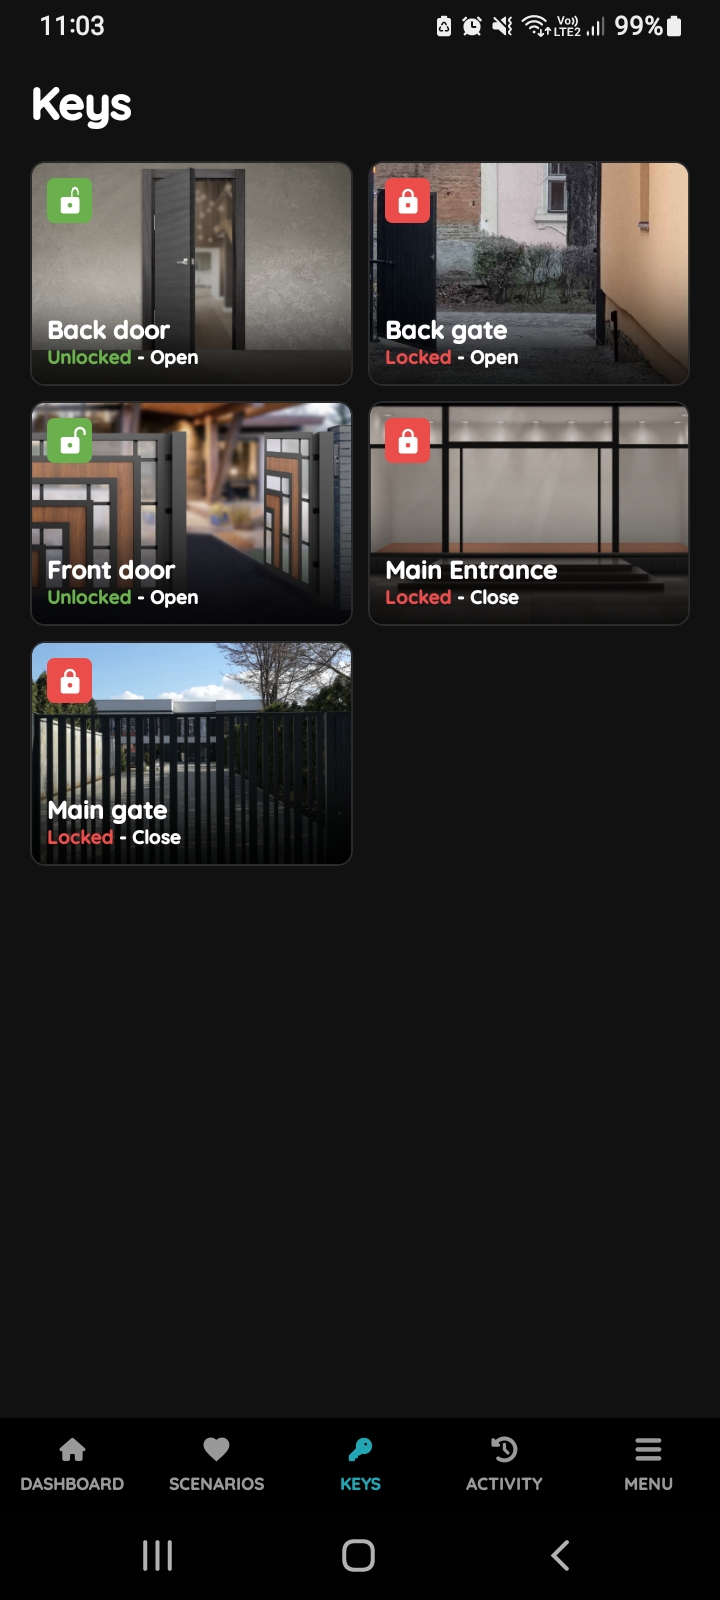
Locked, Unlocked, Closed, Open
Doors can be:
- Locked
- Unlocked
If Magnet sensor is added to the Doors, Doors can be:
- Open
- Closed
GOOD TO KNOW:
For sliding Doors, when they are in the Open Direction position, their status is Open.
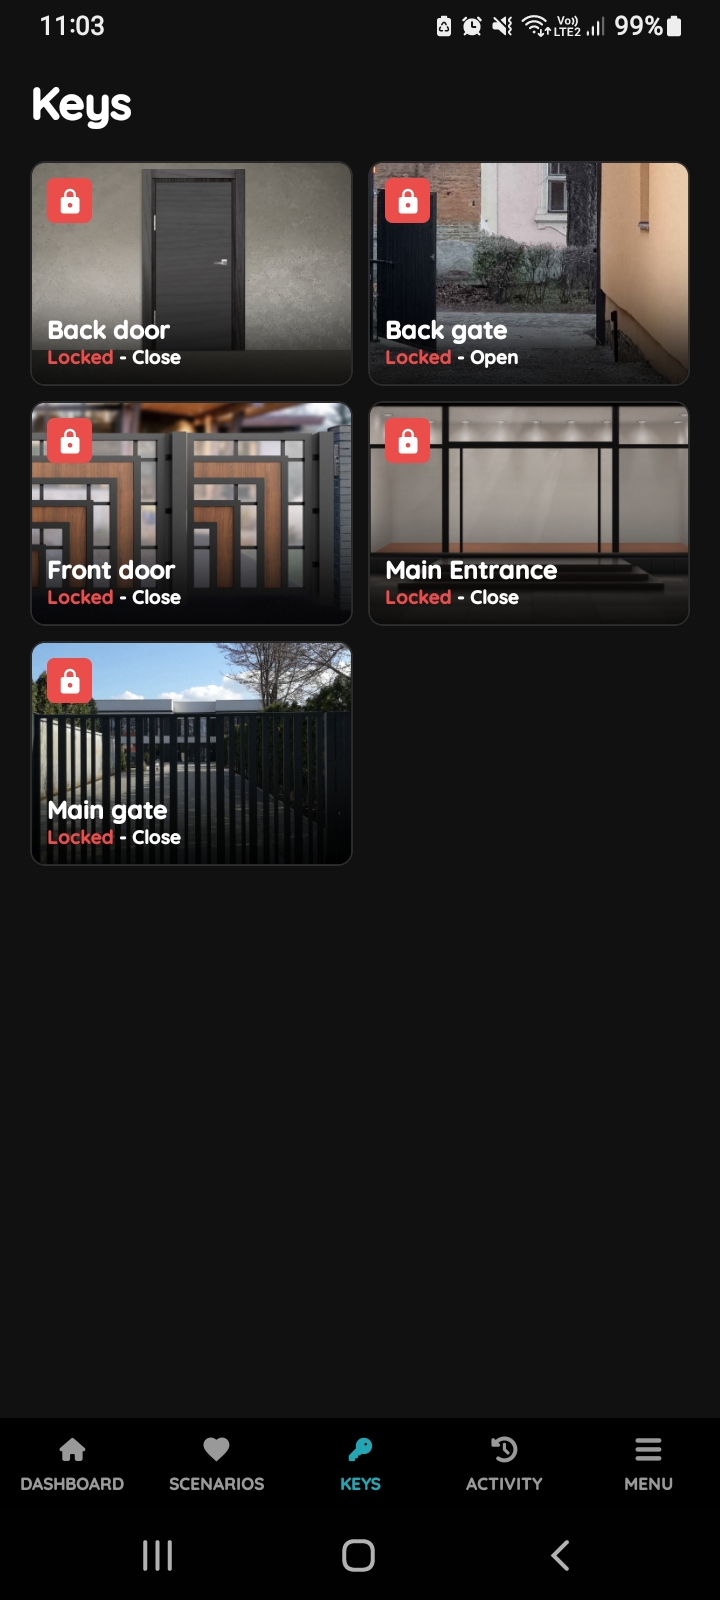
Locked - Close
In order to change status of the Doors from the Unlocked - Open to Locked - Close tap on the card of the desired Doors and status will be changed.
Icon of the Doors and picture will be changed according to status Locked - Close.
Unlocked - Open
In order to change status of the Doors from the Locked - Closed to Unlocked - Open to tap on the card of the desired Doors and status will be changed.
Icon of the Doors and picture will be changed according to the new status Unlocked - Open.
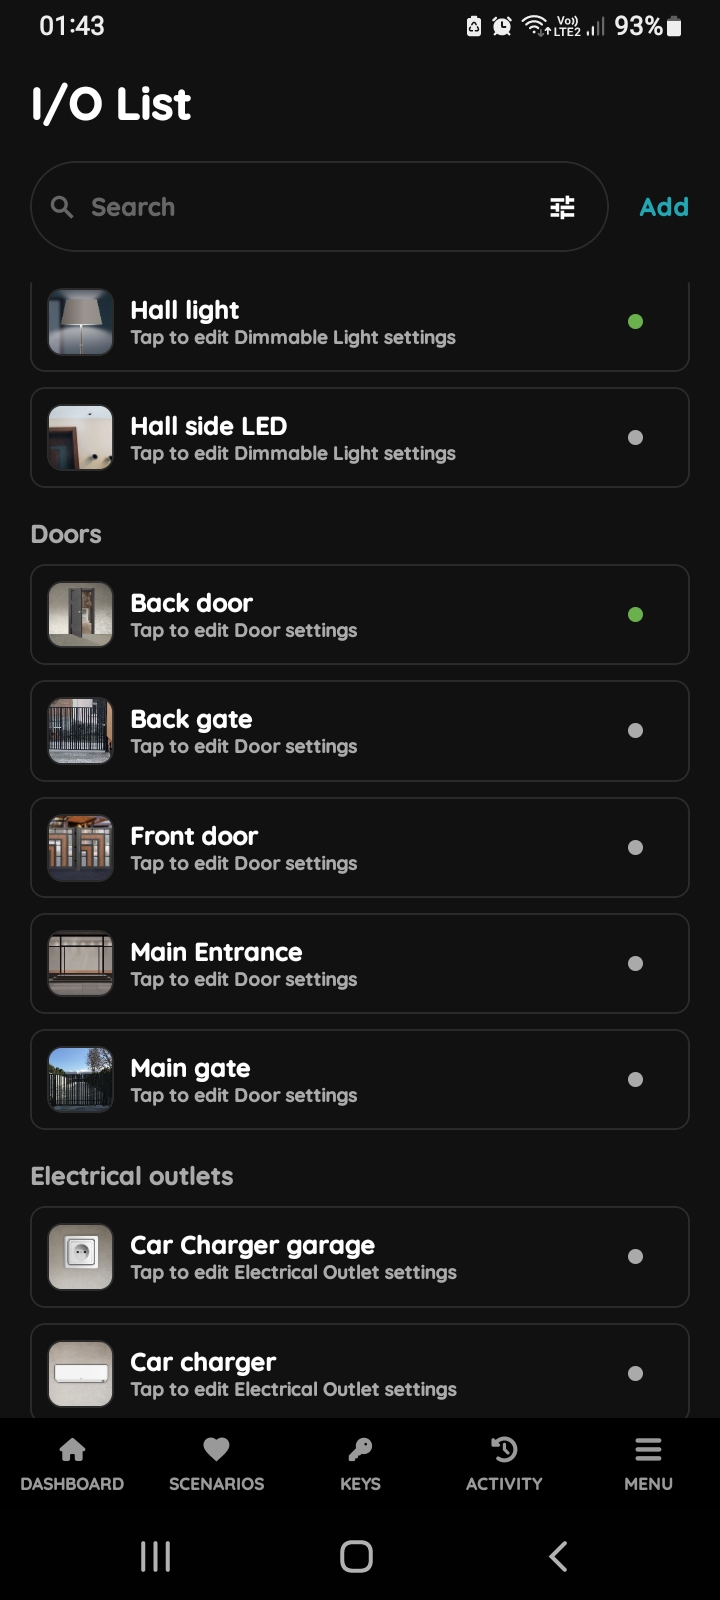
Open I/O list - Doors
To edit the Doors's settings, follow next steps.
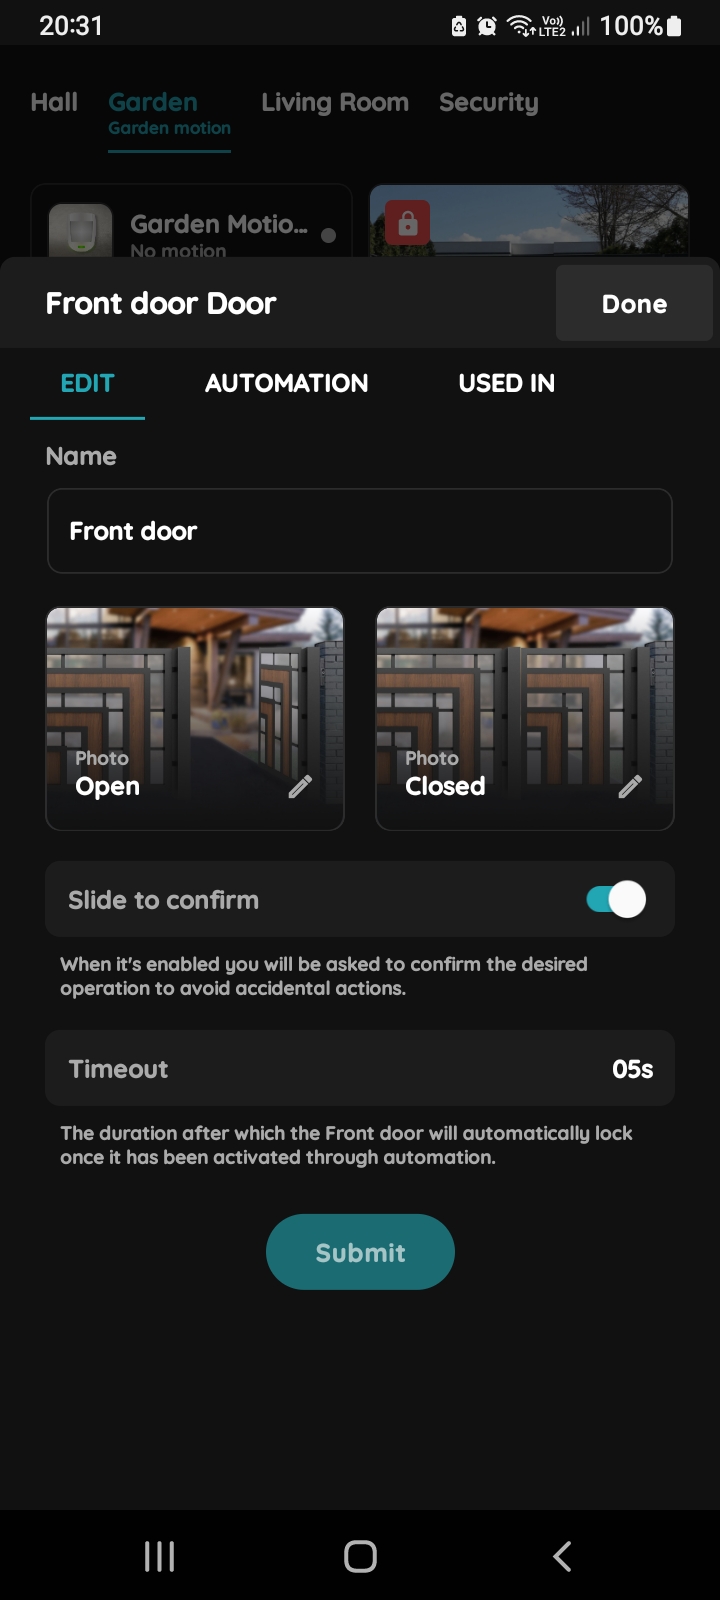
Edit Doors
Edit following form:
- Name - Edit name of the Doors.
- Change picture - Choose the source of the picture for each status of the Doors.
- Slide to confirm - When it is enabled you will be asked to confirm the desired operation to avoid accidental actions.
- Timeout - It shows for how long the Doors will be Open in auto mode.
Tap Submit/Done.
Follow next steps for more details.
GOOD TO KNOW:
Doors can be edited by long-press the Doors' card on the Dashboard or tapping them in the I/O list.
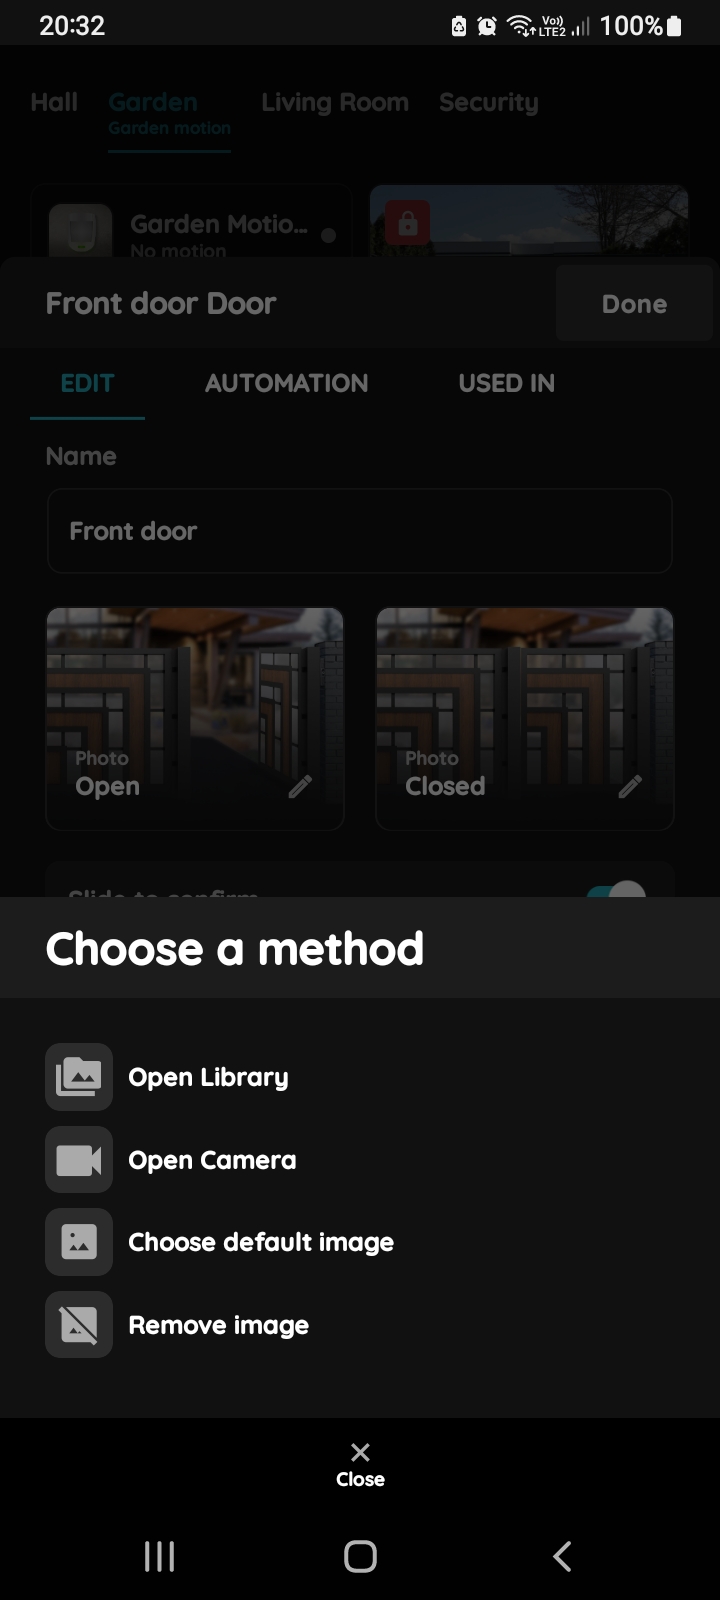
Change a photo - Doors
You have four options:
- Open Library - The phone’s Library will open. It is recommended to take pictures from the same angle for both Doors statuses to achieve a complete and consistent view.
- Open Camera - You can take a picture using your smartphone. For a complete and consistent view, it’s recommended to capture both Doors' statuses from the same angle.
- Choose default image - These images are prepared in advance in order to provide a complete and seamless experience.
- Remove image - Removes existing image.
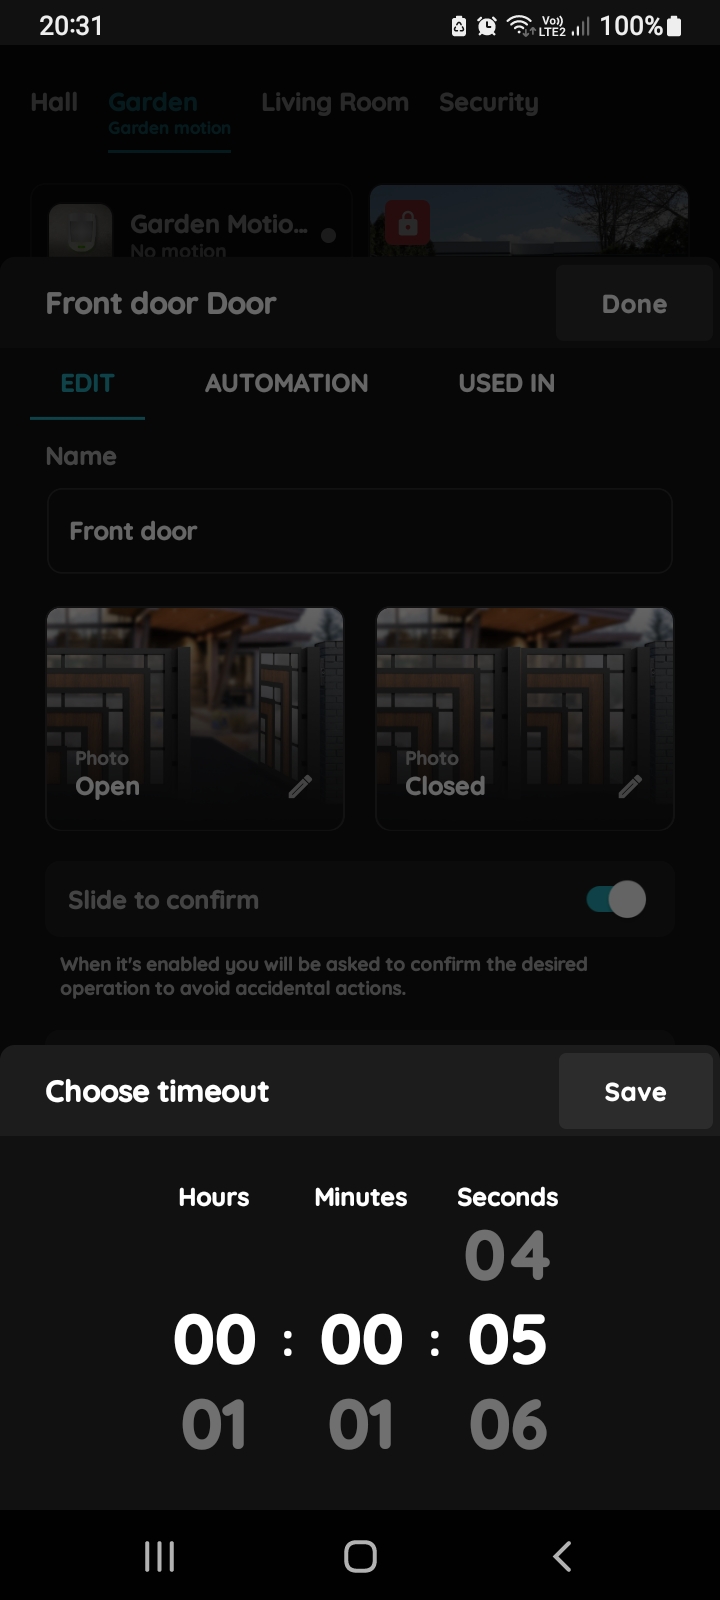
Timeout - Doors
Choose Timeout - scroll through columns for the Hours, Minutes, Seconds.
Tap Save button.
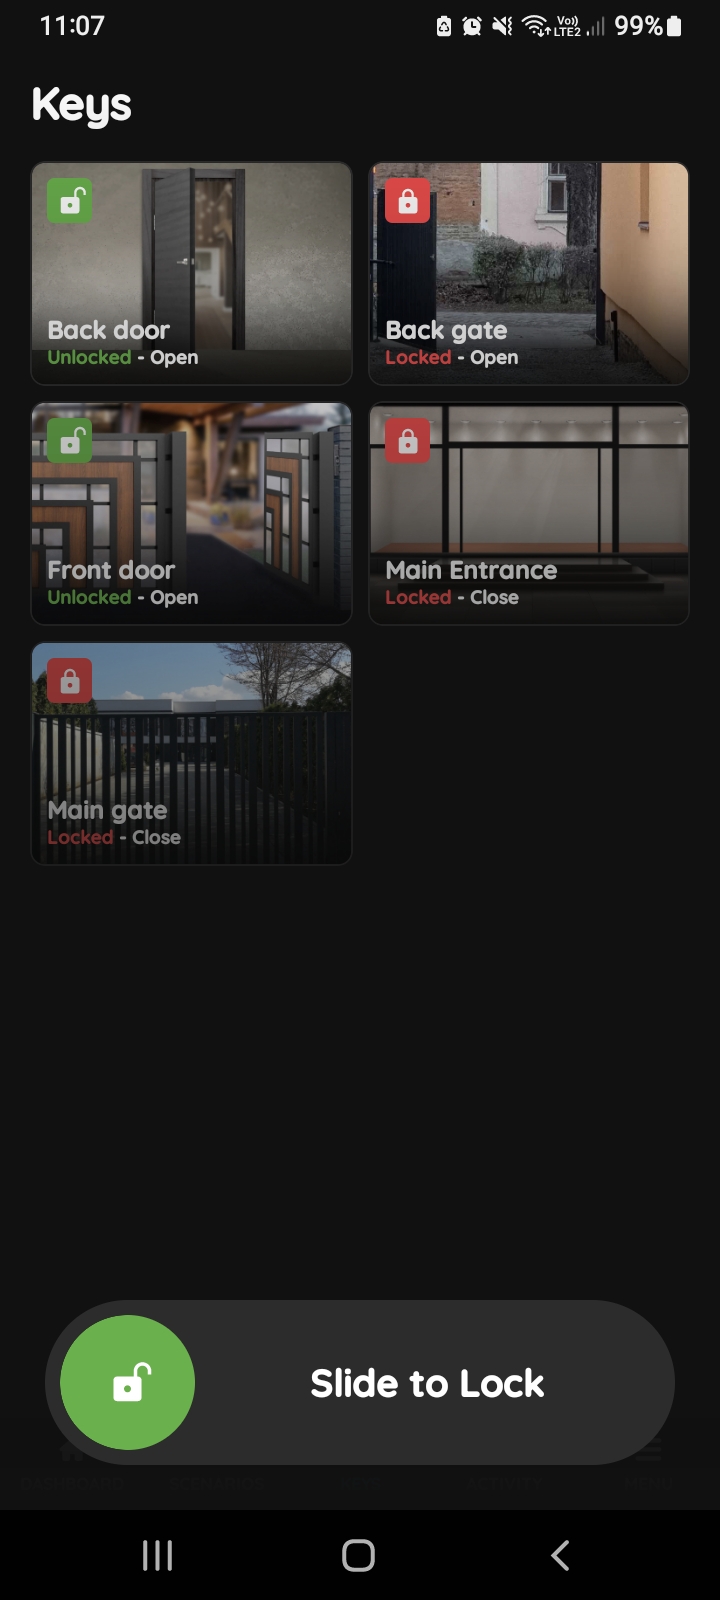
Slide to confirm - Doors
Slide to confirm feature adds an extra layer of security, preventing accidental actions.
It asks you to confirm your choice once more.
If you want Doors to Lock tap on the card of the Doors. Tap button Slide to Lock and slide from the left to the right side.
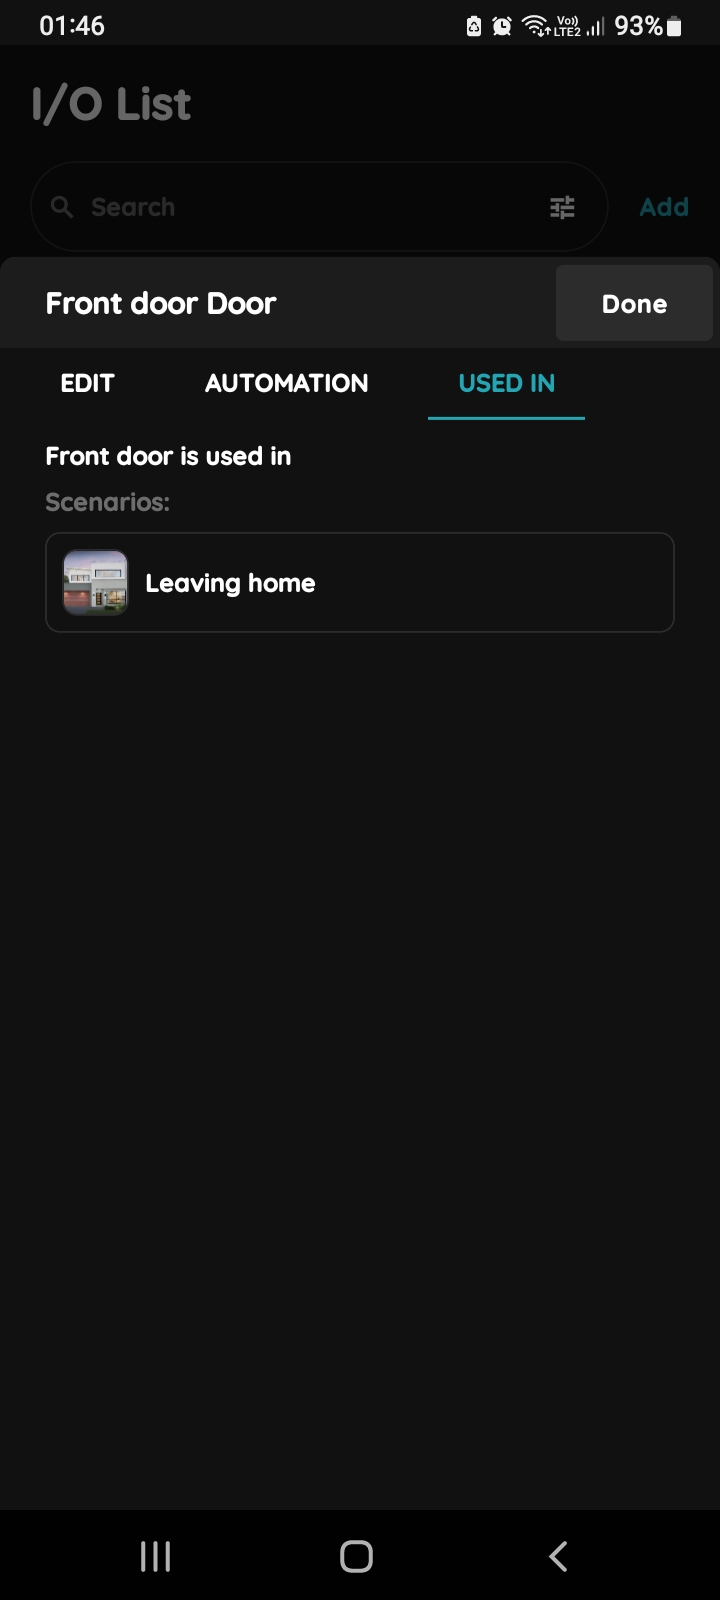
Used In - Doors
The Used In tab shows all the scenarios and automations where the Doors are applied, making it easy to see where this I/O is used without the need to search manually. If it isn't used in any, the list will be empty, and a message will display: "This I/O is not in use anywhere." This feature is particularly useful as it consolidates all relevant information in one place.
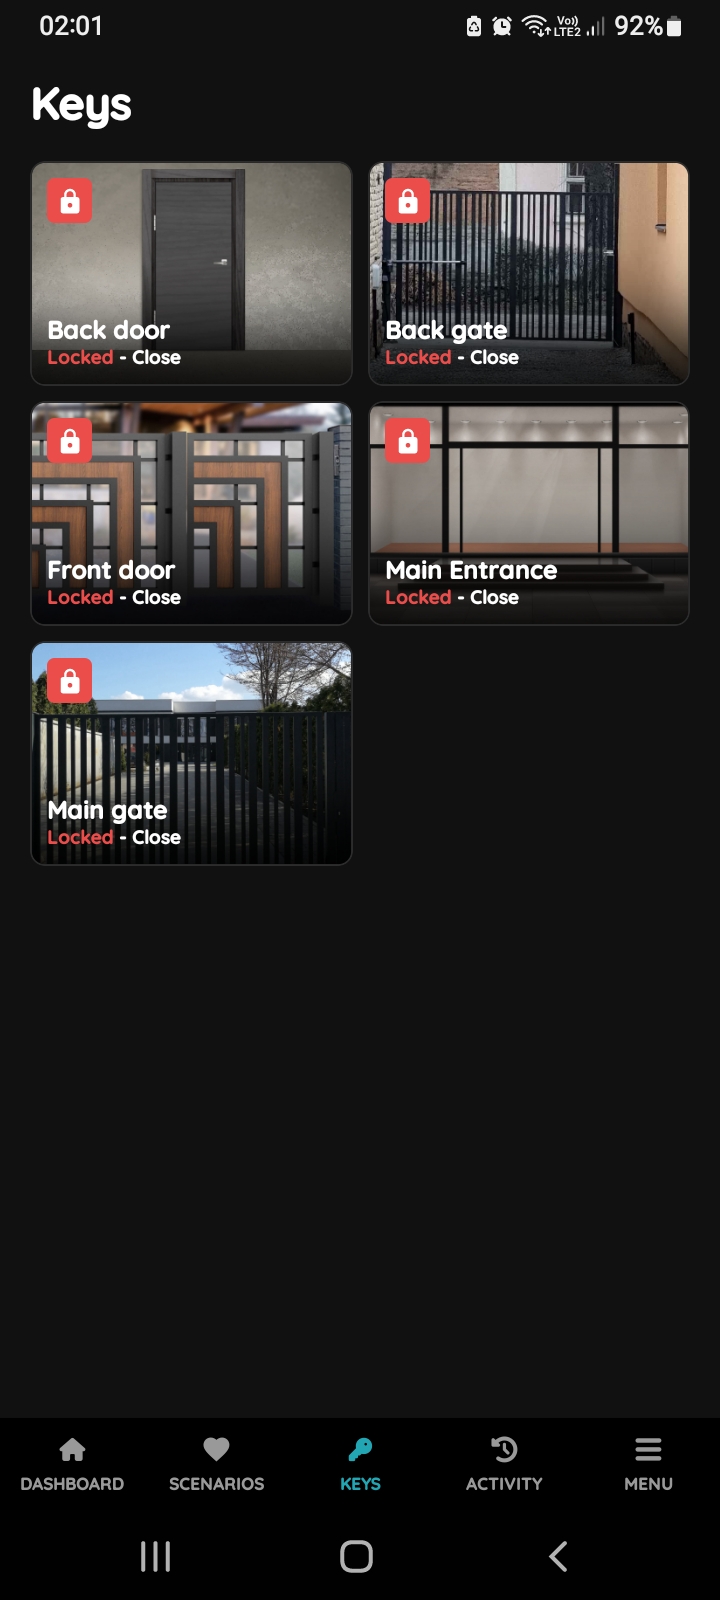
Keys
The Door automatically unlocks every day from Monday to Sunday between 6:00 PM and 3:00 AM, allowing convenient access during these hours. Outside this time range, the Door will remain locked, enhancing security while ensuring accessibility during preferred hours. This automation is ideal for settings like a shared entryway or community space, enabling controlled access aligned with user preferences.
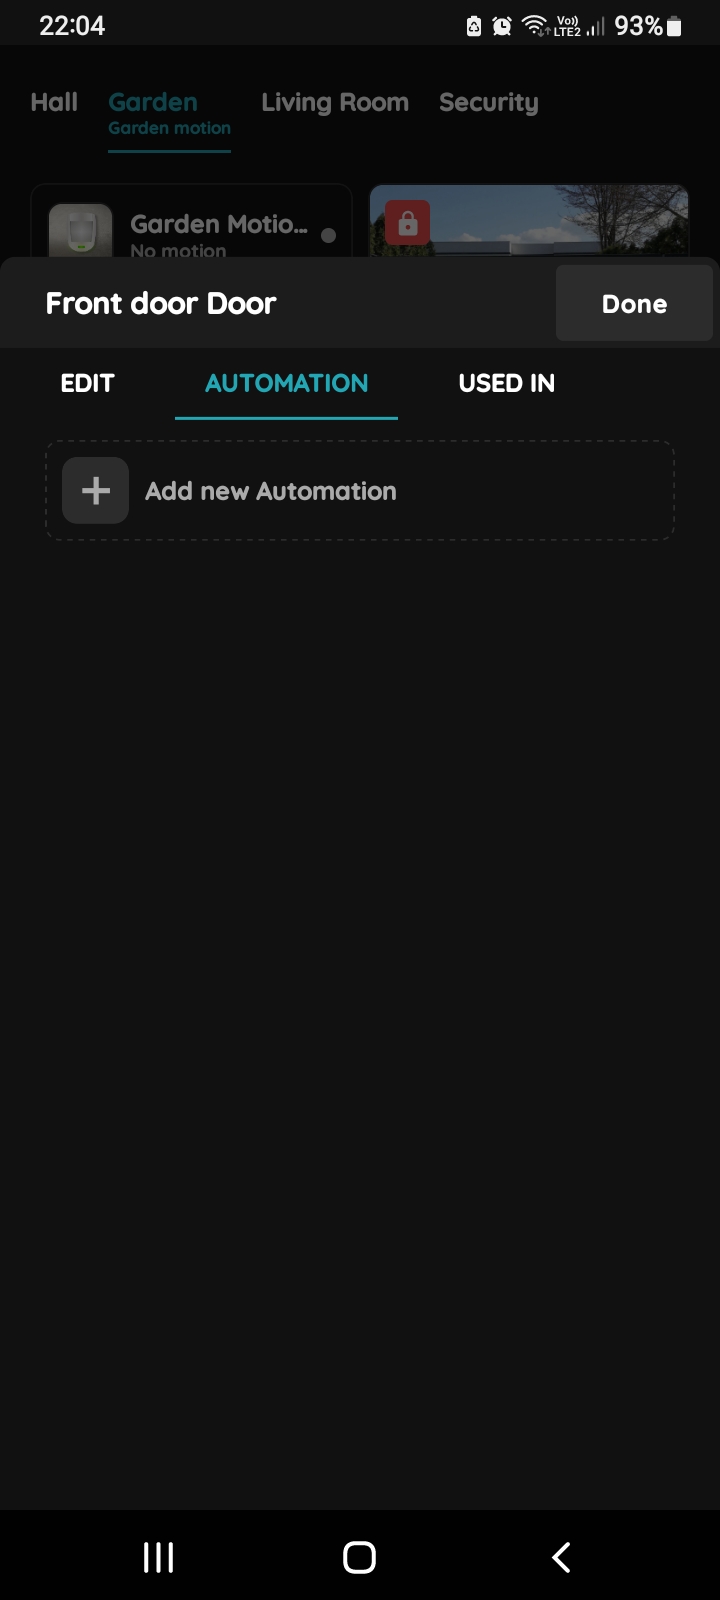
+Add new Automation - Doors
Tap on the tab Automation and then tap on the +Add new Automation.
In this case, Front door will be automated to be unlocked every day from 6 o'clock to 3 o' clock.
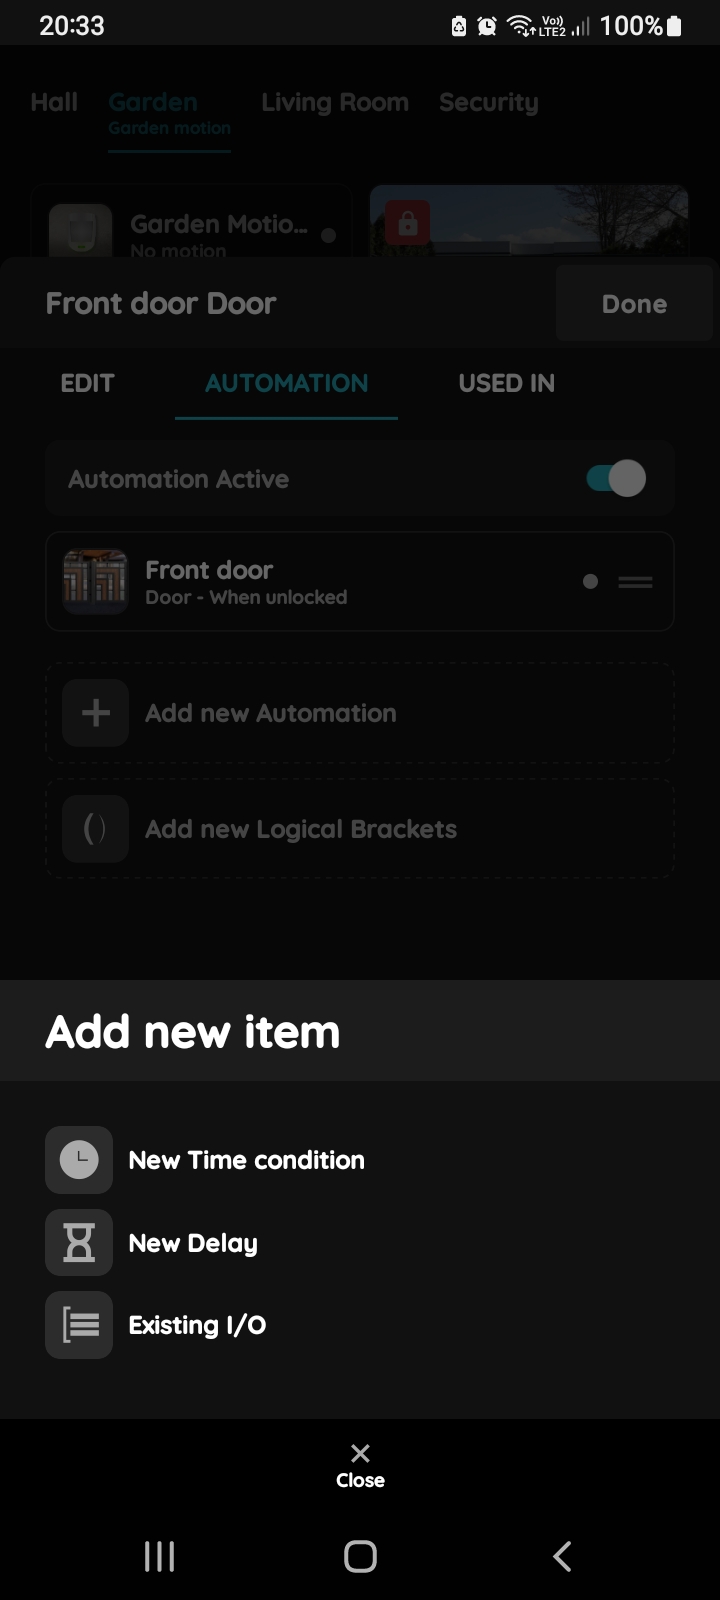
Add new item - Doors
There is possibility to add:
- New Time condition,
- New Delay
- Existing I/O.
Tap the New Time condition.
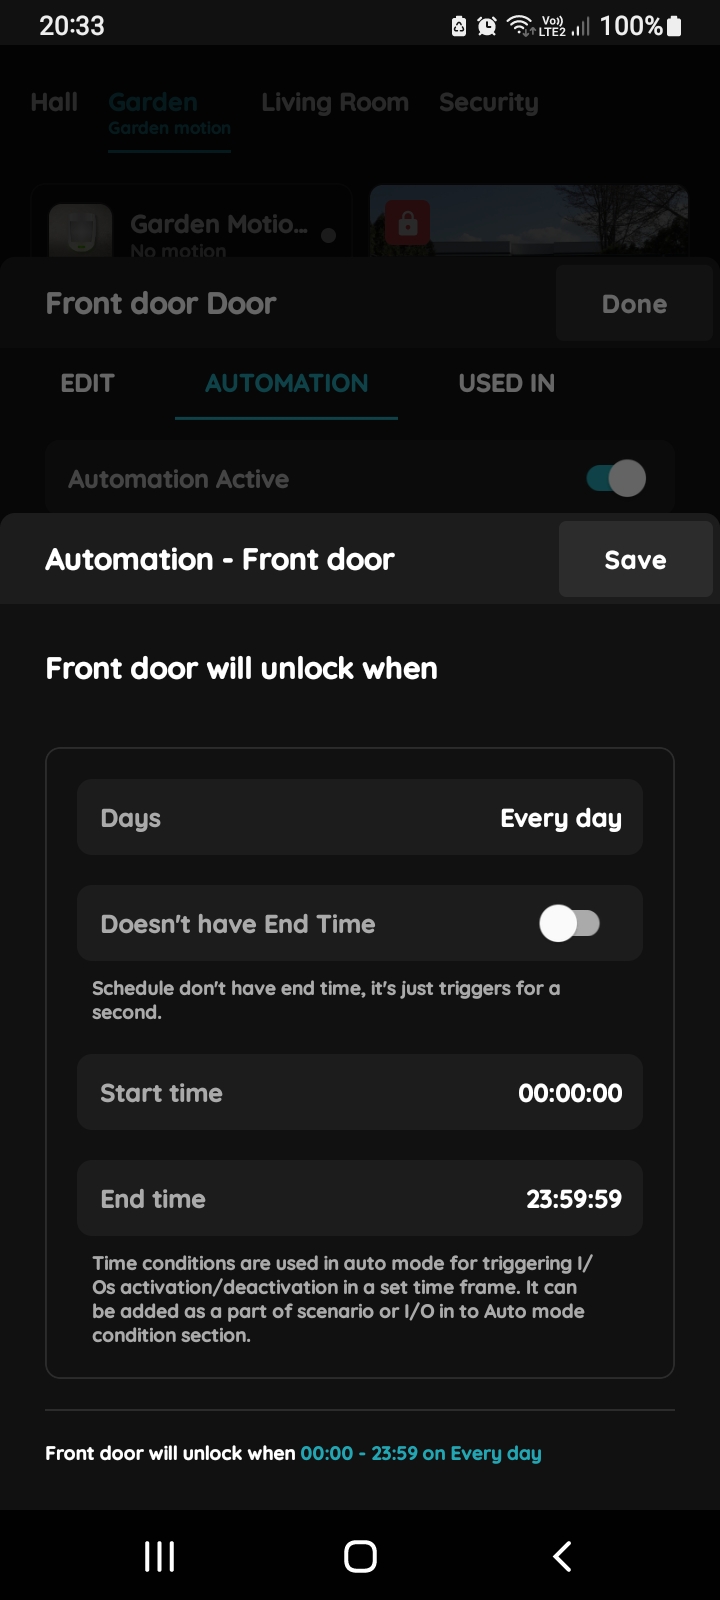
New Time Condition
You should set Days, Start time and End time in this step.
Tap in the field of each of them to set them.
For more details follow next steps.
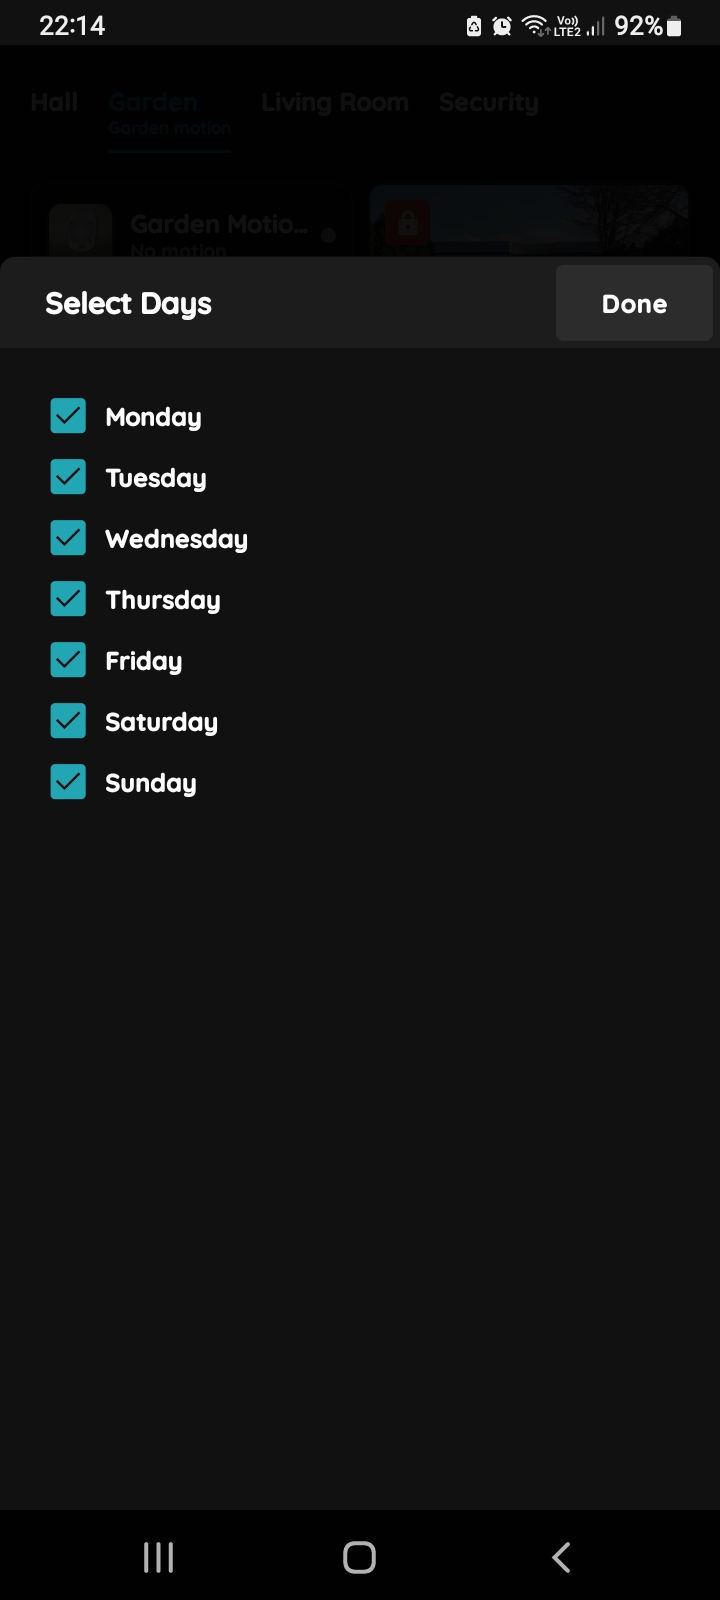
Select Days - Door
Select Days when the Doors will be active by clicking on the checkbox/checkboxes next to the days from the list.
In this case select all days from Monday to Sunday.
Tap the button Done.
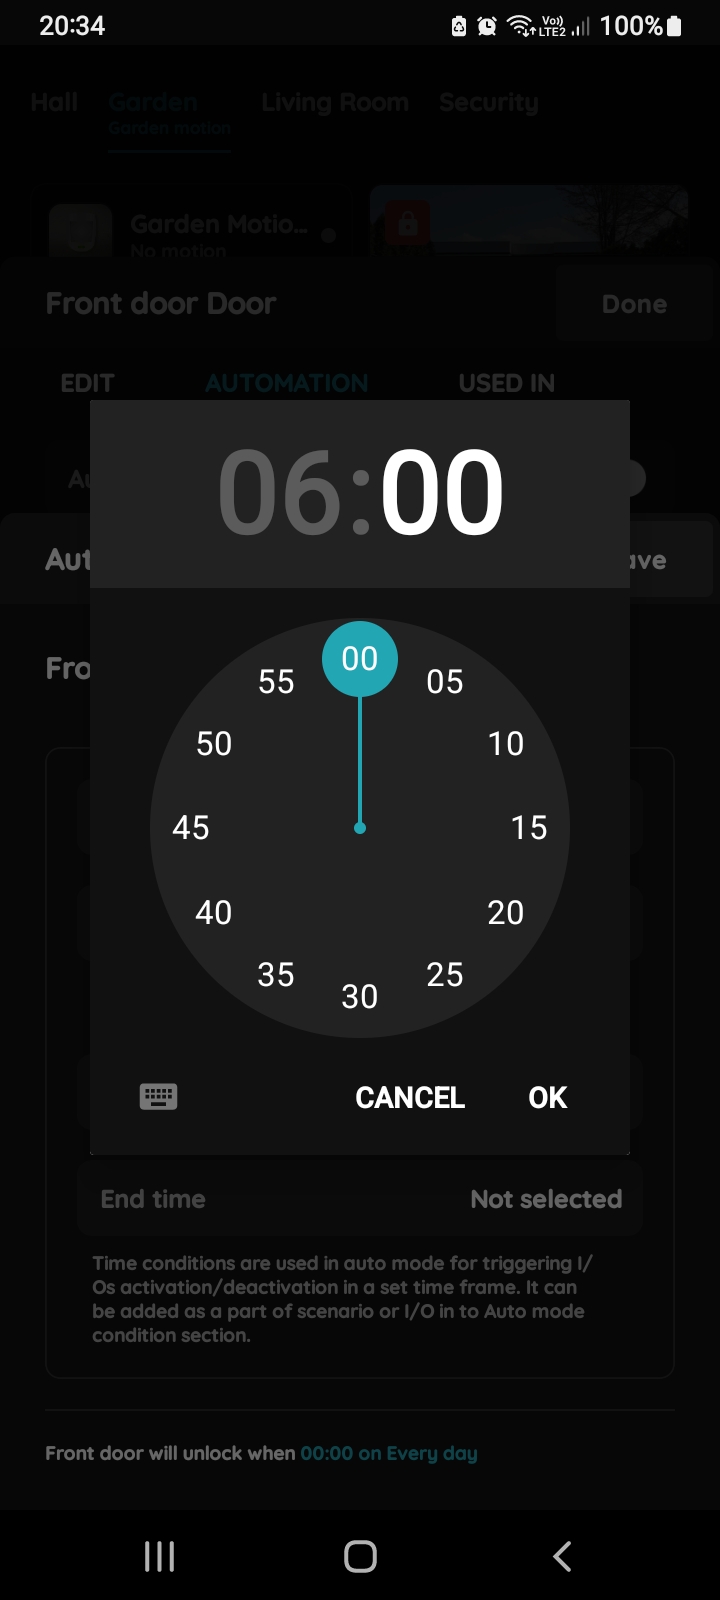
Start Time and End Time
Start time and End time fields will show you clock and icon of the keyboard in order to set these two parameters.
In this case set start time at 6 o'clock and end time to 3 o'clock.
Tap the button OK. In case that you want to cancel it click on the button Cancel.
(Time conditions are used in auto mode or triggering I/Os activation/deactivation in a set time frame. It can be added as a part of the scenario or I/O in to Auto mode condition section.)
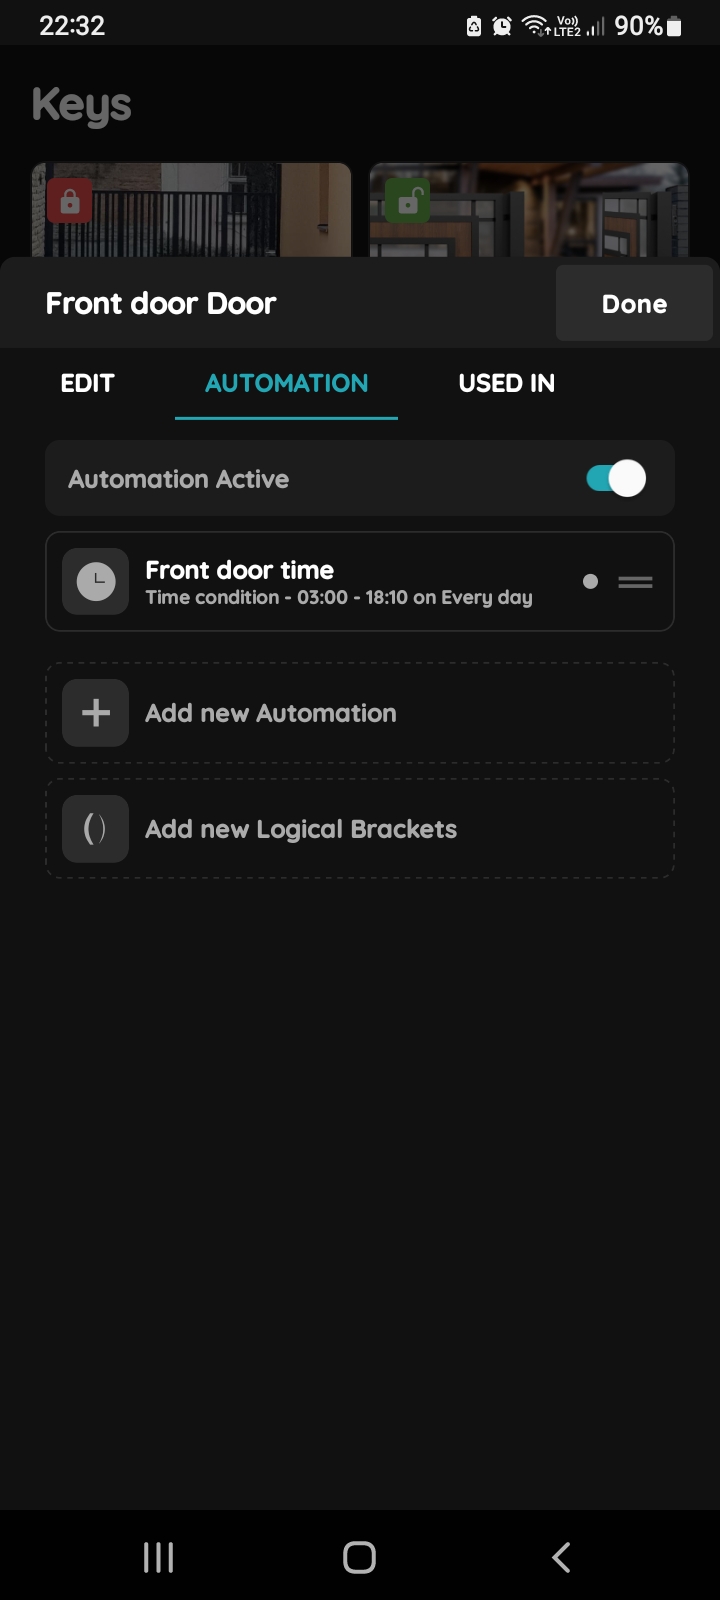
Confirm automation settings - Doors
Confirm automation settings, tap button Done.
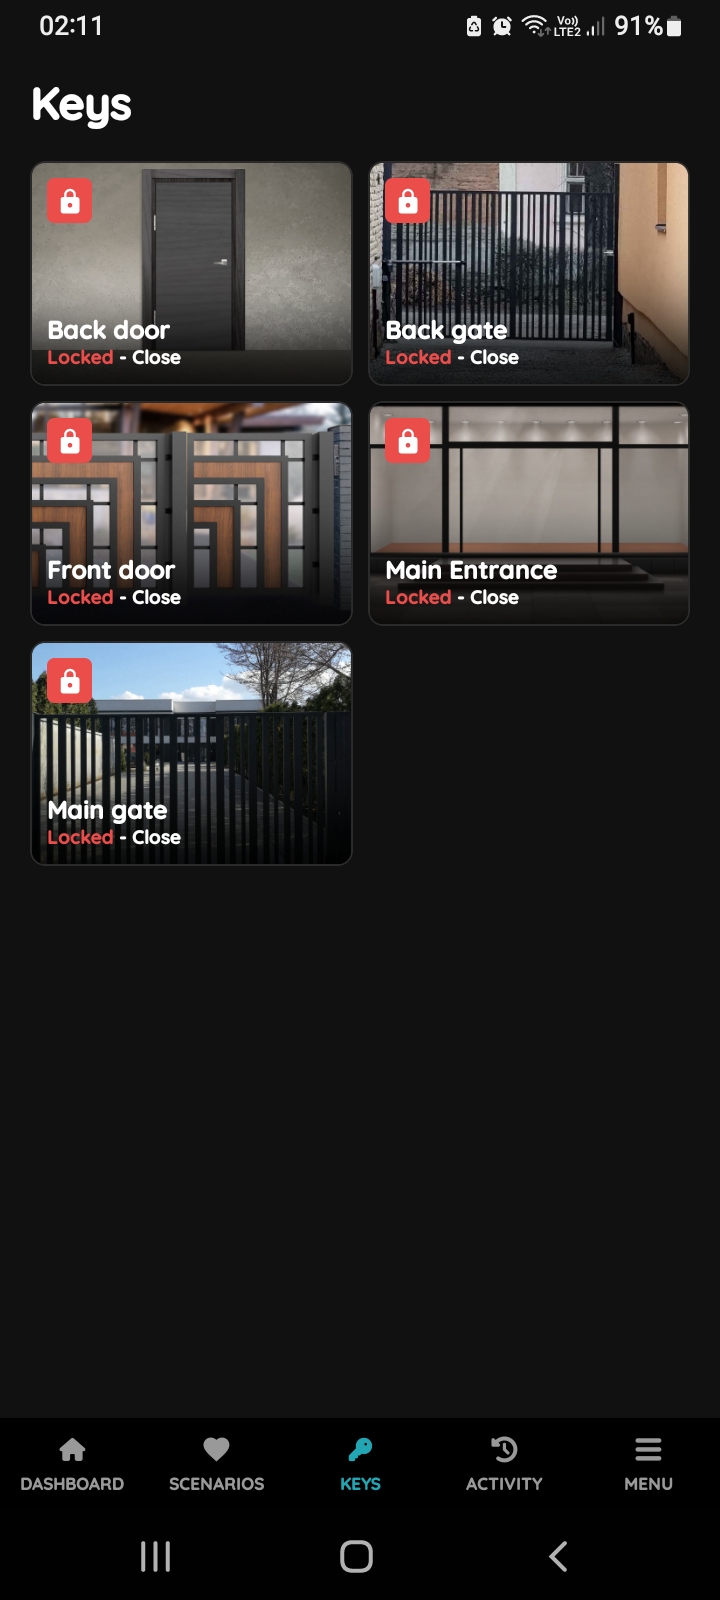
Locked - Close Unlocked - Open
Gates' control is quick and simple, managed directly from the Keys menu.
You can control it from Dashboard, too.
Follow the example of the Main Gate.
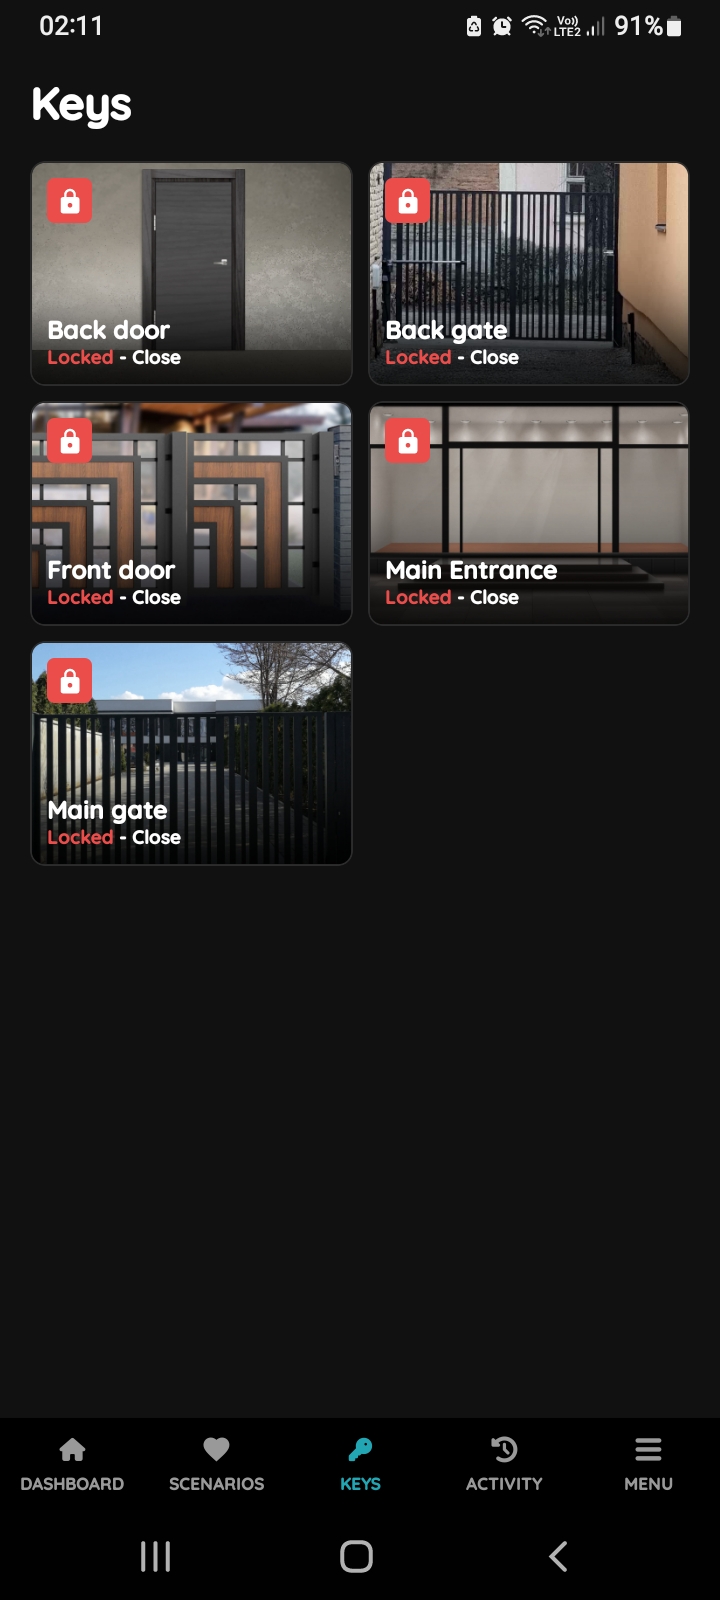
Locked - Close Gates
In order to change status of the Gate from the Unlocked - Open to Locked - Close tap on the card of the desired Gate and status will be changed.
Icon of the Gate and picture will be changed according to new status.
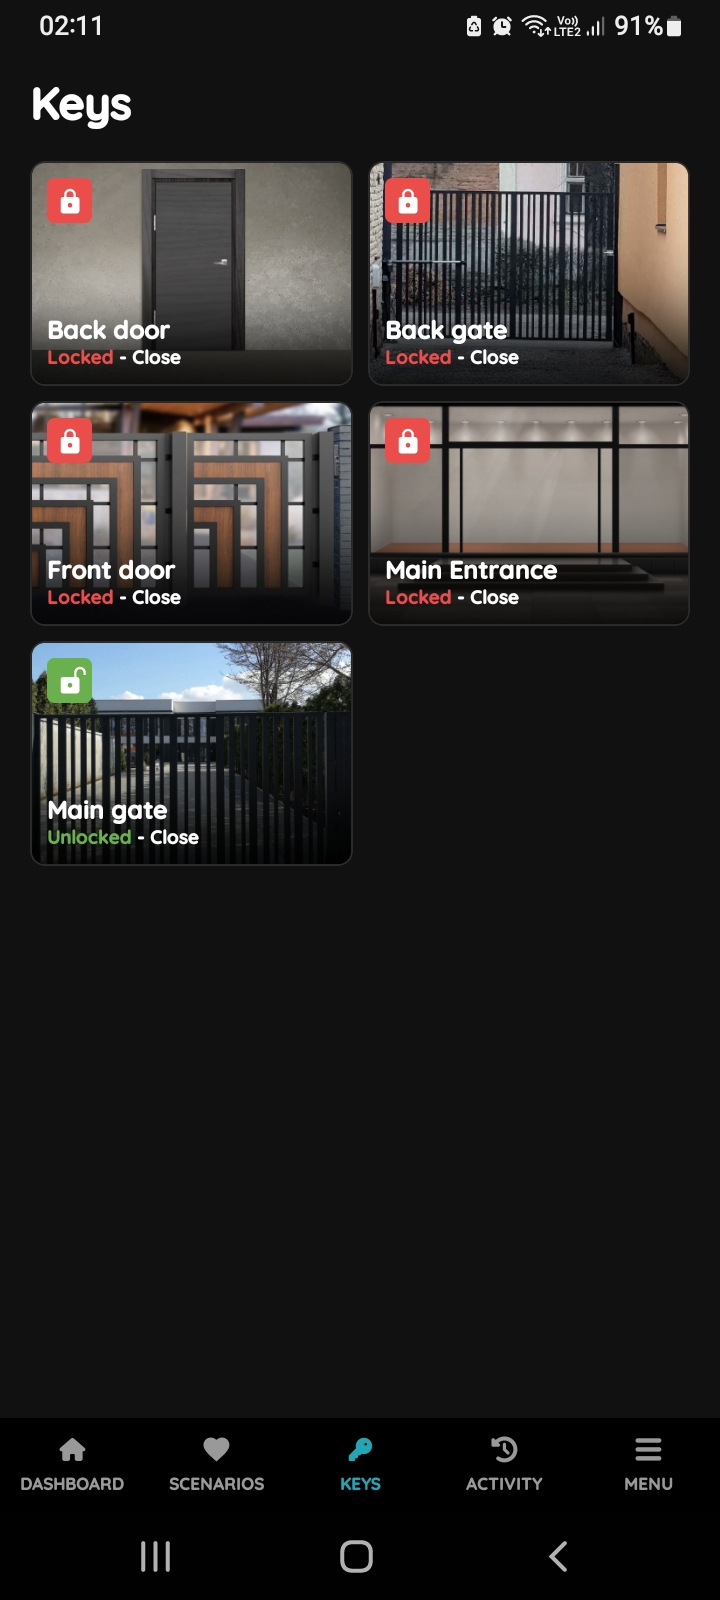
Unlocked - Open - Gates
In order to change status of the Gate from the Locked - Close to Unlocked - Open tap on the card of the desired Gate and status will be changed.
Icon of the Gate and picture will be changed according to status Locked - Close.
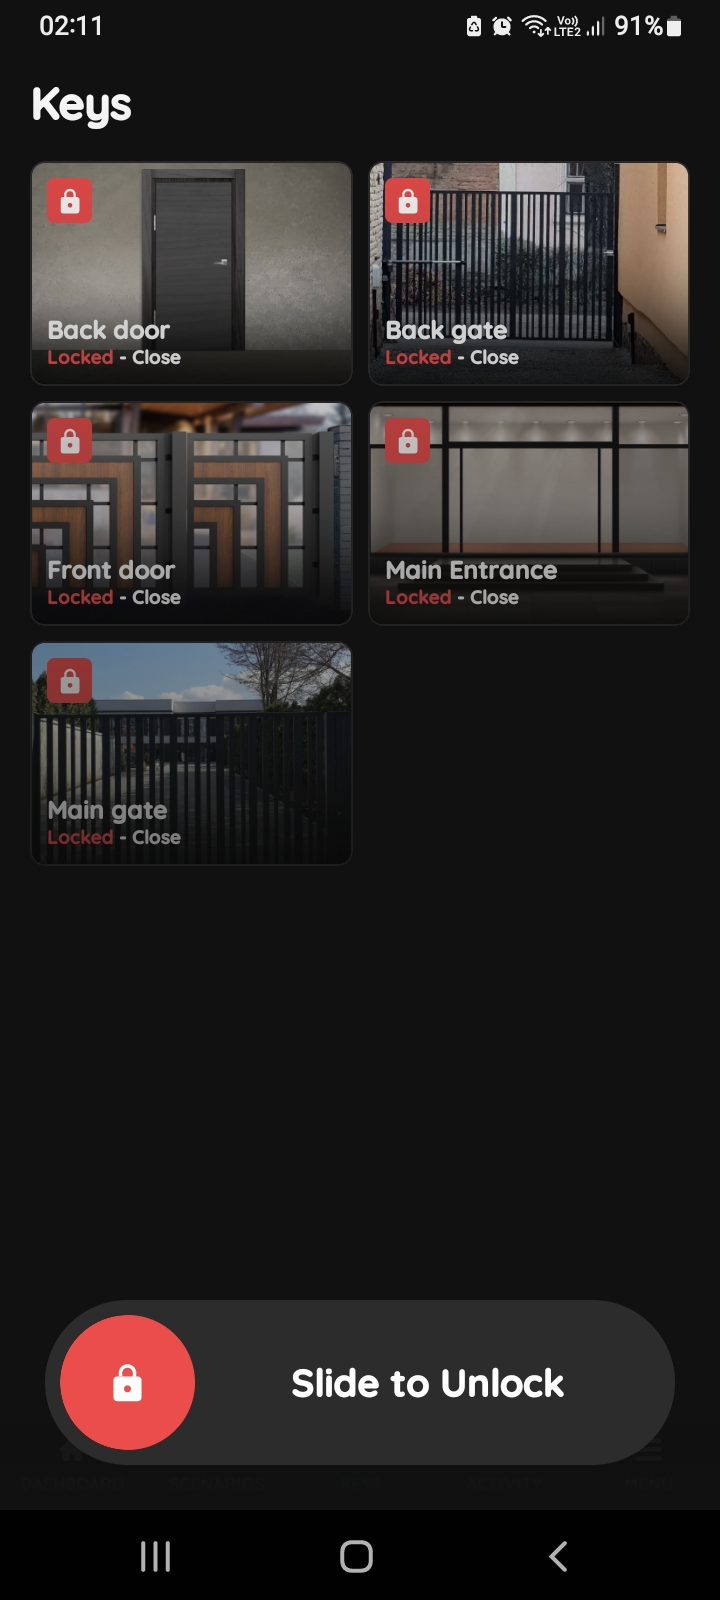
Slide to confirm - Gate
Slide to confirm feature adds an extra layer of security, preventing accidental actions.
It asks you to confirm your choice once more.
Tap on the card of the Gate and use Slide to Unlock button - slide from left to the right side.
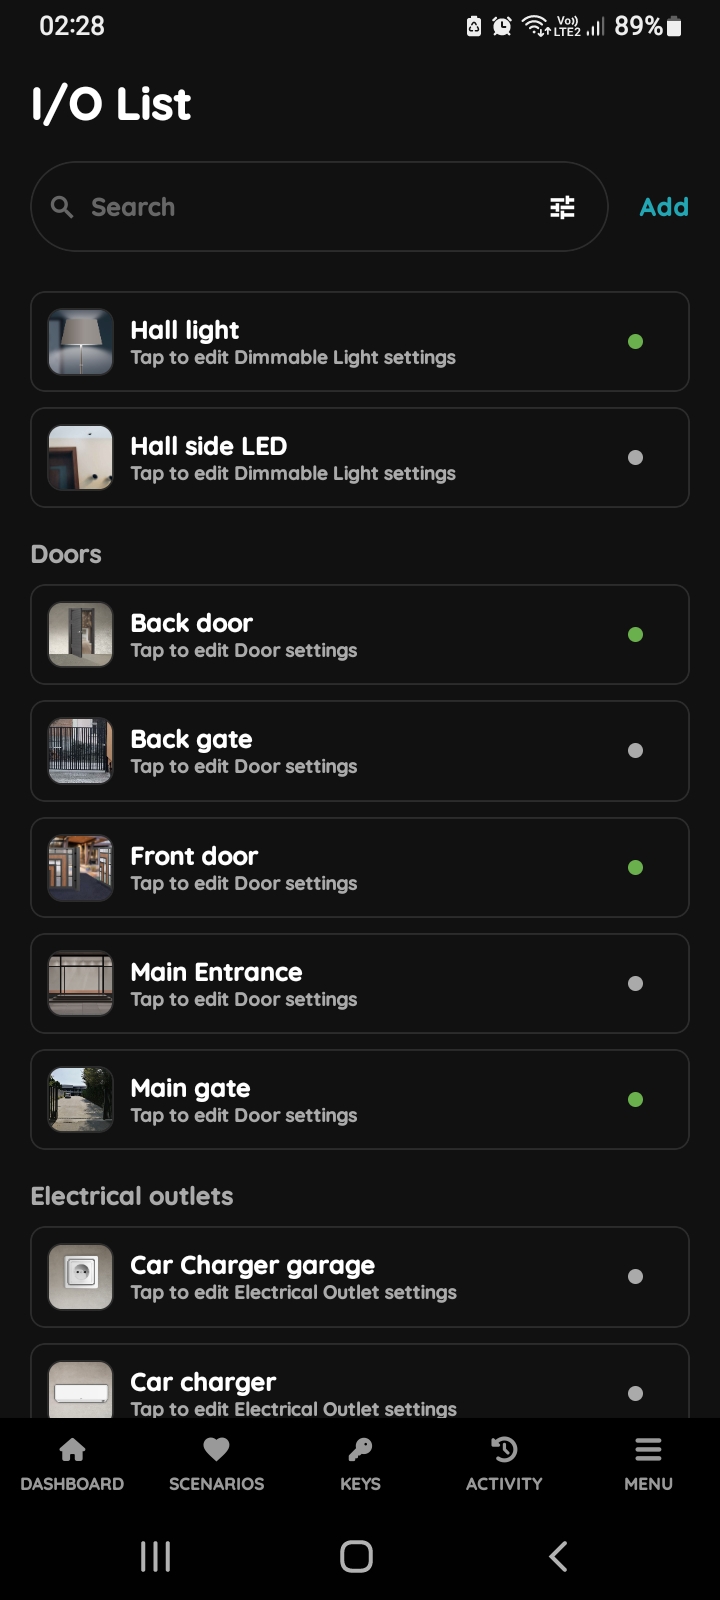
I/O list - Gates
To edit the Gates' settings, follow next steps.
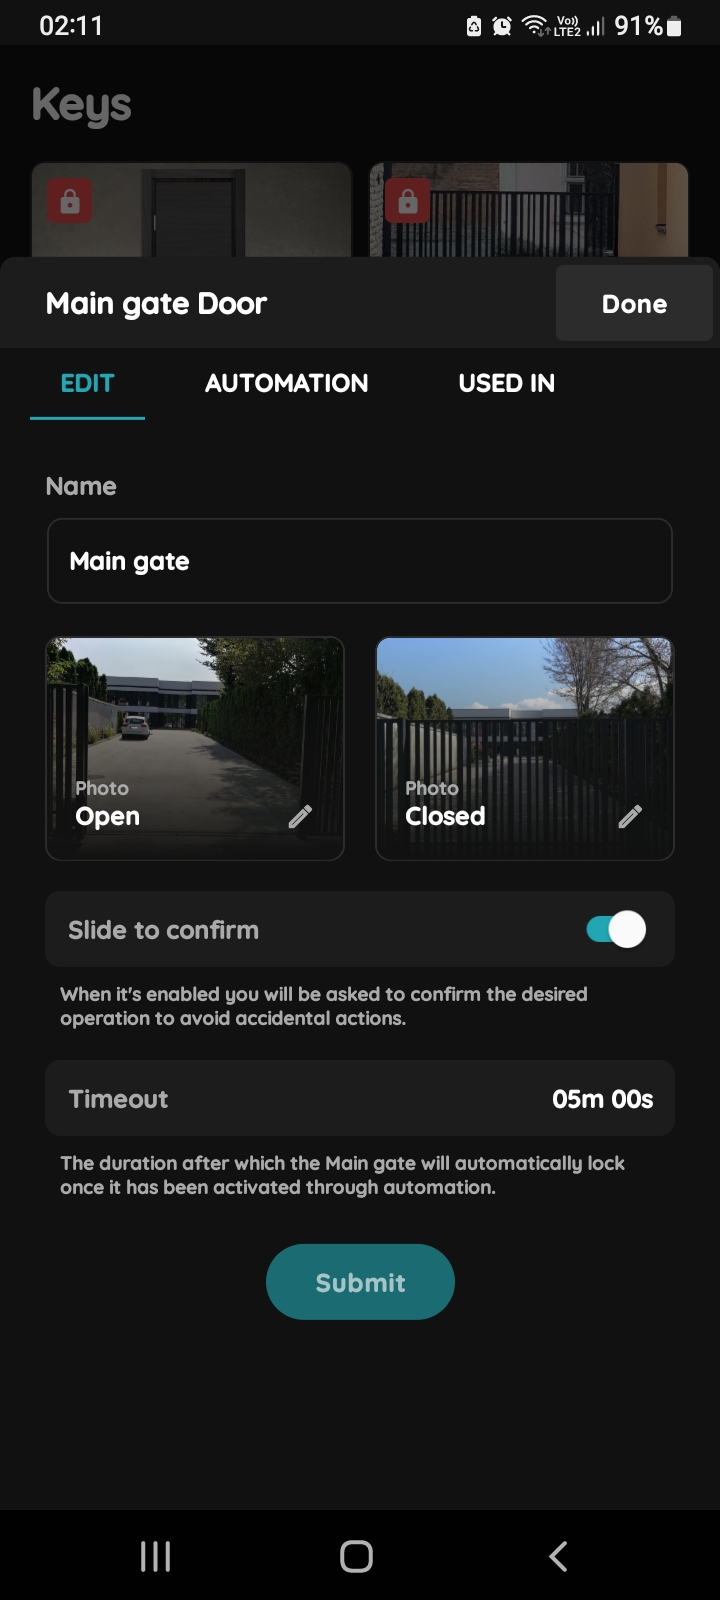
Edit Gates
Edit following form:
- Name - Edit name of the Gate.
- Change picture - Choose the source of the picture for each status of the Gate.
- Slide to confirm - When it is enabled you will be asked to confirm the desired operation to avoid accidental actions.
- Timeout - It shows for how long the Gate will be Open in auto mode.
Tap Submit/Done.
Follow next steps for more details.
GOOD TO KNOW:
Gate can be edited by long-press the Gate's card on the Dashboard or tapping it in the I/O list.
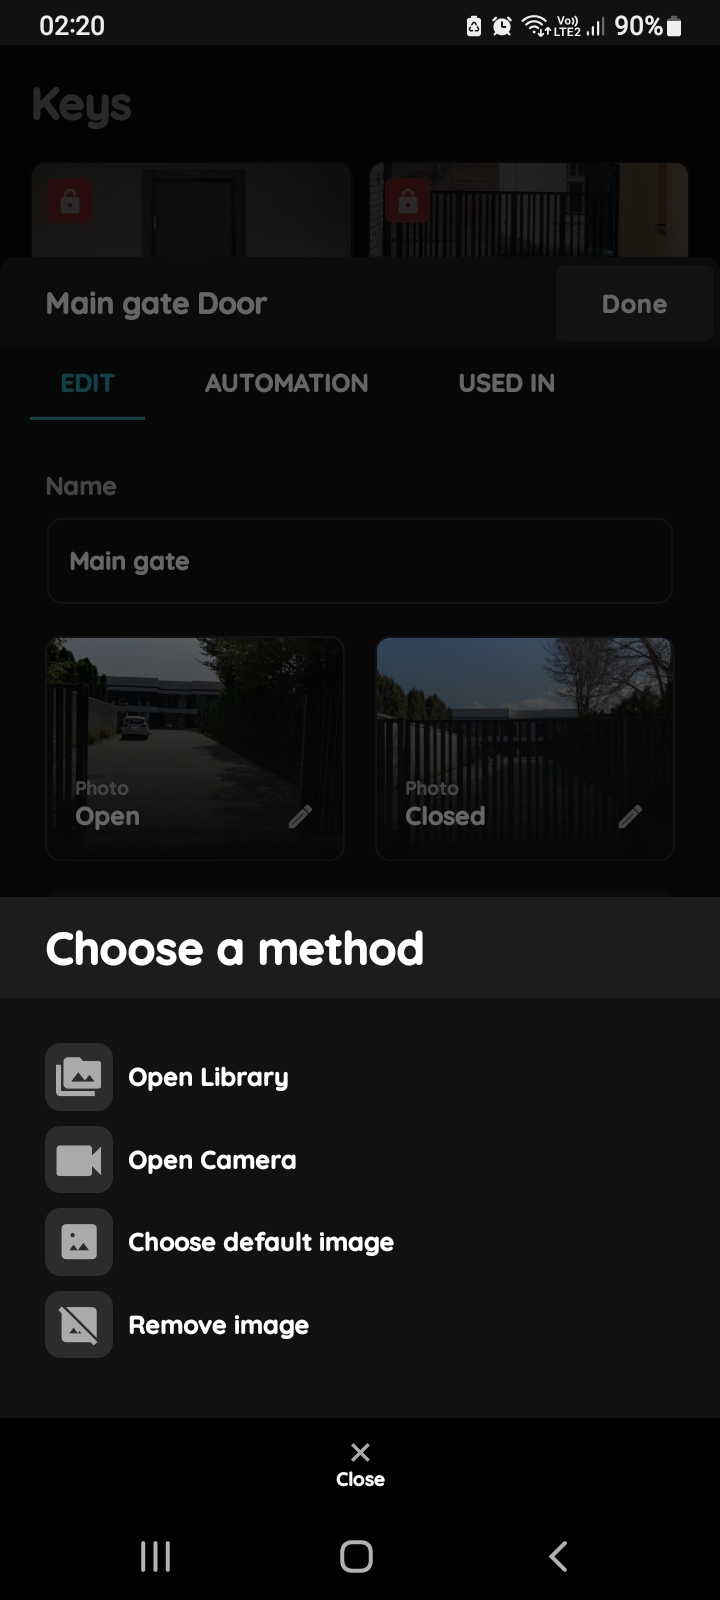
Change a photo - Gates
You have four options:
- Open Library - The phone’s Library will open. It is recommended to take pictures from the same angle for both Gates' statuses to achieve a complete and consistent view.
- Open Camera - You can take a picture using your smartphone. For a complete and consistent view, it’s recommended to capture both Gates' statuses from the same angle.
- Choose default image - These images are prepared in advance in order to provide a complete and seamless experience.
- Remove image - Removes existing image.
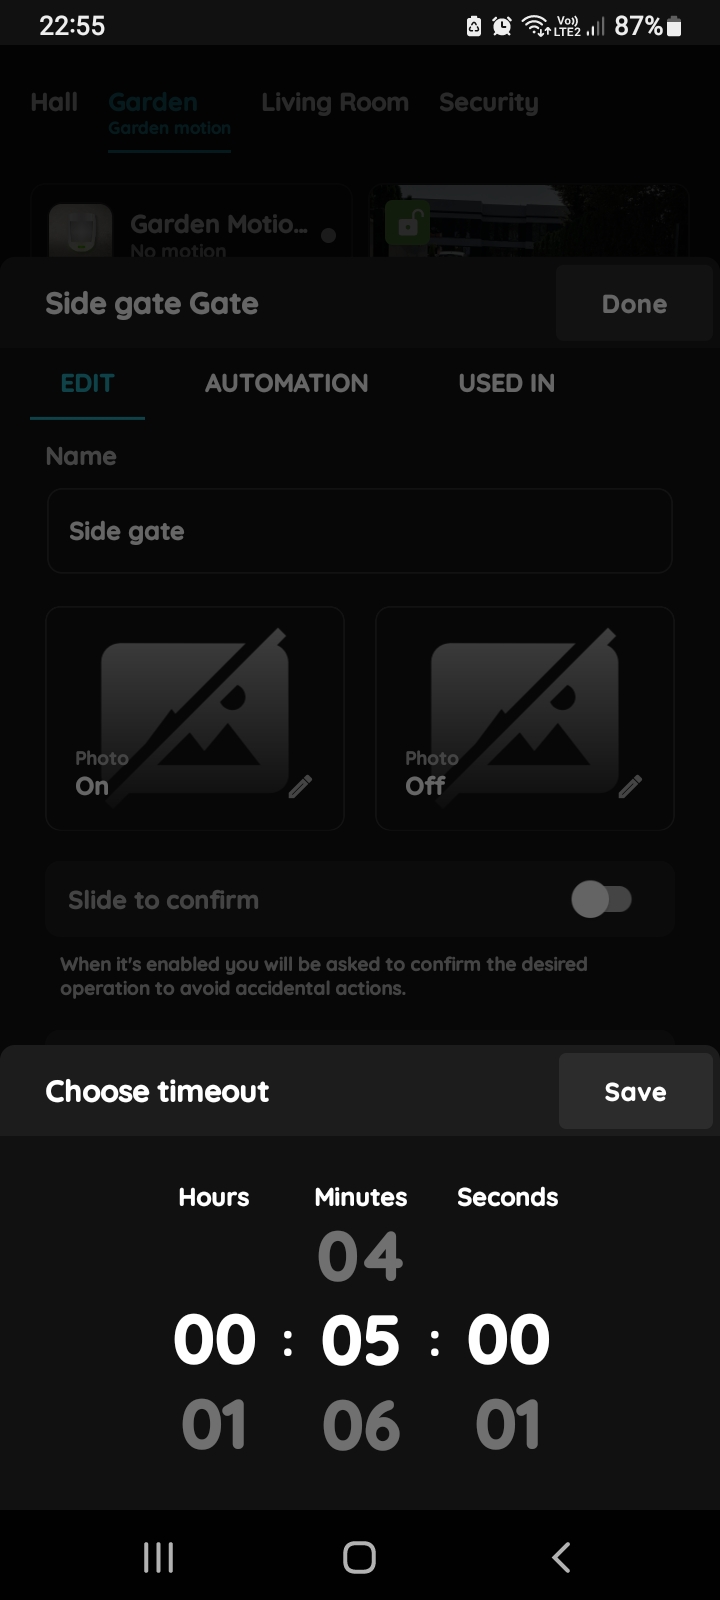
Timeout - Gates
Choose Timeout - scroll through columns for the Hours, Minutes, Seconds.
Tap Save button.
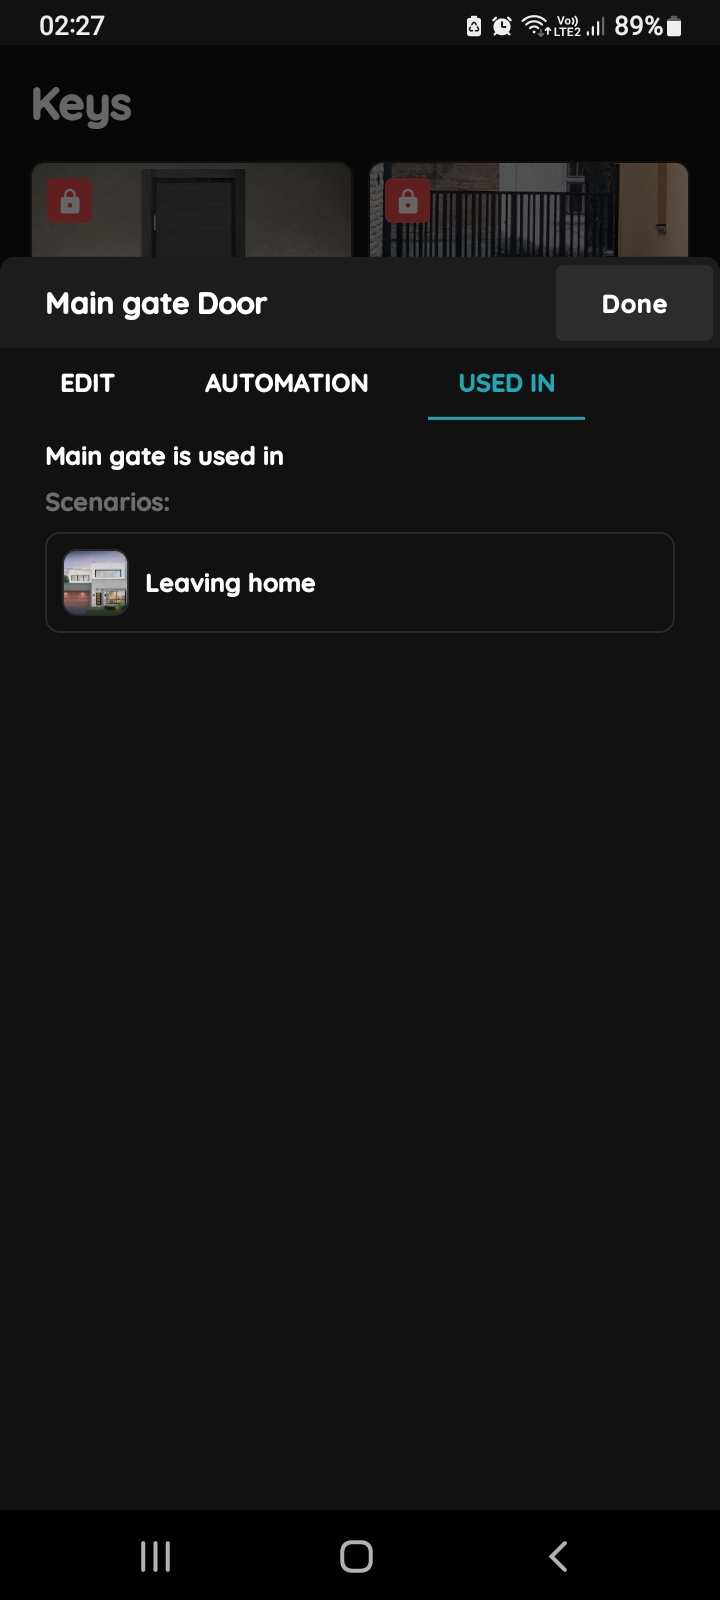
Used In - Gate
The Used In tab shows all the scenarios and automations where Gate is applied, making it easy to see where this I/O is used without the need to search manually. If it isn't used in any, the list will be empty, and a message will display: "This I/O is not in use anywhere." This feature is particularly useful as it consolidates all relevant information in one place.
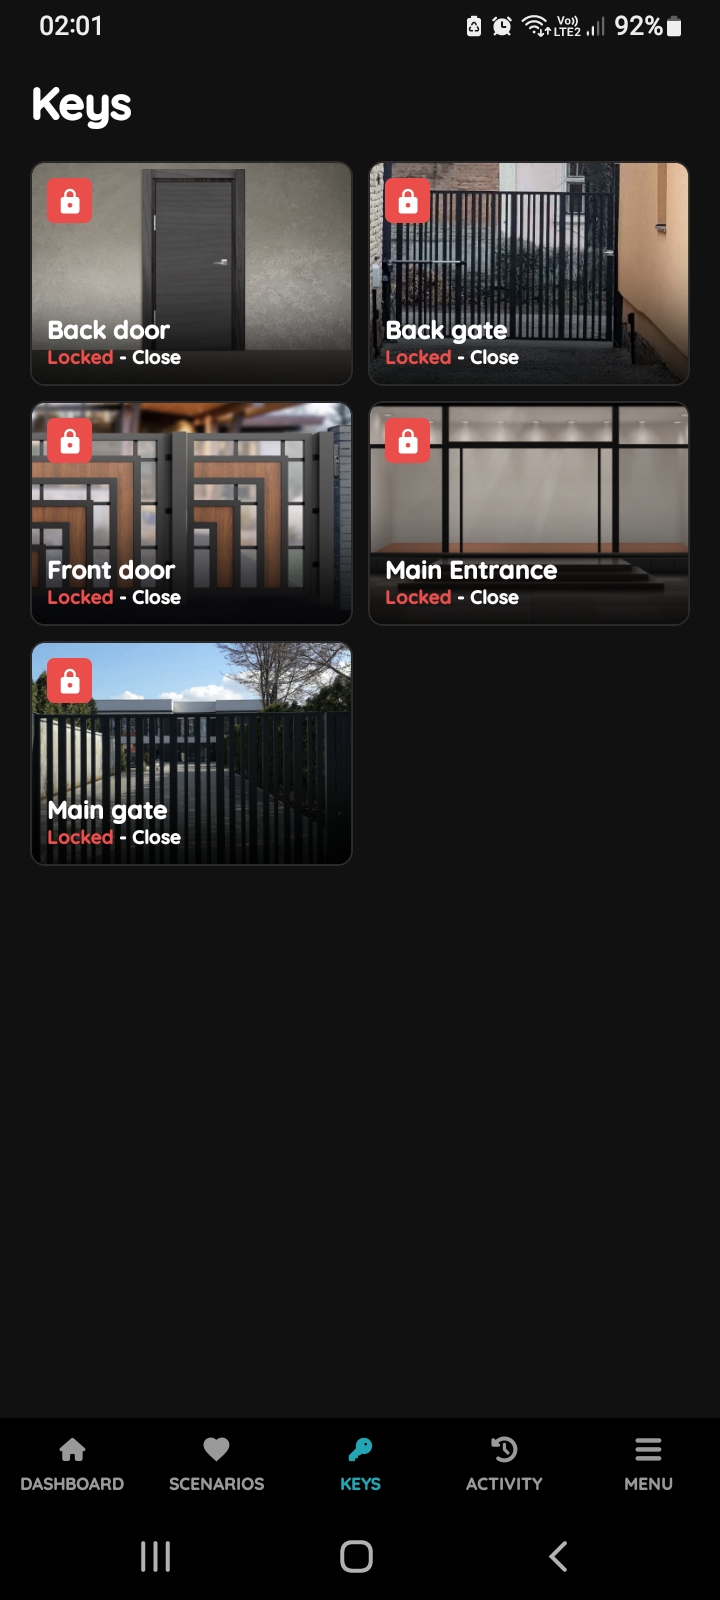
Keys
The Gate automatically unlocks every day from Monday to Friday between 7:00 PM and 5:00 AM, allowing convenient access during these hours. Outside this time range, the Gate will remain locked, enhancing security while ensuring accessibility during preferred hours.
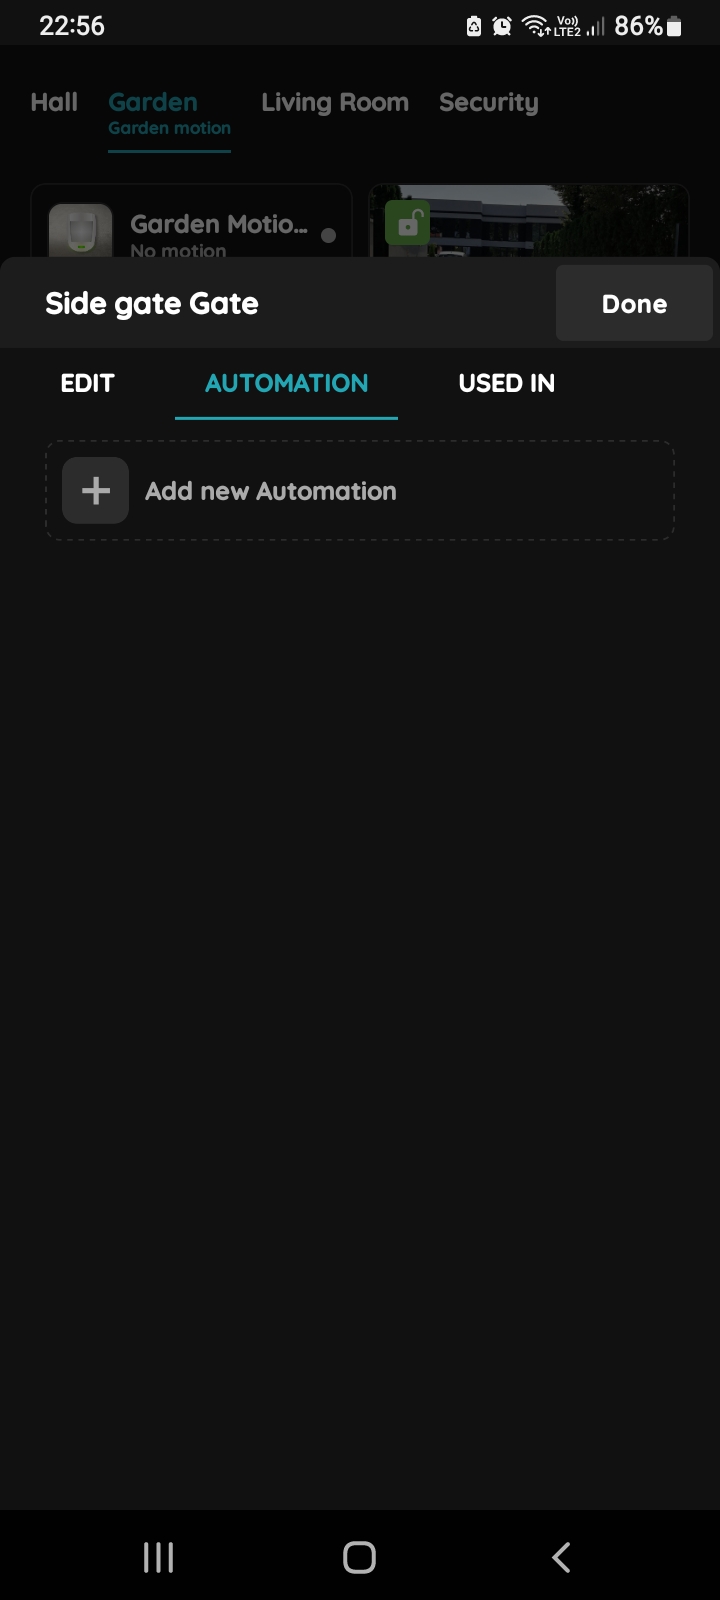
+Add new Automation - Gate
Tap Automation tab and tap on the +Add new Automation in order to add automation for the Gate.
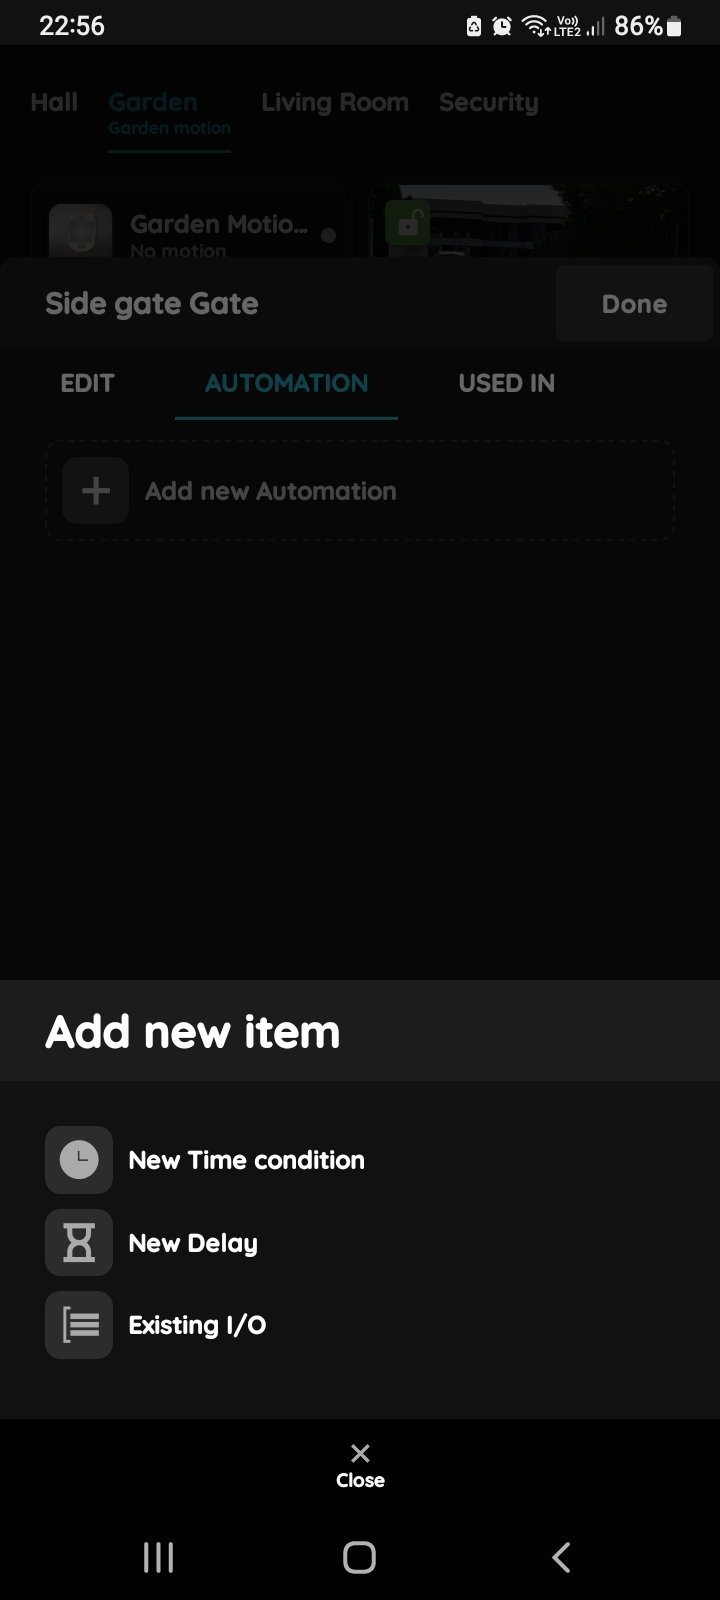
Add new item - Gate
Here is possibility to add:
- New Time condition,
- New Delay
- Existing I/O.
Tap the New Time condition.
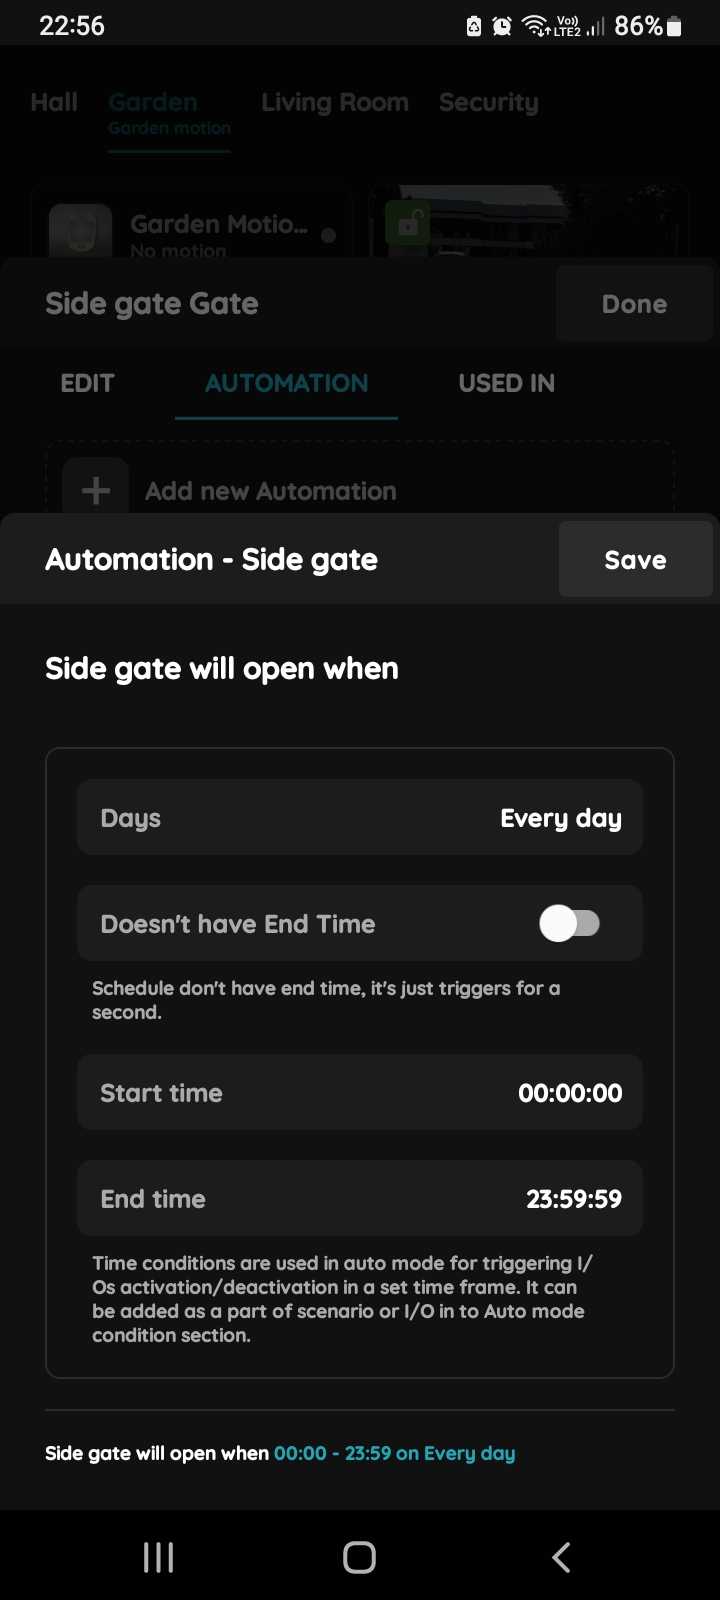
New Time Condition - Gate
You should set Days, Start time and End time in this step.
Tap in the field of each of them to set them.
For more details follow next steps.In this case, Side Gate will be automated to be unlocked from Monday to Friday from 7 o'clock to 5 o' clock.
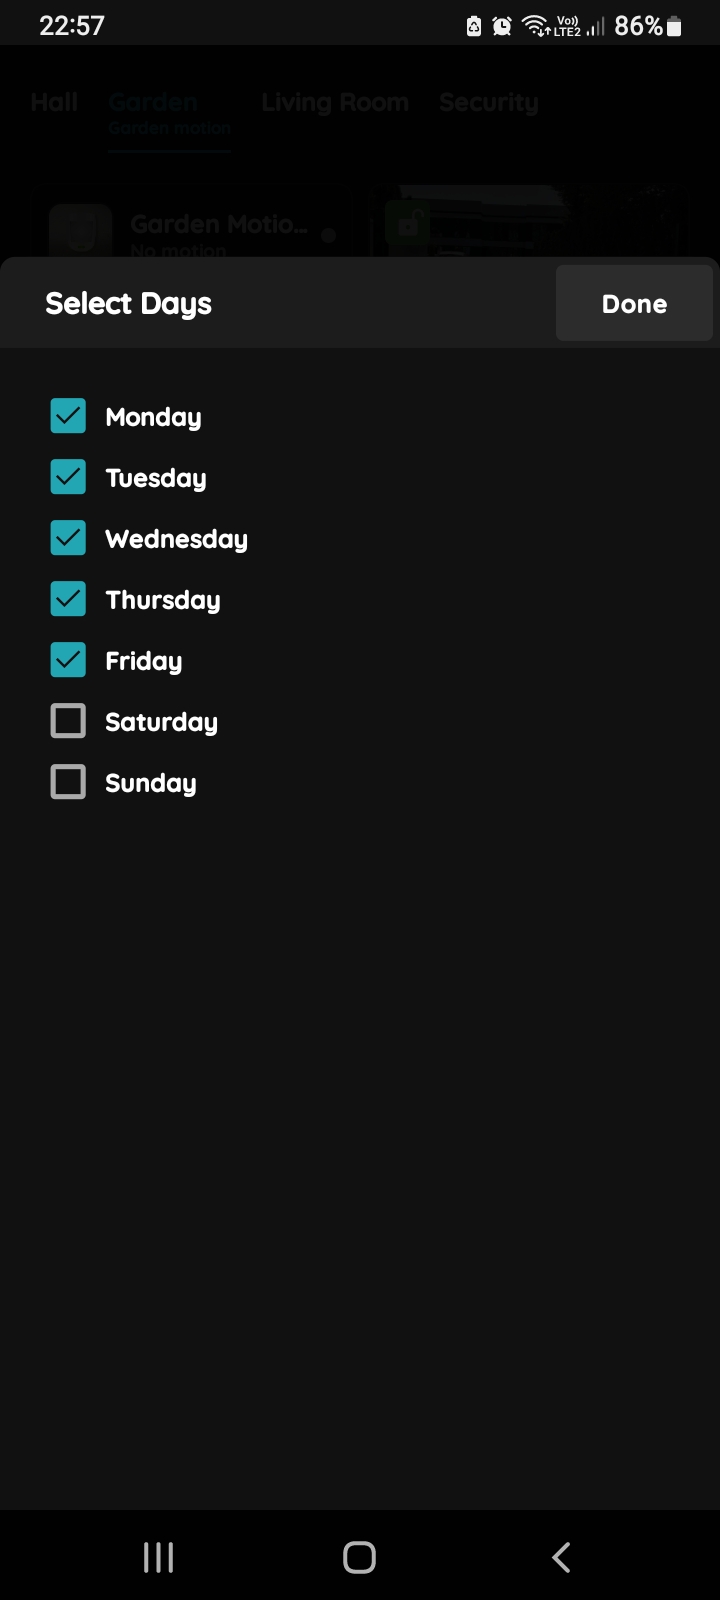
Select Days - Gates
Select Days when the Gate will be active by clicking on the checkbox/checkboxes-for multiple choice, next to the days from the list.
Select days from Monday to Friday.
Tap button Done.
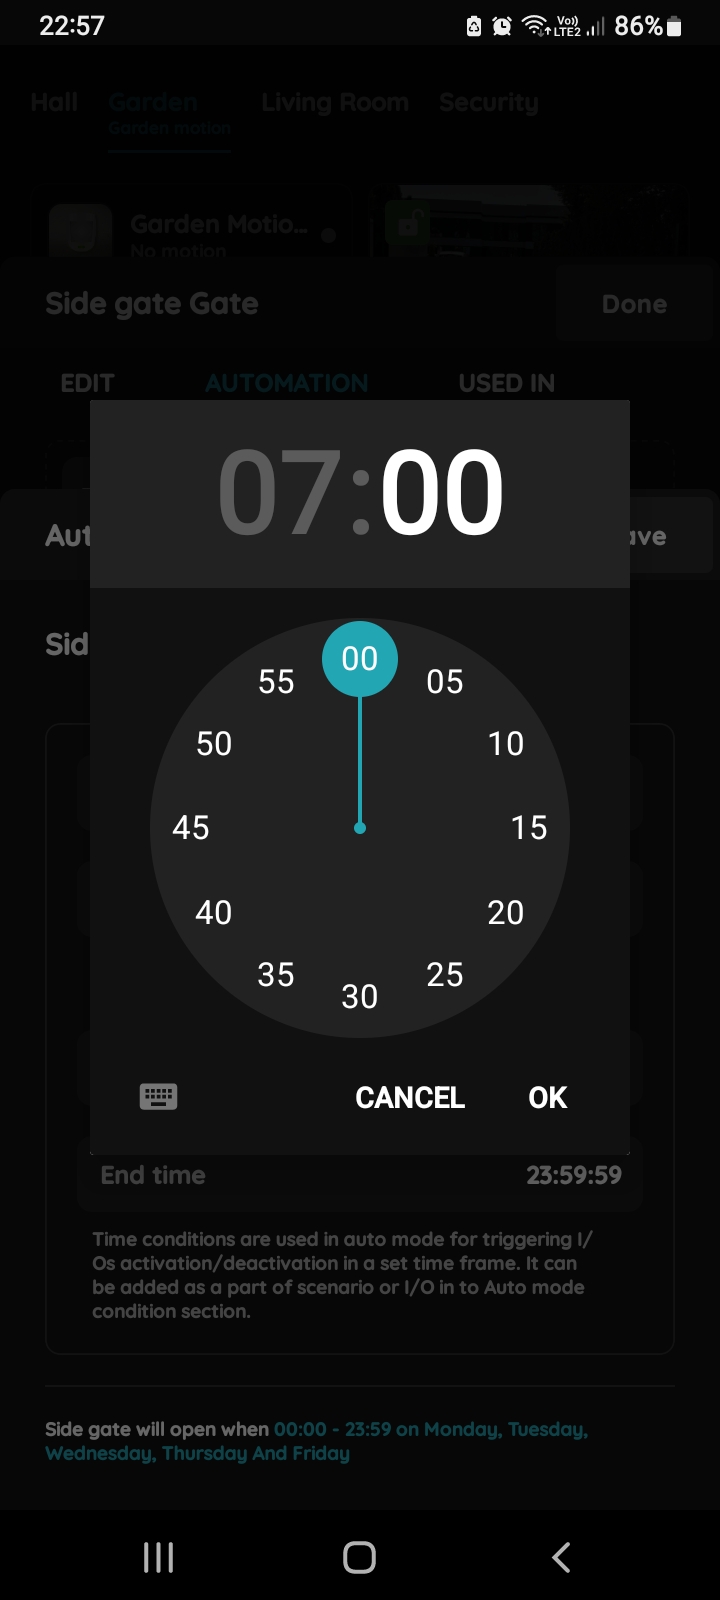
Star time and End time
Start time and End time fields will show you clock and icon of the keyboard in order to set these two parameters.
In this case set start time at 7 o'clock and end time to 5 o'clock.
Tap on the button OK. In case that you want to cancel it tap on the button Cancel.
(Time conditions are used in auto mode or triggering I/Os activation/deactivation in a set time frame. It can be added as a part of the scenario or I/O in to Auto mode condition section.)
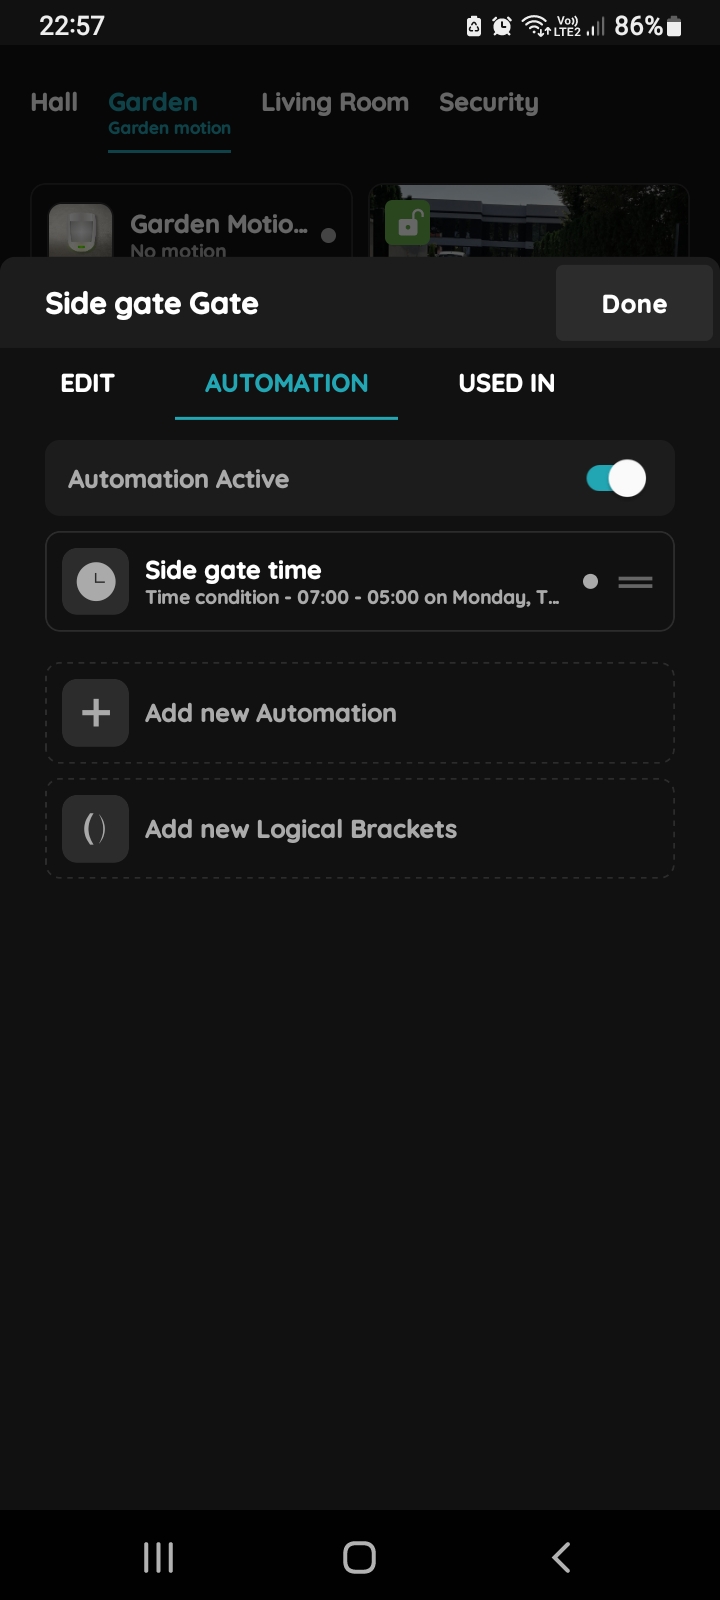
Confirm automation settings - Gate
Confirm automation settings, tap the button Done.