On this page
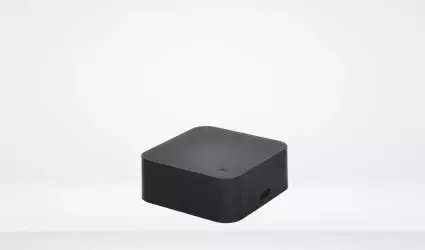
The IR Remote Controller section in the Smart Pierre app allows users to control air conditioners via the app. The controller can be enhanced by adding a temperature sensor to the thermostat to display the current room temperature. If no temperature sensor is added, the display will only show the target temperature that the air conditioner is set to reach. The IR Remote Controller is added as a Wave device.
Key Features:
1. Device Control:
- It is accessible from both the Dashboard and the I/O list, with a corresponding picture for easy identification. Control is direct from the Dashboard with On, Off, and Auto buttons.
2. Advanced Settings:
- A long press on the IR Remote Controller card opens various settings tabs, such as Mode (heating or cooling), Intensity, and Edit (for changing the name, picture, mode, and other parameters). Users can also set minimum and maximum temperatures, target temperature steps, and select the temperature format (Fahrenheit or Celsius). If a temperature sensor is added, the current room temperature will be displayed.
3. Automation and Scenarios:
- The IR Remote Controller can be automated, allowing for scenarios such as turning off the air conditioner when a window contact sensor detects an open window, or setting the air conditioner to heat on specific days and times (e.g., Saturday and Sunday from 8 AM to 3 PM). These automations and scenarios ensure optimal comfort and energy efficiency.
4. Automation and Used In Tab:
- The device includes dedicated tabs for Automation and Used In, providing full control and flexibility in creating automated routines and checking where the controller is used within the system.
The IR Remote Controller section offers comprehensive control over climate devices, ensuring customizable settings, automation options, and real-time temperature monitoring when a sensor is added.
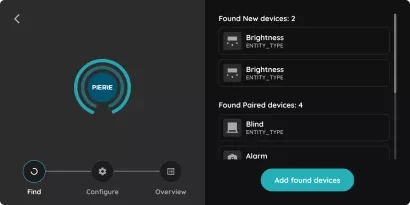
In this step you will add new Wave I/O. First, open Menu.

Open Menu list and under Settings tap on the Add Wave I/O in order to add it.

Tap on the Display Gateway that you would like to add Wave I/O to it.

In this step system will find new device.

There will be shown which device is found and can be added.

Fill following form:
Name - Write name of the device.
Role - Select Role from the list.
Group - Choose Group on Dashboard.
Group is a group of I/Os and scenario that seems most logical to you.
Tap Save and continue or Skip.

You can select desired Role or Roles - multiple choice if you tap on the checkboxes next to them.
Tap on Save/Done.

In this step, you need to select one or more Groups.
Select the checkbox/checkboxes next to the Group/Groups that you want to associate with the I/O.
Once selected, the I/O will appear in the chosen Groups on the Dashboard.
Tap Save/Done to confirm your selection.
Use temperature slider to set desired temperature.

Press the blue point on the temperature slider and slide along it to set desired temperature.


