On this page
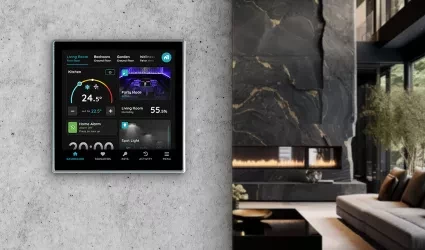
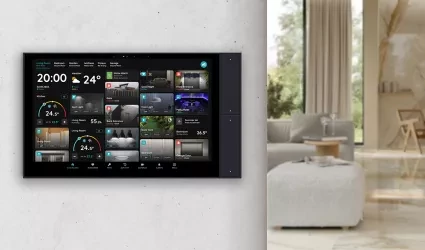
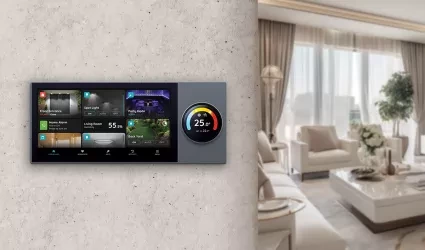
The Displays section in the Settings of the Smart Pierre app shows a list of all display units installed in your home or property. Displays act as central control units for managing connected devices within the system.
Key Features:
1. Display Overview:
• The list shows all available displays, and you can use the search bar to narrow down the list, making it easier to find a specific display.
2. Scan QR:
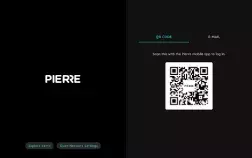
• The Scan QR button allows you to add a new display to the system. When a new display is powered on, a QR code appears on its screen. Scanning this code automatically adds the display to your account, streamlining the setup process.
3. Display Settings:
• Clicking on a display brings up its detailed settings, where you can:
• Rename the display.
• View its activity and see which I/Os it controls.
• Access personalization options
• Setting up the sensors and buttons associated with the display
• Check if there are Wave devices connected to the display.
• Configure any available relay settings on the display.
The Displays section offers centralized management for all connected control units, allowing you to monitor, configure, and personalize your display units for optimal use within your smart home system.
All Displays are shown on the Display's List in the Smart PIERRE app, providing an organized view of all connected display Devices for easy monitoring and management. Use the Search bar at the top to quickly find the desired Display.

Under Settings, Open Display's Menu.

List of all Displays is shown here.
Tap on desired Display in order to edit it.
Use Search function to quickly locate the desired Display.

Tap in the Search field in order to quickly locate the desired Display, use the Search function to filter through the Display's list efficiently.

Scan QR code that is shown on the Display by your smartphone in order to add new Display and follow next steps.

Scanning QR code will invite new Display user.
To confirm tap on the button Done.
In this step you will add new Wave I/O. First, open Menu.

Open Menu list and under Settings tap on the Add Wave I/O in order to add it.

Tap on the Display Gateway that you would like to add Wave I/O to it.

In this step system will find new device.

There will be shown which device is found and can be added.

Fill following form:
Name - Write name of the device.
Role - Select Role from the list.
Group - Choose Group on Dashboard.
Group is a group of I/Os and scenario that seems most logical to you.
Tap Save and continue or Skip.

You can select desired Role or Roles - multiple choice if you tap on the checkboxes next to them.
Tap on Save/Done.

In this step, you need to select one or more Groups.
Select the checkbox/checkboxes next to the Group/Groups that you want to associate with the I/O.
Once selected, the I/O will appear in the chosen Groups on the Dashboard.
Tap Save/Done to confirm your selection.
Follow next steps to edit PIERRE Display Berlin 10".

When you opened Menu, under Settings tap on Displays in order to add new Display.

Choose Display Berlin from the list and tap on it.

Here are shown:
- Name - Edit name of the display.
- Activity - Shows all activities that occurred in the the smart home system (which device was activated by whom and when).
- Access - Shows the role access by the panel.
- Personalization - Kiosk-For Kiosk devices the Status and the Navigation bar is hidden and the screen never turns off. Useful for wall mounted devices.
- Sensors -I t is shown list of integrated sensors.
- Buttons- There are four buttons for this display. They can be programmed to use I/Os or to activate scenarios. There are options for: Tap, Hold and Double tap programming.
- Relays - It is shown list of devices that are connected to the relays.

Tap in the field Name and edit name of the Display.
If you want to confirm your choice tap on the button Submit and Done or if you want to delete it tap on the button Delete.

Here are shown all the activities that occurred during time in smart home system (it is shown who activated devices and when).

You can set time-based access (ALL TIME and LIMITED TIME) and Add new Role Access.
Also, it is shown list of access permissions here.
For more details follow next steps.

Tap in the field next to Add new Role Access in order to add new role.

Here are fields that define access.
You can activate or deactivate them by slider.
- Use I/O - Allow user to open/close doors, switch lights on/off etc in this place.
- Mange I/O - Allow user to create automation for I/Os, edit I/Os.
- Manage Groups - Allow user to change order of the groups, create new groups, remove groups in this place.
- Manage Users - Allows user to add/remove access to this place for other users.
- Mange Roles - Allow user to add/remove/edit roles for this place.
- Location Restriction - Enable I/O usage restriction by location (radius around the building in which I/O usage is allowed).
ALL TIME - User has access every day of the week and all day.
LIMITED TIME User does not have access every day of the week and all day.
For more details follow next seps.
To confirm your choice tap on the button Save or to delete it click on the button Delete.

Activate or deactivate these features:
- Bottom Tabs - Determine whether the user has Bottom Tabs visible in the application or not.
- Group Picker - Determines whether the user has group Picker visible in the application or not.
- Building Picker - Determines whether the user has Building Picker visible in the application or not.
- Mange Self - Determine whether the user can edit his profile (eg: name, image, etc. ...)
To confirm your choice tap on button Submit.

You can tap on any of these sensors and edit it.

You can edit fields:
- Name - Edit name of the sensor.
- Photo - Choose the source of the photo.
- Temperature Offset - When it is enabled set it by clicking on +/-.
- Temperature Format - Choose Fahrenheit or Celsius by clicking on the radio button next to it.
When you want to confirm your choice tap on the button Submit and Done.

Edit fields:
- Name - Edit name of the Humidity sensor.
- Photo - Choose the source of the photo.
- Enable Humidity Offset - If it is enabled set it by clicki on +/-.
When you want to confirm your choice tap on Done and Submit.

You have three options:
- Open Library - The phone’s Library will open.
- Open Camera - You can take a picture using your smartphone.
- Choose default image - These images are prepared in advance in order to provide a complete and seamless experience.

Here is displayed list of Buttons (four of them).

You can edit:
- Name - Edit Name of the Button.
- Photo - Choose if the button will be activated if you Tap, Hold or Double press it.
When you are satisfied with your choice tap on the button Submit and Done.

You can edit:
- Name - Edit name of the Button.
- Tap in the field Toggle I/O. Toggle - Switches from currently active to opposite state.
To confirm your choice tap the button Done.
Follow next steps for more details.

Here is a list of outputs connected to the Relays.
You can edit any of them if you tap on them.
Also, you can add output by clicking on Add Output.
To confirm tap on the button Done.

You can Chose type from the list:
- Light
- Fan
- Electrical Outlet
- Passive Heating/Cooling
- Irrigation


